Saluditos Artistas Creativos de las Manualidades y la Joyería, como siempre para ustedes mis deseos porque todos se encuentren de maravilla un saludo especial para todas mis colegas Mujeres que seguro fueron muy atendidas y homenajeadas este ocho de marzo, un día que escogieron para pichirearnos los otros trescientos sesenta y cuatro, pero bueno no hay justicia 🤣🤣.
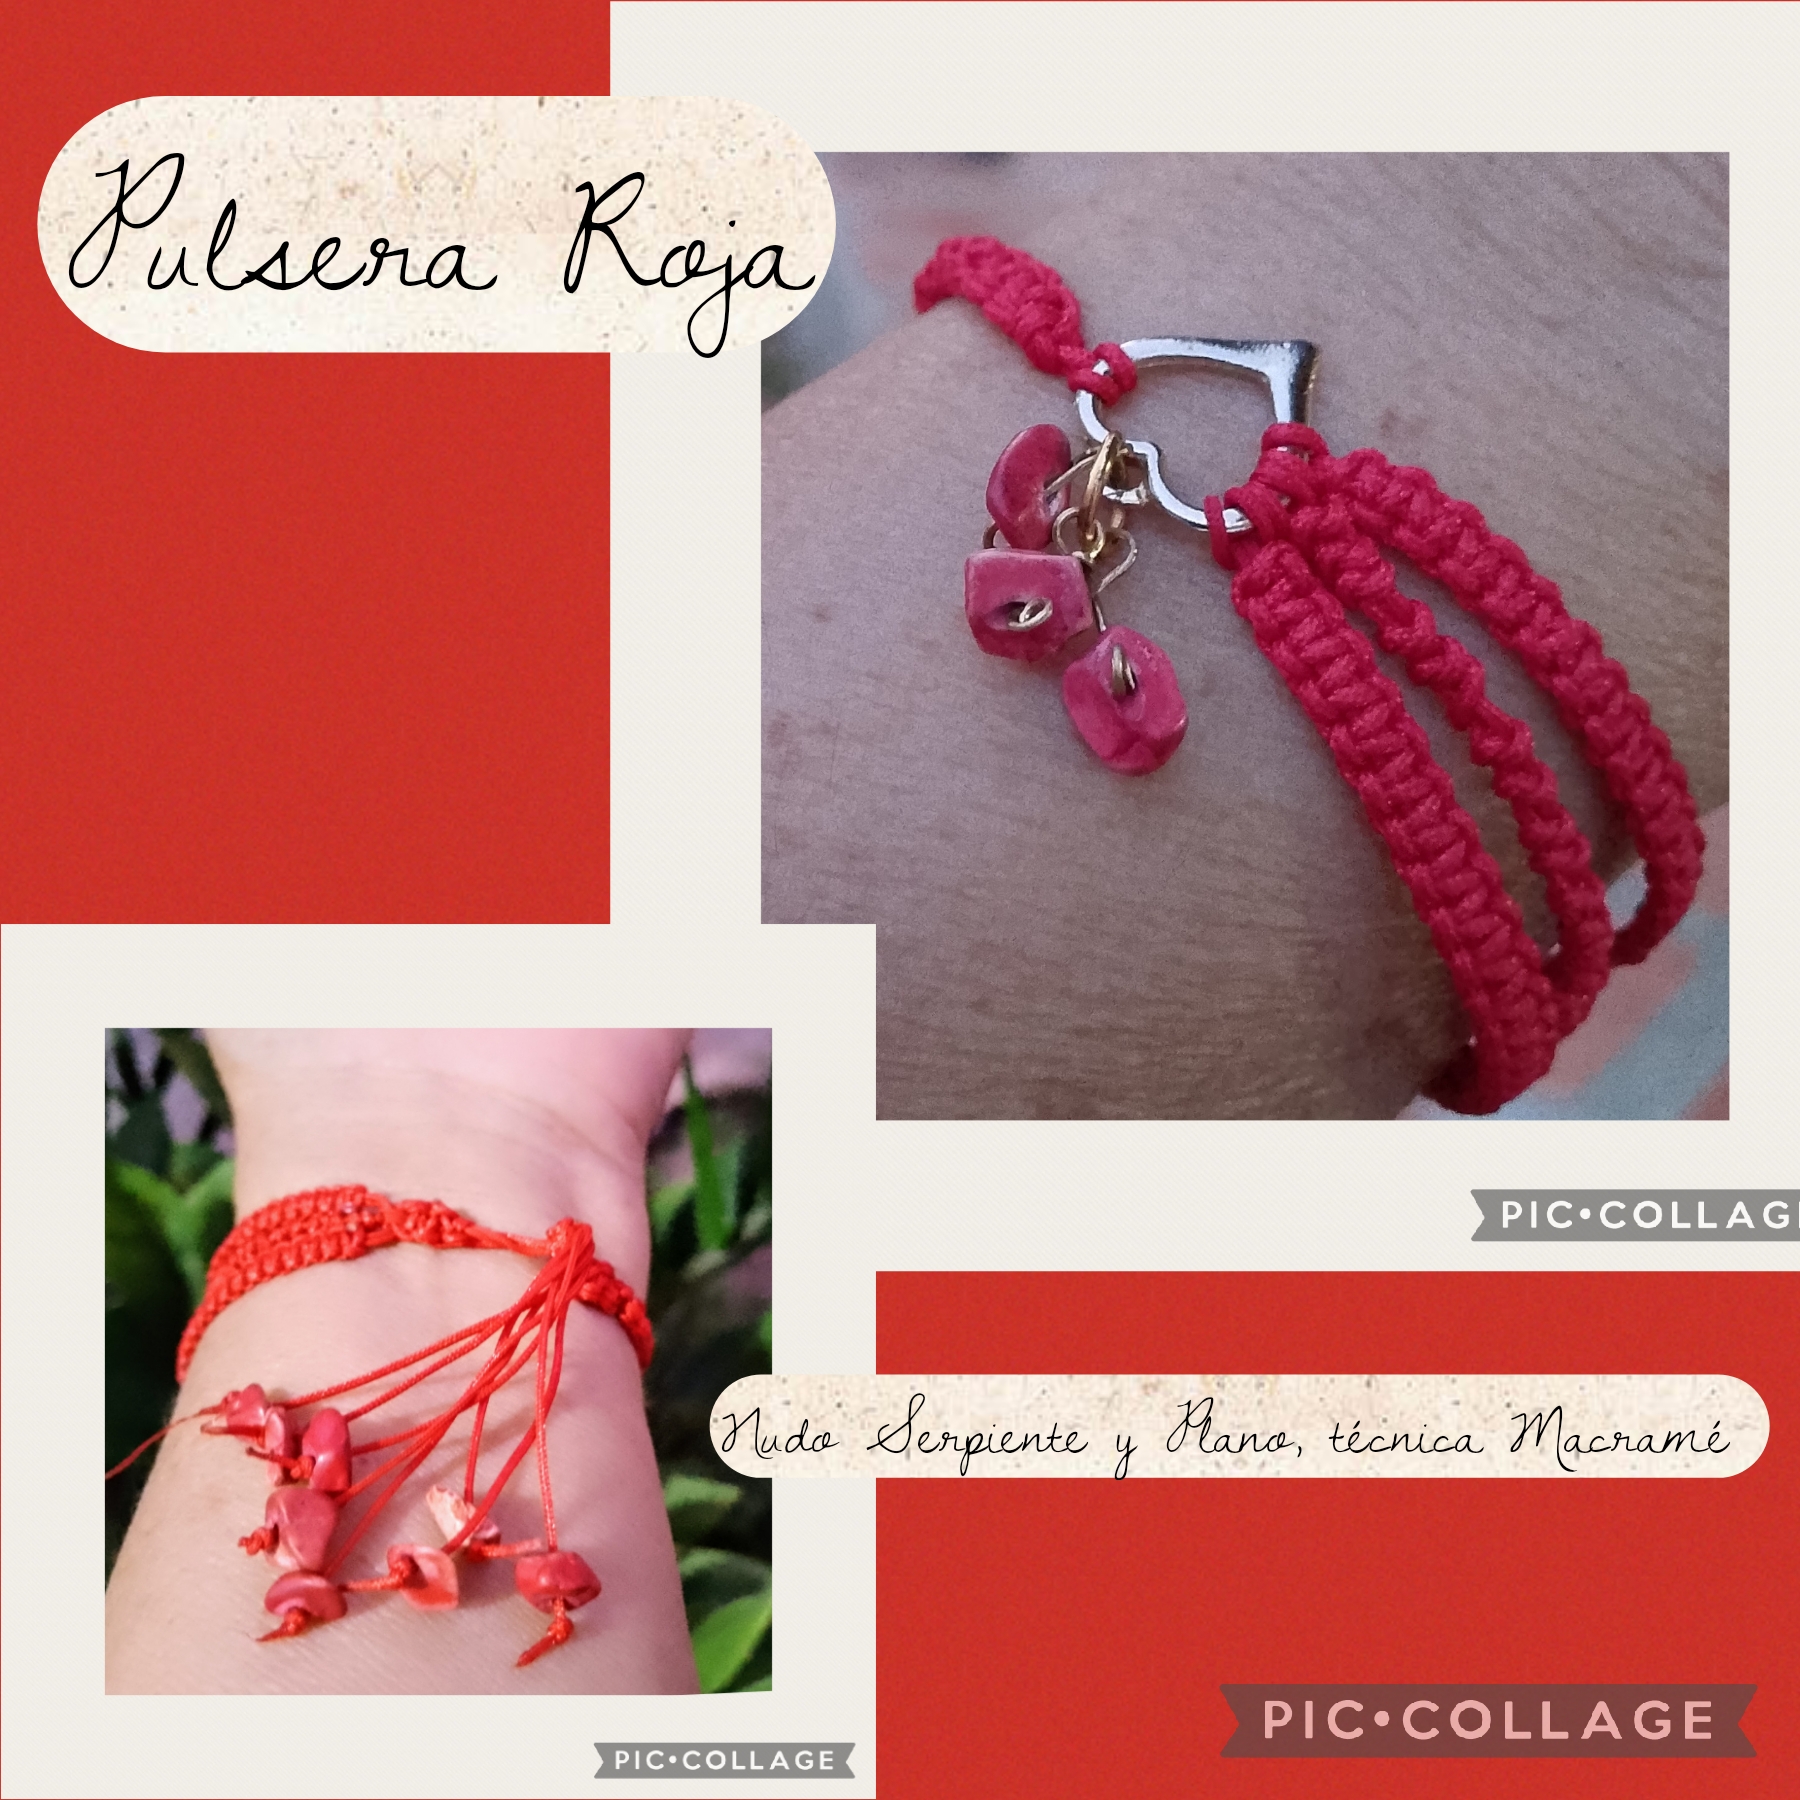
Hoy traigo para compartirles una Pulsera Roja que realicé con la Técnica de Nudos Macramé, y es que la tendencia se ha desatado hacia los chakras y los nudos especialmente el franciscano andan en forma de pulseras en las muñecas de muchos y muchas con siete nudos, según para la fortaleza y protección, y es que desde las culturas mas antiguas se usaba una cinta roja para protegerse de las malas vibras especialmente del llamado mal de ojo, la envidia y otros muy a pesar que Dios prohibió usar esos amuletos amarrados en las muñecas, pero en fin cada quien se protege a su creencia. Mi Pulsera la hice para una amiga pero ella tiene otro motivo quiere sentir la pasión, el amor en la intensidad del color, para realizarla escogí los nudos plano y el nudo Serpiente además le coloqué unos pequeños corales y un corazón.
Les invito a seguir leyendo el paso a paso para que vean cómo la hice.
Greetings Creative Artists of Crafts and Jewelry, as always, my wishes for all of you that you are all doing wonderfully. A special greeting to all of my fellow women who were surely well attended to and honored this March 8th, a day you chose to pichirear us the other three hundred and sixty-four, but hey, there's no justice 🤣🤣.
Today I bring to share with you a Red Bracelet that I made using the Macramé Knot Technique. The trend has been unleashed towards chakras and knots, especially the Franciscan ones. They are worn in the form of bracelets on the wrists of many people with seven knots, according to a sign of strength and protection. Since the most ancient cultures, a red ribbon was used to protect oneself from bad vibes, especially the so-called evil eye, envy, and others, despite the fact that God prohibited wearing these amulets tied on the wrists, but in the end, everyone protects themselves according to their beliefs. I made my bracelet for a friend, but she has another reason: she wants to feel passion, love in the intensity of color. To make it, I chose the flat knot and the Snake knot, and I also added some small corals and a heart.
I invite you to continue reading the step-by-step instructions to see how I made it.
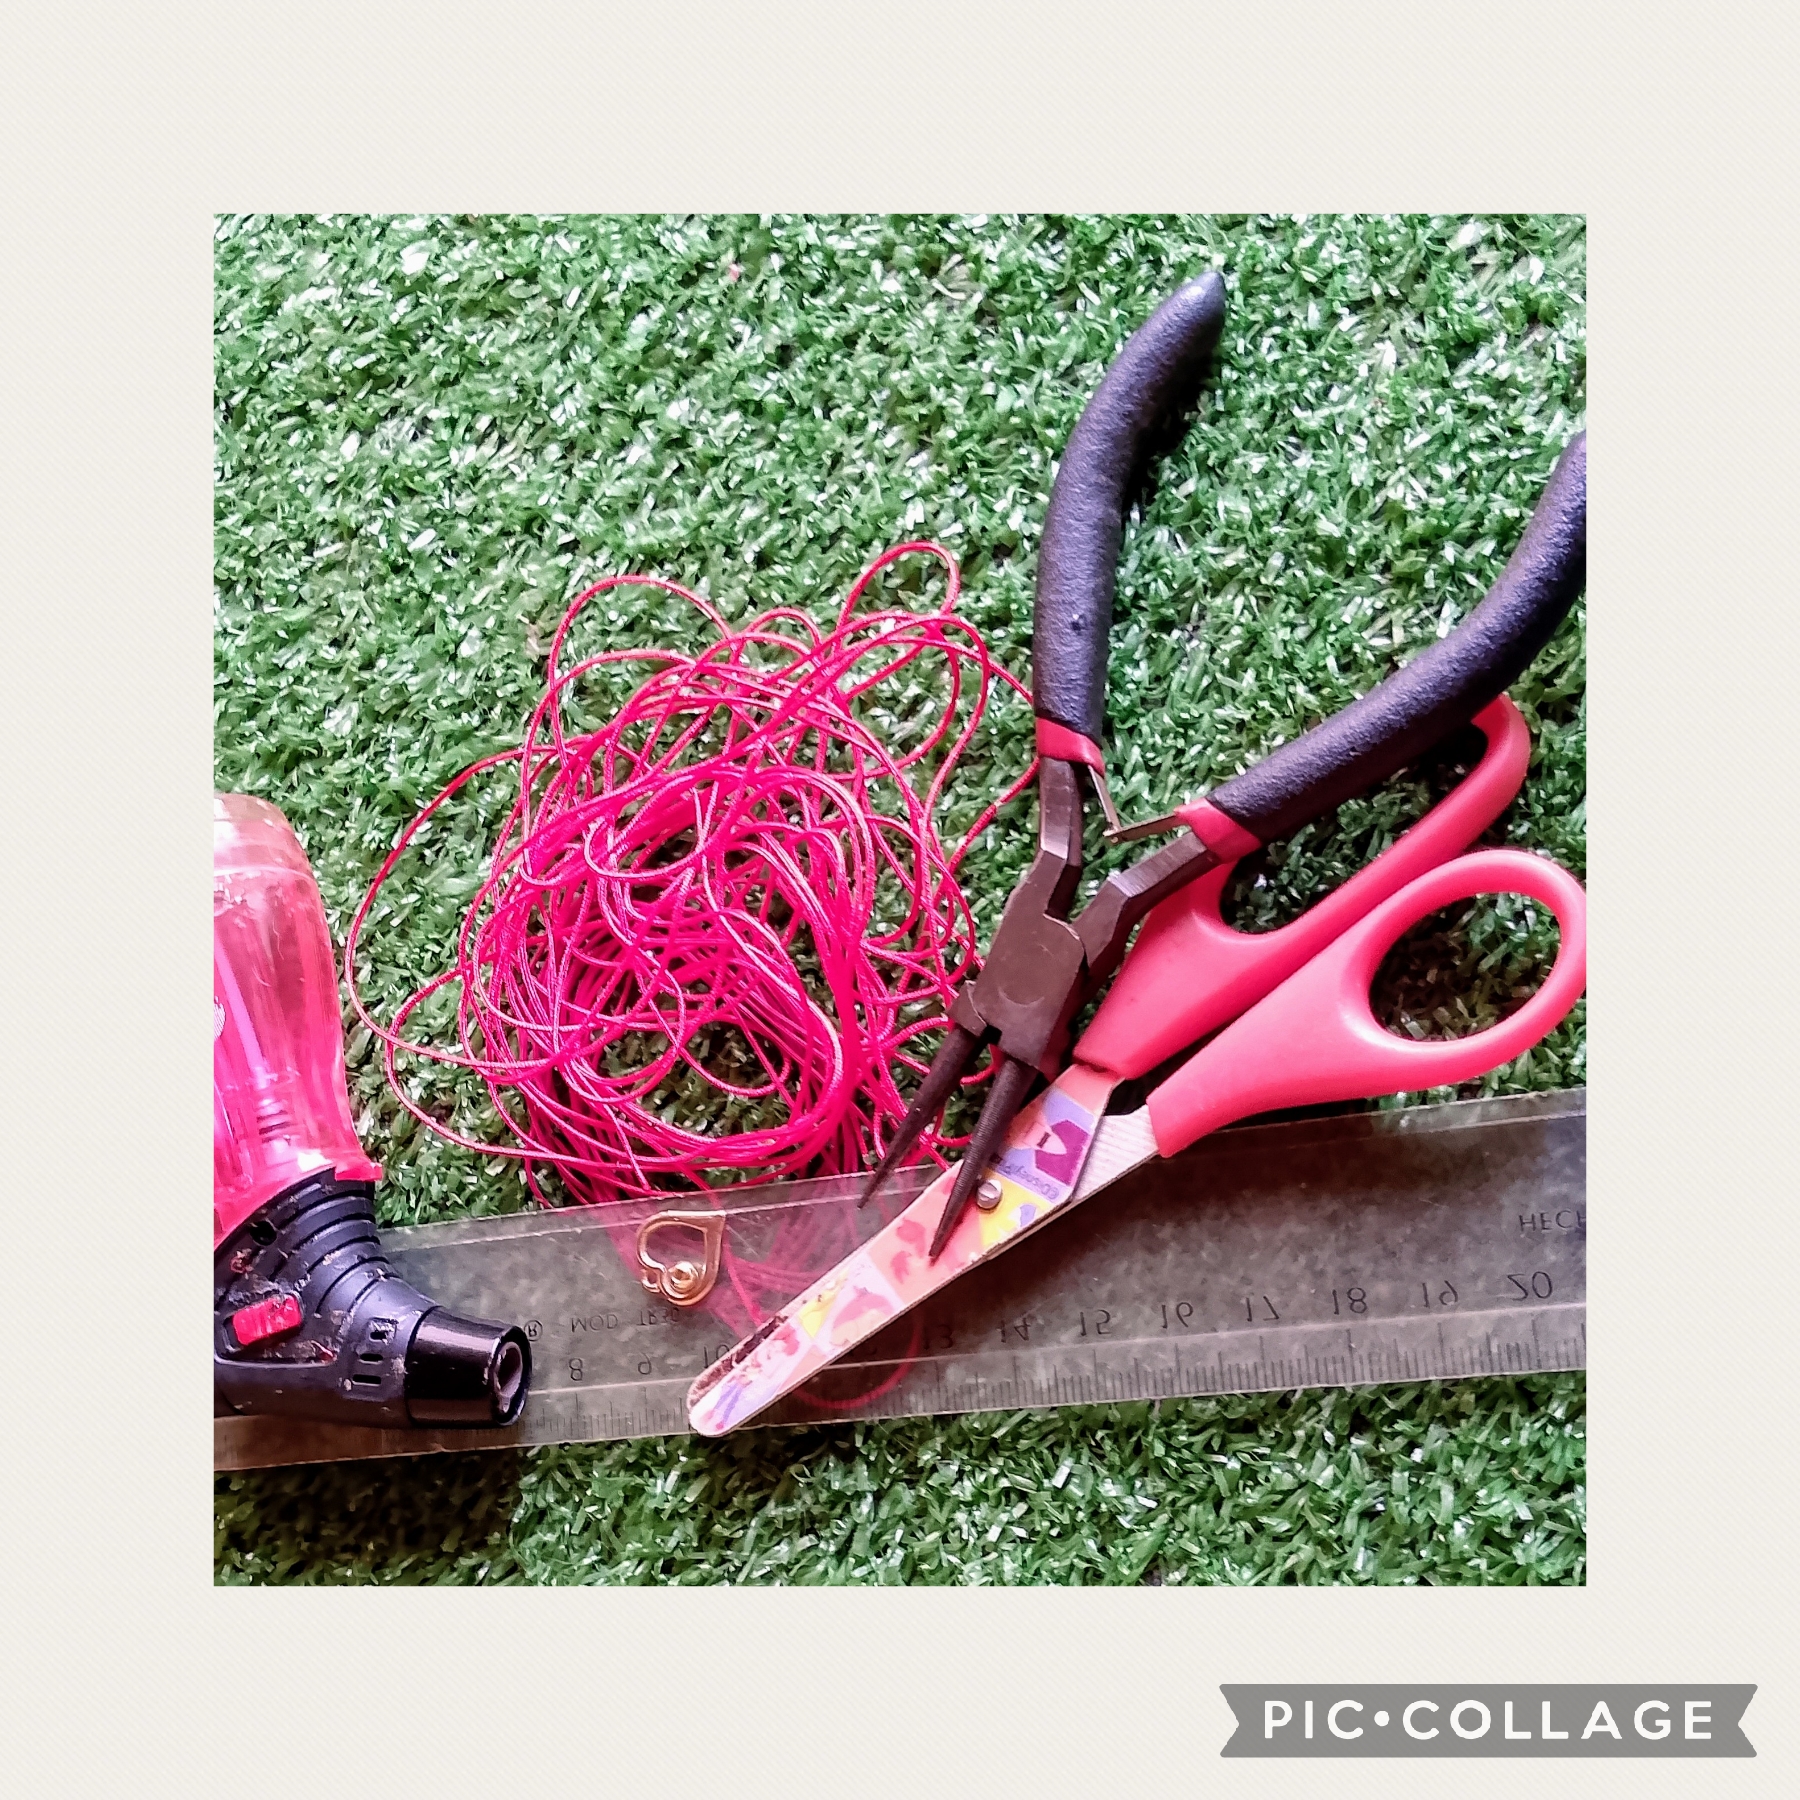
MATERIALES QUÉ USÉ PARA ELABORAR ESTA PULSERA ROJA:
✓Hilo coreano cuatro metros.
✓ Corales marinos tafetados.
✓ Un pequeño dije dorado en forma de.
corazón.
✓ Argolla.
✓ Tijeras.
✓ Encendedor.
✓ Regla.
✓ Pinza.
MATERIALS I USED TO MAKE THIS RED BRACELET:
✓ Four meters of Korean thread.
✓ Taffeta sea coral.
✓ A small gold heart-shaped charm.
✓ Ring.
✓ Scissors.
✓ Lighter.
✓ Ruler.
✓ Pin
CON ESTOS PASOS REALICÉ SU ELABORACIÓN:
PRIMER PASO:
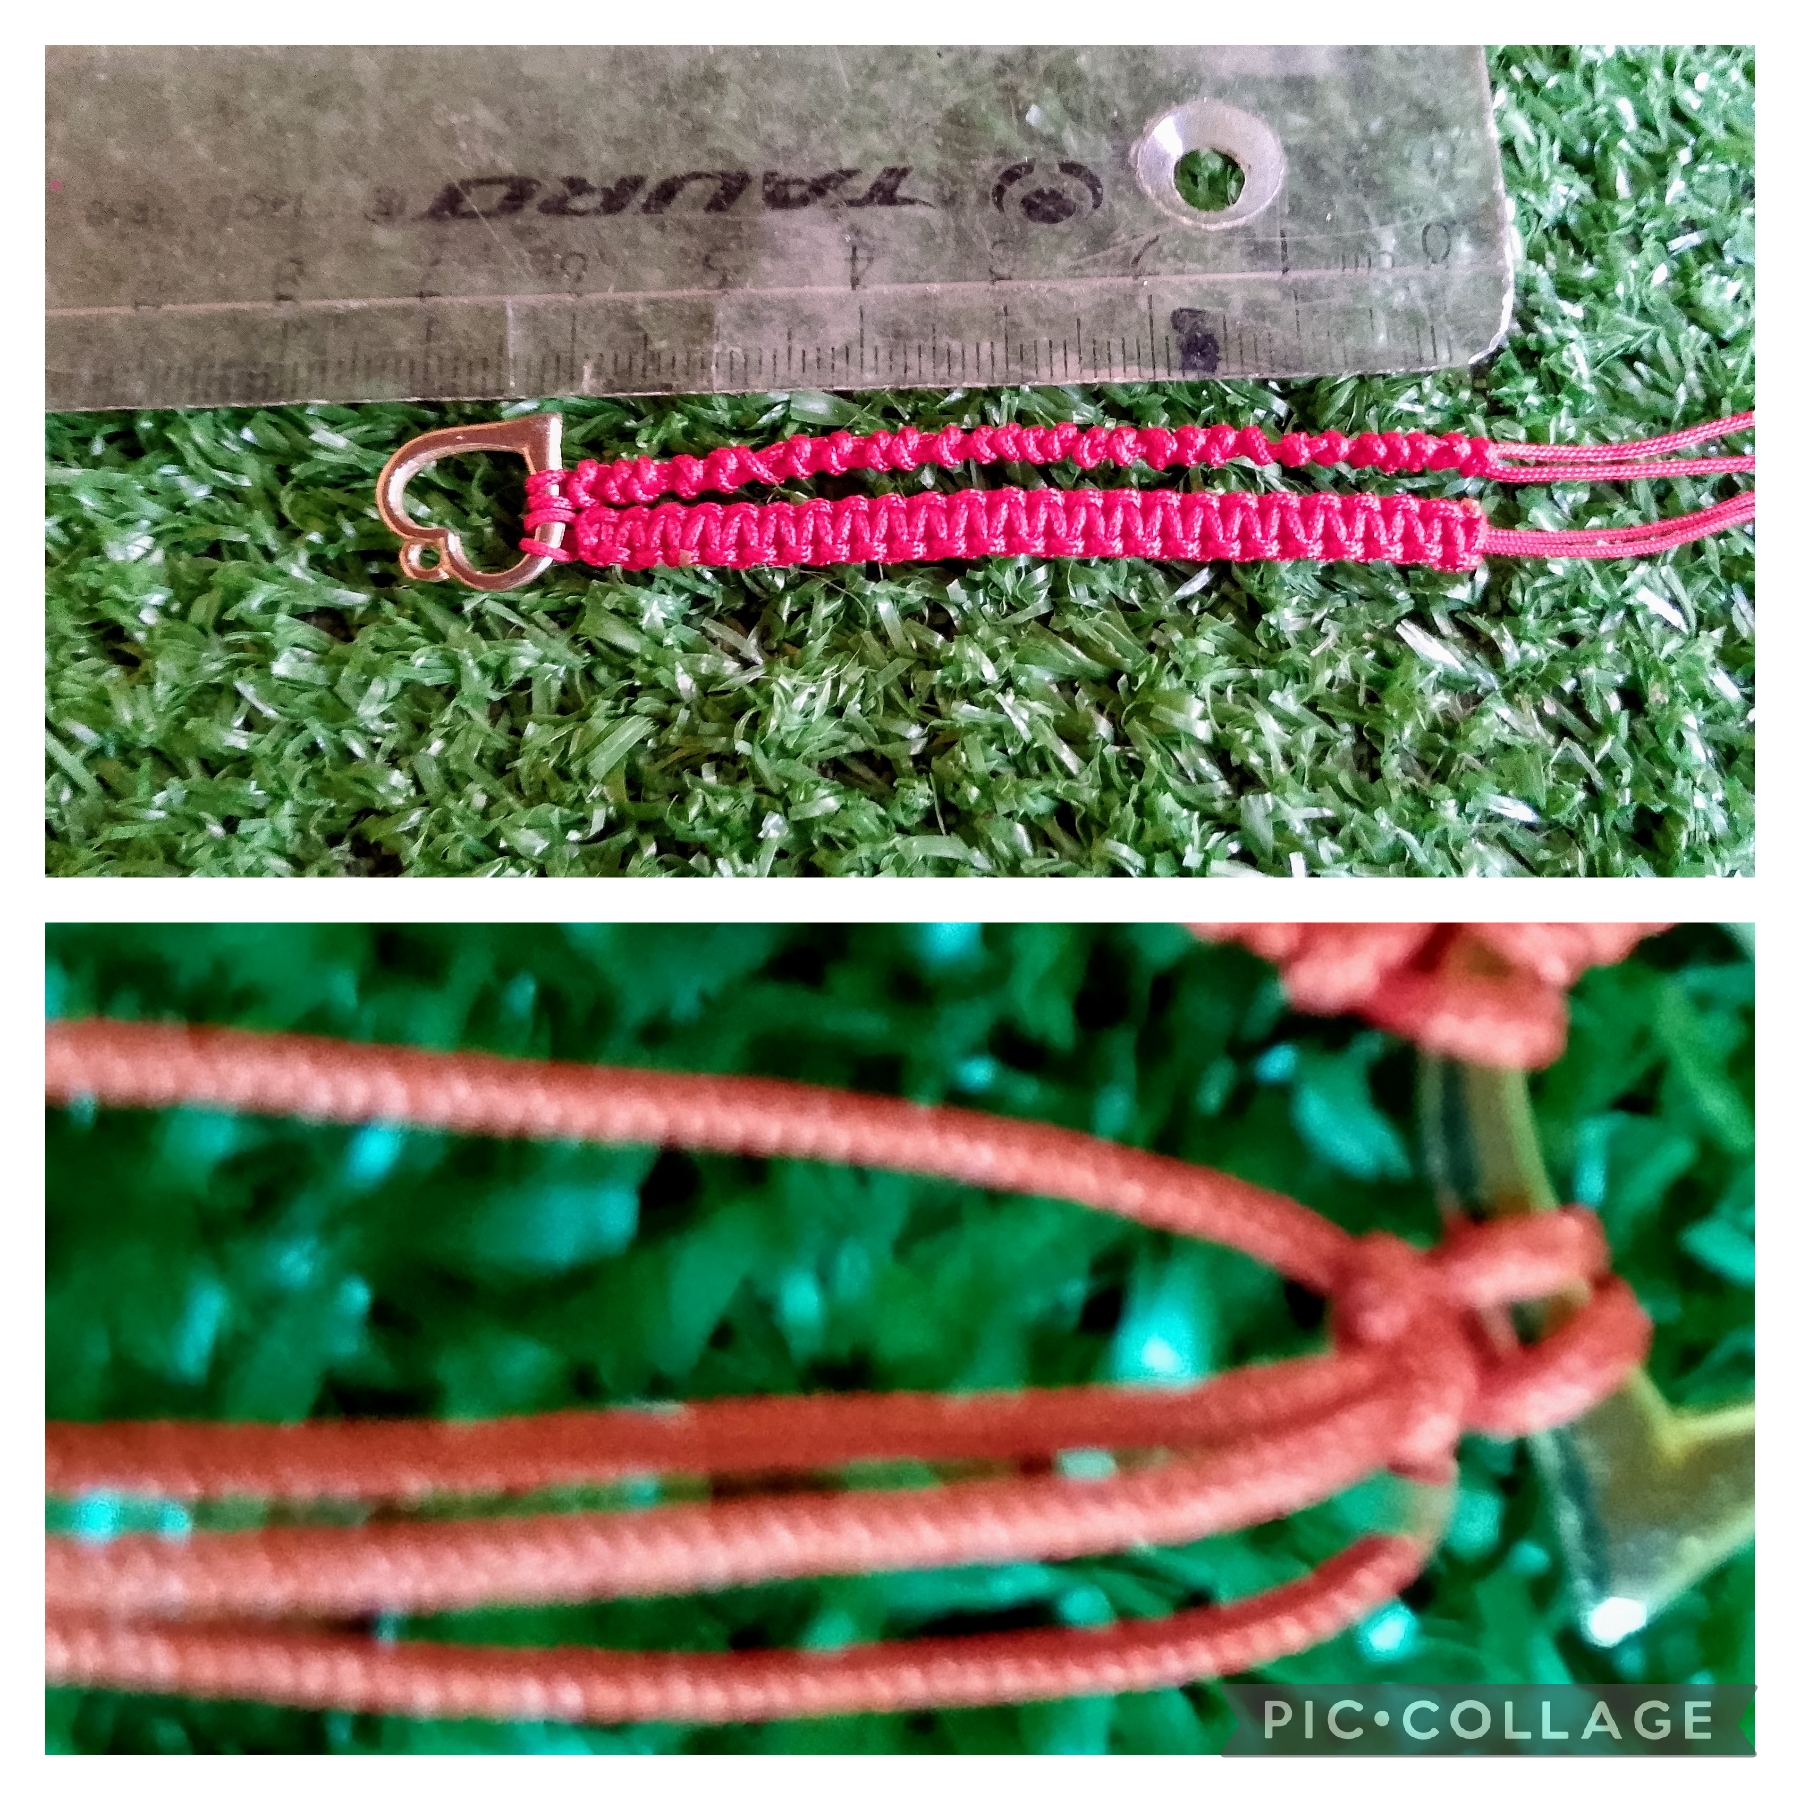
Para elaborar esta pulsera use dos tipos de nudos y la teji en dos partes, comienzo midiendo con la regla catorce centímetros del hilo coreano y lo doblo a mitad para rectificar que me quede la medida exacta uno las dos puntas, ahora voy a pasar el hilo por un lado del dije corazón y haciendo una especie de argolla paso las puntas por ella y ajusto como muestro tenso bien el hilo así, ahora corto sesenta centímetros del hilo coreano rojo y lo coloco debajo de los hilos que van a ser los centrales para realizar el Nudo plano, comienzo el nudo por la derecha y como ya lo he explicado en otras oportunidades tomo el hilo de la derecha y lo coloco encima de los hilos centrales, ahora con el hilo de la izquierda lo pongo encima del hilo de la derecha lo paso por debajo de los hilos centrales, paso el hilo por la argolla que forme con el hilo de la derecha y saco por arriba halo las dos puntas y así tengo mi nudo, se realiza un mismo procedimiento del lado contrario y así vamos alternando hasta tener el largo deseado.
WITH THESE STEPS I MADE IT:
FIRST STEP:
To make this bracelet I used two types of knots and wove it in two parts. I start by measuring fourteen centimeters of Korean thread with a ruler and fold it in half to ensure that I get the exact measurement between the two ends. Now I'm going to pass the thread through one side of the heart charm and, making a kind of ring, I pass the ends through it and adjust as shown. I tighten the thread well like this. Now I cut sixty centimeters of red Korean thread and place it under the threads that will be the central ones to make the Flat Knot. I start the knot on the right and, as I have explained on other occasions, I take the thread on the right and place it on top of the central threads. Now with the thread on the left, I put it on top of the thread on the right, I pass it under the central threads, I pass the thread through the ring that I formed with the thread on the right and take it out from above, I pull the two ends and that's how I have my knot. A same procedure on the opposite side and thus we alternate until we have the desired length.

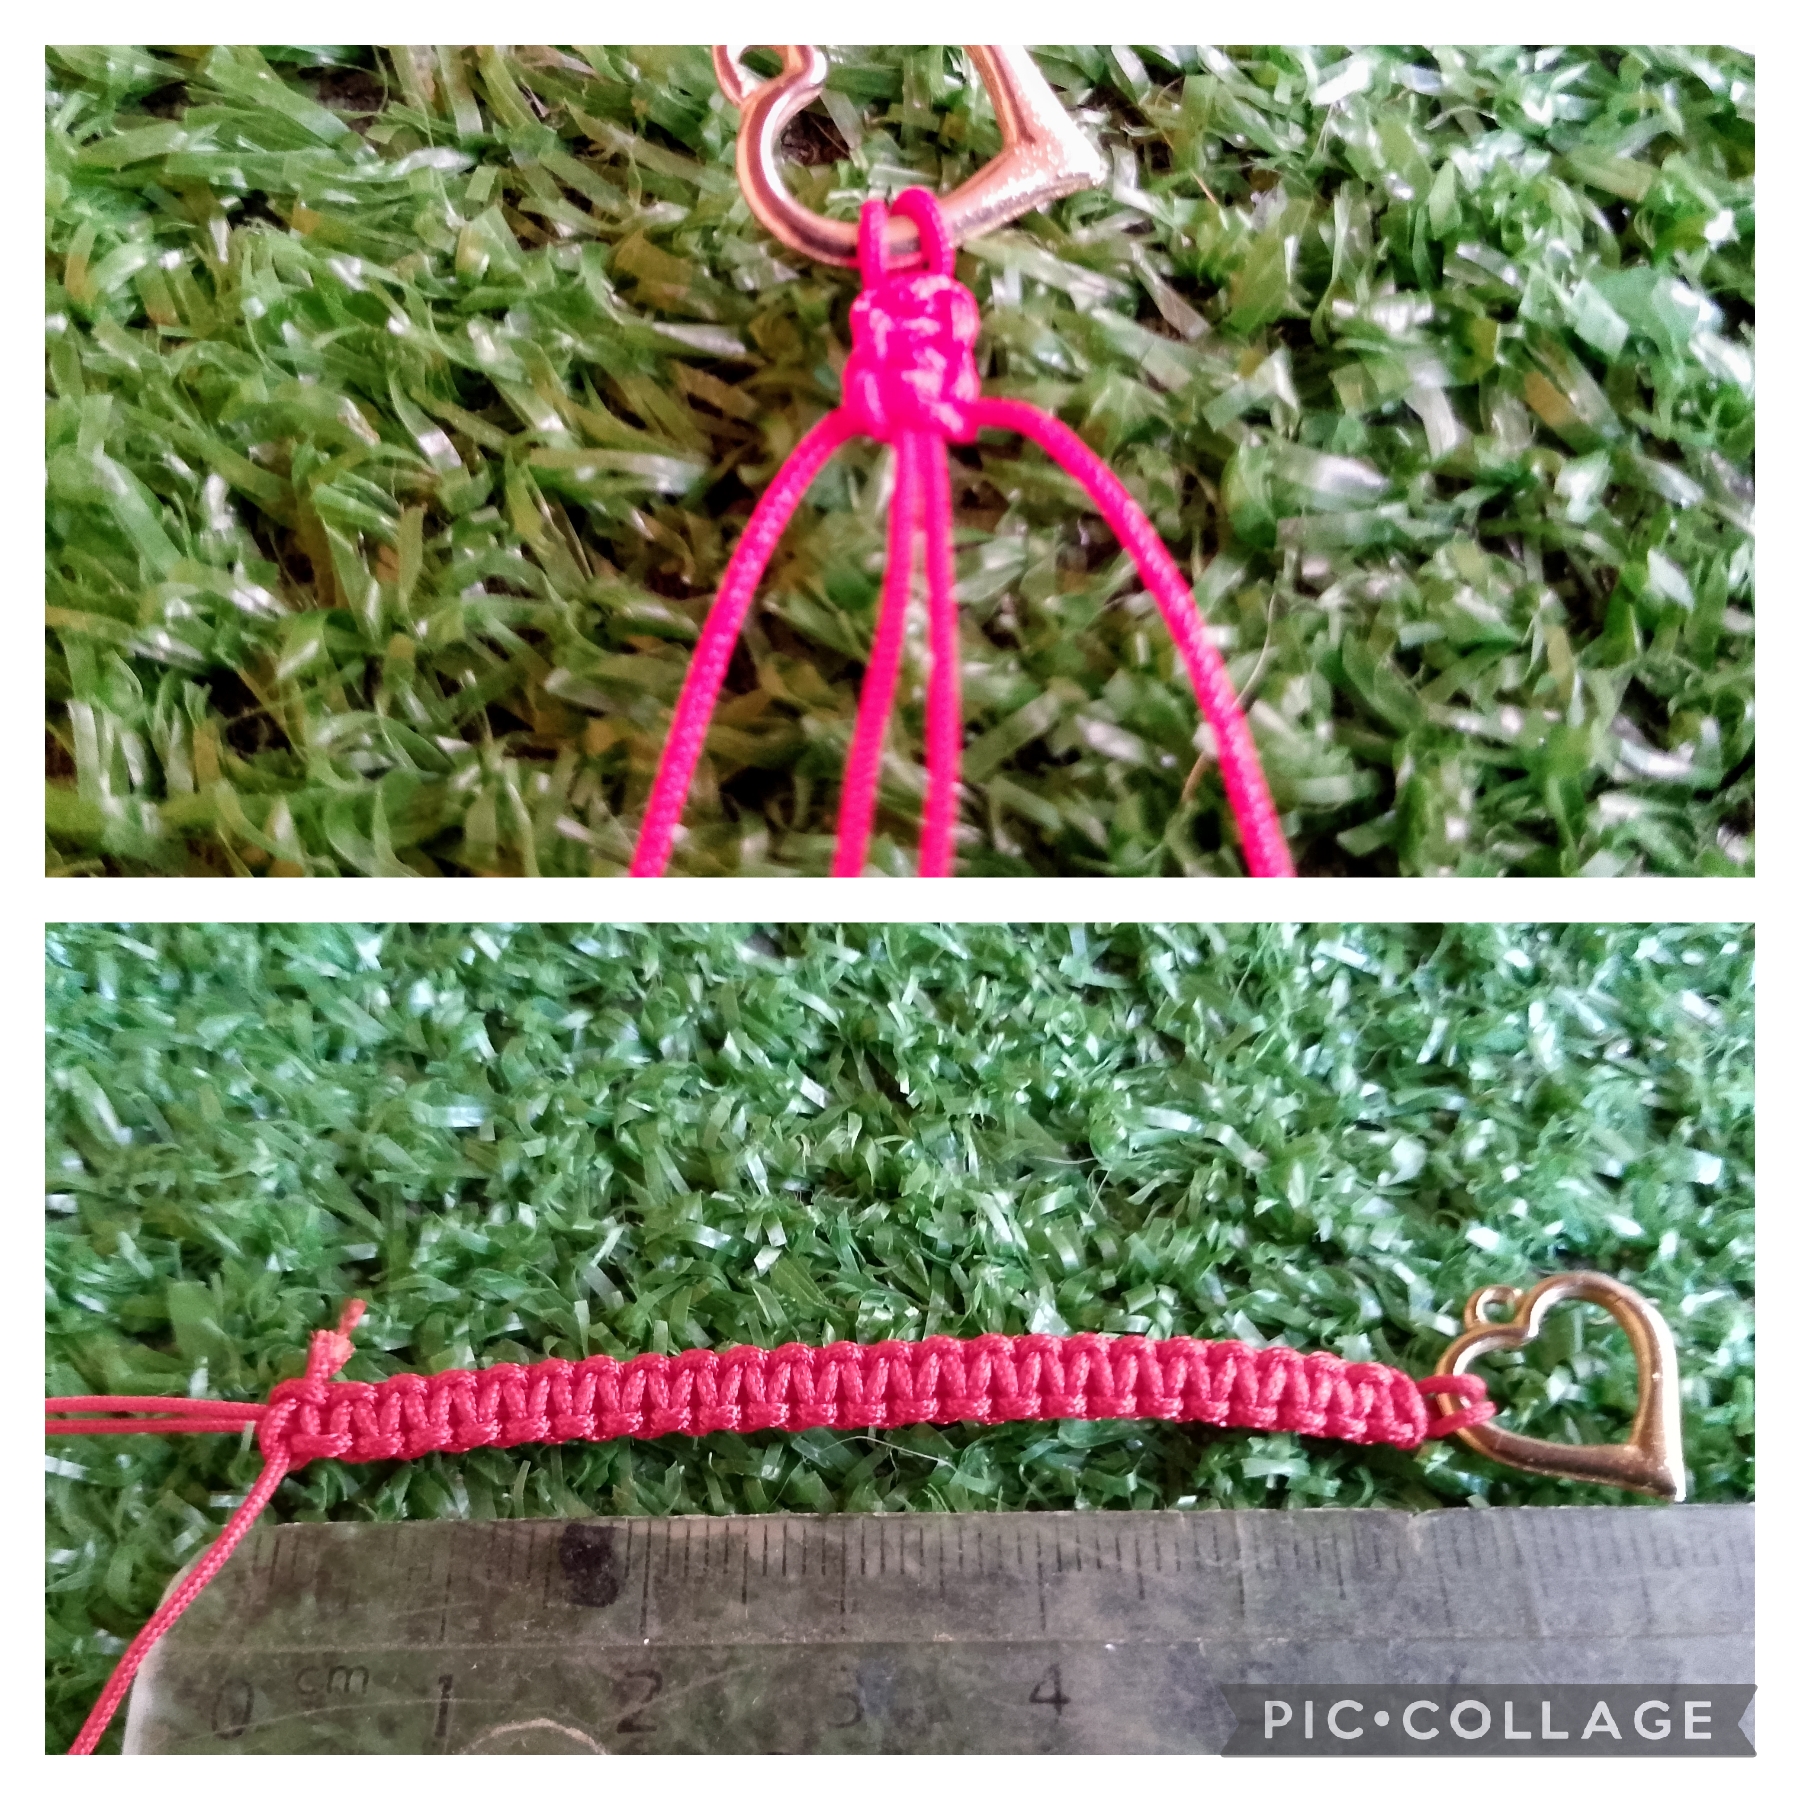
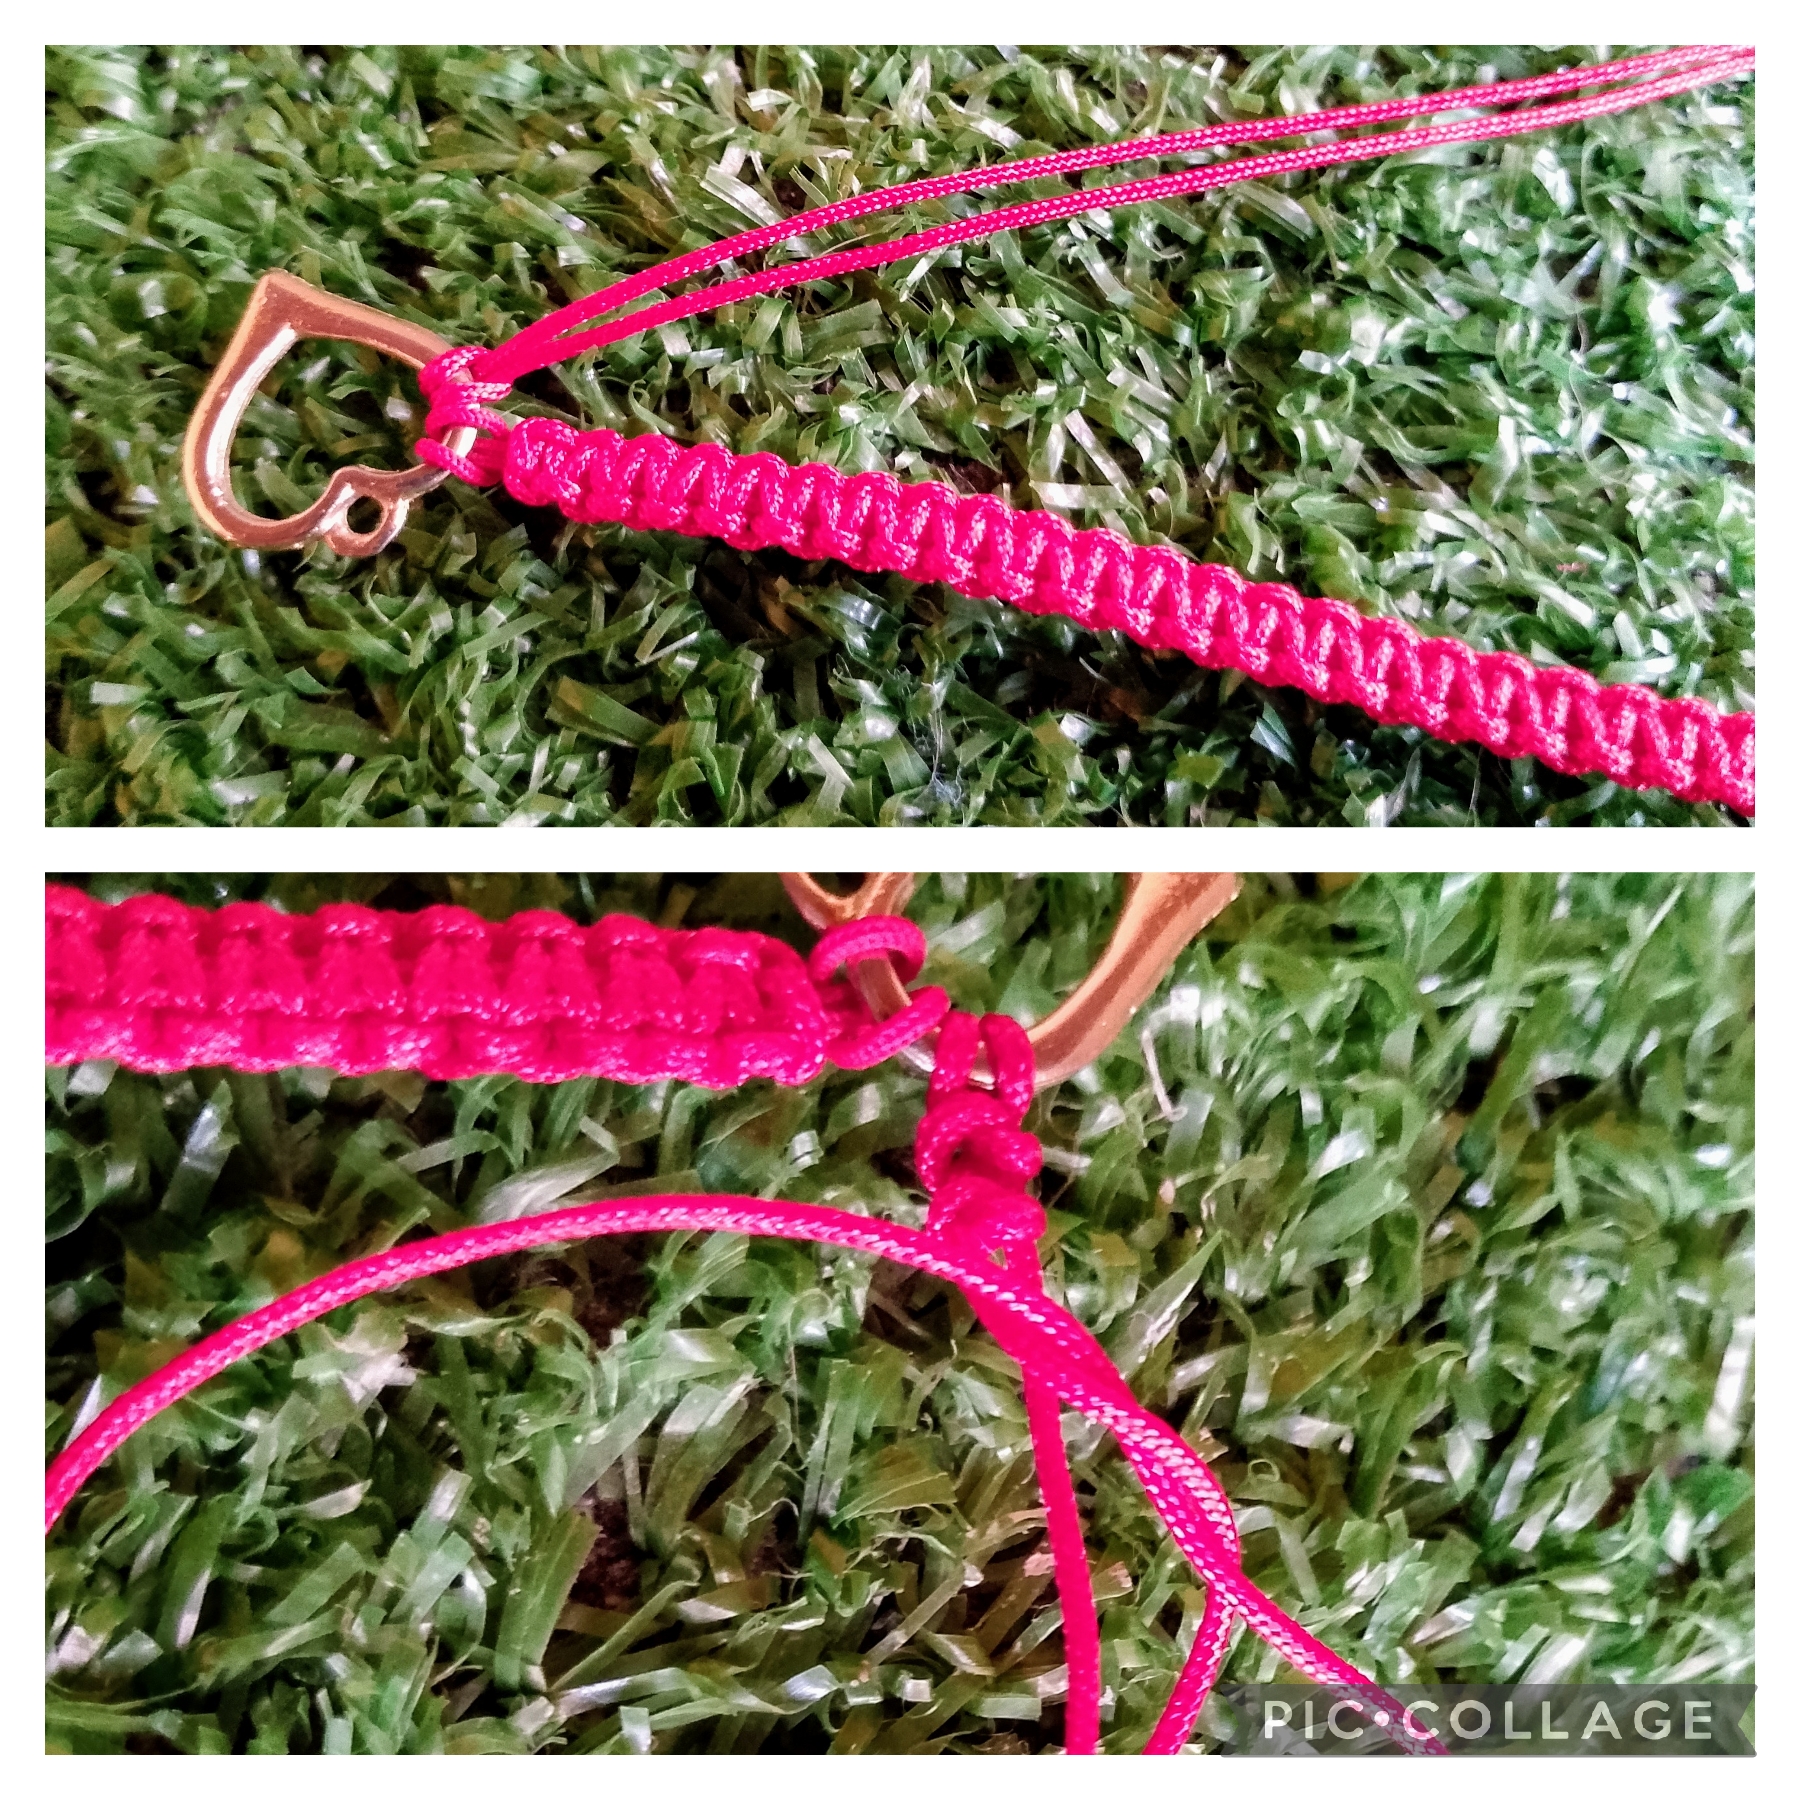
PASO DOS:
Una vez que tengo un largo de siete centímetros de nudo plano, voy a realizar siete centímetros de nudo de serpiente y siete centímetros de nudo plano de nuevo, está vez inserto en el dije corazón un hilo coreano de cuarenta centímetros y elaboro nudo serpiente que también lo he realizado anteriormente aquí tomamos el hilo de la derecha y formamos una O encima del hilo de la izquierda ahora pasamos el hilo de la izquierda por la O y abrazamos los dos hilos y lo sacamos de nuevo por la argolla jalando para ajustar, repetimos el proceso hasta tejer los siete centímetros, ahora tejemos de nuevo siete centímetros de nudo plano y así tengo listo las tres piezas que van a formar un lado de la pulsera.
STEP TWO:
Once I have a seven-centimeter-long flat knot, I'm going to make a seven-centimeter snake knot and a seven-centimeter flat knot again. This time I insert a forty-centimeter Korean thread into the heart charm and make a snake knot, which I've also done before. Here, we take the right thread and form an O over the left thread. Now, we pass the left thread through the O and clasp the two threads together. We pull it back through the ring, pulling to tighten. We repeat the process until we have woven the seven centimeters. Now we weave another seven centimeters of flat knot, and that way, I have the three pieces that will form one side of the bracelet ready.
PASO TRES:
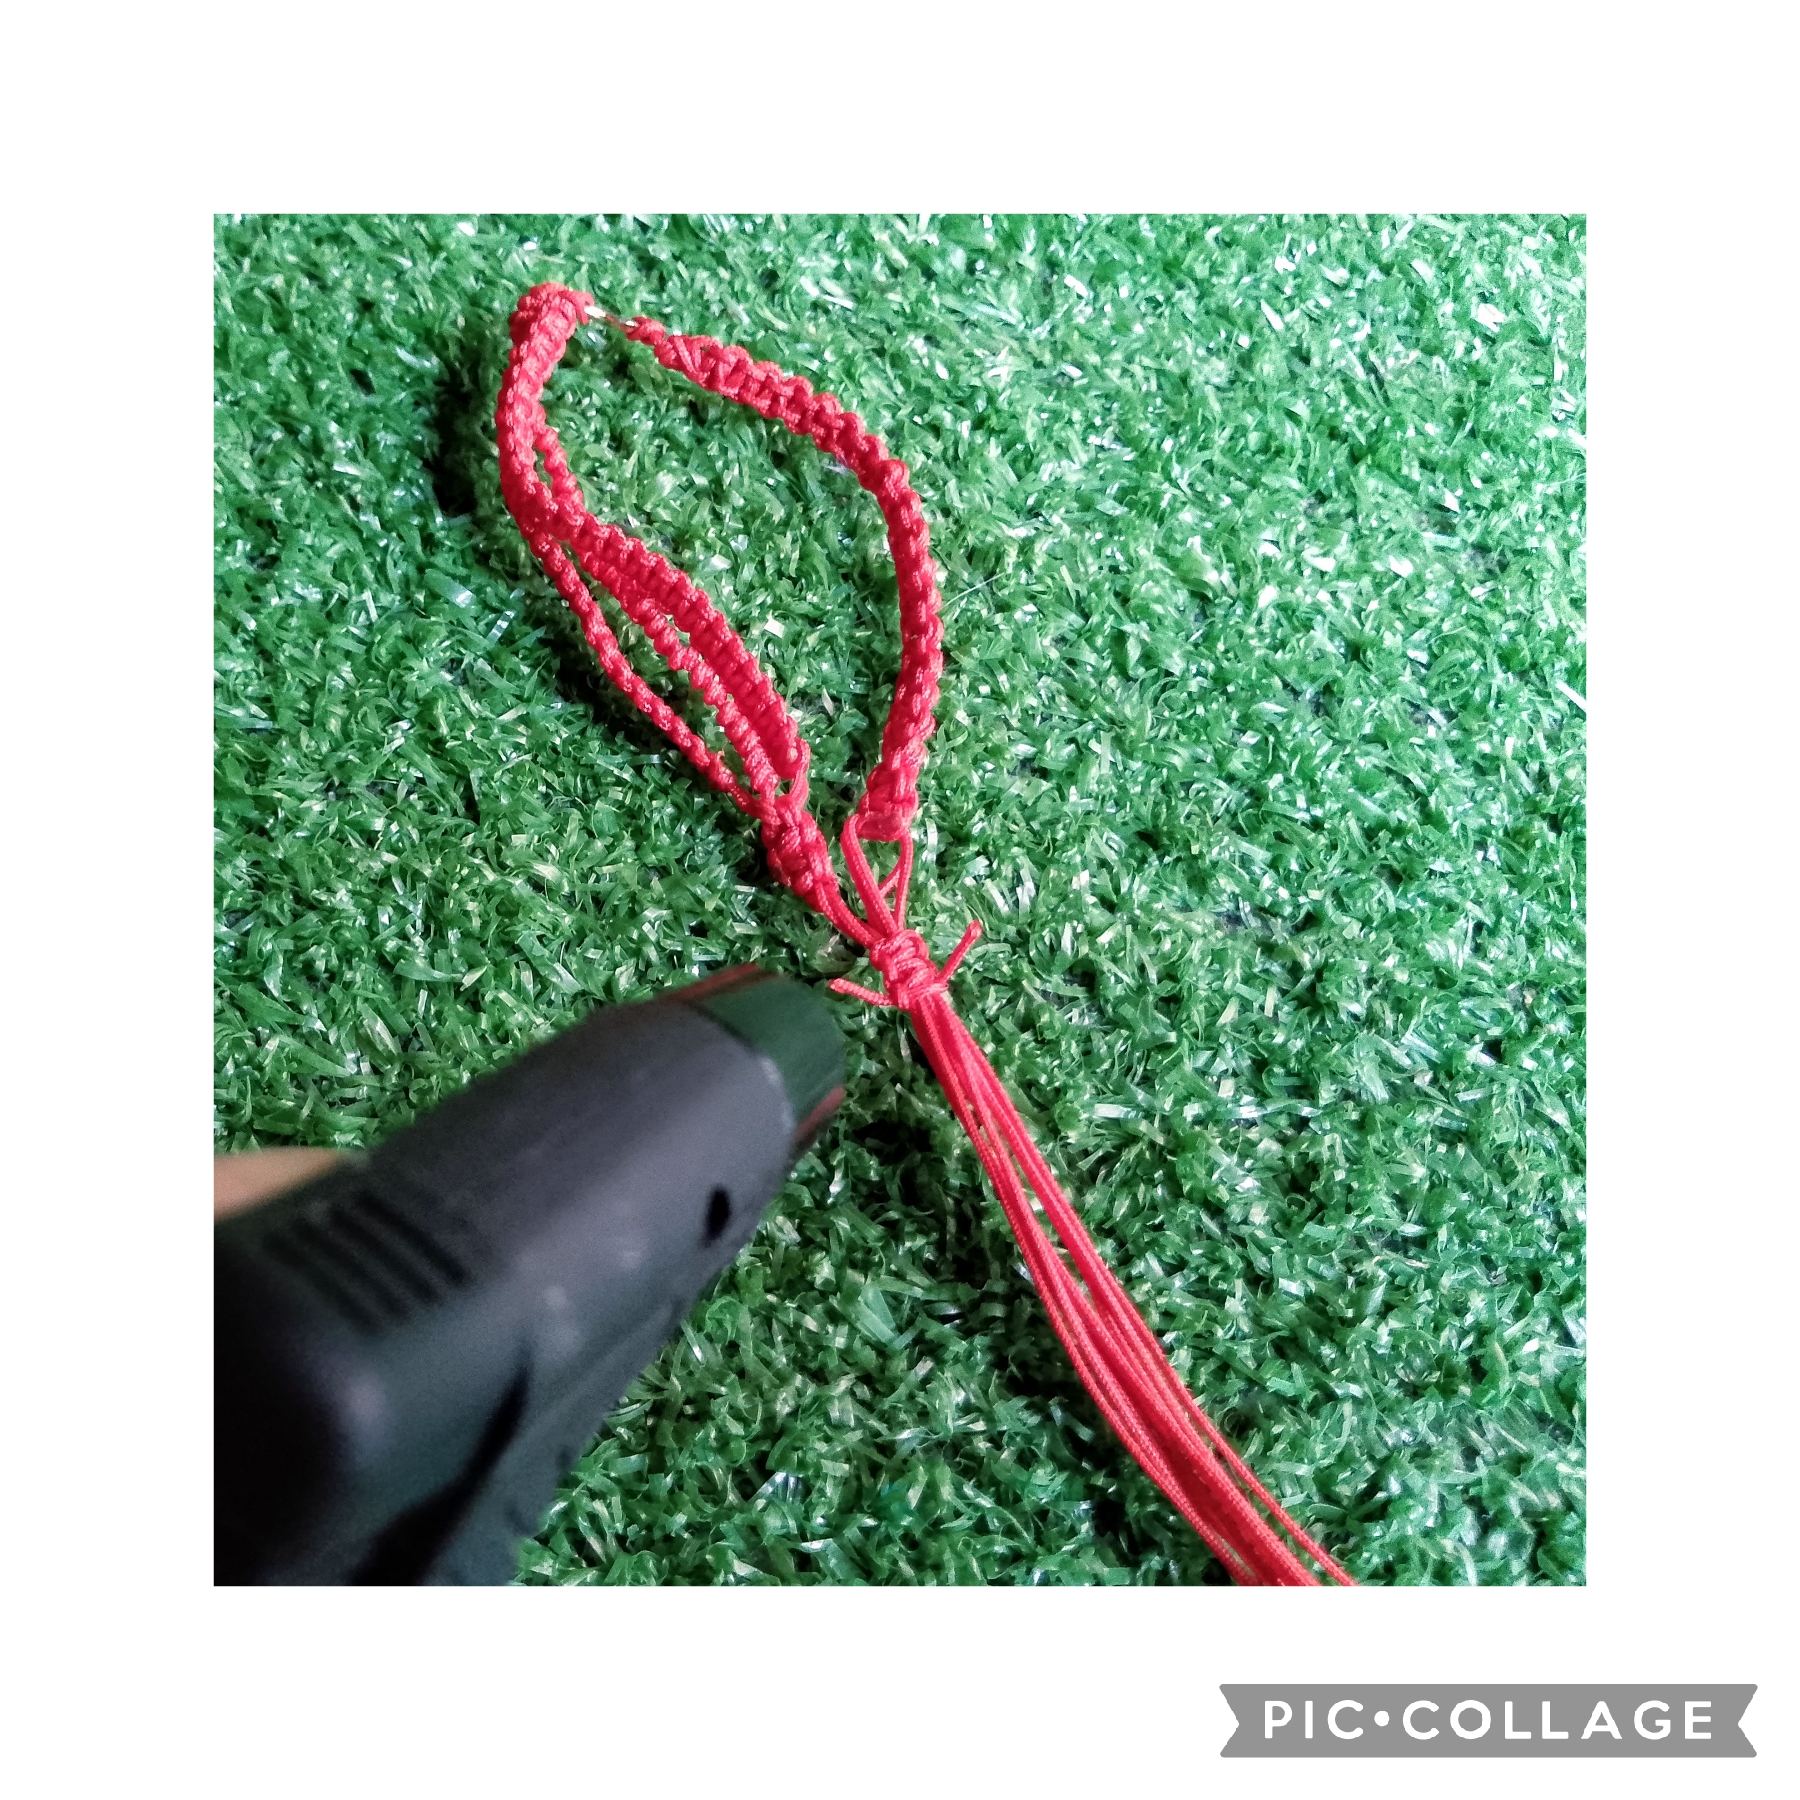
En este paso voy a realizar el otro lado de la pulsera este va a ser siete centímetros de nudo plano pero con una variedad para hacer más grueso este cordón voy a colocar los dos hilos centrales de siete centímetros y dos cordones de sesenta centímetros que doblados a la mitad son cuatro cordones de treinta, ahora tomamos de los cuatro cordones anudadores tres para formar la P que colocamos encima de los nudos centrales con el otro hilo que nos queda lo pasamos por arriba y luego por debajo como hacemos en un nudo plano normal y así realizamos el otro lado. Ahora tomamos las tijeras y cortamos los cordones excedentes y sellamos con el encendedor, tomamos un hilo rojo de seis centímetros para hacer el cierre, juntamos todos los hilos y hacemos cuatro nudos planos, cortamos y sellamos con el encendedor, en la punta de cada hilo colocamos un coral para que mi pulsera tenga un aspecto exótico y en el corazón una argolla con tres corales para un resultado espectacular.
STEP THREE:
In this step, I'm going to make the other side of the bracelet. This will be a seven-centimeter flat knot, but with a variety of knots to make this cord thicker. I'm going to place the two central seven-centimeter threads and two sixty-centimeter cords that, folded in half, make four thirty-centimeter cords. Now, we take three of the four knotting cords to form the P shape, which we place on top of the central knots. With the remaining thread, we pass it over and then under, as we do with a normal flat knot. This is how we make the other side. Now, we take the scissors and cut the excess cords and seal them with a lighter. We take a six-centimeter red thread to make the clasp. We gather all the threads and make four flat knots. We cut and seal them with a lighter. At the end of each thread, we place a coral to give my bracelet an exotic look, and at the heart, a ring with three corals for a spectacular result.

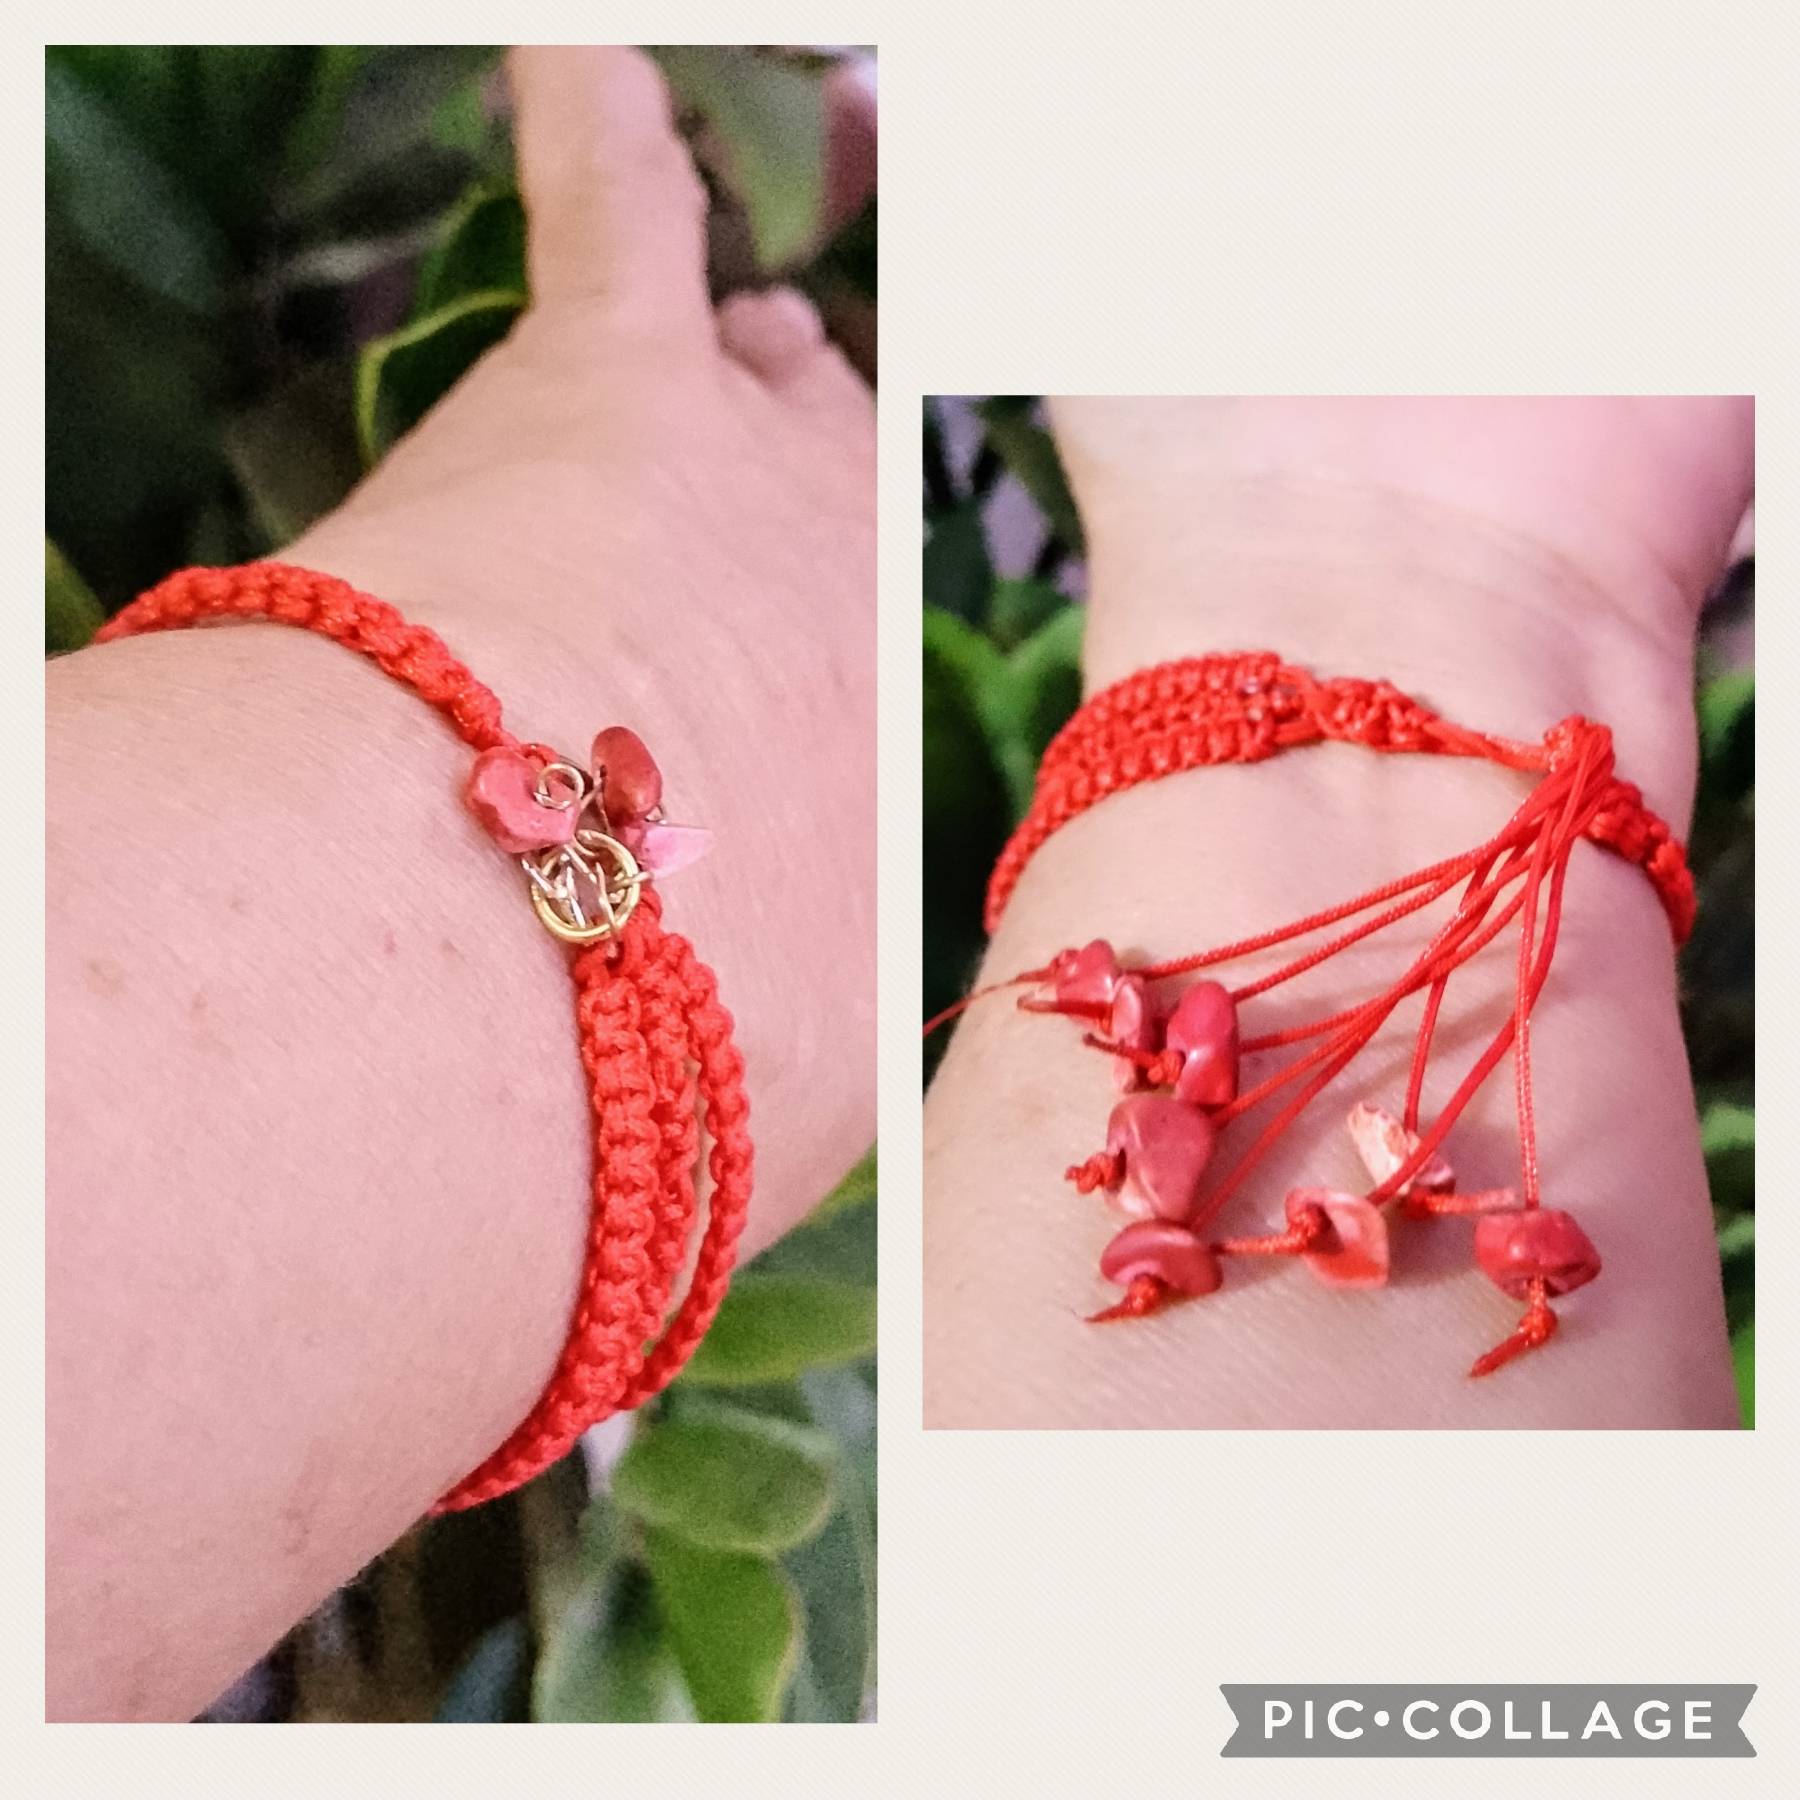
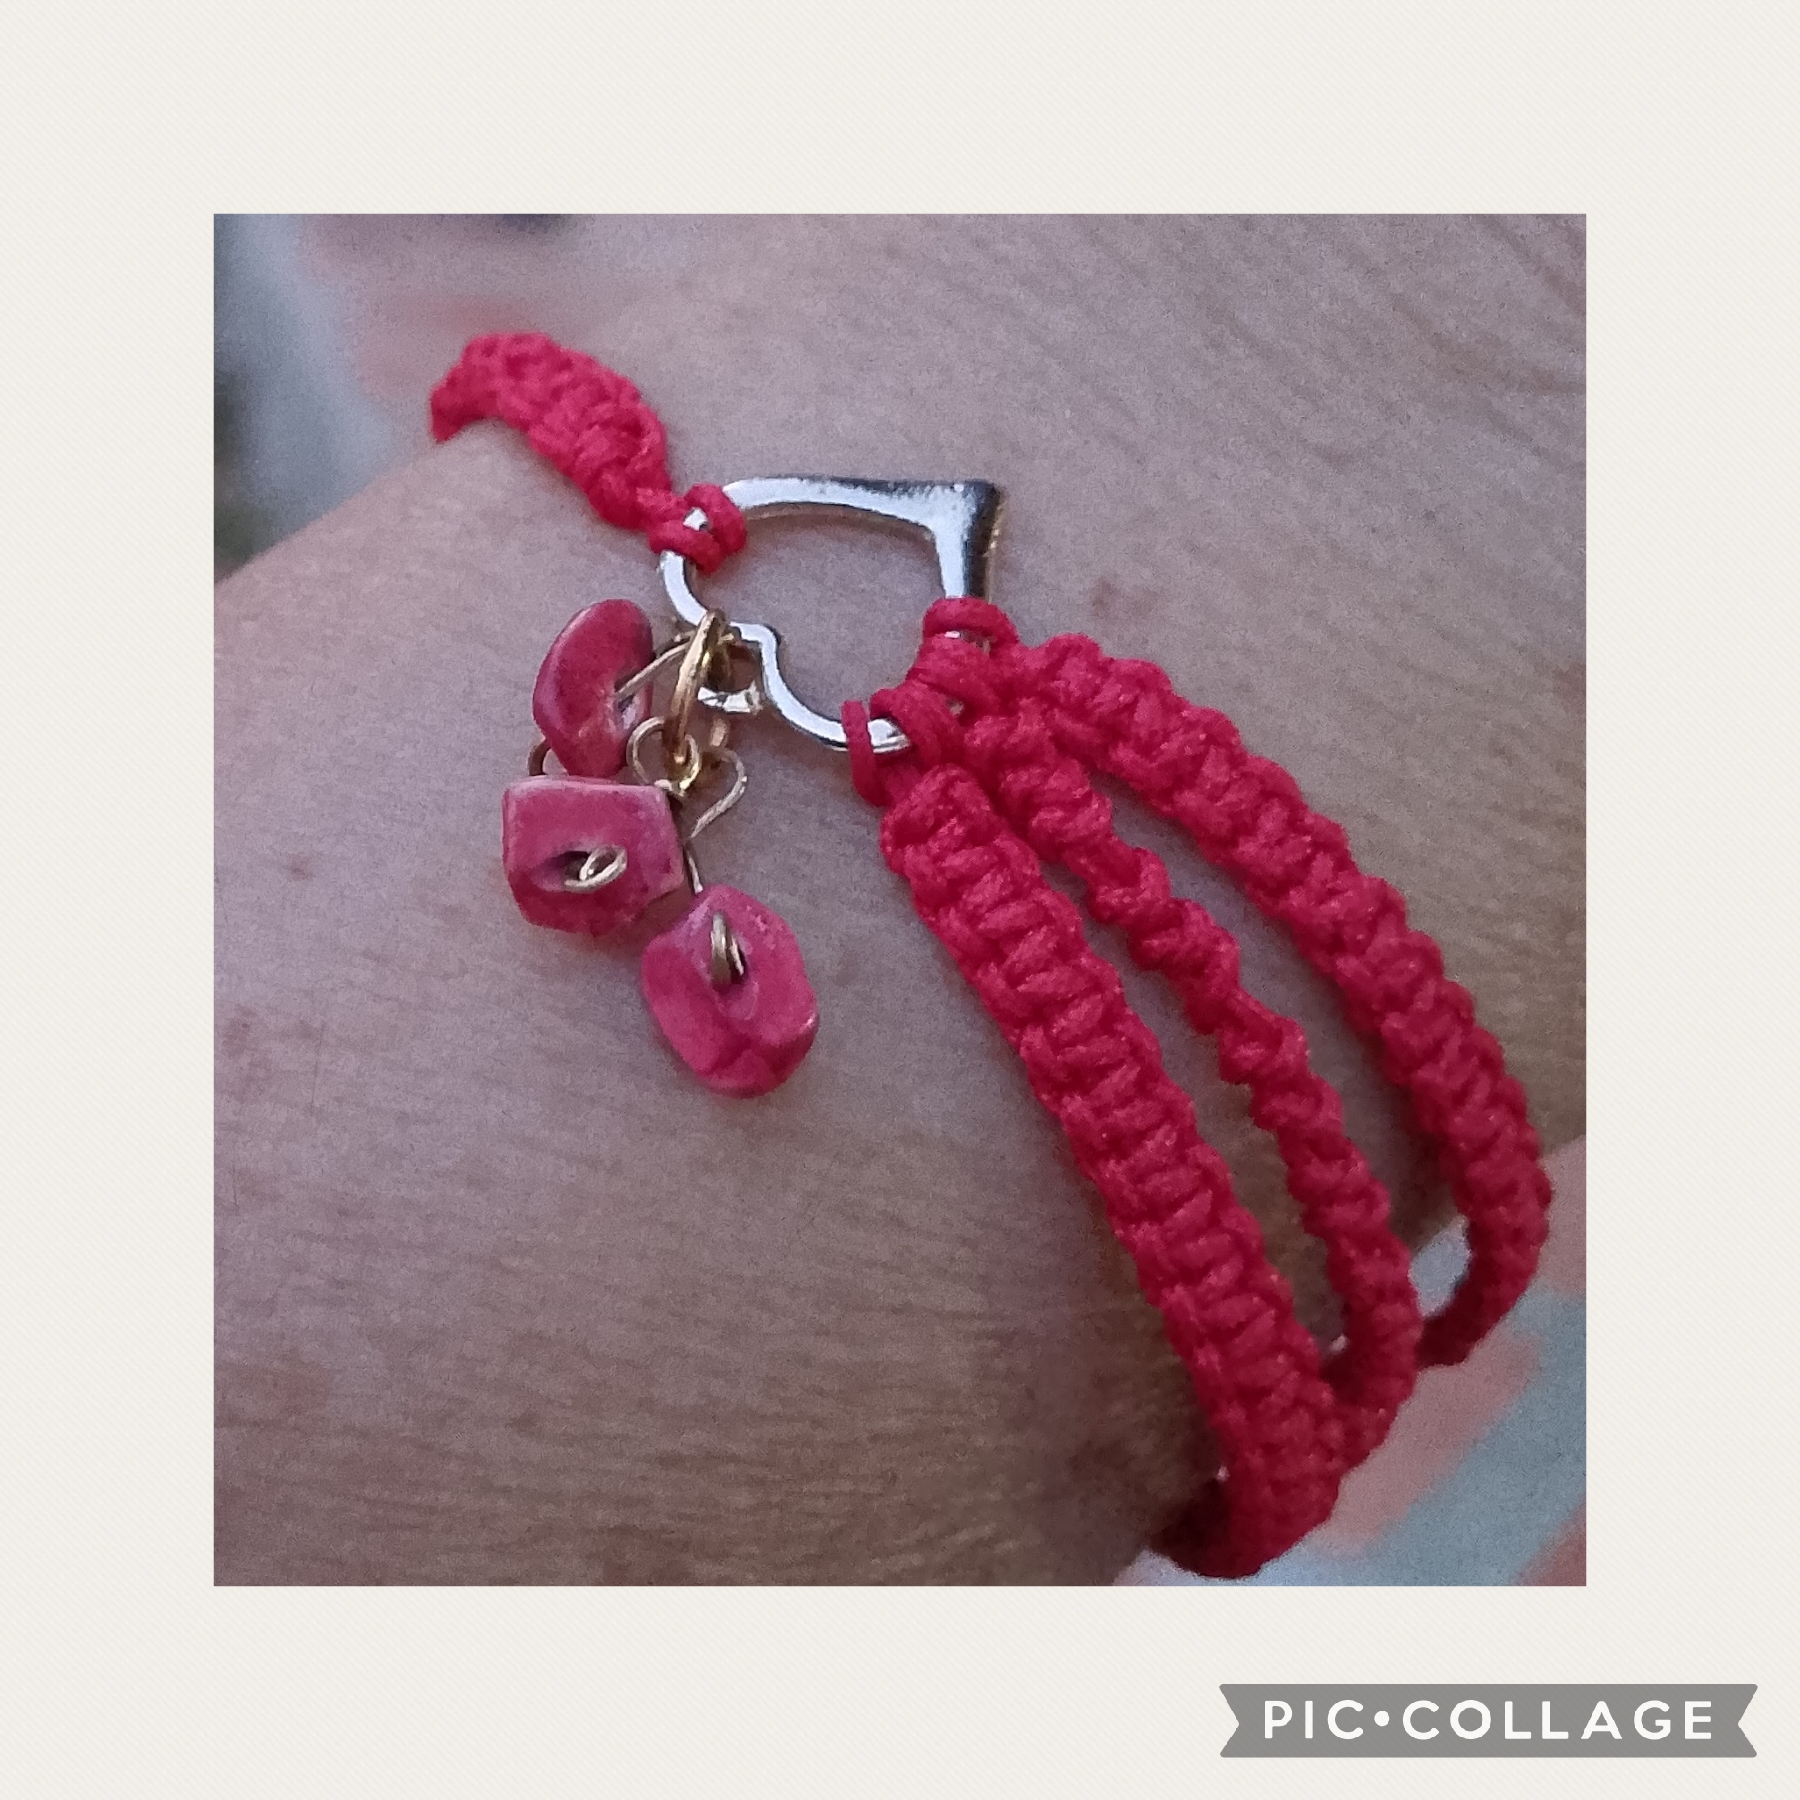
Artistas Creativos de las Manualidades y la Joyería este es el resultado final de mi manualidad espero que les guste y usen está idea para sus creaciones a mi me gustó mucho y a mi amiga también, como siempre gracias por leer mis publicaciones y dejarme sus valiosos comentarios, que tengan buen descanso y nos vemos en la próxima manualidad, bye bye.
Creative Artists of Crafts and Jewelry, this is the final result of my craft. I hope you like it and use this idea for your creations. I really liked it, and so did my friend. As always, thank you for reading my posts and leaving me your valuable comments. Have a good rest, and see you in the next craft. Bye bye.
Las imágenes y redacción de este tutorial son de mi exclusiva propiedad las fotos fueron tomadas con mi teléfono celular Tecno Spark Go 20 y las edite con una aplicación gratis del mismo, para traducir texto use Google traductor.
The images and writing in this tutorial are my exclusive property. The photos were taken with my Tecno Spark Go 20 cell phone and I edited them with a free application. To translate text, use Google Translate.
Hermosa pulsera con todos los detalles que le colocaste en las puntas y el diseño, un lindo color.
Agradezco el comentario y valioso apoyo a esta creación como siempre orgullosa de compartirla en tan maravillosa comunidad #hive-189504 bendiciones.
It is stylish, elegant, and beautiful. It looks absolutely amazing. Good to see how you made it. Well done!
What a flattering comment, thank you so much for the support.
Me reí bastante con tu introducción, hasta me di la tarea de ver si había traducción al inglés para la palabra pichirre, jajaja.
Tu brazalete está precioso. Buen trabajo.
Me estoy muriendo de risa @karen.art, tu siempre tan ocurrente, bueno eso es algo como tacaño la palabra la conozco por mi abuela la usaba cuando le daban poco de lo que quería, jajaja; me acordé de Ti el día de las hermanas espero que este año si te felicitarán; no pude publicar porque el tiempo no me alcanza, te deseo una feliz noche, bendiciones 🤗
Loved the design of this bracelet, I'm not so goot at crochet that's why i never try bracelets out of thread but you have made it with fingers it means i can also try this one, thanks for your detailed explanation of process 😁😊
Thank you so much @hadianoor for visiting my blog. Your comment is very flattering and it's all a matter of patience and practice. Rest well and have a good night.
This triple bracelet is really really cute. It even looks more good on this hand.