Saluditos Artistas Creativos de las manualidades y la Joyería, feliz inicio de una nueva semana y solo nos queda dieciséis días para finalizar diciembre y con ello también el año dos mil veinticuatro, Yo, espero que todos estén sanos con alegría y mucho entusiasmo para despedir este año y recibir uno nuevo con metas y proyecciones de éxito y prosperidad, les comento que a pesar del mucho trabajo siempre dispuesta a compartir con ustedes mis creaciones hoy les traigo un peculiar Llavero que realicé con la imagen de Santa Claus, como ustedes saben Papá Noel, San Nicolás, Viejito Pascuero o sencillamente Santa es un personaje que se dedicaba a traer los regalos para los niños viajando en su trineo, entrando por la chimenea y causando que todos esperaramos con emoción todos los años su llegada, ya no era solo los niños nos acostumbramos a que cuando fuera las doce de la noche del día veinticuatro aparecería y era frecuente ir al arbolito a revisar que nos trajo, para mí aún es la mejor época y me emociono mucho esperar los regalos que me traerá Papá Noel.
Todavía estamos compartiendo regalitos del amigo secreto y está semana me tocó un caballero, me gusta hacer mis propios detalles y por eso realicé este Llavero con la imagen de Santa, lo hice tejido a crochet y le adicione otros abalorios para darle cuchitura a mi pieza.
Les invito a seguir leyendo el paso a paso y mirar como lo hice:
Greetings Creative Artists of crafts and jewelry, happy start of a new week and we only have sixteen days left to finish December and with it also the year two thousand twenty-four, I hope that you are all healthy with joy and much enthusiasm to say goodbye to this year and welcome a new one with goals and projections of success and prosperity, I tell you that despite the hard work always willing to share with you my creations today I bring you a peculiar Keychain that I made with the image of Santa Claus, as you know Santa Claus, Saint Nicholas, Old Man Pascuero or simply Santa is a character who was dedicated to bringing gifts for children traveling in his sleigh, entering through the chimney and causing us all to wait with excitement every year for his arrival, it was no longer just the children we got used to the fact that when it was twelve o'clock at night on the twenty-fourth he would appear and it was common to go to the tree to check what he brought us, for me it is still the best time and I get very excited to wait for the gifts that Santa Claus will bring me. We are still sharing Secret Santa gifts and this week I got a gentleman. I like to make my own details and that is why I made this Keychain with the image of Santa, I crocheted it and added other beads to give my piece some charm.
I invite you to continue reading the step by step and see how I did it:

MATERIALES USADOS EN SU ELABORACIÓN:
✓ Hilo pabilo color blanco.
✓ Aguja para tejer número seis.
✓ Un clip de los que traen las latas para
abrirlas.
✓ Cuerina roja.
✓ Perlas corridas blancas.
✓ Silicón.
✓ Dos cristales negros.
✓ Un mostacillón rojo.
✓ Un balín dorado.
✓ Un pedacito de cola de ratón roja.
✓ Cuatro eslabones de cadena dorada.
✓ Tijeras.
✓ Pinzas.
MATERIALS USED IN ITS PREPARATION:
✓ White wick thread.
✓ Knitting needle number six.
✓ A clip from those that come with cans to open them.
✓ Red leatherette.
✓ White pearls.
✓ Silicone.
✓ Two black crystals.
✓ A red seed bead.
✓ A golden ball.
✓ A small piece of red mouse tail.
✓ Four links of golden chain.
✓ Scissors.
✓ Tweezers.

PASOS CON LOS QUE REALICE ESTA MANUALIDAD:
PRIMER PASO:
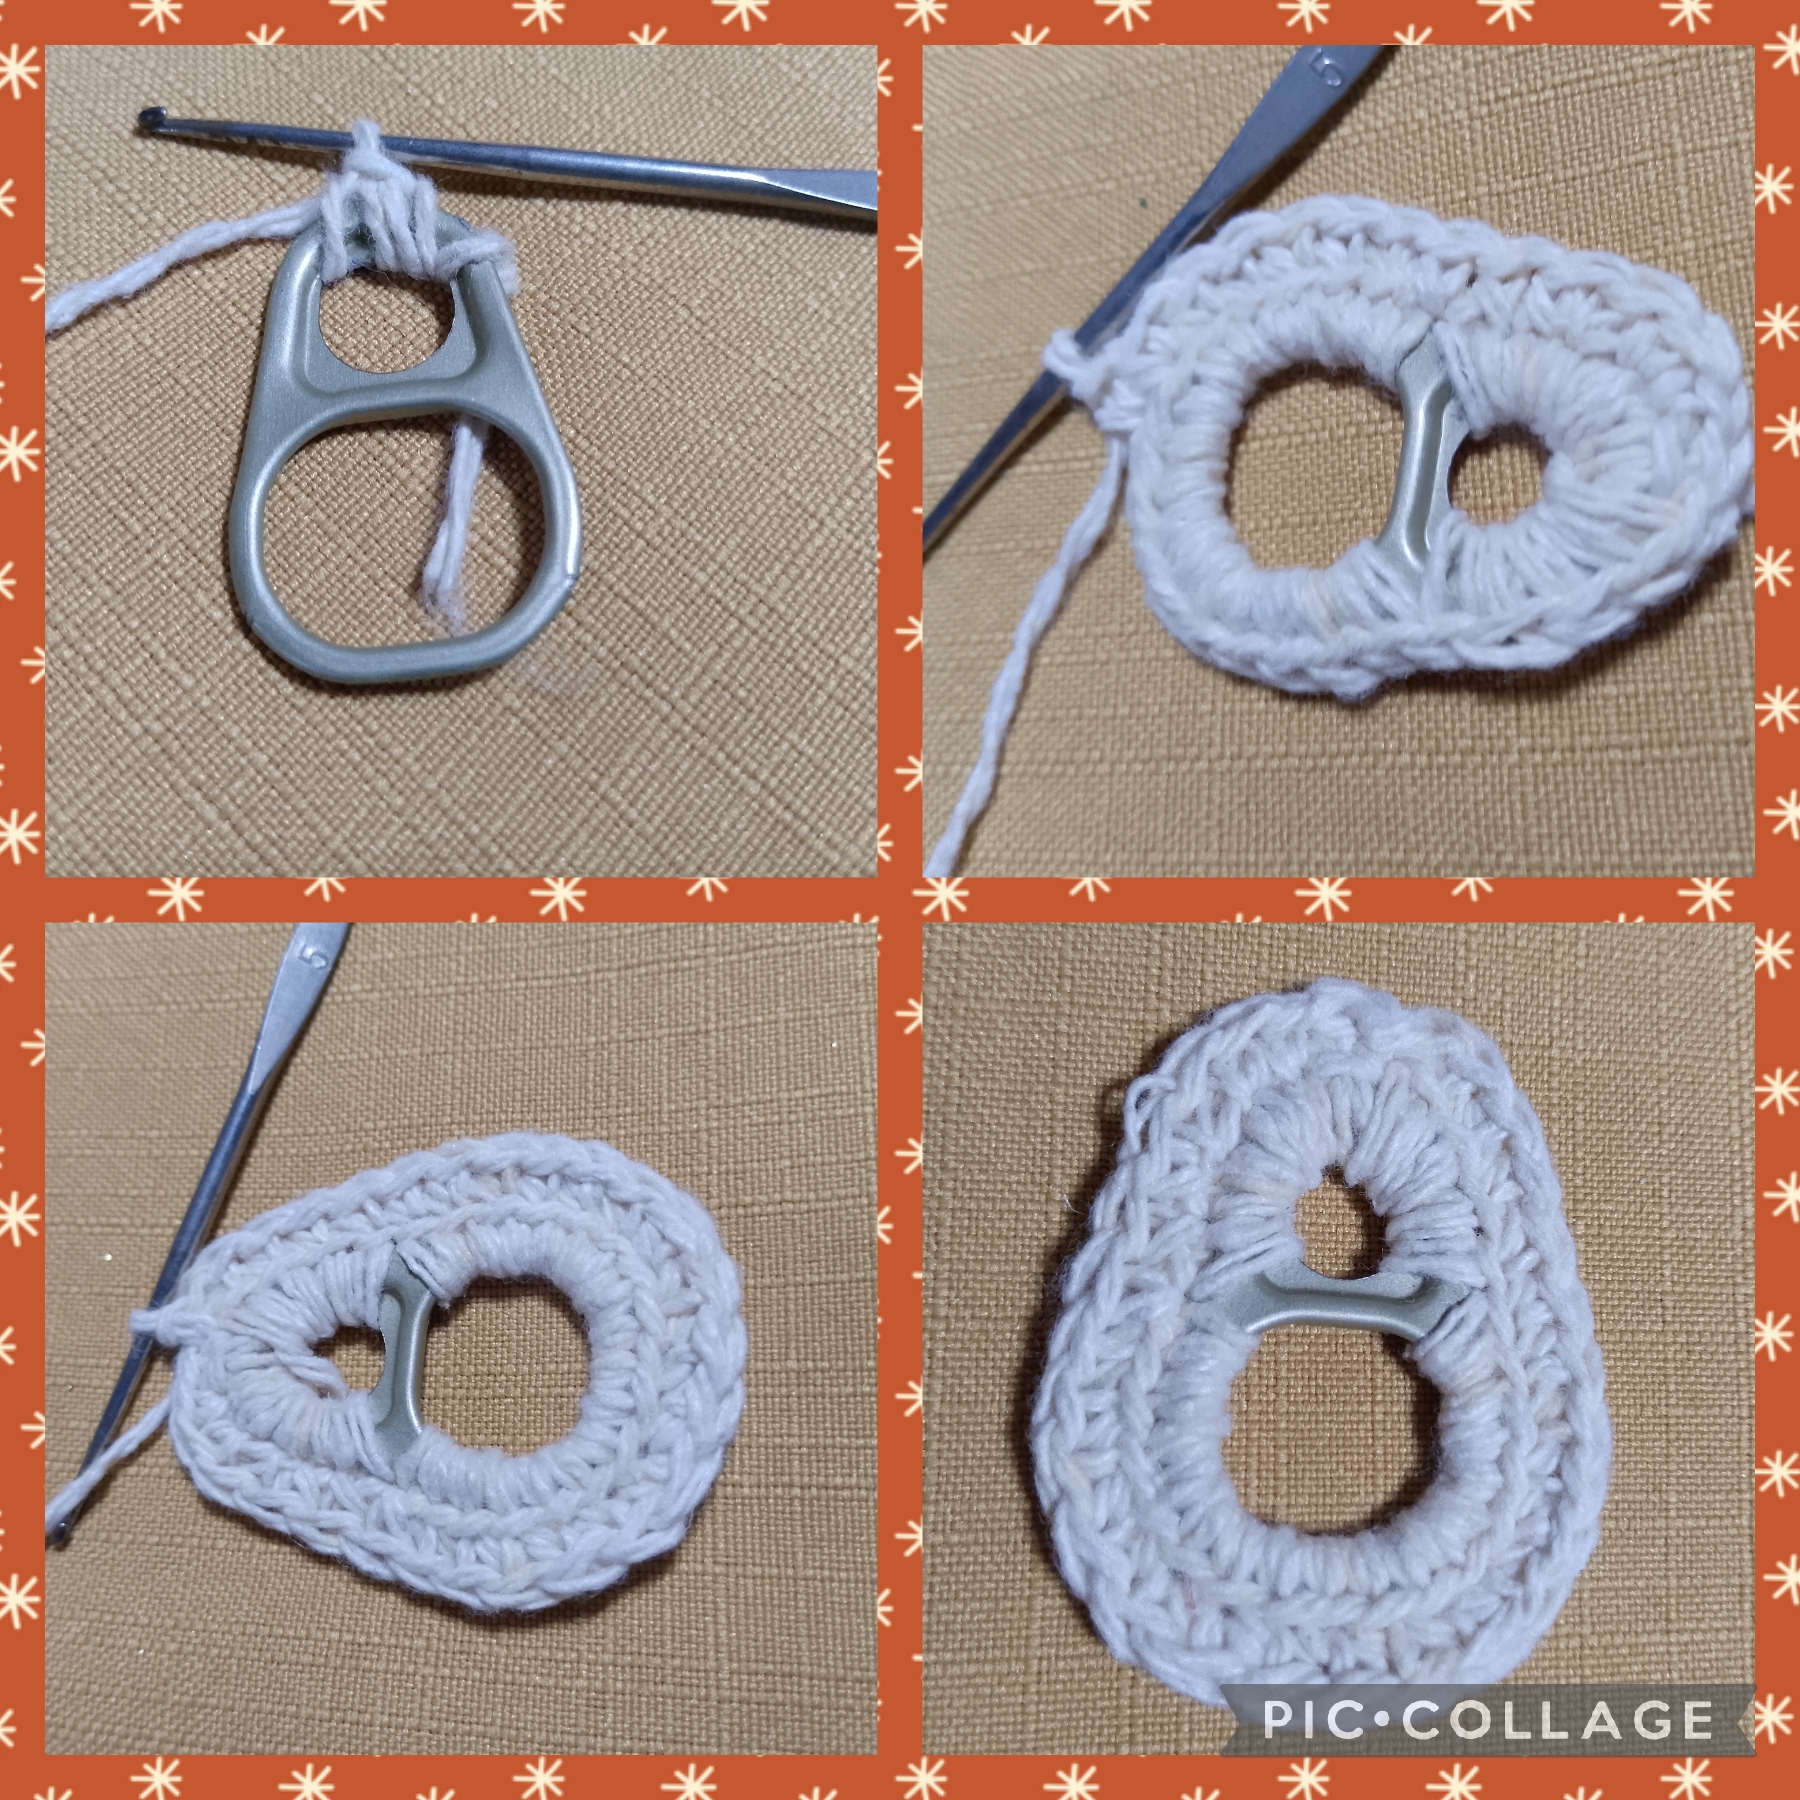
Voy a comenzar está manualidad mostrándole como use material de provecho para elaborarla es un clip de los que traen las latas como refrescos, embutidos, grasas etc., para abrirlas.
Tomo el clip y el hilo pabilo, paso la punta del hilo por el clip y hago un nudo simple, ahora con la aguja de tejer elaboro punto enano o medio punto, este se hace así: tomo una lazada del hilo y lo paso por el clip abrazándolo lo saco y tengo dos hebras, tomo otra lazada y la saco por las dos hebras y este es el punto, esto lo voy a realizar por todo el contorno del clip, remato pasando el hilo por el punto donde inicié el trabajo , ahora hago una cadeneta y realizó de nuevo puntos medios, así como se ve en la imagen.
STEPS WITH WHICH I MADE THIS CRAFT:
FIRST STEP:
I am going to start this craft by showing you how I used a useful material to make it. It is a clip from those that come with cans such as soft drinks, sausages, fats, etc., to open them.
I take the clip and the thread, I pass the end of the thread through the clip and make a simple knot, now with the knitting needle I make a slip stitch or half stitch, this is done like this: I take a loop of the thread and pass it through the clip, hugging it, I take it out and I have two strands, I take another loop and take it out through the two strands and this is the stitch, I am going to do this around the entire perimeter of the clip, I finish by passing the thread through the stitch where I started the work, now I make a chain stitch and I do half stitches again, as you can see in the image.
SEGUNDO PASO:
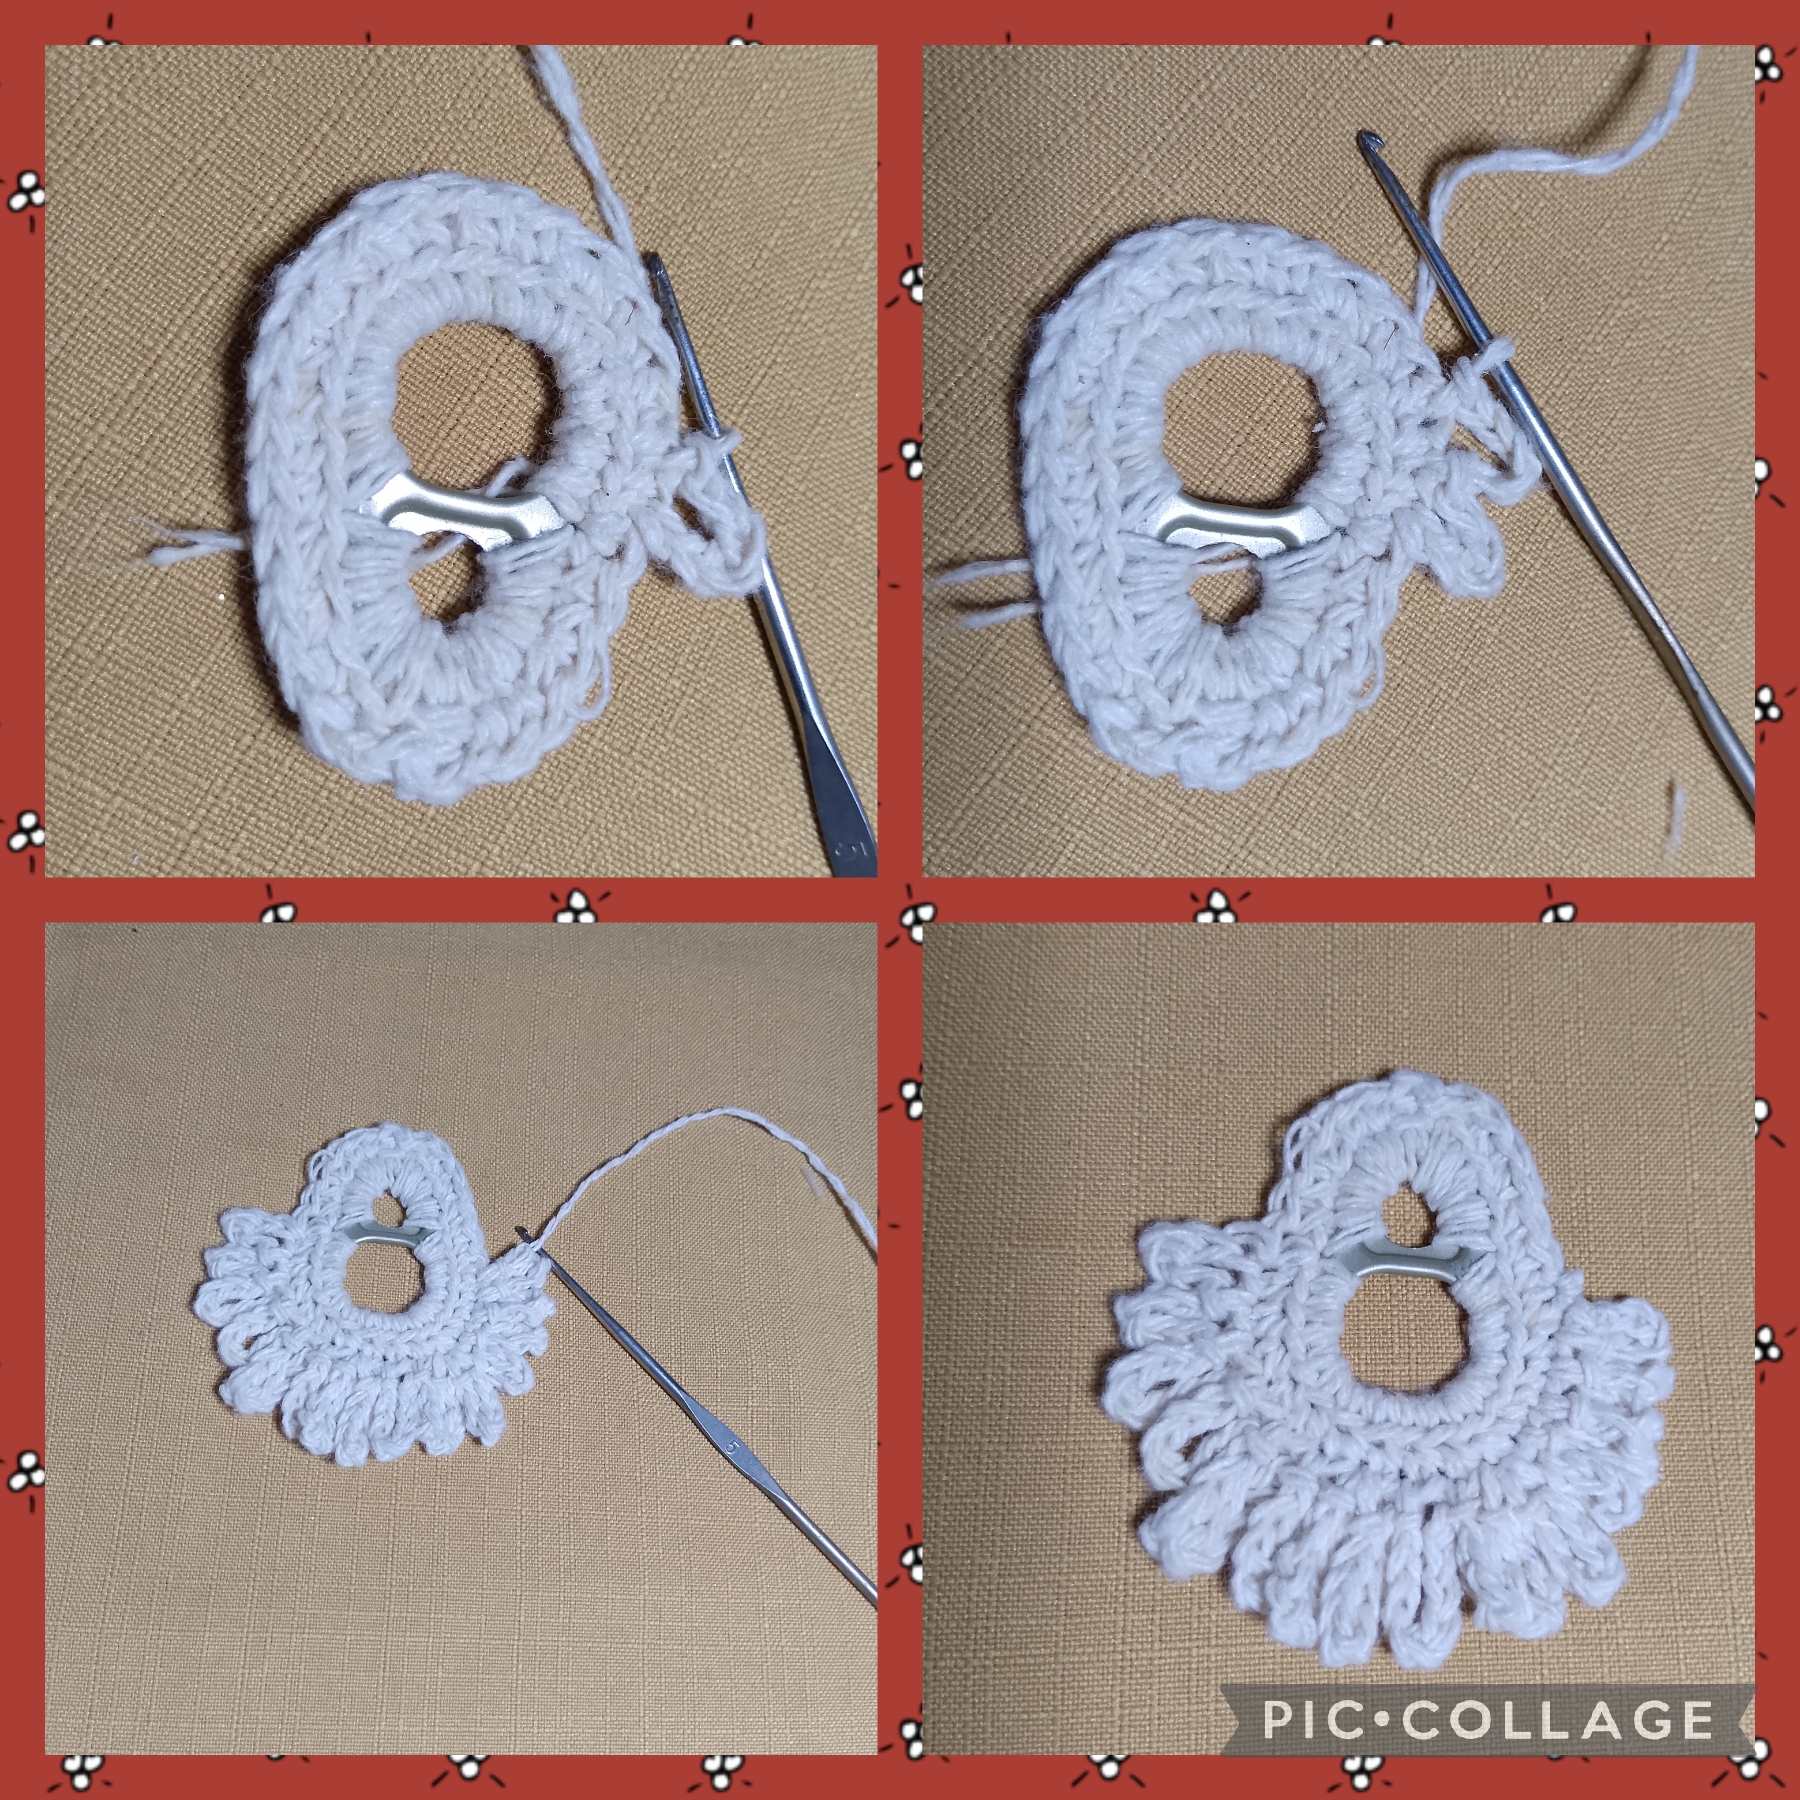
En este paso elaboro lo que será la barba de Santa, a la altura del segundo anillo pues este clip tiene dos, este es más ancho uso de nuevo el hilo y lo pongo en el punto que está a esa altura aquí elaboro seis cadenetas, ahora en el punto siguiente paso la aguja y realizó medio punto, hago de nuevo seis cadenetas y en el punto siguiente otro medio punto , sigo en la misma secuencia pero realizando dos veces siete cadenetas, dos veces ocho cadenetas , dos veces nueve cadenetas, y ahora me devuelvo con dos veces ocho, dos veces siete, y termino como al principio con dos veces seis, aquí remato el punto y así queda la barba de Santa.
SECOND STEP:
In this step I make what will be Santa's beard, at the height of the second ring because this clip has two, this one is wider, I use the thread again and put it in the stitch that is at that height here I make six chains, now in the next stitch I pass the needle and make a half stitch, I make six chains again and in the next stitch another half stitch, I continue in the same sequence but making seven chains twice, eight chains twice, nine chains twice, and now I go back with two times eight, two times seven, and I finish as at the beginning with two times six, here I finish the stitch and this is how Santa's beard looks.
TERCER PASO:
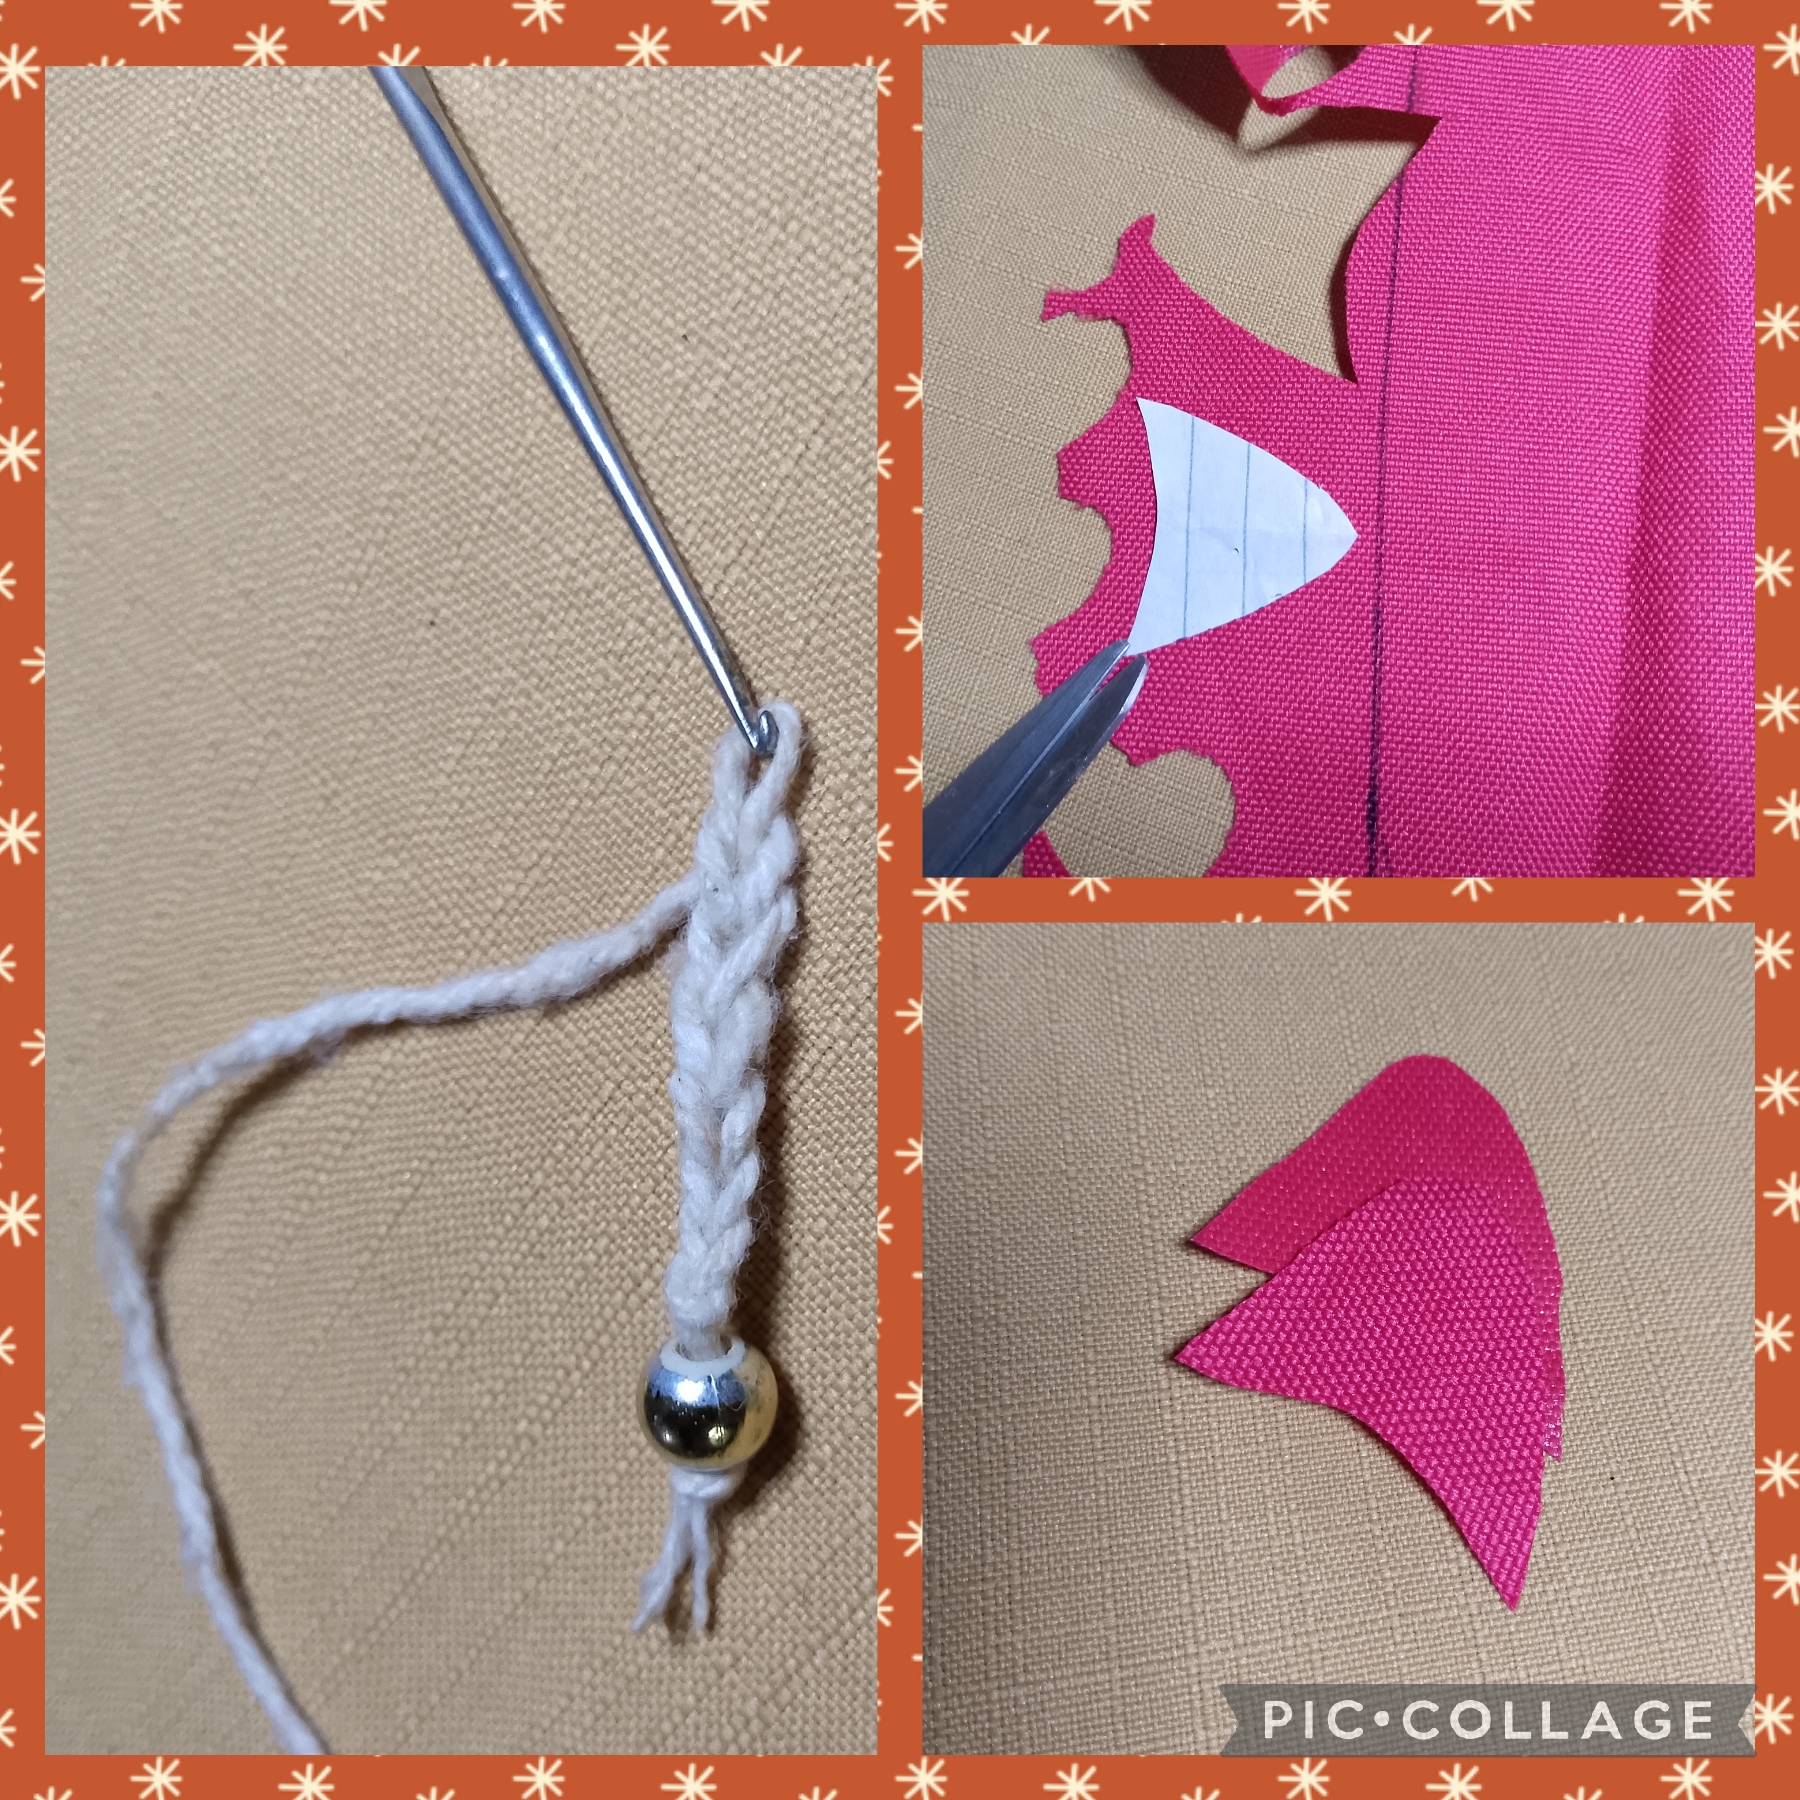
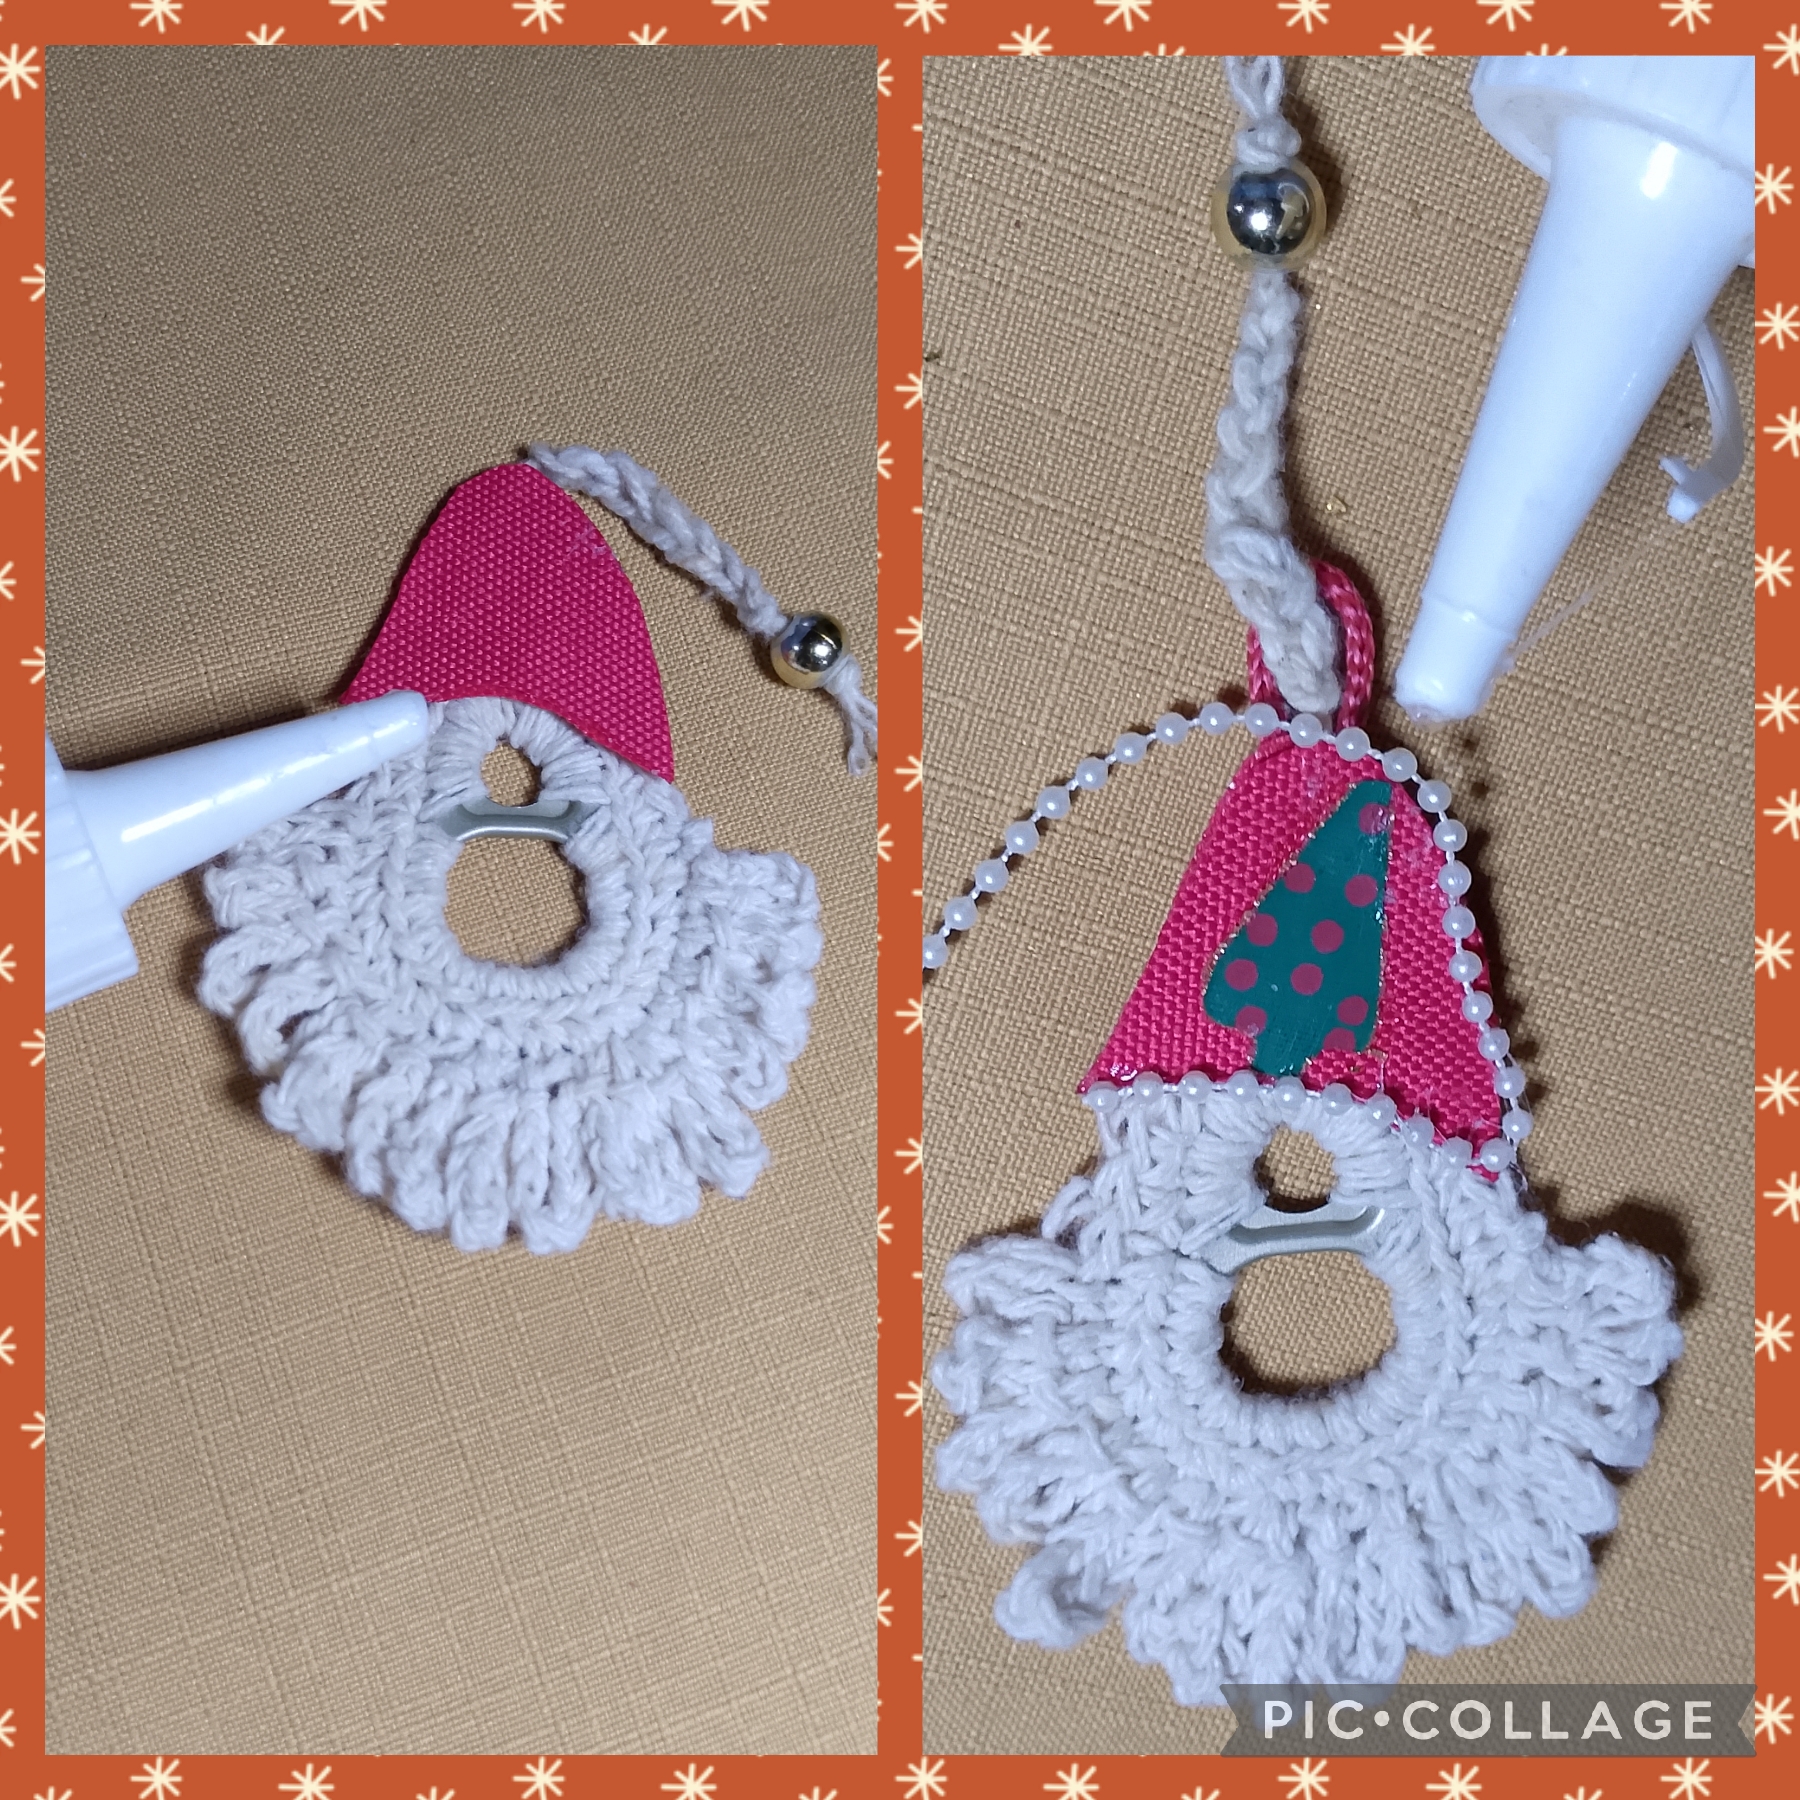
Ahora voy a hacer el gorro, saco un patrón y lo corto en la cuerina roja dos veces, antes hago una cadeneta y le pongo un balín dorado en un extremo, ahora con silicón pego la cadeneta en la mitad del gorro y lo tapo con la otra mitad, una vez listo el gorro lo pongo encima del cuerpo de Santa y lo pego con el silicón, ahora coloco los detalles como son la perla corrida por todo el contorno y una imagen de un arbolito.
THIRD STEP:
Now I'm going to make the hat. I take a pattern and cut it out of the red leather twice. First, I make a chain stitch and put a golden ball on one end. Now, with silicone, I glue the chain stitch to half of the hat and cover it with the other half. Once the hat is ready, I put it on top of Santa's body and glue it with silicone. Now, I add the details, such as the pearl running all around the edge and a picture of a little tree.
CUARTO PASO:
En este paso coloco los detalles, dos cristales negros para los ojos, uno rojo para la boca, corte un trocito de cola de ratón rojo hice una argolla que puse en la parte de atrás, allí puse cuatro eslabones de cadena dorada, elaboré un lacito rojo que coloque para que Santa se vea muy coqueto de esta manera.
STEP FOUR:
In this step I put the details, two black crystals for the eyes, one red one for the mouth, I cut a little piece of red mouse tail and made a ring that I put on the back, there I put four links of gold chain, I made a little red bow that I put so that Santa looks very flirtatious this way.
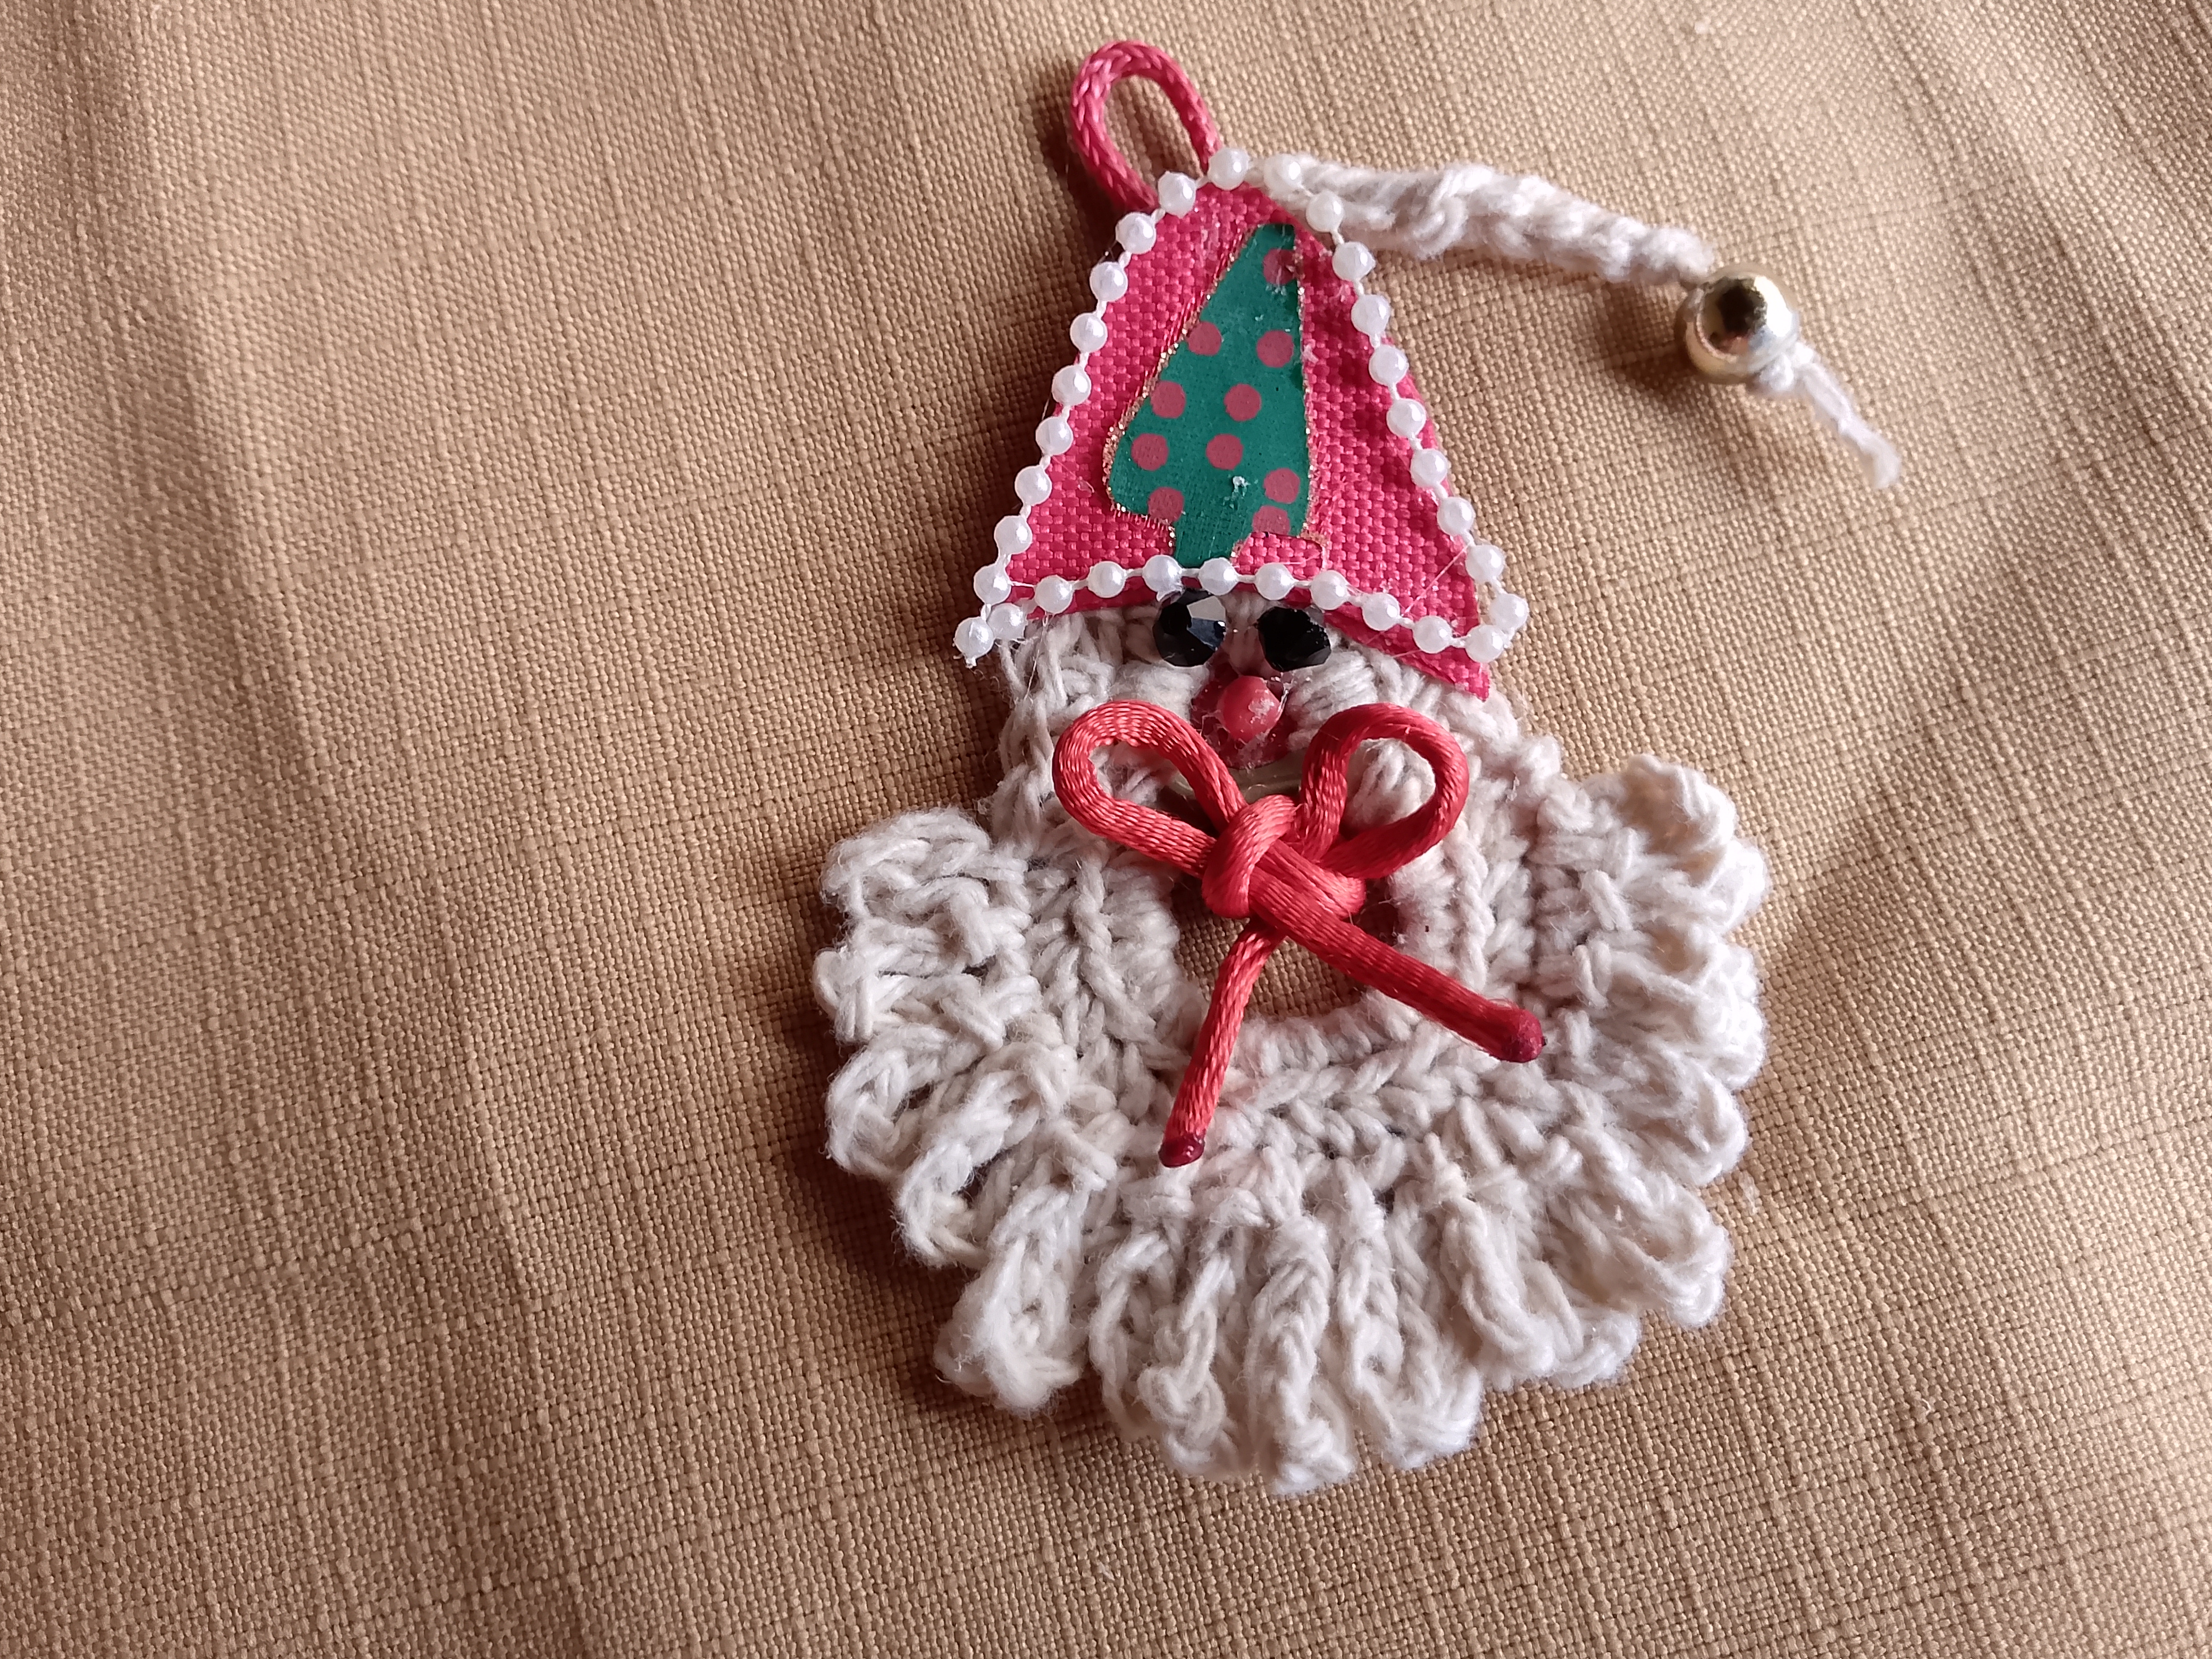
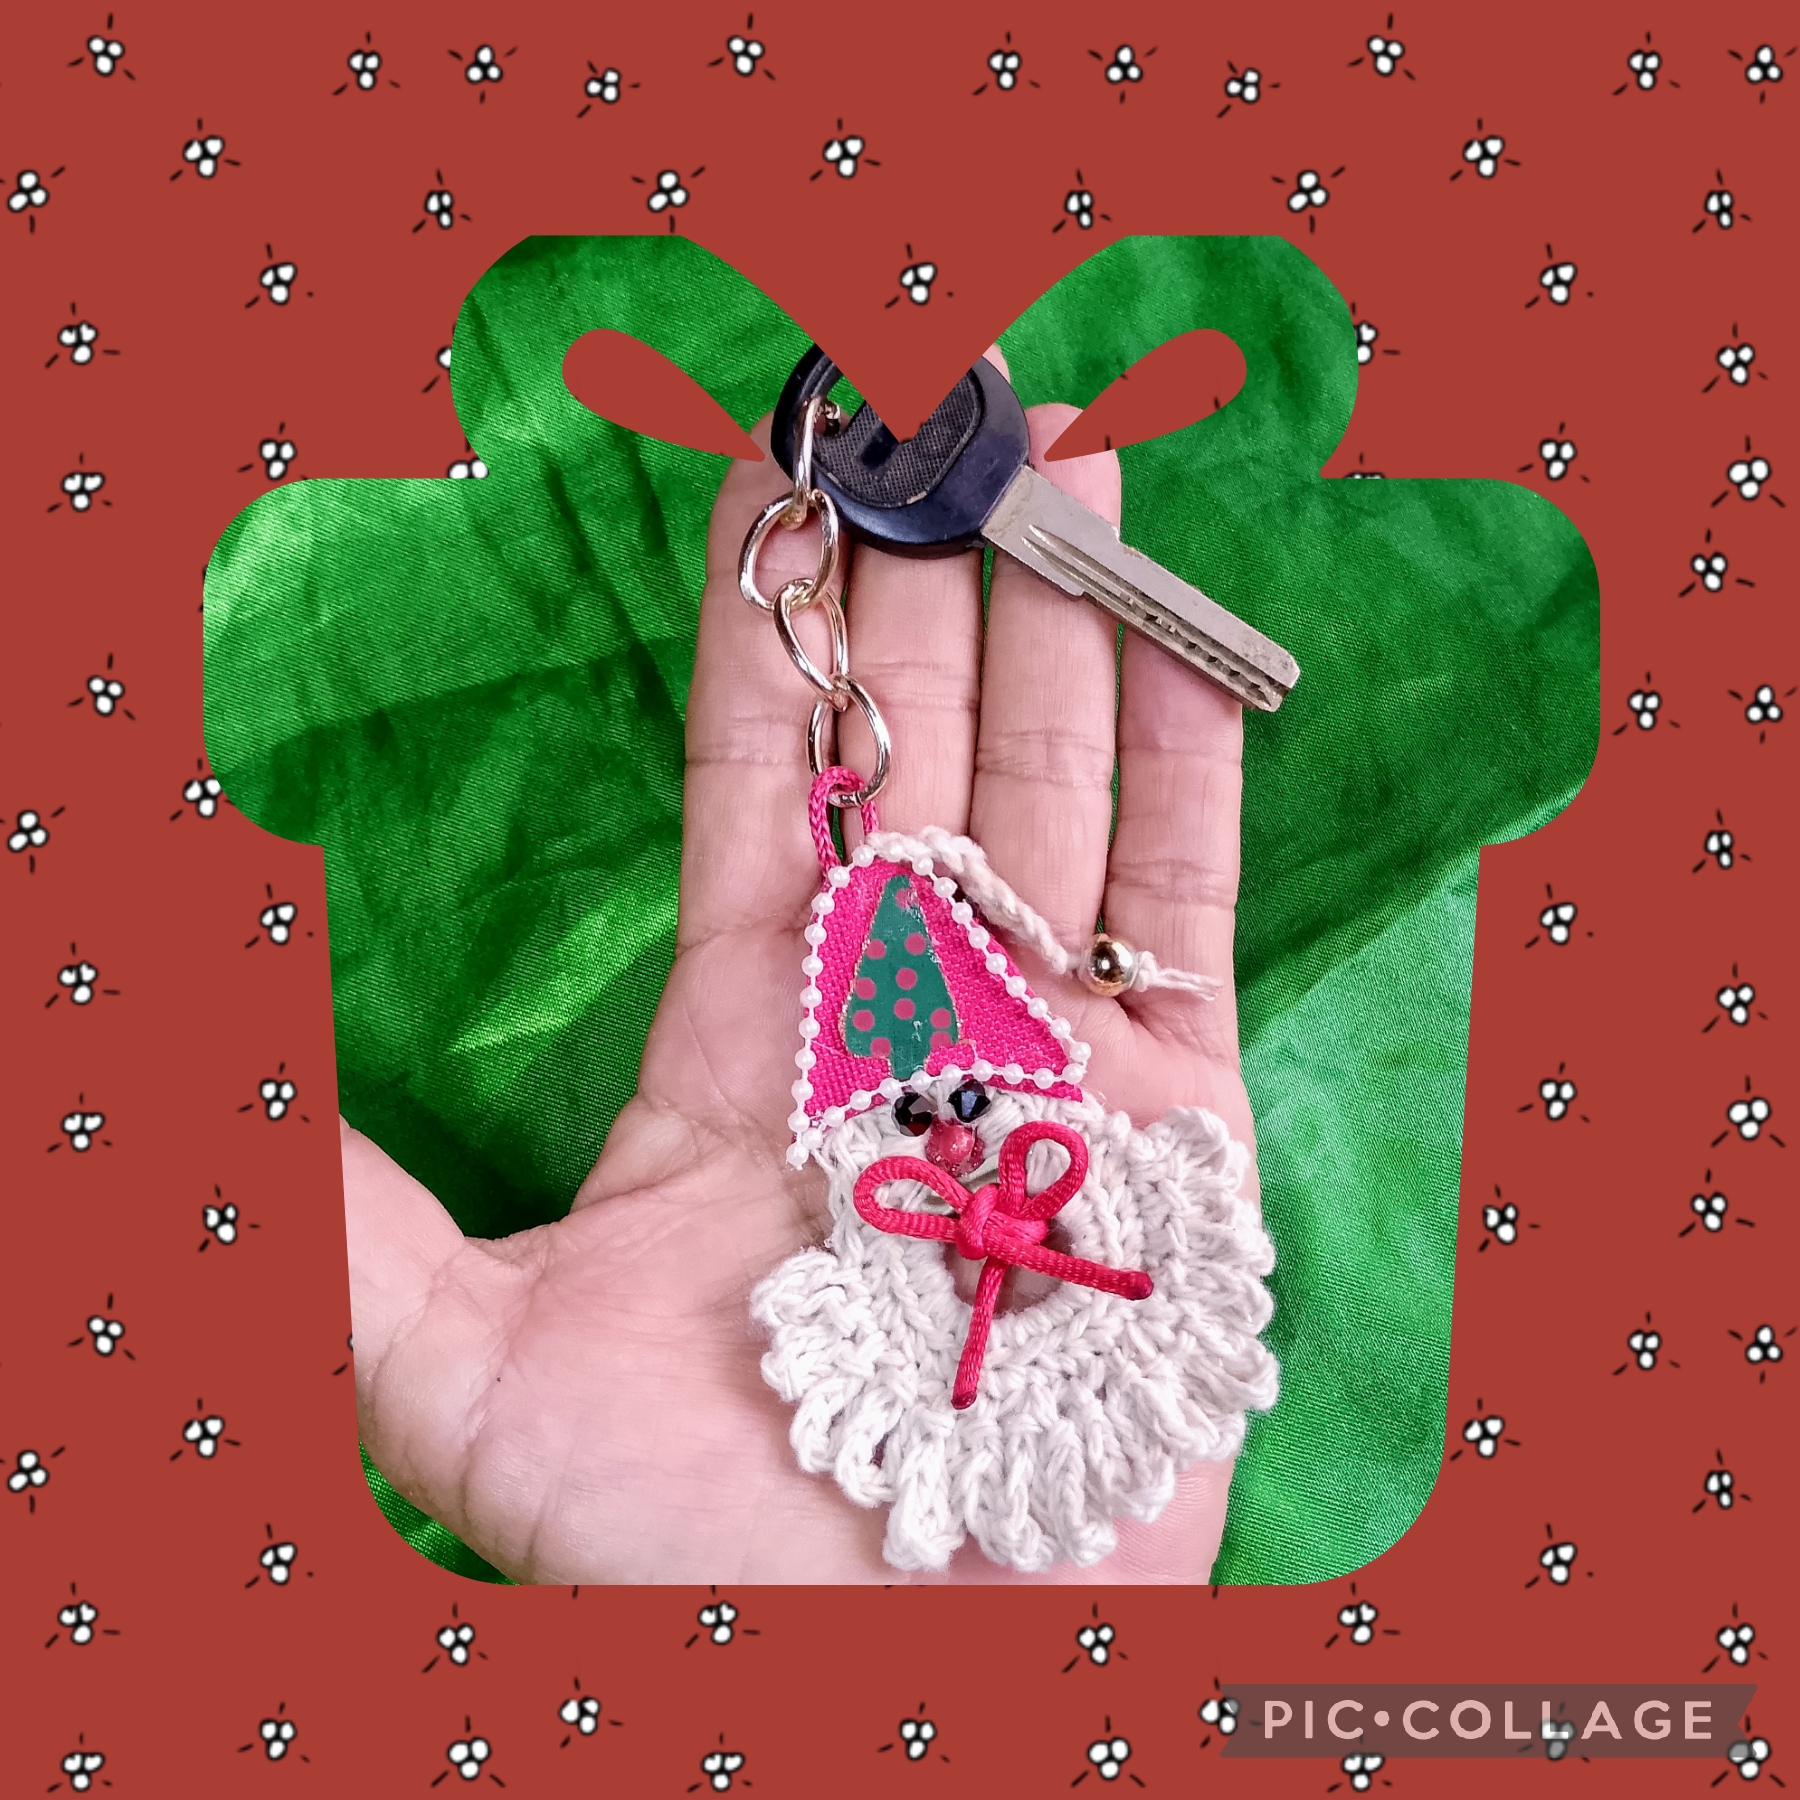
Artistas Creativos de las manualidades y la Joyería, este es el resultado final de mi manualidad, espero que les guste, me encantó ver como realicé mi santa con un material de provecho , después les contaré que dijo mi compañero de su original llavero; gracias por ver y leer mis publicaciones apoyandome con sus valiosos comentarios, feliz noche y nos vemos en la próxima manualidad, bye bye.
Creative Artists of crafts and jewelry, this is the final result of my craft, I hope you like it, I loved seeing how I made my saint with a useful material, later I will tell you what my partner said about his original keychain; thank you for seeing and reading my publications supporting me with your valuable comments, happy night and see you in the next craft, bye bye.

Las imágenes y redacción de este tutorial son de mi exclusiva propiedad, las fotos fueron tomadas con mi teléfono celular Tecno Spark Go 20 y las edite con una aplicación gratis del mismo.
Para traducir texto use Google traductor.
The images and writing of this tutorial are my exclusive property, the photos were taken with my Tecno Spark Go 20 cell phone and I edited them with a free application of the same.
To translate text use Google translator

It looks so complicated, I feel like if I had to do something like this I would never be able to do it, but you have done it so perfectly.
Hi Yasir, it just seems complicated but it is not at all, thanks for visiting my blog, try it and you will see how you can do it, 🤗🎄
Your keychain is indeed cute and everything about the design and colour is perfect! Well done.
Thank you, thank you, that comment is very flattering, greetings.
Hola. Me agrada tu llavero, Santa Claus es un personaje bastante frecuente en la navidad. Saludos.