Hola, holaaa querida comunidad un saludo lleno de las mejores bendiciones para este nuevo año que empezamos, le pido a Dios por todos nosotros para que nos acompañe por ese camino hacia el éxito y la prosperidad .
Y, ya lista para la faena diaria en mis labores, el último festín para despedir la navidad lo tuvimos este pasado 6, Día de los Reyes Magos así que con Melchor, Baltazar, y Gaspar; nos despedimos con la nostalgia que nos deja esa unión junto amigos y familiares que vivimos en las fiestas decembrinas.
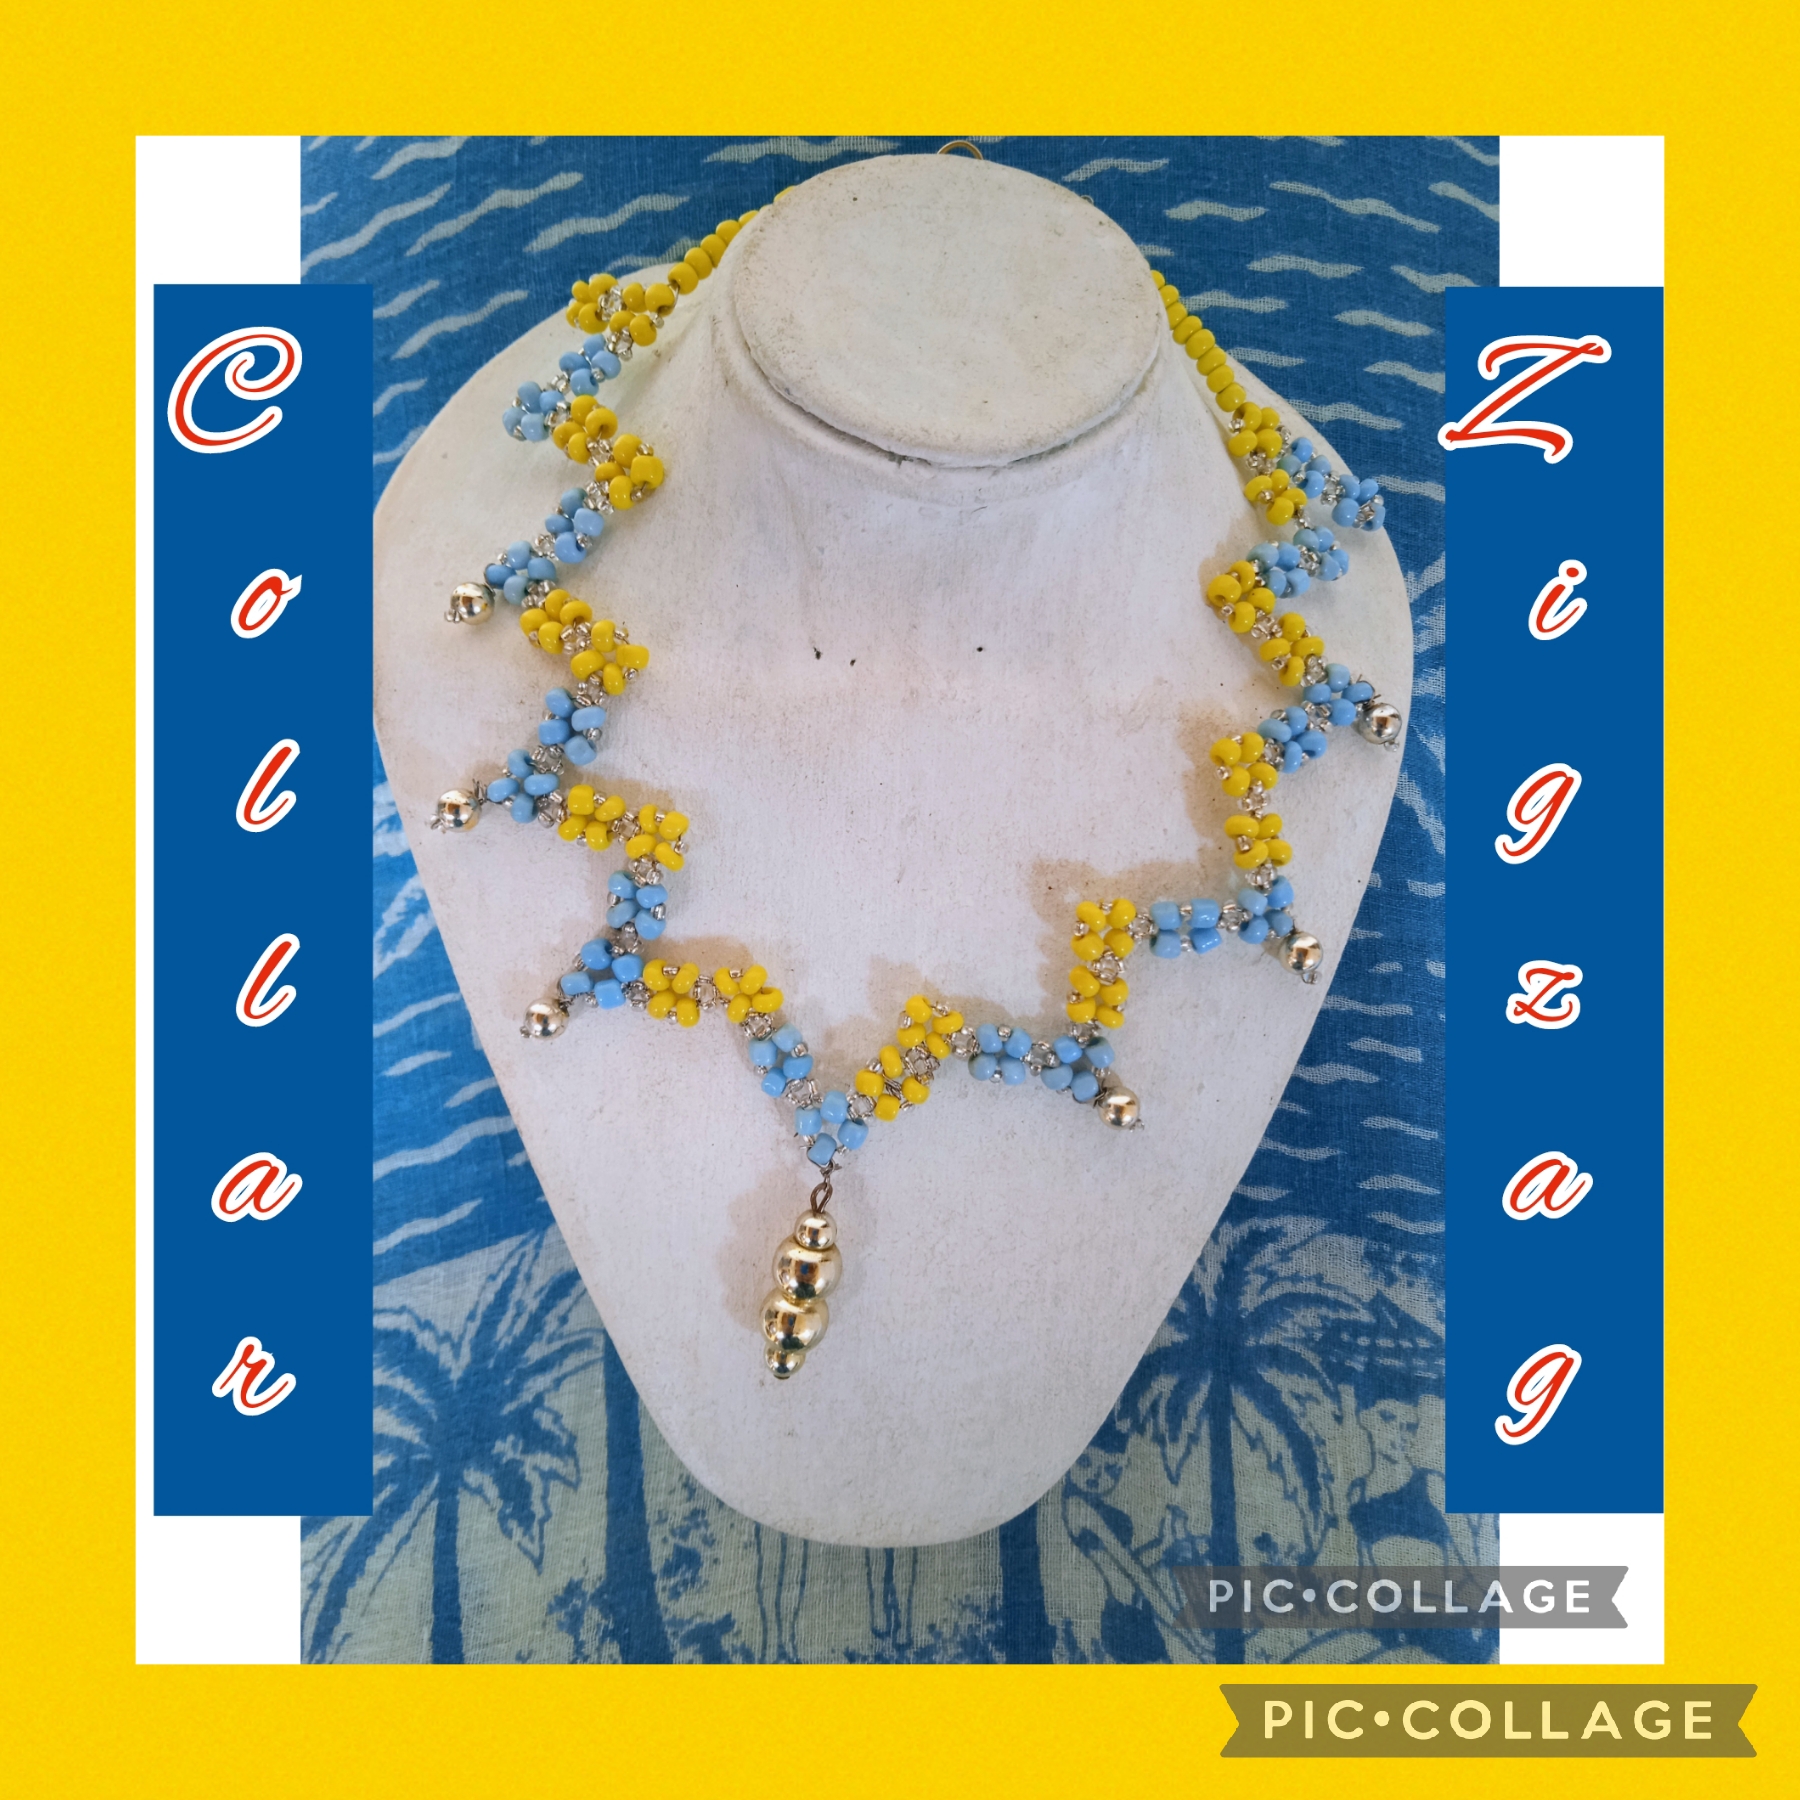
Para este compartir como era de esperarse la tradición de los dulces, caramelos, y variedades de confites no podían faltar las botijitas de los camellos estaban repletas y los regalos para dejar los bonitos recuerdos de la fecha no podían faltar; hicimos intercambios de regalos dejando al azar la elección del compañero o compañera que recibiría el regalo, fui muy afortunada pues con mi regalo pude complacer a una amiga amante de los collares , su color favorito es el azul uno de los colores que estará de moda en esta temporada y le puse un poco de amarillo para que el dinero y la prosperidad no le falte, usando mostacillones lo realicé en Zigzag; y sigan leyendo para que vean como lo hice:
Hello, hello dear community, greetings full of the best blessings for this new year that we begin, I ask God for all of us to accompany us on this path to success and prosperity.
And, now ready for the daily task of my work, we had the last feast to say goodbye to Christmas this past 6th, Three Kings Day, so with Melchior, Baltazar, and Gaspar; We say goodbye with the nostalgia that this union with friends and family that we experienced during the December holidays leaves us with.
For this sharing, as expected, the tradition of sweets, candies, and varieties of confections could not be missing, the camels' bottles were full and the gifts to leave beautiful memories of the date could not be missing; We exchanged gifts, leaving to chance the choice of the partner who would receive the gift. I was very lucky because with my gift I was able to please a friend who loves necklaces. Her favorite color is blue, one of the colors that will be in fashion in this season and I put a little yellow on it so that money and prosperity are not lacking, using beads I made it in a Zigzag; and keep reading to see how I did it:
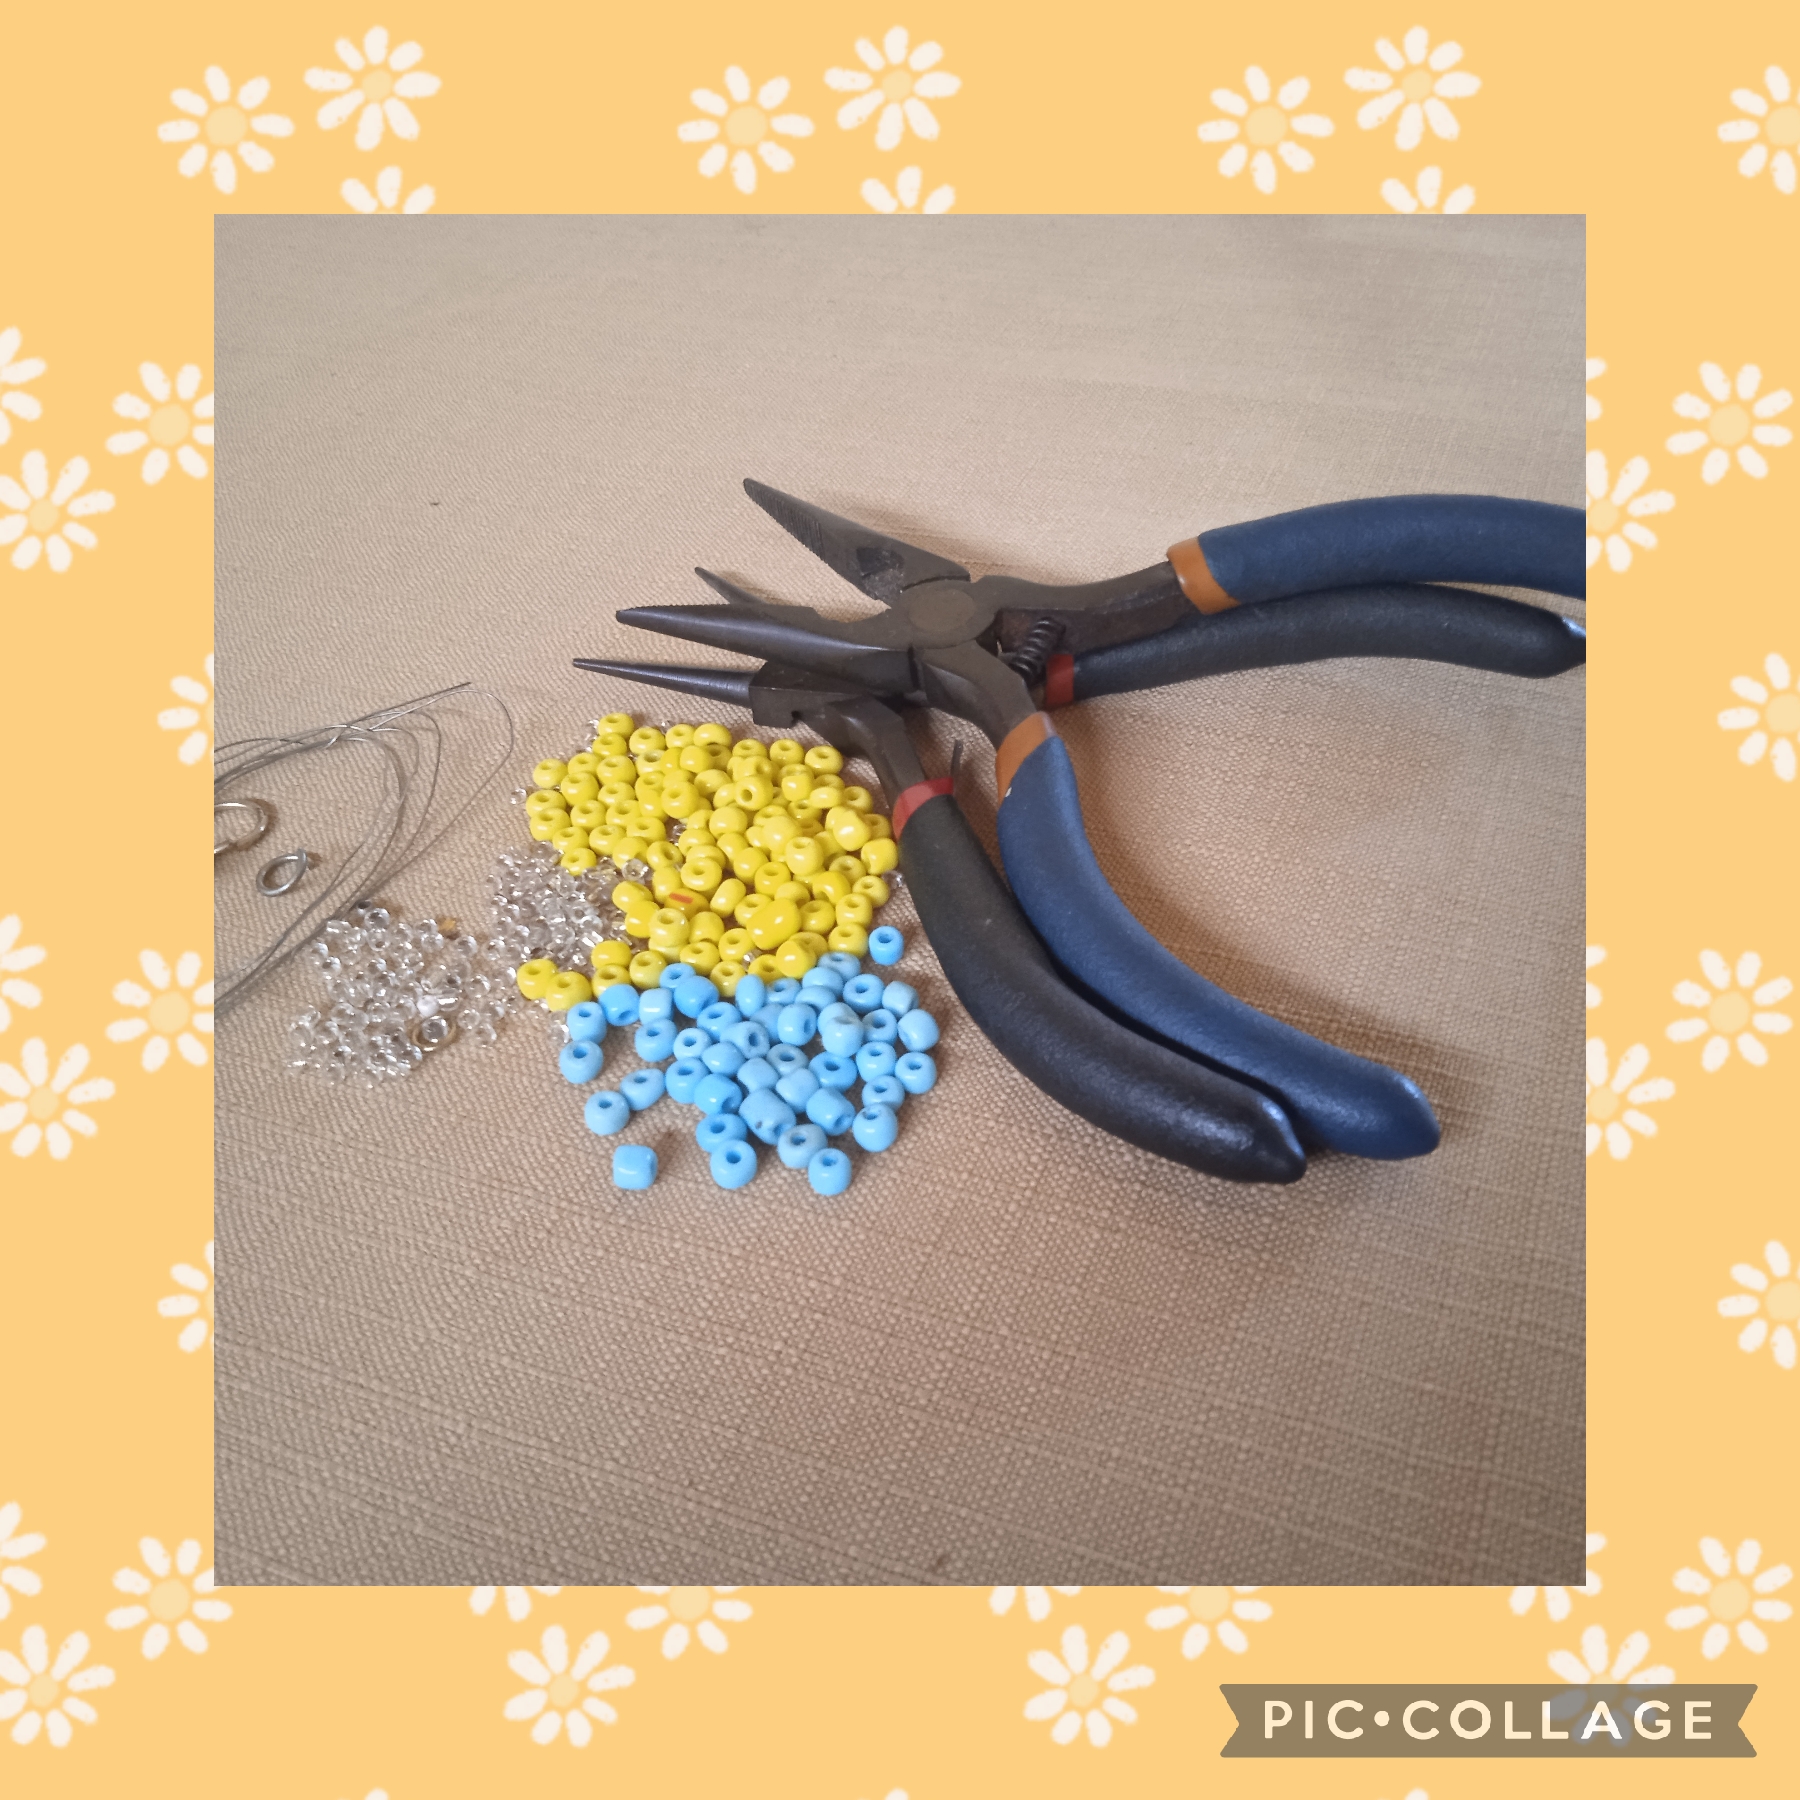
MATERIALES QUE USE PARA REALIZAR ÉSTA MANUALIDAD.
✓Mostacillones color azul.
✓ Mostacillones color amarillo.
✓ Mostacillas transparentes.
✓ Alambre calibre 28"
✓ Seis balines dorados número cuatro.
✓ Un balín dorado número seis.
✓ Dos argollas pequeñas.
✓ Una tranca tipo langosta.
✓ Pinzas.
✓ Escalachines.
MATERIALS USED TO MAKE THIS CRAFTSMANSHIP.
✓Blue mostacillons.
✓ Yellow mostacillons.
✓ Transparent beads.
✓ 28" gauge wire
✓ Six golden number four pellets.
✓ A golden number six ball.
✓ Two small rings.
✓ A lobster type lock.
✓ Tweezers.
✓ Escalachines.
PASOS UTILIZADOS PARA REALIZAR ESTE ORIGINAL COLLAR.
PRIMER PASO:
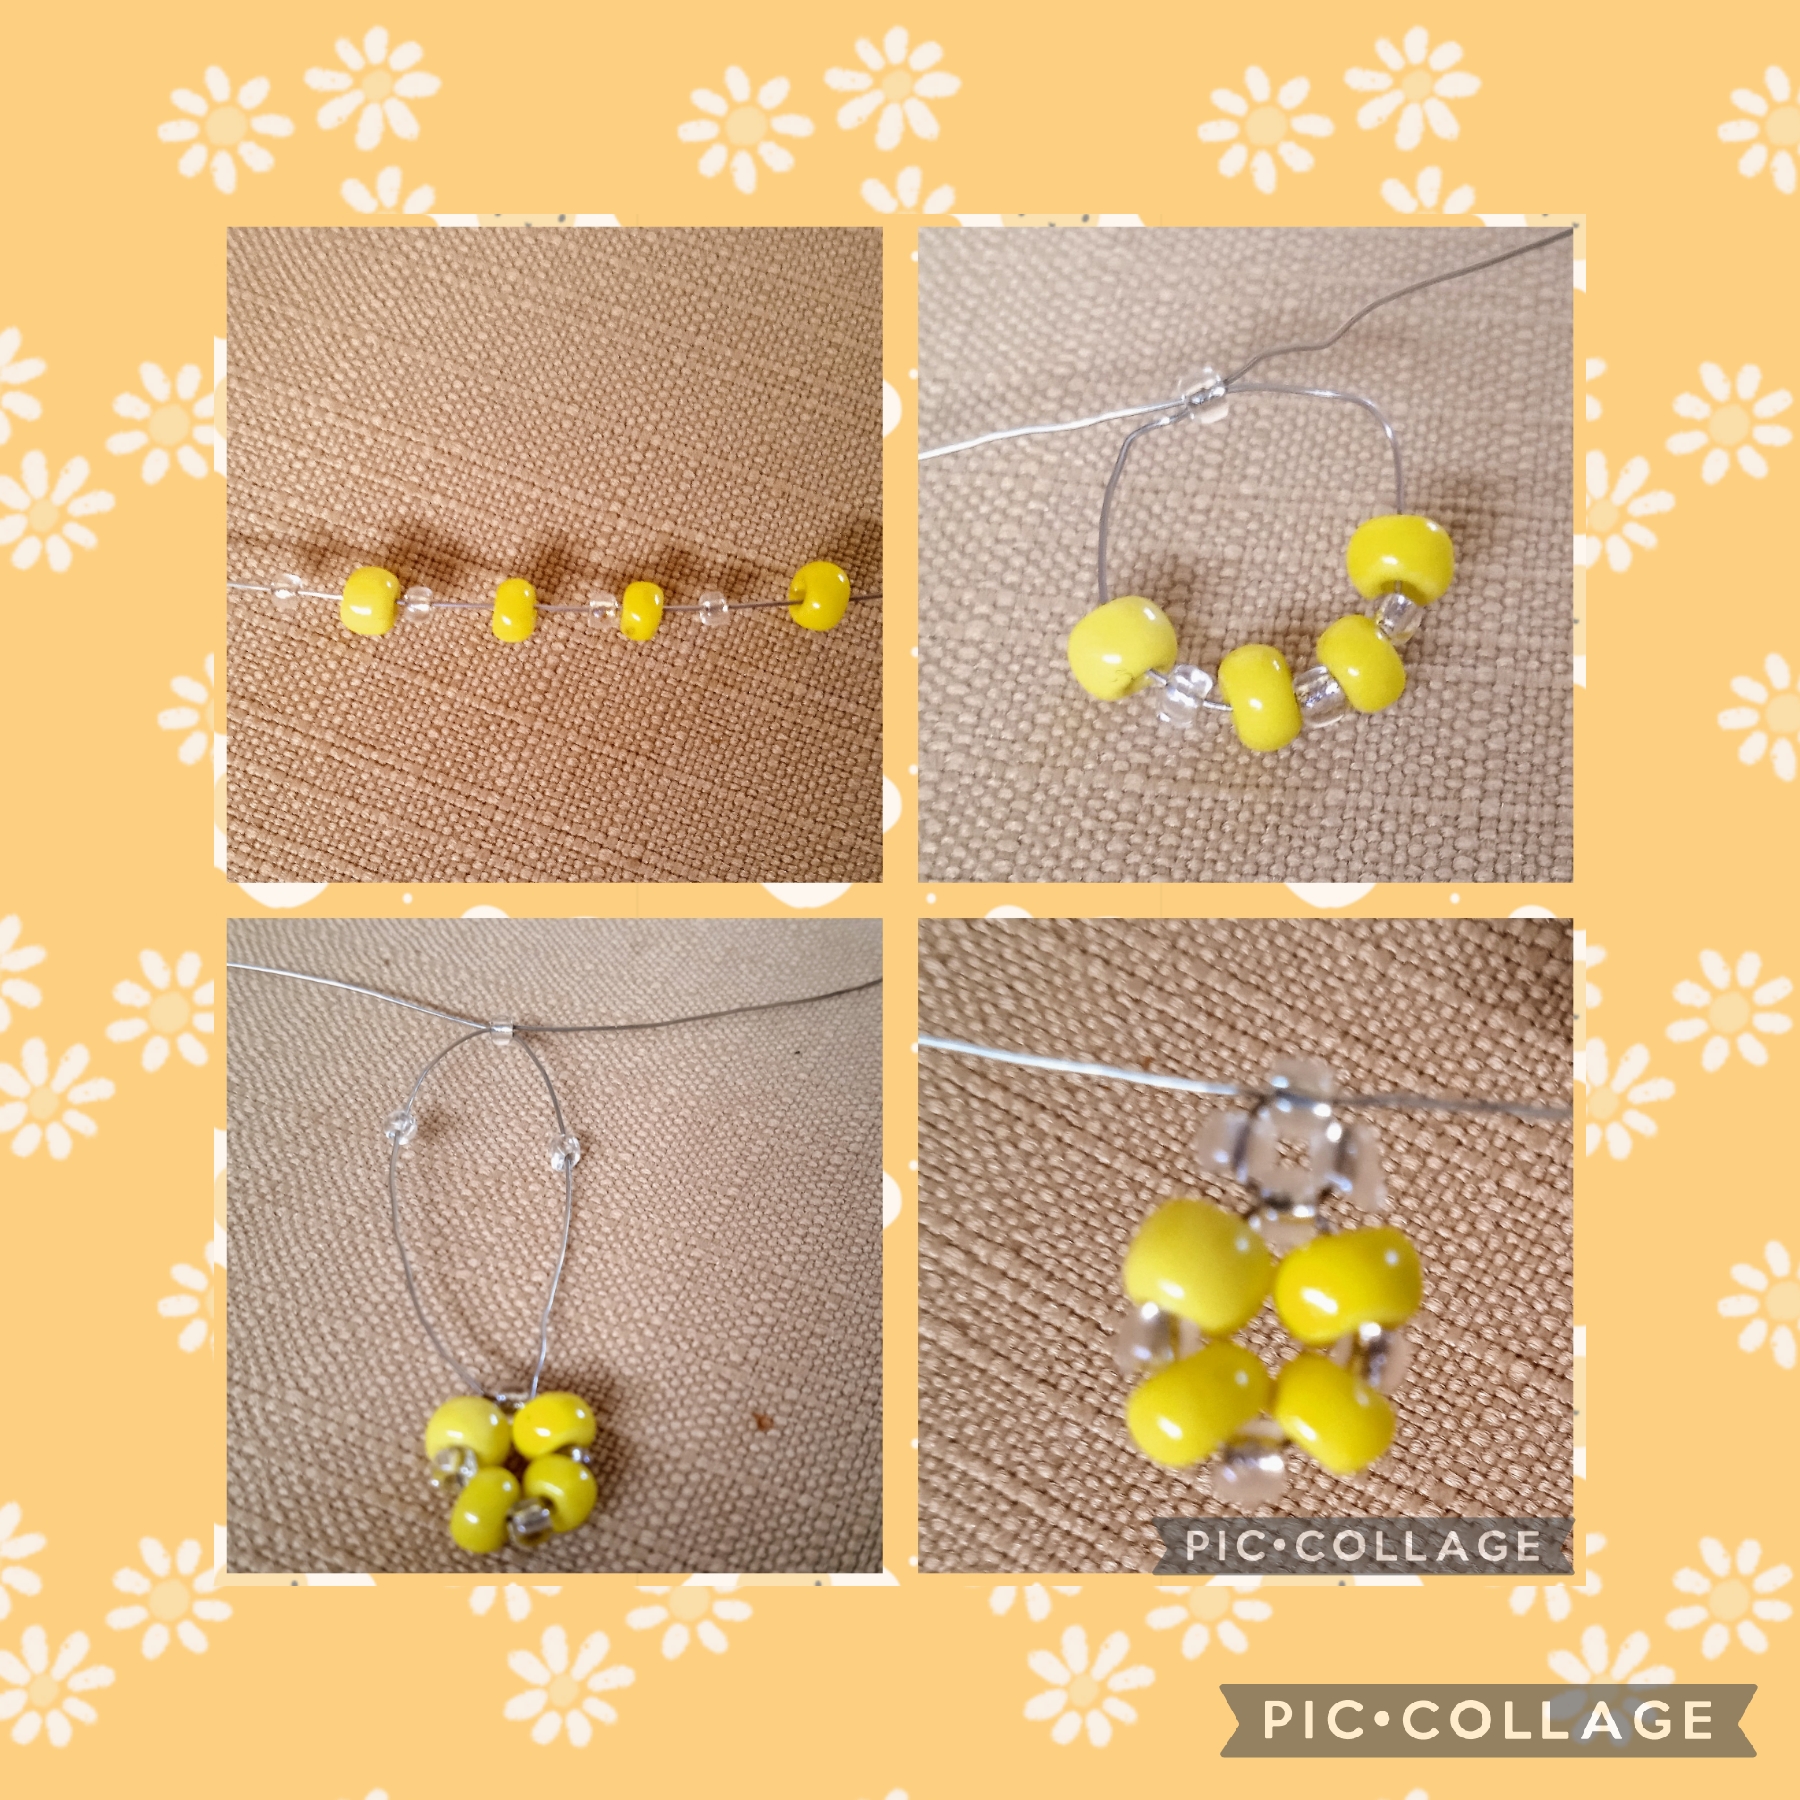
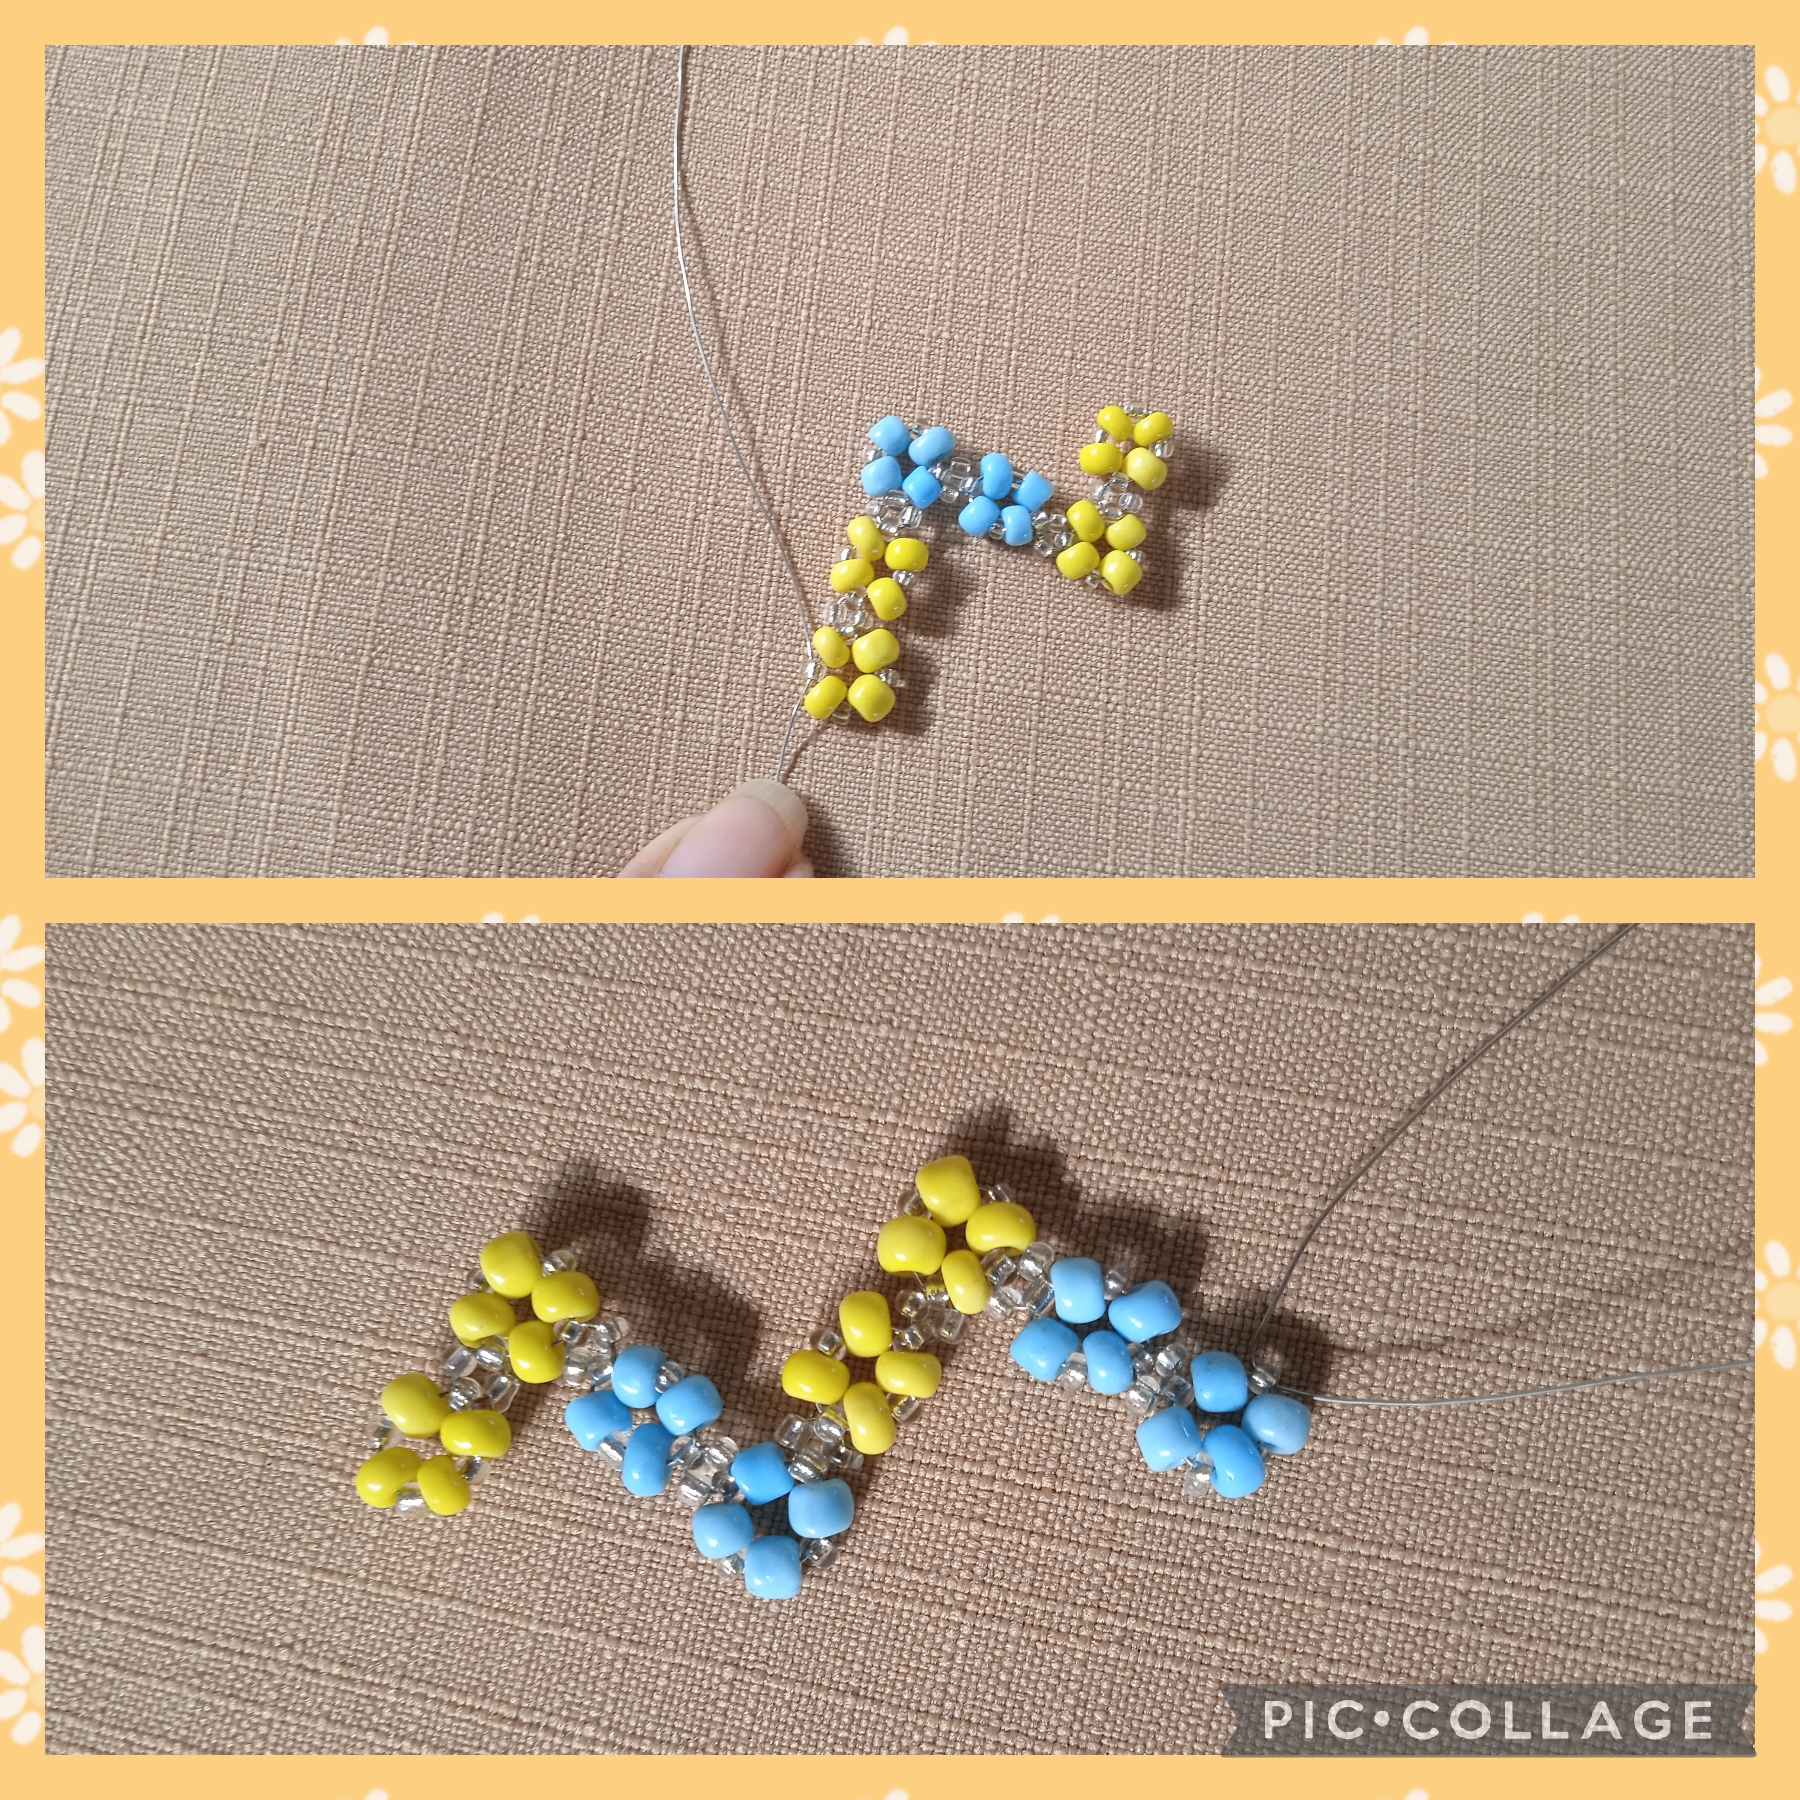
Comienzo ocupando un metro diez centímetros de alambre calibre 28 " para empezar con la elaboración, inserto por un lado de este alambre una mostacilla transparente, luego un mostacillón amarillo, ahora una mostacilla transparente, un mostacillón amarillo, una mostacilla transparente, un nuevo mostacillón amarillo, una mostacilla transparente, un mostacillón amarillo; de esta forma tengo cuatro mostacillas transparentes y cuatro mostacillones amarillos, los coloco en la mitad del alambre, igualo las puntas y cruzo la primera mostacilla transparente para formar un módulo como muestra la foto, ahora inserto de cada lado de la mostacilla otra mostacilla y tengo tres, inserto una nueva mostacilla por uno de los lados y la cruzo con el alambre del otro lado halo las dos puntas y así tengo un módulo de cuatro mostacillas. Continúo insertando un mostacillón amarillo de cada lado de la mostacilla, ahora pongo una mostacilla transparente en cada mostacillón amarillo, sigo insertando de un lado (puede ser izquierdo o derecho, yo lo hice del lado derecho, pero hay que llevar la secuencia para hacer el Zigzag) pongo un mostacillón amarillo, una mostacilla transparente, un mostacillón amarillo y voy a cruzar por la mostacilla transparente del lado derecho, así formo otro módulo y tengo dos módulos con un separador de cuatro mostacillas.
STEPS USED TO MAKE THIS ORIGINAL NECKLACE.
FIRST STEP:
I start by occupying one meter ten centimeters of 28" gauge wire. To begin with the elaboration, I insert a transparent bead on one side of this wire, then a yellow bead, now a transparent bead, a yellow bead, a transparent bead, a new yellow bead. , a transparent bead, a yellow bead; this way I have four transparent beads and four yellow beads, I place them in the middle of the wire, equalize the ends and cross the first transparent bead to form a module as shown in the photo, now I insert On each side of the bead, another bead and I have three, I insert a new bead on one side and cross it with the wire on the other side, I pull the two ends and thus I have a module of four beads. I continue inserting a yellow bead on each side of the bead, now I put a transparent bead on each yellow bead, I continue inserting on one side (it can be left or right, I did it on the right side, but you have to follow the sequence to make the Zigzag) I put a yellow bead, a transparent bead, a yellow bead and I am going to cross through the transparent bead on the right side, this way I form another module and I have two modules with a four-bead separator.

PASO DOS:
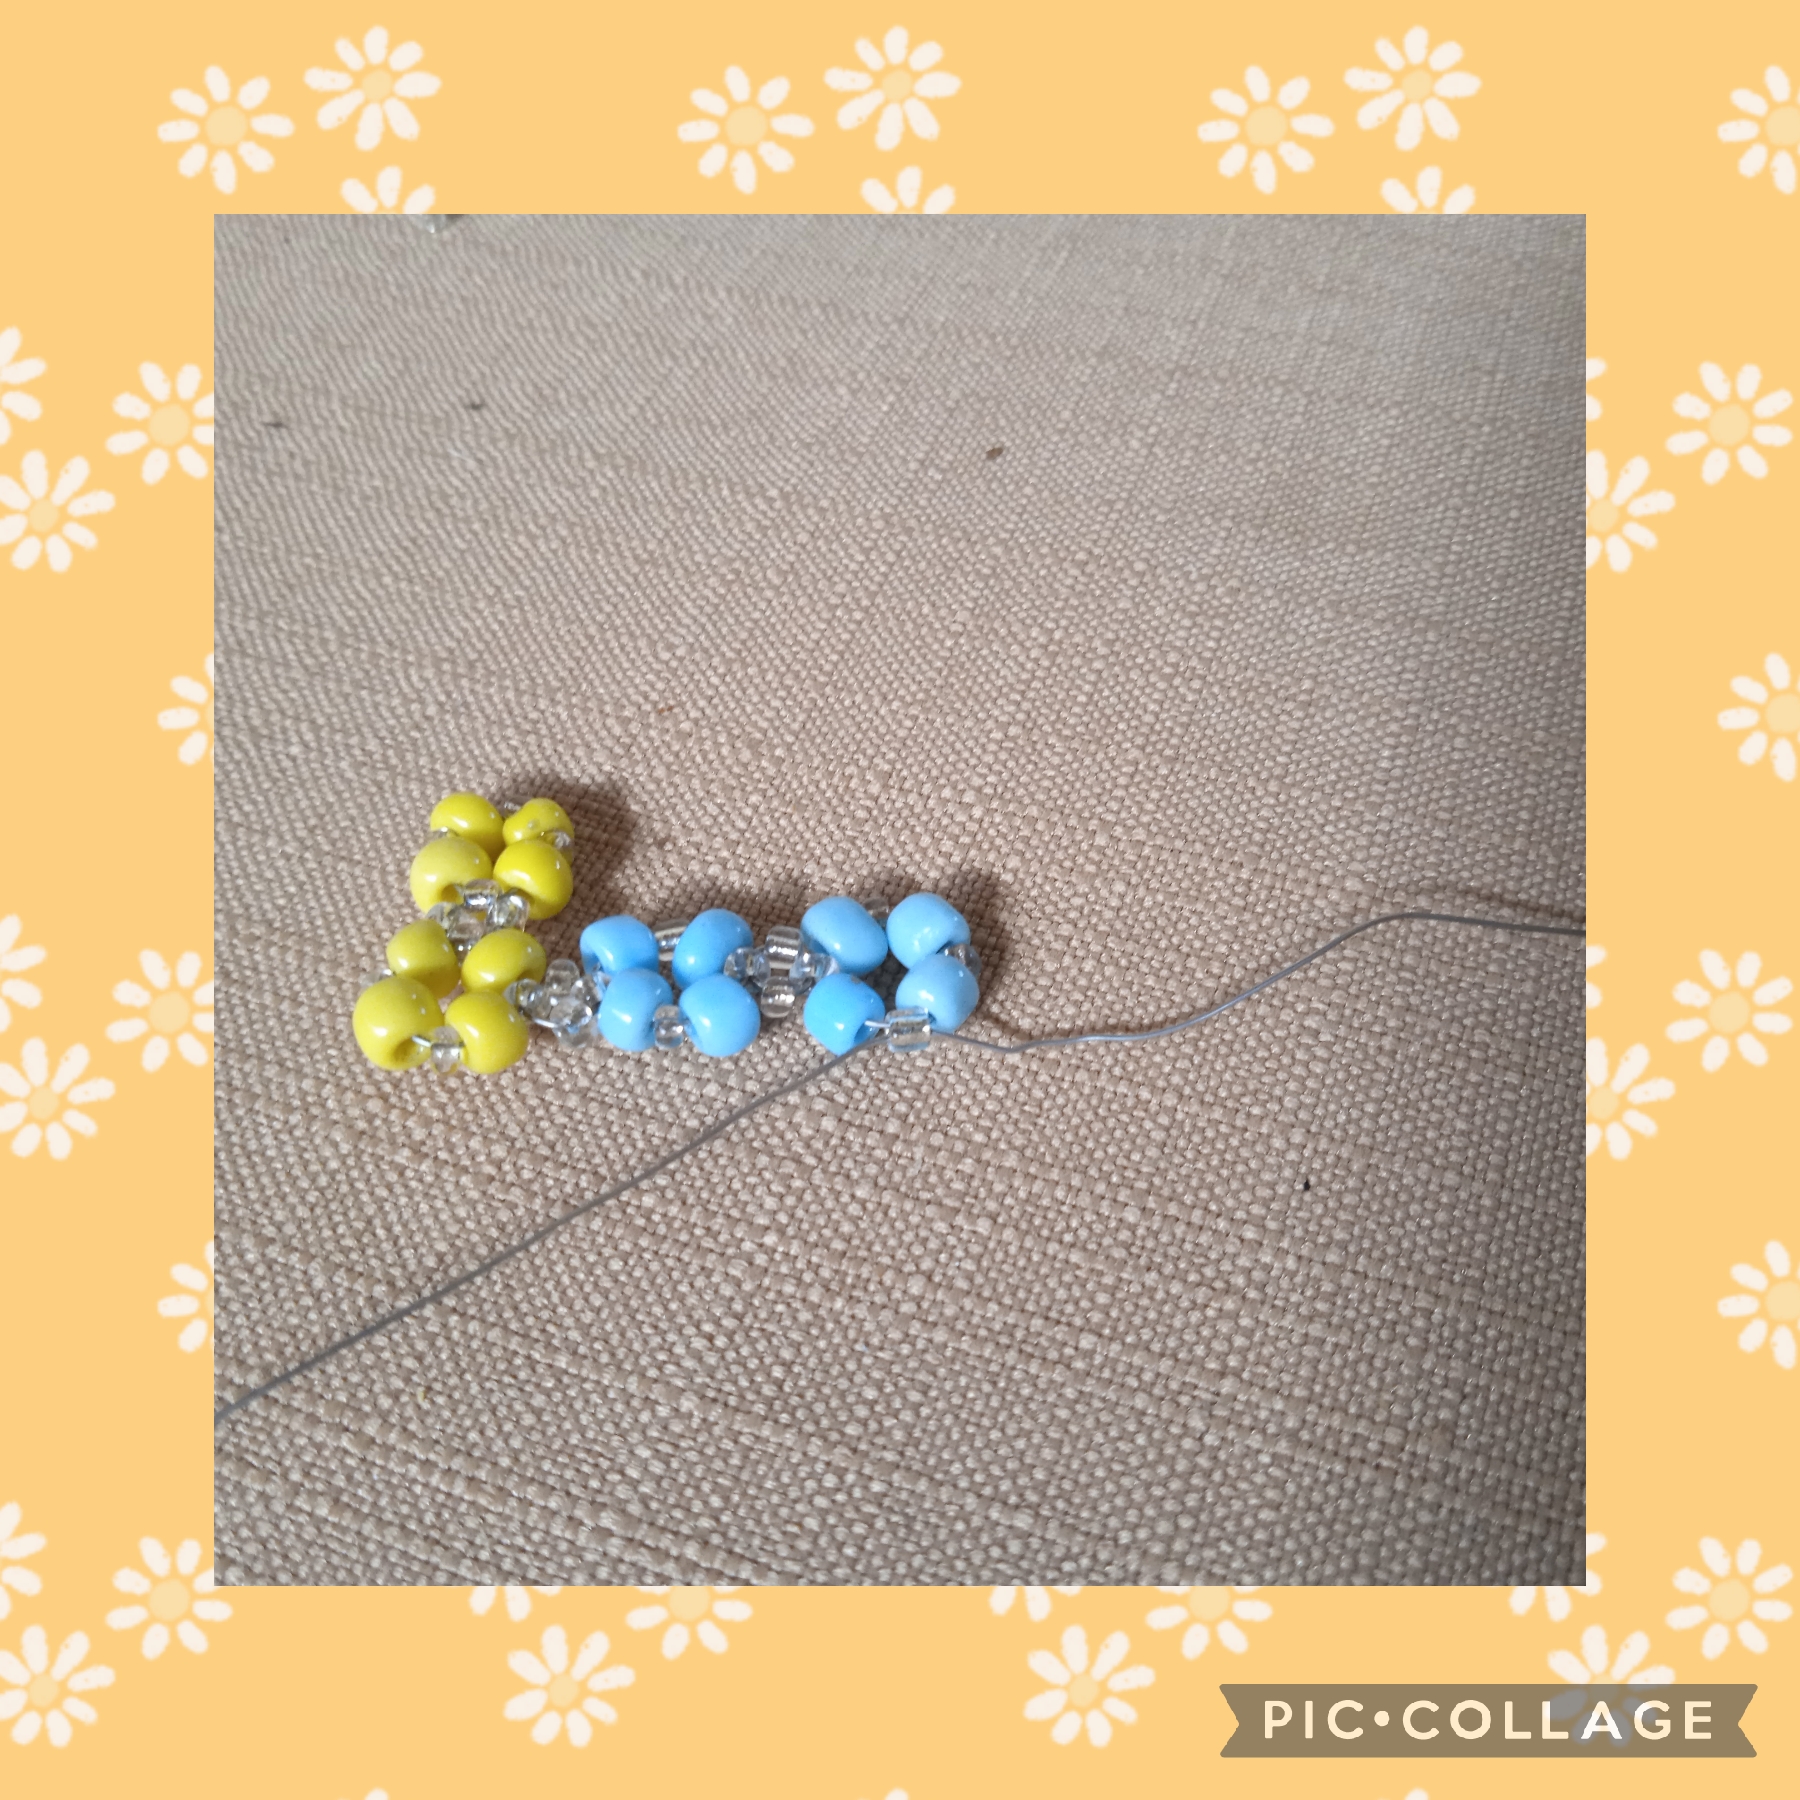
Realizado el primer paso y explicado la elaboración de los módulos que forman la figura con las que vamos hacer el collar, utilizo el color azul, en las cuatro mostacillas que forman lo que llamamos separador que están en el lateral derecho formamos una figura igual de color azul con el mismo procedimiento, seguimos alternando los colores y hacemos de nuevo una amarilla, una azul y formamos una especie de "M" así como en le foto.
STEP TWO:
Once the first step has been completed and the elaboration of the modules that form the figure with which we are going to make the necklace has been explained, I use the color blue, in the four beads that form what we call the separator that are on the right side we form a figure of the same color blue with the same procedure, we continue alternating the colors and make another yellow one, a blue one and we form a kind of "M" just like in the photo.
PASO TRES:
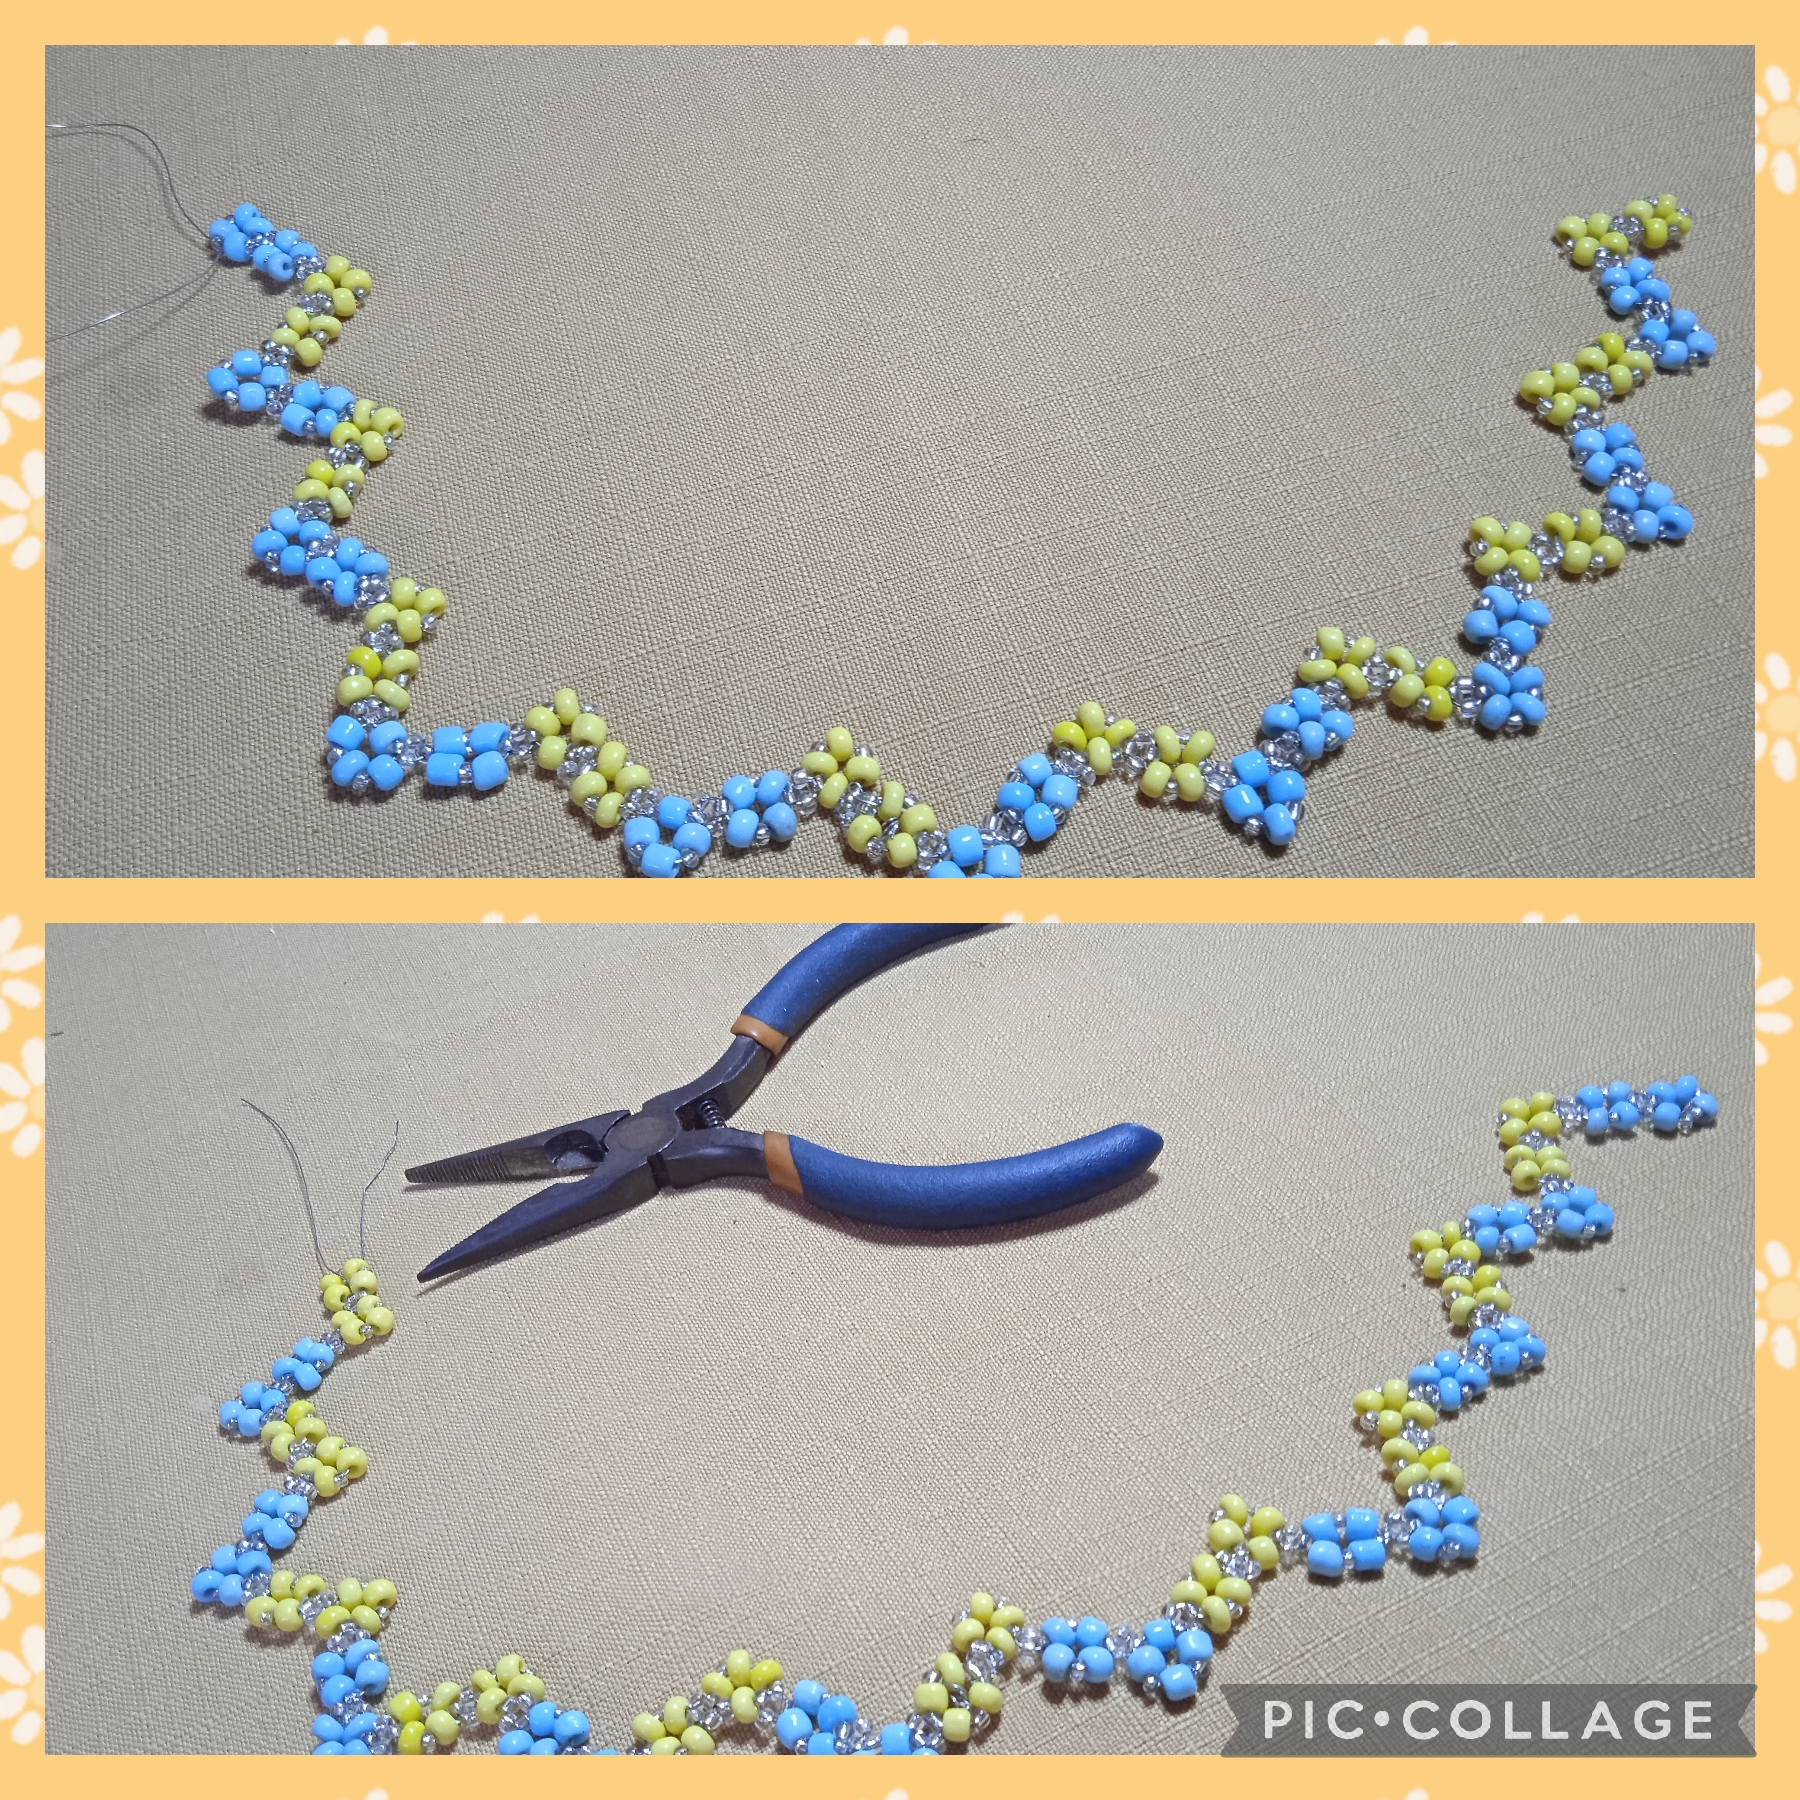
Sigo elaborando módulos iguales hasta obtener el largo deseado yo lo hice modo gargantilla; una vez que lo tengo listo uso la pinza para ajustar con un escalachin y cortar los excedentes.
STEP THREE:
I continue making equal modules until I obtain the desired length. I did it as a choker; Once I have it ready, I use the clamp to adjust it with a scalloper and cut off the excess.
PASO CUATRO:
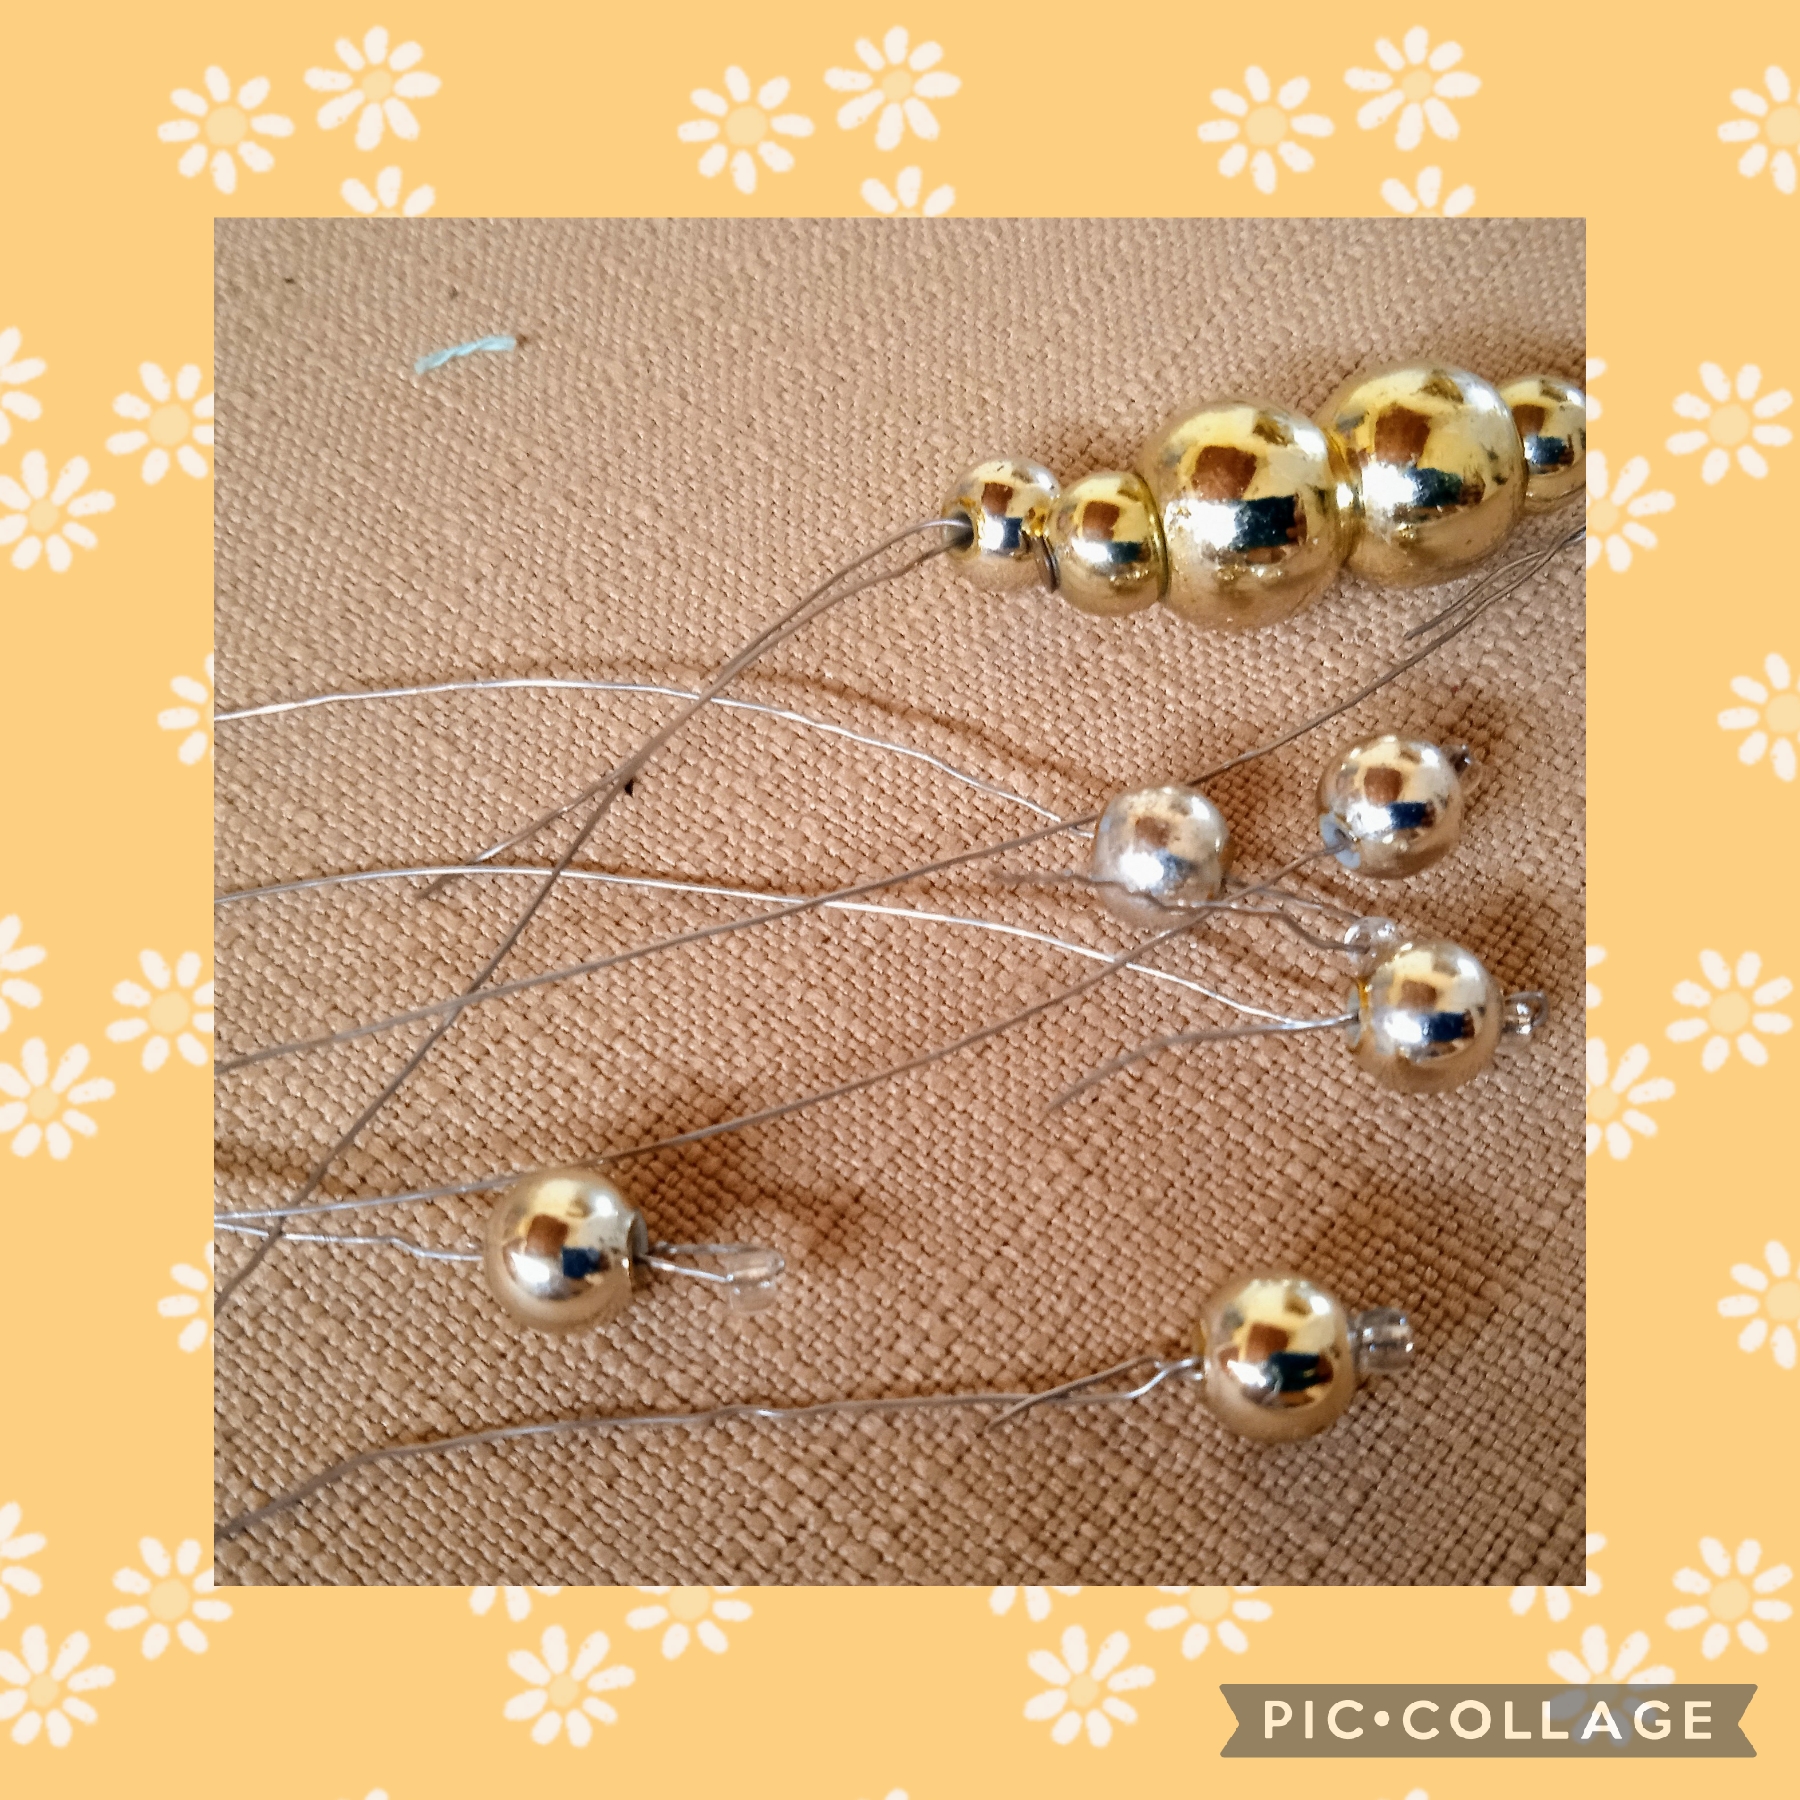
En este paso usando los balines dorados hago unos dijes que coloco en las puntas y uno de cuatro balines para poner en el centro; en alambres con una medida de cuatro centímetros inserto una mostacilla transparente que entorcho en la punta del alambre coloco un balín número cuatro y no corto el alambre y así quedan.
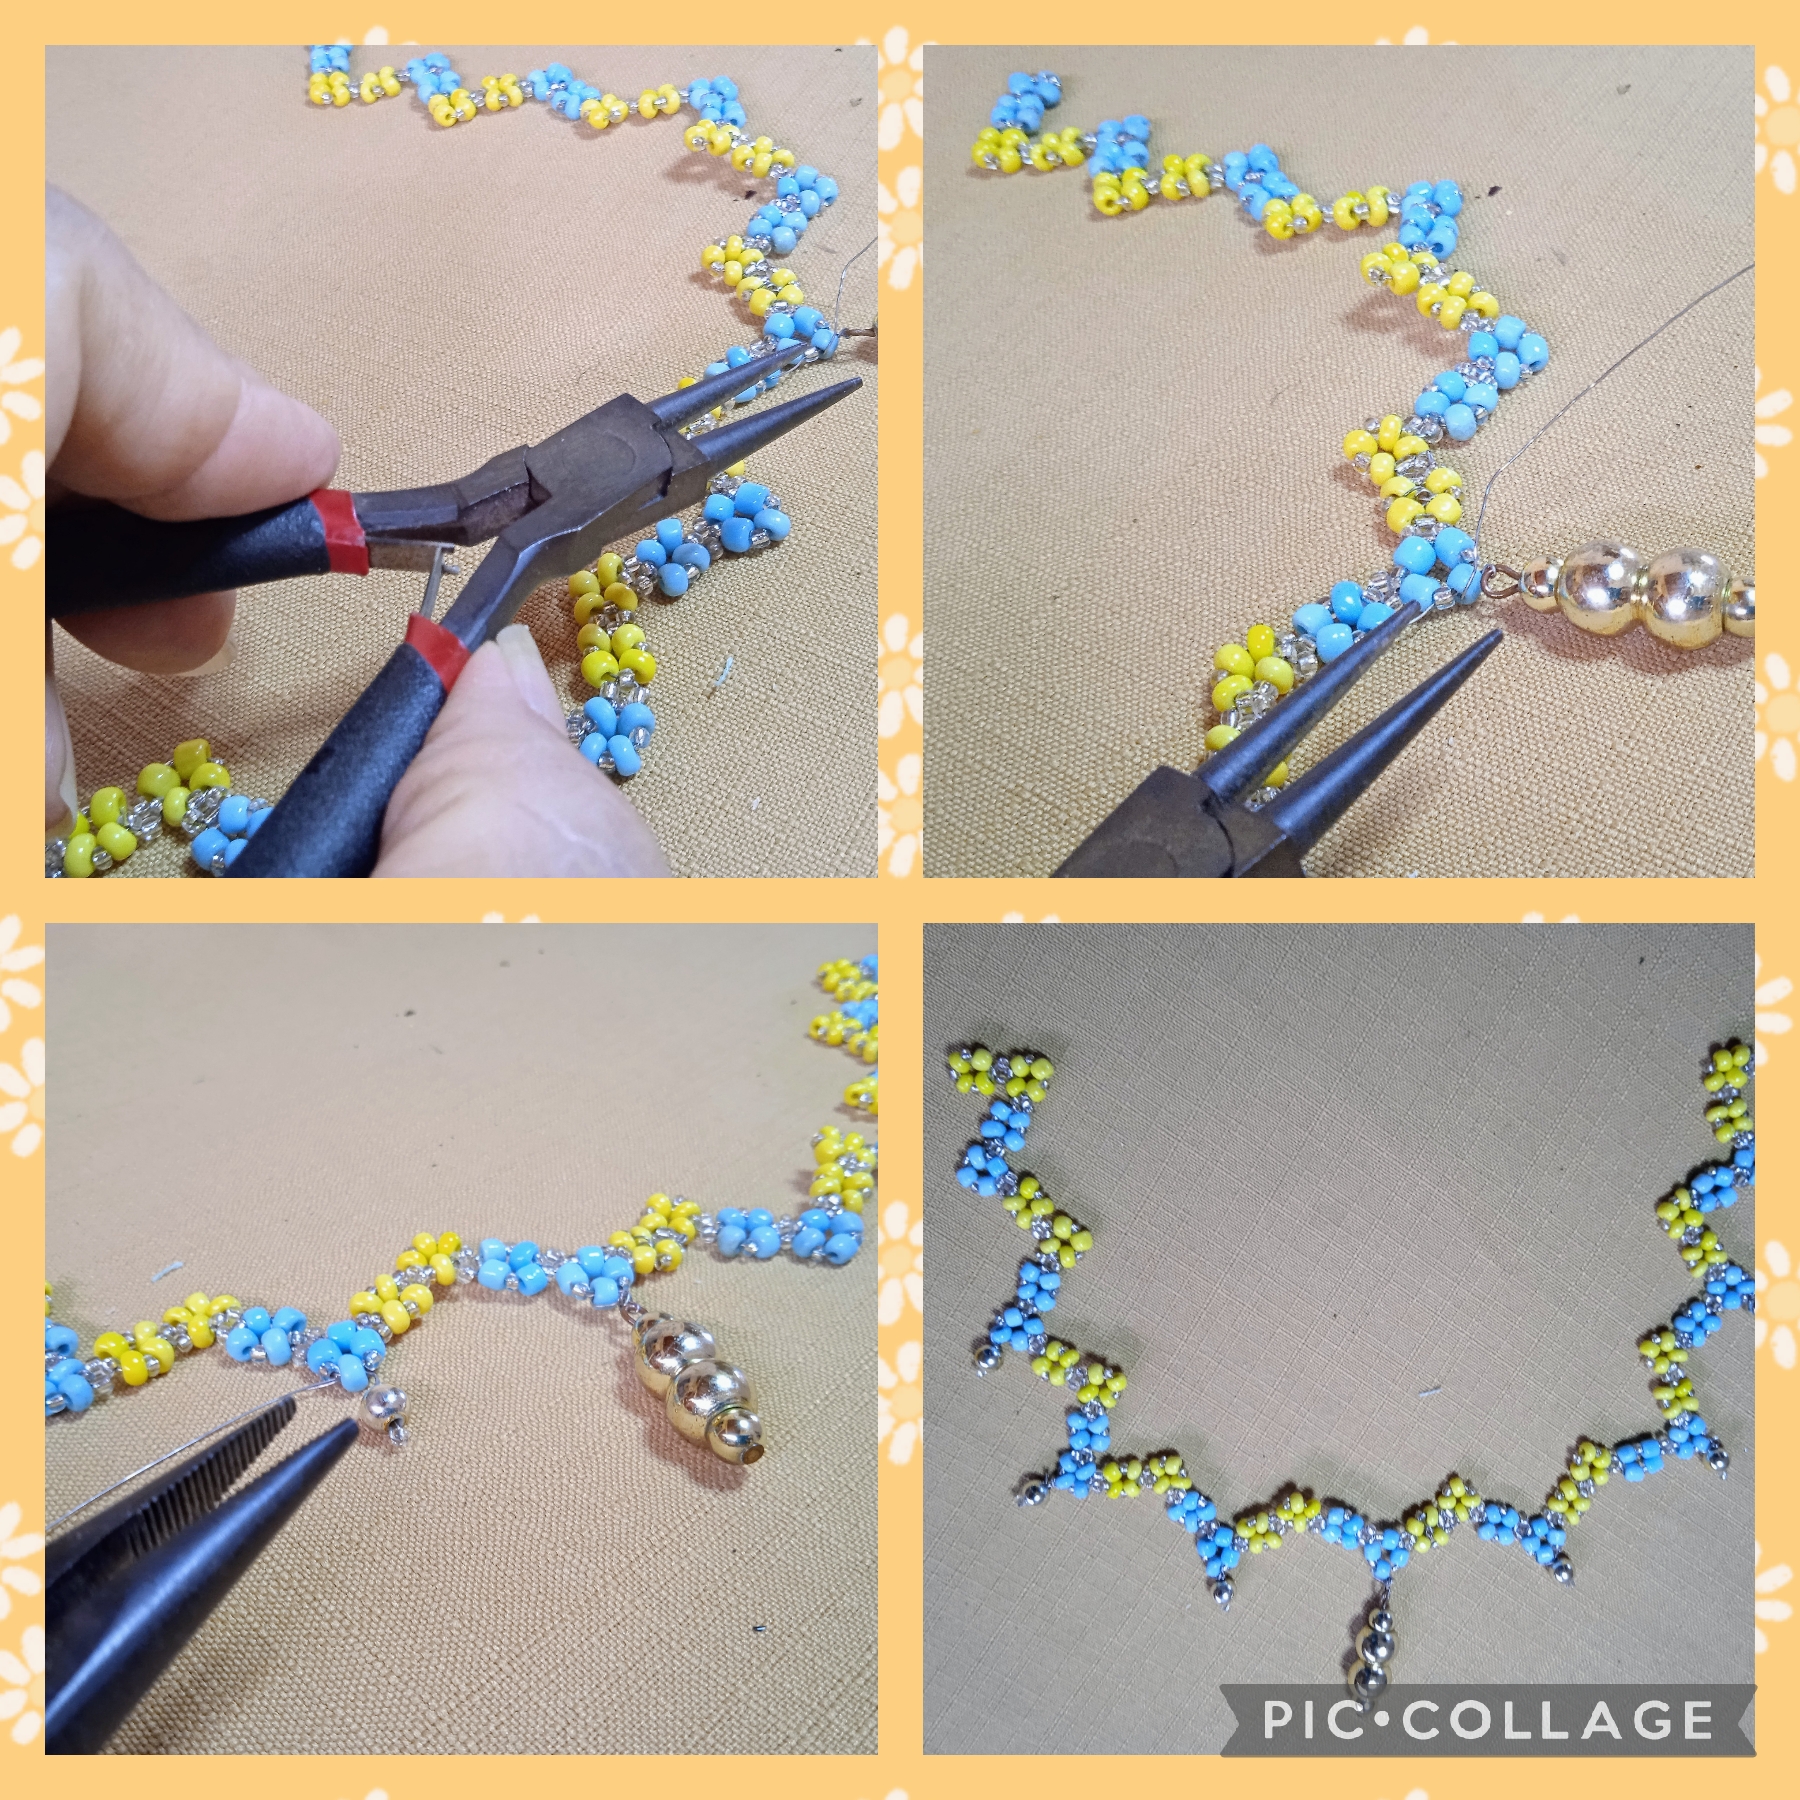
Ahora uso la pinza y los coloco busco la mitad del collar y allí pongo el dije más largo, luego coloco en las tres puntas de cada lado los dijes conformados con los balines como en la imagen .
STEP FOUR:
In this step, using the golden pellets, I make some charms that I place at the tips and one of four pellets to put in the center; In wires with a measurement of four centimeters I insert a transparent bead that I twist on the end of the wire, I place a number four pellet and I do not cut the wire and that is how they look.
Now I use the tweezers and I place them, I look for the middle of the necklace and there I put the longest pendant, then I place the charms made with the pellets on the three tips of each side as in the image.
PASO CINCO:
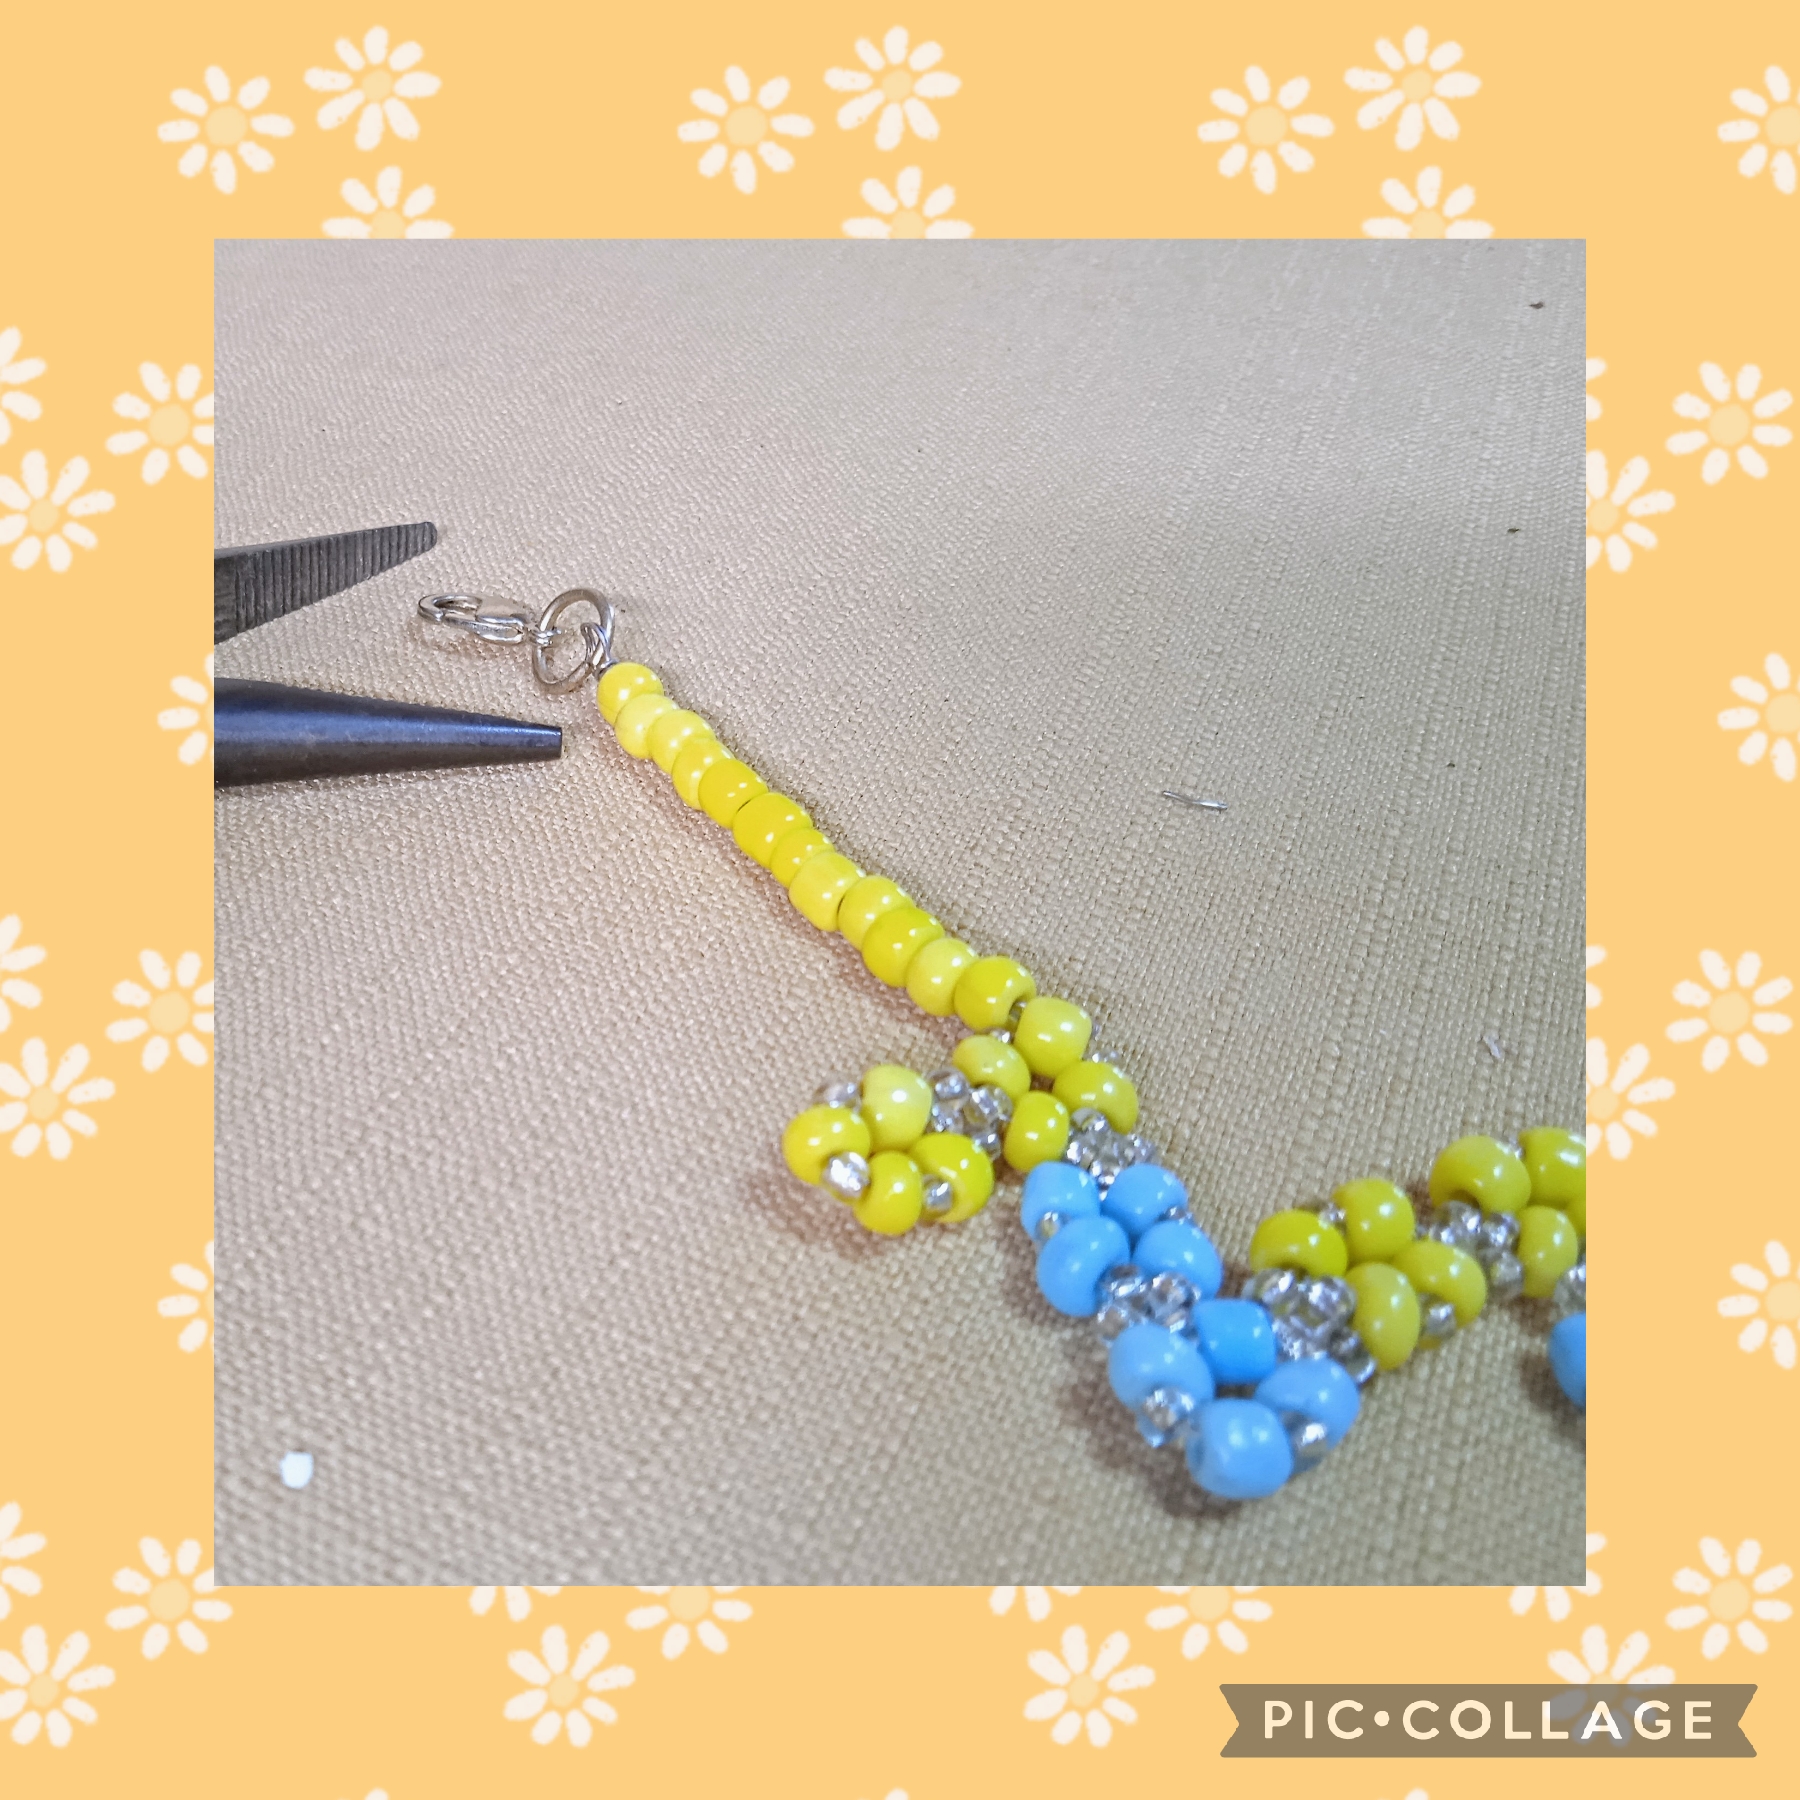
En este paso voy a realizar los detalles del cierre paso un alambre de seis centímetros por el mostacillón amarillo del último módulo, lo doblo para igualar las puntas inserto doce mostacillones amarillos, con la pinza punta redonda hago un arito y coloco una argolla, realizó el mismo procedimiento del otro lado y aquí pongo el cierre tipo langosta para finalizar.
STEP FIVE:
In this step I am going to make the details of the closure, I pass a six centimeter wire through the yellow bead of the last module, I bend it to match the tips, I insert twelve yellow beads, with the round tip tweezers I make a ring and place a ring, I made the Same procedure on the other side and here I put the lobster clasp to finish.

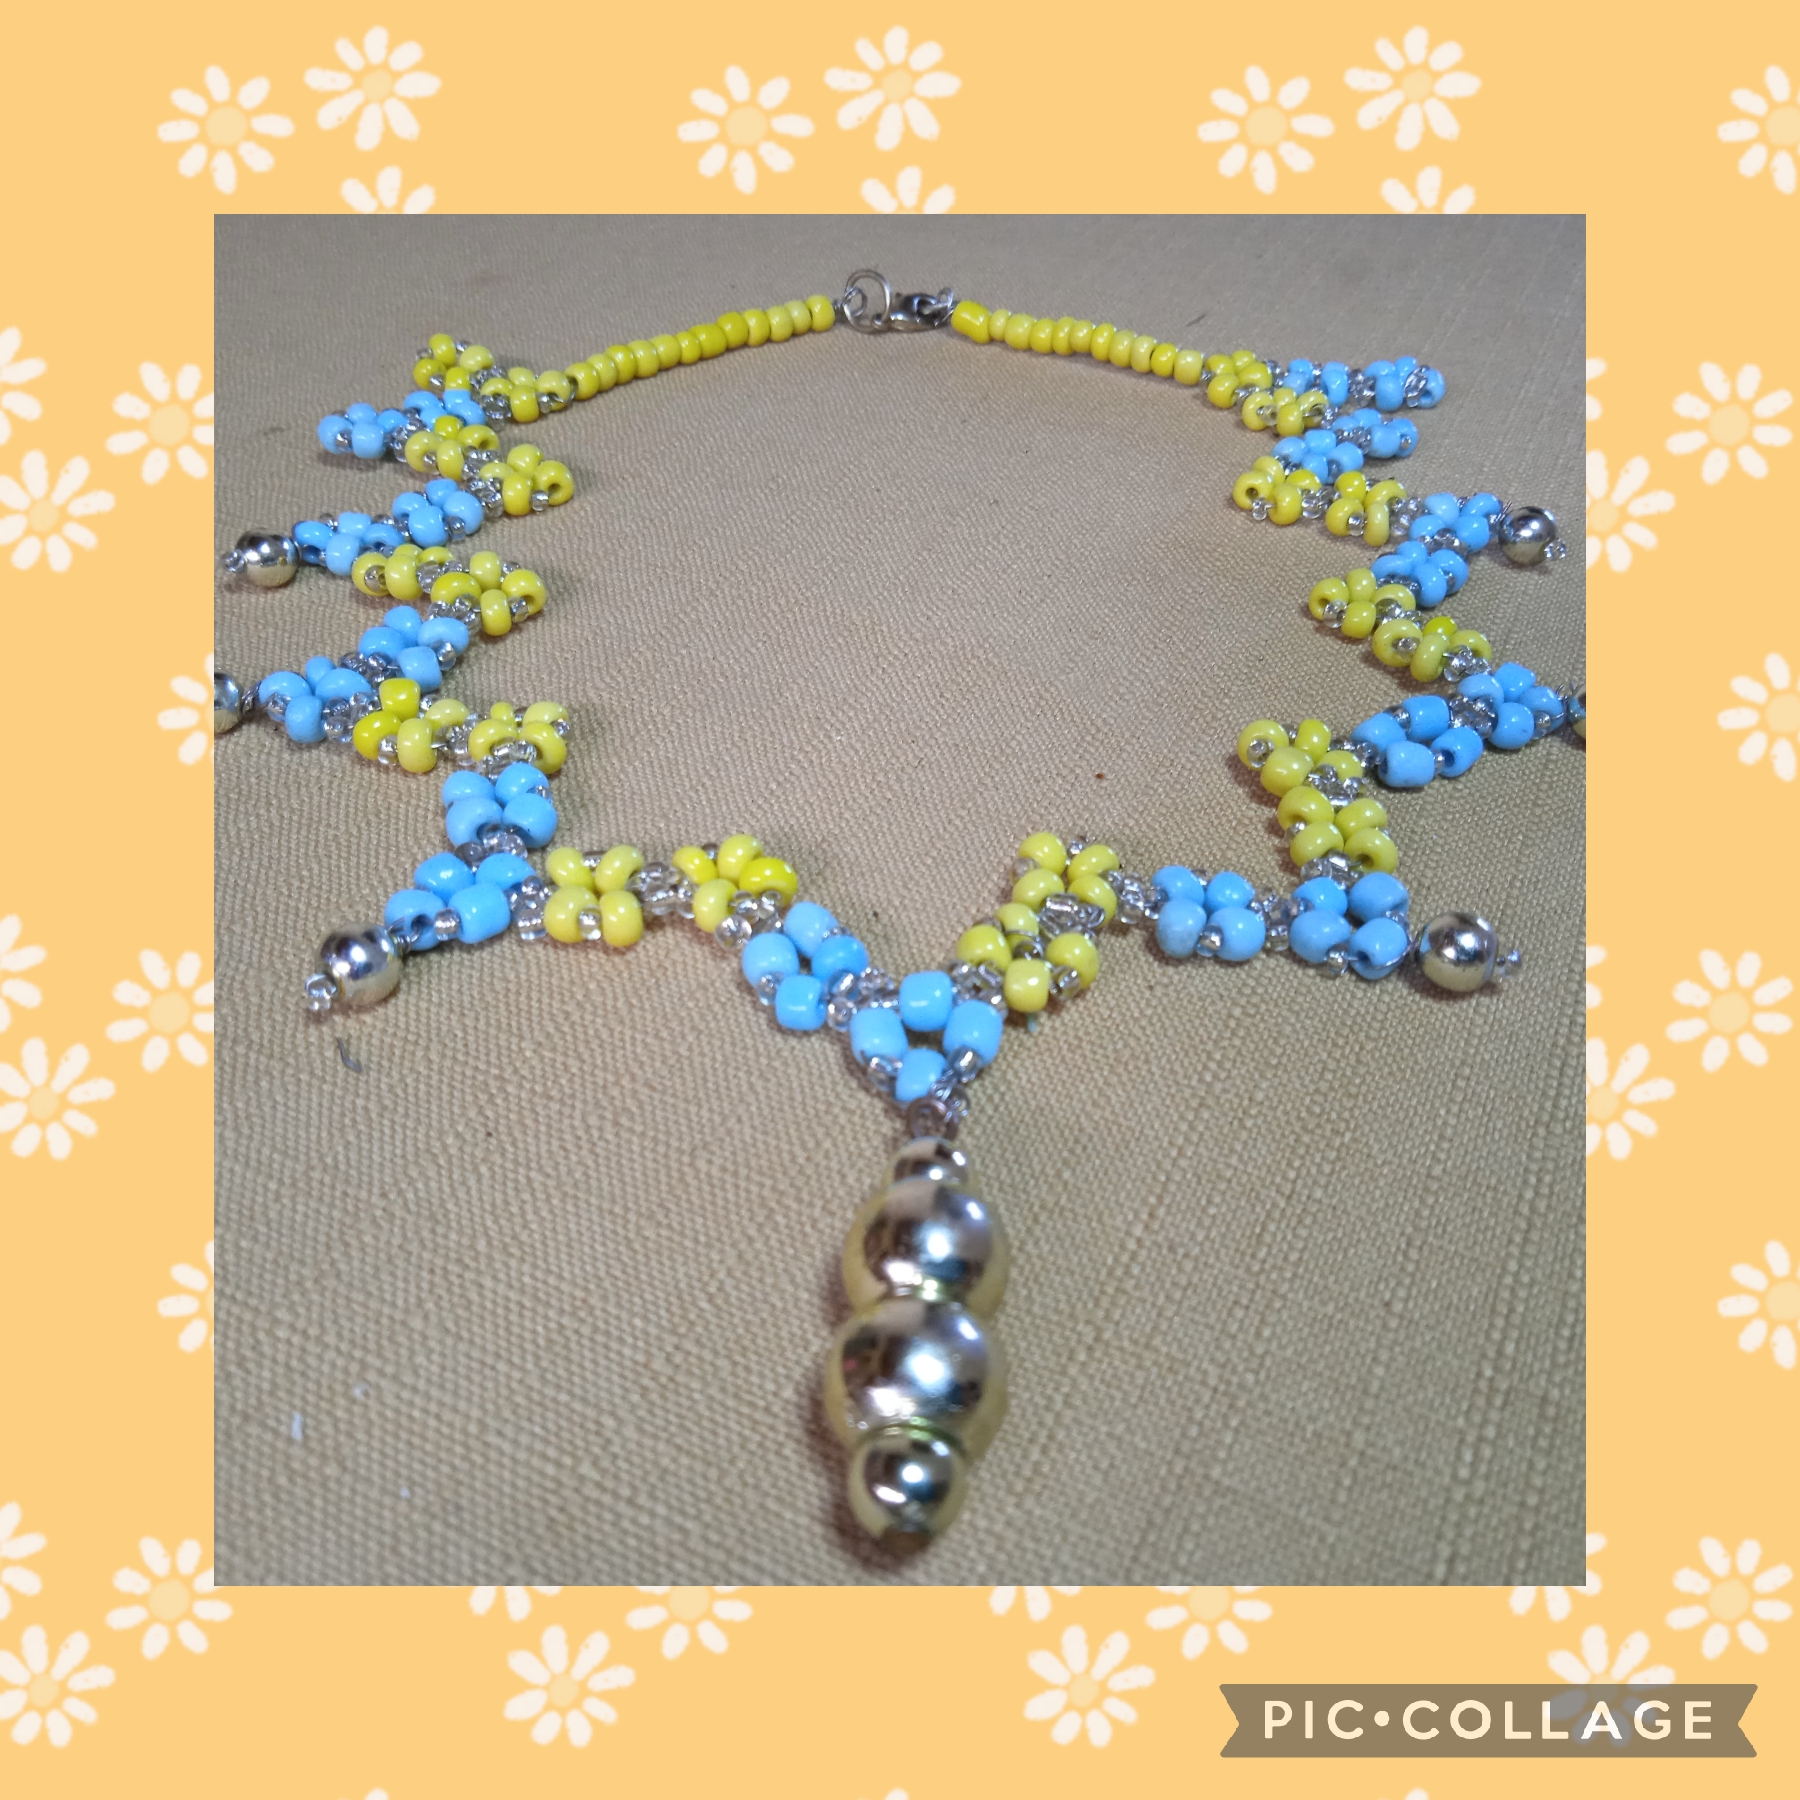
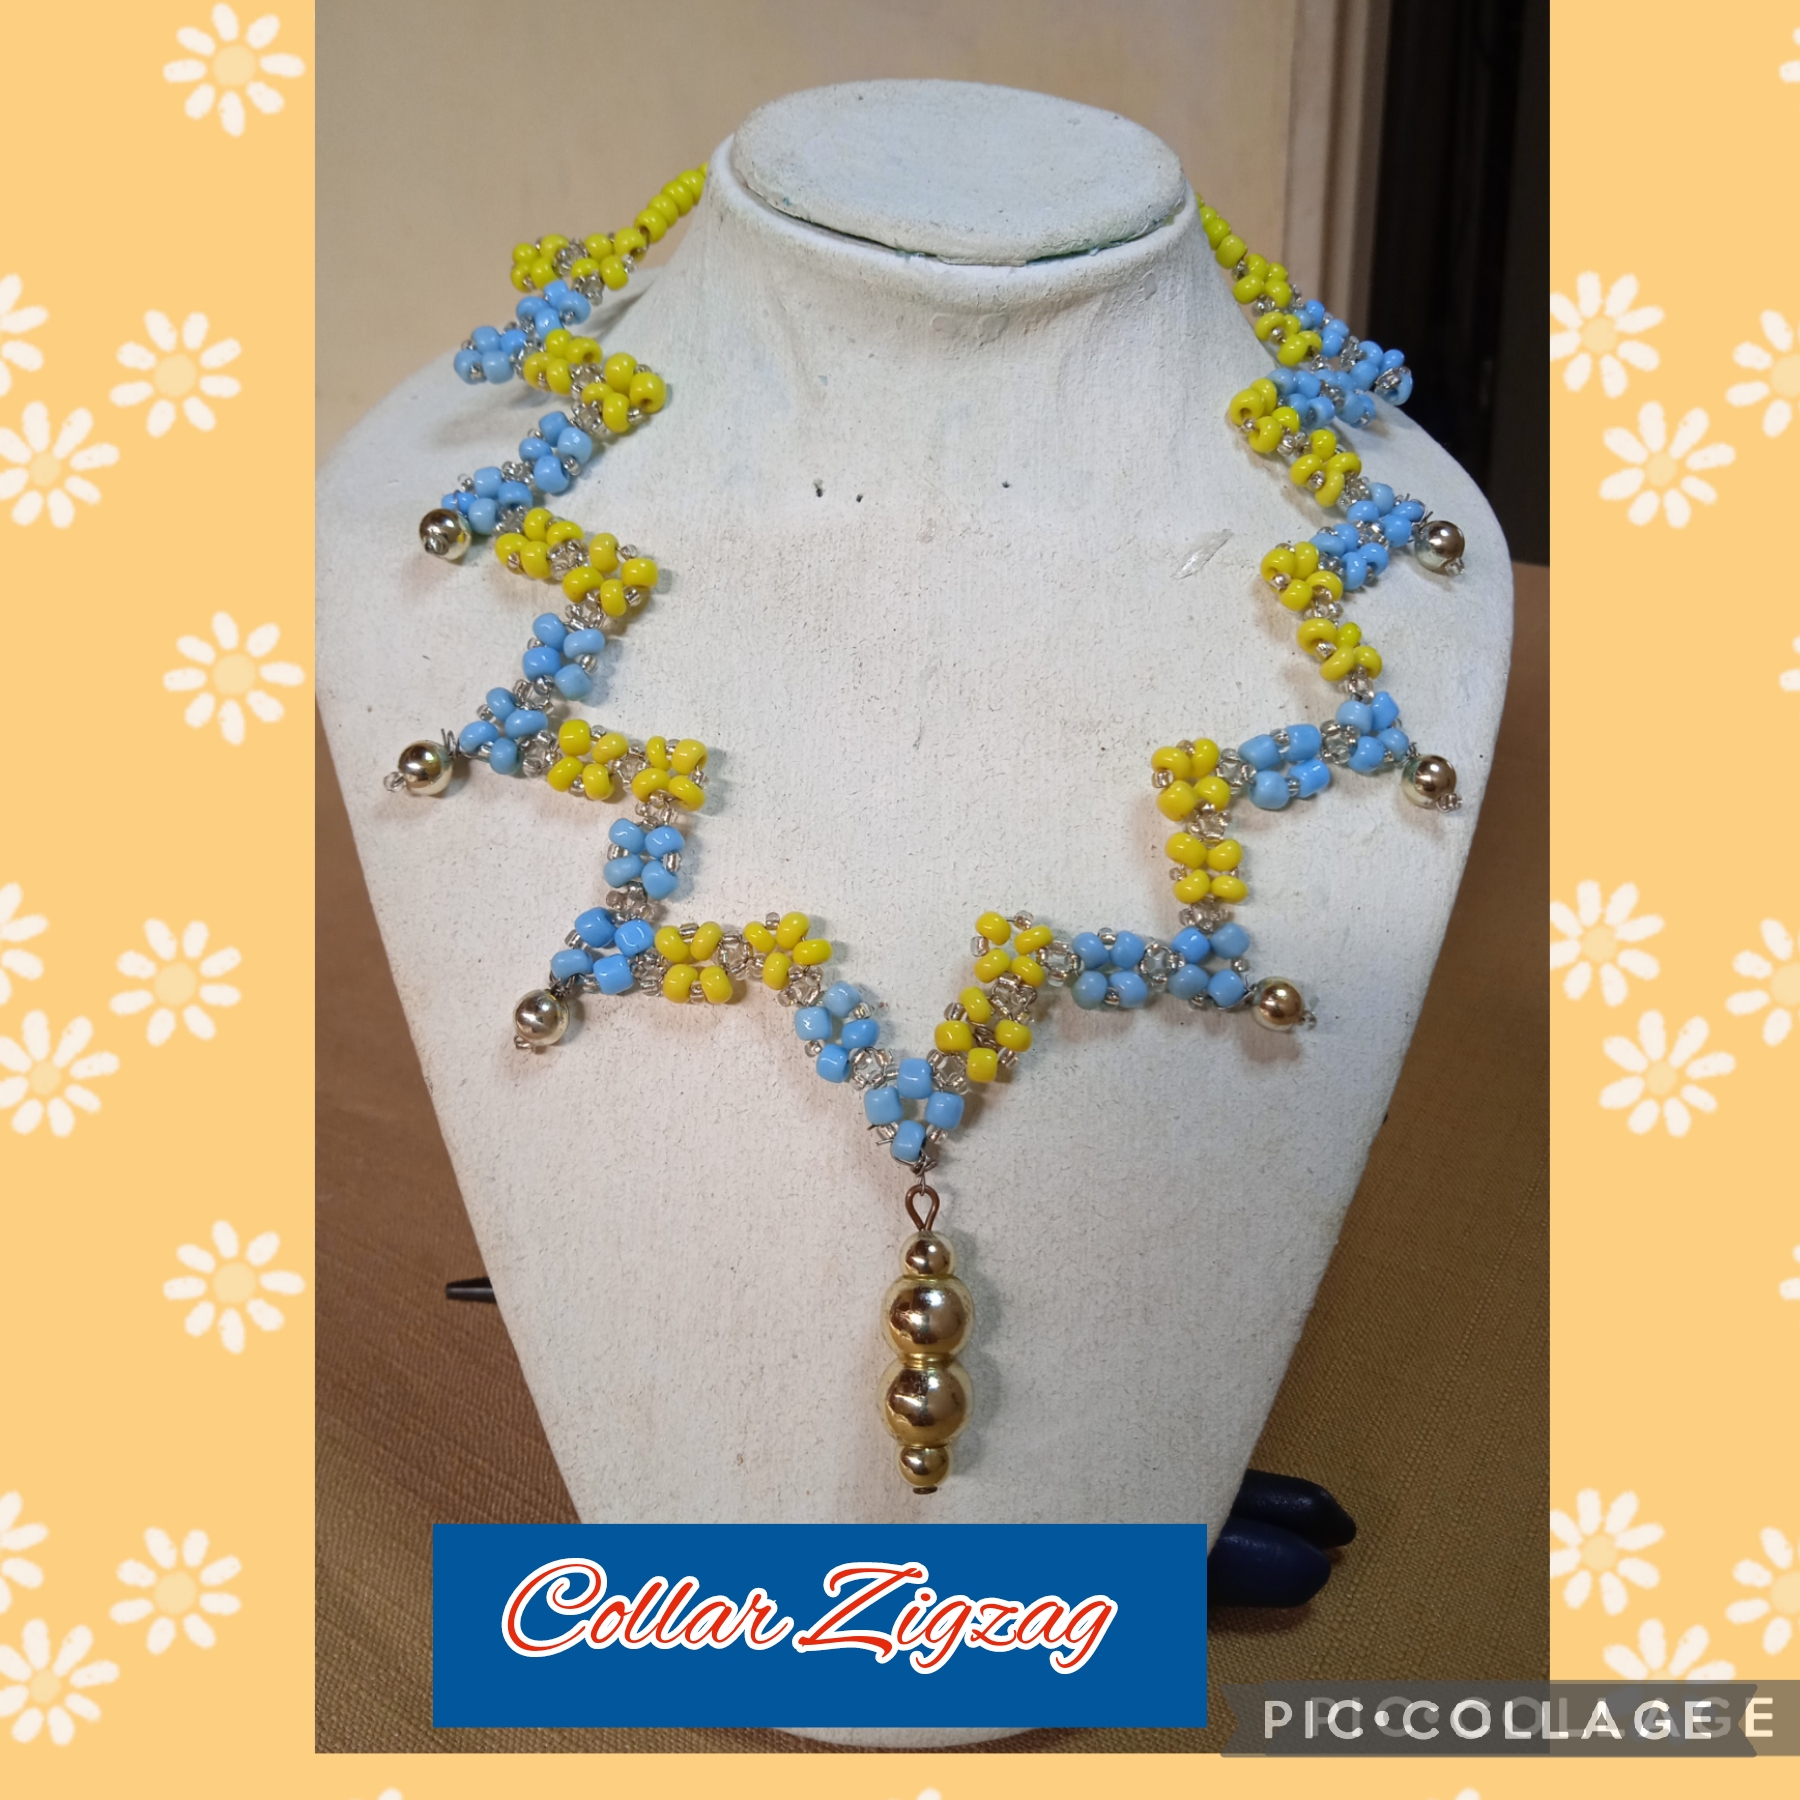
Artistas Creativos de la Joyería, este es el resultado final de mi manualidad, espero que les guste, como a mi amiga que quedó maravillada con su regalo, agradecida con todos por la atención y apoyo que le dan a mis publicaciones y nos vemos en la próxima manualidad, bye bye.
Creative Jewelry Artists, this is the final result of my craft, I hope you like it, like my friend who was amazed by her gift, grateful to everyone for the attention and support they give to my publications and see you at the next craft, bye bye.
Las imágenes y redacción de este tutorial son de mi propiedad, las fotos fueron tomadas con mi teléfono celular redmi 9 y las edité con una aplicación gratis del mismo.
Para traducir texto use Google traductor.
The images and writing in this tutorial are my property, the photos were taken with my Redmi 9 cell phone and I edited them with a free application.
To translate text use Google translator.

aha the necklace looks great thanks for sharing, keep up the good work.
Thank you very much for the support, it greatly motivates me to continue with the good work.
Es una belleza. Estoy fascinada con esta técnica. Tu amiga ha de estar súper feliz con su regalo. Es muy afortunada de que la hayas elegido a ella.
Que bueno que hayas terminado la temporada con esta bonita celebración del día de Reyes.
Saludos y bendiciones
Siiiiii, estuve muy complicada ya al final del año pero a Dios gracias todo tiene solución, espero que esté nuevo año nos de mejores satisfacciones, muy linda tu nena ,bendiciones a todos 🤗
Hola amiga que hermoso te ha quedado este collar buena tecnica feliz dia.
Que amable @tibisayq muchísimas gracias por visitarme me gustó tu comentario 😊