Saluditos mis Artistas Creadores de las Manualidades y la Joyería, un muy feliz inicio de semana para todos; el comienzo de la llamada Semana Mayor ; y es que este Día llamado también Domingo de Ramos por la tradición de asistir a las iglesias y asi obtener ramas de palmas bendecidas en la creencia de como estás palmas fueron esparcidas en la entrada de Cristo a Jerusalén . De mi parte deseo que estos días de asueto los pasen de maravilla en una plena unión familiar, gozando de esa plenitud que nos da ese compartir.
Y como les comenté en mi manualidad anterior este mes nos llenado de celebraciones; una de ellas fué como el pasado 22 de marzo; conmemoramos el Día Mundial del Agua, ese preciado líquido que es vital para todas las funciones que realizamos en la vida y que debemos cuidar.
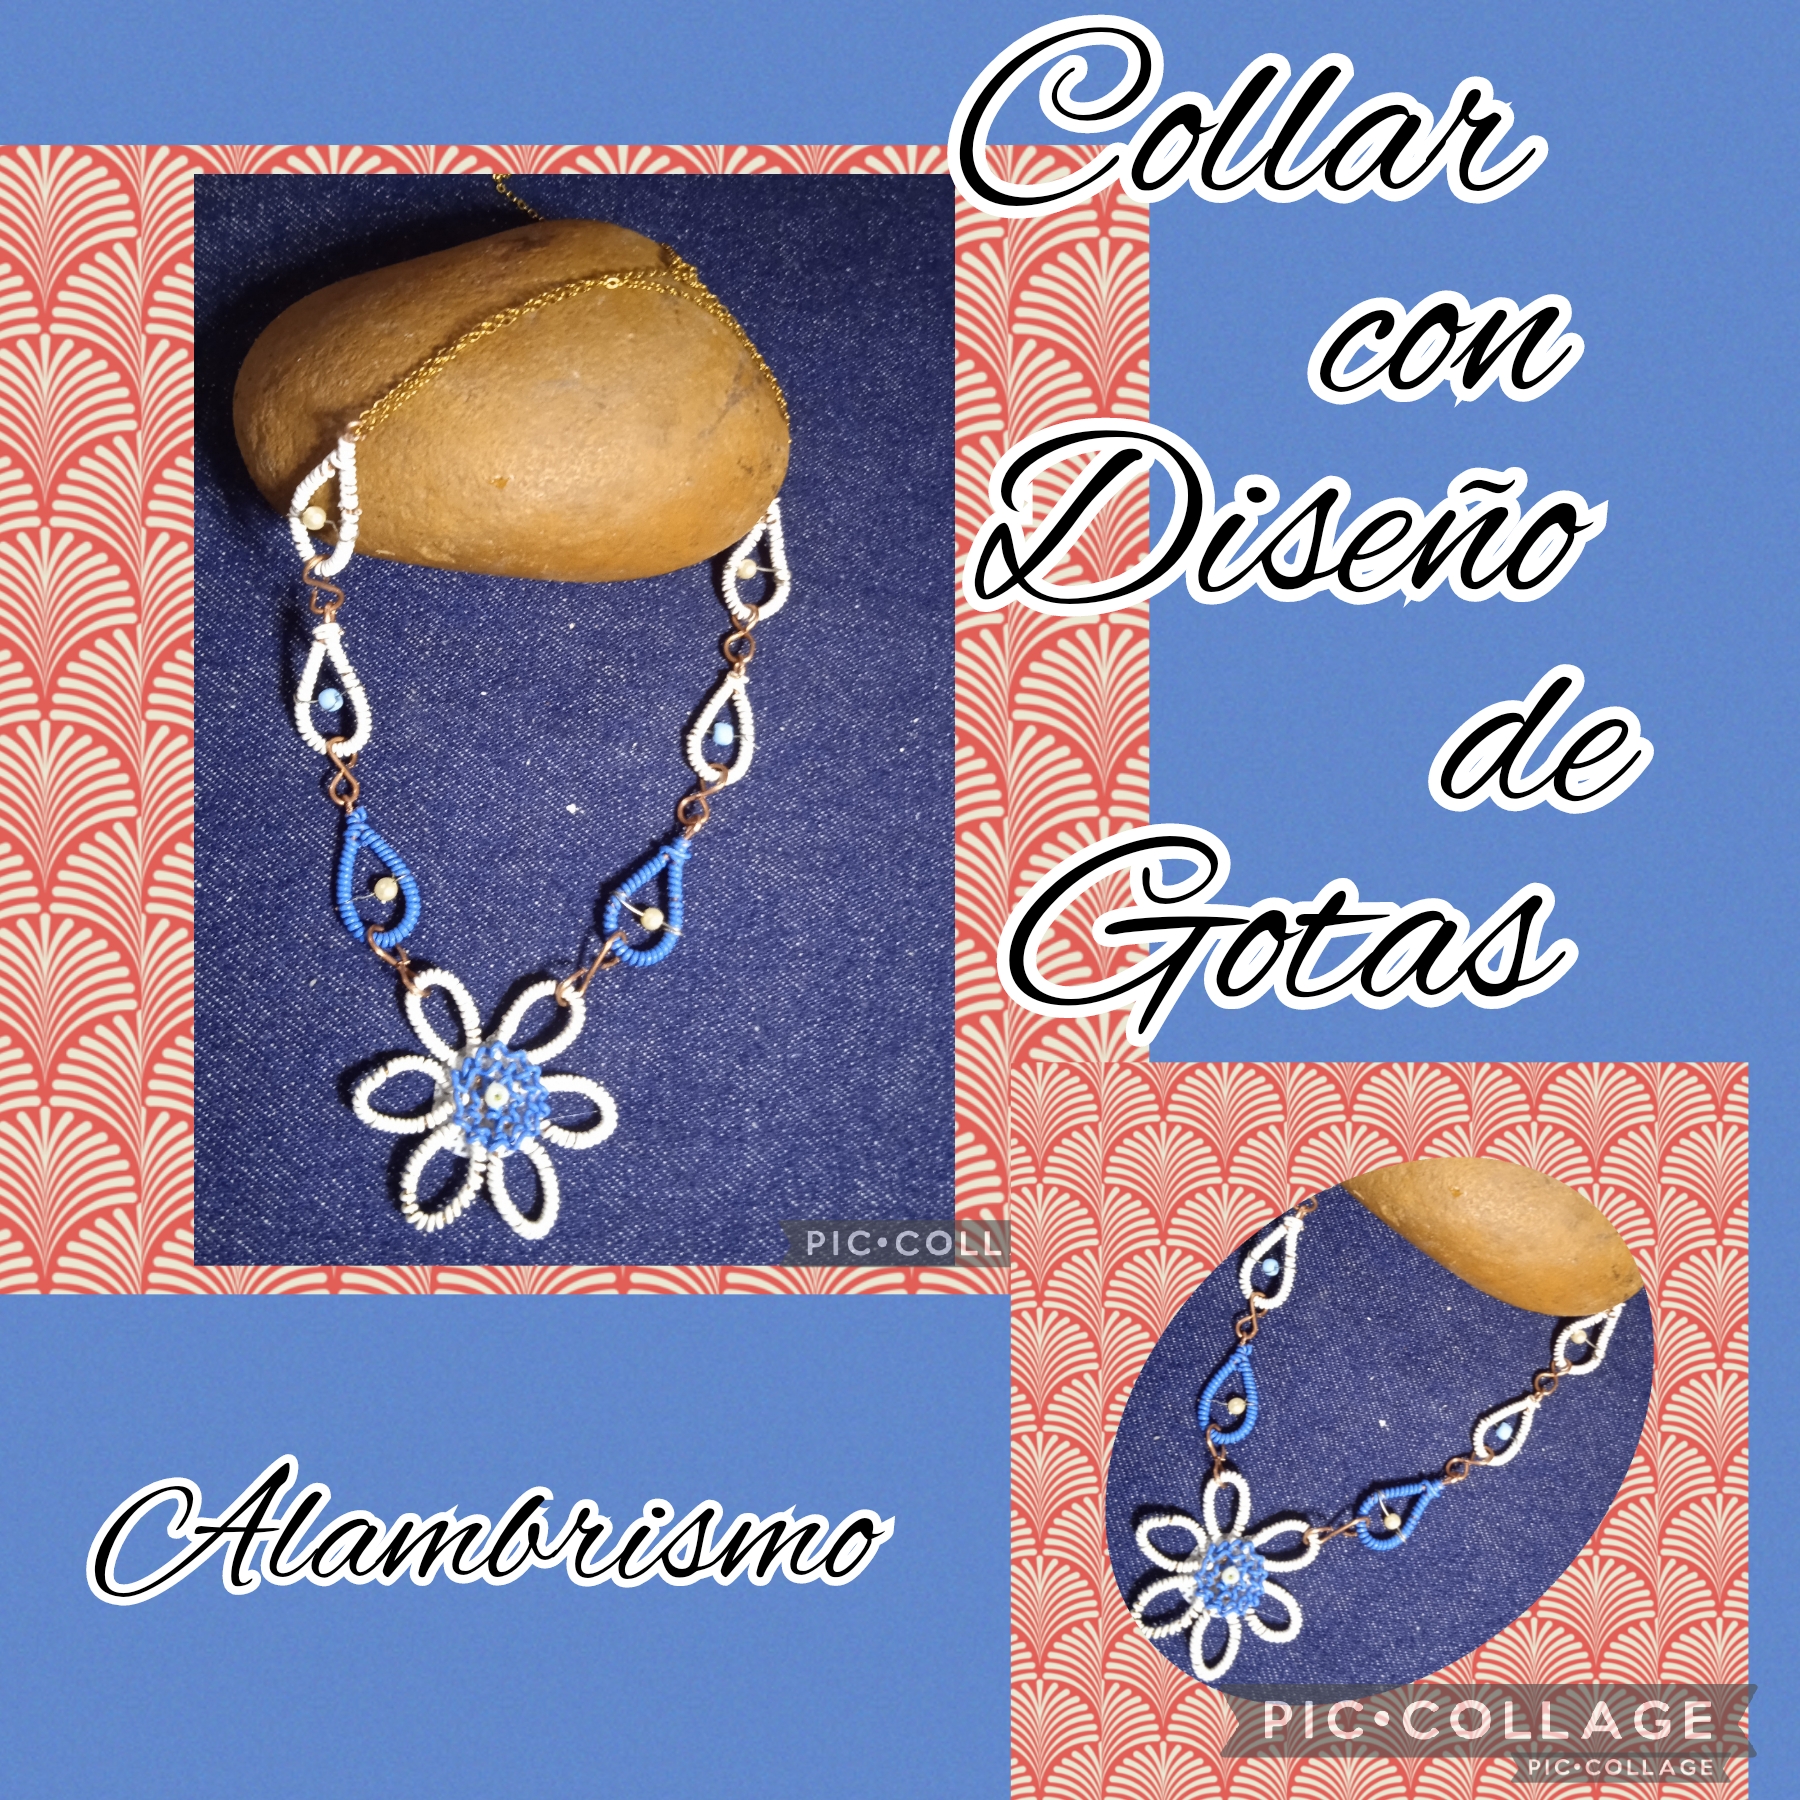
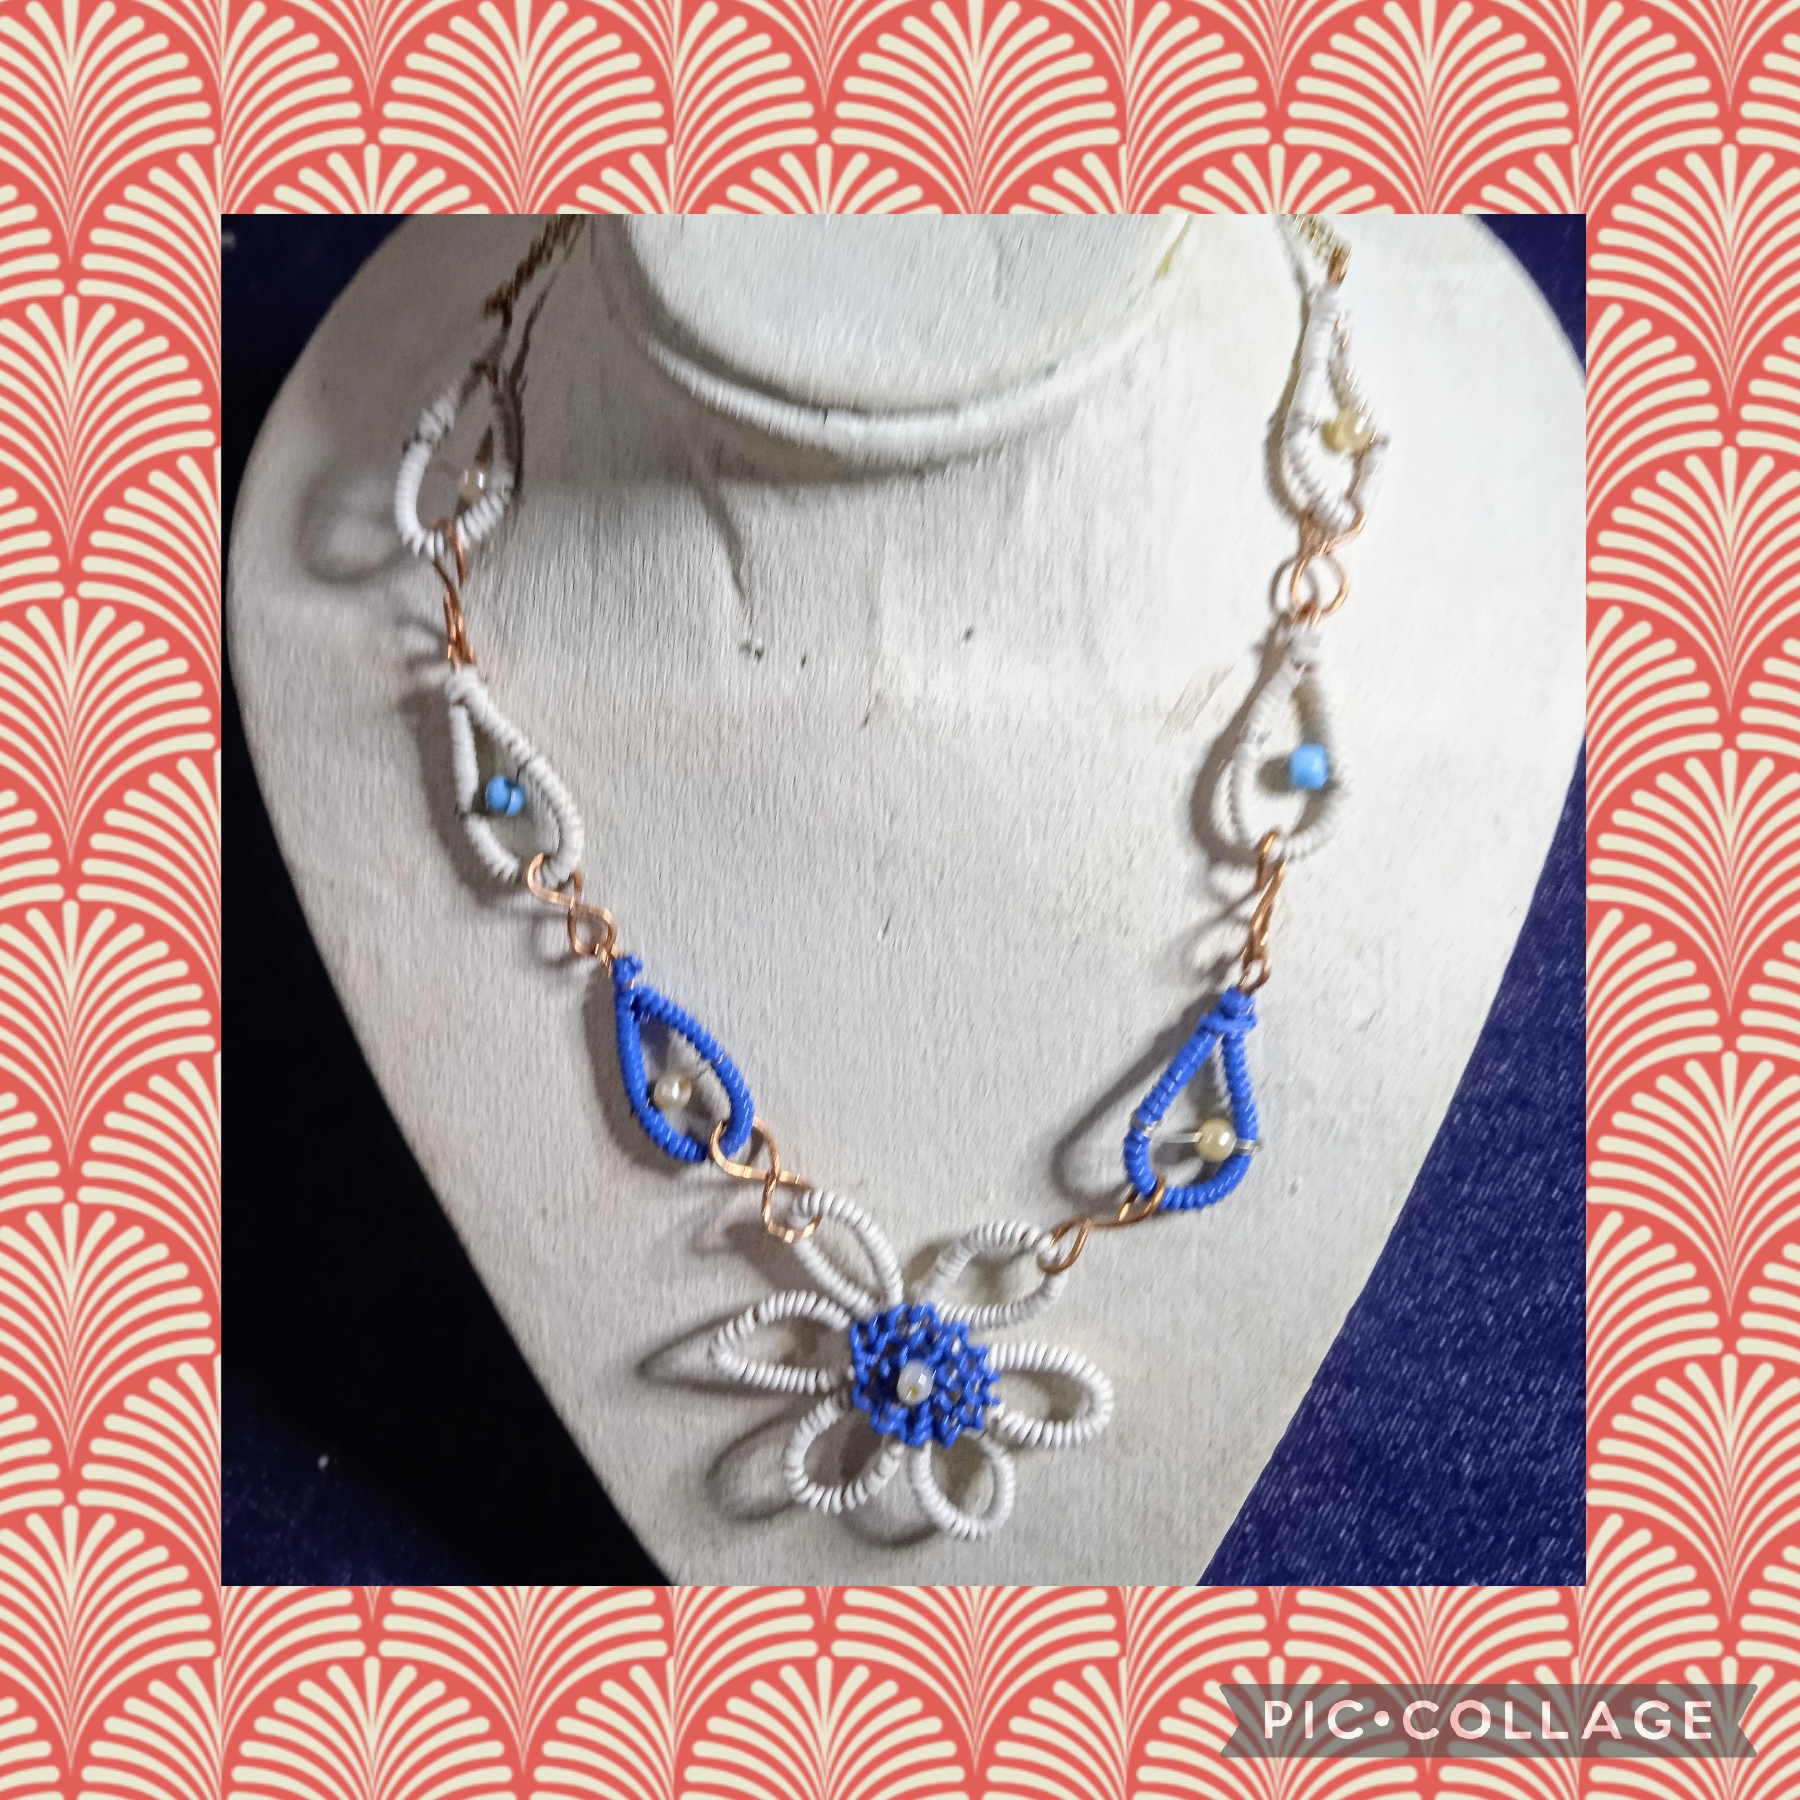
Como es costumbre en la comunidad es parte de la enseñanza hacer notar cualquier fecha importante y esta no podía dejarse pasar, así que cada cual hizo su aporte, carteleras, vallas, murales, artesanías con formas aleatorias que tuvieran que ver con el tema, Yo, para no dejarlo pasar realicé en mi taller de alambrismo un lúcido Collar con diseño de gota 💧 y sigan leyendo para que vean el paso a paso de como lo hice:
Greetings my Artists Creators of Crafts and Jewelry, a very happy start to the week for everyone; the beginning of the so-called Semana Mayor; And this Day is also called Palm Sunday due to the tradition of attending churches and thus obtaining branches of blessed palms in the belief that these palms were scattered at the entrance of Christ to Jerusalem. For my part, I wish that you have a wonderful time these days off in full family unity, enjoying the plenitude that sharing gives us.
And as I mentioned in my previous craft, this month filled us with celebrations; one of them was like last March 22; We commemorate World Water Day, that precious liquid that is vital for all the functions we perform in life and that we must take care of.
As is customary in the community, it is part of the teaching to highlight any important date and this could not be missed, so everyone made their contribution, billboards, billboards, murals, crafts with random shapes that had to do with the theme, I , not to let it pass me by, I made a lucid Necklace with a drop design in my wire workshop 💧 and keep reading to see the step by step of how I did it:
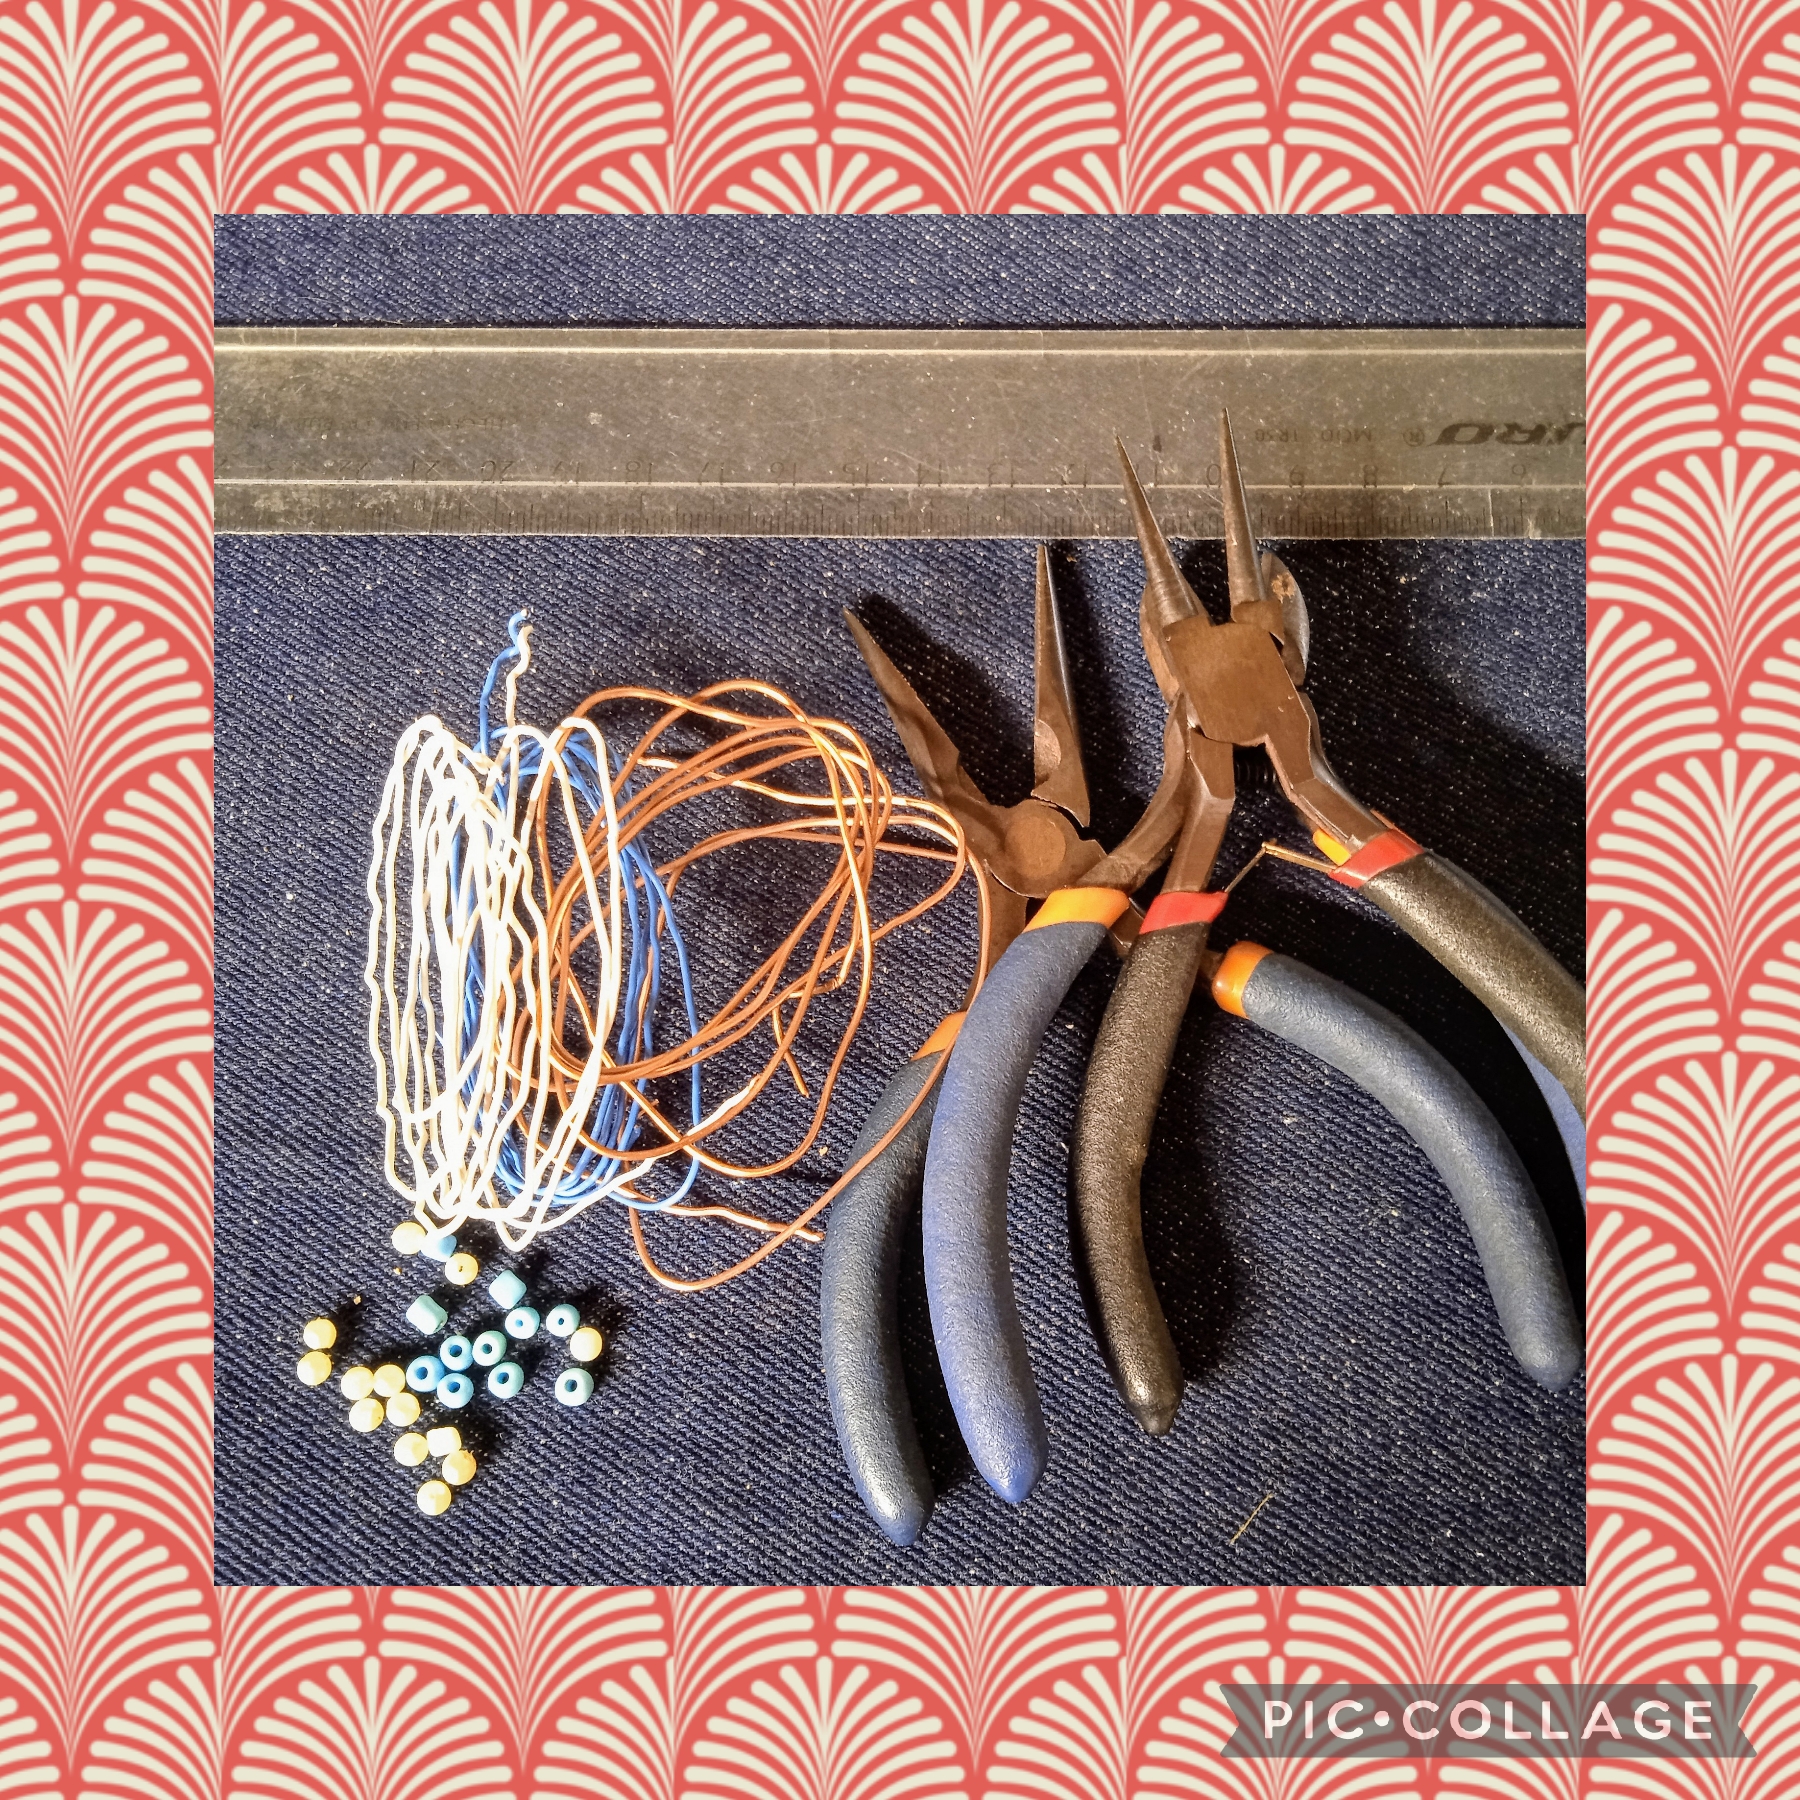
MATERIALES USADOS EN LA ELABORACIÓN DE ESTE ORIGINAL COLLAR:
✓Alambre de cobre calibre 24"
✓ Alambre calibre 26" reciclado de cable.
electrico, color azul
✓ Alambre calibre 26" reciclado de cable.
eléctrico color blanco.
✓ Mostacillones azules.
✓ Perlitas blancas.
✓ Silicón líquido frío.
✓ Cadena de extensión.
✓ Pinza de corte.
✓ Pinza punta redonda.
✓ Pinza plana.
✓ Regla.
MATERIALS USED IN THE PREPARATION OF THIS ORIGINAL NECKLACE:
✓24" gauge copper wire
✓ 26" gauge wire recycled cable.
electric, blue
✓ 26" gauge wire recycled cable.
white electric.
✓ Blue mostacillons.
✓ White pearls.
✓ Cold liquid silicone.
✓ Extension chain.
✓ Cutting clamp.
✓ Round tip tweezers.
✓ Flat clamp.
✓ Rule.
PASOS PARA REALIZAR ÉSTA MANUALIDAD:
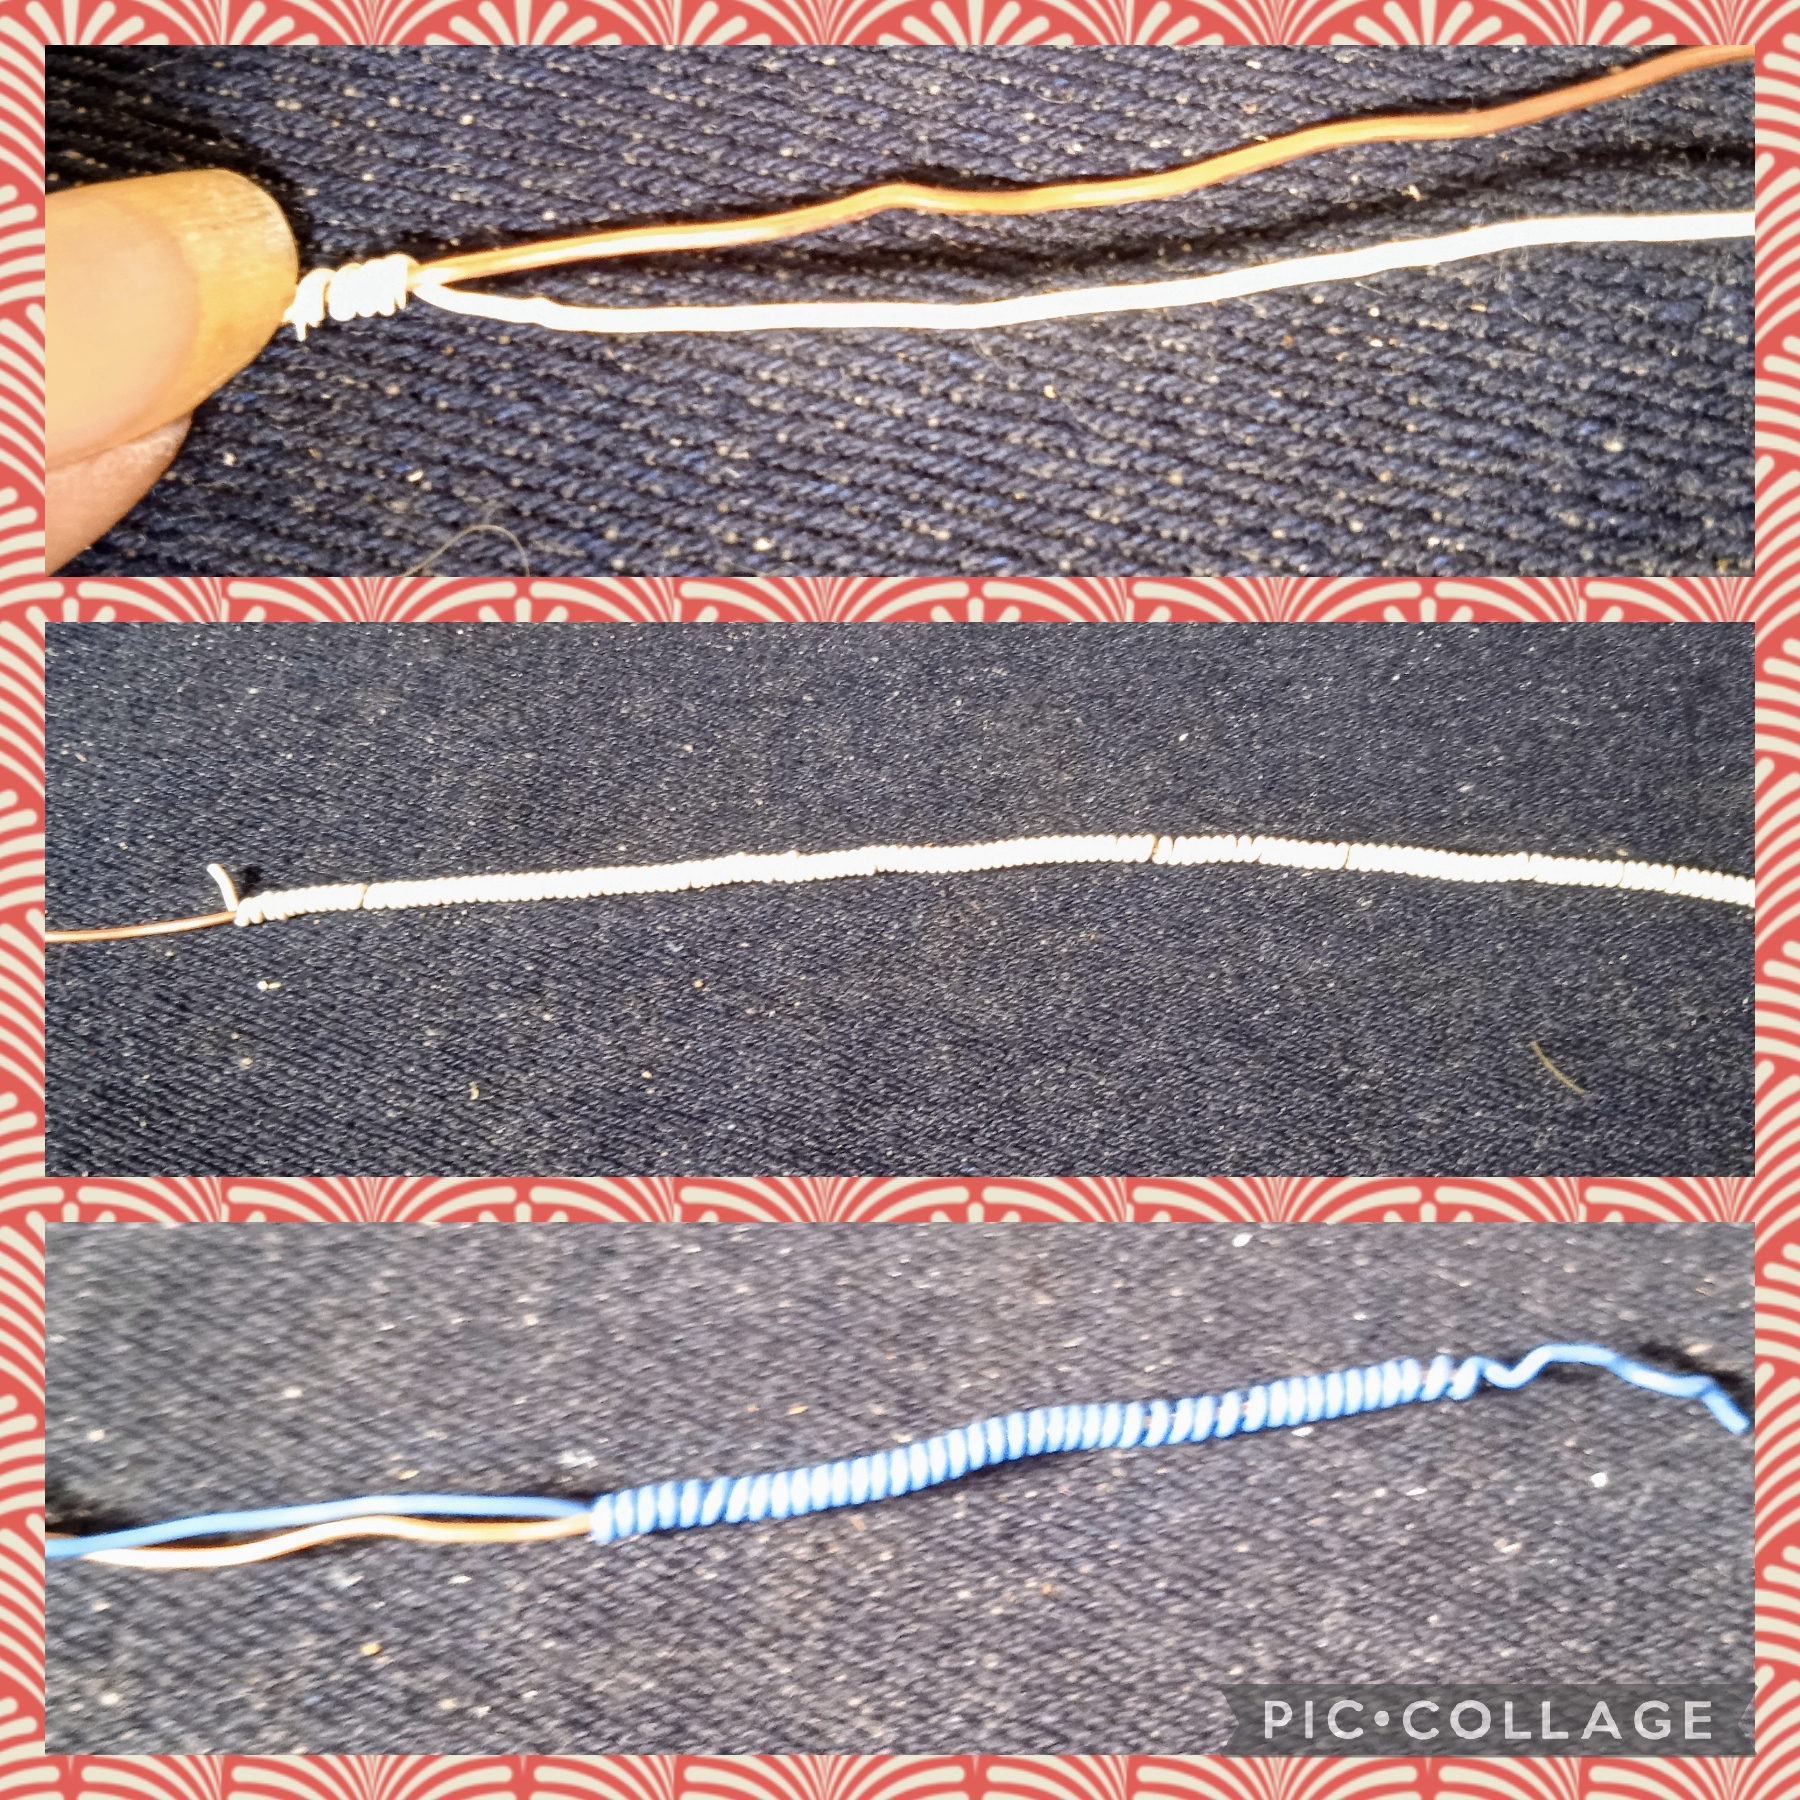
PRIMER PASO:
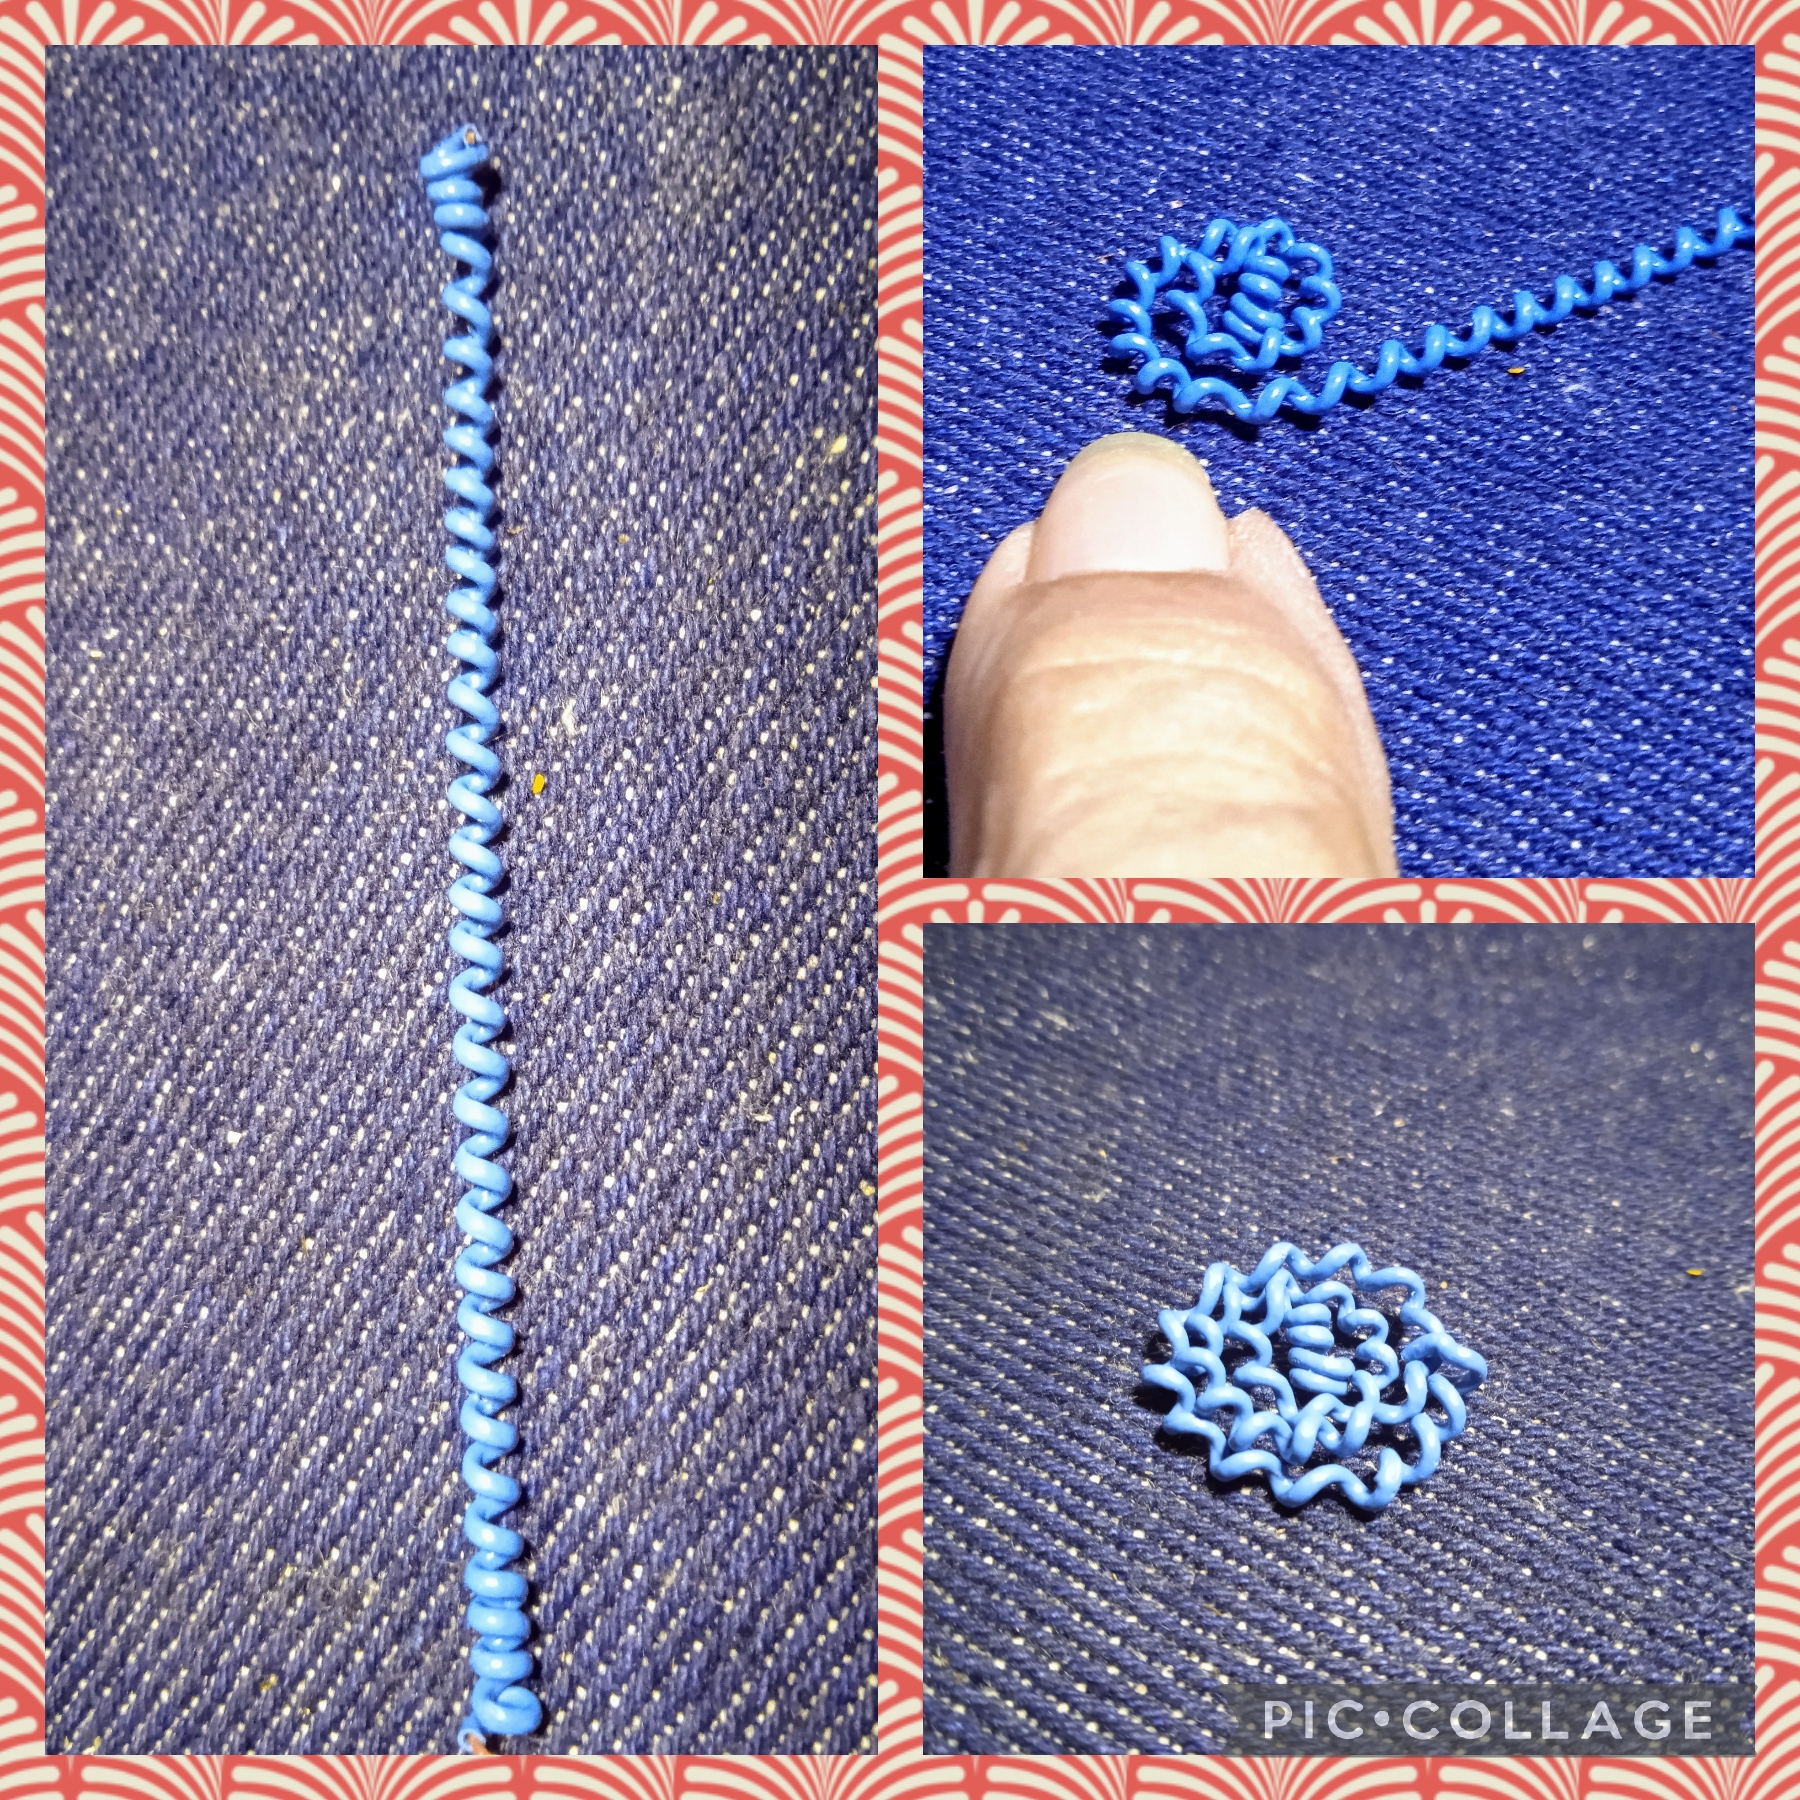
Voy a comenzar usando el alambre de cobre calibre 24" , mido con la regla dos largo de 30 centímetros y corto con la pinza de corte; uso los alambres reciclados de electricidad azul y blanco, y en cada alambre de cobre entorcho en forma envolvente hasta cubrir el largo, así como en la imagen.
FIRST STEP:
I am going to start using the 24" gauge copper wire, I measure 30 centimeters long with the rule two and cut it with the cutting pliers; I use the recycled blue and white electricity wires, and I twist each copper wire in an enveloping shape until cover the length as well as in the picture.
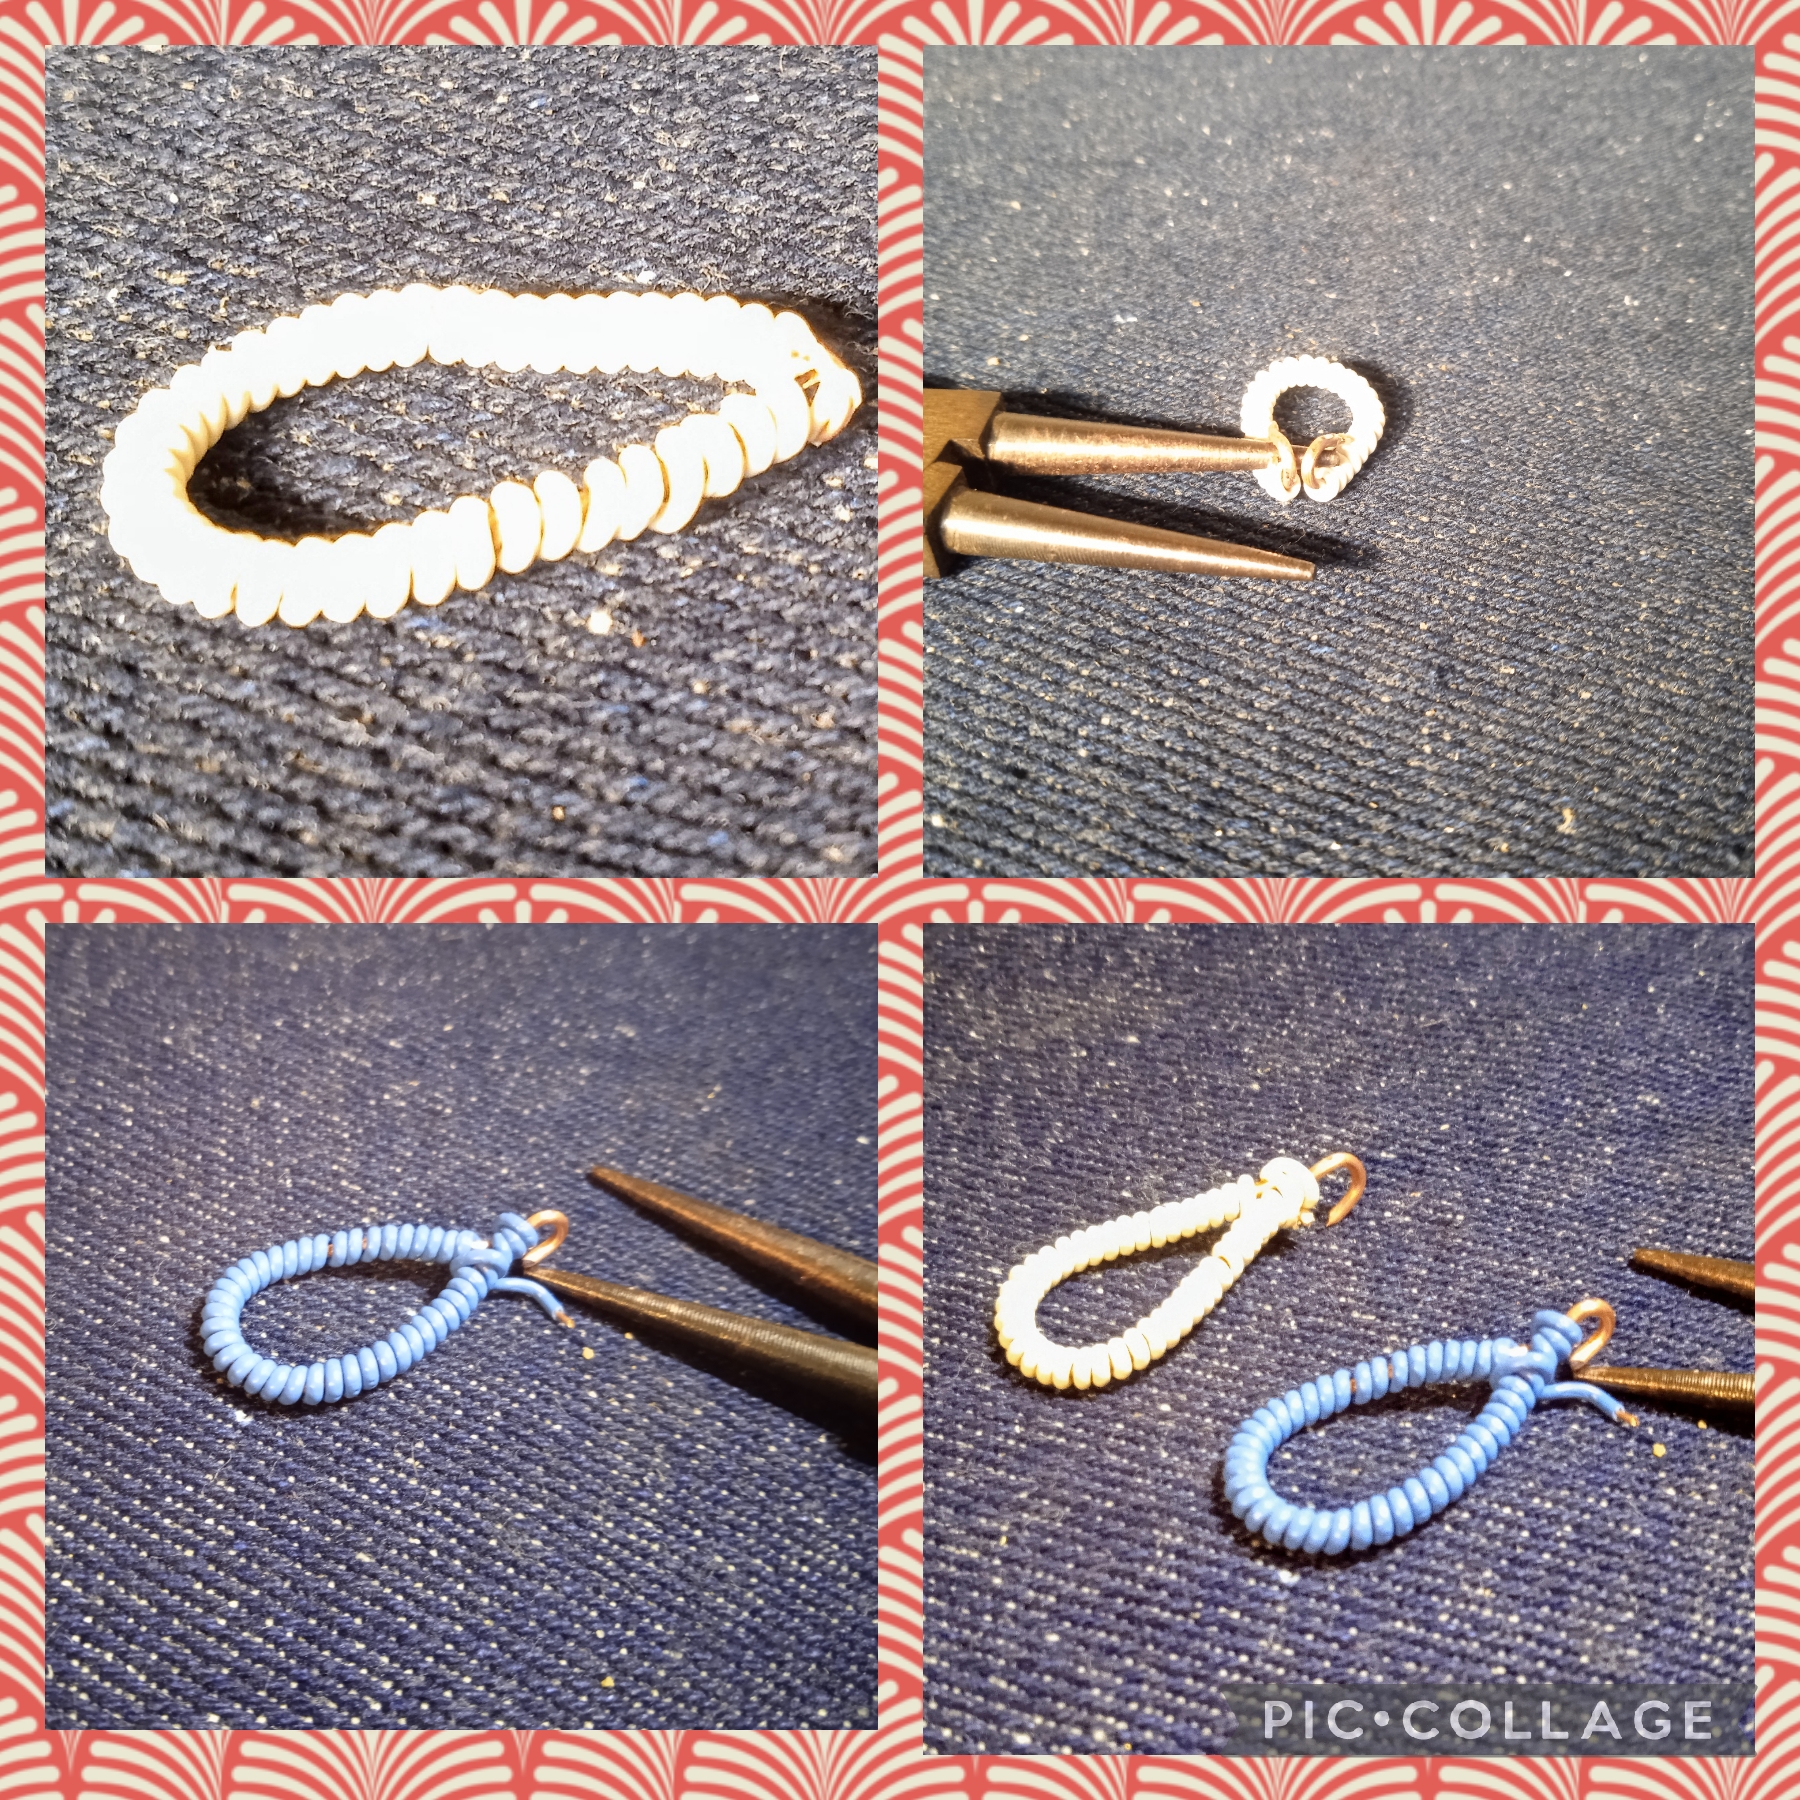
SEGUNDO PASO:
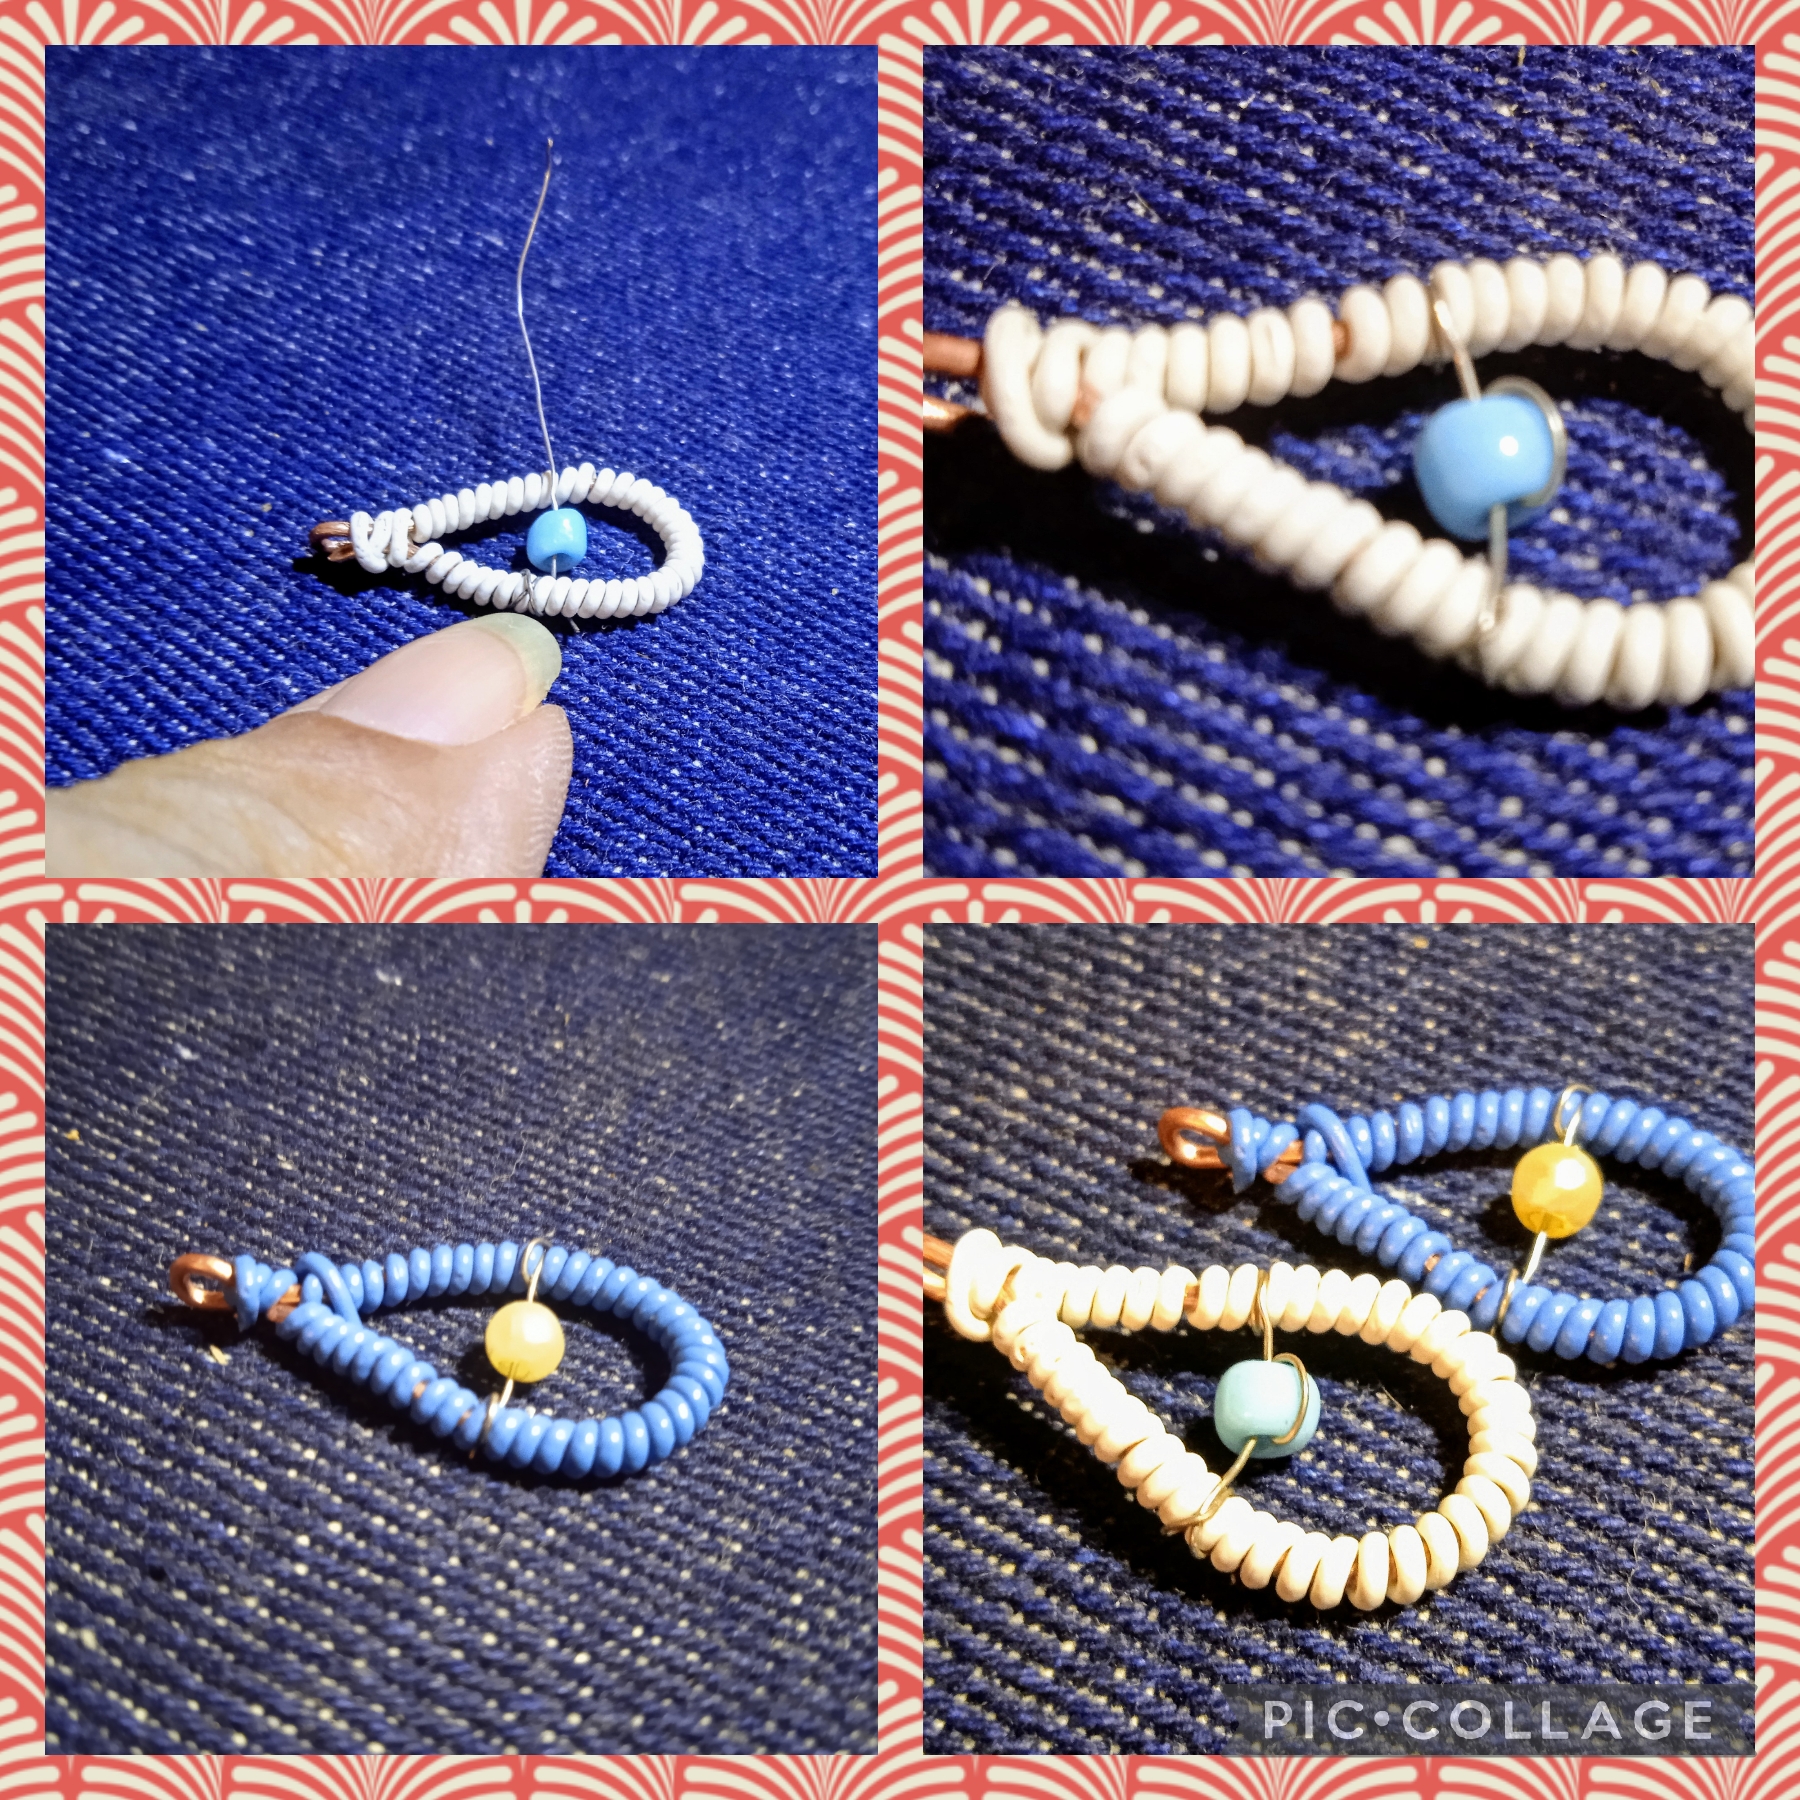
En este paso uso de nuevo la regla y mido trozos de seis centímetros, de los alambres entorchados tanto del azul como del blanco, uso la pinza de punta redonda y con las manos voy moldeando en forma de gota, dejando medio centímetro más largo de un lado sin entorchar para elaborar una pequeña argolla así como muestra la imagen.
SECOND STEP:
In this step I use the ruler again and measure six-centimeter pieces of the twisted wires, both blue and white, I use the round-tipped pliers and with my hands I shape them into a drop shape, leaving half a centimeter longer than a unwound side to make a small ring as shown in the image.
TERCER PASO:
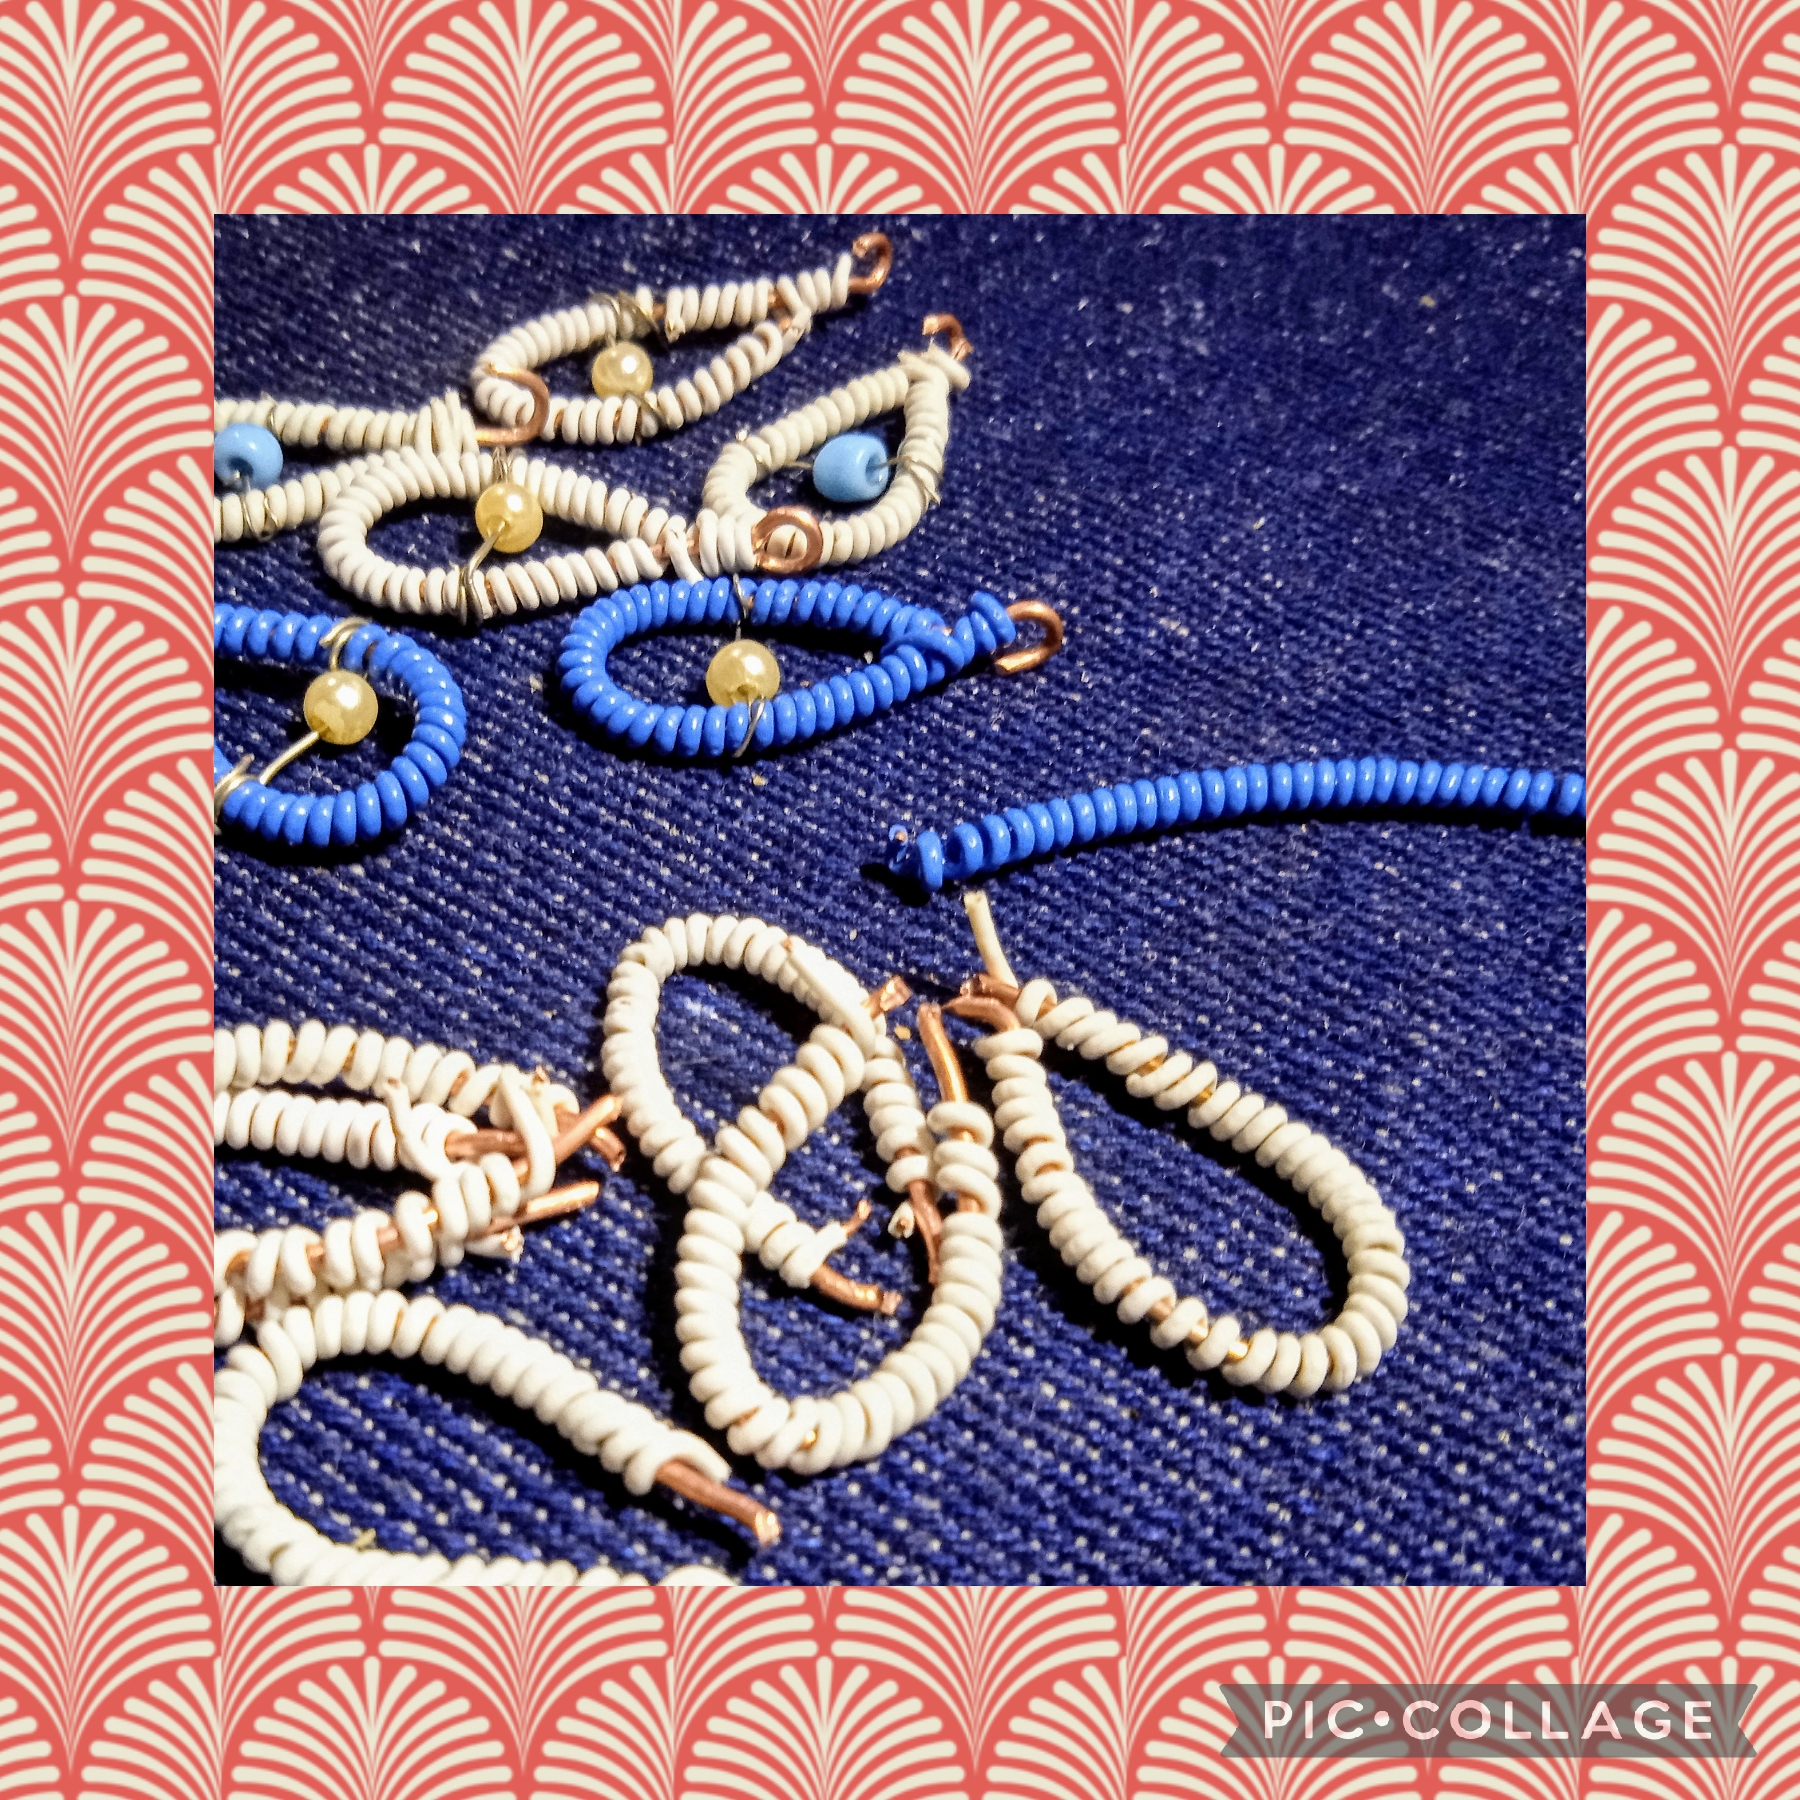
En este paso después de elaborar diez gotas blancas y dos gotas azules, tomo las gotas azules y en un hilo de alambre inserto una perlita blanca y la pongo en el centro de la gota con un entorchado suave, cortando el alambre y escondiendo la punta, hago lo mismo con cuatro de las gotas blancas pero aquí pongo dos mostacillones azules y dos perlitas blancas , dejo seis gotas blancas sin adornar para elaborar una flor.
THIRD STEP:
In this step, after making ten white drops and two blue drops, I take the blue drops and insert a white bead into a wire thread and put it in the center of the drop with a soft twist, cutting the wire and hiding the tip, I do the same with four of the white drops but here I put two blue beads and two white pearls, I leave six white drops unadorned to make a flower.
CUARTO PASO:
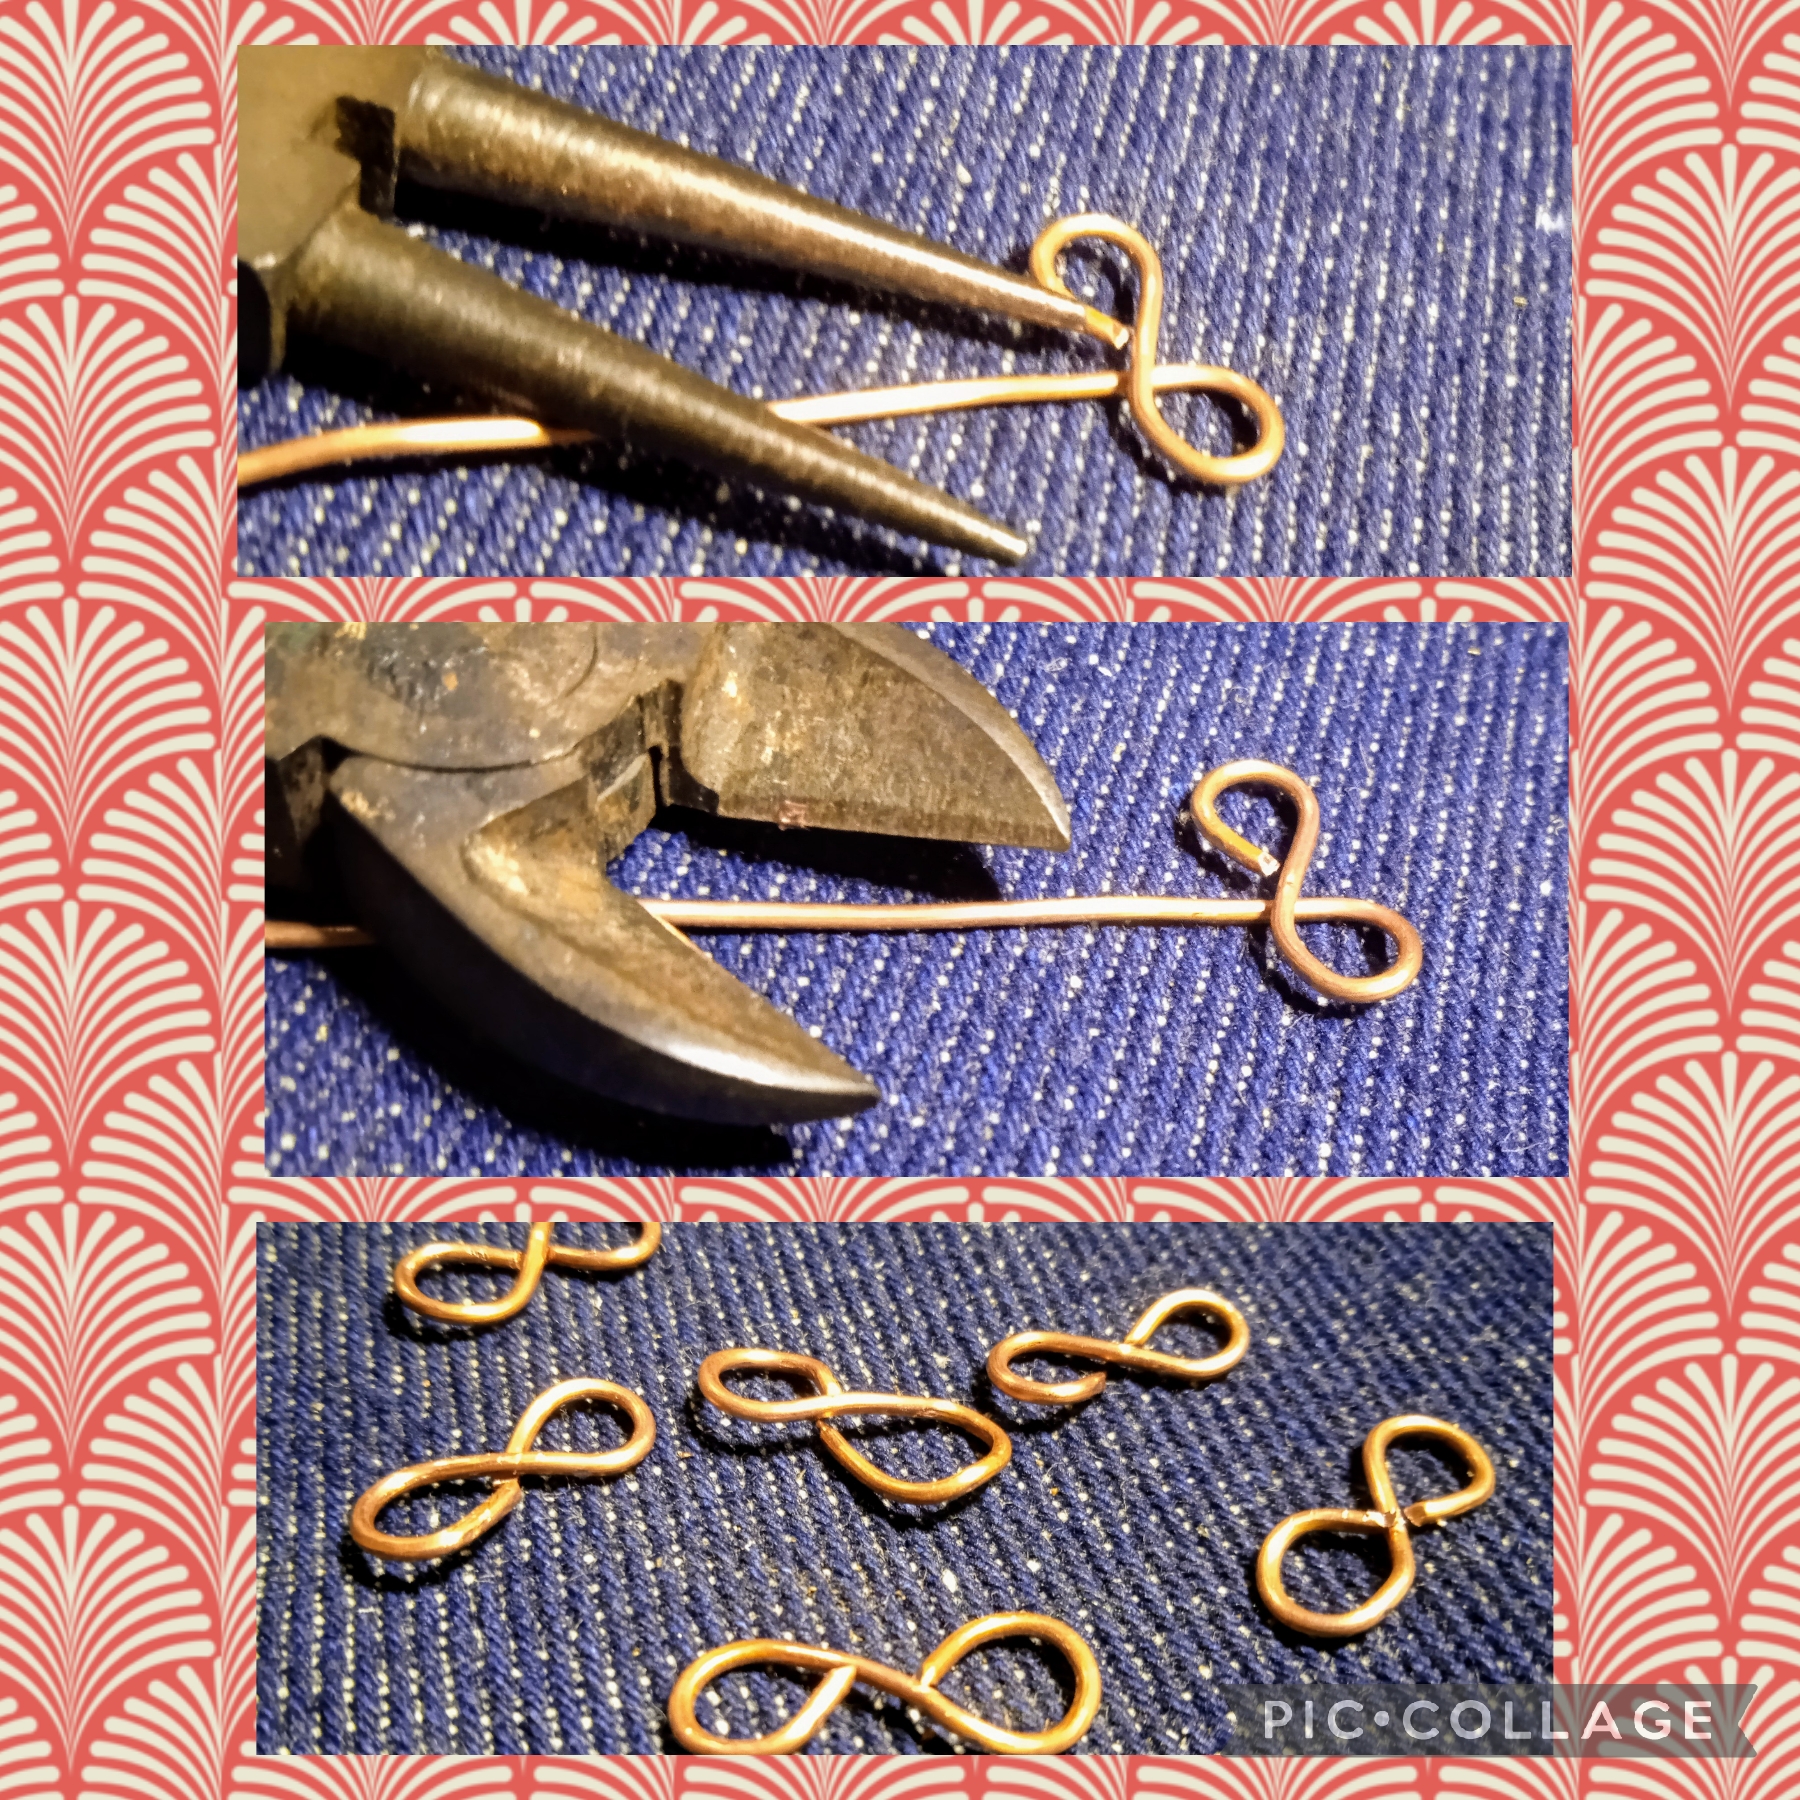
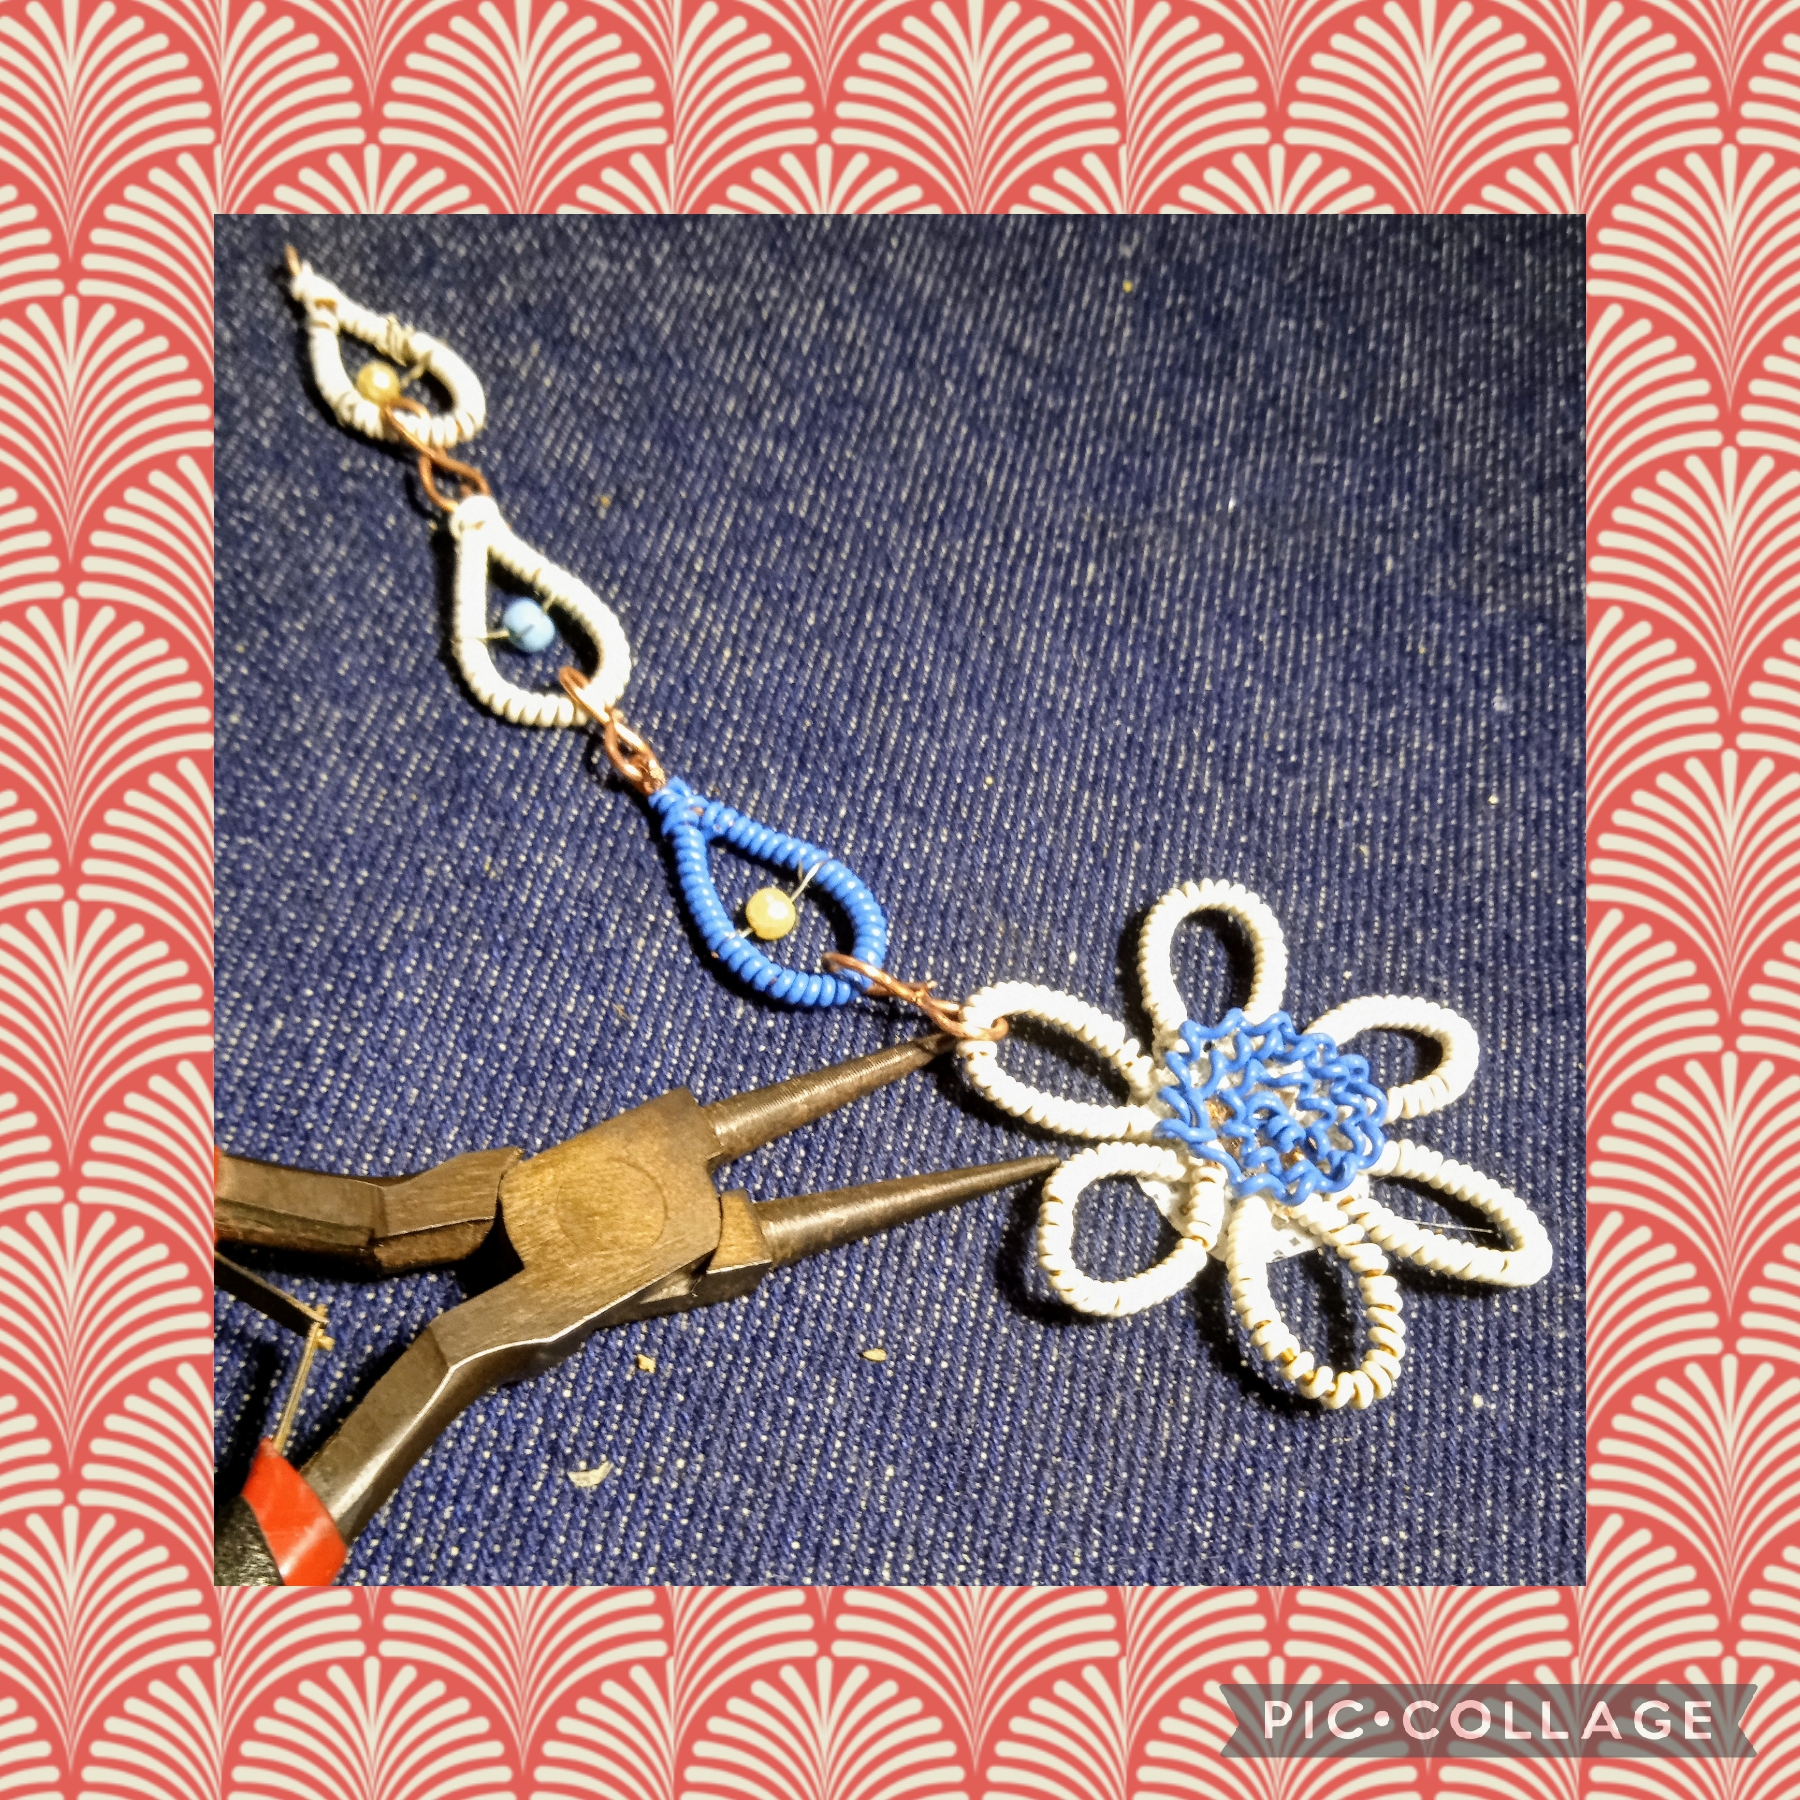
Ahora en este paso voy a elaborar unos separadores para engarzar las gotas y así formar los eslabones del collar así como en las imágenes.
FOURTH STEP:
Now in this step I am going to make some spacers to crimp the drops and thus form the links of the necklace as in the images.
QUINTO PASO:
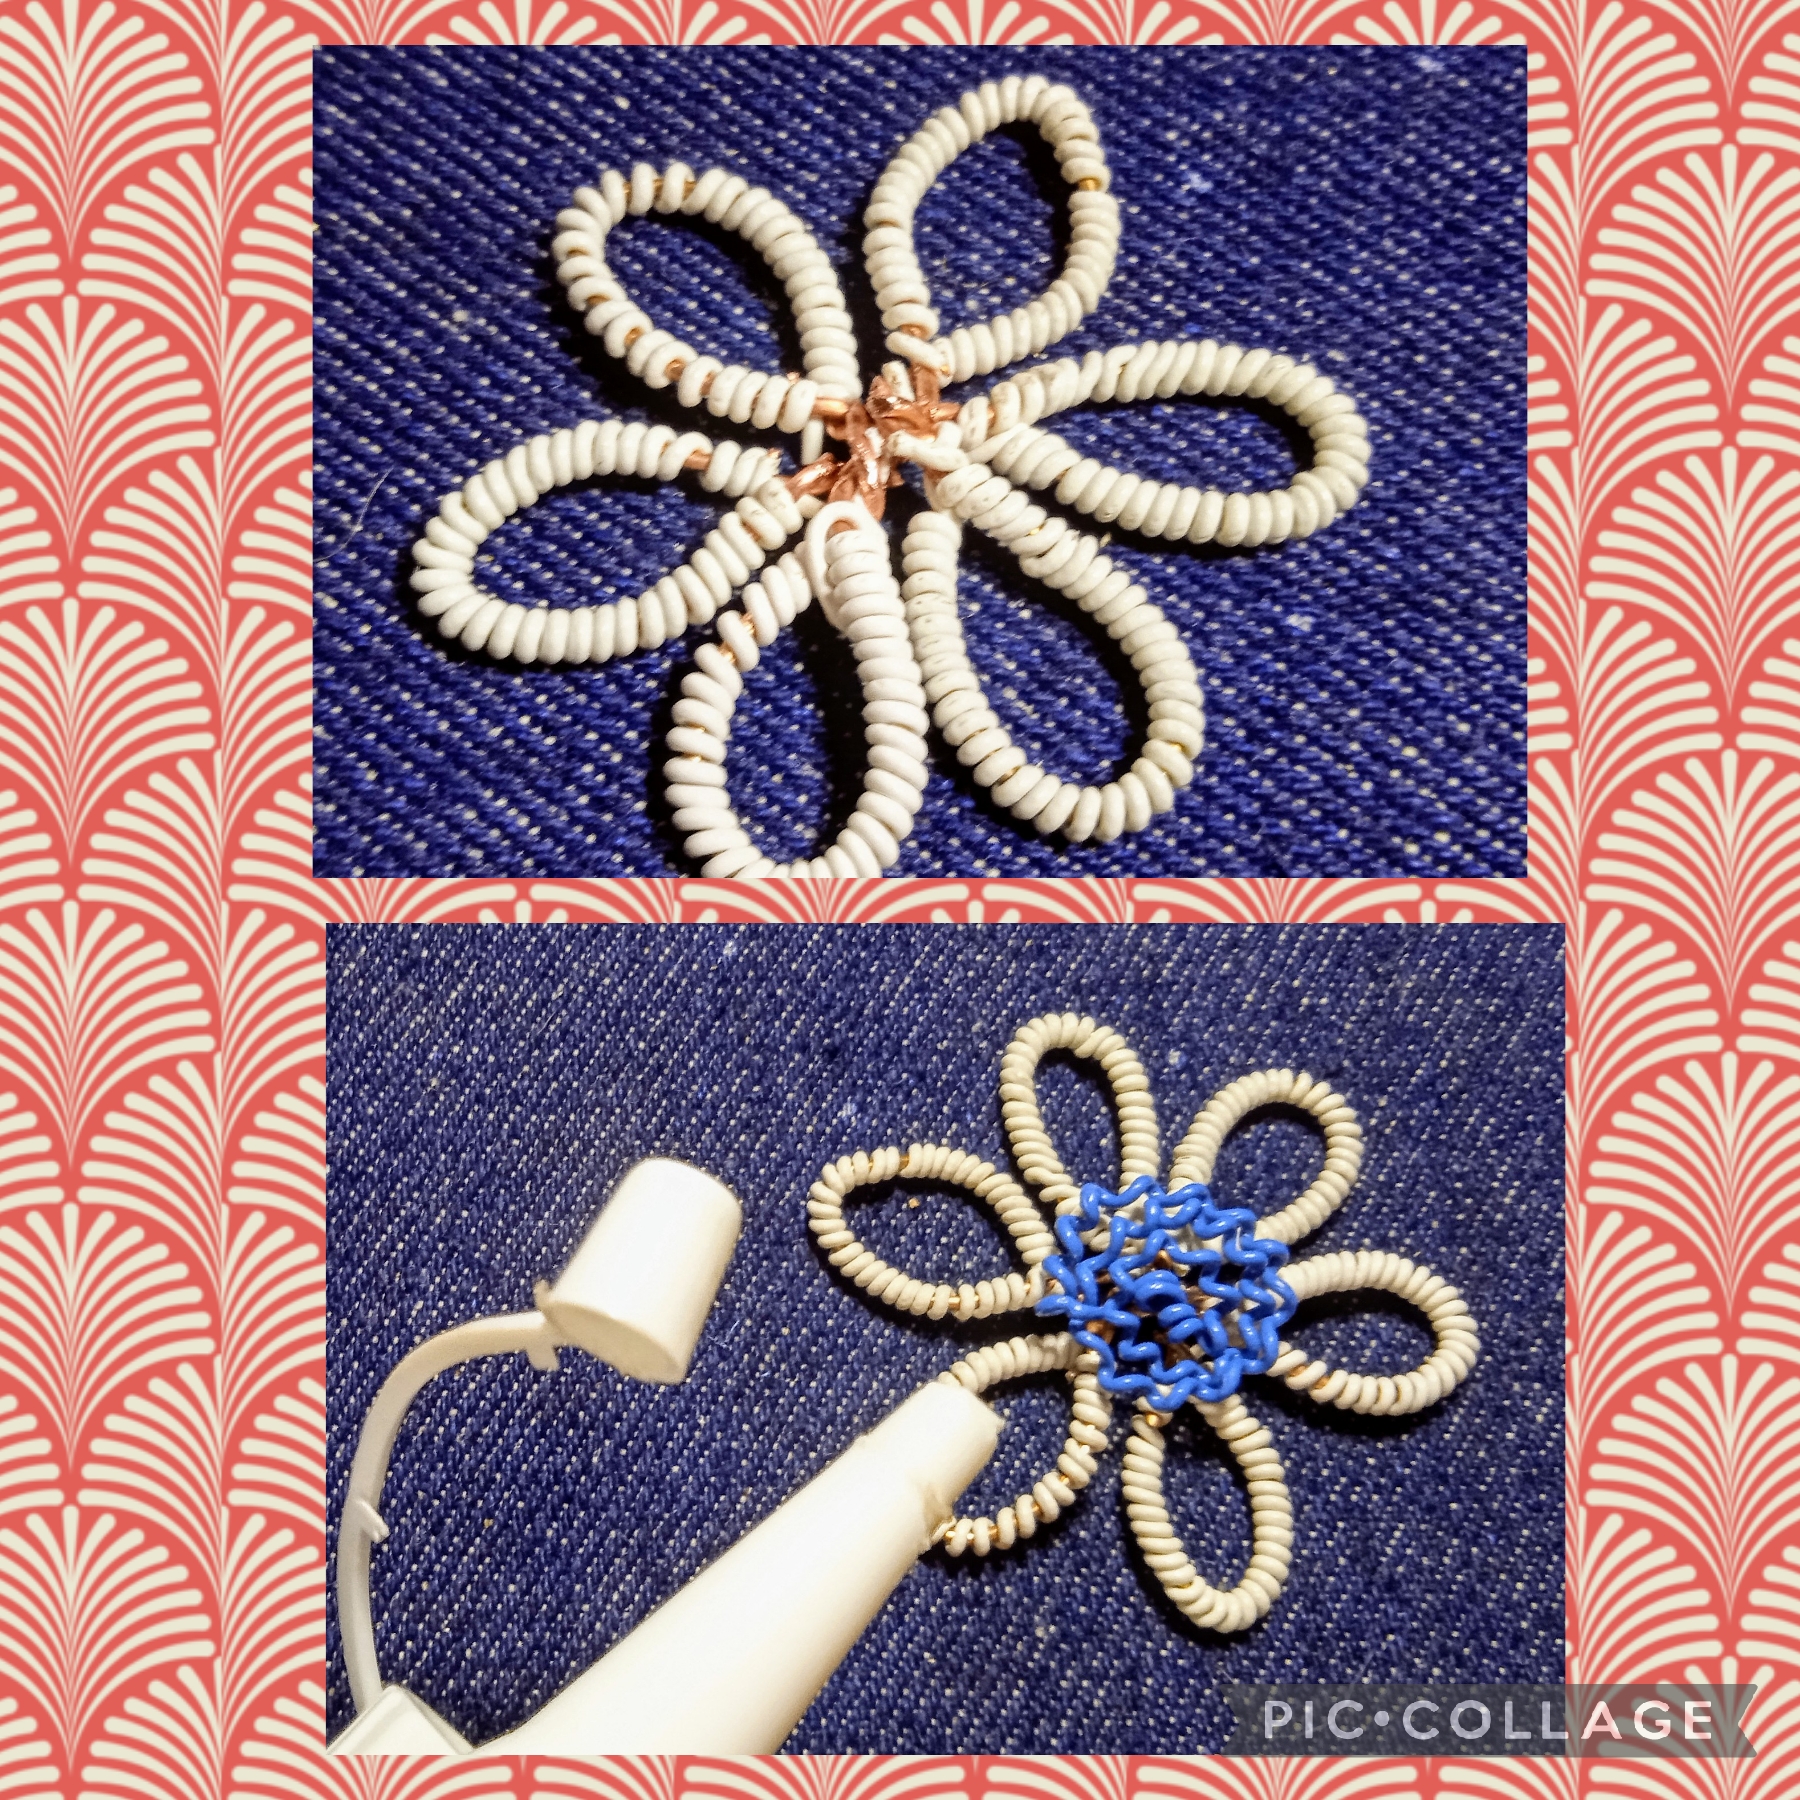
Aquí voy a formar una florecita, el centro de la flor de seis gotas blancas que seran los petalos.
Tomo seis centímetros del alambre azul y lo entorcho en forma de espiral, luego lo estiro un poco para hacer diez centímetros, ahora con las manos lo voy moldeando hasta formar la florecita que muestra la imágen , coloco las seis gotas blancas en forma de flor y usando el silicón frío pongo la florecita azul en el centro así:
FIFTH STEP:
Here I am going to form a little flower, the center of the flower with six white drops that will be the petals.
I take six centimeters of the blue wire and twist it into a spiral shape, then I stretch it a little to make ten centimeters, now with my hands I shape it until it forms the little flower shown in the image, I place the six white drops in the shape of a flower and Using the cold silicone I put the little blue flower in the center like this:
SEXTO PASO:
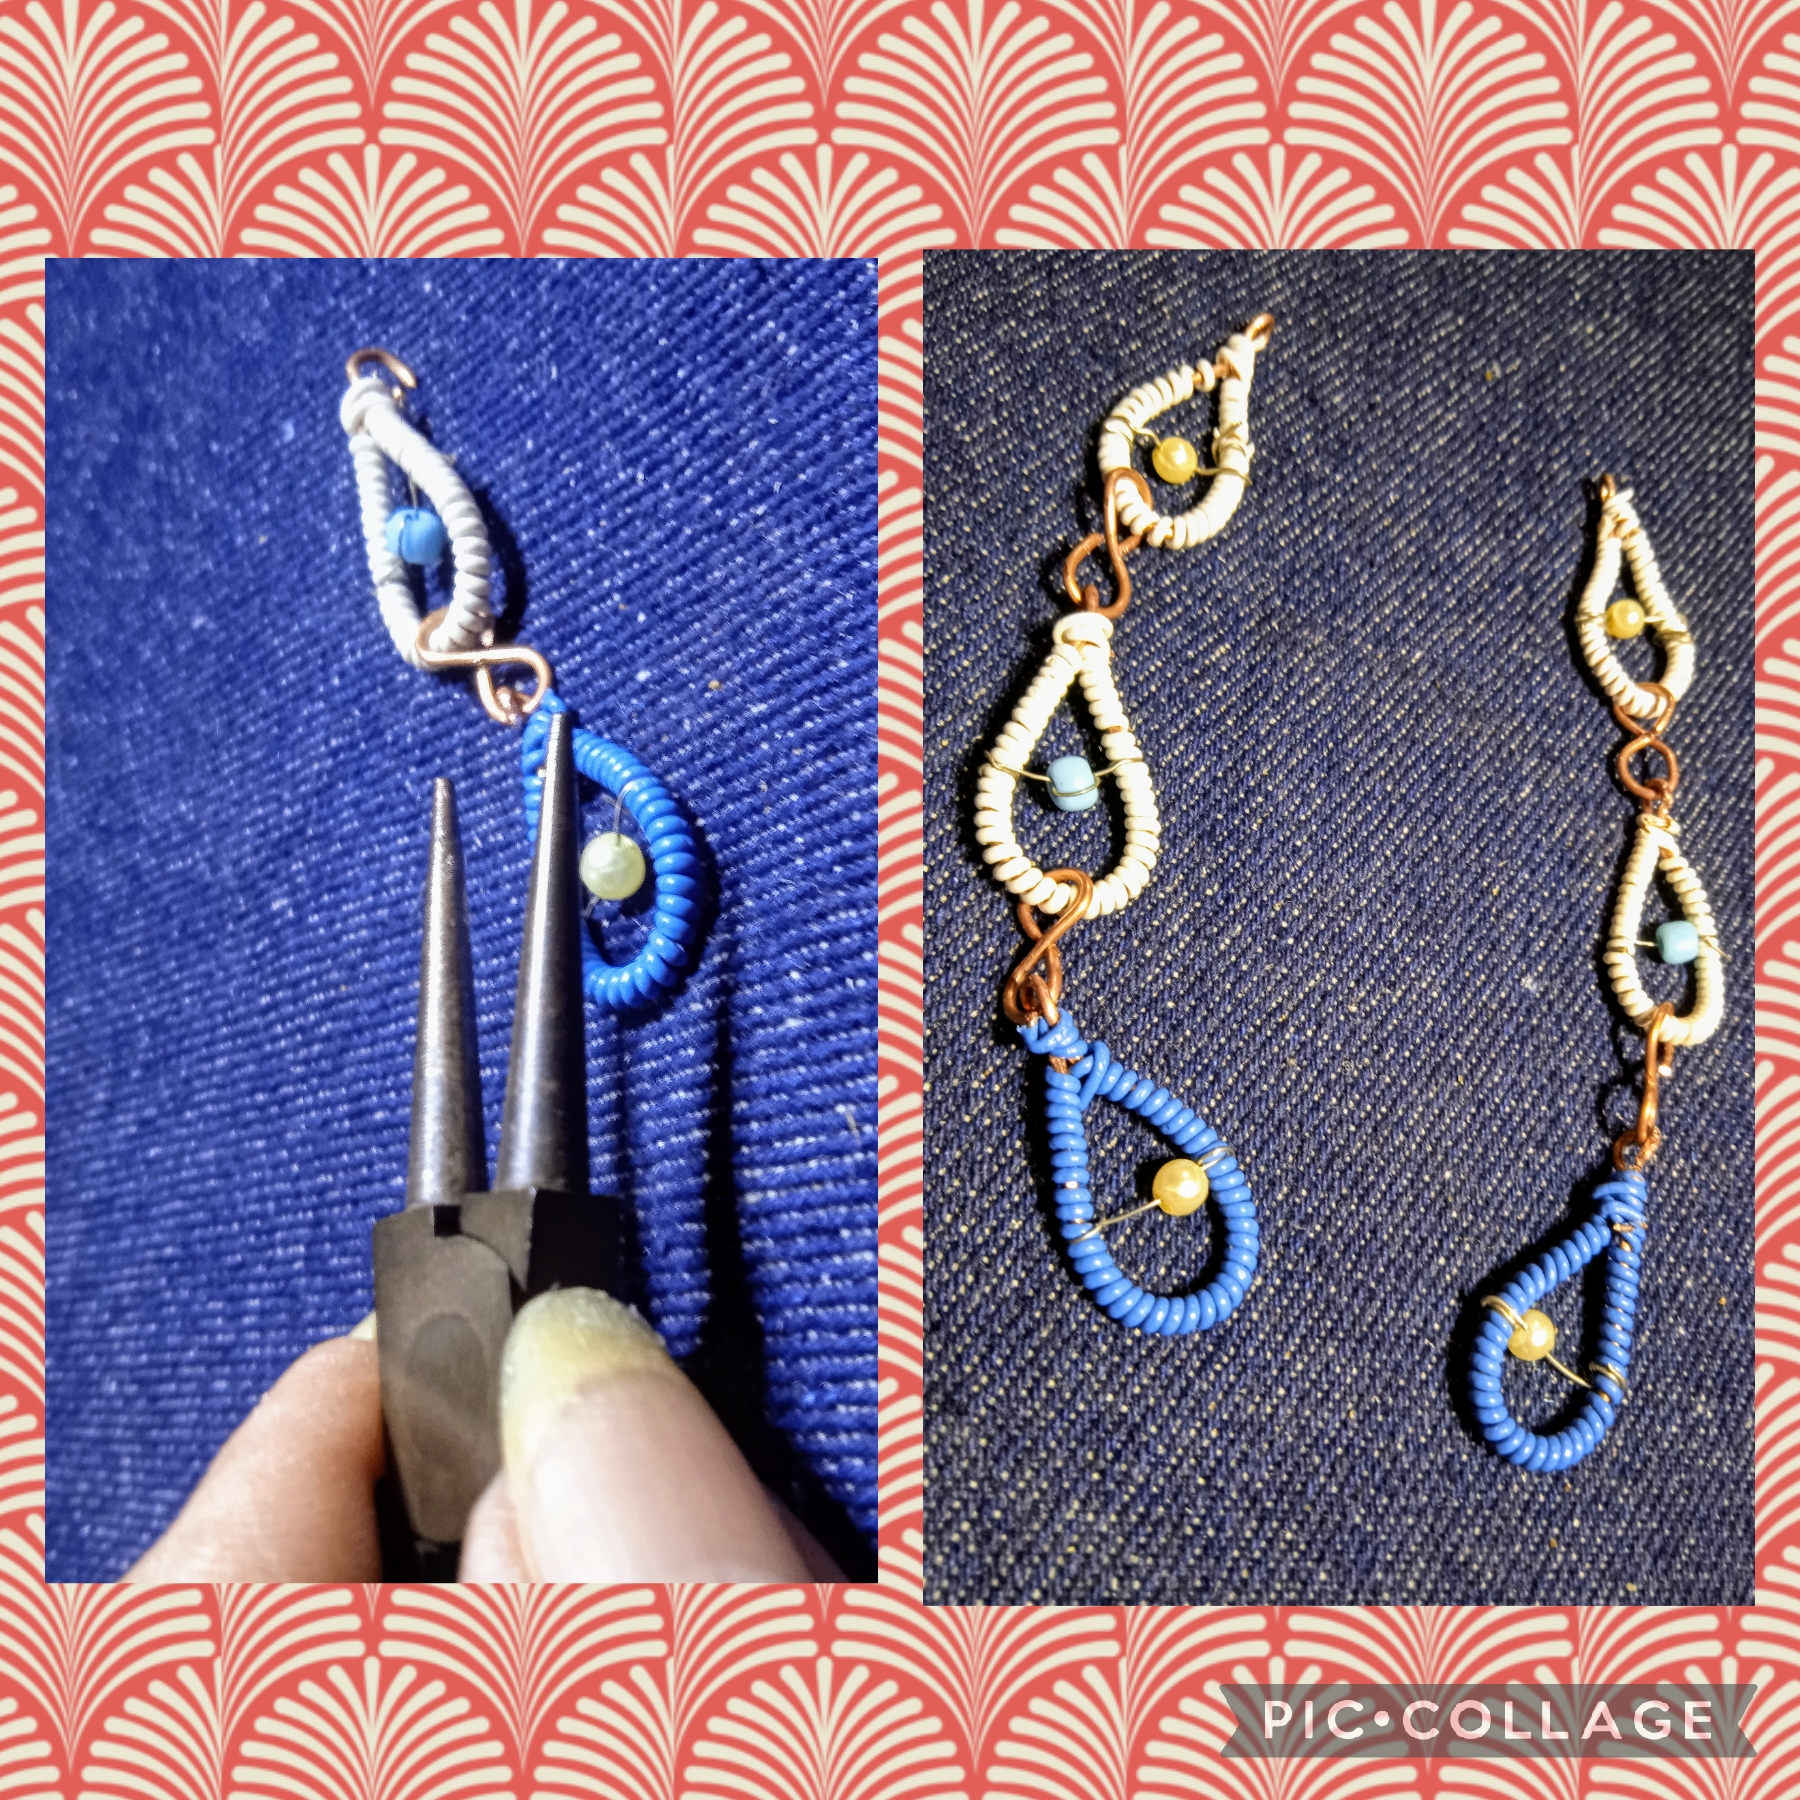
En este paso me ayudo con las pinzas y coloco los eslabones de tres gotas a cada lado de la flor, luego pongo una cadenita de extensión y así queda.
SIXTH STEP:
In this step I help myself with the tweezers and place the three-drop links on each side of the flower, then I put an extension chain and that's how it looks.
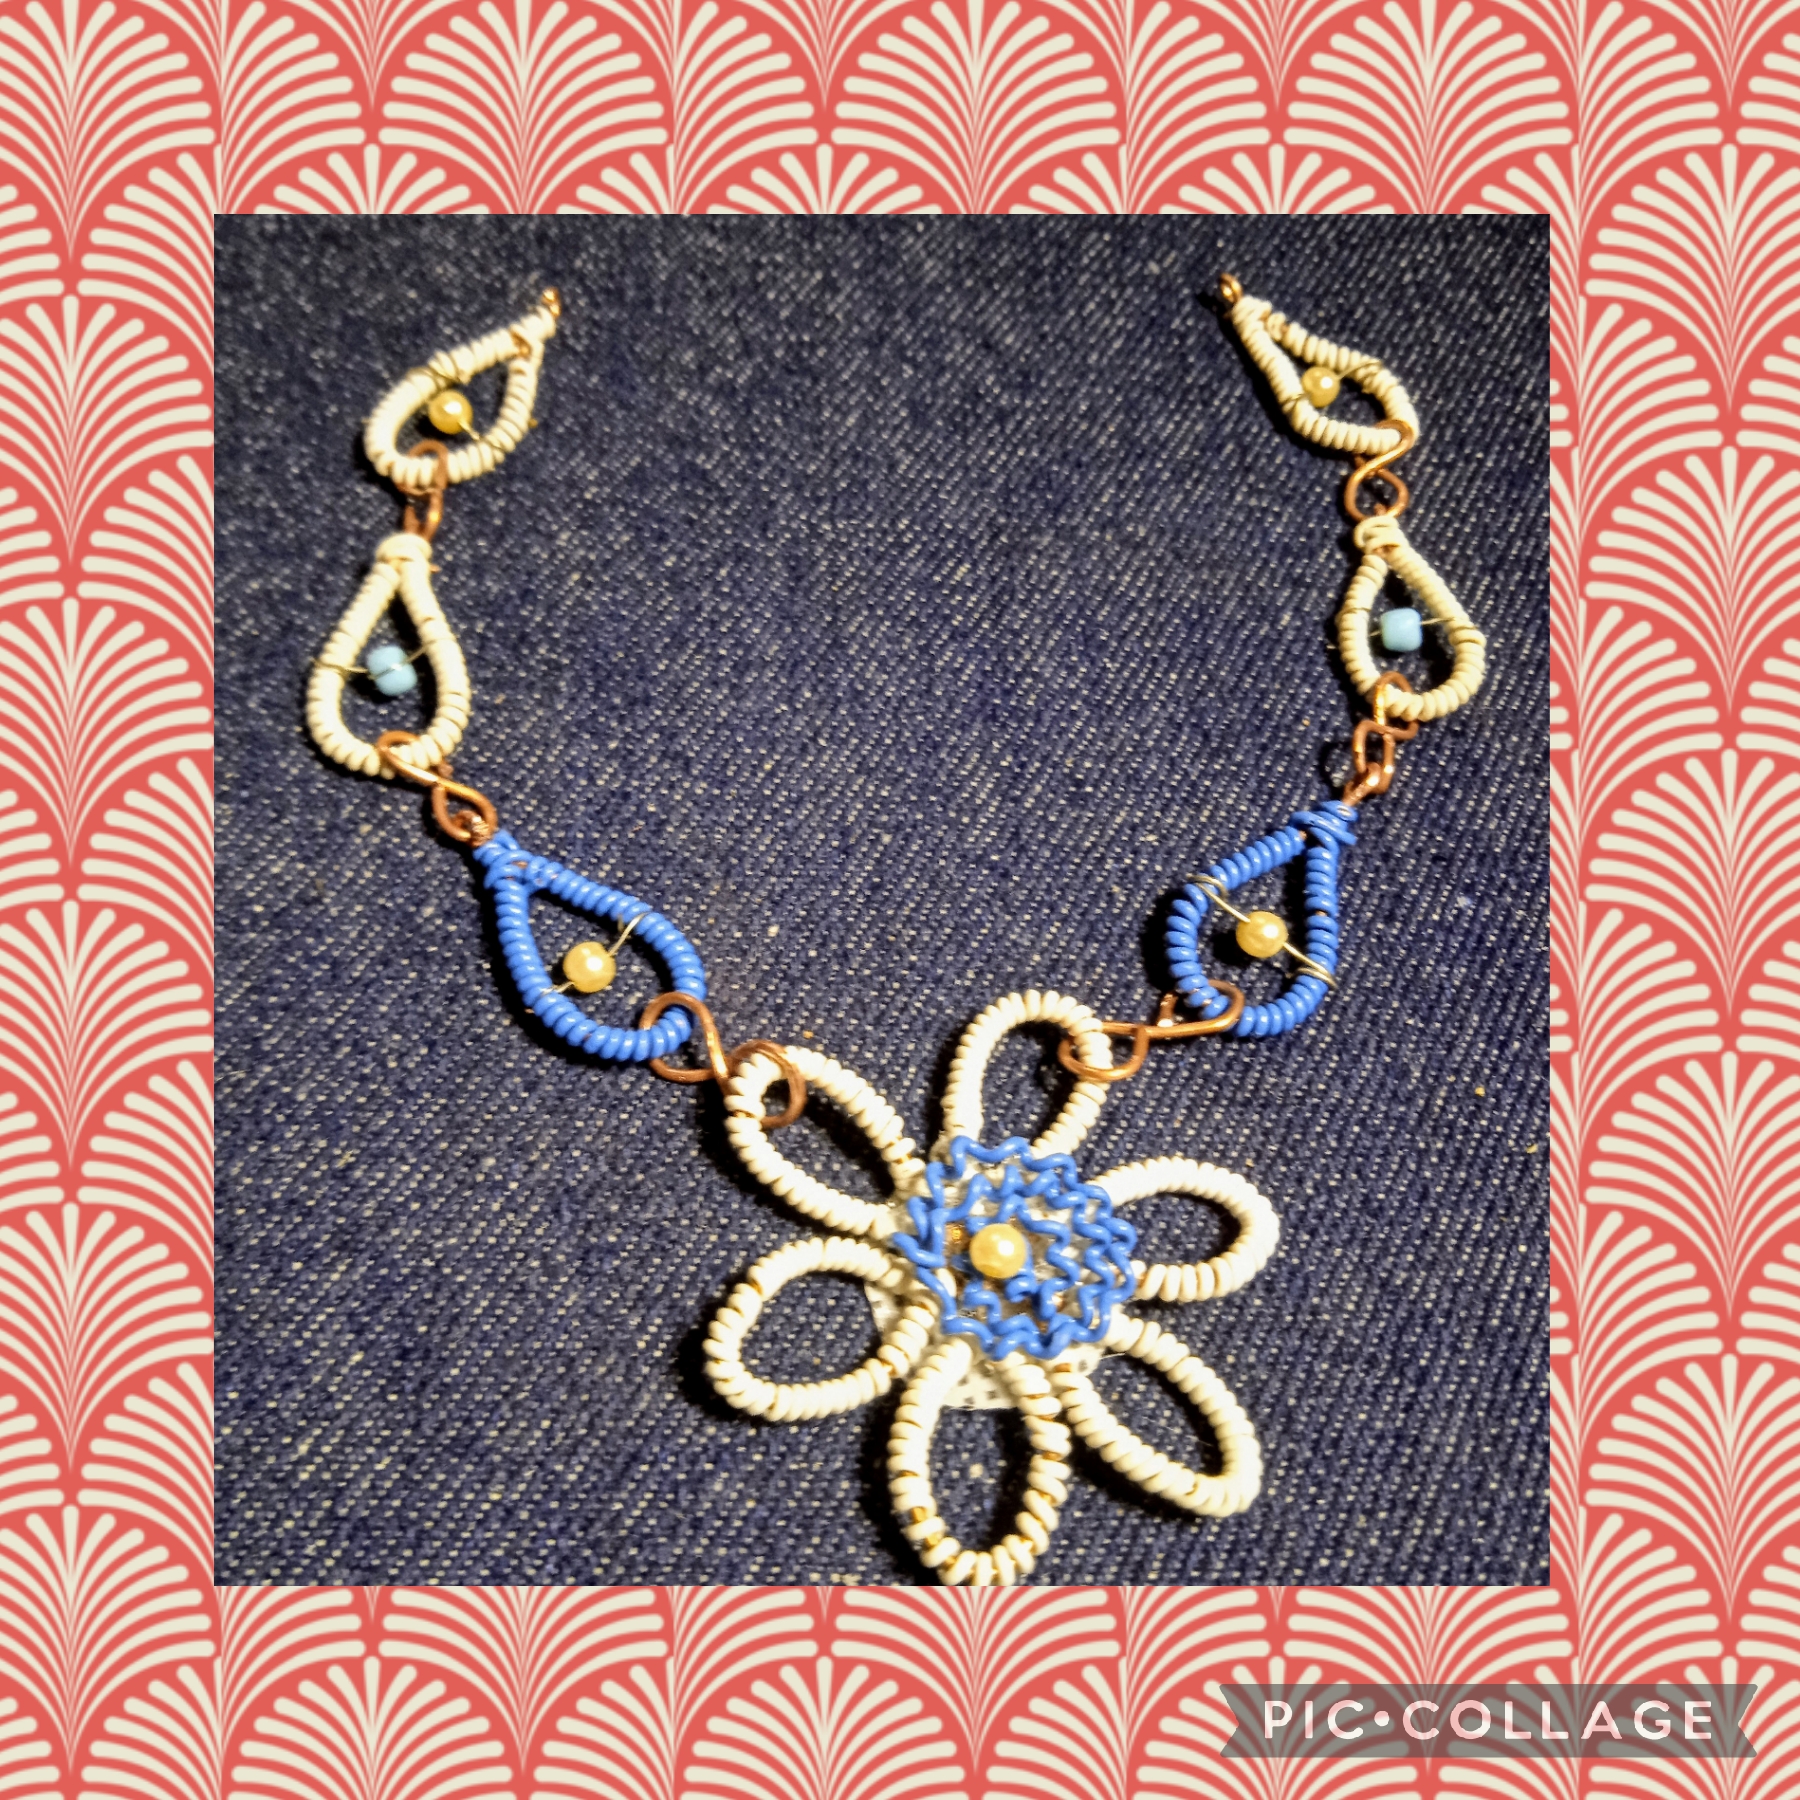
Artistas Creadores de las Manualidades y la Joyería este es el resultado final de mi manualidad creativa de este día, espero que les guste y me dejen sus valiosos comentarios sobre este proyecto, a mi me gustó mucho me sirvio para explicar como realizar resortes y cubrir los alambres con entorchados sencillos.
Les agradezco a todos los que me leen y visitan mi blog para ver mis publicaciones, que pasen una feliz Semana Santa y nos vemos en la próxima manualidad, bye bye.
Artists Creators of Crafts and Jewelry, this is the final result of my creative craft today, I hope you like it and leave me your valuable comments about this project, I really liked it, it helped me to explain how to make springs and cover the wires with simple twists.
I thank everyone who reads me and visits my blog to see my posts, have a happy Easter and see you in the next craft, bye bye.
Las imágenes y redacción de este tutorial son de mi propiedad, las fotos fueron tomadas con mi teléfono celular redmi 9 y las edité con una aplicación gratis del mismo.
Para traducir texto use Google traductor.
The images and writing in this tutorial are my property, the photos were taken with my Redmi 9 cell phone and I edited them with a free application.
To translate text use Google translator.

Que bonito te quedó este collar, muy buen trabajo ☺️
Muchas gracias @marile21, saluditos 🌹
that looks so beautiful, you are amazing. have a great day and week ahead,
Thank you very much diyhub, I am very happy with such a flattering comment,🤗
WOW, está bellísimo, me encanta el diseño de este collar 👍
Saluditos @andreamtovar, muchas gracias que pases una estupenda Semana Mayor.🌹
Se ve muy bonito amiga, muy creativa tu idea, saludos
Gracias amiguita un gran abrazo;🌹
I enjoyed yesterday palm Sunday. Come think of the coiling those materials for the middle of the earring, so artistic. Nobody would believe this were joined with wire.
Disfruté ayer domingo de palma. Ven a pensar en la bobina de esos materiales para el centro de la pendiente, tan artístico. Nadie creería que esto se unieron con alambre.
Muchísimas gracias y las mejores bendiciones para ti 🤗
Es bastante creativo. Y si, guarda total relación con la temática del agua. Has hecho un precioso y delicado accesorio y al contemplarlo podemos apreciar lo que nos deseas transmitir con tu creación.
Hermoso.
Un saludo cariñoso para ti @artsugar, me encanta recibir ese comentario tan gentil para mí creación, que pases una semana de diversión y las mejores bendiciones, 🤗
oYE te quedó hermoso me encanta felicitaciones.
Gracias amiguita 🤗
Que lindo collar, me gustó la combinación de colores, va muy bien con el tema del agua.
Saludos!
Muchísimas gracias @evelin71 aprecio mucho tu comentario 😊