Hola buenas noches amigos , Dios les bendiga, saludos para todos , espero de corazón que hayan pasado un increíble fin de semana , hoy les quiero compartir un cintillo que le realicé a mi nieta con dos tonos que muy poco lo combinan pero que son hermosos como el rojo con amarillo, utilizando como diseño principal mariposa doble tipo 3D con tan sólo simples pasos a continuación les mostraré los materiales qué utilice y pasos que realicé
Hello good evening friends, God bless you, greetings to all, I hope you have had an incredible weekend, today I want to share with you a headband that I made for my granddaughter with two tones that combine very little but are beautiful as red with yellow, using as main design double butterfly 3D type with just simple steps below I will show you the materials I used and steps I performed

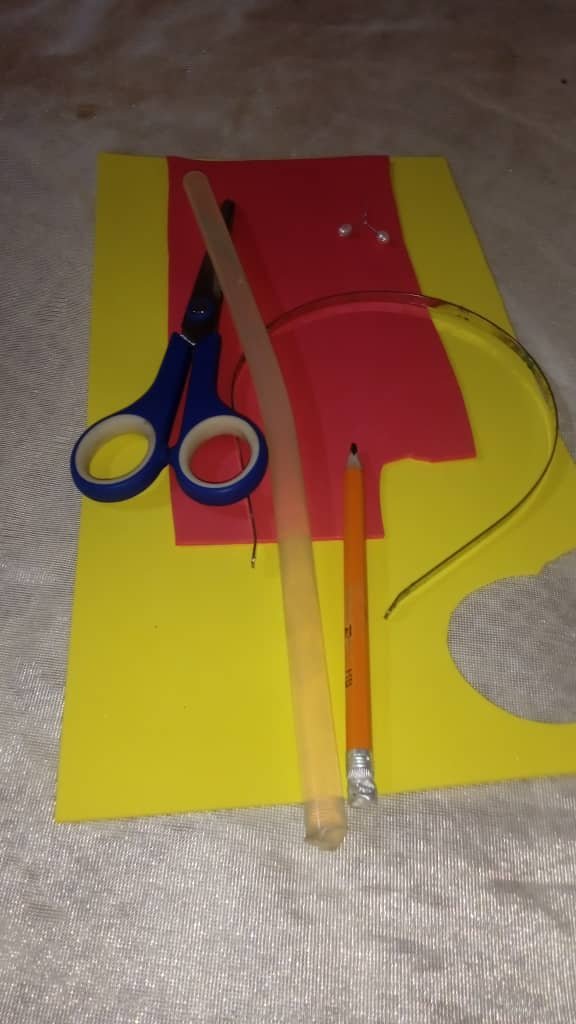
Materiales para crear un cintillo mariposa tipo 3D:
-Cintillo
-Foamis
-Silicon
-Tijera
-Lapiz
Materials to create a 3D butterfly headband:
-Beadband
-Foamis
-Silicon
-Scissors
-Pencil
Pasos que realizar :
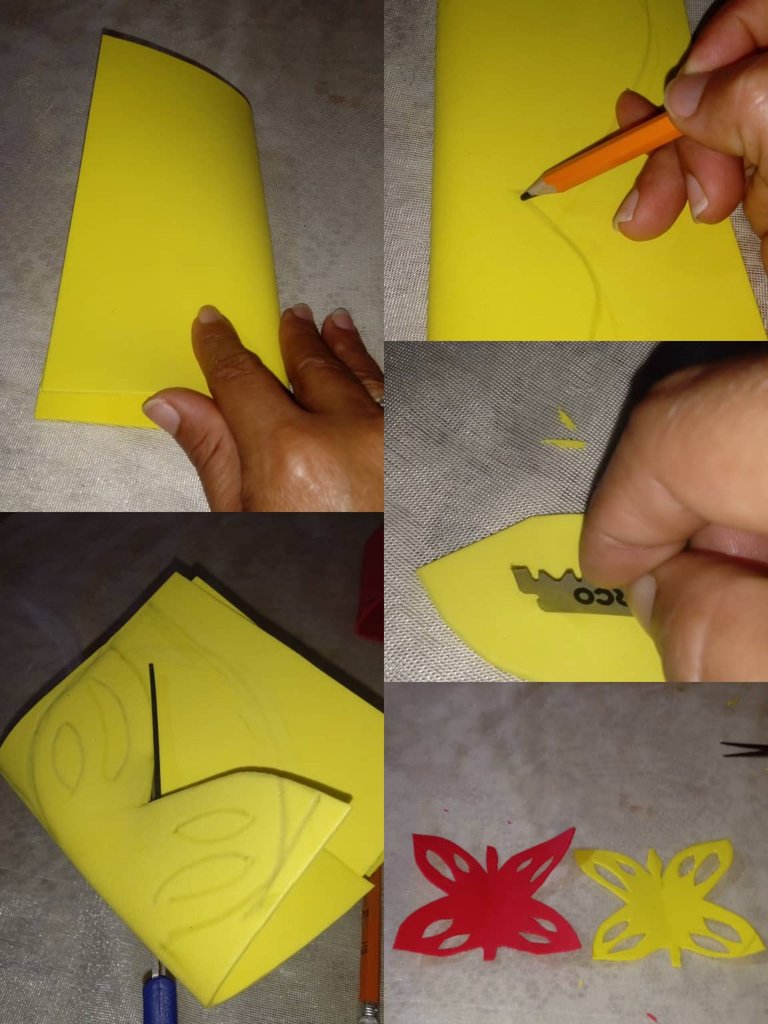
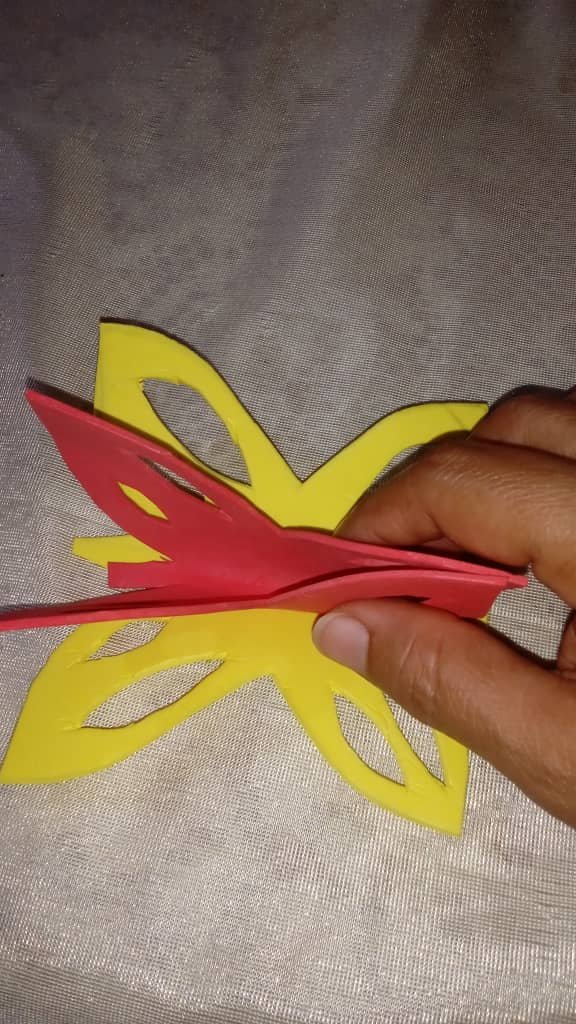
Paso 1: comenzamos realizando la temática principal de nuestro cintillo la cuál es una mariposa doble tipo 3D , la forma a realizar es muy sencilla, comenzamos tomando un cuadro de foamis del tamaño de nuestra preferencia, dicho cuadro Io vamos a doblar en dos y sujetar con nuestra mano mientras realizamos el diseño de nuestra mariposa en un lado , únicamente dos alas ya que al abrir quedarán las cuatro, luego vamos a continuar recortando nuestro diseño de mariposa con la ayuda de nuestra tijera, con la ayuda de una hojilla vamos a continuar recortando el diseño de las alas de la mariposa, finalizando así nuestras mariposas, los mismos pasos que realizamos para hacer la mariposa amarilla serán los mismos de la mariposa roja como pueden apreciar
Steps to perform :
Step 1: we start by making the main theme of our headband which is a double 3D butterfly, the way to do it is very simple, we start by taking a foamis square of the size of our preference, this square we are going to fold it in two and hold it with our hand while we make the design of our butterfly on one side, only two wings because when we open it will be the four, then we will continue cutting our butterfly design with the help of our scissors, with the help of a blade we will continue cutting the design of the wings of the butterfly, thus finalizing our butterflies, the same steps we did to make the yellow butterfly will be the same as the red butterfly as you can see.
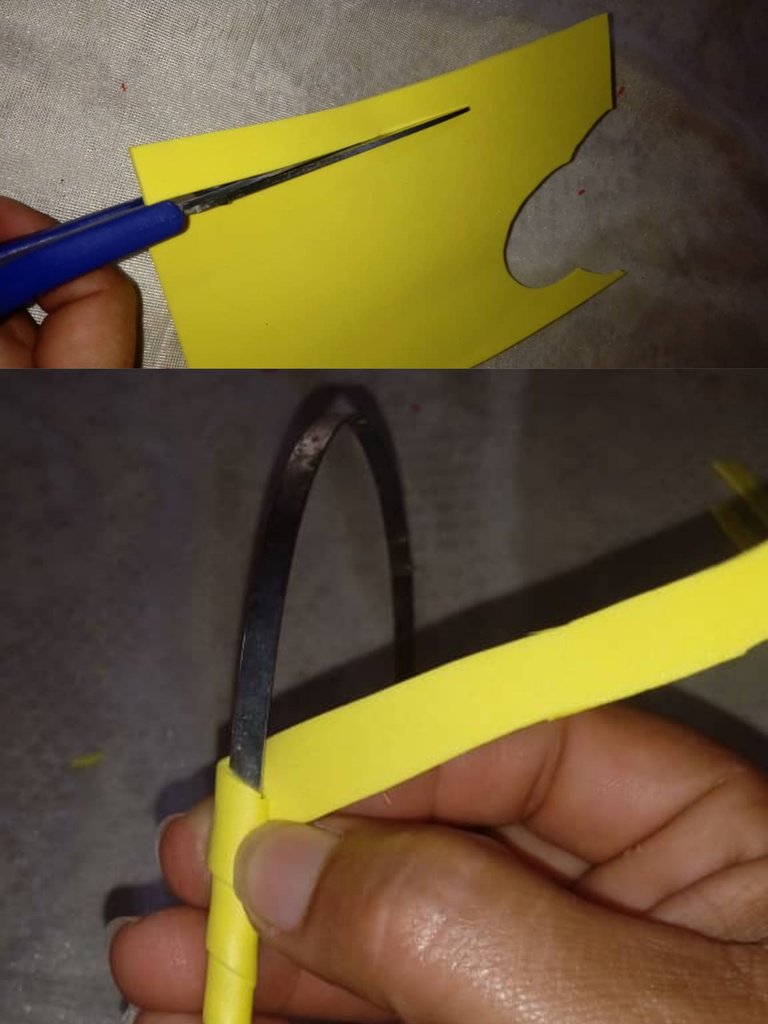
Paso 2: seguidamente vamos a continuar cubriendo el cintillo, recortamos una tira de foamis y comenzamos a enrollar hasta cubrir el cintillo como pueden detallar en la fotografía
Step 2: next we will continue covering the headband, we cut a strip of foamis and begin to roll up to cover the headband as you can see in the picture.
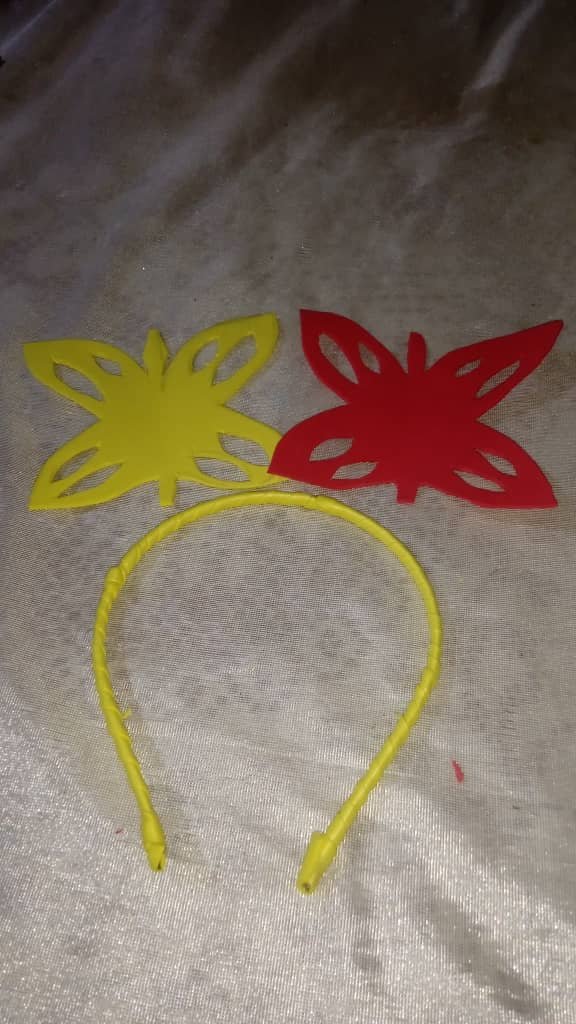
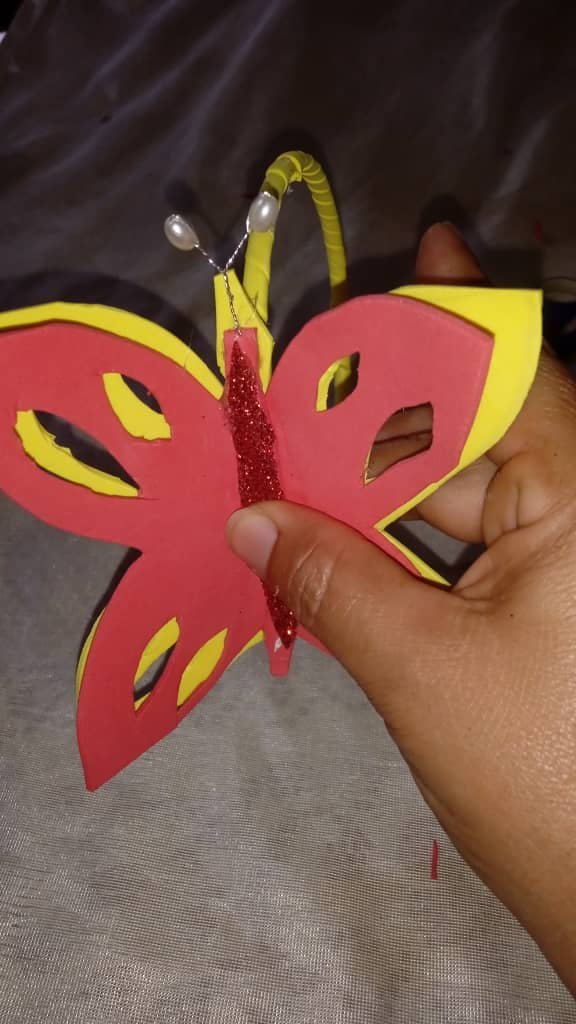
Paso 3: de esta manera quedará nuestro cintillo y las dos mariposas que en realidad formarán una tipo 3D como les mencioné al principio
Step 3: this way our headband and the two butterflies will form a 3D type as I mentioned at the beginning.
Paso 4: a continuación en el cuarto paso vamos a tomar ambas mariposas y las pegaremos , agregamos silicón a la mariposa roja , sosteniendo las dos alas juntas y pegamos , de modo que está va a quedar pegada semi levantada lo que haga el diseño 3D
Step 4: next in the fourth step we are going to take both butterflies and glue them, add silicone to the red butterfly, holding the two wings together and glue, so that it will be glued semi raised which makes the 3D design.
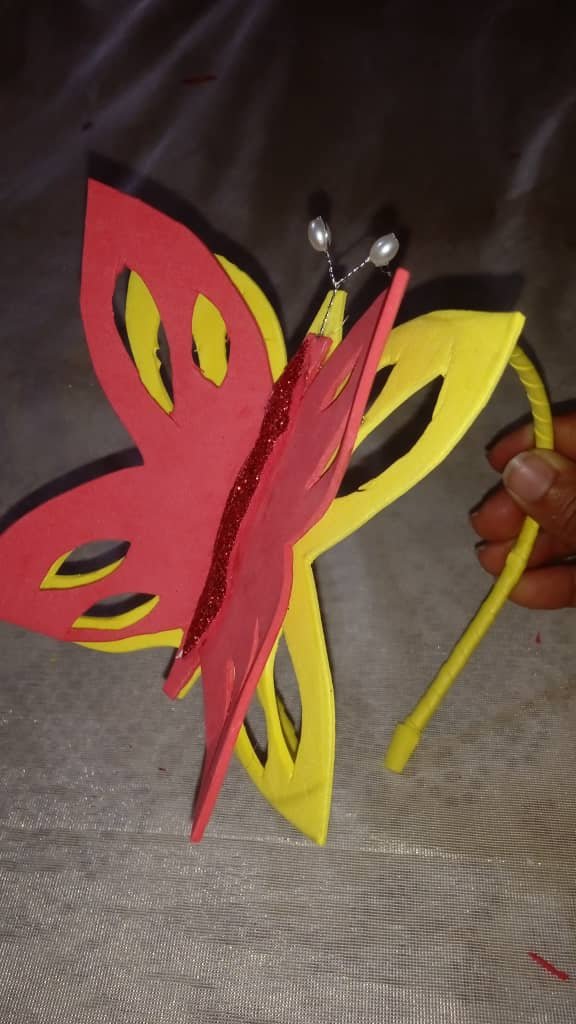
Paso 5: cuando hayamos pegado nuestra mariposa y nuestro Cintillo se encuentre listo , vamos a pegar en una esquina culminando así nuestro accesorio para las pequeñas de la casa
Step 5: when we have glued our butterfly and our headband is ready, we are going to glue in a corner thus culminating our accessory for the little ones of the house.
Agradezco por su amable atención, espero que les guste el modelo y puedan ponerlo en práctica, lo realicé con mucho amor y dedicación para mí nieta ,hasta la próxima amigos
Thank you for your kind attention, I hope you like the model and can put it into practice, I made it with love and dedication for my granddaughter, until next time friends
This butterfly hair band is unique way of creating hairband. I love this color combination
WOW! It looks so beautiful and lovely. Your granddaughter is so cute and looks amazing wearing this. Nice work! Thanks!
Quedó muy bonito👏 @rameuris saludos y bendiciones 🙏
Que linda se ve la niña con su cintillo de mariposa ....genial
This is very cute butterfly headband.