

Es un placer para mi saludarlos nuevamente, espero que se encuentren muy bien, buen provecho para los que aún no almorzaron.
Agradecida con Dios por permitirme compartir un nuevo trabajo con ustedes, les agradezco de antemano el apoyo que me han brindado.
It is a pleasure for me to greet you again, I hope you are very well, bon appetit for those who have not yet had lunch.
Grateful to God for allowing me to share a new job with you, I thank you in advance for the support you have given me.
En esta nueva publicasion quise compartirles el paso a paso para la elaboracion de una linda pulsera pero esta vez tome la iniciativa de hacerla con un material diferente al hilo , esta vez quise utilizar alambre de cobre y pues la verdad es que el resultado me encanto. Estoy maravillada de la variedad de modelos y materiales con los que podemos crear innumerables accesorios ya sean pulseras, anillos, zarcillos entre otros . Es increible que con pocos materiales se pueda lograr hacer bellas piezas de bisuteria. Y es que cada dia me voy enamorando un poco mas de este maravilloso arte, bueno no solo de la bisuteria pues en realidad he aprendido y sigo aprendiendo de todo un poquito y es que en ocasiones anteriores hice trabajos de costura, manualidades, maquillaje y ahora la bisuteria y aunque no soy la mas experta me propuse ilustrarme un poco mas en las diversas ramas de esta gran plataforma.
In this new publication I wanted to share the step by step for the elaboration of a beautiful bracelet but this time I took the initiative to make it with a different material than thread, this time I wanted to use copper wire and the truth is that I loved the result. I am amazed at the variety of models and materials with which we can create innumerable accessories, be they bracelets, rings, earrings, among others. It is incredible that with few materials it is possible to make beautiful pieces of jewelry. And it is that every day I am falling in love a little more with this wonderful art, well not only with costume jewelery because in reality I have learned and I continue to learn a little about everything and that is that on previous occasions I did sewing, crafts, makeup and now jewelry and although I am not the most expert I decided to illustrate myself a little more in the various branches of this great platform.
Sin más, los invito a disfrutar del siguiente material.
Without further ado, I invite you to enjoy the following material.
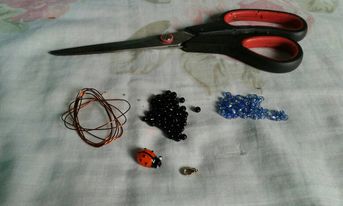
Para la elaboracion de esta pulsera necesitaras:
- Alambre de cobre.
- Mostacillas del color de tu preferencia, yo elegi negras y azules.
- Piedras decorativas.
- Trancadero de pulsera.
- Tijera.
To make this bracelet you will need:
- Copper wire.
- Beads of the color of your preference, I chose black and blue.
- Decorative stones.
- Bracelet locker.
- Scissors.
Manos a la obra:
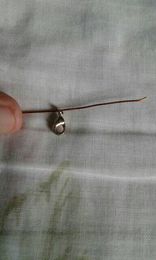
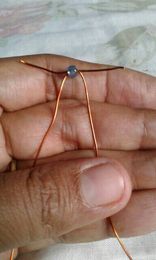
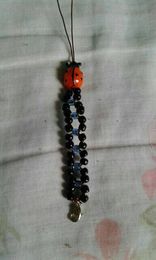
Lo primero que haras sera introducir el alambre de cobre por el agujero del trancadero de pulsera y colocarlo en el centro del alambre de cobre luego haz un nudo de manera que este no se valla a rodar. (observa las imagenes)
Let's do it:
A
The first thing you will do is introduce the copper wire through the hole in the bracelet lock and place it in the center of the copper wire, then tie a knot so that it does not roll away. (look at the images)
.jpg)
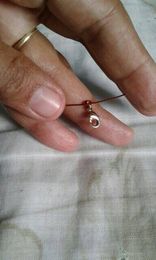
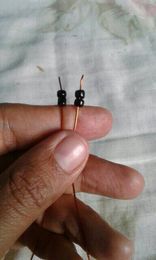
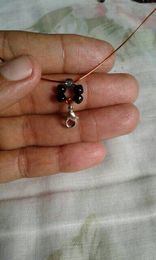
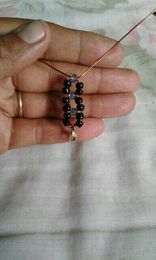
Ahora comienza la creatividad procede a introducir las mostacillas en ambos extremos del alambre empezando asi el diseño que desees realizar, yo elegi hacer especies de circulos colocando dos mostacillas a cada lado, luego de esto coloca otra mostacilla pero esta vez vas introducir ambos extremos del alambre por la misma y jala las ambas puntas asegurandote de estas no se aflojen , Luego de esto comenzara a verse de esta manera, repite el procedimiento hasta el punto que quieras colocar las piedras decorativas.(observa las imagenes).
Now the creativity begins, proceed to introduce the beads at both ends of the wire, thus starting the design you want to make, I chose to make a kind of circle by placing two beads on each side, after this, place another beads but this time you will introduce both ends of the wire by it and pull both ends making sure they do not loosen, After this it will begin to look like this, repeat the procedure until the point you want to place the decorative stones. (see the images).
.jpg)
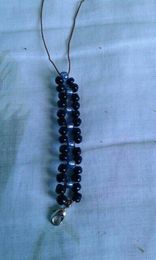
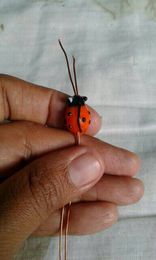
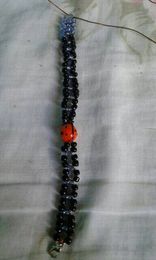
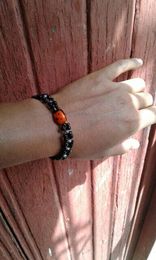
Inserta la piedra decorativa de tu eleccion, yo elegi colocar una mariquita en el centro, luego continua con el procedimiento B, al terminar haz un nudo doble de manera que no se valla a soltar colocale el trancadero y finalmente corta el alambre sobrante.
Insert the decorative stone of your choice, I chose to place a ladybug in the center, then continue with procedure B, when finished make a double knot so that it does not come loose, place the lock and finally cut the excess wire.
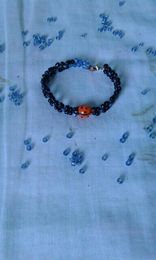
Gracias por tu visita.
Thank you for your visit.
Nota: Las fotos fueron tomadas por mi telefono Samsung ace J1.
Note: The photos were taken by my Samsung ace J1 phone.