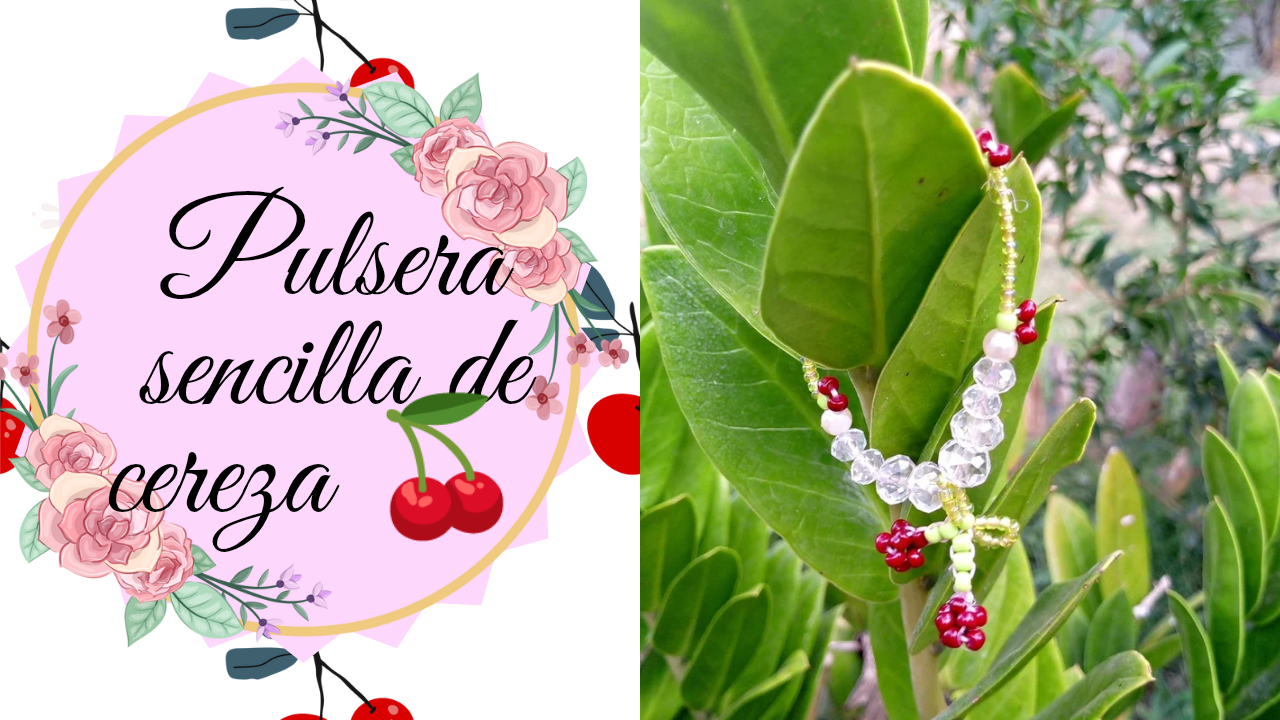
Hello, hello! How are you? A huge hello to all of you at Jewelry. On this special evening, I'm excited to share with you the new bracelet I've been working on. This time, I decided to go for a design that isn't too over-the-top—in fact, it's quite simple—but it has its own charm. The reason behind this choice is that I want to highlight a charm I created, which is a beautiful cherry blossom. I've noticed that, lately, clothing with cherry and strawberry motifs is very trendy. I love how these designs add a fresh and fun touch to any outfit. So I thought, why not make a bracelet that complements that trend? I wanted the charm to be the centerpiece, so I opted for a minimalist design that wouldn't compete with its beauty.
And telling you a little more about the bracelet I'll be making, I want to share that the technique I'll be using to create the cherry is something I learned when I was making Charosqui bracelets. This technique is called fireball, and back then, it was primarily used as a charm. The reason I chose this technique is because, since it's round, it can perfectly simulate the shape of cherries. I think it's a creative way to incorporate such a popular element into my crafts. Additionally, I plan to add the stem and leaves, which will give my design an even more authentic and attractive touch. Imagining how the bracelet would look with these elements, I got very excited. I'm convinced that by combining the fireball technique with the cherry design, the result will be very beautiful and original. I hope that in the end, I'll be able to capture that fresh and fun essence that I love so much. I can't wait to start working on this bracelet and see how it comes to life. I hope you're also ready to join me in this creative process.
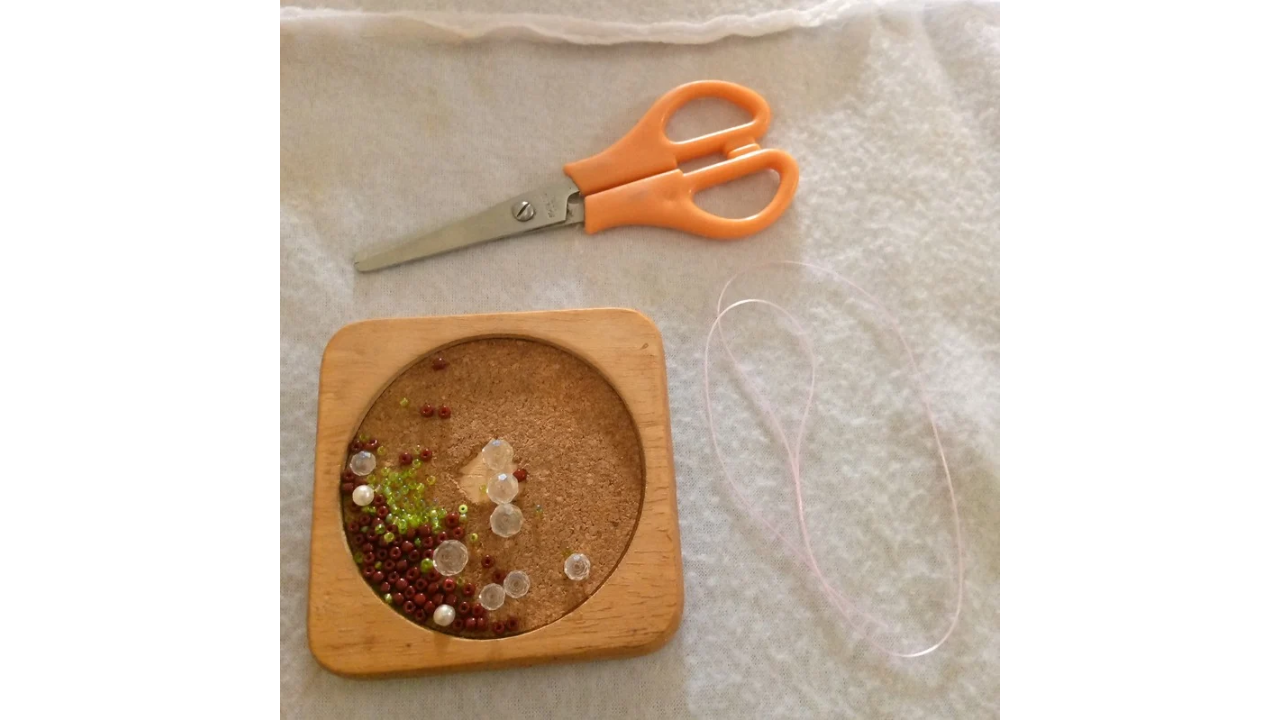
(Materiales🍒:)||(Materials🍒:)
- Cuentas de color rojo
- Cuentas de color verde
- Mostacillas de color verde claro
- Hilo elástico
- Tijeras
- Dos cristales grandes y dos pequeños
- Dos perlas
- Red beads
- Green beads
- Light green seed beads
- Elastic thread
- Scissors
- Two large and two small crystals
- Two pearls
(Procedimiento:)||(Procedure:)
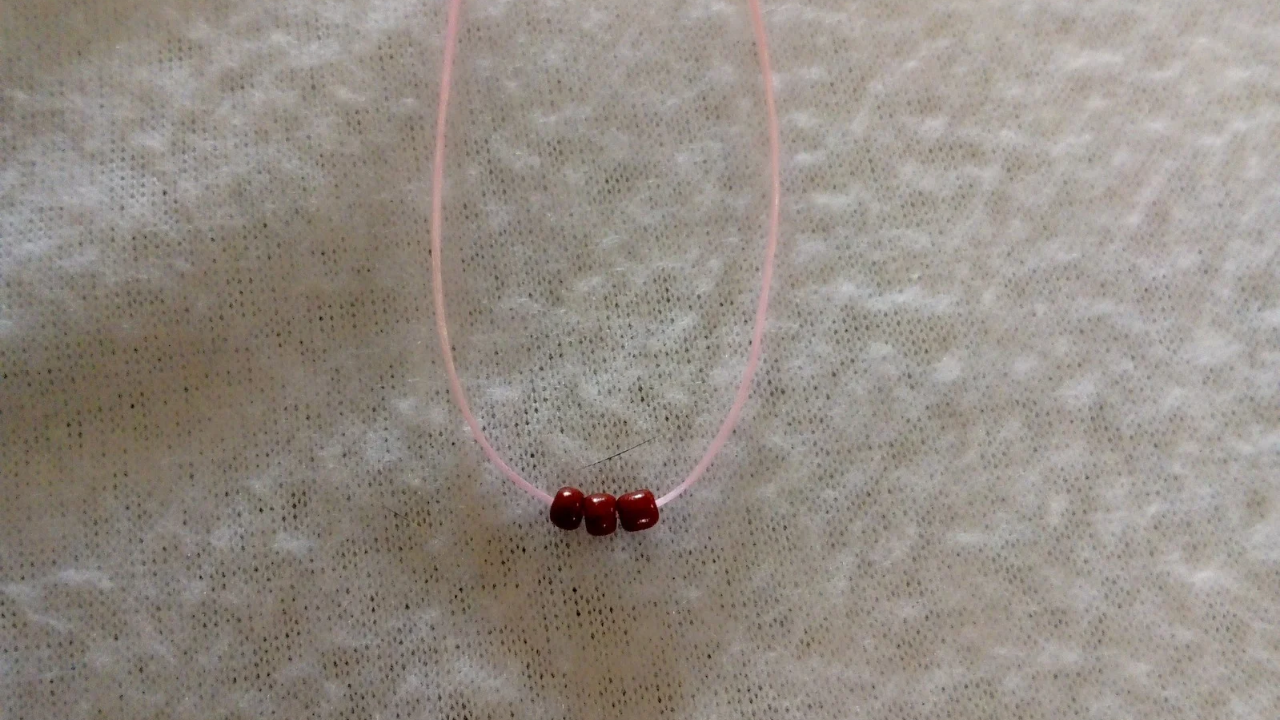
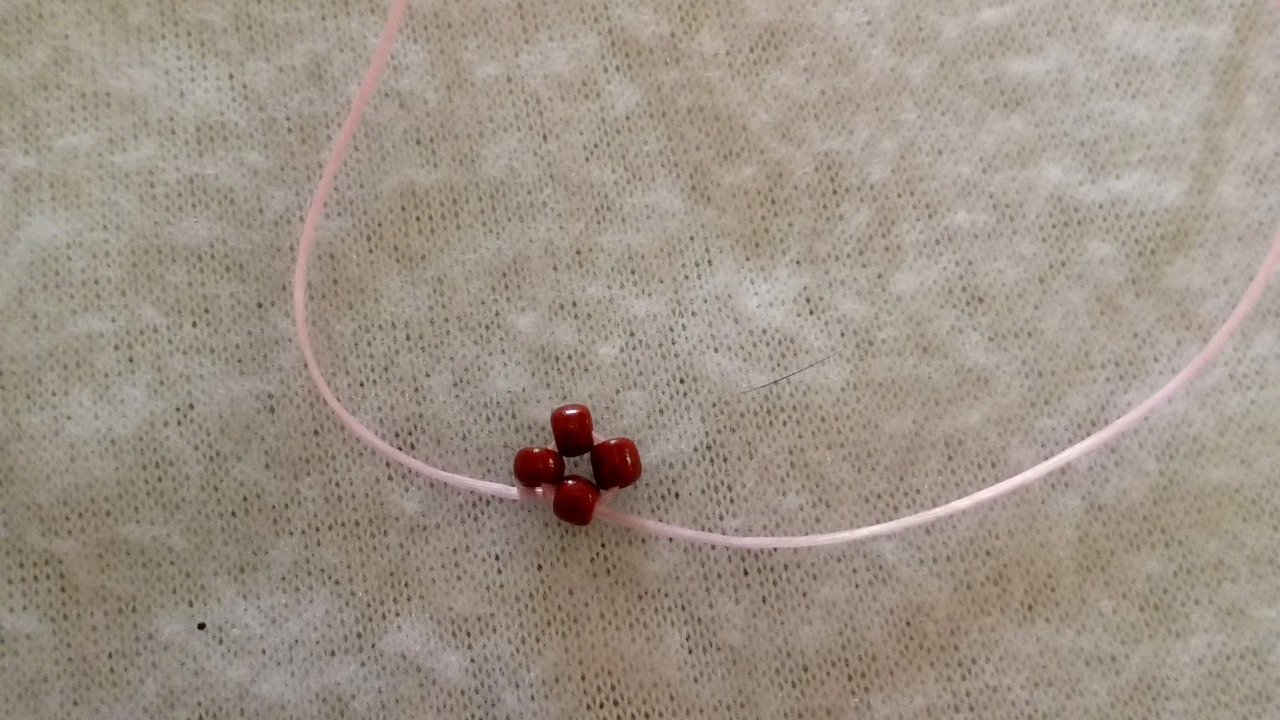

Paso nro 1
Paso nro 1
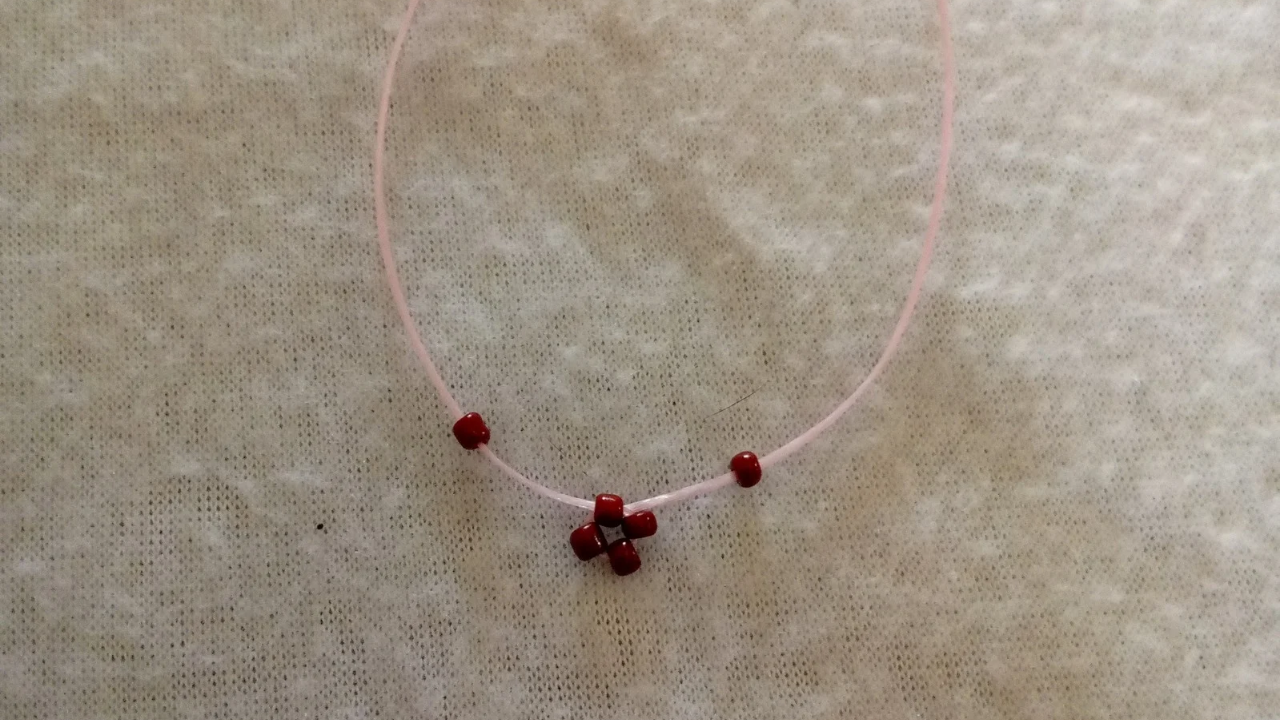
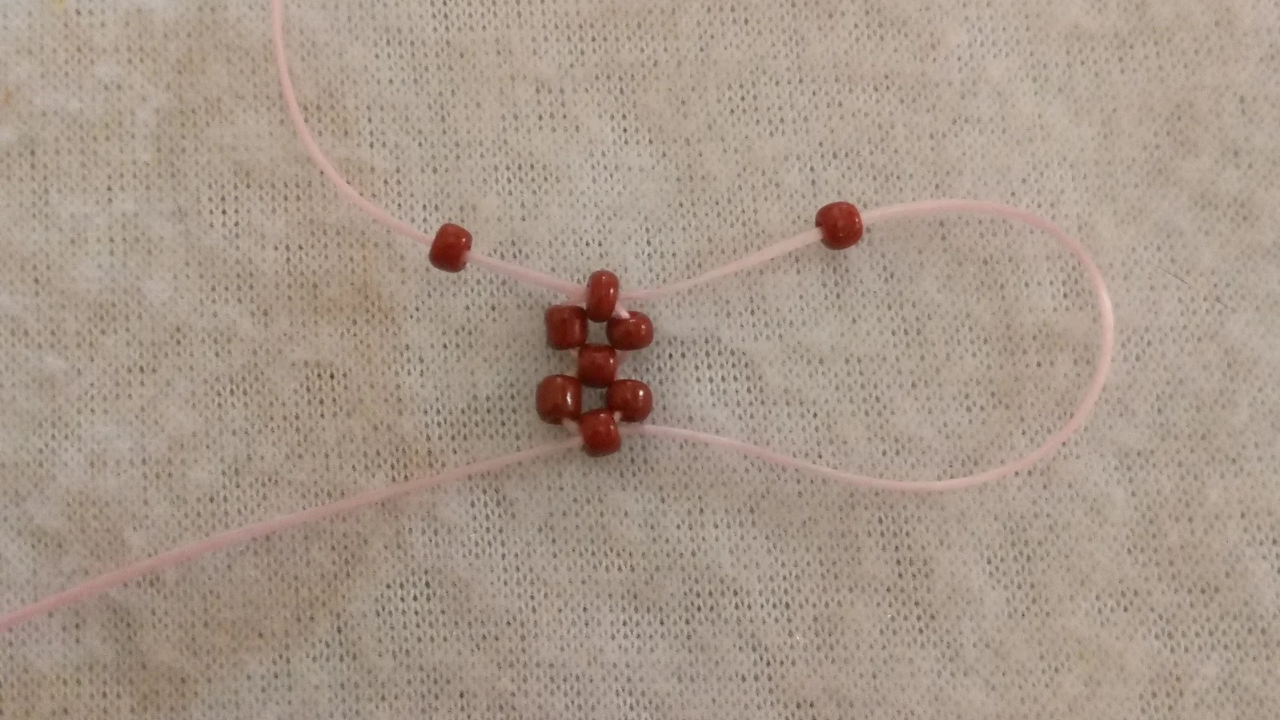
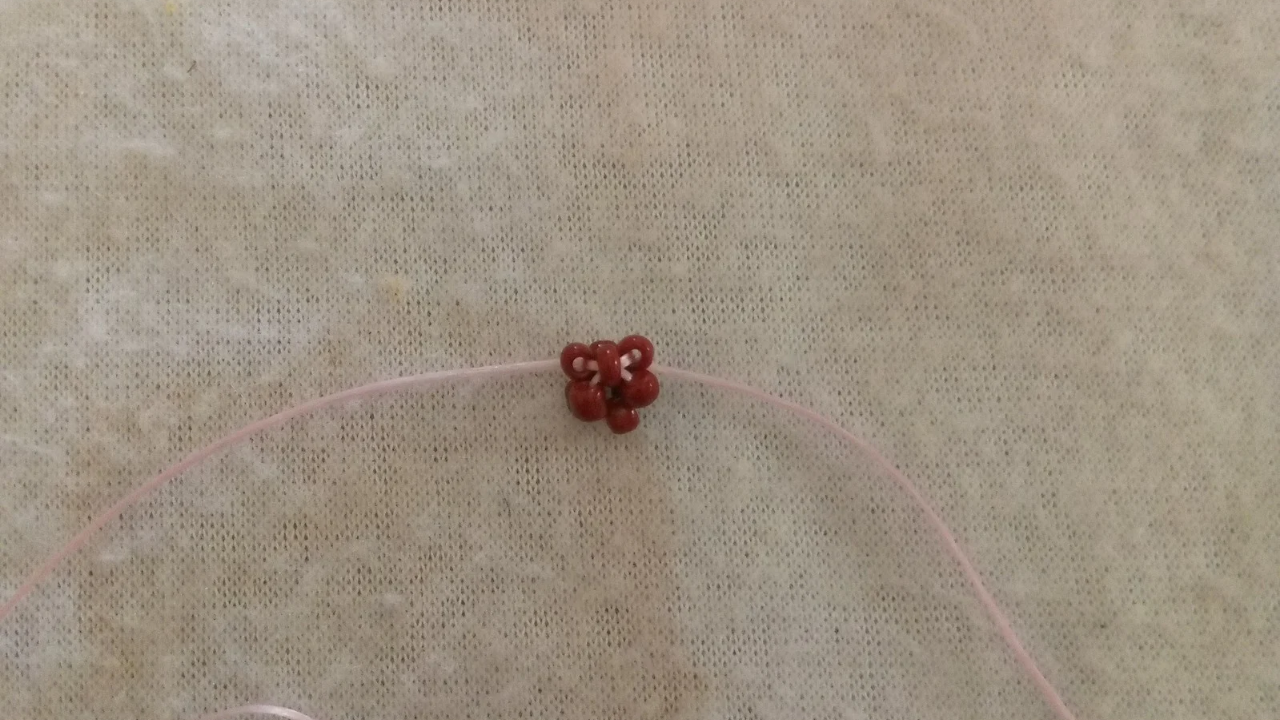
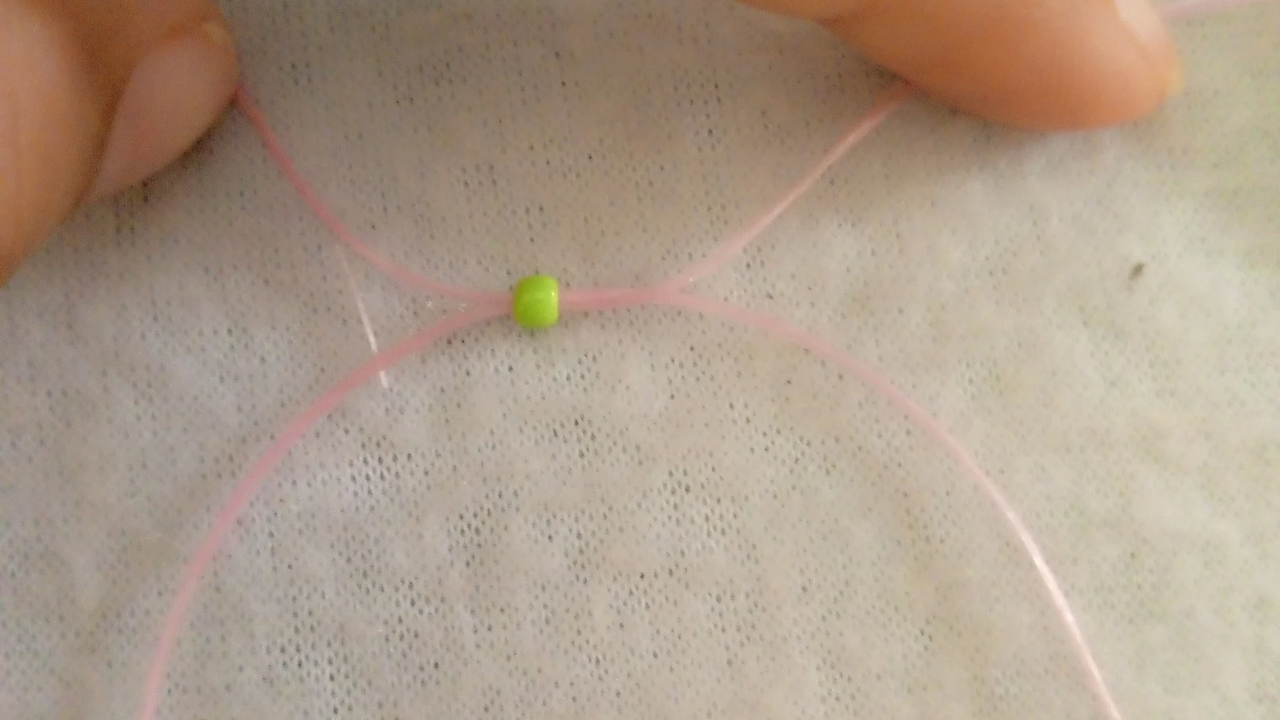
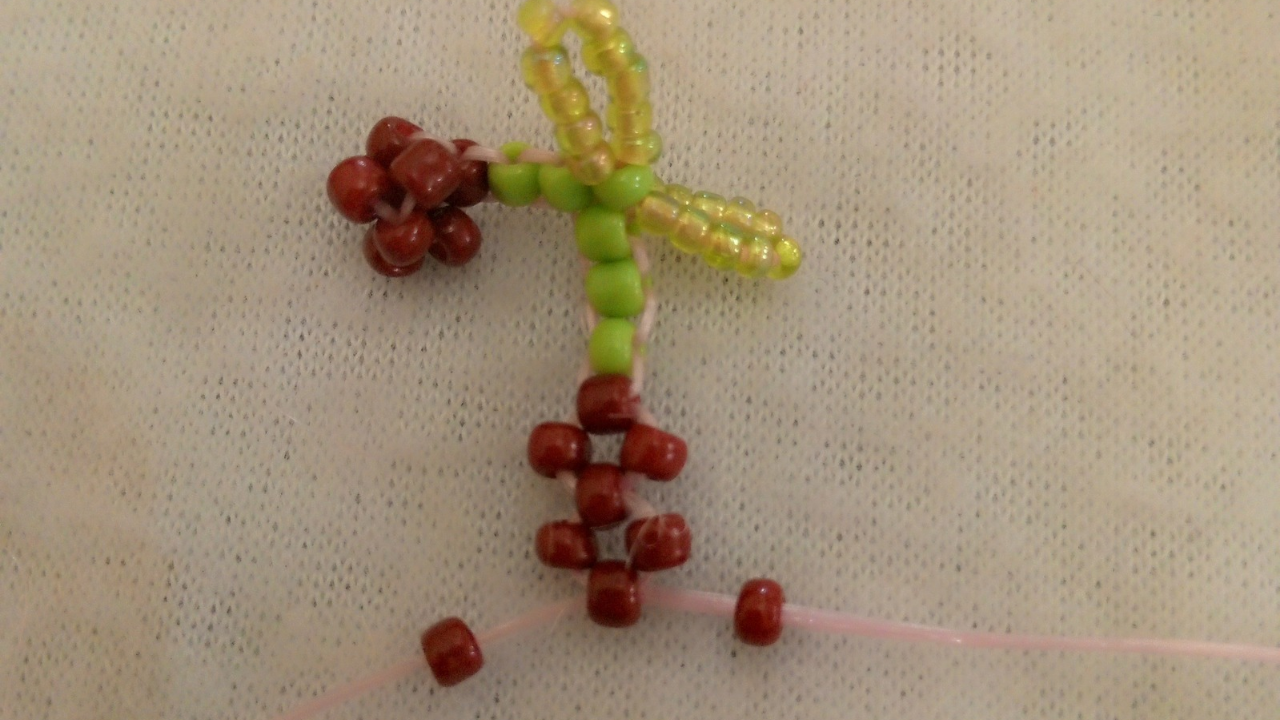
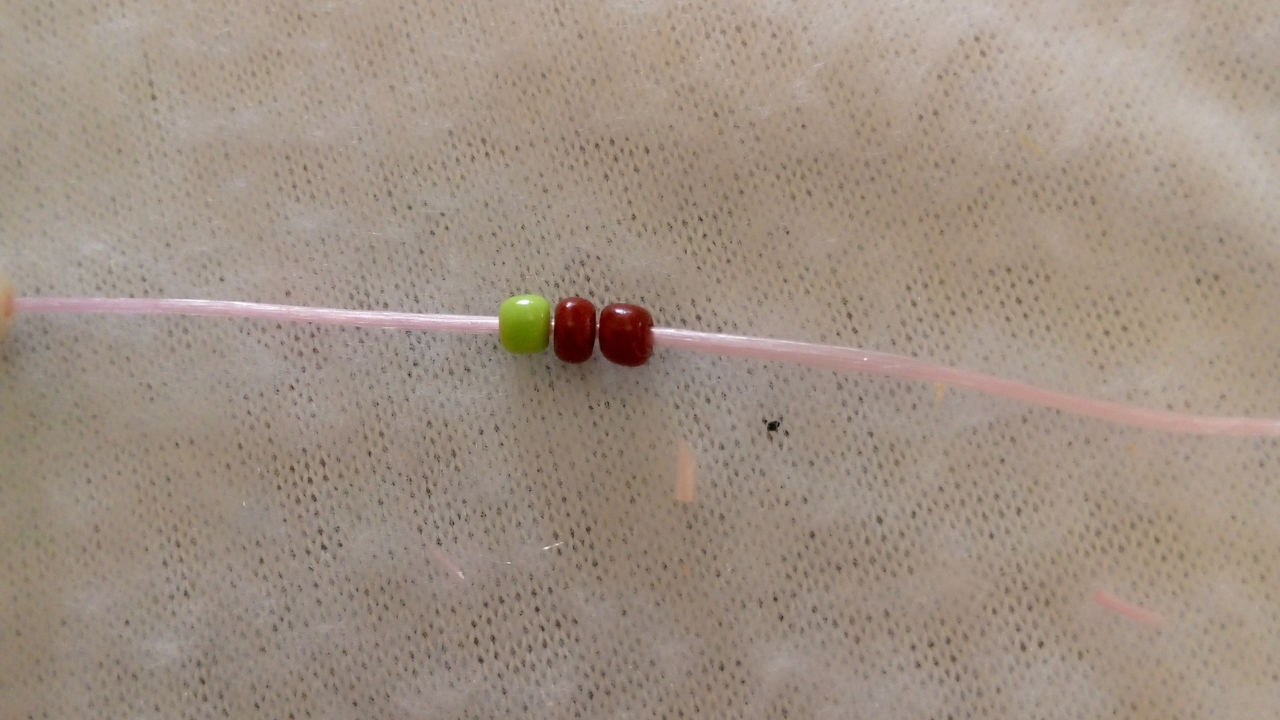
In the first step of making this bracelet, I'm going to start preparing the charm, or the cherry. I start by taking a piece of thread and placing three red beads, which will form the base of the cherry. Then, I take a fourth bead and thread the ends of the thread through the middle of this bead. Next, I place a bead on each side of the cross and again thread the ends of the thread through the middle of these beads, adjusting to make sure everything is secure. Finally, I place one more bead on each side. This time, I thread the ends of the thread through the middle of the first bead I started with.
Paso nro 2
Paso nro 2
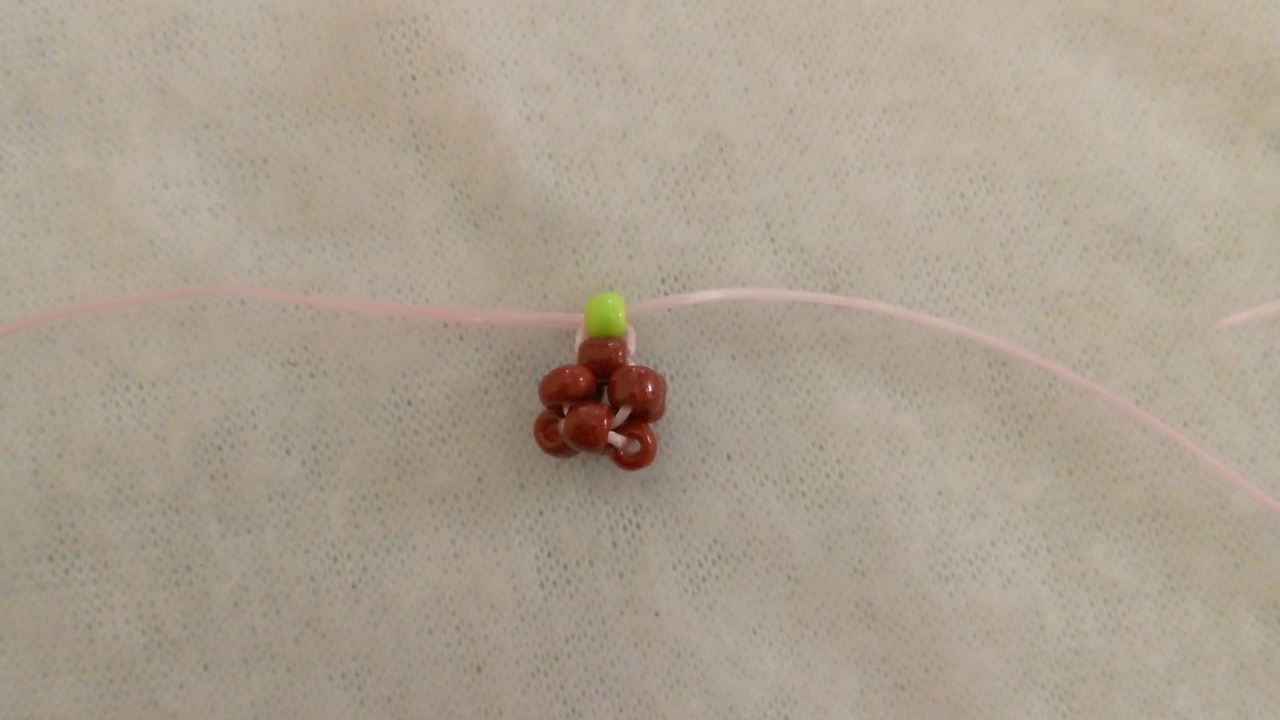
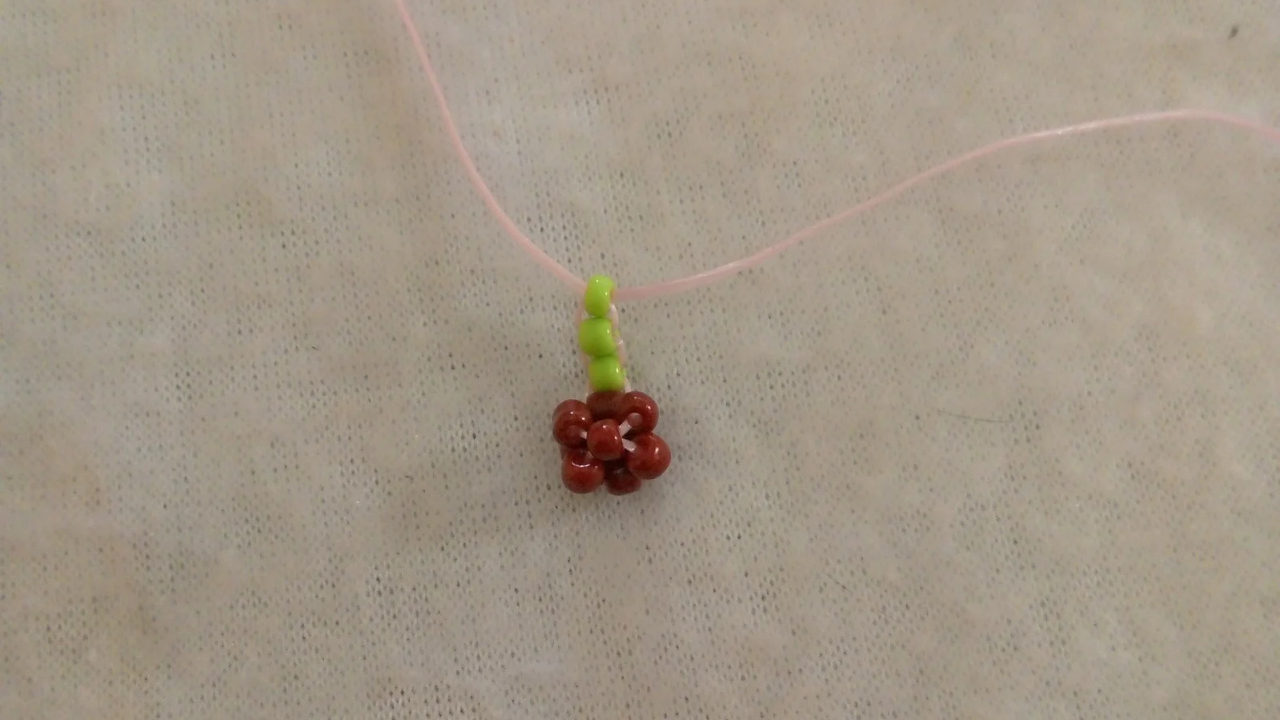
Now I'm going to make the cherry stem. To do this, I'm going to take a green bead and place the ends of the thread through the middle, securing it tightly. I'll repeat this process two more times to give the stem a fuller look.

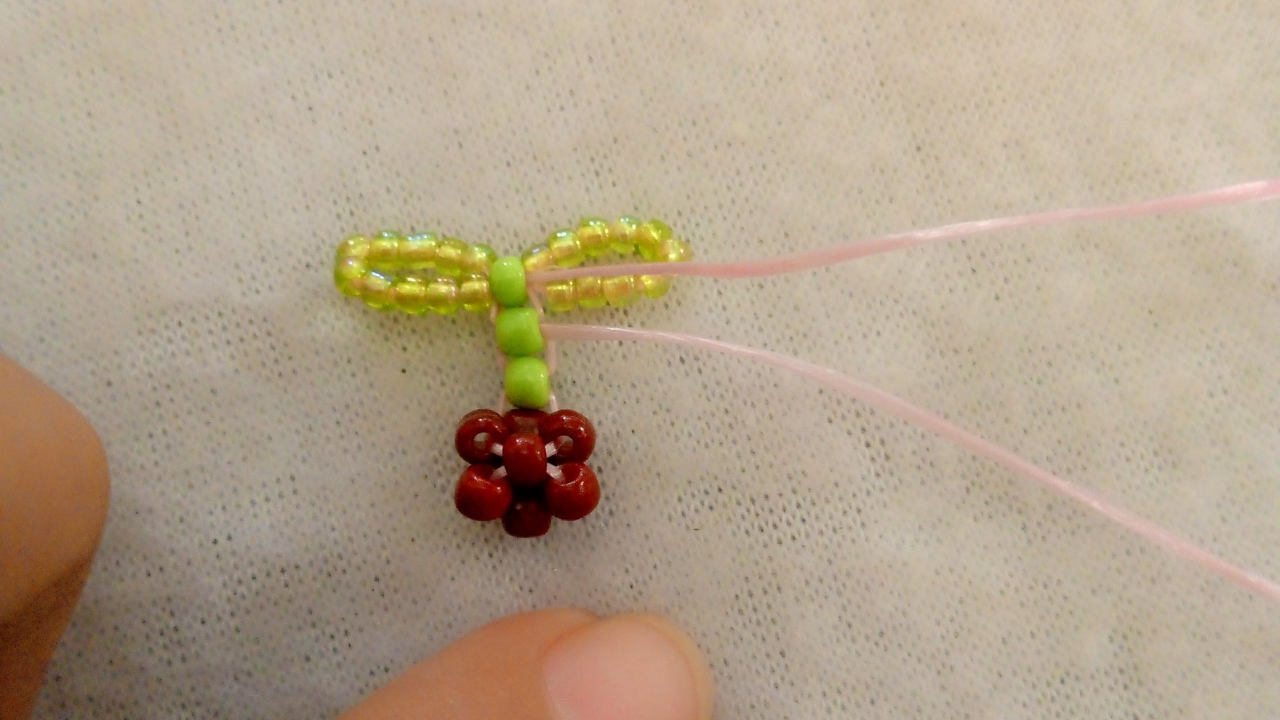
Paso nro 3
Paso nro 3
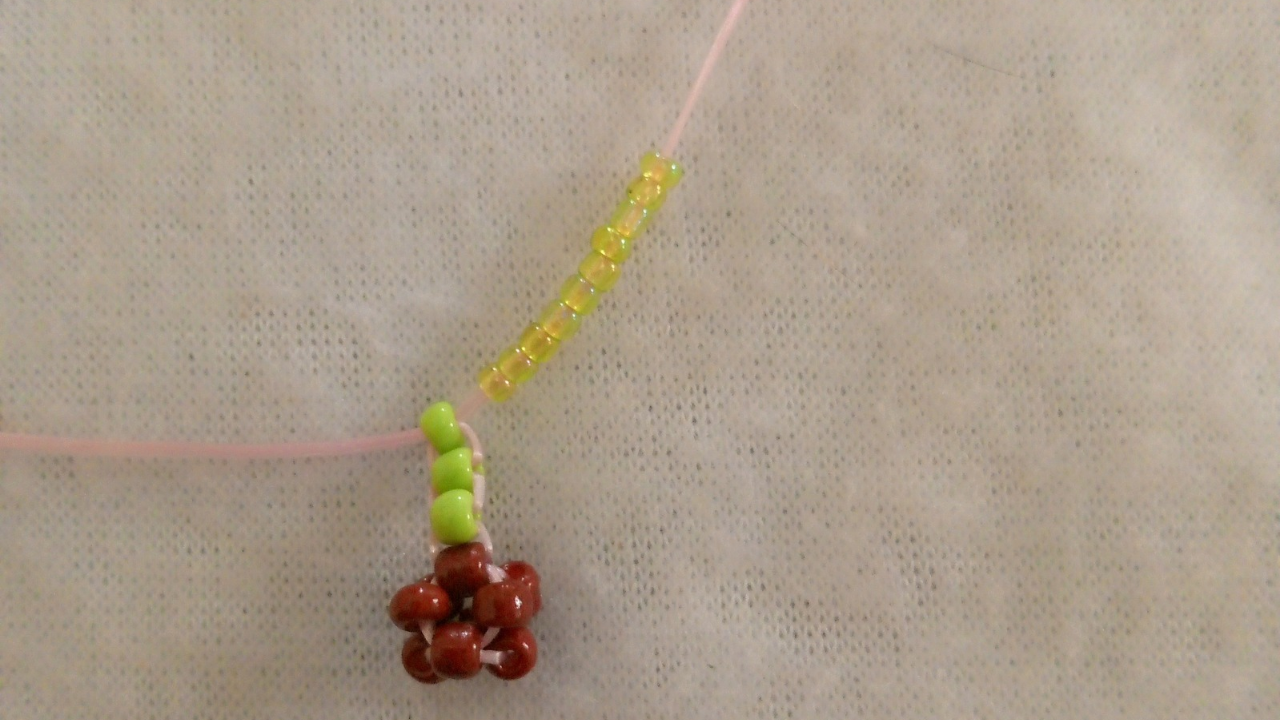
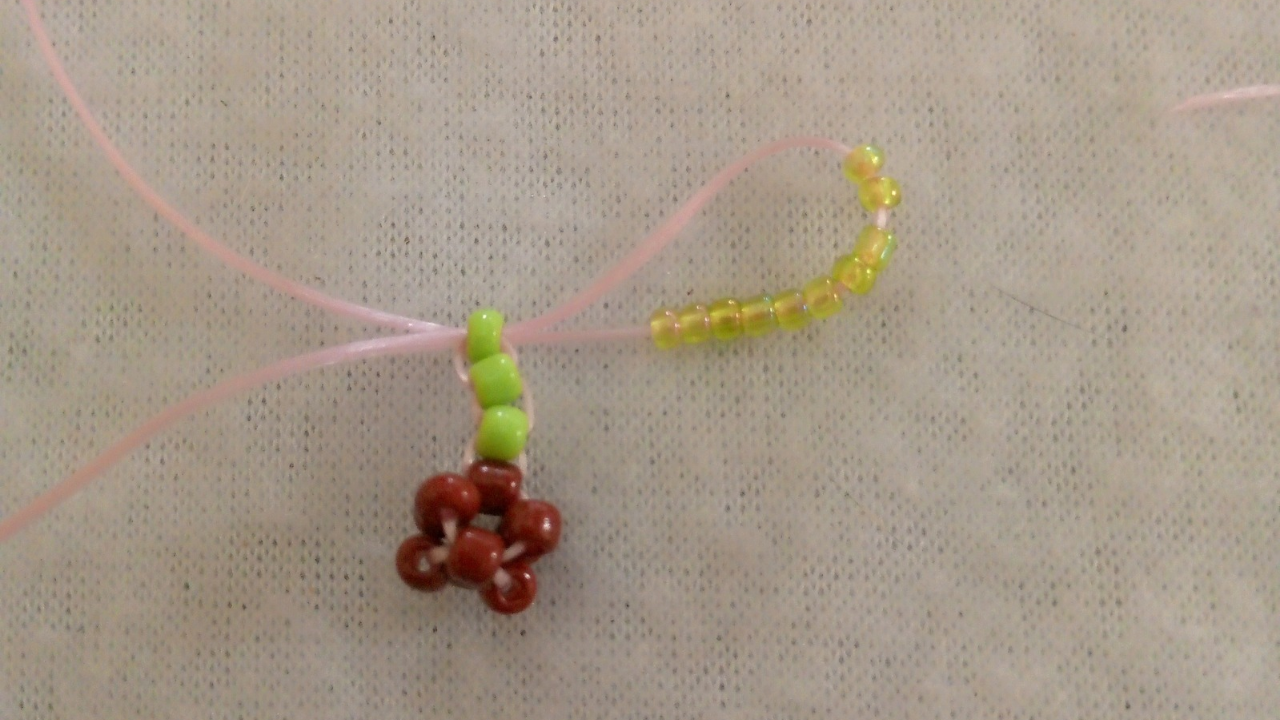
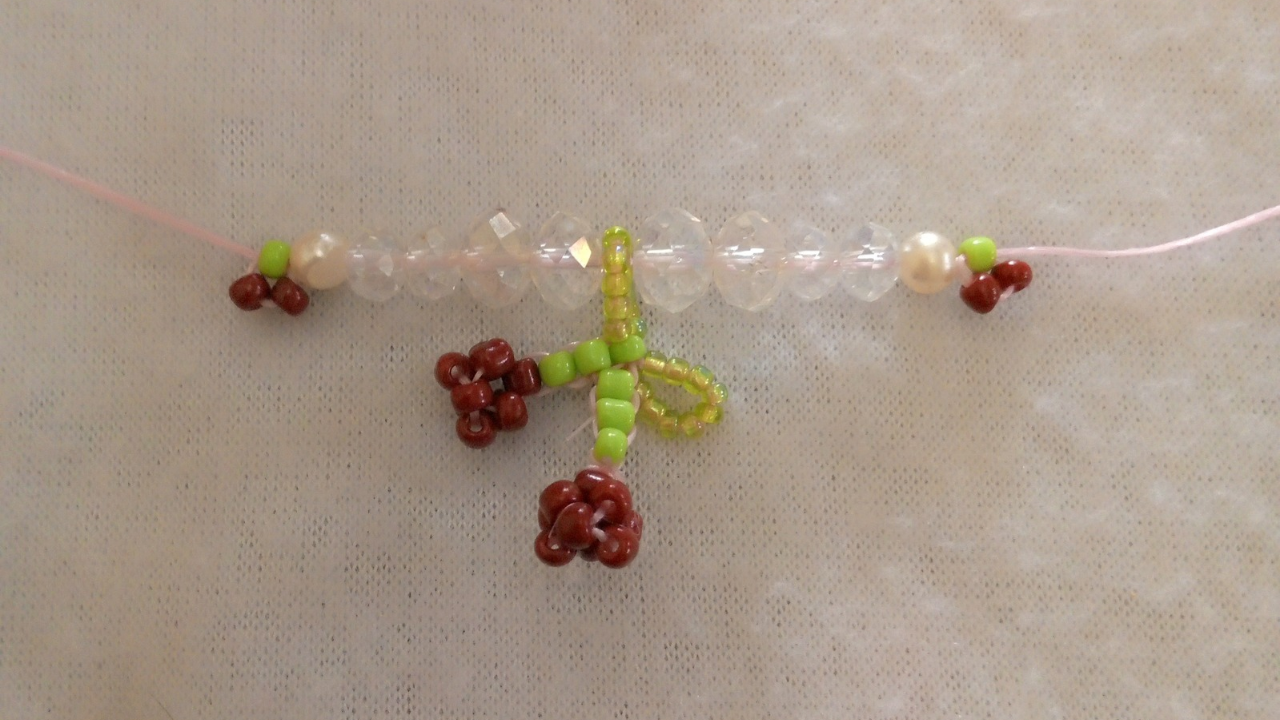
Next, I'm going to make the leaves, using seed beads that are a lighter color than the green stem beads. To make the leaves, I place ten seed beads on each side and then thread the thread through the third stem bead. I do this identically on both sides, and I can already see the cherry taking shape.
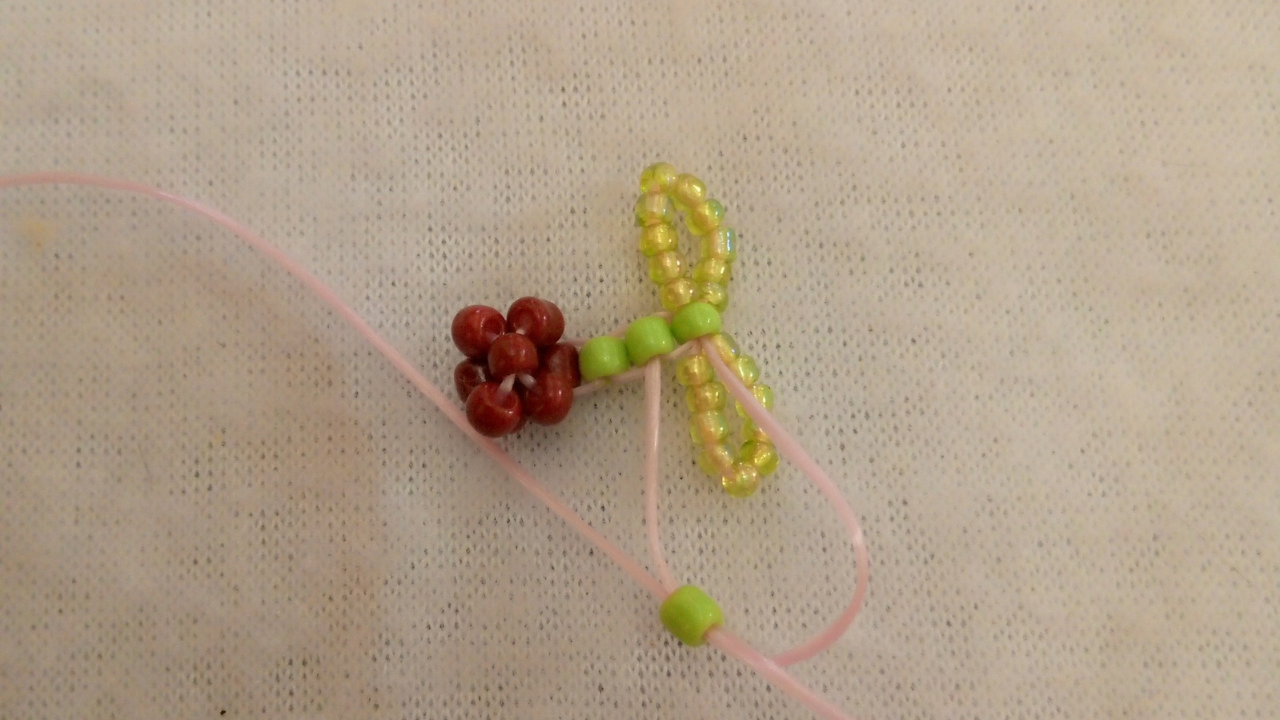

Paso nro 4
Paso nro 4
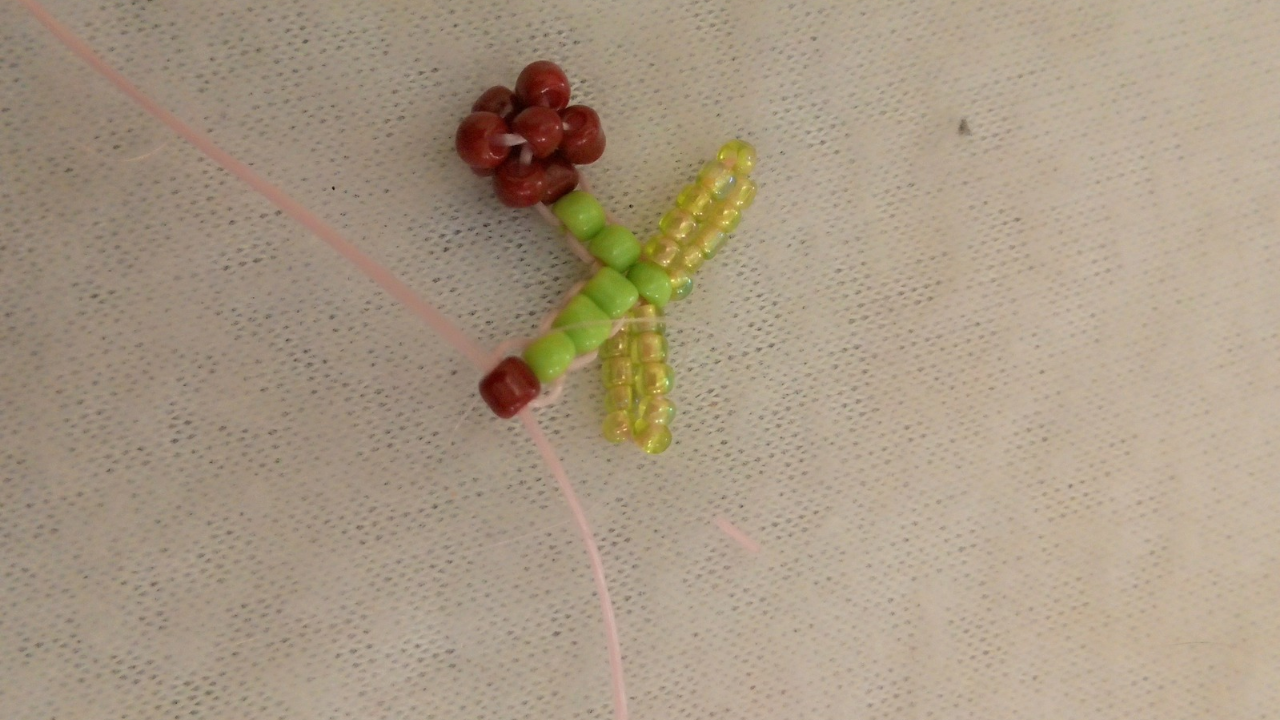
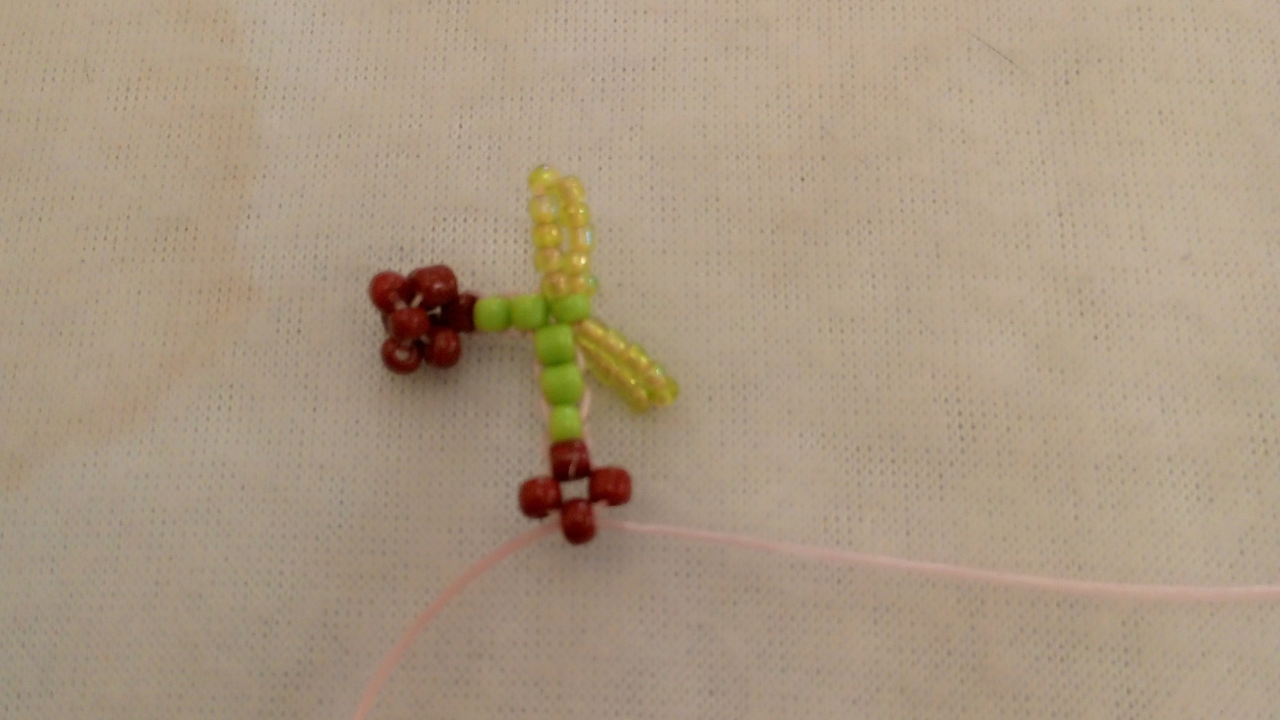
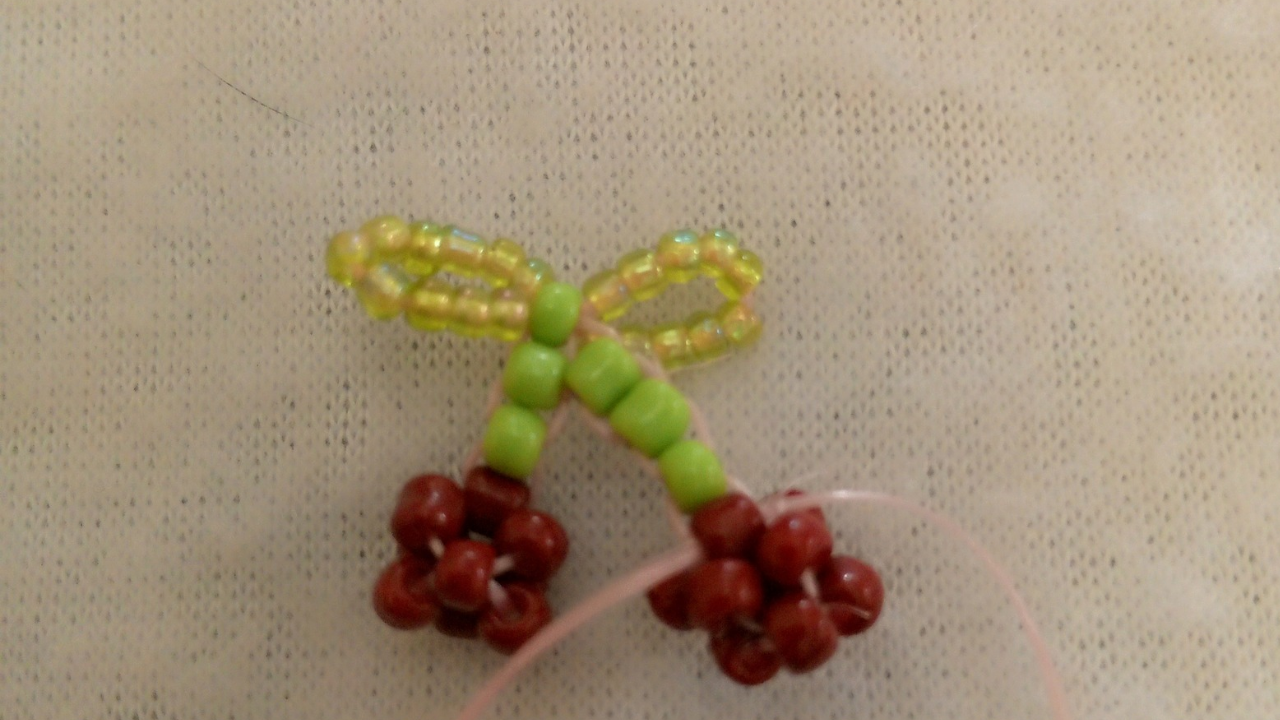
Finally, I'm going to move on to the last part of the charm. After making the leaves, I move on to making the other stem for the second cherry. It's basically the same as the beginning, but this time I'm starting with the stem and finishing with the cherry.
Paso nro 5
Paso nro 5
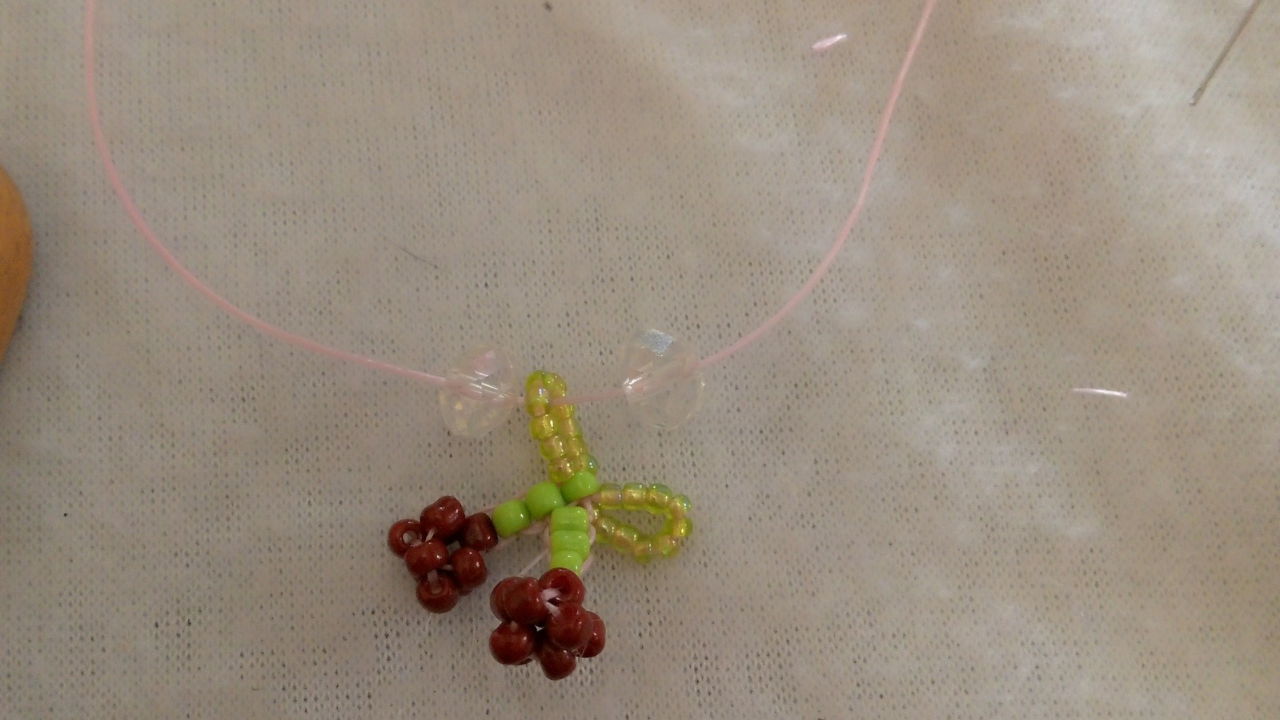
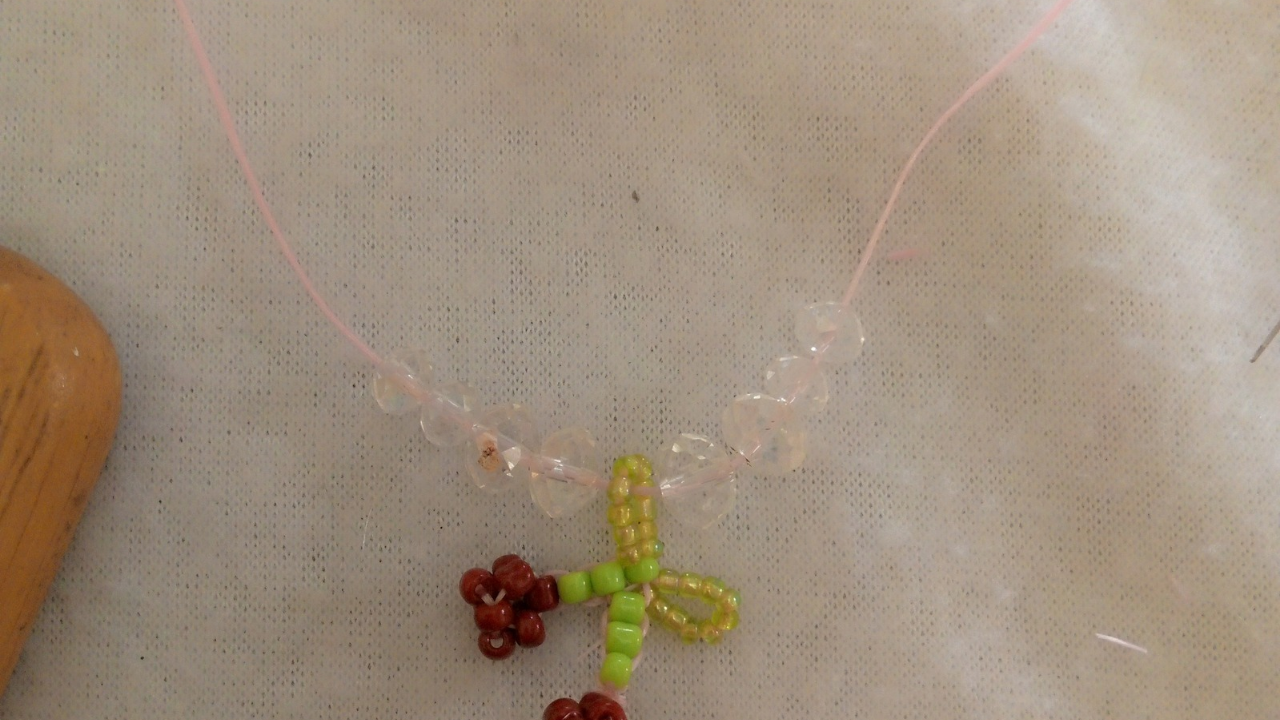
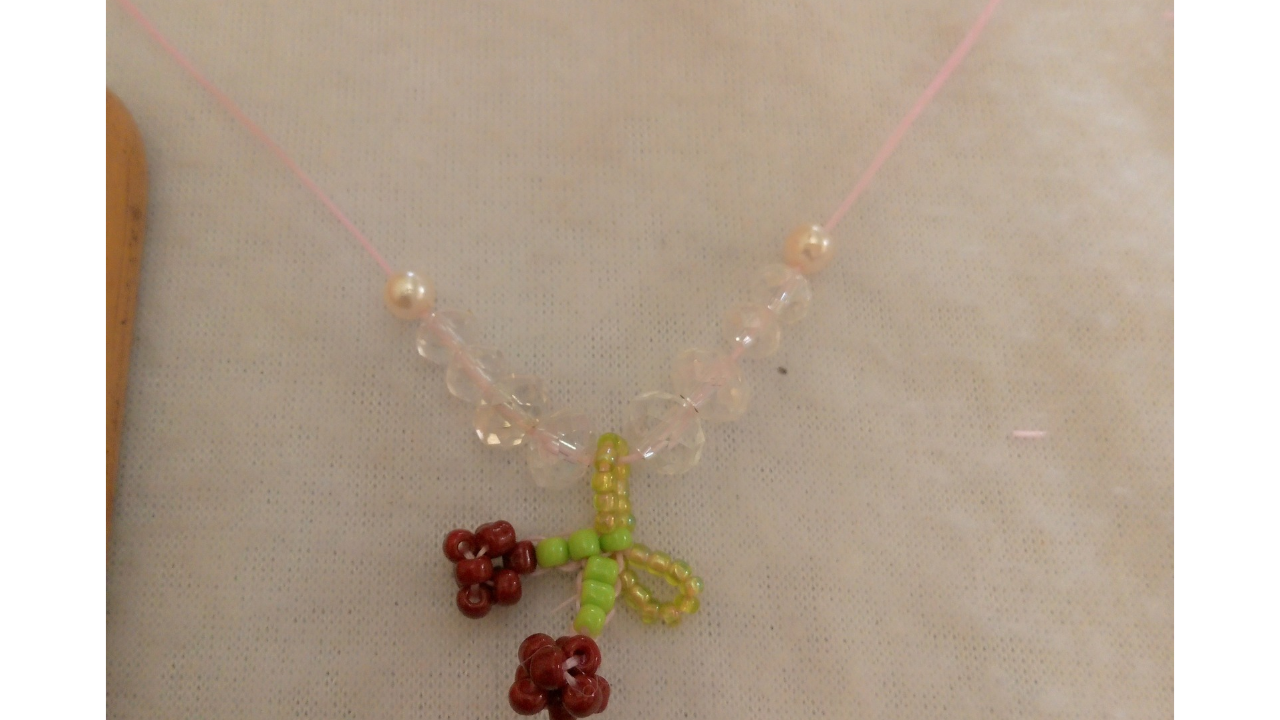
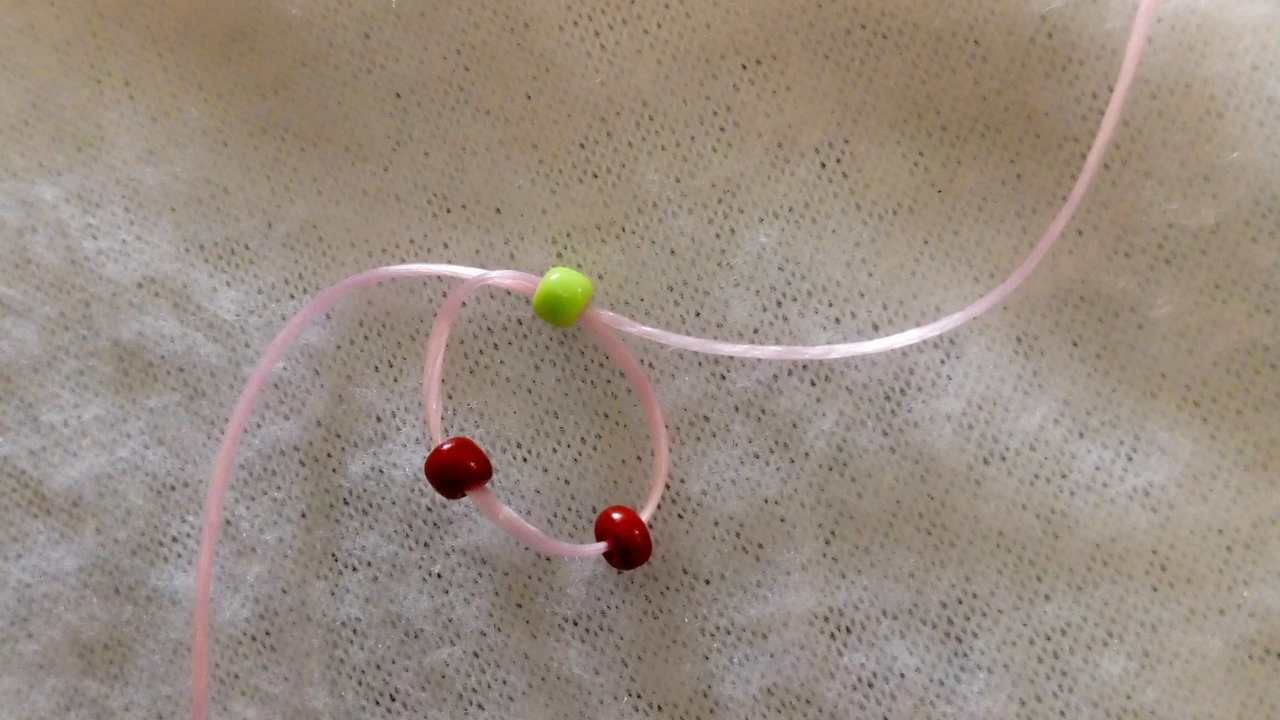
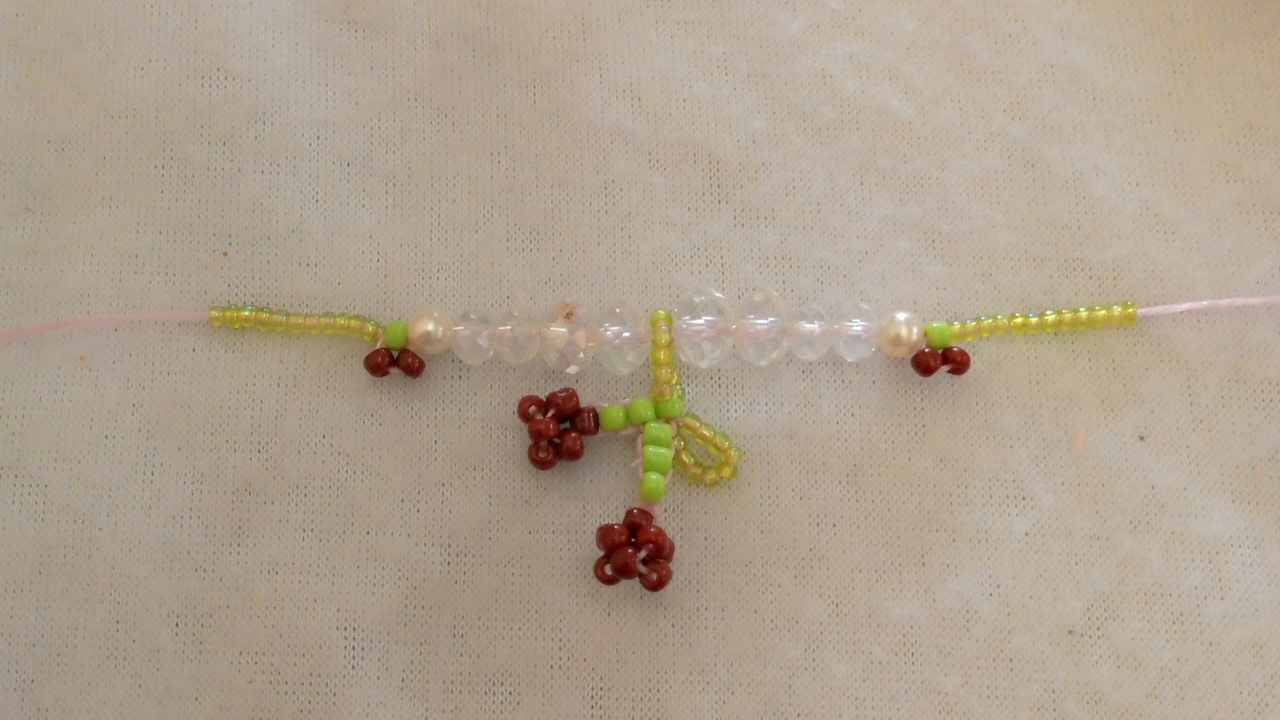
Now, it's time to put together the bracelet. With the leftover elastic thread, just the size of my wrist, I'll first place the cherry bouquet. On the sides, I'll place two crystals on each side, then two smaller crystals on each side, and finally, a pearl on each side. Next, I'll make some mini cherries. I place one green bead and two red beads. I thread the thread back through the green bead and tighten it so you can see it's a mini cherry. Then, I place two seed beads, another mini cherry, and continue the same sequence on the other side. Finally, I finish the bracelet by placing twenty green beads, and that's it.
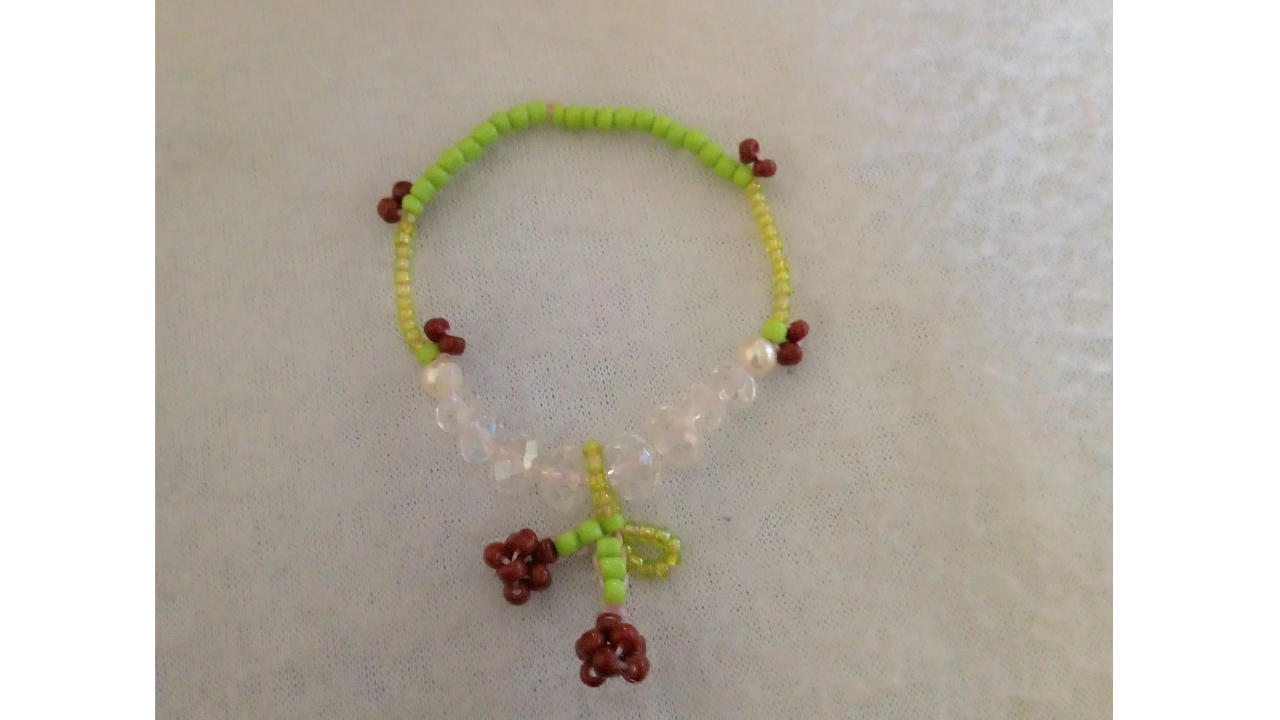
(Resultado final:)||(Bottom line:)
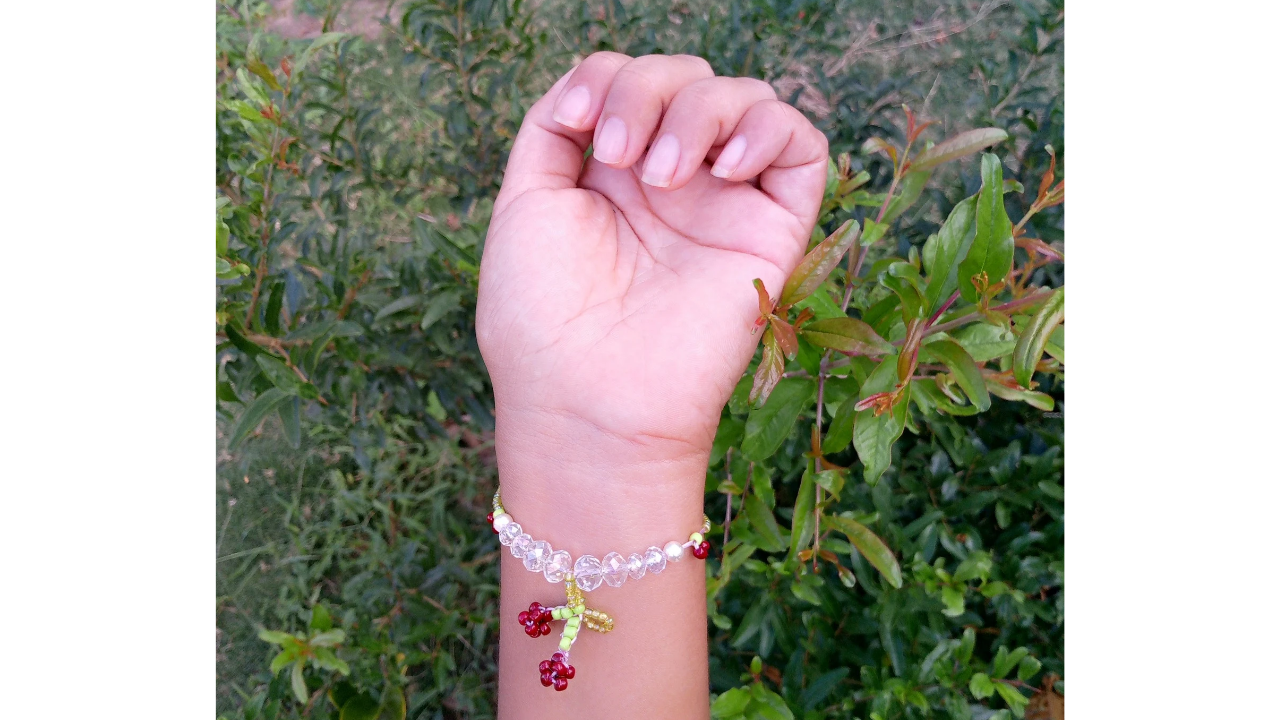
And so, after a creative process filled with detail and dedication, my cherry bracelet is complete. This project has not only been a moment of relaxation and enjoyment, but also a way to express my style and creativity. I hope this experience has inspired all of you to venture into the world of jewelry making. Thank you for joining me on this journey!

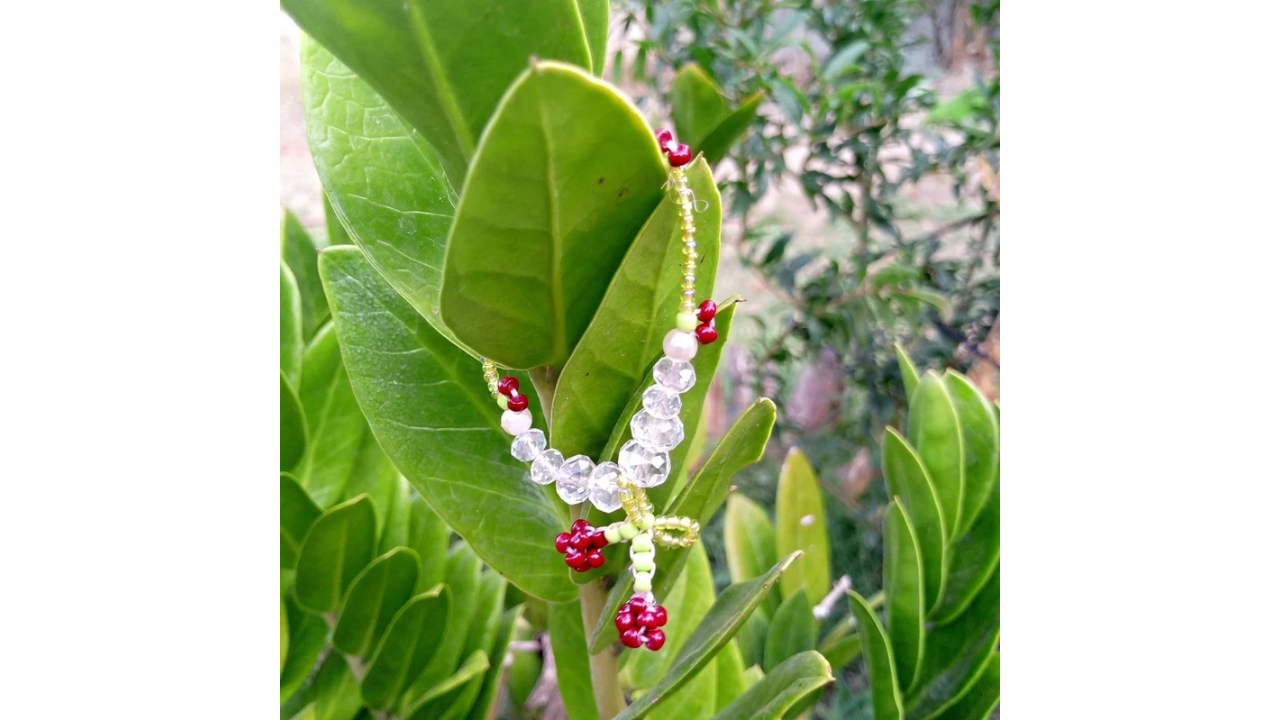

Las fotos de este blog son de mi propiedad|Las imágenes son editadas en canva|Fotografías tomadas en mi celular infinix Smart 7|El contenido está traducido en el traductor de Firefox.
Quedó linda, gracias por mostrar el proceso
Gracias
¡Enhorabuena!
✅ Has hecho un buen trabajo, por lo cual tu publicación ha sido valorada y ha recibido el apoyo de parte de CHESS BROTHERS ♔ 💪
♟ Te invitamos a usar nuestra etiqueta #chessbrothers y a que aprendas más sobre nosotros.
♟♟ También puedes contactarnos en nuestro servidor de Discord y promocionar allí tus publicaciones.
♟♟♟ Considera unirte a nuestro trail de curación para que trabajemos en equipo y recibas recompensas automáticamente.
♞♟ Echa un vistazo a nuestra cuenta @chessbrotherspro para que te informes sobre el proceso de curación llevado a diario por nuestro equipo.
🏅 Si quieres obtener ganancias con tu delegacion de HP y apoyar a nuestro proyecto, te invitamos a unirte al plan Master Investor. Aquí puedes aprender cómo hacerlo.
Cordialmente
El equipo de CHESS BROTHERS
the right color combination, the design details are also neat.
Thank you, I like your comment☺️
You're welcome, have a nice day friends
Your bracelet looks amazing and unique, you did such an amazing job with the bracelet. Great work and thanks for walking us through the entire creation process.
thank you thank you very much
Es tierno y muy bello. Las cerezas son de lo más bonito.
Gracias me alegra mucho que te haya gustado gracias
This cherry bracelet is looking super cute and elegant. I loved it so so much.