
Greetings to my beautiful people from HIVE, especially the #jewelry community where we grow and learn from each other with their beautiful arts in jewelry and various creations where creativity flies and I congratulate all of them, they are great teachers.
El día de hoy le traigo una bella creación de unos aretes tipo gotitas en alambre y perlas son muy fáciles de realizar y con muy poco material son casuales estos me los hice para mi rapidito que fuí a un evento de la iglesia para recoger fondo para el mantenimiento de la misma.
Today I bring you a beautiful creation of droplet type earrings in wire and pearls. They are very easy to make and with very little material. They are casual. I made them for my quickie that I went to a church event to raise funds for the maintenance of it.
MATERIALES:
MATERIALS:
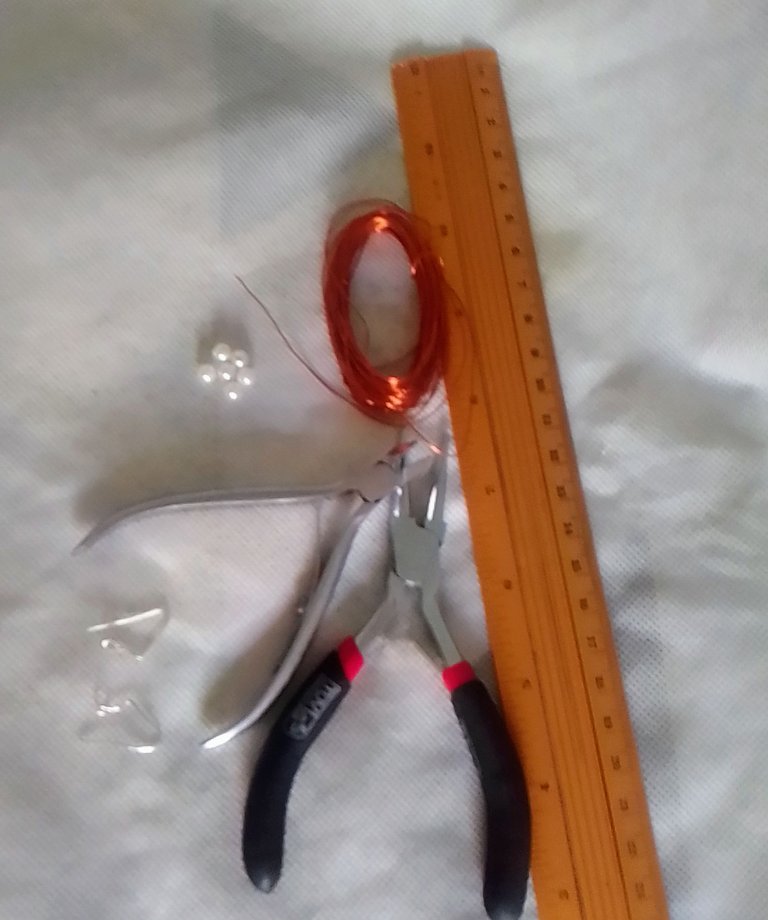
- Pinzas
- 6 perlas blancas
- 2 anzuelos
- alambre
- Regla.
- Tweezers
- 6 white pearls
- 2 hooks
- wire
- Ruler.
PROCEDIMIENTO:
PROCEDURE:
PASO 1
STEP 1
Tomé la regla y medí el alambre para empezar hacer los aretes así que medí 80 cms y corté en total fueron dos que corté.
I took the ruler and measured the wire to start making the earrings, so I measured 80 cm and cut a total of two that I cut.

PASO 2
STEP 2
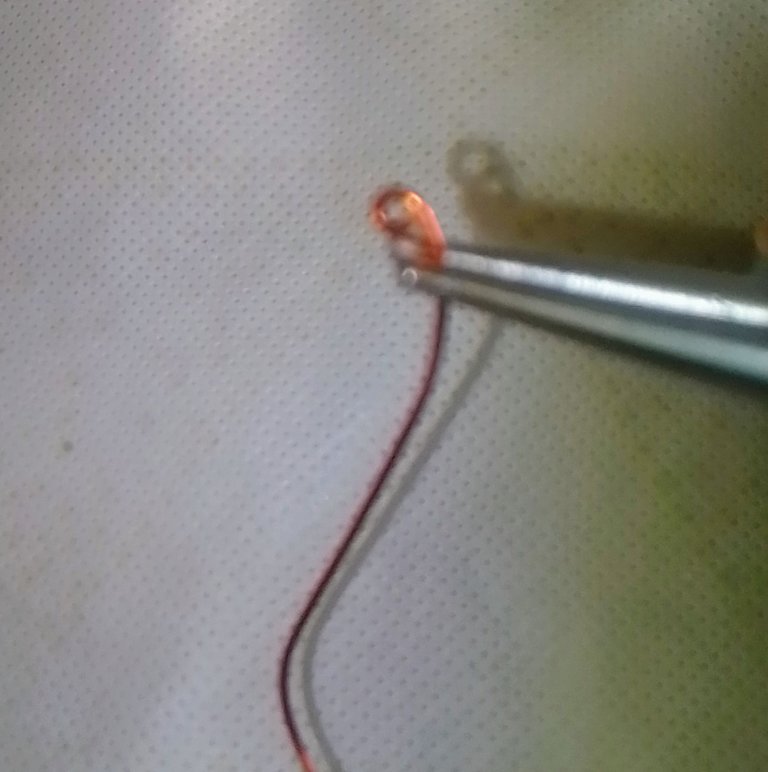
Luego que corté los dos alambres tomé la pinza y empecé a enrollar en la punta hay que tratar de hacer el primer enrollado lo más pequeño que pueda como me hace falta una pinza especial que si te ayuda realizarlo muy bien, pero con esta se logra pero se me dificulta un poco, pero no hay que pararse por eso.
After I cut the two wires, I took the tweezers and started winding at the end. You have to try to make the first winding as small as possible, as I need a special tweezer, which helps you do it very well, but with this one you can do it but It's a little difficult for me, but I don't have to stop because of that.
PASO 3
STEP 3
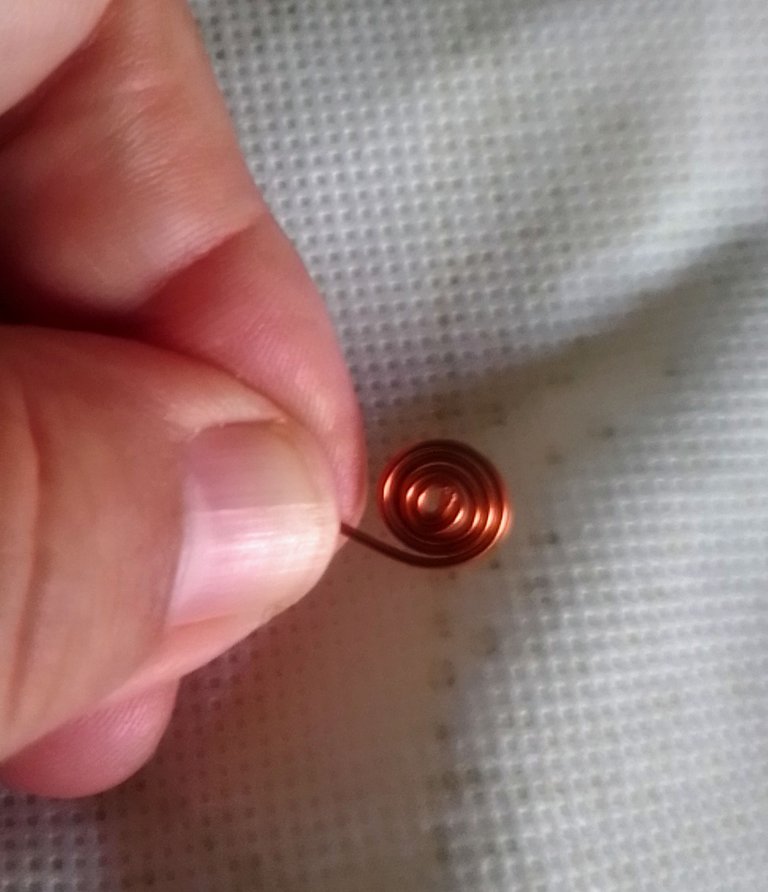
Bueno como se podrán dar cuenta que ha quedado perfecto y así va poco a poco enrollando.
Well, as you can see, it has turned out perfectly and that's how it rolls up little by little.
PASO 4
STEP 4
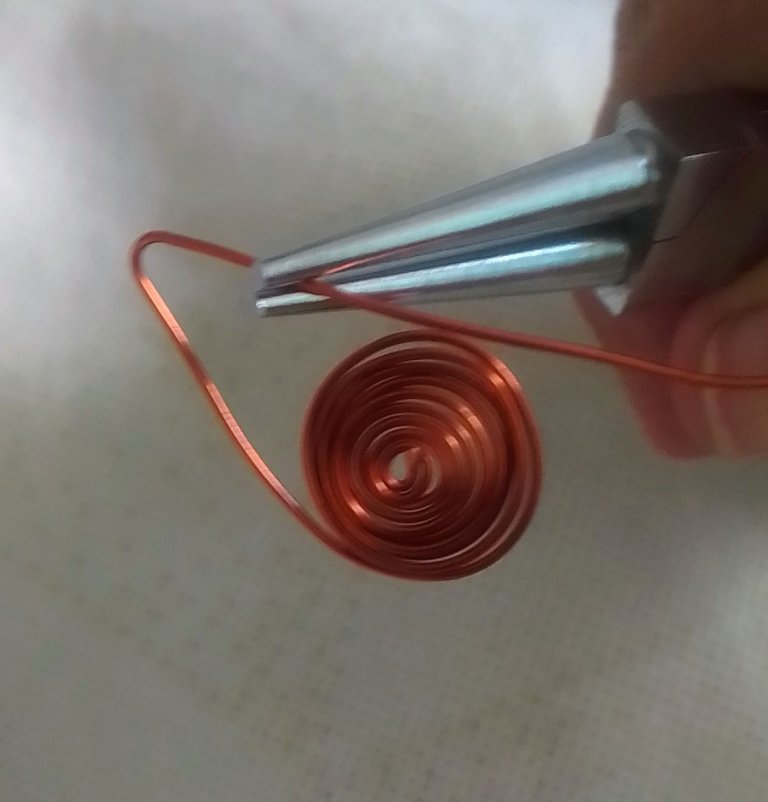
Luego que hayas echo el enrollado al tamaño que prefieras vas a medir como dos centímetros hacia abajo el alambre y luego haces un dobles con la pinza y llevas el otro alambre hacia arriba.
After you have made the coil to the size you prefer, you are going to measure the wire about two centimeters down and then make a double with the clamp and take the other wire up.
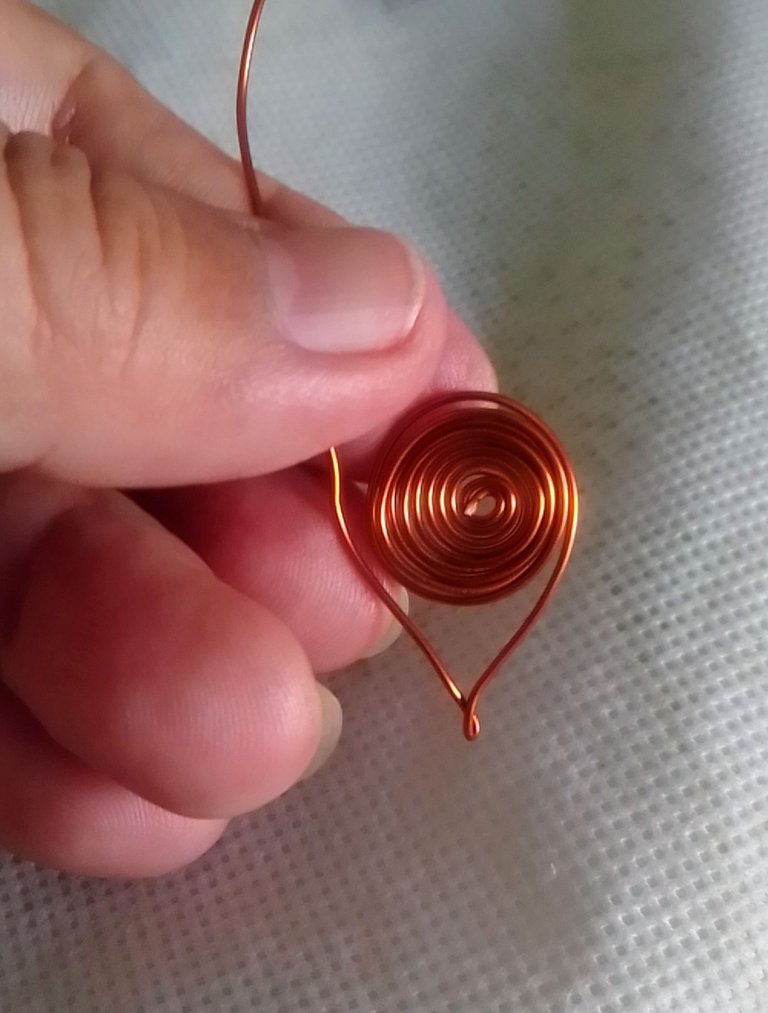
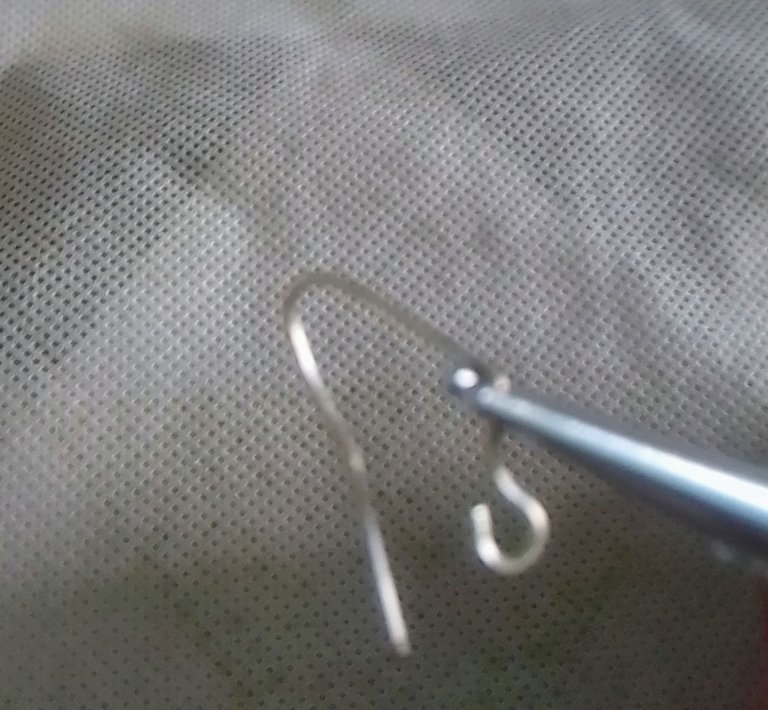
PASO 5
STEP 5
Una vez con la pinza vas a hacer presión en todo el medio como muestra la imagen y te queda así en forma de una gotita.
Once with the tweezers you are going to put pressure on the entire medium as shown in the image and it will look like a droplet.
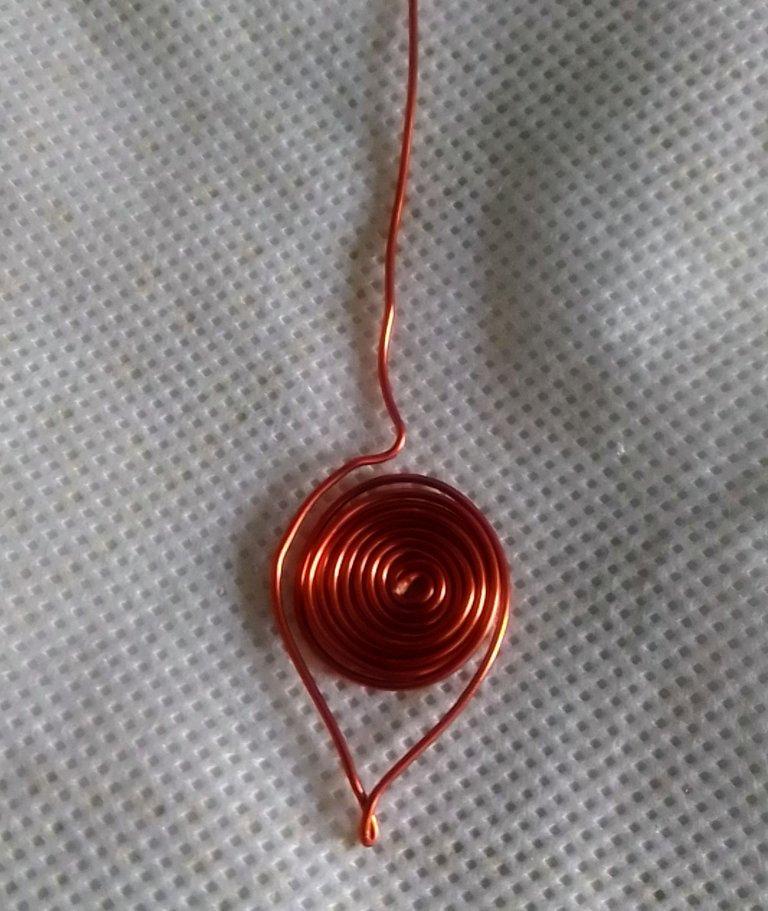
PASO 6
STEP 6
Después doblas el alambre hacia arriba y a la vez le hace el dobles que te quede en todo el medio del arete con la ayuda de la pinza lo endereza allí no hay problema y ve como esta quedando se ve bonita.
Then you bend the wire upwards and at the same time make the doubles that remain in the entire middle of the earring with the help of the tweezers, straighten it there, there is no problem and see how it looks, it looks pretty.
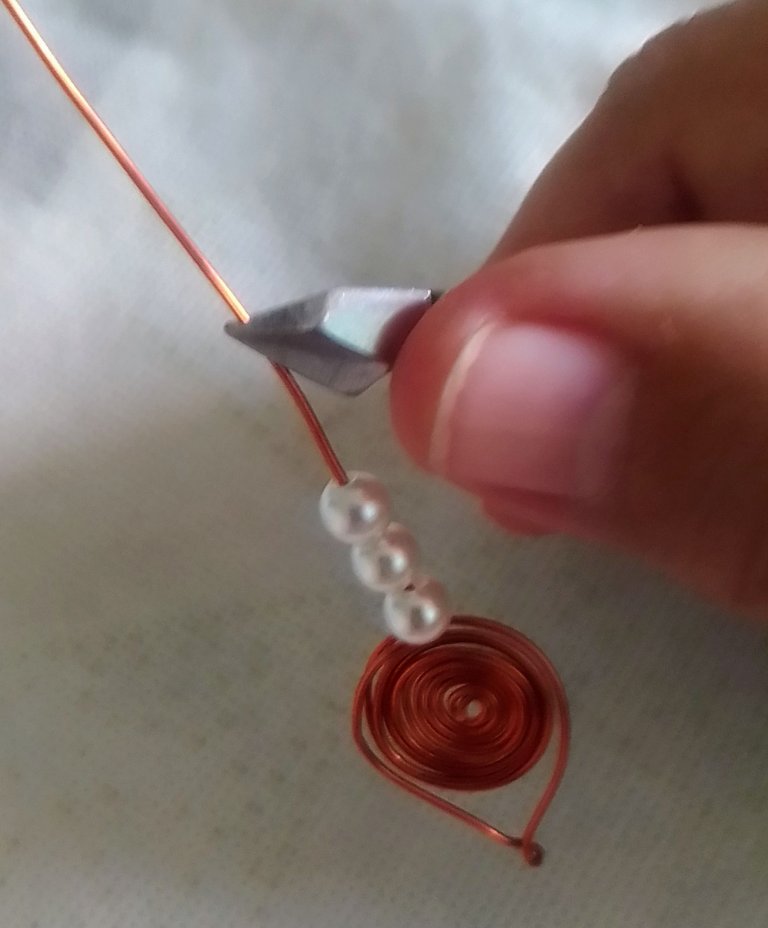
PASO 7
STEP 7
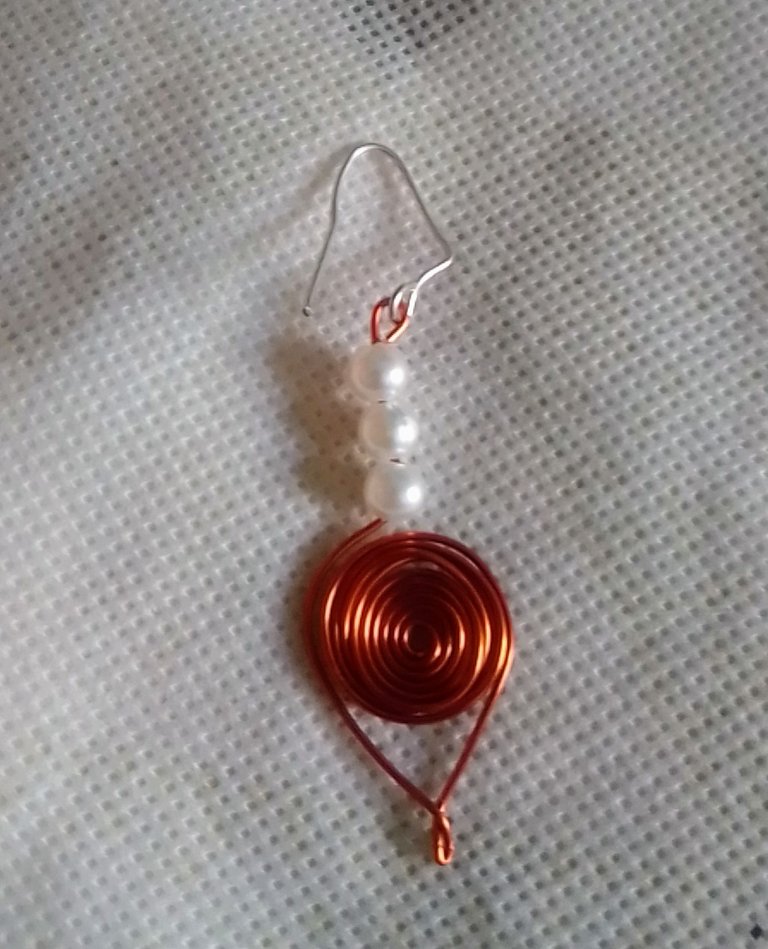
Una vez que hayas enderezado el alambre con la ayuda de la pinza vas a introducir 3 perlas blanca y con la piqueta cortas dejando 1 cms medio para hacer la argolla arriba.
Once you have straightened the wire with the help of the tweezers you are going to insert 3 white pearls and with the pickaxe cut them, leaving 1 cm in the middle to make the ring at the top.
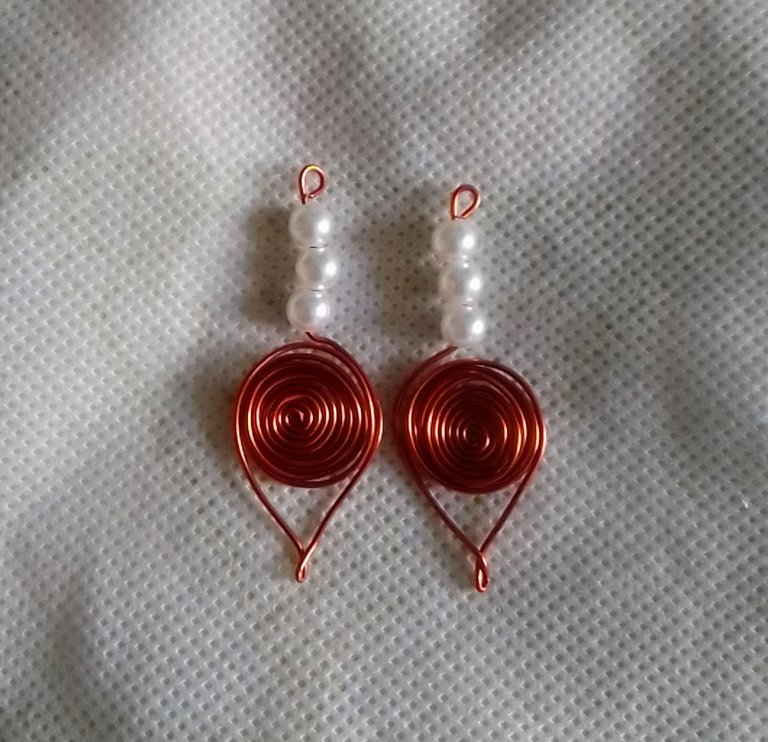
PASO 8
STEP 8
Ya acá tengo listo los dos aretes siempre es bueno ir midiendo cuando se realiza el otro arete para que queden iguales y ya están hechas las dos argollas.
Here I have the two earrings ready, it is always good to measure when the other earring is made so that they are the same and the two rings are already made.
PASO 9
STEP 9
Luego tomo los anzuelos y con la ayuda de la pinza abro el círculo donde voy a introducir llos aretes.
Then I take the hooks and with the help of the pliers I open the circle where I am going to insert the earrings.
PASO 10
STEP 10
Como podrán darse cuenta ya inserté el primer arete al anzuelo.
As you can see, I already inserted the first earring to the hook.
PASO 11
STEP 11
Ya acá están listo los dos aretes me quedaron hermosos para lucirlos.
Here the two earrings are ready, they were beautiful to show off.
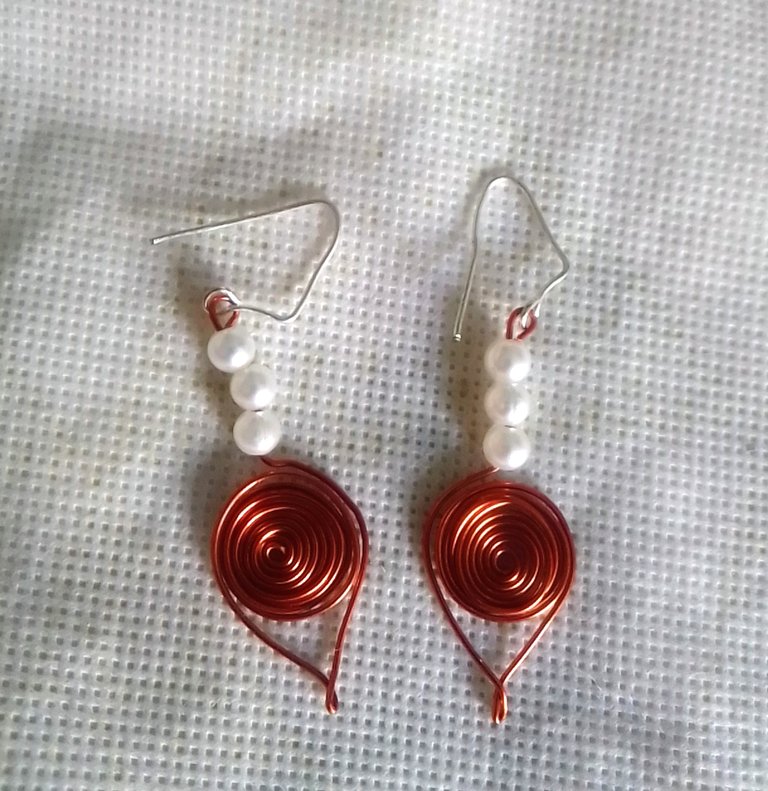
Bueno ya lista estrenando mis aretes y lo más importante hecho por mi y me ahorré dinero y tiempo y eso para mi es muy valioso.
Well, now I'm ready to wear my earrings and the most important thing is done by me and I saved money and time and that is very valuable to me.

Gracias por haberme acompañado en ver este paso a paso hasta el final y agradezco tu comentario y apoyo, espero que te haya gustado.
Thank you for accompanying me in seeing this step by step until the end and I appreciate your comment and support, I hope you liked it.
Todas las imágenes son tomadas con mi celular logicl55b.
Traducido con google.
All images are taken with my logic l55b cell phone.
Translated with Google.
BENDICIONES PARA TODOS.
BLESSINGS FOR ALL.

Feliz día bendiciones.
Le quedaron muy lindos los aretes Sra. @tibisayq23, me encanto mucho el diseño y la combinación de colores del alambre.
Que tenga una linda noche...
!DIY
Gracias amiga me alegro que te haya gustado feliz día muy agradecida por tu visita y comentario bendiciones un abrazo.
You can query your personal balance by
!DIYSTATSGracias.uy agradecida siempre feliz día bendiciones.
The introduction of using wire for earring putting together is becoming popular to people of a given society
Hola buen día amiga así es y muy bello trabajarlo feliz día bendiciones y éxitos.
It is so beautiful. It is stylish and elegant. Love it. Great work!
Gracias cuánto honor .e hacen me alegro que le haya gustado feliz día bendiciones.