
| Esp | Eng |
|---|---|
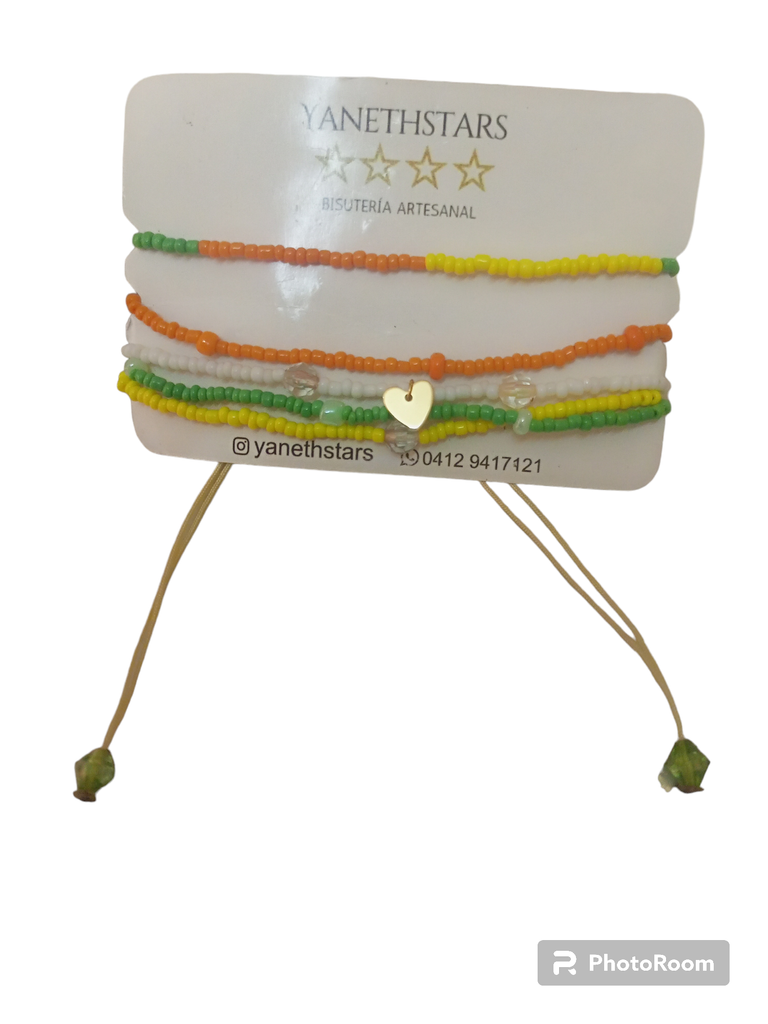
| Hola amigos de nuestra linda y creativa comunidad, Te enseño a ensamblar tu pulsera de mostacillas. Desde hace un tiempo había querido hacer este LINDO BRAZALETE DE MOSTACILLA, pero se me complicaba el ensamblaje y por más que intentaba no podía, porque introducir el hilo chino por las mostacillas no funcionaba por más que quemará las puntas, y trabajar la manilla del brazalete con hilo mostacillero tampoco me gustaba porque quedaba muy delgada la manilla. Ví muchos videos y no explicaban la técnica bien, sino el resultado, como que guardaban el secreto, en otra plataforma famosa ví un video con éste titulo "Te enseño a ensamblar estas hermosas pulseras de mostacillas", me ilusione y dije por fin aprenderé inicie el video lo ví pero no explicaron como se ensambla, abajo había un link, dicho link me llevo a contactar a una persona y debía pagar 25 $ para recibir la técnica, me frustre mucho para ser sincera, pero estaba obsesionada por aprender, y realmente pase días pensando e intentando hacerla, hasta que se me ocurrió hacer la técnica que les explico. No se si hay otras maneras de ensamblar o es la que usan los artesanos expertos, pero si alguien quiere hacerla no sufrirá lo que yo sufrí por lo que se las enseño. A continuación les comparto el paso a paso y la lista de materiales. | Hello friends of our beautiful and creative community, I teach you how to assemble your bead bracelet. For some time I had wanted to make this NICE MOSTACILE BRACELET, but the assembly was complicated and no matter how hard I tried I could not, because introducing the Chinese thread through the beads did not work even if it burned the ends, and working the handle of the bracelet with bead thread I did not like either because the handle was too thin. I saw many videos and they did not explain the technique well, but the result, as if they kept the secret, in another famous platform I saw a video with this title "I teach you how to assemble these beautiful beads bracelets ", I got excited and I said finally I will learn I started the video I saw it but they did not explain how to assemble it, below there was a link, this link took me to contact a person and I had to pay 25 $ to receive the technique, I was very frustrated to be honest, but I was obsessed to learn, and I really spent days thinking and trying to do it, until it occurred to me to do the technique I explained. I don't know if there are other ways to assemble it or if it is the one used by expert craftsmen, but if someone wants to make it, they won't suffer what I suffered, so I'll show you how to do it. Below I share with you the step by step and the list of materials. |
| Materiales: | Materials: |
|---|---|
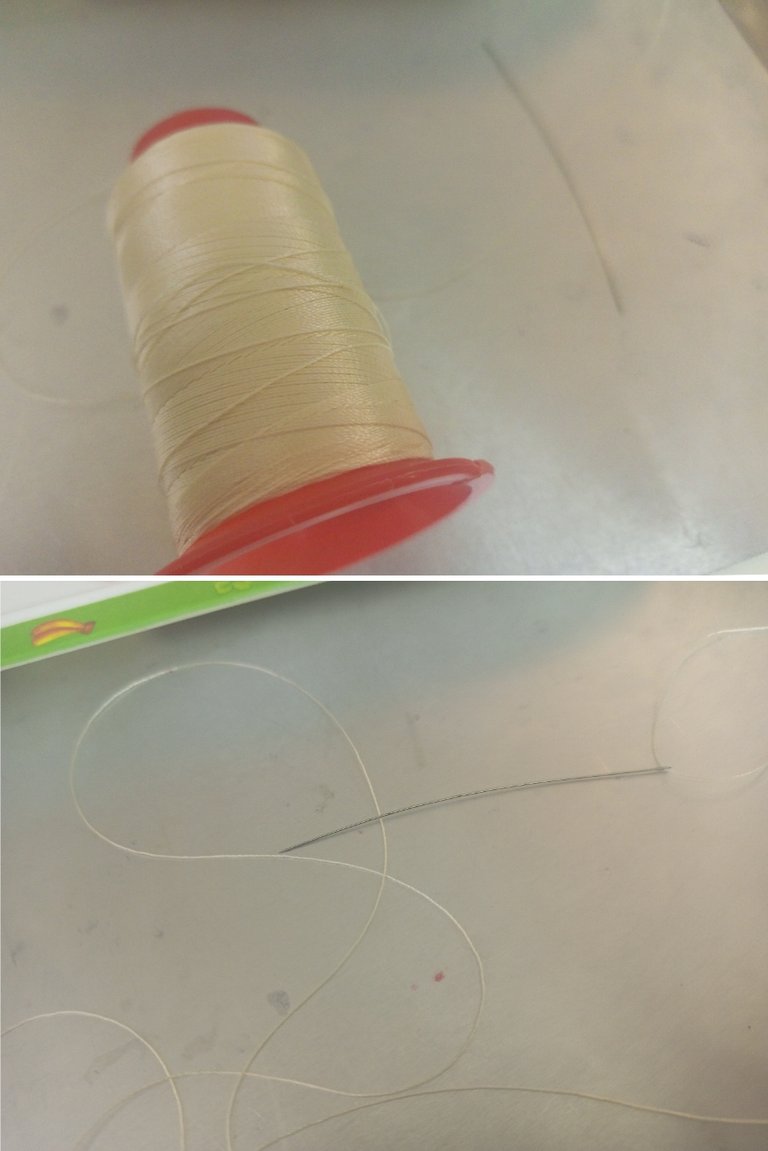
| Hilo chino beige, hilo para mostacillas beige, mostacillas: blanca, verde, amarilla, naranja, cristales, piedras, mostacillones, 1 dije de corazón, tijeras, yesquero, carpeta con ganchos, aguja mostacillera, pinza de bisutería, regla o metro. | Chinese beige thread, beige bead thread, beige beads, beads: white, green, yellow, orange, crystals, stones, beads, 1 heart charm, scissors, tinder, folder with hooks, beige bead needle, jewelry tweezers, ruler or tape measure. |

| Instrucciones: | Instructions: |
|---|
| Paso 1 | Step 1 |
|---|---|
| El primer paso fué cortar 2 metros de hilo mostacillero para trabajar cómodamente y sin temor a quedarnos sin hilo, y lo enhebramos en la aguja mostacillera. | The first step was to cut 2 meters of mustard thread to work comfortably and without fear of running out of thread, and thread it on the mustard needle. |
| Paso 2 | Step 2 |
|---|---|
| El brazalete es de 5 pulseras ensambladas en una, comenzaremos con la primera que es de color amarillo, la medida que utilizaremos es de 15 cm de largo, hice en la carpeta 4 marcas, a 3,75 cm, en el medio a 7, 50 cm, a 11,25 cm y a 15 cm para tener referencias donde debo introducir los cristales, el dije y mostacillones. Comencé a introducir mostacillas amarillas y en la marca de 7.50 cm introduje una cristal seguí introduciendo las mostacillas hasta la marca de 15 cm. Pise con el gancho de la carpeta y rodé las mostacillas hasta aproximado un metro del hilo, cuidando quede una cola de hilo de 1 metro de cada lados. | The bracelet is 5 bracelets assembled in one, we will start with the first one which is yellow, the measure we will use is 15 cm long, I made in the folder 4 marks, at 3.75 cm, in the middle at 7.50 cm, at 11.25 cm and at 15 cm to have references where I should introduce the crystals, the pendant and beads. I started inserting yellow beads and at the 7.50 cm mark I inserted a crystal and continued inserting the beads until the 15 cm mark. I stepped on the hook of the folder and rolled the beads up to approximately one meter of the thread, taking care to leave a thread tail of 1 meter on each side. |

| Paso 3 | Step 3 |
|---|---|
| Pisaremos los hilos con dos ganchos en los dos extremos del hilo para que no se suelten las mostacillas. Y aquí viene el ensamblaje, para esto debemos cortar dos hilos chinos de aproximado 30 cm cada uno. Y ataremos estos hilos en el inicio y final de está primera pulsera amarilla. Les recomiendo que este nudo no quede muy apretado, porque debemos introducir la aguja por ese nudo, debemos sujetar estos hilos con ganchos para que no se suelte el nudo y podamos trabajar mejor. | We will step on the threads with two hooks at both ends of the thread so that the beads do not come loose. And here comes the assembly, for this we must cut two Chinese threads of approximately 30 cm each. And we will tie these threads at the beginning and end of this first yellow bracelet. I recommend that this knot is not too tight, because we must introduce the needle through this knot, we must hold these threads with hooks so that the knot does not come loose and we can work better. |

| Paso 4 | Step 4 |
|---|---|
| Haremos ahora la segunda pulsera que es color naranja, introduje mostacillones naranjas intercalados en las 4 marcas. Y la aguja la pasaré por el orificio del nudo, y tenemos listas las dos primeras pulseras. | We will now make the second bracelet which is orange, I introduced orange beads interspersed in the 4 marks. And I will pass the needle through the hole of the knot, and we have the first two bracelets ready. |

| Paso 5 | Step 5 |
|---|---|
| Continúe ensamblando y corresponde a la pulsera blanca. Introduje la aguja por el nudo, introduje las mostacillas blancas y a una medida diferente a 2 centimetros antes del medio introduje cristales, conté 10 mostacillas, introduje el dije, conte 10 mostacillas más, 1 cristal y continue introduciendo las mostacillas hasta completar los 15 cm. | Continue assembling and it corresponds to the white bracelet. I introduced the needle through the knot, introduced the white beads and at a different measure 2 centimeters before the middle I introduced crystals, counted 10 beads, introduced the pendant, counted 10 more beads, 1 crystal and continued introducing the beads until completing the 15 cm. |


| Paso 6 | Step 6 |
|---|---|
| Recordemos que al inicio y final de cada pulsera debemos introducir la aguja por los nudos de hilo chino. Haremos la cuarta pulsera color verde, e intercalaremos mostacillones verdes en las marcas que hicimos. A esta altura ya el hilo de la aguja está corto, por lo que debemos introducir la aguja por las pulseras para reforzar y rematar muy bien este hilo, quemamos el excedente y trabajaremos con el hilo del otro lado. | Remember that at the beginning and end of each bracelet we must introduce the needle through the Chinese thread knots. We will make the fourth green bracelet, and we will insert green beads in the marks we made. At this point the needle thread is already short, so we must introduce the needle through the bracelets to reinforce and finish off this thread very well, burn the excess and work with the thread on the other side. |

| Paso 7 | Step 7 |
|---|---|
| Esta última pulsera la hice en colores: verde, amarilla, naranja, verde, introduje la aguja por el orificio del nudo del hilo chino. | This last bracelet I made it in colors: green, yellow, orange, green, I introduced the needle through the hole of the knot of the Chinese thread. |

| Paso 8 | Step 8 |
|---|---|
| El hilo excedente lo introduje por todas las mostacillas de las demás pulseras para dar más resistencia y seguridad al brazalete. | The excess thread was threaded through all the beads of the other bracelets to give more strength and security to the bracelet. |

| Paso 9 | Step 9 |
|---|---|
| Ahora destaremos los nudos e introduje 2 cristales verdes. | Now we untie the knots and introduce 2 green crystals. |


| Paso 10 | Step 10 |
|---|---|
| Corté 2 hilos chinos de 20 cm cada uno. Sujeté con el gancho de la carpeta e hice un trancadero de nudo plano de 9 puntos. Corté y quemé el excedente del hilo. | I cut 2 Chinese threads of 20 cm each. I fastened with the hook of the binder and made a 9 stitches flat knot lock. I cut and burned the excess thread. |

| Paso 11 | Step 11 |
|---|---|
| Introduje un cristal en cada lado de los hilos de la manilla. | I inserted a crystal on each side of the handle threads. |

| Despedida | Farewell |
|---|---|
| Y está es mi propuesta del día de hoy LINDO BRAZALETE DE MOSTACILLA. Un post hecho con amor, espero les guste y disfruten mi post. | And this is my proposal for today NICE BRACELET MADE OF MUSTARD CLAY. A post made with love, I hope you like it and enjoy my post. |


| Créditos | Credits |
|---|---|
| Traductor: www.DeepL.com/Translator (free version).Las fotos fueron tomadas con mi Celular Tecno Sport 7T. Foto de portada editada con Canva y PhotoRoom Banner editado con Canva. Patron: https://images.app.goo.gl/nDWEaoLxKGnokedKA. | Translator: www.DeepL.com/Translator (free version).The photos were taken with my Tecno Sport 7T cell phone. Cover photo edited with Canva y PhotoRoom. Banner edited with Canva. Patron: https://images.app.goo.gl/nDWEaoLxKGnokedKA |
Hermoso brazalete amiga, me encanta.
Gracias por compartir 😃
Gracias amiga. Saludos 🤗
Gracias @melinda010100 por el apoyo a mi trabajo. Saludos 🤗
Muy linda pulsera. Feliz día de la Mujer 🌷. Saludos
Gracias amiga. Para ti también mucha felicidad. Saludos 🤗
Preciosa. Los colores son muy lindos porque es una combinación de colores cálidos y el verde le da un contraste genial. Me gusta jugar con los colores y probar combinaciones contrastantes. Esta te quedó genial.
Gracias 😊. No soy mucho de esa combinación de colores prefiero los rosas, azules y otros colores neutros, pero siempre hay que probar y también me gustó el resultado. Saludos 🤗
Muy buena técnica, hay que tener gran dedicación y mucha paciencia amiga, es todo un arte,🤗
Gracias ☺️..saludos 🤗
Bendiciones amiga. me encanta los colores de la pulsera se ven muy llamativo
I usually admire people putting this mixing of bracelet because I finds it challenging because my hand can swell because no air usually enter my hands.
Congratulations @yanethstars! You have completed the following achievement on the Hive blockchain And have been rewarded with New badge(s)
Your next target is to reach 350 posts.
Your next target is to reach 1000 comments.
You can view your badges on your board and compare yourself to others in the Ranking
If you no longer want to receive notifications, reply to this comment with the word
STOPCheck out our last posts: