| Esp | Eng |
|---|---|
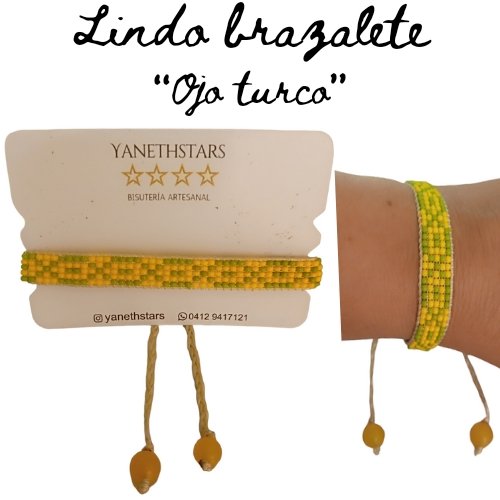
| Hola hermosa comunidad de JEWELRY, saludos a todos mis amigos creativos, que cada día se esfuerzan para compartir contenido de calidad. El día de hoy traigo para ustedes esté LINDO BRAZALETE DE OJOS TURCOS. Accesorios con estos ojos están muy de moda, los vemos en anillos, aretes, brazaletes, broches de carteras, y muchos más. También se conocen como ojo griego, nazar, muchos los utilizan como amuleto y otros los usan porque les gusta la moda. Yo lo hice siguiendo el patrón creyendo que era una figura geométrica, y cuando detalle entendí que son ojos. Yo particularmente no creó en esta especie de protección, creo en la protección de Dios, pero no dejaré de compartir el trabajo. A continuación les comparto la lista de materiales y el paso a paso de mi trabajo. | Hello beautiful JEWELRY community, greetings to all my creative friends, who every day strive to share quality content. Today I bring for you this NICE TURKISH EYES BRACELET. Accessories with these eyes are very fashionable, we see them in rings, earrings, bracelets, wallet clasps, and many more. They are also known as Greek eye, nazar, many use them as an amulet and others use them because they like fashion. I made it following the pattern believing that it was a geometric figure, and when detailing I understood that they are eyes. I don't particularly believe in this kind of protection, I believe in God's protection, but I will not stop sharing the work. Below I share with you the list of materials and the step by step of my work. |
| Materiales: | Materials: |
|---|---|
| Hilo chino beige, hilo para mostacilla beige, mostacillas calibradas: amarilla, verde, 2 piedras amarillas, telar, tijeras, aguja mostacillera, yesquero, pinzas de bisuteria. | Chinese beige thread, beige bead thread, calibrated beads: yellow, green, 2 yellow stones, loom, scissors, beige bead needle, tinder, jeweler's tweezers, jewelry tweezers. |

| Instrucciones: | Instructions: |
|---|
| Paso 1 | Step 1 |
|---|---|
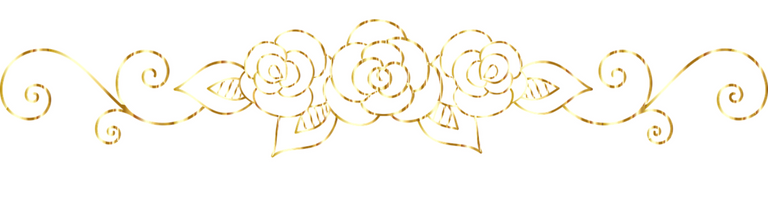
| Lo primero que haremos será montar en nuestro telar el hilo para tejer la pulsera. Esté brazalete es de 5 columnas, por lo que montaremos en el telar 6 hilos. Resaltando que los dos hilos que van en los extremos, los monto en hilo chino beige, prefiero hacerlo en hilo chino porque es más firme que el hilo de mostacilla, y le da más precensia y mejor acabado a nuestro brazalete. | The first thing we will do is to mount on our loom the thread to weave the bracelet. This bracelet is of 5 columns, so we will mount 6 threads on the loom. Highlighting that the two threads that go in the ends, I mount them in Chinese beige thread, I prefer to do it in Chinese thread because it is firmer than the mustard thread, and it gives more precensia and better finished to our bracelet. |

| Paso 2 | Step 2 |
|---|---|
| Luego con el hilo de mostacilla color beige, monto el resto de las columnas que son 4, aproximadamente utilizo para esto 4 metros de hilo. | Then with the beige mustard thread, I assemble the rest of the columns, which are 4, approximately I use 4 meters of thread for this. |
| Paso 3 | Step 3 |
|---|---|
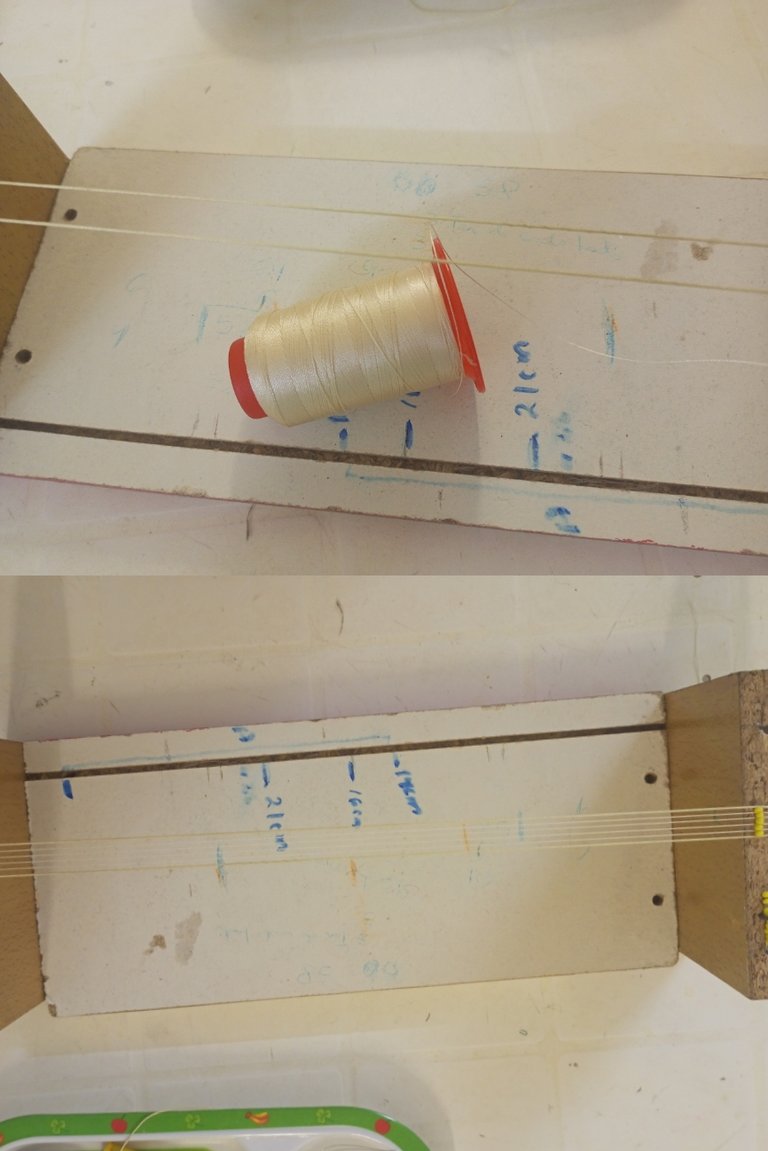
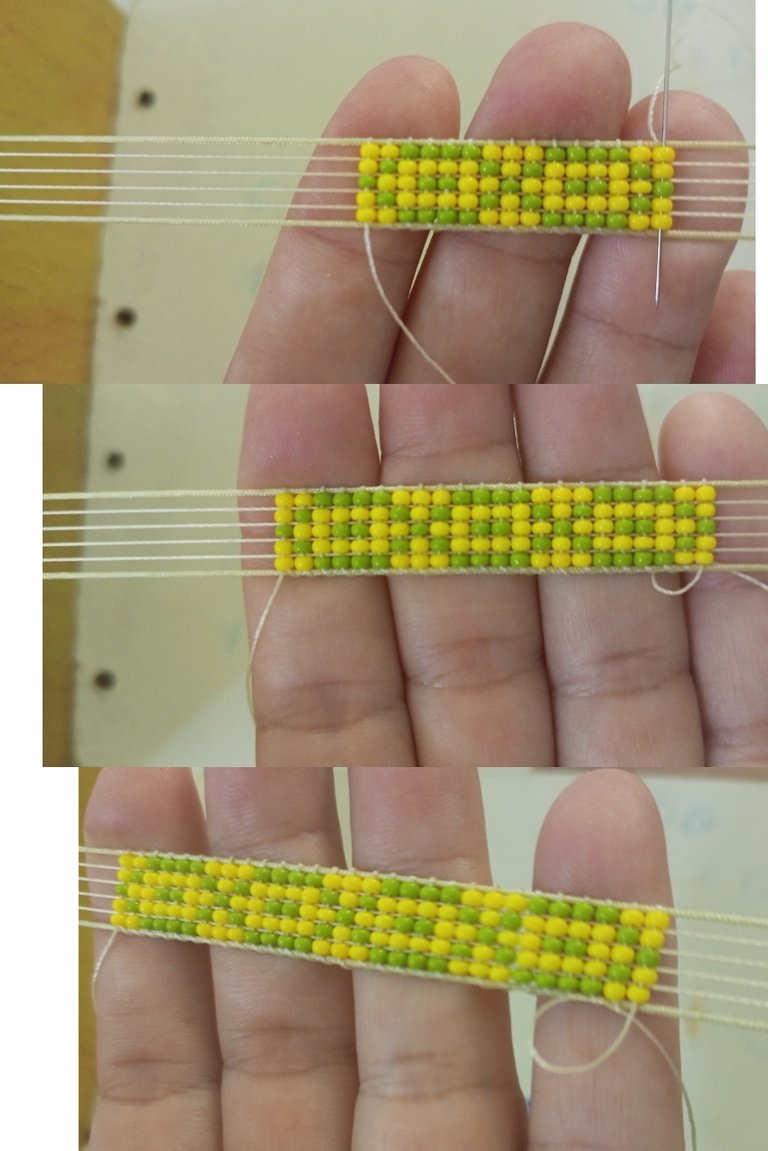
| El siguiente paso es comenzar a tejer, ya que nuestro telar está ya preparado. La pulsera es de 65 filas y para las terminaciones 3 filas: una de 5, luego de 3 y para el final 1, para un total de 71 filas. 9 ojos para todo el brazalete. Comenzaremos enhebrando 3 metros de hilo pescador en nuestra aguja mostacillera. Y tomaremos las mostacillas según el patron que tengamos para trabajar. | The next step is to start weaving, since our loom is already prepared. The bracelet is 65 rows and for the ends 3 rows: one of 5, then 3 and for the end 1, for a total of 71 rows. 9 eyes for the whole bracelet. We will start by threading 3 meters of fishing line on our bead needle. And we will take the beads according to the pattern we have to work with. |
| Paso 4 | Step 4 |
|---|---|
| El patrón que usamos para cada ojo es de 8 filas. La primera el patrón es: 2 amarillas, 1 verde, 2 amarillas; la segunda: 1 amarilla, 1 verde, 1 amarilla, 1 verde, 1 amarilla; la tercera: 1 verde, 3 amarillas, 1 verde; la cuarta: 1 verde, 1 amarilla, 1 verde, 1 amarilla, 1 verde; la quinta: 1 verde, 1 amarilla, 1 verde, 1 amarilla, 1 verde; la sexta: 1 verde, 3 amarillas, 1 verde; la septima: 1 amarilla, 1 verde, 1 amarilla, 1 verde, 1 amarilla, la octava: 2 amarillas, 1 verde, 2 amarillas. | The pattern we use for each eye is 8 rows. the first pattern is: 2 yellows, 1 green, 2 yellows; the second: 1 yellow, 1 green, 1 yellow, 1 yellow, 1 green, 1 yellow; the third: 1 green, 3 yellows, 1 green; the fourth: 1 green, 1 yellow, 1 green, 1 yellow, 1 green; **the fifth: ** 1 green, 1 yellow, 1 green, 1 yellow, 1 green; the sixth: 1 green, 3 yellows, 1 green; the seventh: 1 yellow, 1 green, 1 yellow, 1 green, 1 yellow, 1 green, 1 yellow, the eighth: 2 yellows, 1 green, 2 yellows. |

| Paso 5 | Step 5 |
|---|---|
| Ahora seguiremos solo el patrón hasta completar los 9 ojos. En está imagen vemos el proceso hasta el cuarto ojo. | Now we will follow only the pattern until completing the 9 eyes. In this image we see the process up to the fourth eye. |
| Paso 6 | Step 6 |
|---|---|
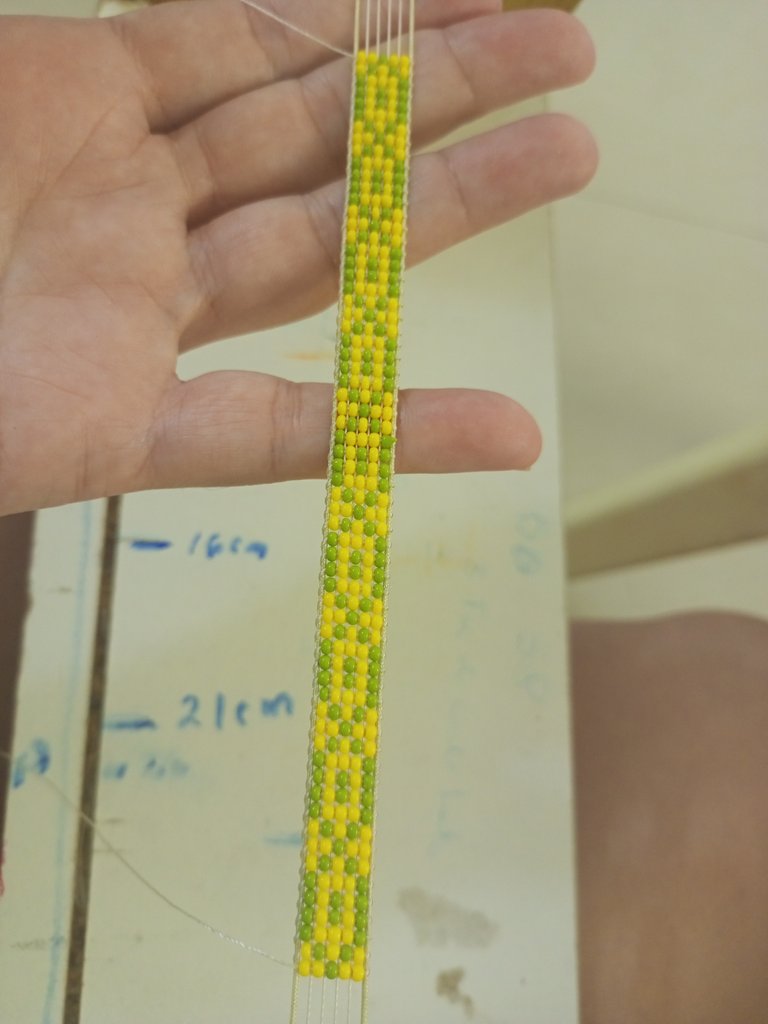
| En estas imágenes vemos la pulsera concluida en los 9 ojos. | In these images we can see the finished bracelet in the 9 eyes. |

| Paso 7 | Step 7 |
|---|---|
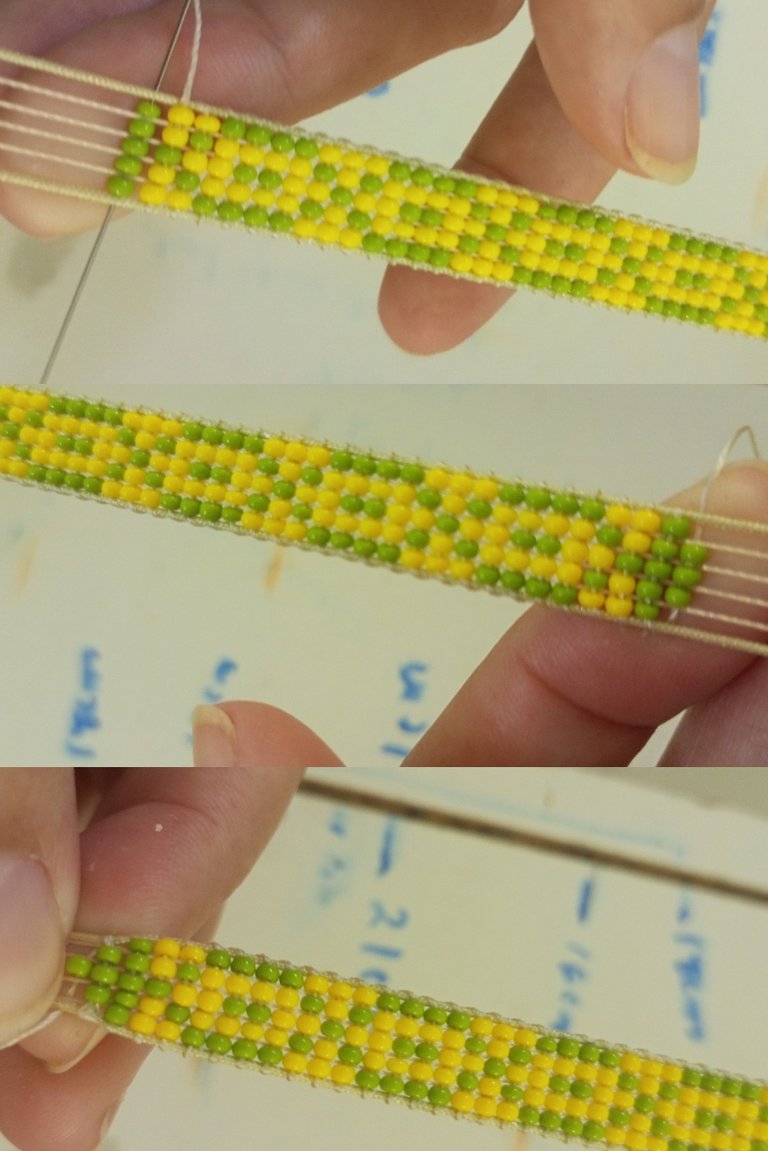
| Trabajaremos con las terminaciones, iniciamos con una reducción de cada lado, 5, 3, 1. Pero para marcar y se vea distinto colocamos estas fila en mostacillas en color verde. Una vez colocadas estás mostacillas el hilo que sobre lo devuelvo a la pulsera enredando el hilo entre las mostacillas. Cortamos y quemamos el excedente, repetimos el proceso en el otro lado. Cortamos los hilos del telar, y desmontamos. | We will work with the endings, we start with a reduction on each side, 5, 3, 1. But to mark and look different we place these rows in green beads. Once these beads are placed the thread that is left over I return it to the bracelet tangling the thread between the beads. We cut and burn the excess, repeat the process on the other side. We cut the threads of the loom, and we dismantle the bracelet. |

| Paso 8 | Step 8 |
|---|---|
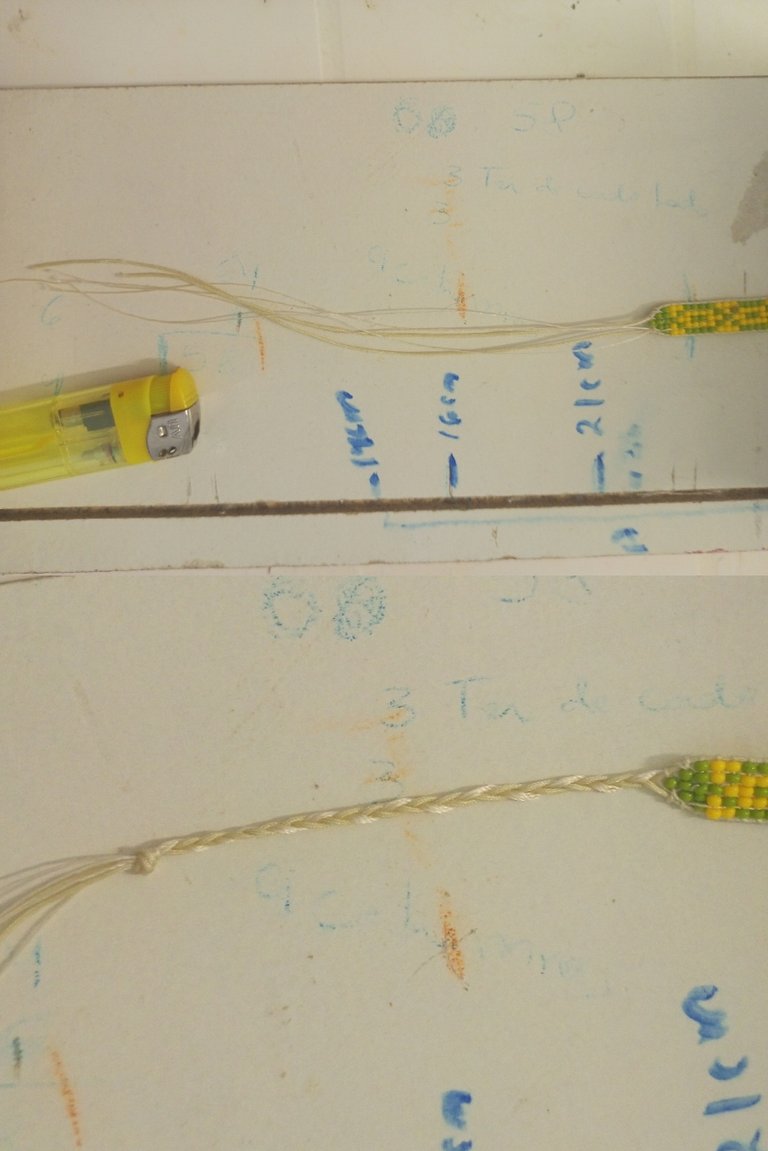
| Tejemos con una trenza de tres, utilizando todos los hilos. En otros diseños podemos tejer todos los hilos en el brazalete escondiendo el hilo entre las mostacillas, en éste caso decidí tejer todo y hacer un nudo en al final. Repetimos el proceso en el otro lado. | We weave with a braid of three, using all the threads. In other designs we can weave all the threads in the bracelet hiding the thread between the beads, in this case I decided to weave all the threads and make a knot at the end. Repeat the process on the other side. |
| Paso 9 | Step 9 |
|---|---|
| Introducimos los hilos por la piedra amarilla hacemos un nudo, cortamos y quemamos el excedente. | We introduce the threads through the yellow stone, tie a knot, cut and burn the excess. |
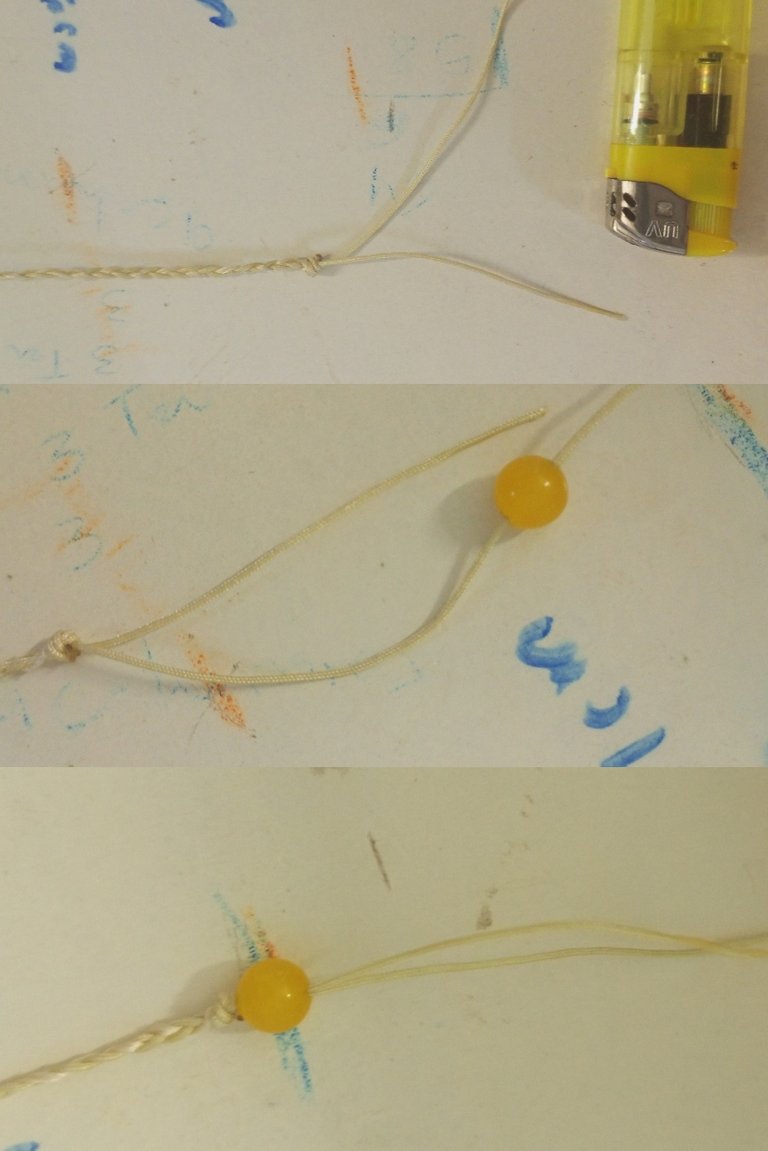
| Paso 10 | Step 10 |
|---|---|
| Cerramos con un nudo franciscano de 4 vueltas, cortamos y quemamos el excedente. | Close with a Franciscan knot of 4 turns, cut and burn the excess. |

| Despedida | Farewell |
|---|---|
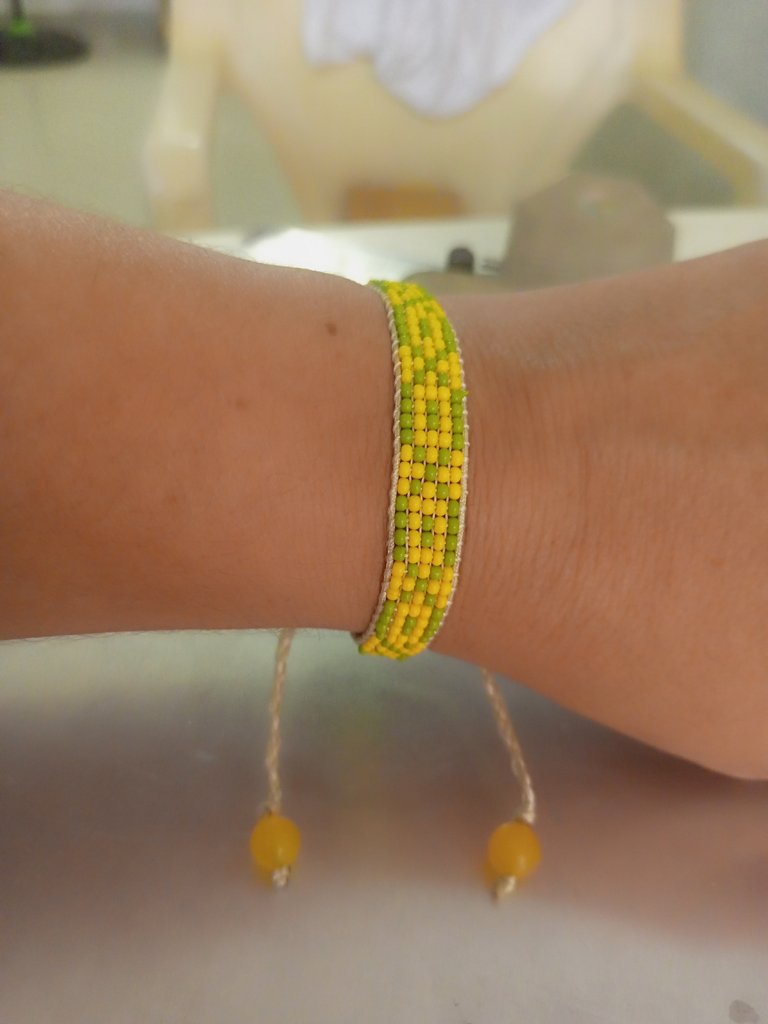
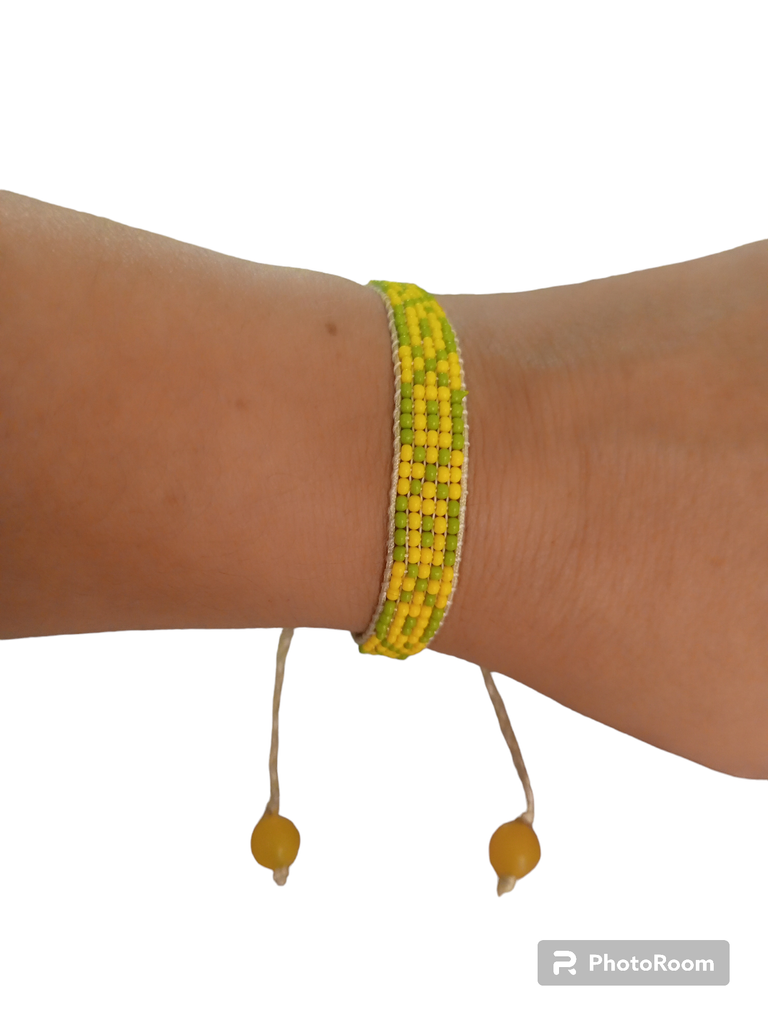
| Y está es mi propuesta del día de hoy LINDO BRAZALETE DE OJOS TURCOS. Un post hecho con amor, espero les guste y disfruten mi post. | And this is my proposal for today NICE TURKISH EYES BRACELET. A post made with love, I hope you like it and enjoy my post. |


| Créditos | Credits |
|---|---|
| Traductor: www.DeepL.com/Translator (free version).Las fotos fueron tomadas con mi Celular Tecno Sport 7T. Foto de portada editada con Canva y PhotoRoom Banner editado con Canva. Patron: https://images.app.goo.gl/nDWEaoLxKGnokedKA. | Translator: www.DeepL.com/Translator (free version).The photos were taken with my Tecno Sport 7T cell phone. Cover photo edited with Canva y PhotoRoom. Banner edited with Canva. Patron: https://images.app.goo.gl/nDWEaoLxKGnokedKA |
 ⁷
⁷
Muy lindo, el color es genial me encanta, gracias por compartir @yanethstars
Gracias amiga. Saludos 🤗
Se ve muy bonito amiga, a mi me gusta el color amarillo, es muy vibrante y aporta algo de energia, yo tambien creo en Dios pero ciertos colores lo ayudan a uno a verse de mejor semblante.
Gracias amiga por visitar mi post. Saludos 🤗
Está muy lindo. Me encantó este diseño. Gracias por compartir 😊
Gracias amiga a ti por visitar y comentar mi post. Saludos 🤗
Que linda pulsera una técnica muy laboriosa y original ....un gran talento ....gracias por compartir
Gracias amiga. Saludos 🤗
Hermoso trabajo @yanethstars me pareció de muy buen gusto amiga, saluditos.
Gracias amiga. Saludos 🤗