| Esp | Eng |
|---|---|
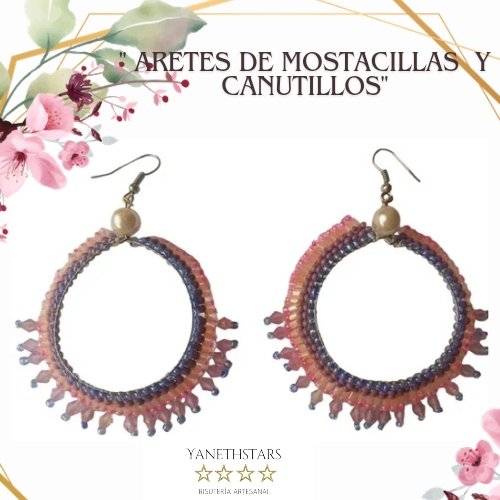
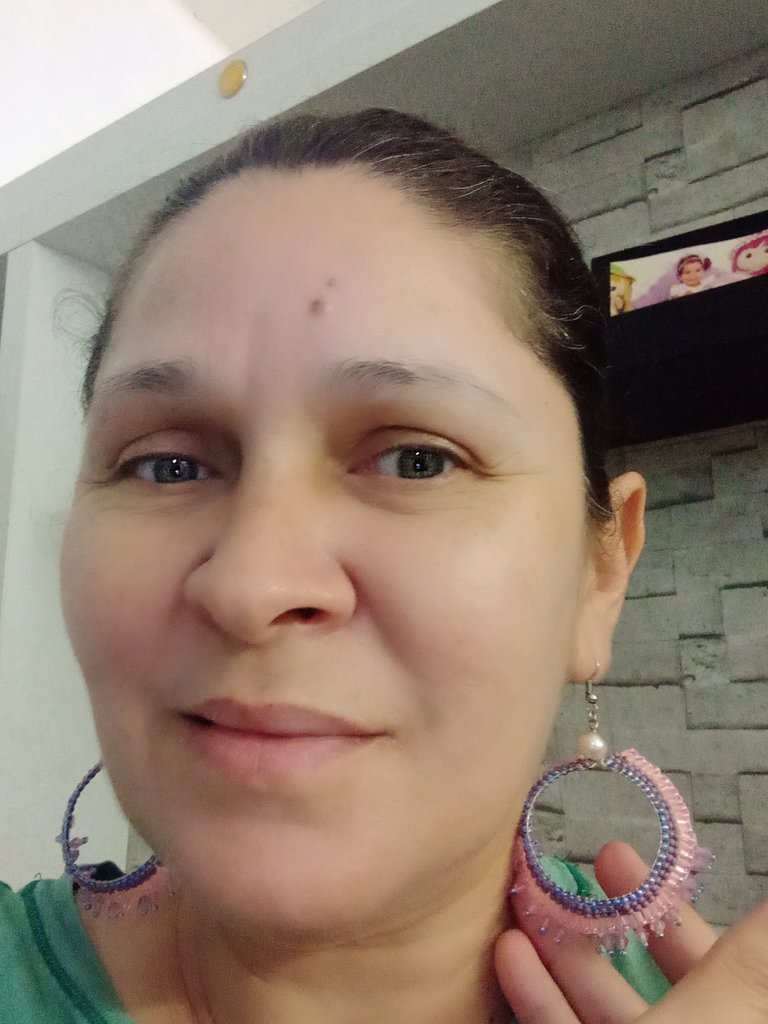
| Hola a todos amigos creativos de la comunidad de Jewelry, hoy traigo está hermosa y elegante propuesta unos LINDOS ARETES EN MOSTACILLAS Y CANUTILLOS. A continuación nuestra lista de materiales. | Hello to all creative friends of the Jewelry community, today I bring you this beautiful and elegant proposal of CINCELLAR AND CANUTILLAS PITCHES. Here is our list of materials. |
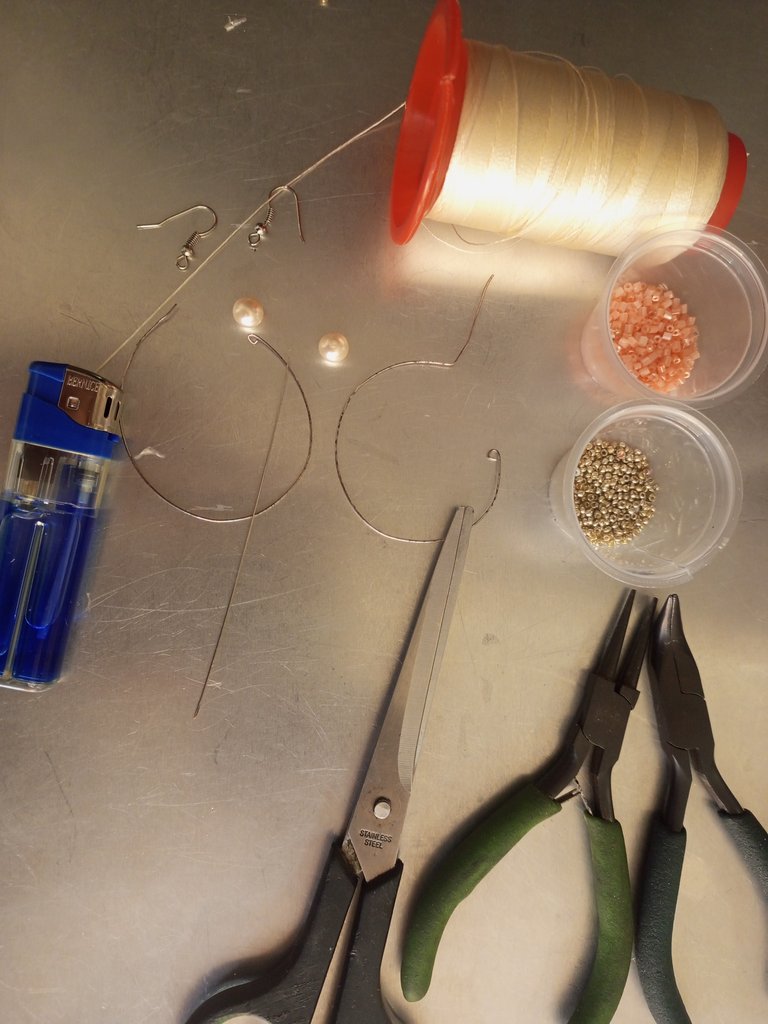
| Materiales: | Materials: |
|---|---|
| Dos bases de alambre, mostacillas: grises, azules, rosadas. Canutillos: rosados, 2 perlas 0,90 mm, hilo para mostacillas beige, aguja de mostacillas, 2 anzuelos, 2 argollas pequeñas, pinzas de bisutería, yesquero, tijera. | Two wire bases, beads: gray, blue, pink. Beads: pink, 2 beads 0.90 mm, beige beading thread, beading needle, 2 hooks, 2 small rings, jewelry tweezers, tinder, scissors. |
| Instrucciones: | Instructions: |
|---|
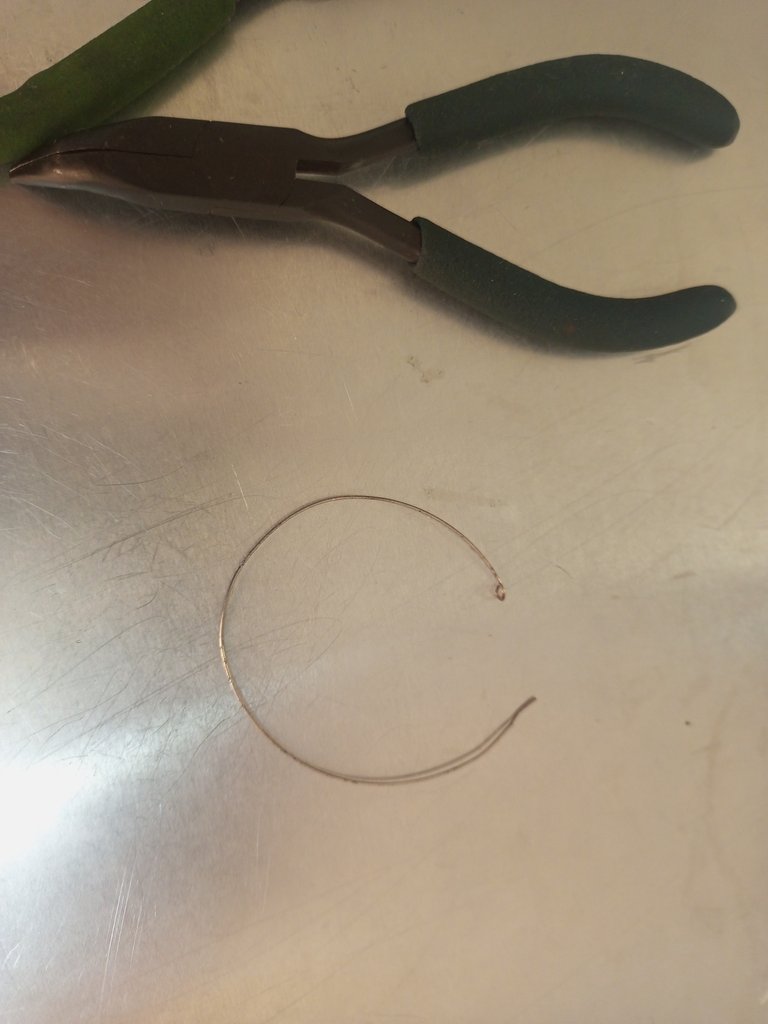
| Paso 1 | Step 1 |
|---|---|
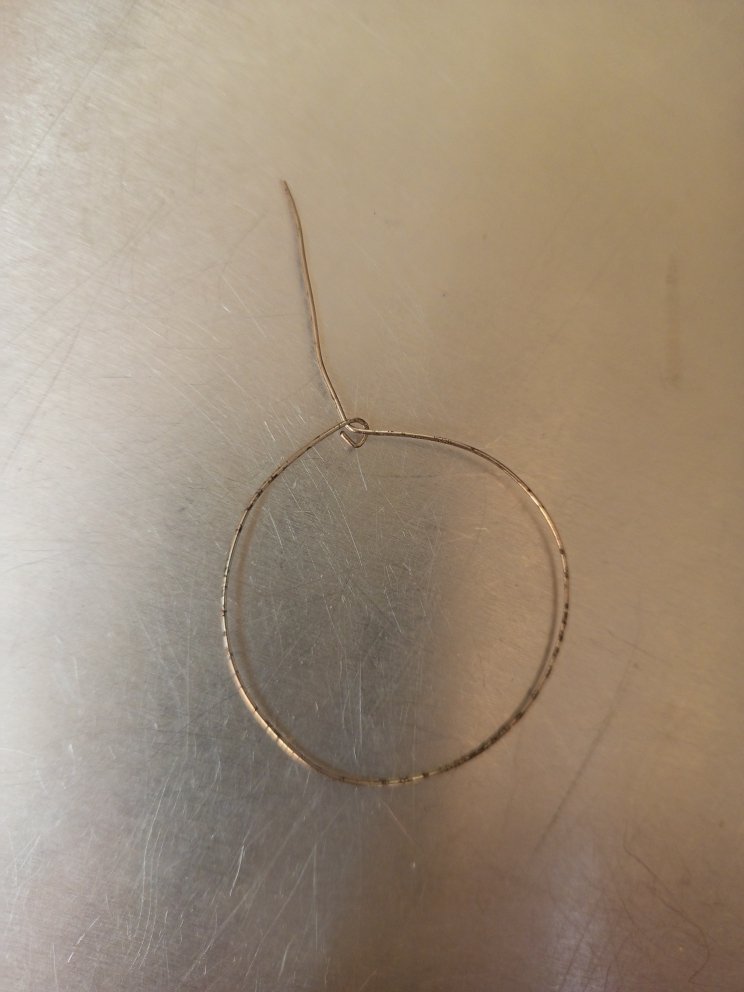
| El primer paso es darle forma a la base de las argollas, haciéndole un ojal en uno de los extremos y en el otro extremo darle una forma plana ayudandonos con la pinza. | The first step is to shape the base of the rings, making an eyelet at one end and at the other end give it a flat shape with the help of the pliers. |
| Paso 2 | Step 2 |
|---|---|
| Ese lado del alambre que quedo plano debemos introducirlo por el ojal del otro extremo quedando la argolla cerrada. | That side of the wire that was left flat should be inserted through the eyelet at the other end, thus closing the ring. |
| Paso 3 | Step 3 |
|---|---|
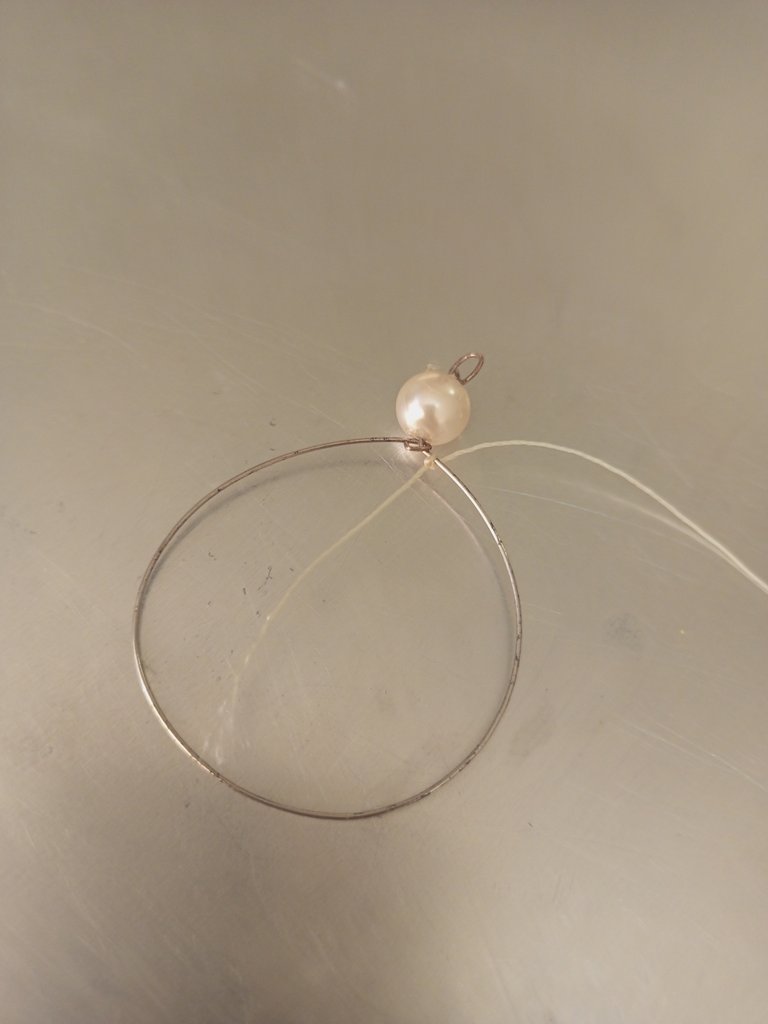
| Introducimos la perla por el alambre y ayudándonos con las pinzas haremos con el alambre un ojal superior que usaremos para la argolla donde guindaremos los anzuelos. | We introduce the pearl through the wire and with the help of the pliers we will make with the wire an upper eyelet that we will use for the ring where we will hang the hooks. |

| Paso 4 | Step 4 |
|---|---|
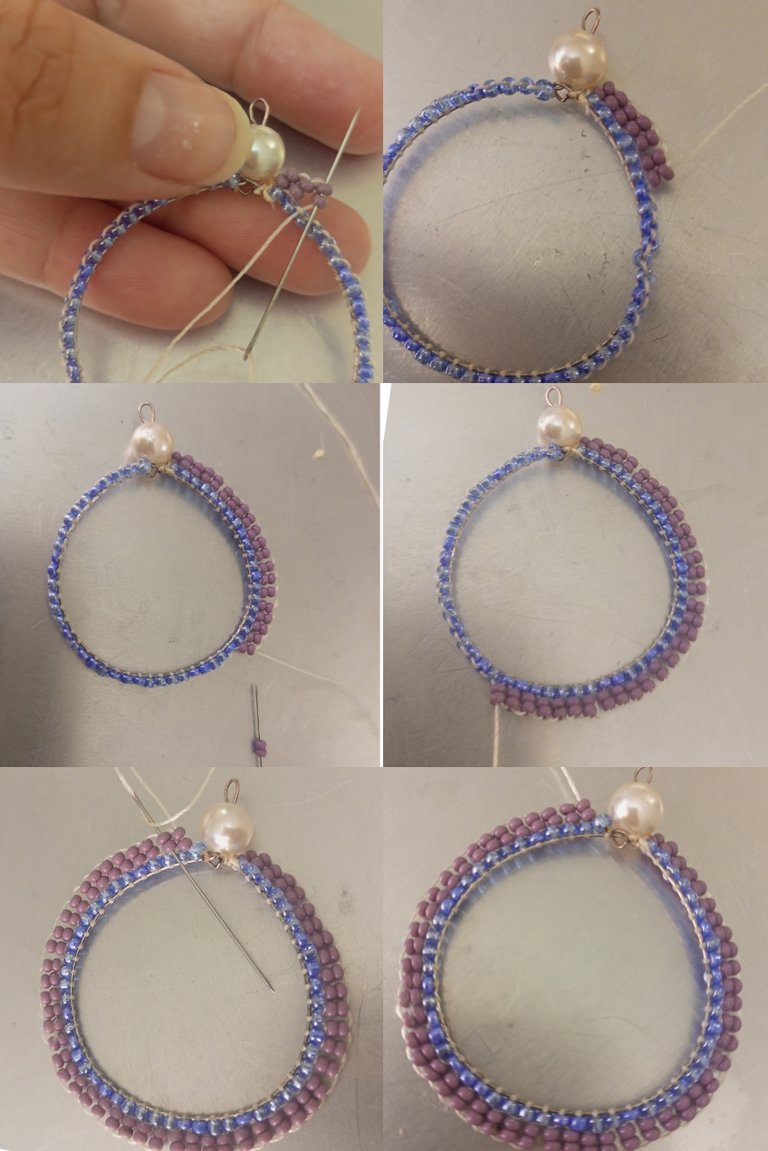
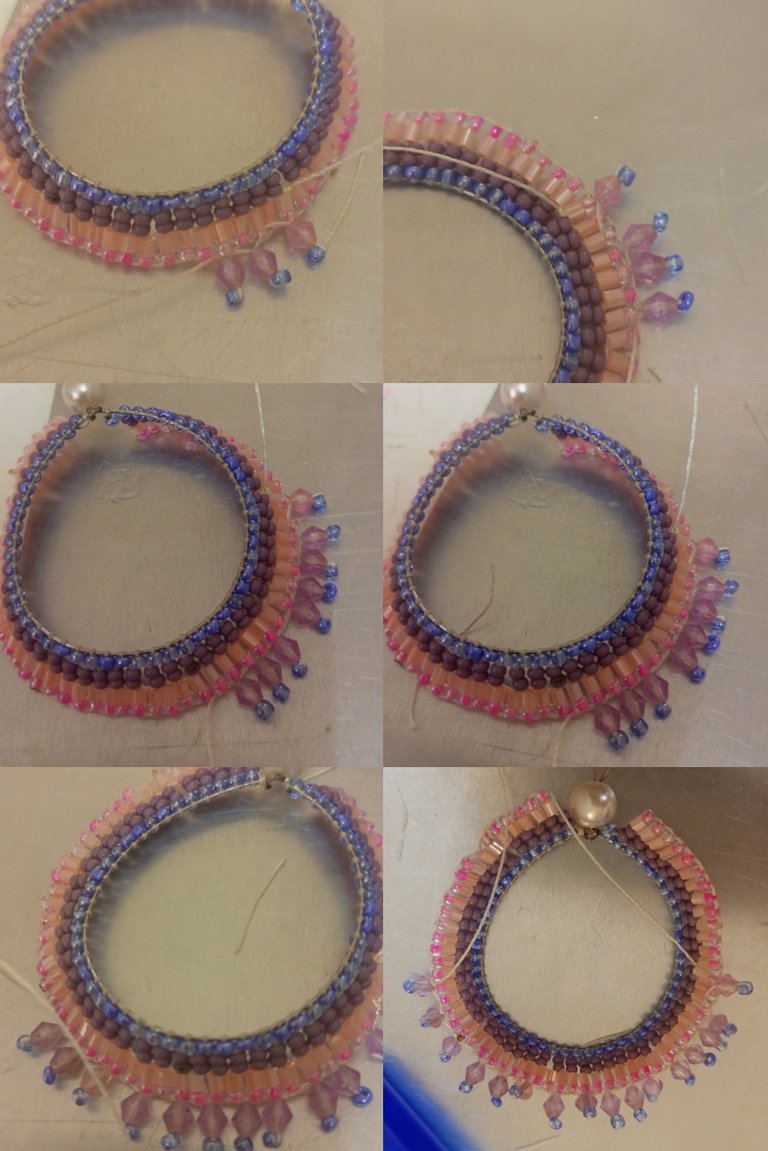
| Enhebre 1 metro de hilo y até a la argolla con un nudo simple doble. Lo lleve al incio de la argolla y allí comenzaré a tejer. | Thread 1 meter of yarn and tie it to the ring with a simple double knot. Bring it to the beginning of the ring and there I will begin weaving. |
| Paso 5 | Step 5 |
|---|---|
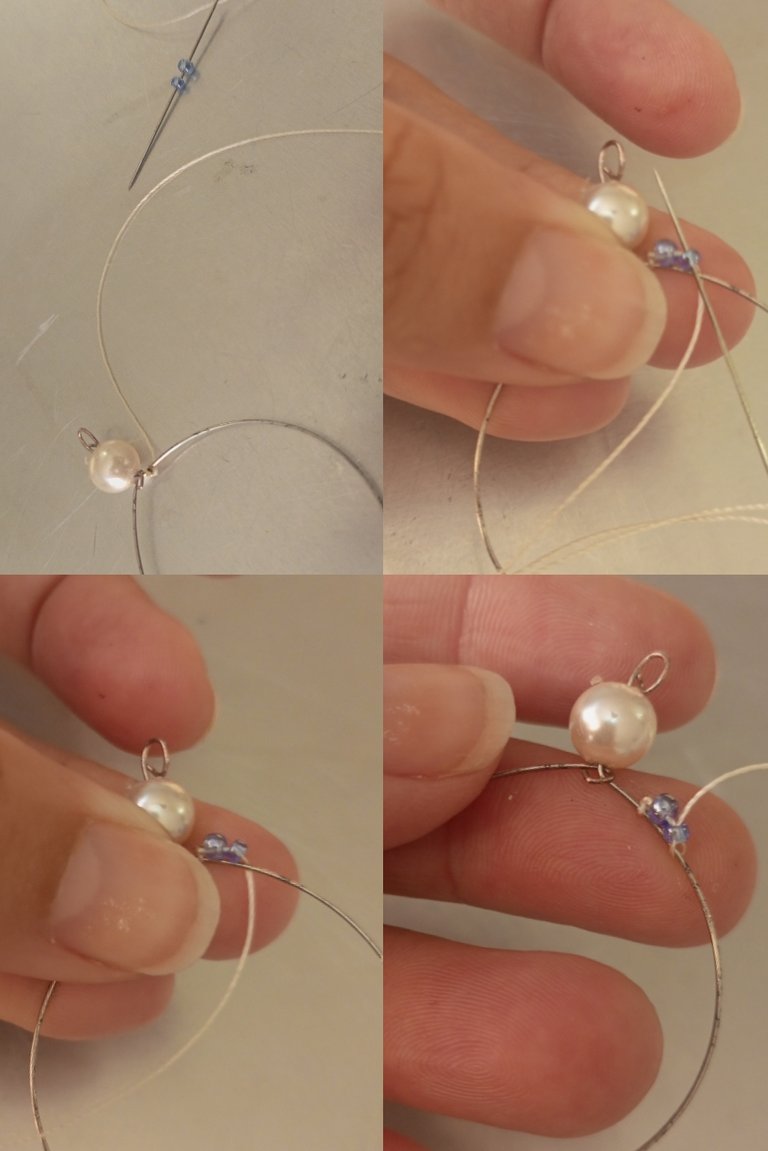
| Introduje 2 mostacillas azules en la aguja y la posicionamos sobre la argolla llevamos la aguja hacia abajo y luego subimos la aguja de abajo hacía arriba sacando por la segunda mostacilla. | I inserted 2 blue beads in the needle and positioned it on the ring, brought the needle downwards and then raised the needle from the bottom to the top, pulling it out through the second bead.. |
| Paso 6 | Step 6 |
|---|---|
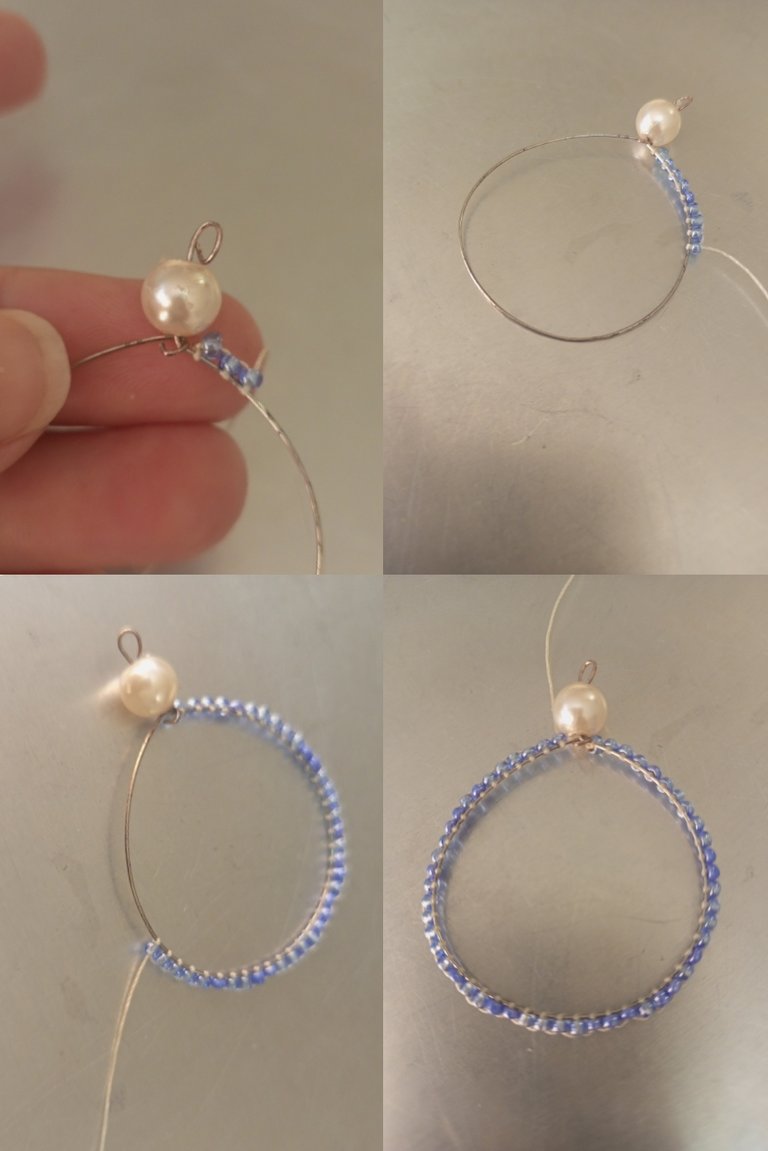
| Continuaremos tejiendo utilizando la misma técnica hasta cubrir todo el espacio de la argolla. | We will continue weaving using the same technique until we cover all the space of the ring. |
| Paso 7 | Step 7 |
|---|---|
| Trabajaremos con las mostacillas grises que la haremos doble poe lo que usaremos cuatro mostacillas, introduciendo la aguja luego en el primer puente de hilo que encontramos. | We will work with the gray beads that we will make it double so we will use four beads, introducing the needle then in the first thread bridge we find. |

| Paso 8 | Step 8 |
|---|---|
| Terminaremos de tejer con las mostacillas grises siempre usando dos mostacillas. En la foto observamos ya tejido todo está sección. | We will finish weaving with the gray beads always using two beads. In the photo we can see the woven section. |
| Paso 9 | Step 9 |
|---|---|
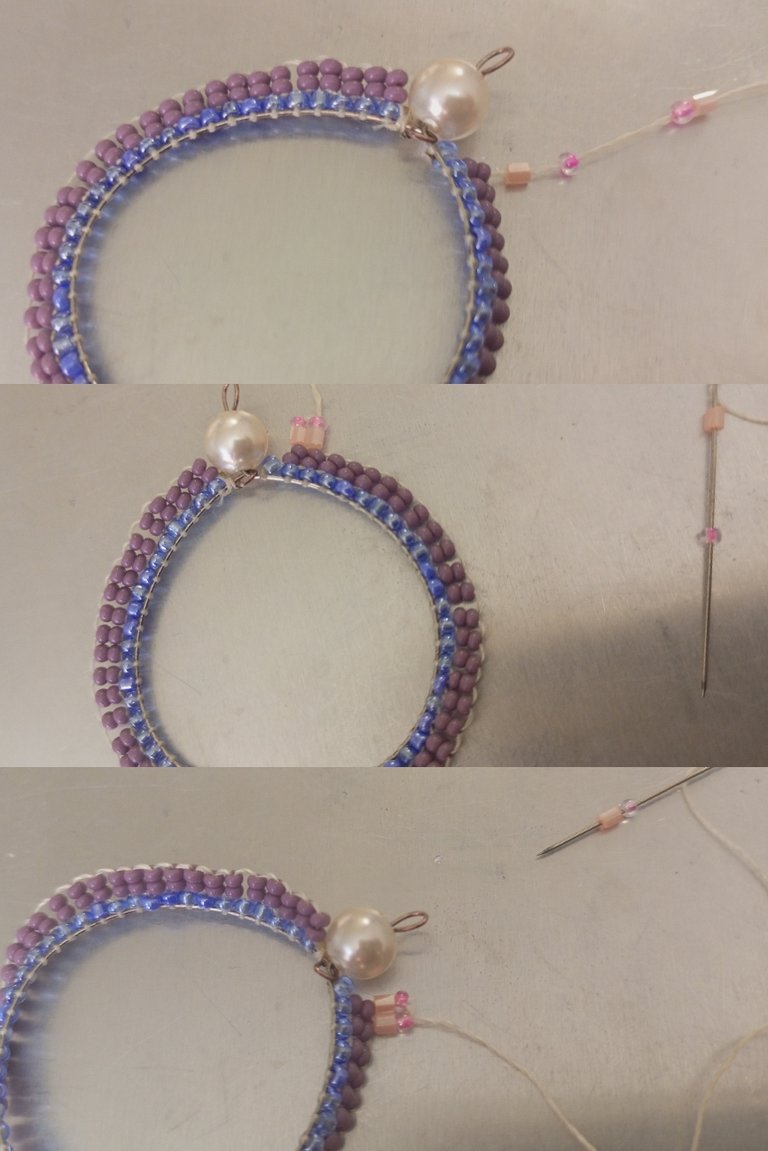
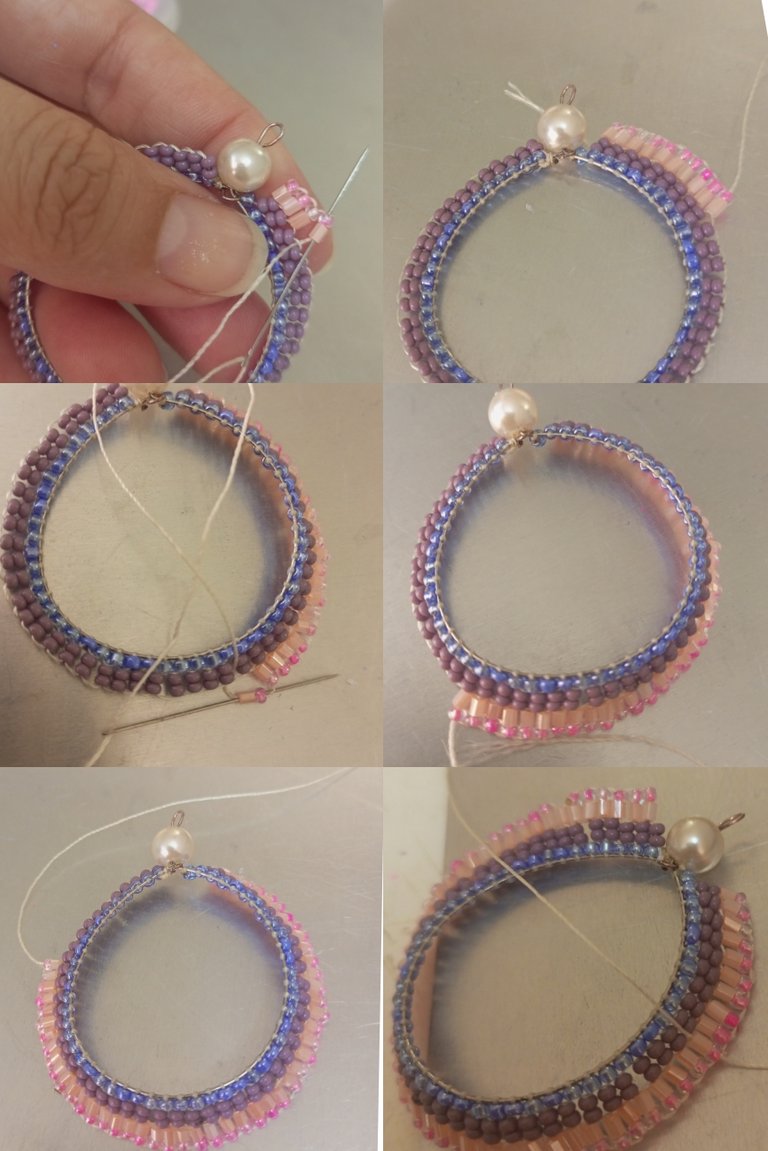
| Para la siguiente seccion tejí igual en dos espacios por lo que introduje 1 canutillo rosado y 1 mostacilla rosada, 1 mostacilla rosada y 1 canutillo rosado. Introducimos la aguja en el segundo grupo de las mostacillas. | For the next section I knit the same in two spaces so I introduced 1 pink bead and 1 pink bead, 1 pink bead and 1 pink bead. We introduce the needle in the second group of beads. |
| Paso 10 | Step 10 |
|---|---|
| Seguimos tejiendo hasta completar toda la argolla. Usando sienpre la misma técnica. | We continue weaving until the whole ring is completed. Always using the same technique. |
| Paso 11 | Step 11 |
|---|---|
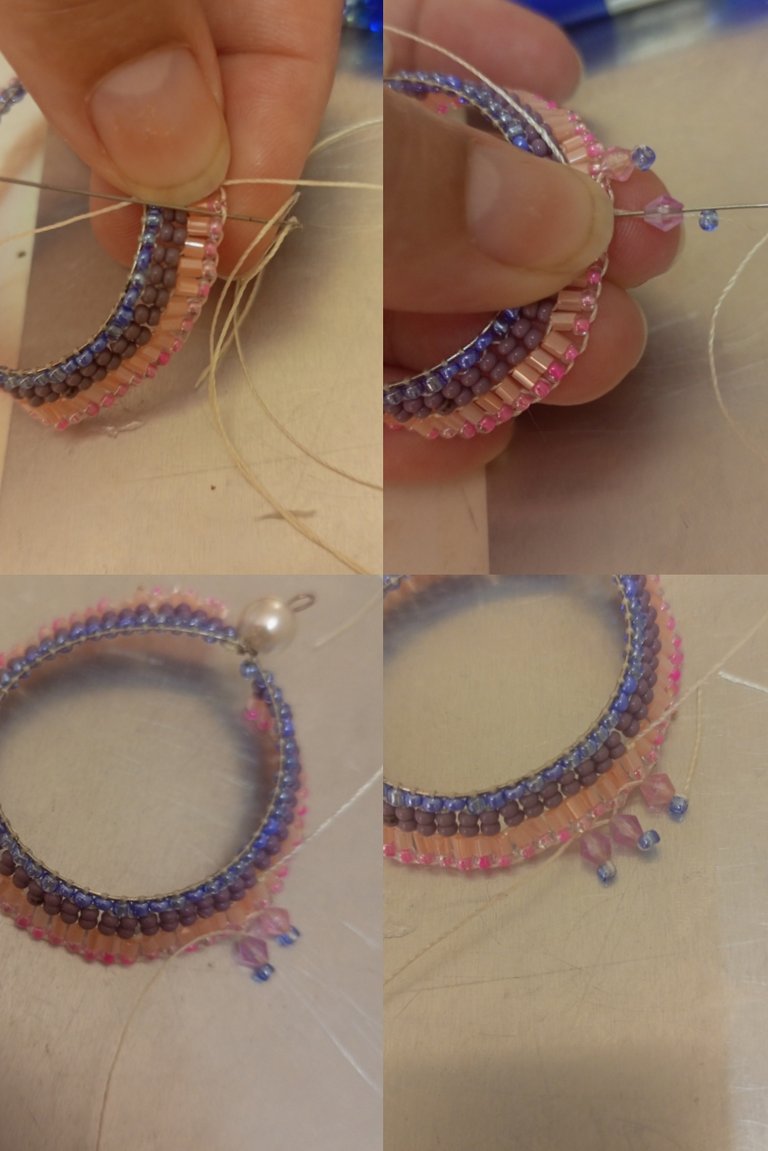
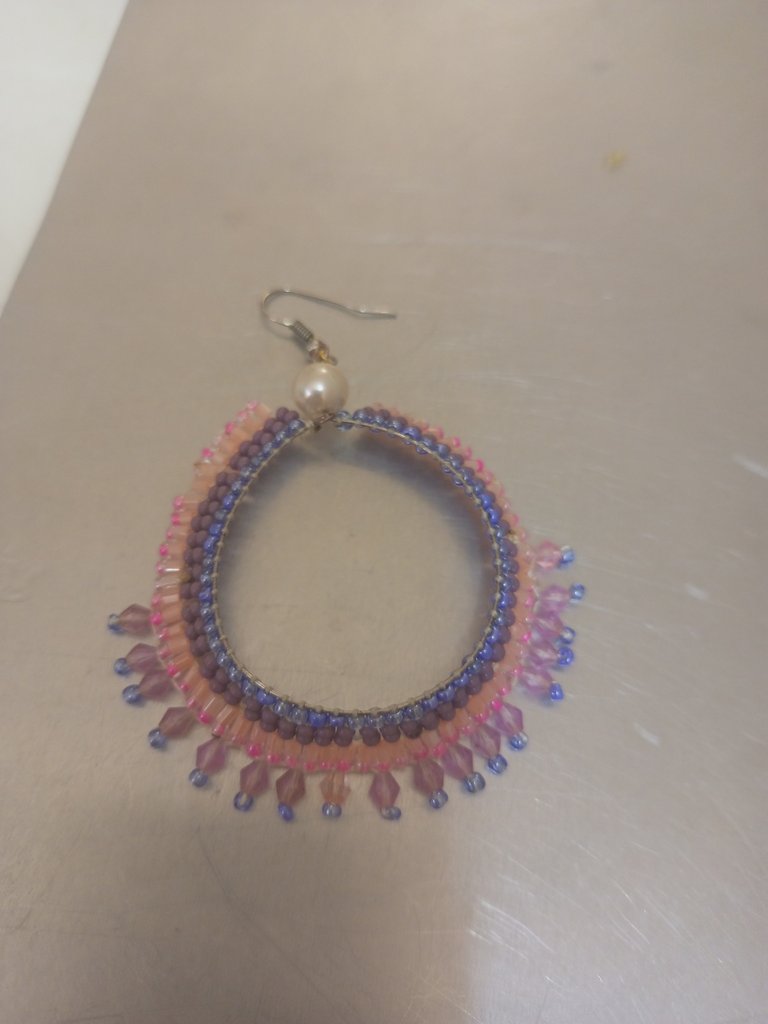
| Contamos 14 mostacillas partiendo de un lado y allí comenzarmwos a tejer la última sección o tramo. Sacamos la aguja en ese tramo y comenzamos a tejer introduciendo un cristal rosado número 0.6 mm y una mostacilla azul, introducimos el hilo por el cristal cuidando dejar la mostacilla para que sirva de tapón al cristal, son 18 cristales hasta cubrir el espacio deseado. | We count 14 beads starting from one side and there we begin to weave the last section or section. We take out the needle in that section and begin to weave introducing a pink crystal number 0.6 mm and a blue bead, we introduce the thread through the crystal taking care to leave the bead to serve as a stopper to the crystal, there are 18 crystals to cover the desired space.i |
| Paso 12 | Step 12 |
|---|---|
| Ya listo el arte ahora colocaremos la argolla abriremos ayudándonos con las pinzas, introducimos el arito por los ojales de los dos aretes y apretamos con las pinzas. | Once the art is ready, now we will place the ring, we will open it with the help of the tweezers, we introduce the ring through the eyelets of the two rings and tighten it with the tweezers. |

| Paso 13 | Step 13 |
|---|---|
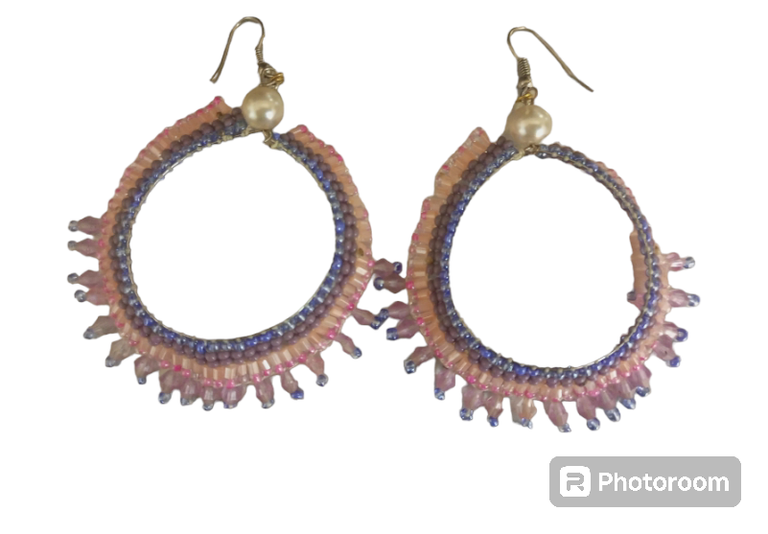
| Repetí todo el procedimiento para el segundo arete. | I repeated the whole procedure for the second earring.. |

| Despedida | Farewell |
|---|---|
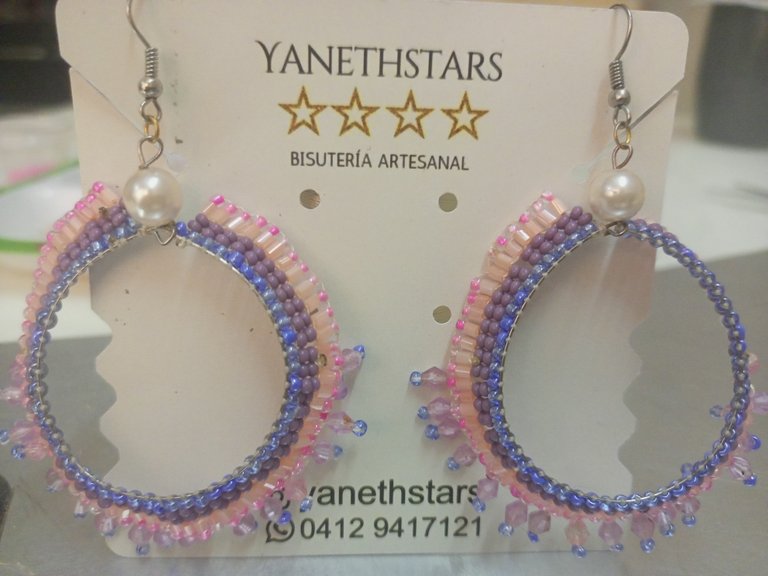
| Y está es mi propuesta del día de hoy LINDOS ARETES EN MOSTACILLAS Y CANUTILLOS. Un post hecho con amor, espero les guste y disfruten mi post. | And this is my proposal for today BEADS AND BEAD EARRINGS. A post made with love, I hope you like it and enjoy my post. |

| Créditos | Credits |
|---|---|
| Traductor: www.DeepL.com/Translator (free version).Las fotos fueron tomadas con mi Celular Tecno Sport 7T. Foto de portada editada con Canva y PhotoRoom Banner editado con Canva. Patron: https://images.app.goo.gl/nDWEaoLxKGnokedKA. | Translator: www.DeepL.com/Translator (free version).The photos were taken with my Tecno Sport 7T cell phone. Cover photo edited with Canva y PhotoRoom. Banner edited with Canva. Patron: https://images.app.goo.gl/nDWEaoLxKGnokedKA |
Hola se ven muy bonitos tus aretes
Gracias @virgilio07 saludos.
Gracias @rutablockchain por el apoyo. Saludos 🤗
Que hermsoos tus aretes me ha encantado tu idea, esta parece la tecnica ladrillo muy bonito la verdad