| Esp | Eng |
|---|---|
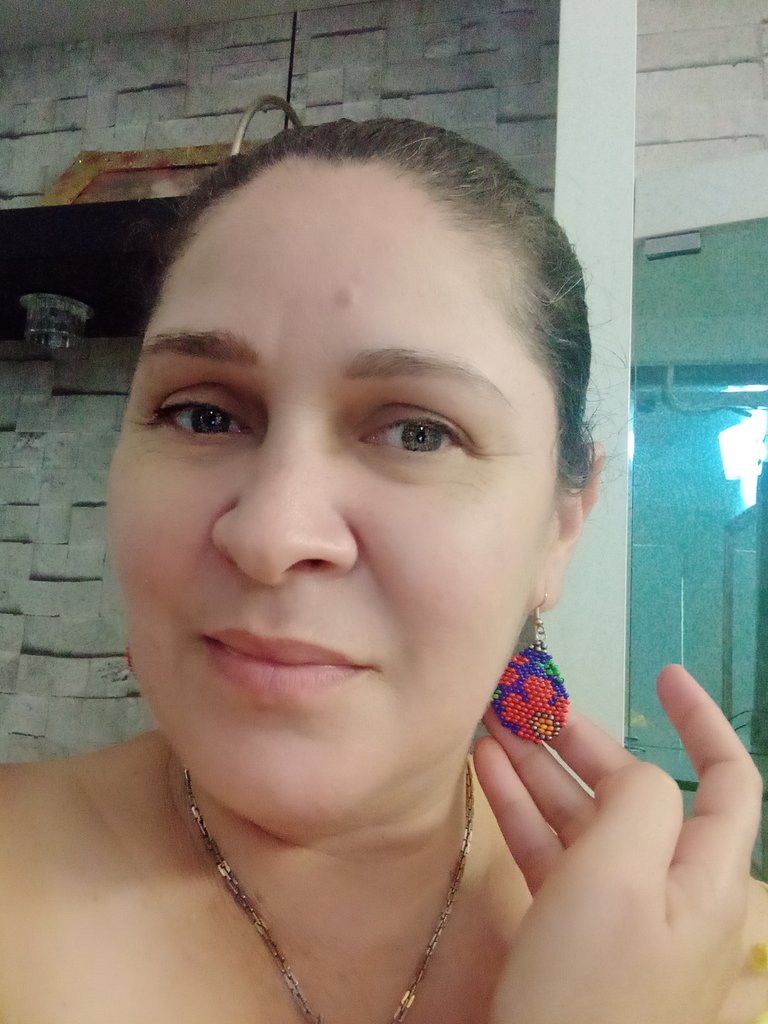
| Hola a todos amigos creativos de la comunidad de Jewelry, hoy les traigo en éste post la realización de estos LINDOS Y COLORIDOS ARETES EN MOSTACILLAS, utilizando la técnica ladrillo o peyote, los colores protagonistas son el azul y rojo, y podemos ver que hacen una hermosa combinación entre colores calidos y frios. Yo quedé muy satisfecha ya que mayo es el mes de las flores y los usaré mucho en éste mes para dar ese toqué de alegría a mis atuendos. A continuación nuestra lista de materiales. | Hello to all my creative friends of the Jewelry community, today I bring you in this post the realization of these CLEAR AND COLORFUL MOSTACILLAS ARETS, using the brick or peyote technique, the main colors are blue and red, and we can see that they make a beautiful combination of warm and cold colors. I was very satisfied since May is the month of flowers and I will use them a lot in this month to give that touch of joy to my outfits. Here is our list of materials. |

| Materiales: | Materials: |
|---|---|
| Mostacillas: azul marino, rojo, plateado, amarillo, verde y naranja. Hilo para mostacillas negro, aguja mostacillas, 2 argollas pequeñas,2 anzuelos, tijeras, yesquero, 1 pinza de bisutería. | Beads: navy blue, red, silver, yellow, green and orange. Black beading thread, beading needle, 2 small rings, 2 hooks, scissors, tinder, 1 jewelry clip. |

| Instrucciones: | Instructions: |
|---|
| Paso 1 | Step 1 |
|---|---|
| El primer paso es enhebrar 1,5 metros de hilo negro en la aguja mostacillera. Y construiremos nuestra primera columna o fila, introduciendo las mostacillas en la aguja según el patrón de lo que quiero construir. Comenzamos con 12 mostacillas: 2 verdes, 1 azul, 2 rojas, 1 azul, 6 rojas. | The first step is to thread 1.5 meters of black thread on the beading needle. And we will build our first column or row, introducing the beads in the needle according to the pattern of what I want to build. We start with 12 beads: 2 green, 1 blue, 2 red, 1 blue, 6 red. |

| Paso 2 | Step 2 |
|---|---|
| Bajamos las mostacillas hasta la mitad del hilo aproximadamente 75 cm y presionamos con el gancho de una carpeta o sujetamos con algo. Esto lo hacemos con la finalidad de que no se salgan las mostacillas por el hilo contrario y trabajar más cómodo. | We lower the beads to the middle of the thread approximately 75 cm and press them with the hook of a folder or hold them with something. We do this so that the beads do not come out of the opposite thread and work more comfortably. |

| Paso 3 | Step 3 |
|---|---|
| Se introduce la aguja en la segunda mostacilla. | The needle is inserted into the second bead. |

| Paso 4 | Step 4 |
|---|---|
| Continuamos construyendo la columna de una en una, siempre introduciendo la aguja de abajo hacia arriba hasta completar la columna de 12 mostacillas. | We continue building the column one by one, always inserting the needle from the bottom to the top until completing the column of 12 beads. |

| Paso 5 | Step 5 |
|---|---|
| Esté tipo de construcción para dar la forma que queremos debemos iniciar cada construcción en reducción o ampliacion. En la imagen observamos que introducimos la aguja en la segunda mostacilla verde, esto lo hacemos con la intención de realizar una reducción y nos quedé un espacio menos. | This type of construction to give the shape we want we must start each construction in reduction or enlargement. In the image we observe that we introduce the needle in the second green mustard, we do this with the intention of making a reduction and we have one space less. |

| Paso 6 | Step 6 |
|---|---|
| Con el hilo ya en la posición que queremos, que es la segunda mostacilla verde, introducimos en la aguja dos mostacillas azules. Otro dato importante es que cada línea que comencemos debemos iniciar con dos mostacillas y luego seguir de a una. Esto es para que el hilo no quedé por fuera de la mostacilla, esté error solía cometerlo cuando comencé a trabajar está técnica, hasta que aprendí esté tips. | With the thread already in the position we want, which is the second green bead, we introduce two blue beads in the needle. Another important fact is that each line that we start we must begin with two beads and then continue one by one. This is so that the thread is not left outside the bead, I used to make this mistake when I started working this technique, until I learned this tips. |

| Paso 7 | Step 7 |
|---|---|
| Seguimos construyendo la fila metiendo la aguja por cada hilo de unión de las mostacillas de abajo, hasta completar la fila. | We continue building the row by inserting the needle through each thread of the beads below, until the row is completed. |

| Paso 8 | Step 8 |
|---|---|
| En está tercera fila no hay reducción. Comenzamos en la primera mostacilla pero igual con dos mostacillas. | In this third row there is no reduction. We start at the first bead but the same with two beads. |

| Paso 9 | Step 9 |
|---|---|
| En las siguientes imágenes vemos el proceso hasta la novena fila. | In the following images we see the process up to the ninth row. |

| Paso 10 | Step 10 |
|---|---|
| Seguimos construyendo las siguientes filas que forman la parte superior del arete. | We continue building the following rows that form the upper part of the earring. |

| Paso 11 | Step 11 |
|---|---|
| Construimos la penúltima fila en color plateado que corresponde a tres mostacillas. | We build the penultimate row in silver color that corresponds to three beads. |

| Paso 12 | Step 12 |
|---|---|
| El siguiente paso es colocar la argolla y el anzuelo. | The next step is to set the ring and hook. |

| Paso 13 | Step 13 |
|---|---|
| Trabajaremos en la parte inferior del arete. Tomaremos el hilo del otro extremo y lo enhebramos. Y construimos las filas de la parte inferior. | We will work on the lower part of the earring. We will take the thread from the other end and thread it. And we build the rows of the lower part. |


| Paso 13 | Step 13 |
|---|---|
| En la siguiente foto observamos el proceso de elaboración del otro arete. | In the following photo we can see the process of making the other earring. |

| Despedida | Farewell |
|---|---|
| Y está es mi propuesta del día de hoy LINDOS Y COLORIDOS ARETES EN MOSTACILLAS. Un post hecho con amor, espero les guste y disfruten mi post. | And this is my proposal for today CLEAR AND COLORFUL MOSTACILLAS ARETS. A post made with love, I hope you like it and enjoy my post. |


| Créditos | Credits |
|---|---|
| Traductor: www.DeepL.com/Translator (free version).Las fotos fueron tomadas con mi Celular Tecno Sport 7T. Foto de portada editada con Canva y PhotoRoom Banner editado con Canva. Patron: https://images.app.goo.gl/nDWEaoLxKGnokedKA. | Translator: www.DeepL.com/Translator (free version).The photos were taken with my Tecno Sport 7T cell phone. Cover photo edited with Canva y PhotoRoom. Banner edited with Canva. Patron: https://images.app.goo.gl/nDWEaoLxKGnokedKA |

Amiga un precioso trabajo, el diseño quedo hermoso, me encanta como resalta la flor y sobre todo la combinación de colores.
Bello día para ti...
!diy
!discovery 40
Hola amiga, gracias, si la combinación queda muy bella. Saludos. Igual para ti amiga excelente dia. 😊
This post was shared and voted inside the discord by the curators team of discovery-it
Join our Community and follow our Curation Trail
Discovery-it is also a Witness, vote for us here
Delegate to us for passive income. Check our 80% fee-back Program
You can query your personal balance by
!DIYSTATSa community encouraging first-hand content, and each individual living their best life.
I love this
This is so fine that the creation of the earring gave us what we hope for. That fact it's so combined with creativeness.
Gracias agradezco el apoyo a mi trabajo. Saludos. 😊
Hermosos tus aretes, amo esta tecnica! es super facil solo requiere paciencia
Hola amiga, si la técnica ladrillo es muy linda y fácil, como dice solo se necesita paciencia y un poco de practica para perfeccionarla. Saludos.
Que bonitos se ven, buen trabajo 😊
Un trabajo muy hermoso de artesanía minuciosa esos aretes geniales con esos colores llamativos
So beautiful