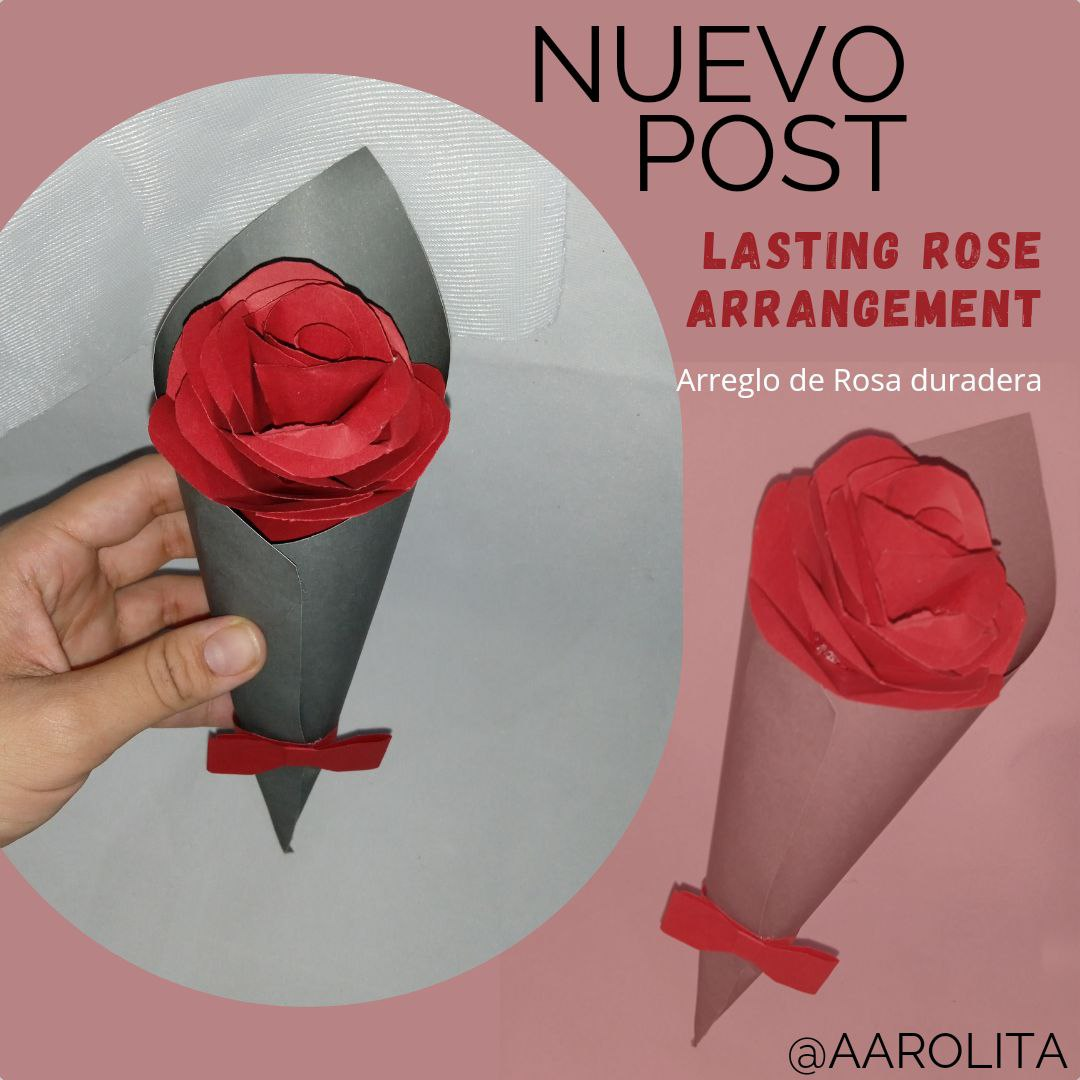
Hello hello, my friends from the DIYhub community. Nowadays, giving roses is undervalued, perhaps because of their high cost, because they don't last long and wither quickly, or for some other reason, but today I bring you a simple idea to give a long-lasting rose. duration and that it costs nothing to make compared to its sentimental value, many people love this type of details that are handmade and personalized.
Hola hola, mis amigos de la comunidad de DIYhub. Hoy en día, el regalar rosas esta infravalorado, quizás por el alto costo de ellas, porque no duran mucho tiempo y se marchitan rápido, o por alguna otra razón, pero el día de hoy te traigo una idea sencilla para regalar una rosa de larga duración y que no cuesta nada hacerla comparada con su valor sentimental, a muchas personas le encantan este tipo de detalles que son hecho a manos y personalizados.
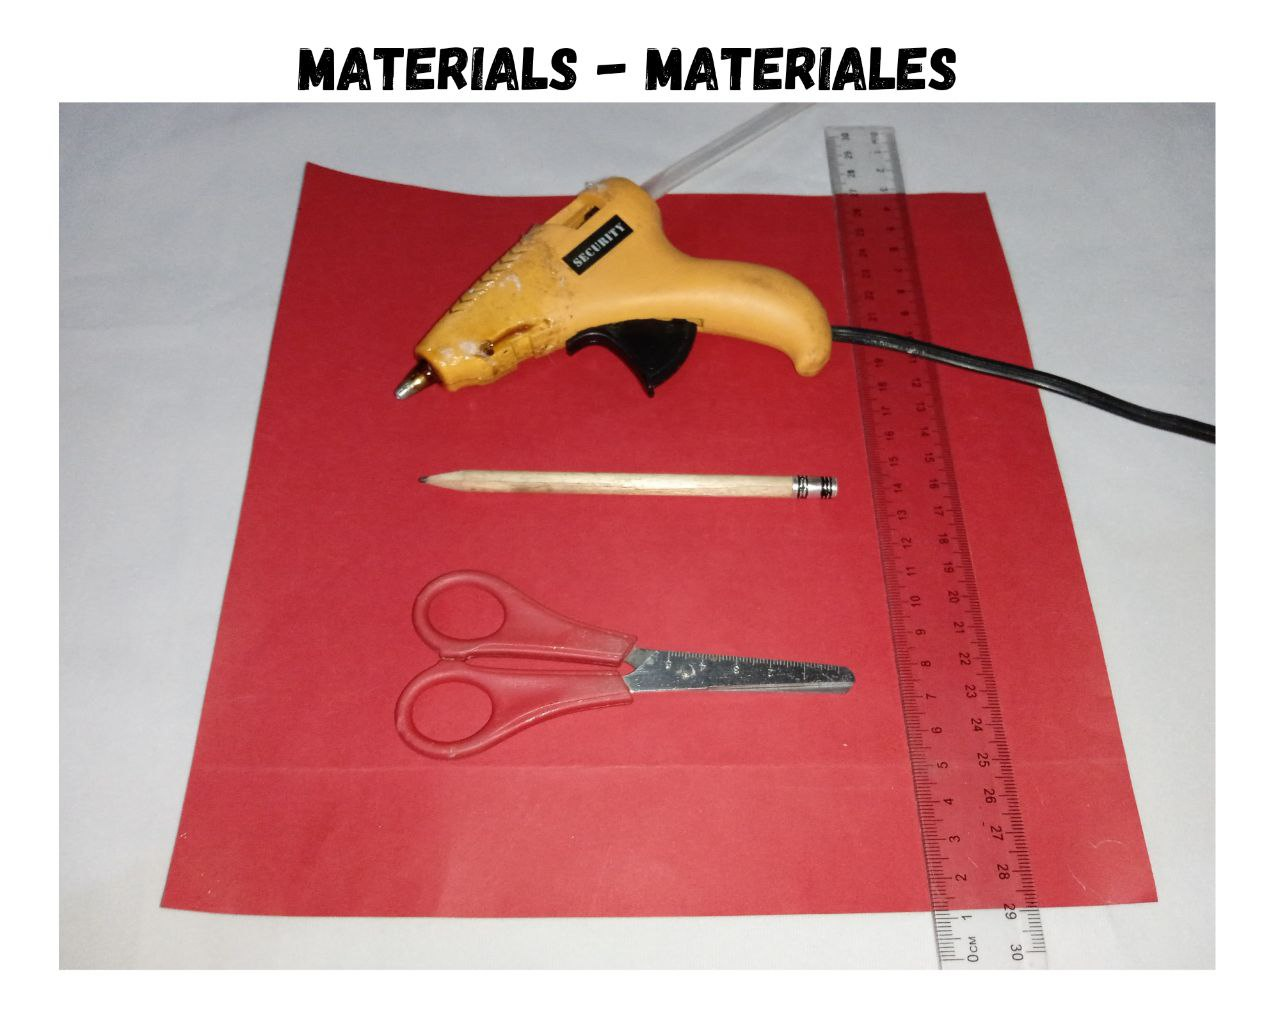
Materials to make the rose:
- Red cardboard.
- Hot silicone.
- Ruler.
- Scissors.
- Pencil.
Materiales para realizar la rosa.
- Cartulina roja.
- Silicón caliente.
- Regla.
- Tijera.
- Lápiz.
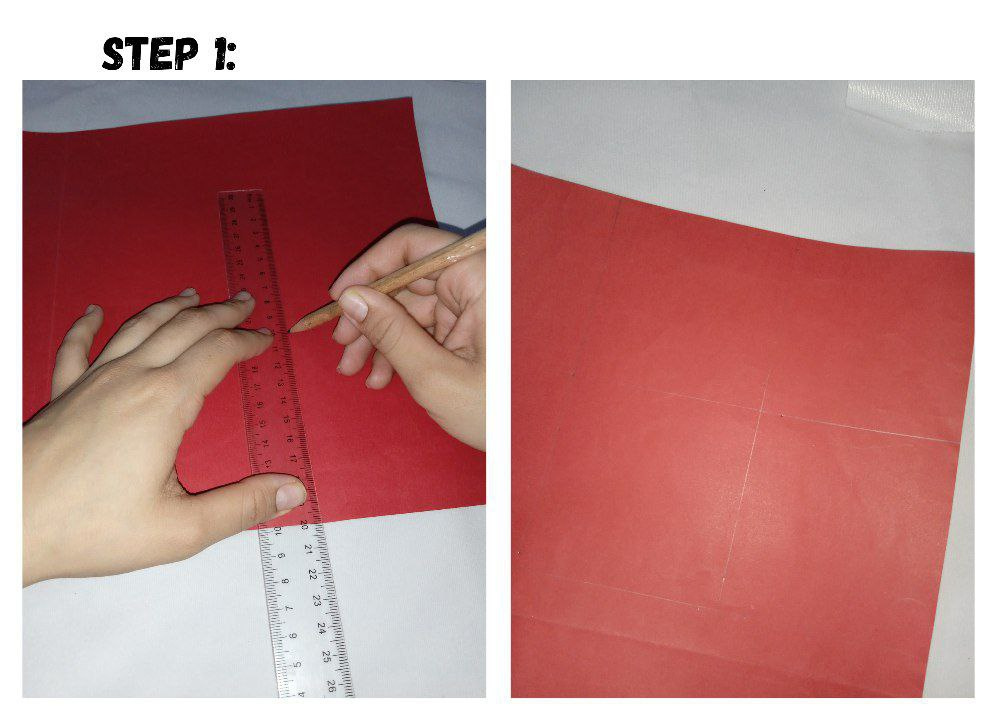
1.- The first step will be to draw four squares on the 10cm x 10cm cardboard.
1.- El primer paso, será dibujar cuatro cuadros en la cartulina de 10cm x 10cm.
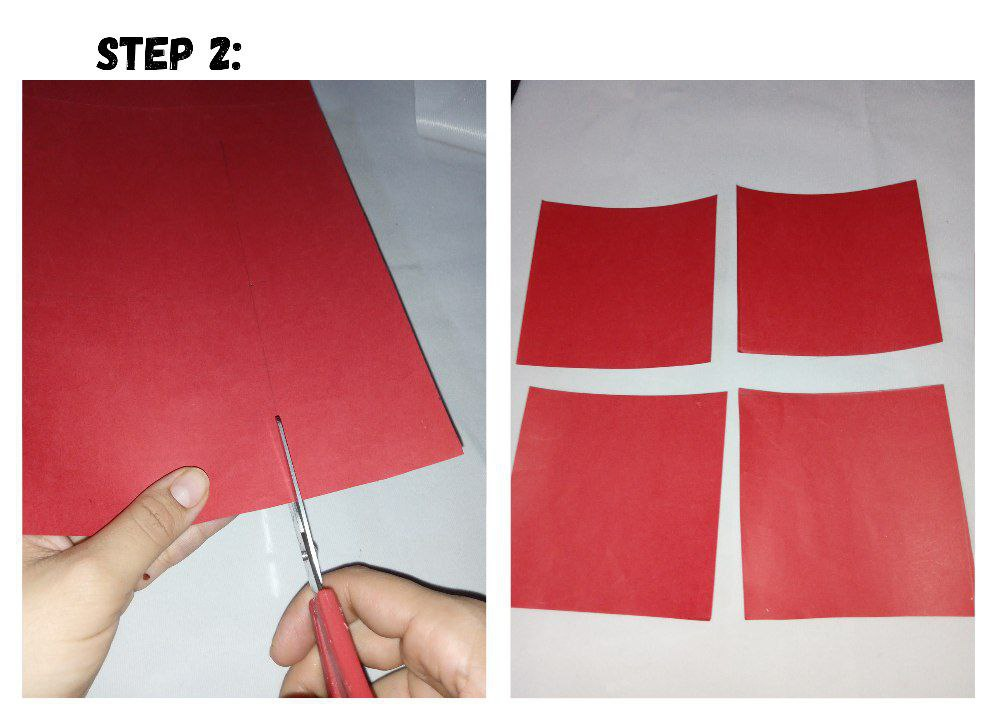
2.- Then I will cut out each one of the squares.
2.- Luego recortaré cada uno de los cuadros.
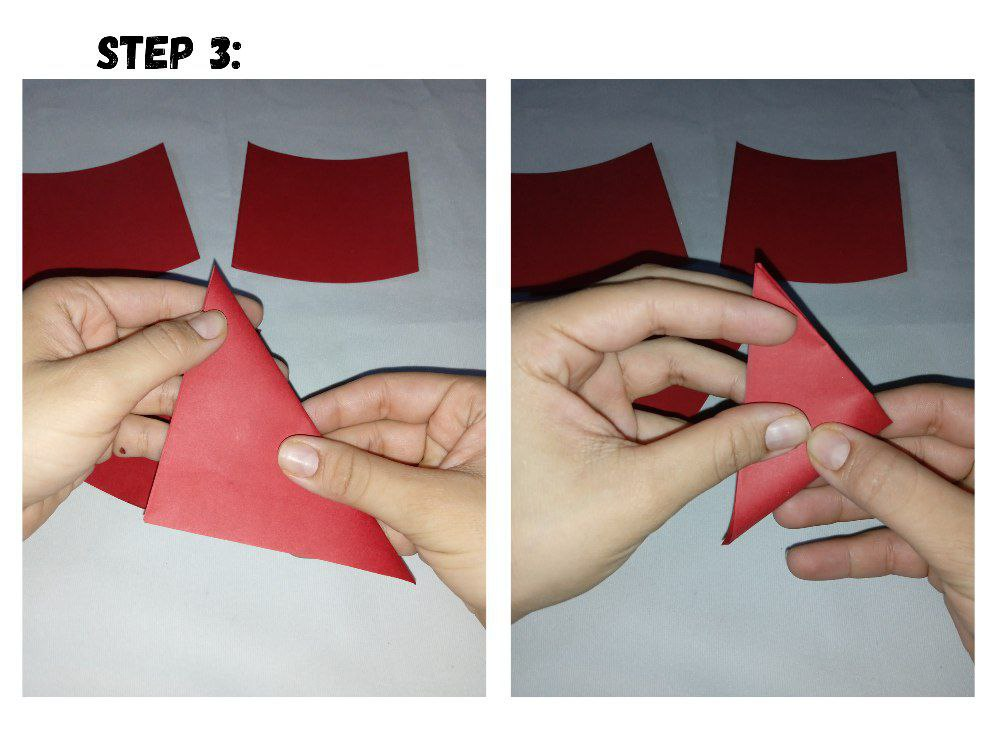
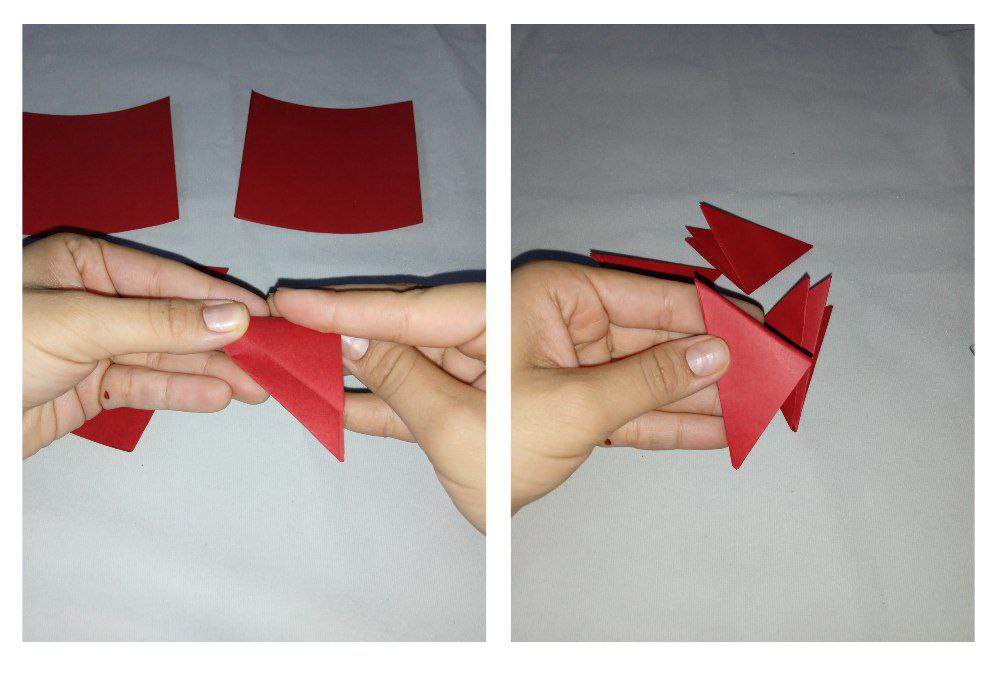
3.- I will make three folds from end to end, it has to be the shape of an isosceles triangle.
3.- Realizaré tres dobleces de extremo a extremo, tiene que quedar la forma de un triángulo isósceles.
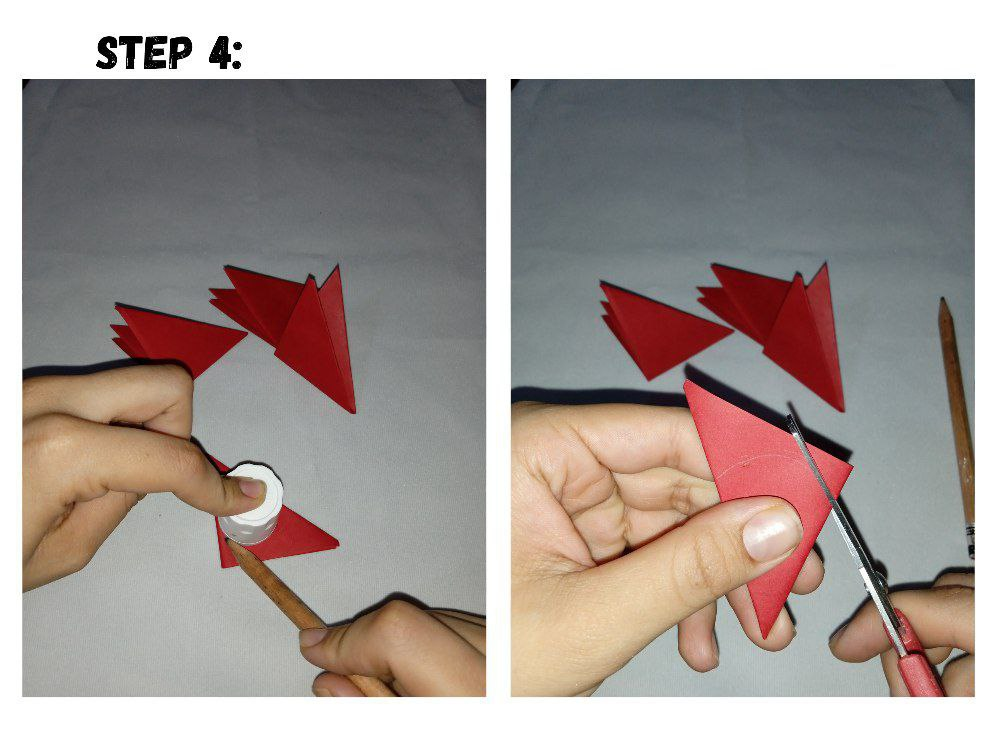
4.- Then, with the help of something circular, I mark the shape of the petal and cut it out, so when I open it I will obtain a flower with eight petals. I will repeat the same process with the three squares.
4.- Luego con la ayuda de algo circular marco la forma del pétalo y lo recorto, así al abrirlo obtendré una flor de ocho pétalos. Repetiré el mismo proceso con los tres cuadrados.
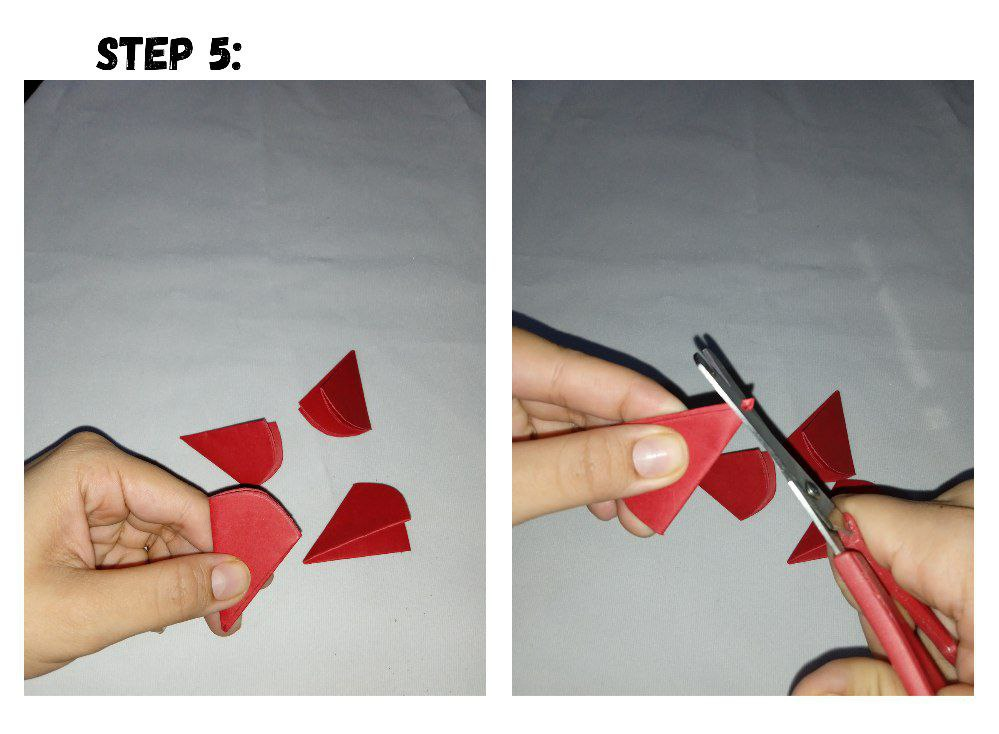
5.- Once I have cut the circular shape of the four petals, I will cut the tips a little.
5.- Una vez haya cortado la forma circular de los cuatro pétalos cortaré un poco las puntas.

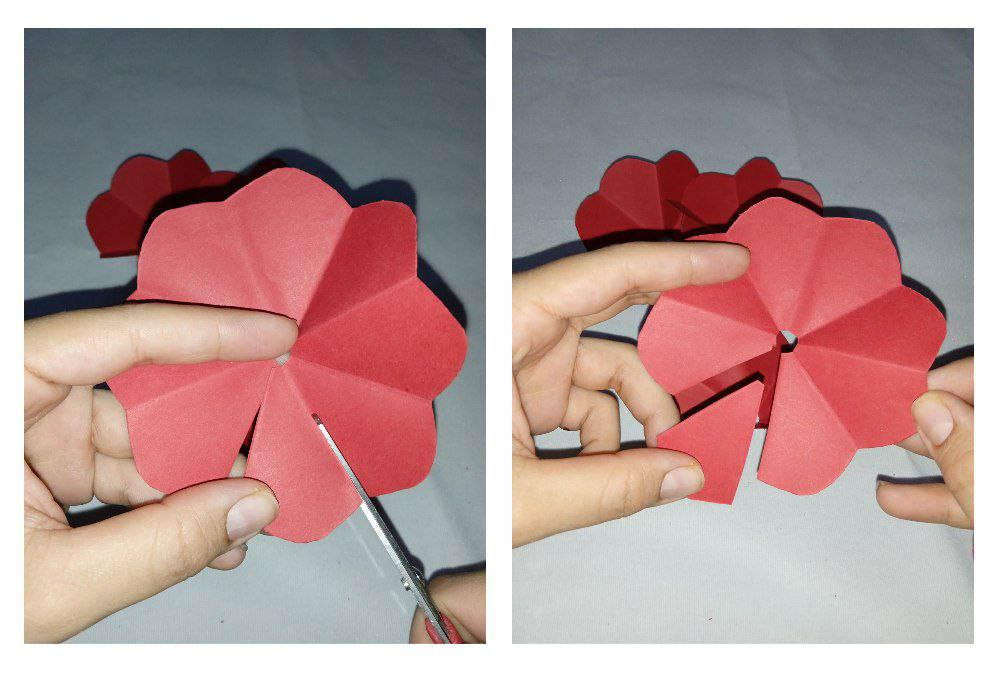
6.- Once I have my four flowers ready, I will cut a petal from one of them.
6.- Una vez tenga lista mis cuatro flores recortare un pétalo de una de ellas.
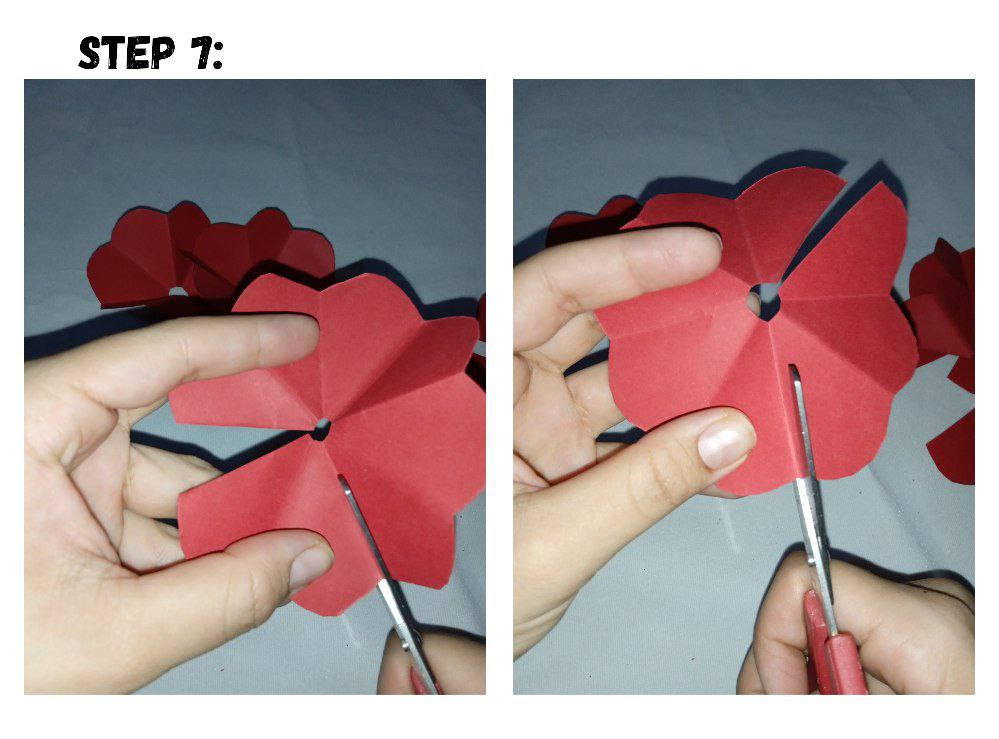
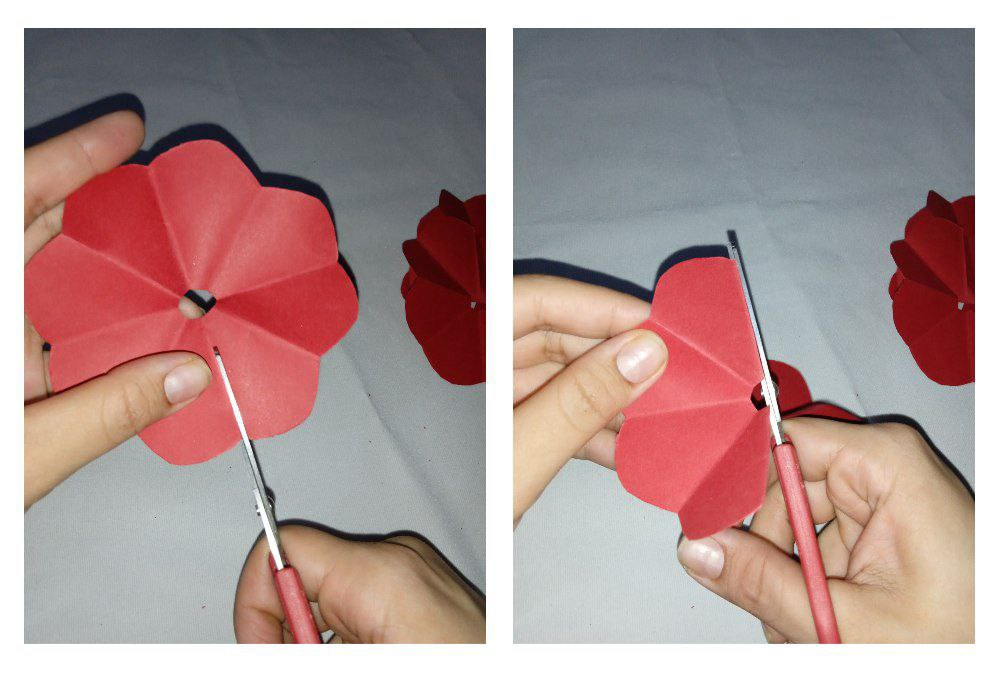
7.- Cut two petals from the second flower, cut three petals from the third flower, and cut four petals or half of the flower from the fourth flower.
7.- De la segunda flor recortare dos pétalos, de la tercera flor recorta tres pétalos, y de la cuarta flor recorta cuatro pétalos o la mitad de la flor.
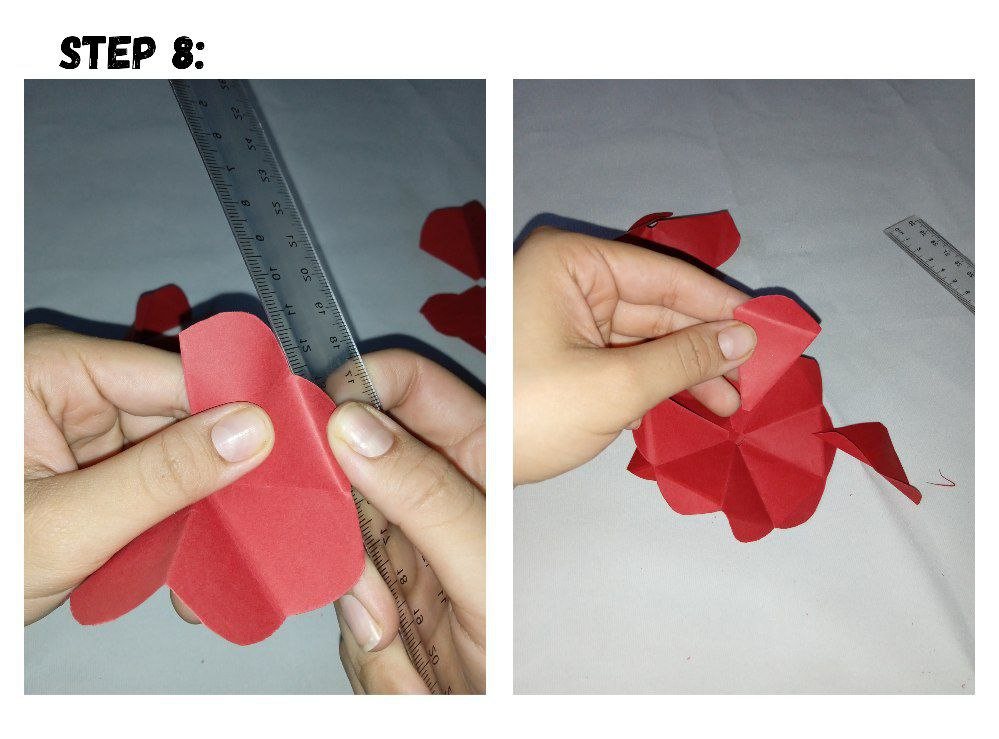
8.-I will fold each of the ends of the petals with the help of a ruler, so you will give volume to the rose.
8.-Doblare cada uno de los extremos de los pétalos con ayuda de una regla, así le darás volumen a la rosa.
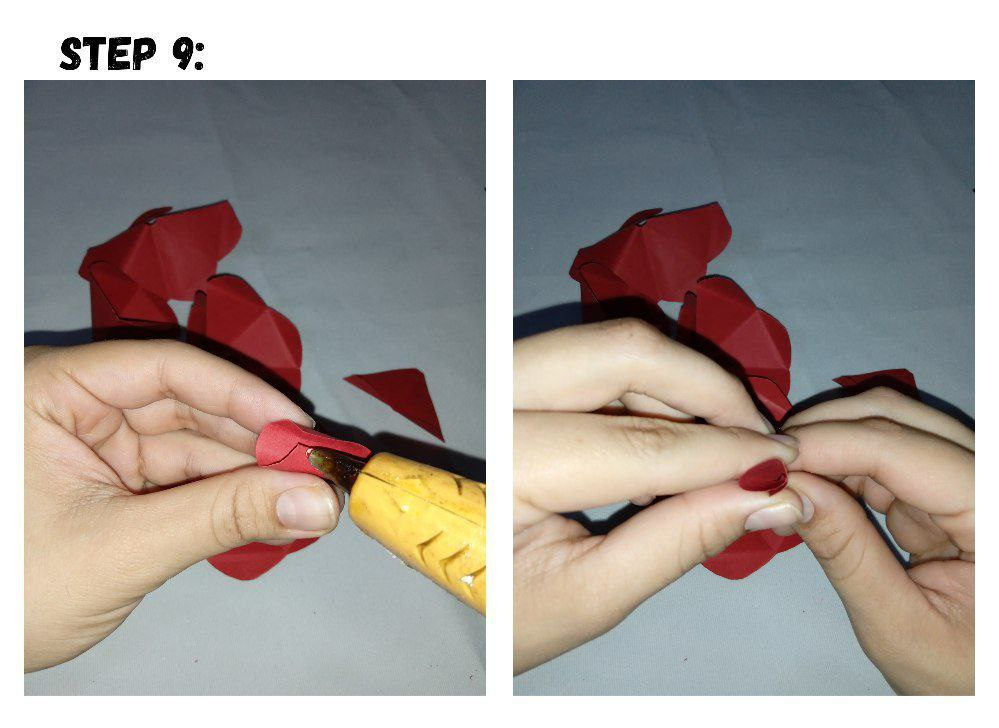
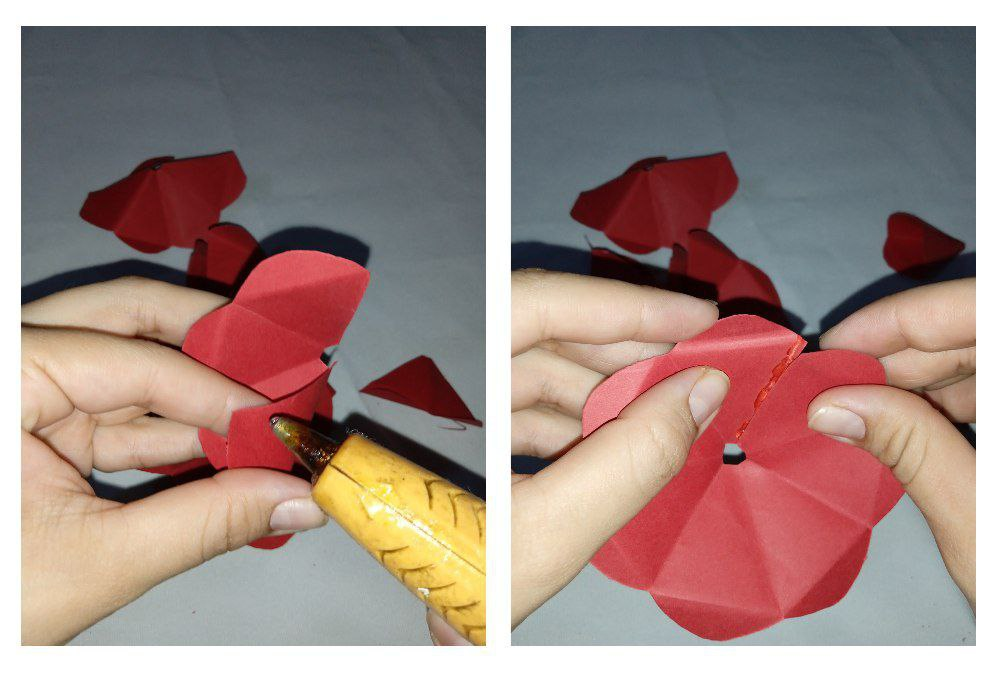
9.- Now with the help of hot silicone I will glue the petals by placing a bit of silicone and gluing both sides, as shown in the photo.
9.- Ahora con ayuda de silicón caliente iré pegando los pétalos colocando un poco de silicón y pegando ambos lados, como se muestra en la foto.
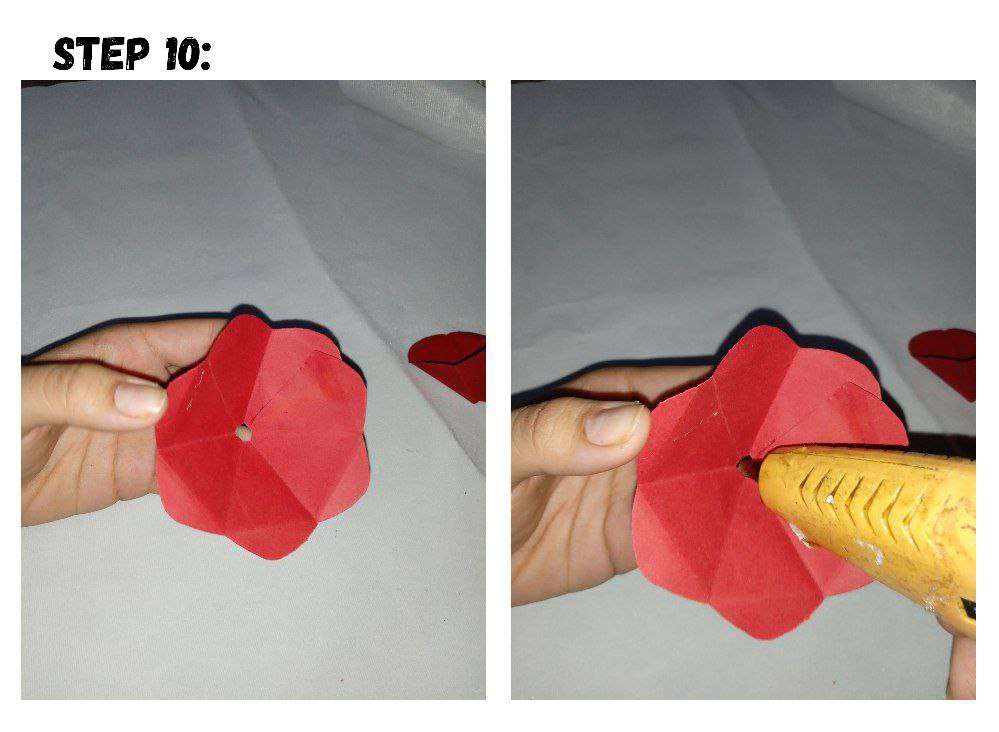
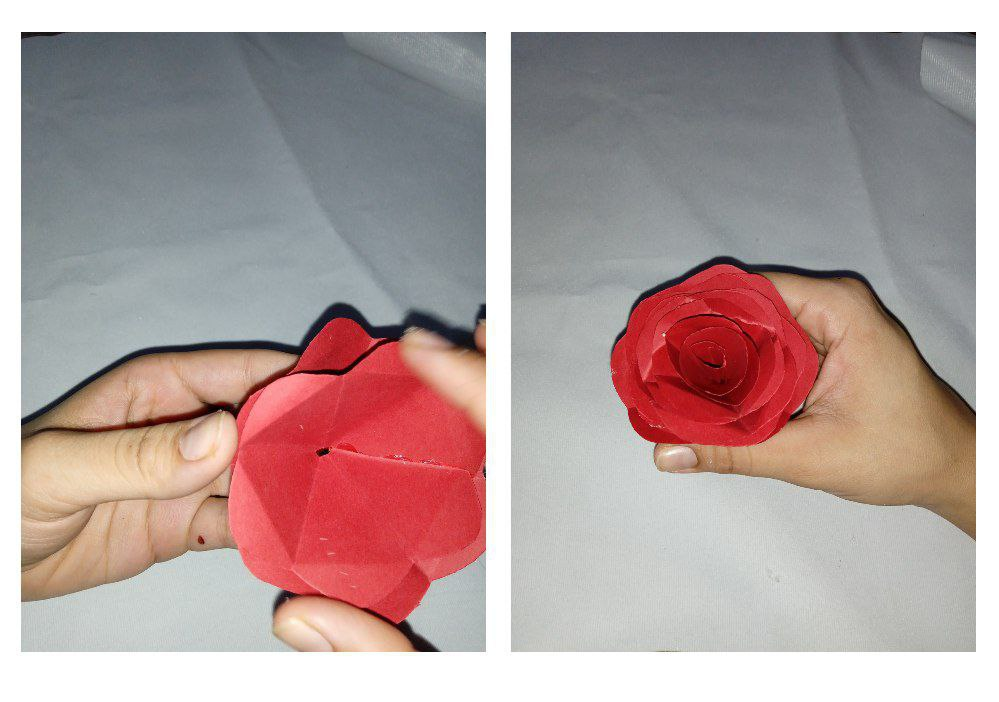
10.- When all the petals are perfectly glued I will begin to assemble the Rose. I will start by gluing the petals from largest to smallest, from the petals with the largest quantities until reaching petal 1.
10.- Cuando todos los pétalos estén perfectamente pegados comenzare a armar la Rosa. Iniciaré pegando los pétalos de mayor a menor, desde los pétalos de más cantidades hasta llegar al pétalo 1.
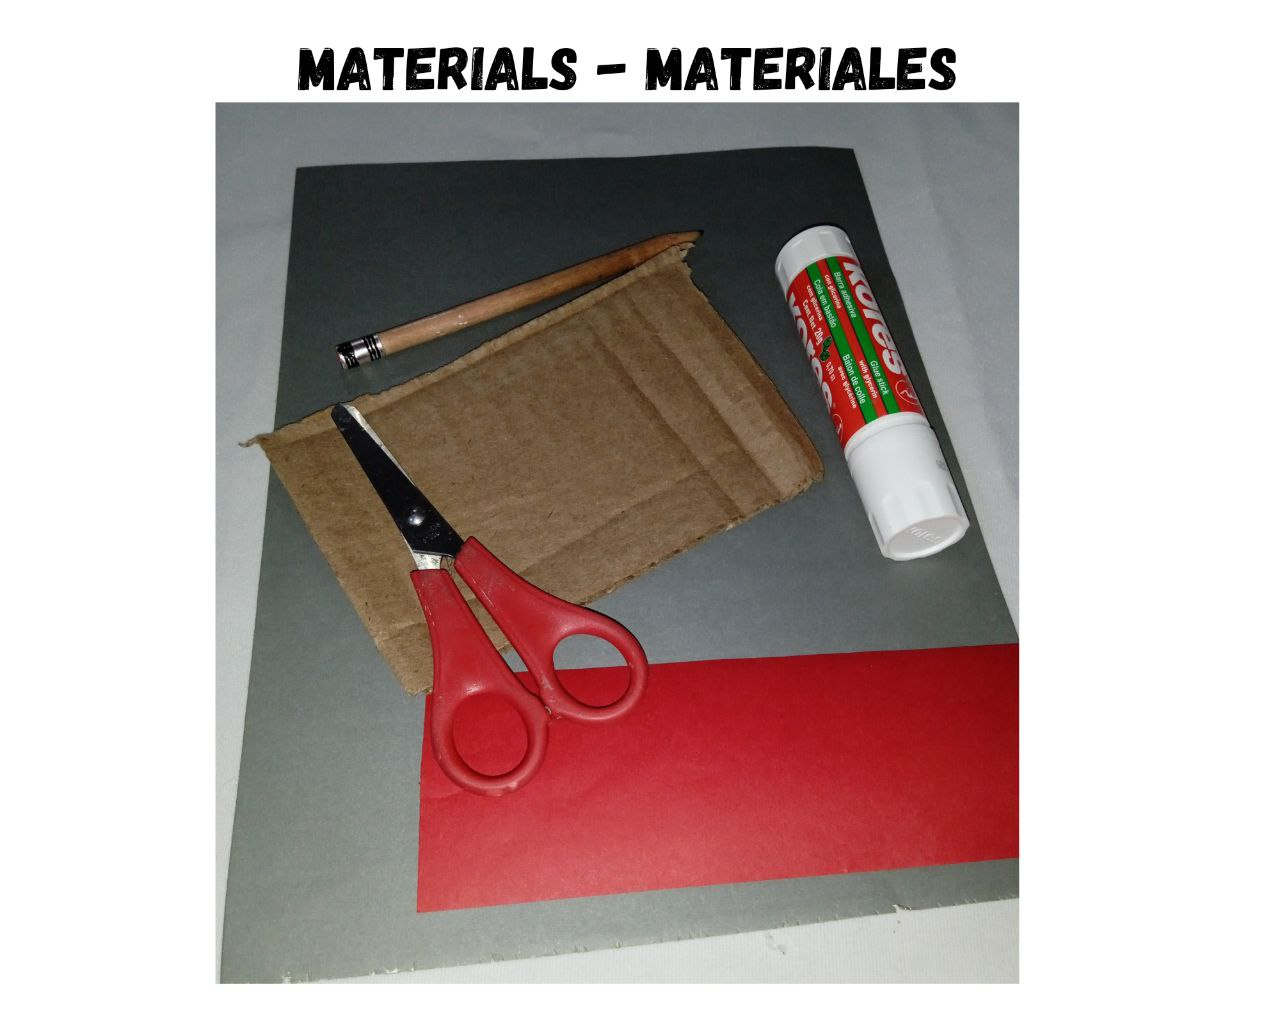
Materials for the cone:
- Cardboard.
- Grey cardboard.
- Red cardboard.
- Paste in bar.
- Scissors.
- Pencil.
Materiales para el cono:
- Cartón.
- Cartulina gris.
- Cartulina roja.
- Pega en barra.
- Tijera.
- Lápiz.
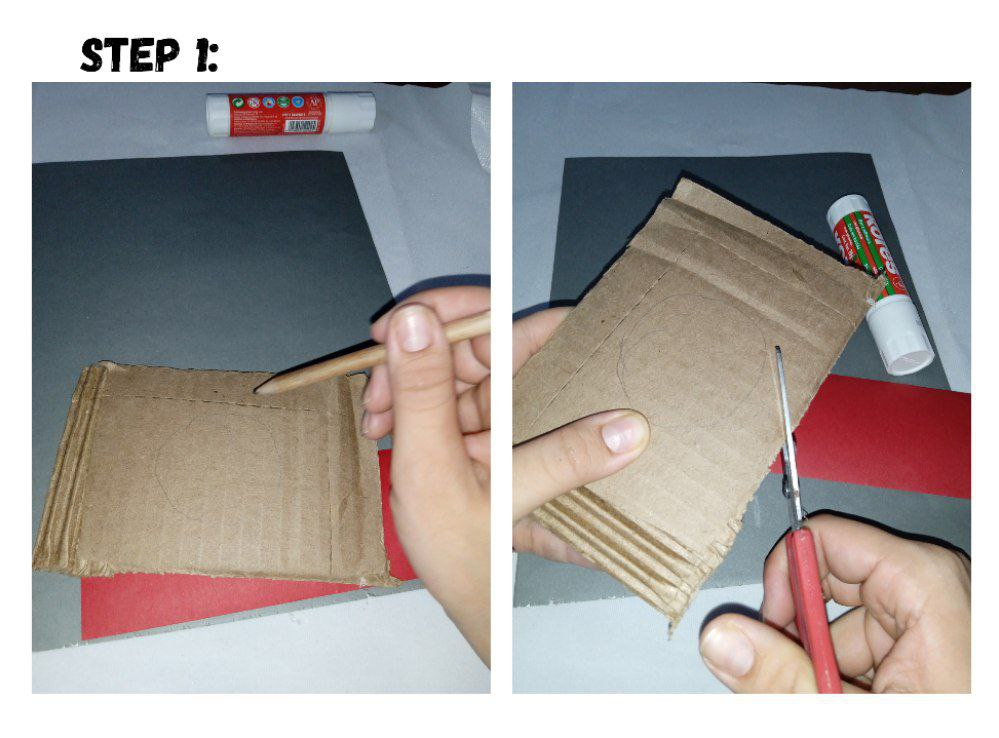
1.- For the base of our rose I will start by drawing and cutting a small circle on a piece of cardboard.
1.- Para la base de nuestra rosa comenzaré dibujando y cortando un círculo pequeño en un trozo de cartón.
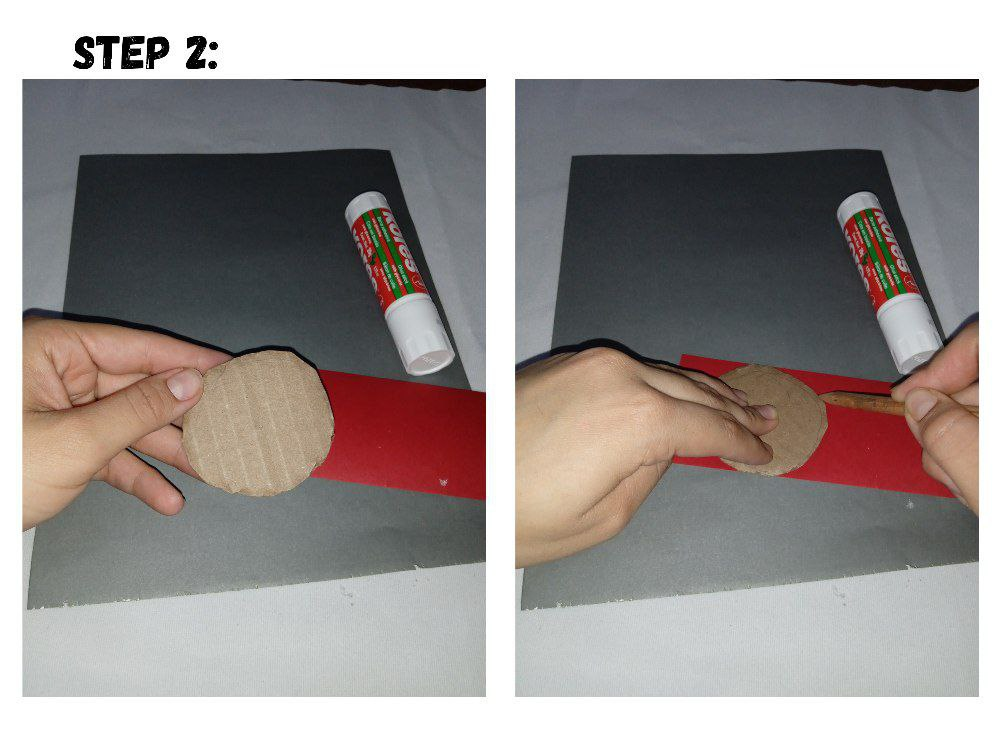
2.- Then I will take the measurement of the circle cut in the cardboard and I will draw it on top of a piece of cardboard of the same color as the rose.
2.- Luego tomaré la medida del círculo cortado en el cartón y lo dibujare encima de un pedazo de cartulina del mismo color de la rosa.
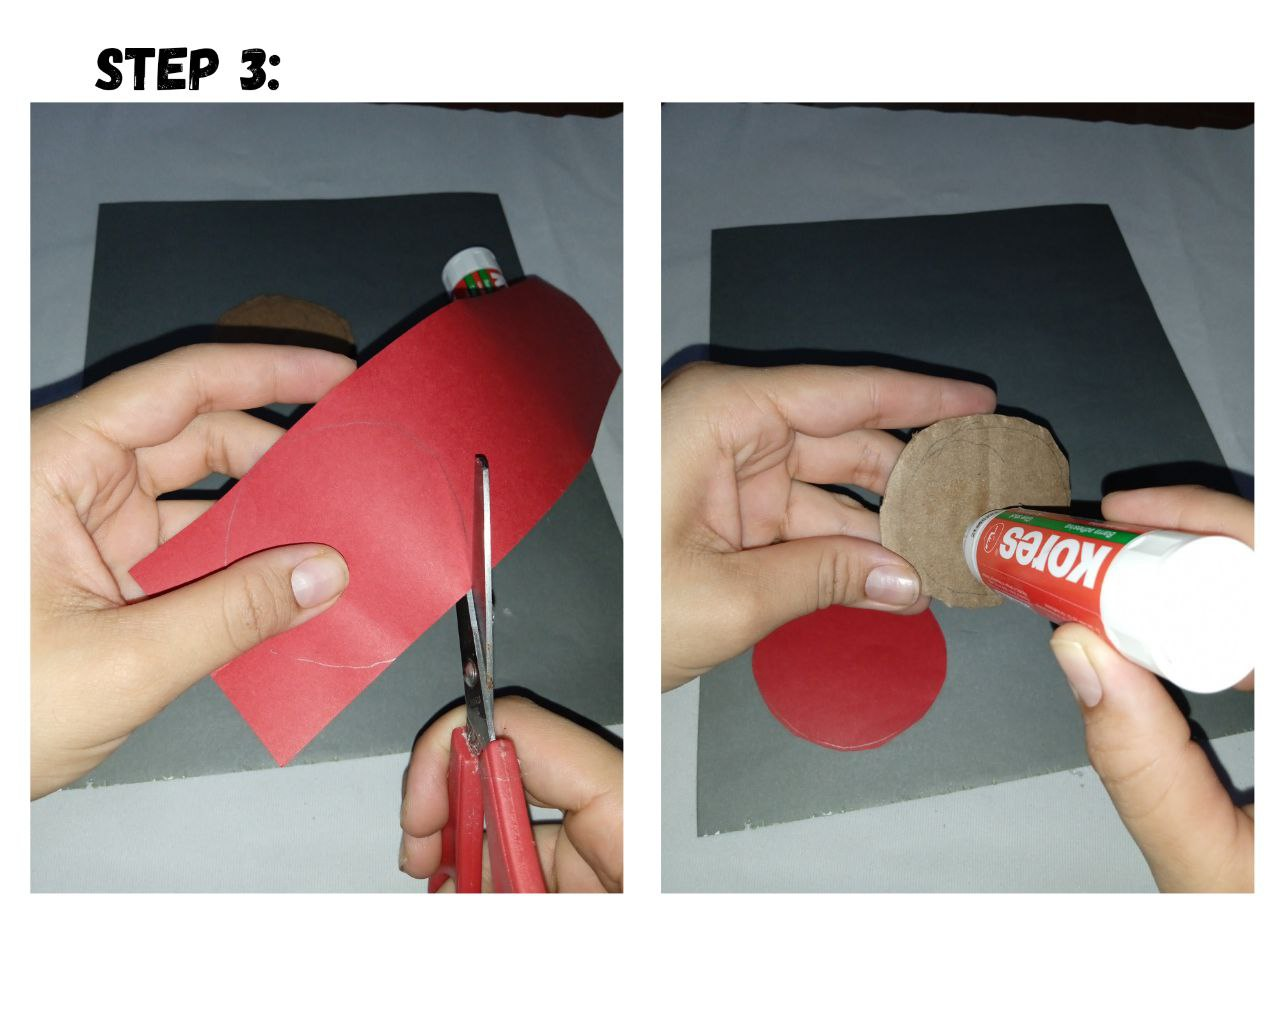
3.-I cut out the circle from the cardboard and paste it on the piece of cardboard.
3.-Recorto el circulo de la cartulina y lo pego en el pedazo de cartón.
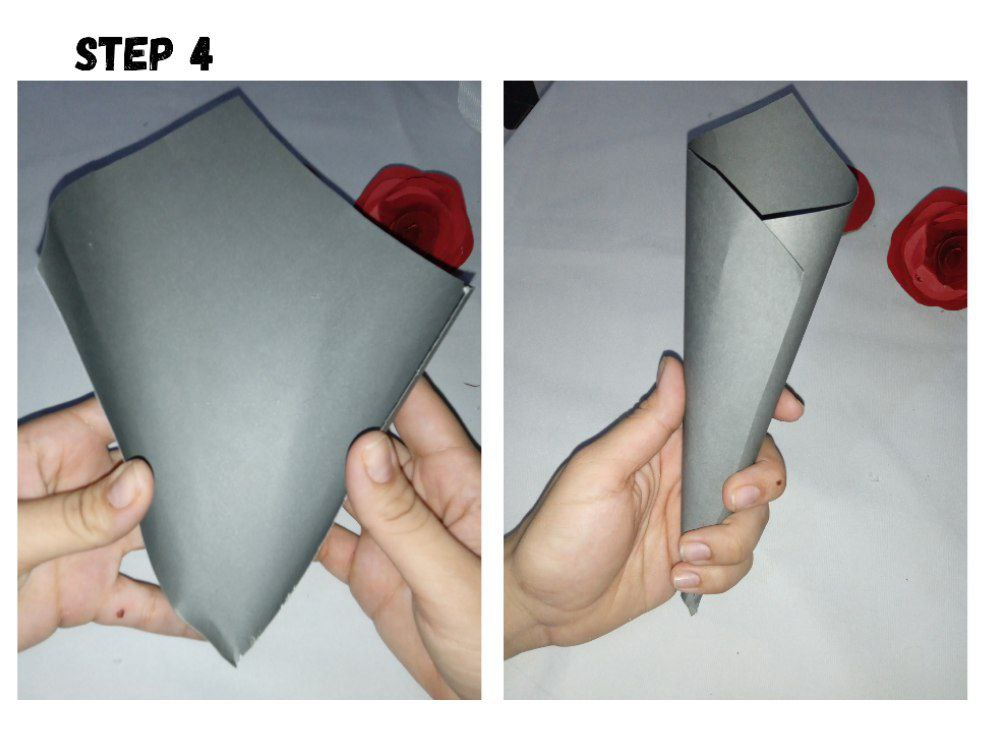
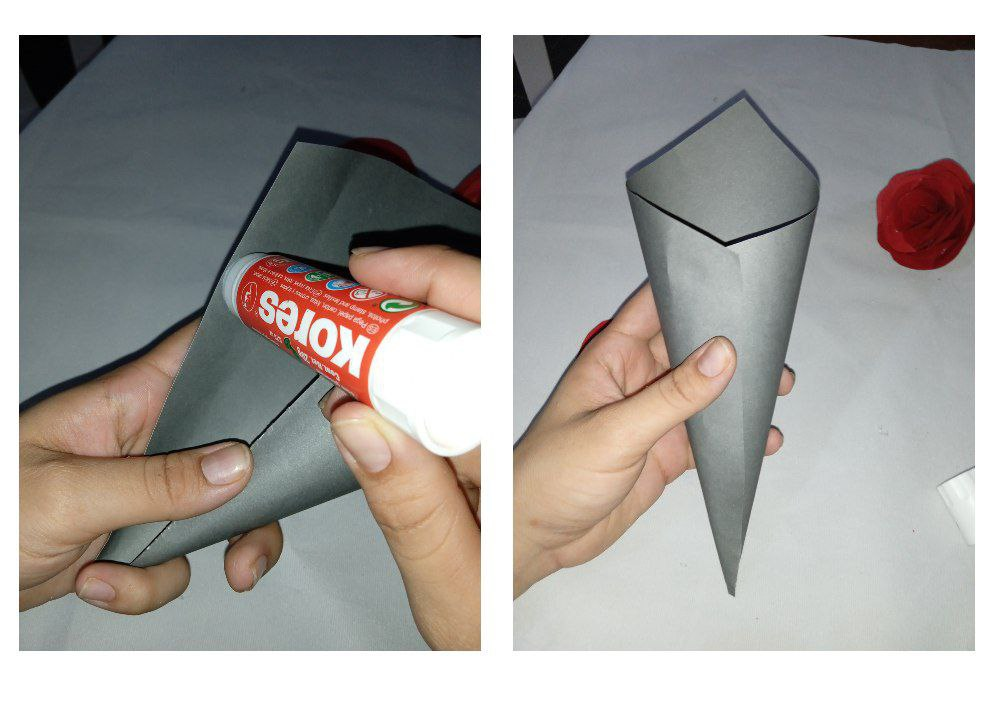
4.- For the cone I will use gray cardboard, I will cut it in the shape of a rectangle and I will roll it from end to end. I put glue on one end and glue it on the other.
4.- Para el cono utilizare cartulina de color gris, lo cortaré en forma de rectángulo y lo enrollo de extremo a extremo. Coloco pega en uno de los extremos y lo pego en el otro.
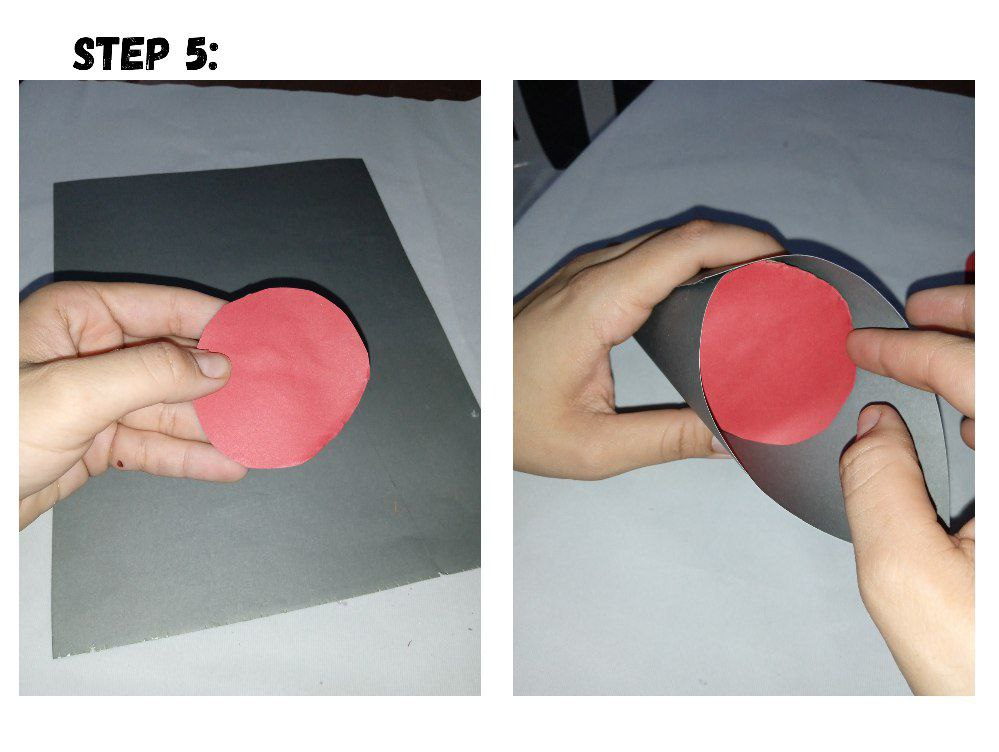
5.- The next step will be to fit the circle into the cone, if it is loose you can glue a little silicone on the edges to secure it.
5.- El próximo paso será encajar el circulo en el cono, si queda suelto pueden pegarle un poco de silicón en los bordes para asegurarlo.
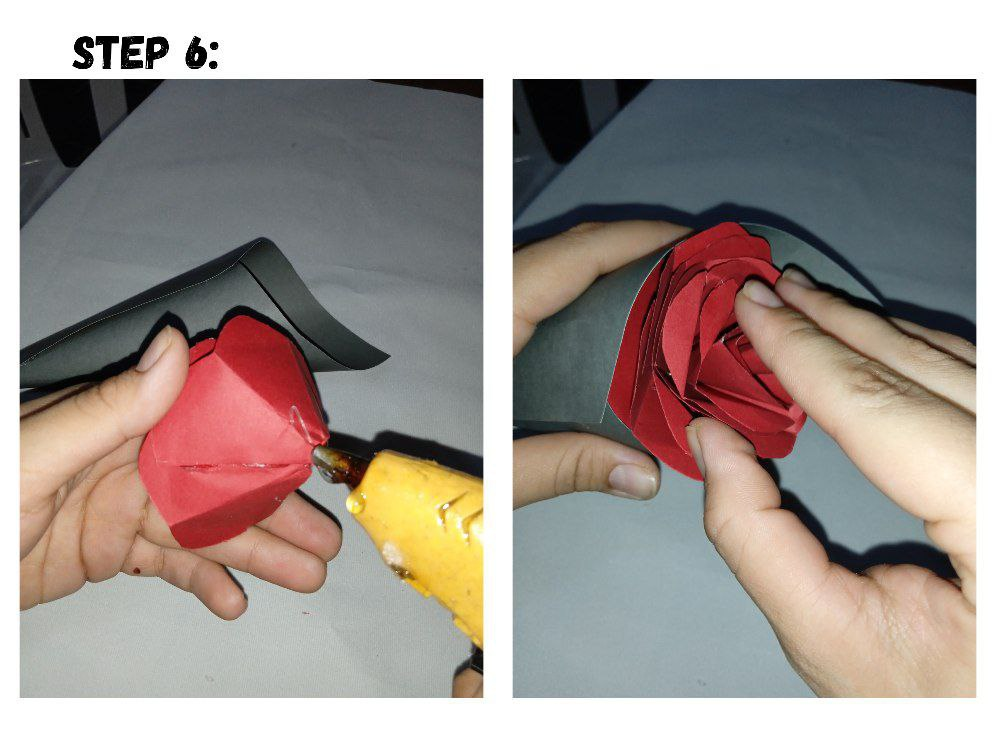
6.- I place glue on the tip of the rose and I'm going to glue it in the center of the circle on the cone.
6.- Coloco pega en la punta de la rosa y lo voy a pegar en el centro del círculo en el cono.
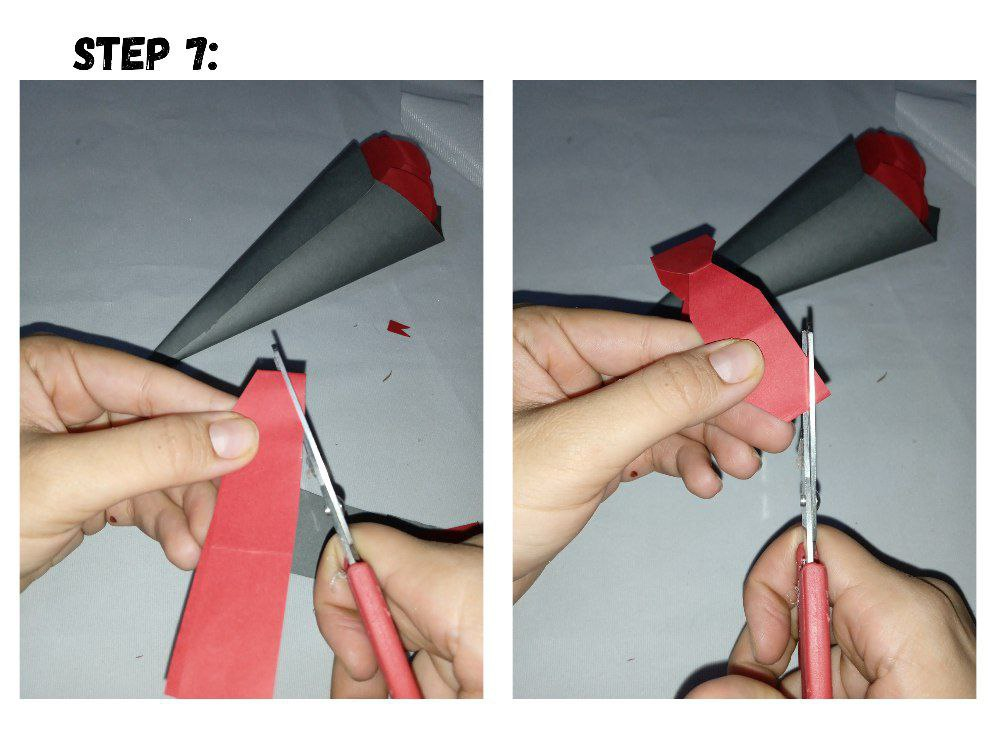
7.- For the decoration of the cone I am going to make a loop with a piece of cardboard that I had left over, I make two folds and cut the corners a little.
7.- Para la decoración del cono voy a hacer un lazo con un trozo de cartulina que me sobró, hago dos dobleces y corto un poco las esquinas.
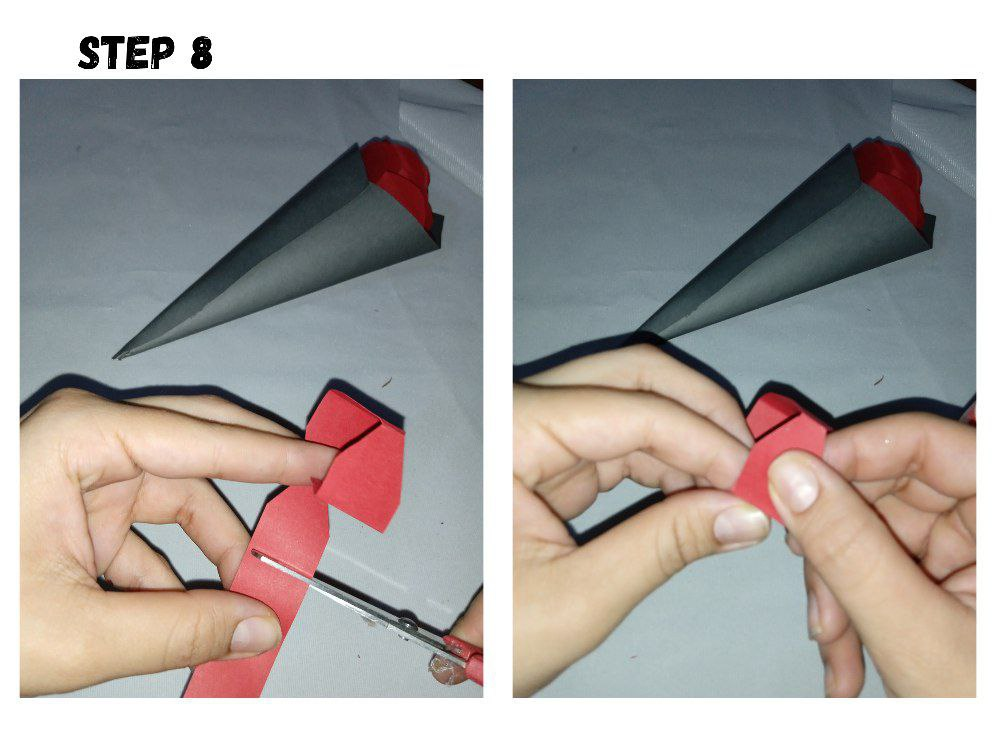
8.- Then I cut the excess end to shape the loop.
8.- Luego corto el extremo sobrante para darle la forma al lazo.
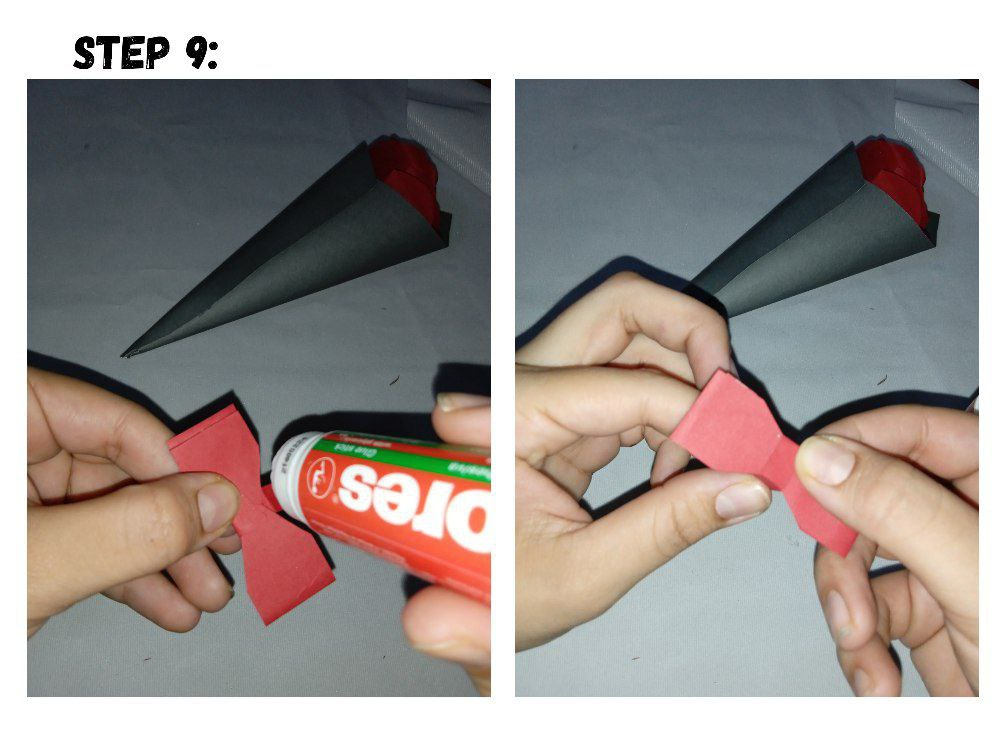
9.- Now to stick it I'm going to place a bit of cardboard in the center.
9.- Ahora para pegarlo voy a colocar un poco de cartulina en el centro.

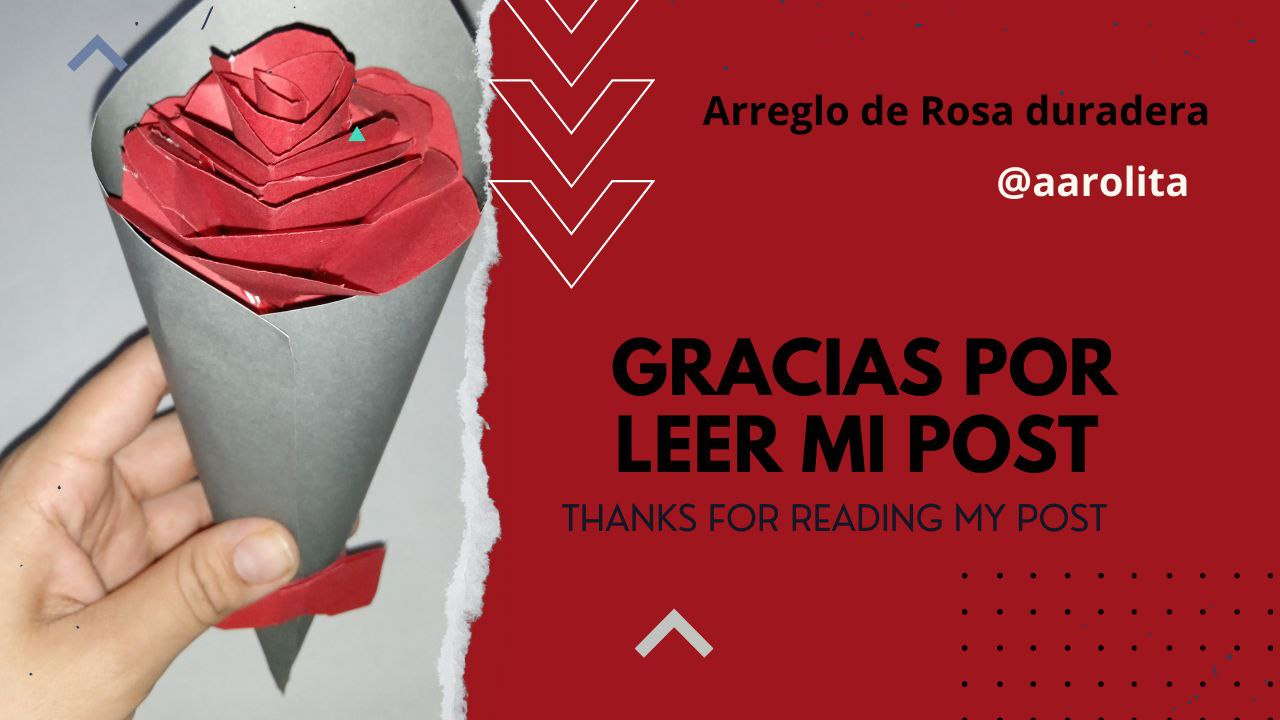
10.- Place a piece of cardboard around the cone of the same thickness as the bow, and glue the bow on top of it. And so our rose remains, ready to give to the lover or in love with her.
10.- Coloco un trozo de cartulina alrededor del cono del mismo grosor del lazo, y le pegó el lazo por encima. Y así queda nuestra rosa, lista para regalar a su enamorado o enamorada.
All the photos were taken from my redmi 9a cell phone, and edited in canva.
Que trabajo tan lindo amiga... está muy bien explicado para seguir el paso a paso. Gracias por compartir 😊. Te sigo para ver más de tus trabajos.
!discovery 33
!LADY
!VSC
!PIZZA 🍕
@chacald.dcymt has sent VSC to @aarolita
This post was rewarded with 0.1 VSC to support your work.
Join our photography communityVisual Shots
Check here to view or trade VSC Tokens
Be part of our Curation Trail
@chacald.dcymt ha enviado VSC a @aarolita
Éste post fue recompensado con 0.1 VSC para apoyar tu trabajo.
Únete a nuestra comunidad de fotografía Visual Shots
Consulte aquí para ver o intercambiar VSC Tokens
Se parte de nuestro Trail de Curación
Te quedó muy bonito este arreglo. Tienes mucha razón, ya nadie regala flores por el alto costo, así que hacerlas de papel me parece una excelente opción, además se ve preciosa. Gracias por compartir.
Excellent work and idea, you got a very nice rose and it is a great gift to last in time. Congrats on your great content and thanks for sharing it in our community. We look forward to continue seeing your work @aarolita <3 // Excelente trabajo e idea, te quedo muy linda la rosa y es un gran regalo para que perdure en el tiempo. Felicidades por tu gran contenido y gracias por compartirlo en nuestra comunidad. Esperamos seguir viendo tu trabajo @aarolita <3
This post was shared and voted inside the discord by the curators team of discovery-it
Join our Community and follow our Curation Trail
Discovery-it is also a Witness, vote for us here
Delegate to us for passive income. Check our 80% fee-back Program
$PIZZA slices delivered:
@chacald.dcymt(1/5) tipped @aarolita