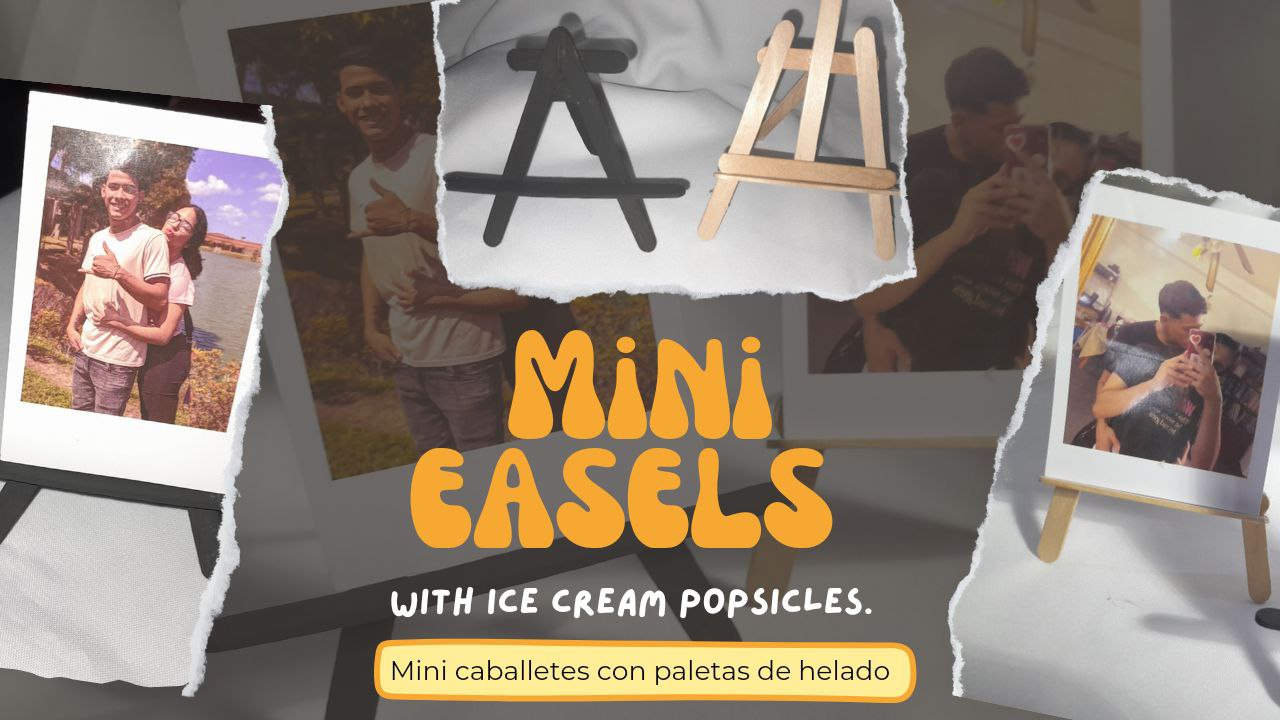
Hola hola, mi gente linda de la comunidad de DIYHub . El día de hoy vengo con la intención de mostrarle dos ideas para hacer unos mini caballetes con paletas de helado, son un soporte de mesa ideal para exhibir nuestras fotos de una manera muy ingeniosa. Son sumamente sencillos y quedan espectaculares, espero que les guste y vean el paso a paso hasta el final.
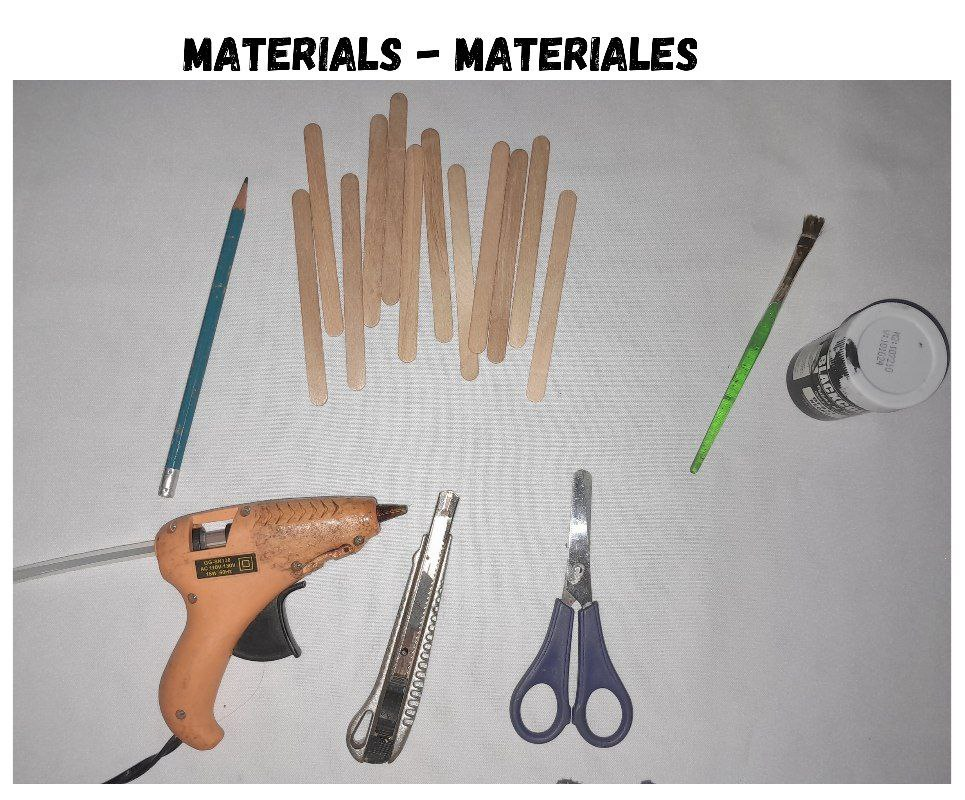
Materials:
- Ice cream stick.
- Silicone gun.
- Exact or scissors.
- Cold paint.
- Brush.
Materiales:
- Paletas de helado.
- Pistola de silicón.
- Exacto o tijera.
- Pintura al frío.
- Pincel.
Procedure:
Procedimiento:
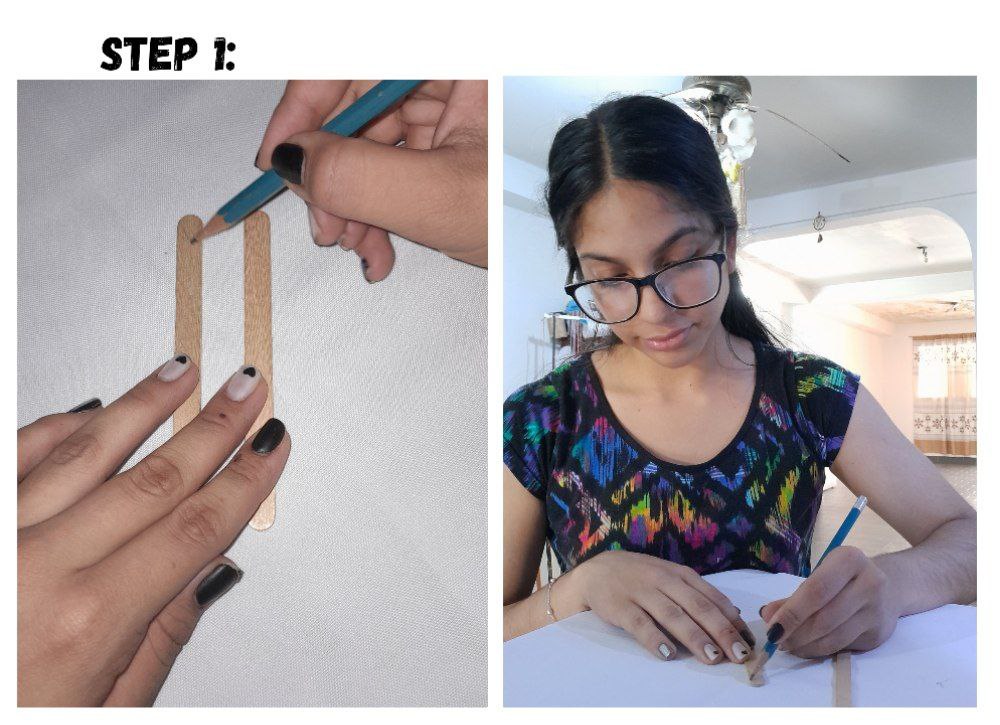
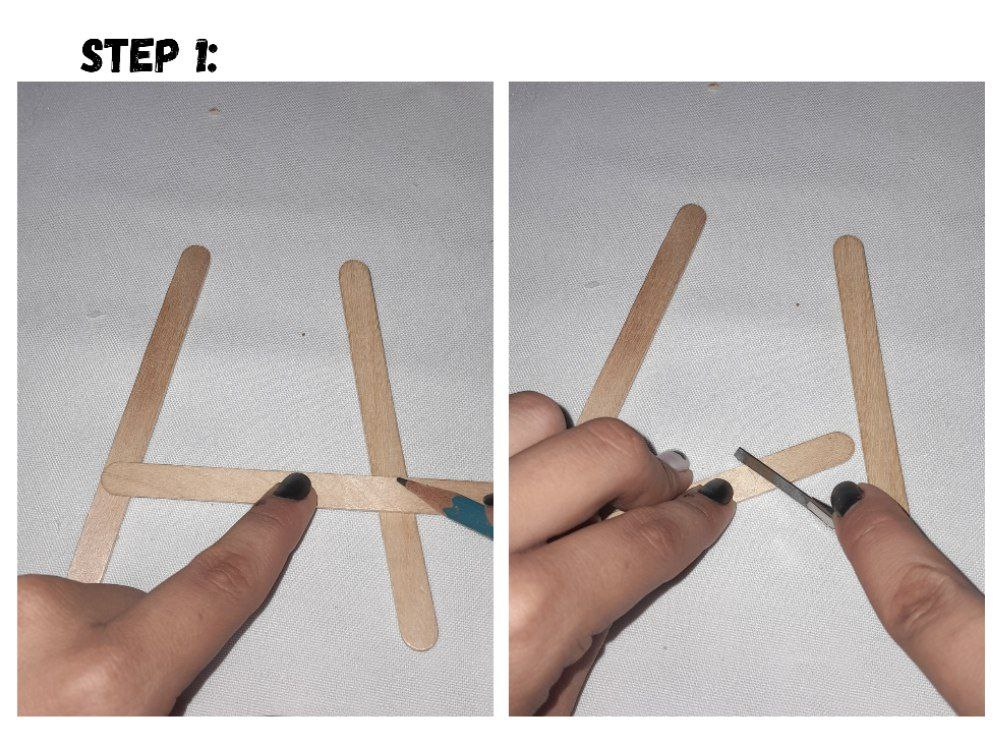
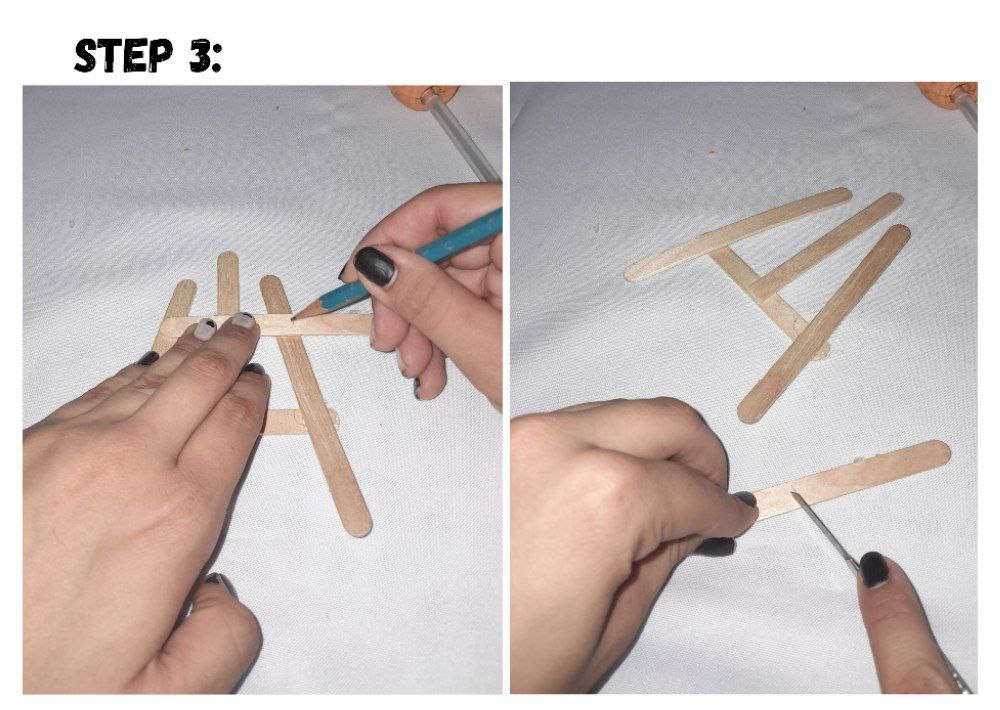
1.- We will take two ice cream popsicles and make a diagonal mark on each one in the upper corner.
1.- Tomaremos dos paletas de helado y le haremos una marca de diagonal a cada una en la esquina superior.
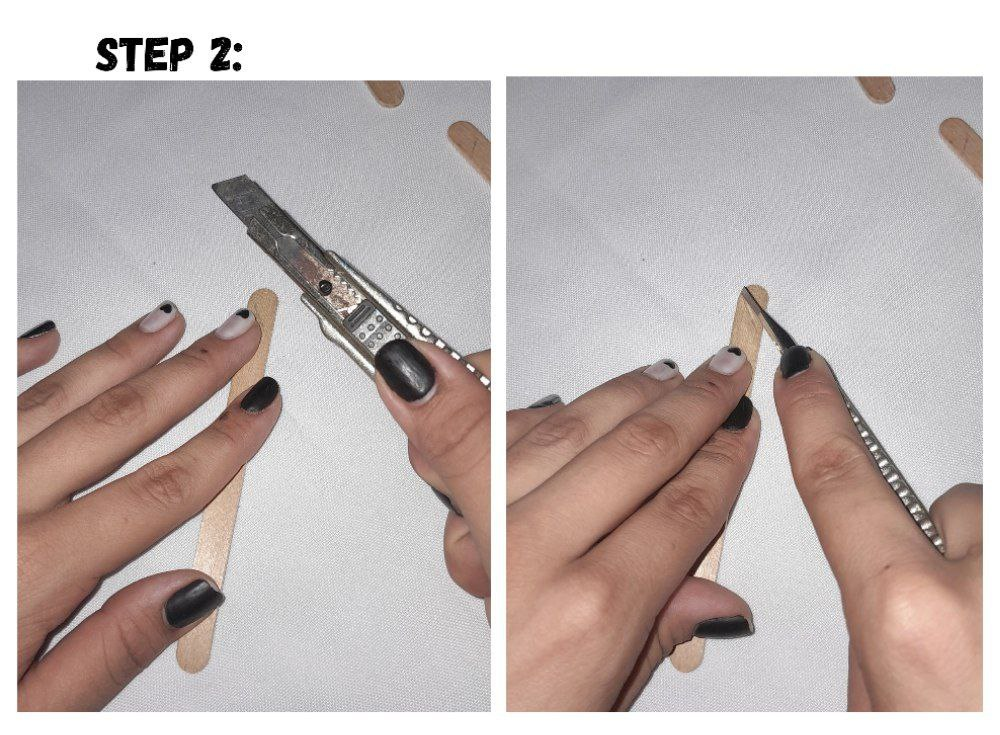
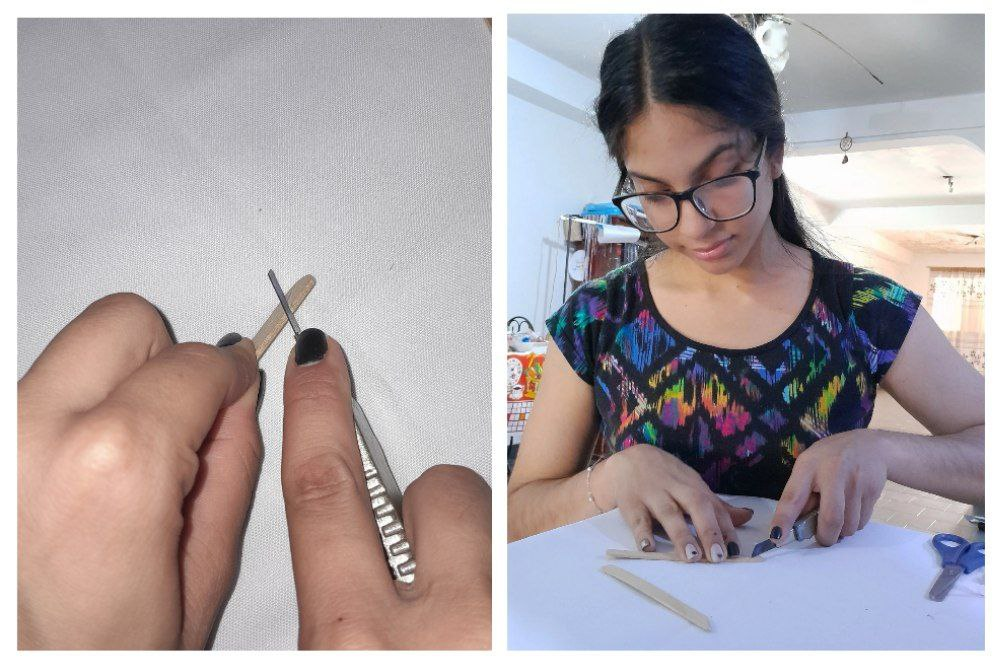
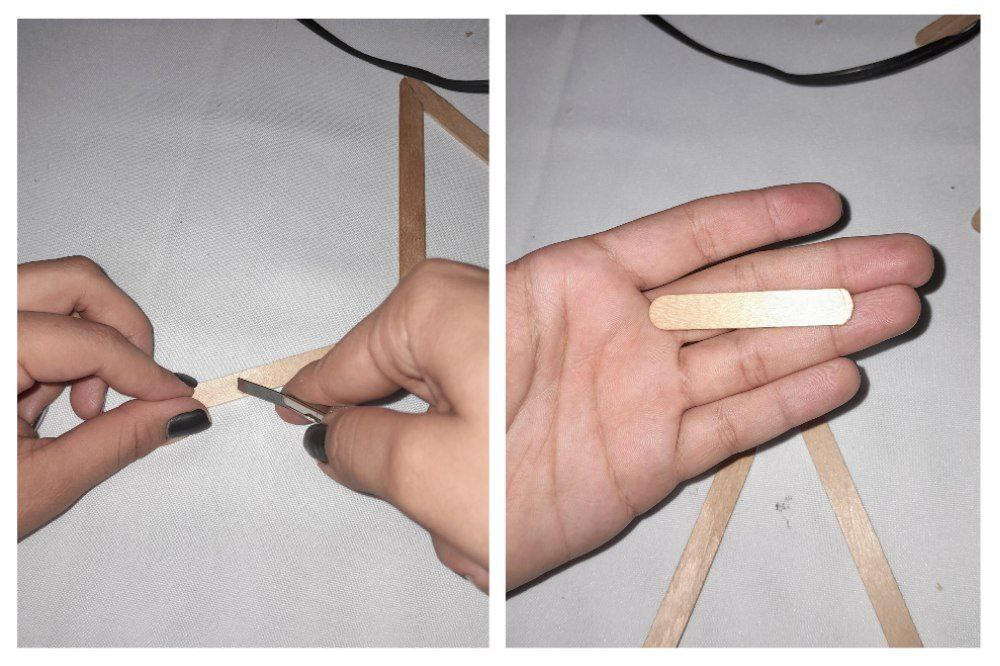
2.- We will take our exact and we are going to cut them, really very carefully because although they seem harmless, it really took me a lot of work to make that type of cut.
2.- Tomaremos nuestro exacto y los vamos a cortar, en verdad con mucho cuidado porque aunque parecen inofensivos en verdad me costó mucho mucho trabajo hacerles ese tipo de corte.
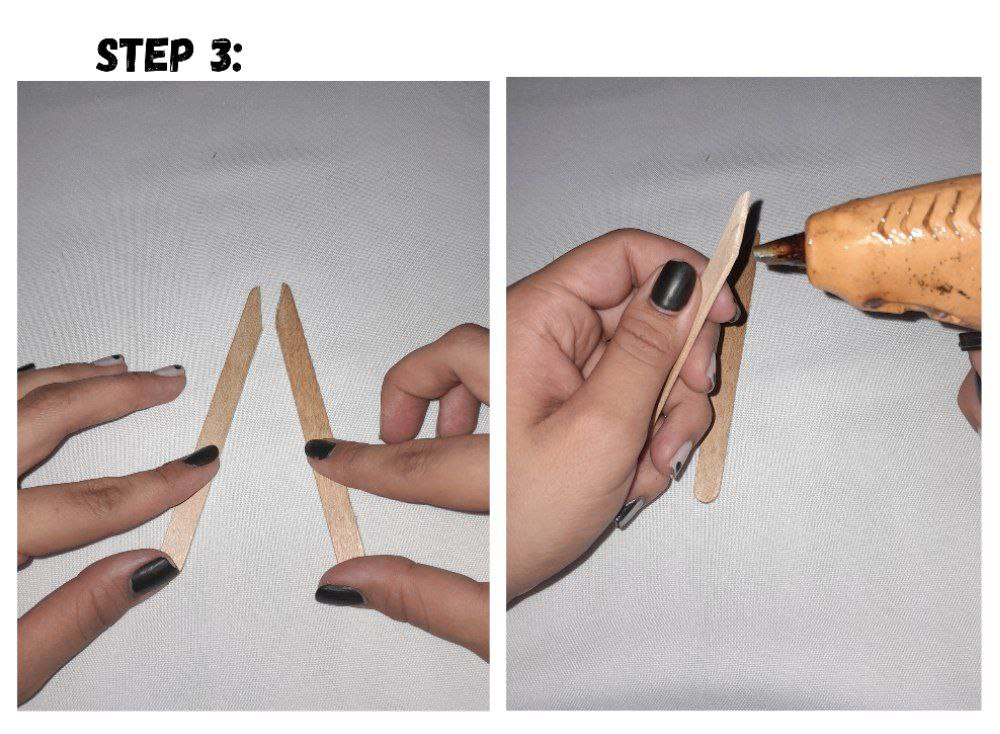
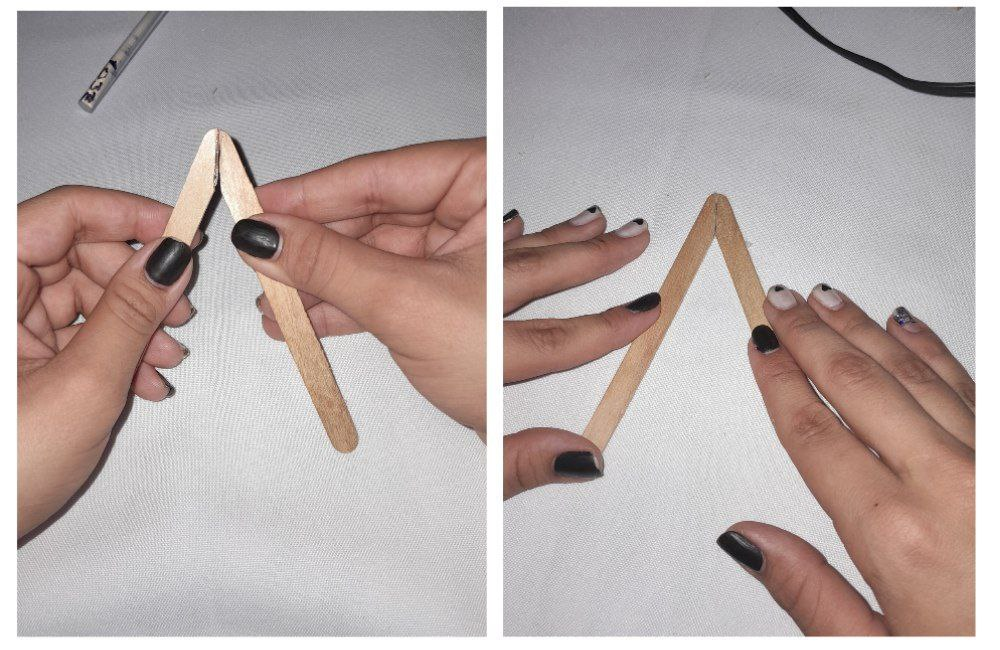
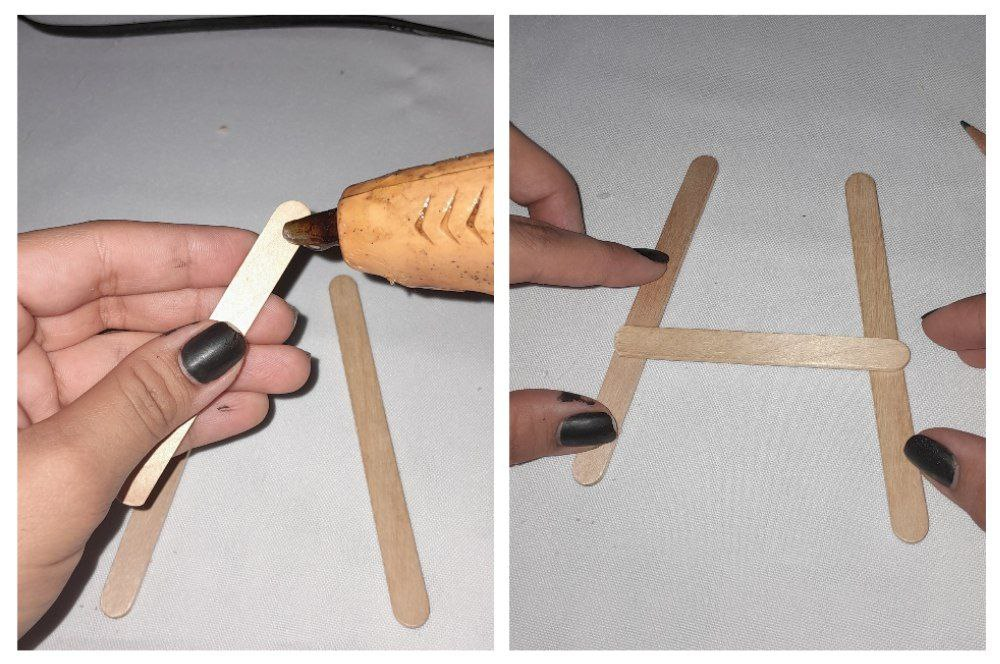
3.- It should look like a simulation of a letter "A". We will put a little glue on the cut to join them together.
3.- Nos debe de quedar así como una simulación de una letra "A". Le pondremos un poco de pegamento en el corte para unirlos.
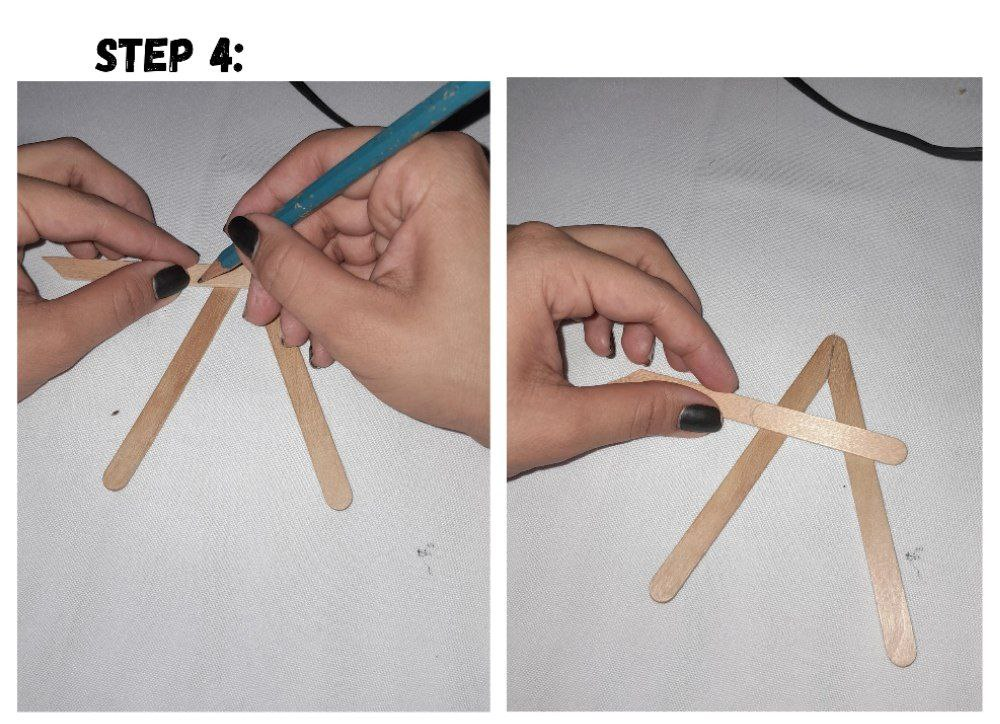
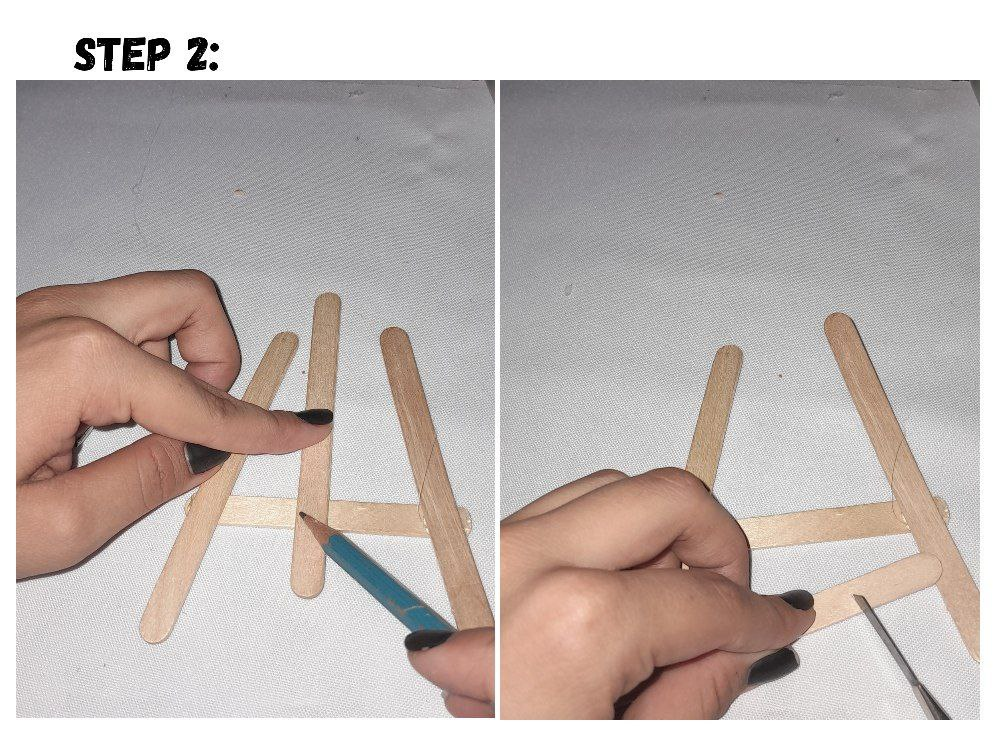
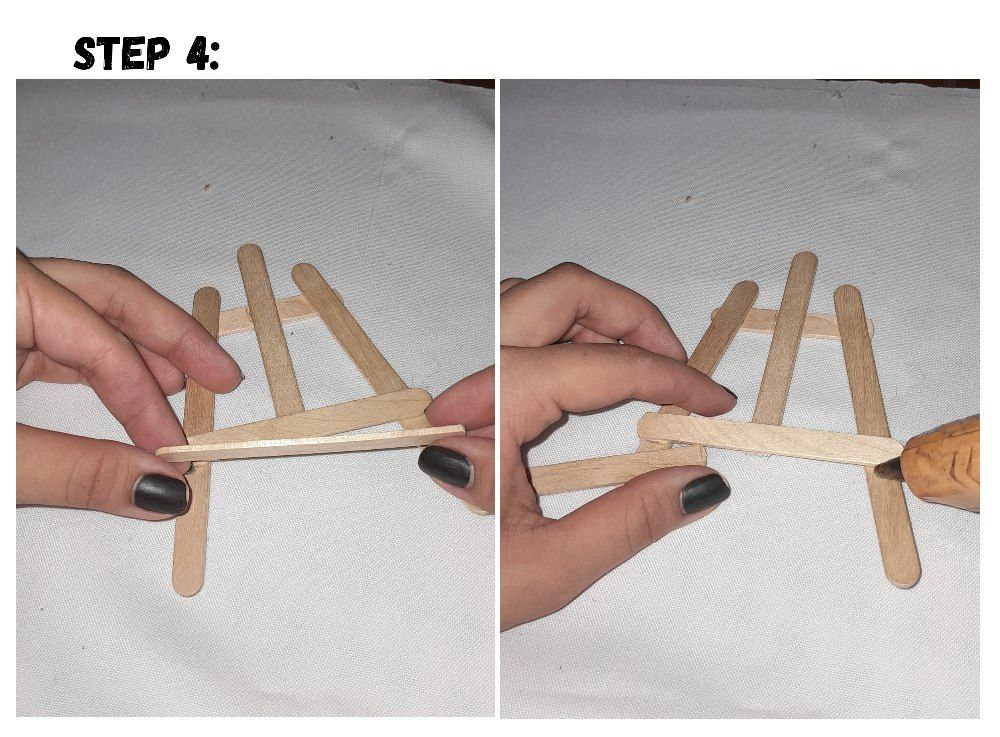
4.- I will take another palette and I will measure the amount necessary to make the top part, marking a semicircle with the pencil and then cutting with an exact.
4.- Tomaré otra paleta y voy a medir la cantidad necesaria para hacer la parte superior, marcando con el lápiz un semicírculo para luego cortar con un exacto.
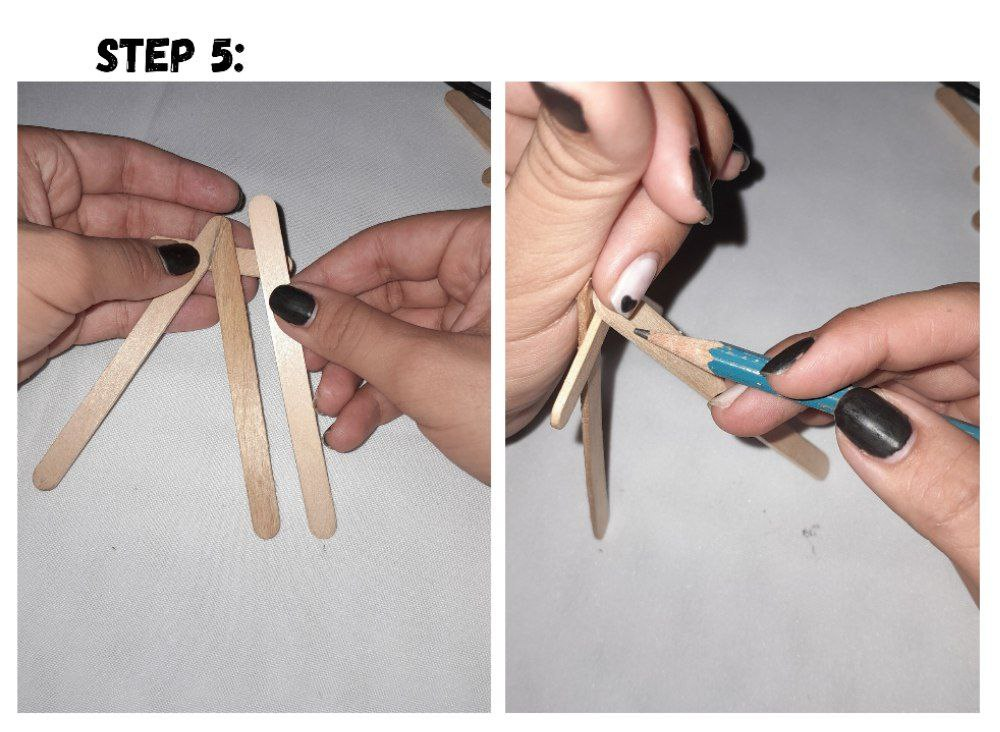
5.- I took another pallet and measured to make the base with which we are going to stabilize the easel.
5.- Tomó otra paleta y medire para hacer la base con la que vamos a estabilizar el caballete.
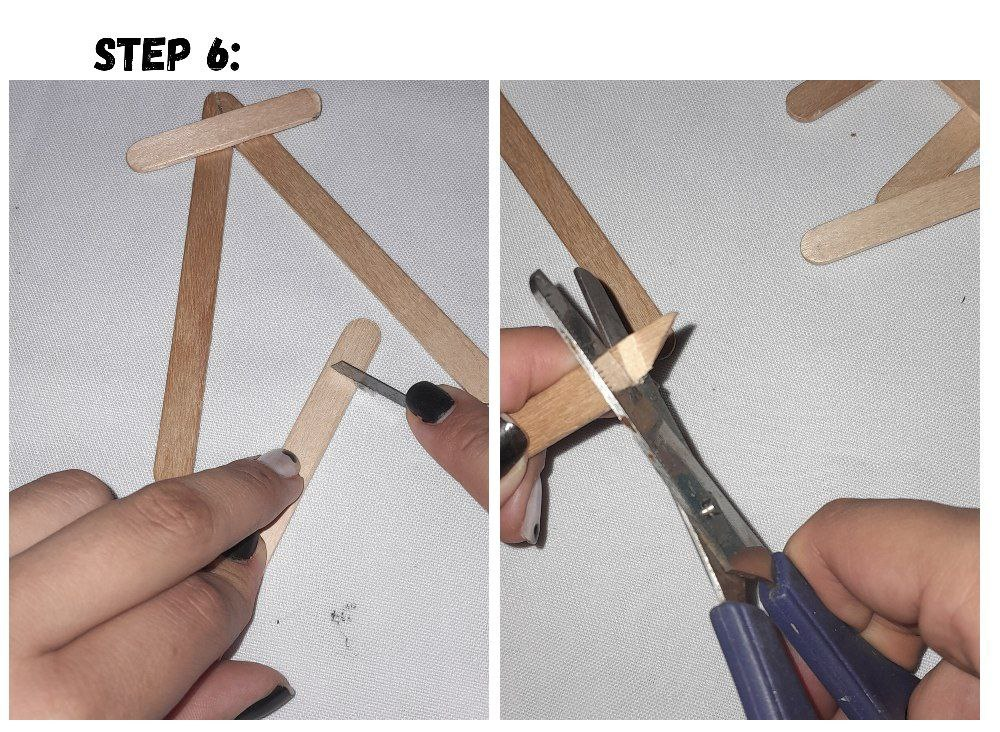
6.- In the same way we are going to cut with the exact one, try using scissors but it is easier with something sharp like a blade.
6.- De igual manera vamos a cortar con el exacto, intente utilizar la tijera pero es más sencillo con algo filoso como una hojilla.
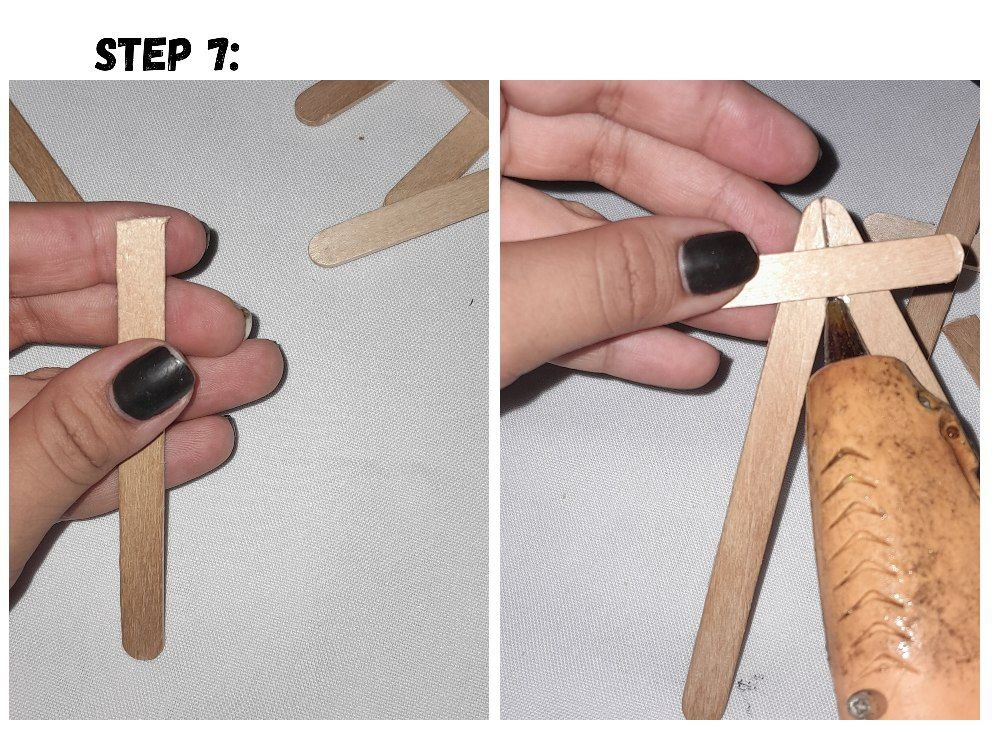

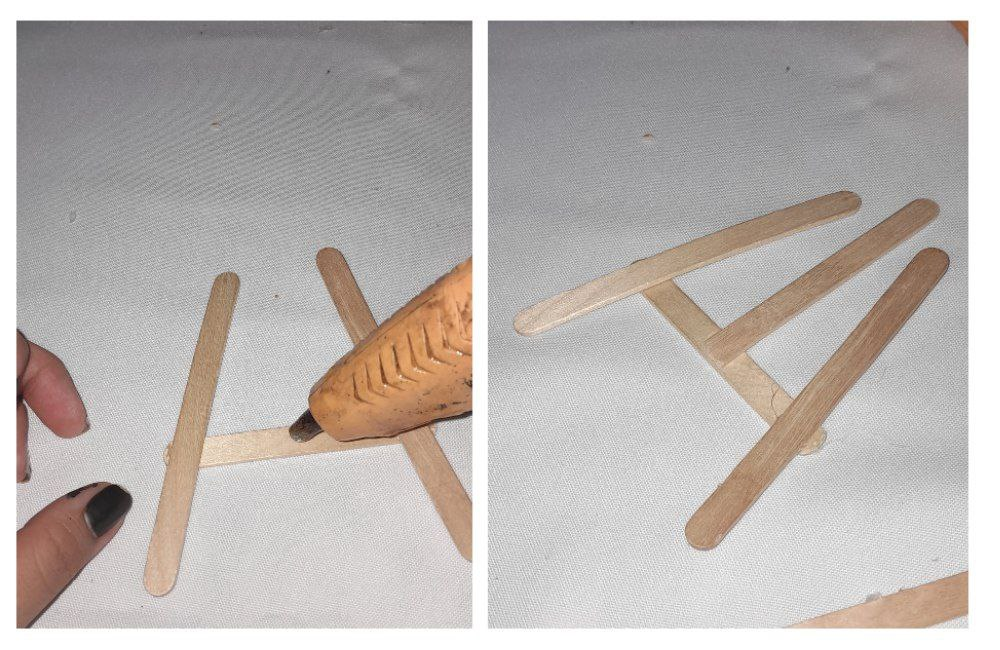
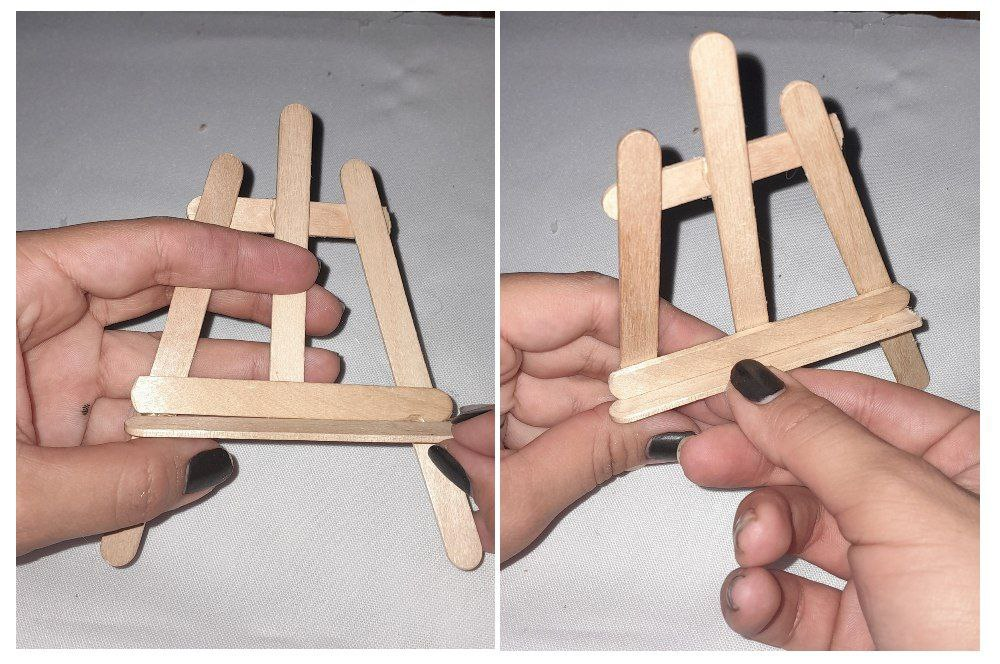
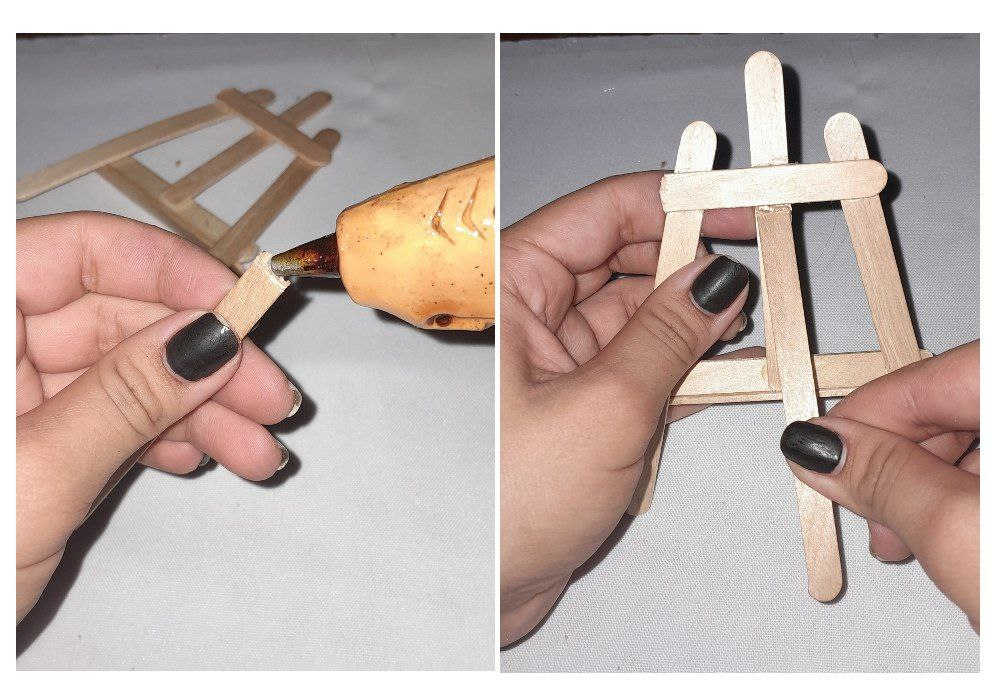
7.- Once ready, we take the silicone gun and place a point below the palette that we previously placed on top. We glue and make sure it is correct.
7.- Una vez listo tomamos la pistola de silicón y colocamos un punto por debajo de la paleta que colocamos anteriormente en la parte superior. Pegamos y nos fijamos que quedé correctamente.
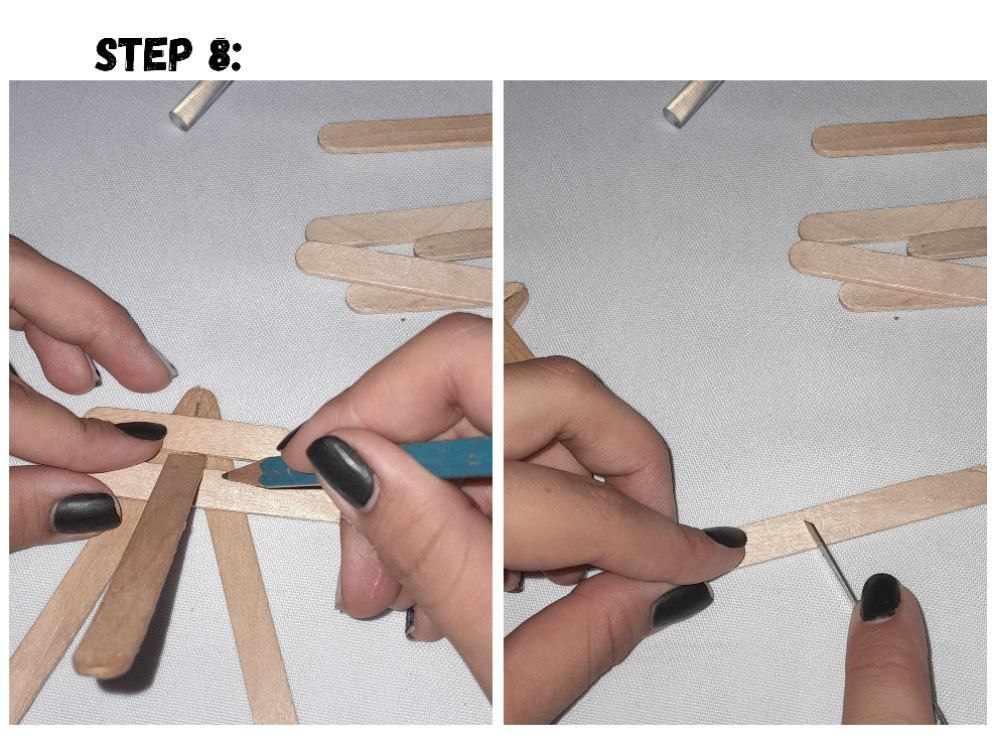
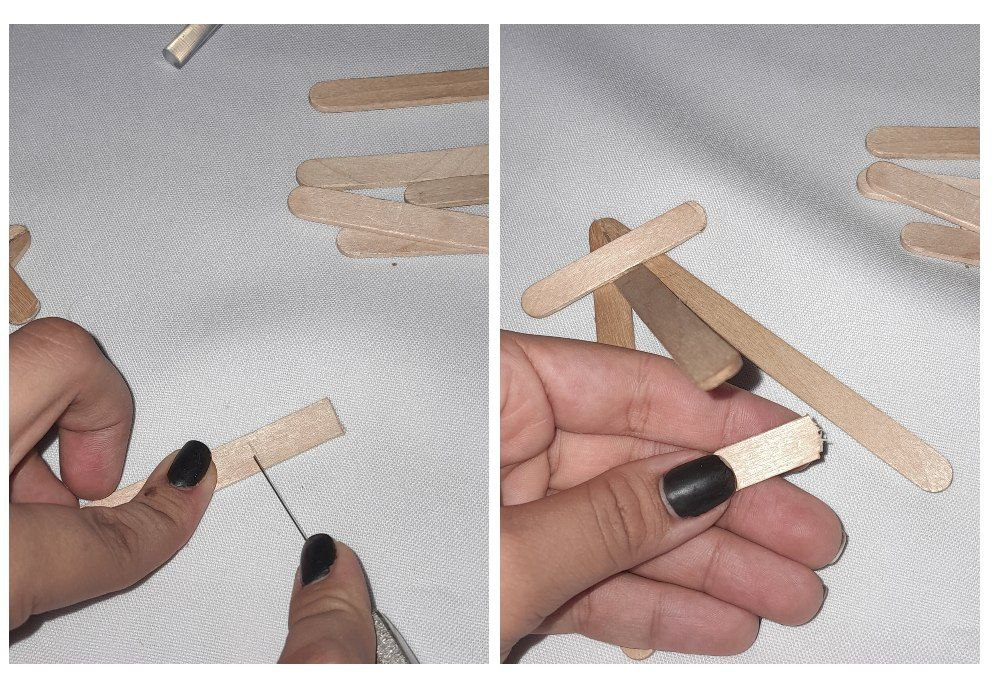
8.- Chop one more piece of one of the palettes to place it below the palette that we placed on top and make sure that the base is well fixed.
8.- Picamos un trozo más de una de las paletas para colocarlo por debajo de la paleta que colocamos en la parte superior y asegurarnos de que la base quede bien fija.
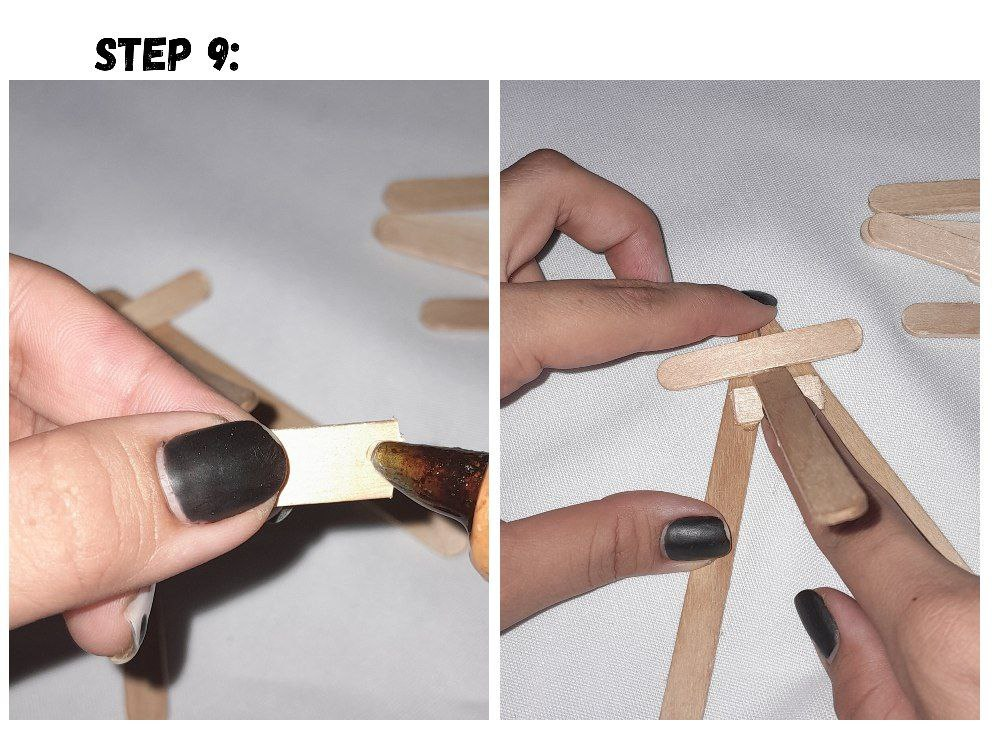
9.- We place a little silicone on the ends and glue it under the base.
9.- Colocamos un poco de silicon en los extremos y lo pego por debajo de la base.
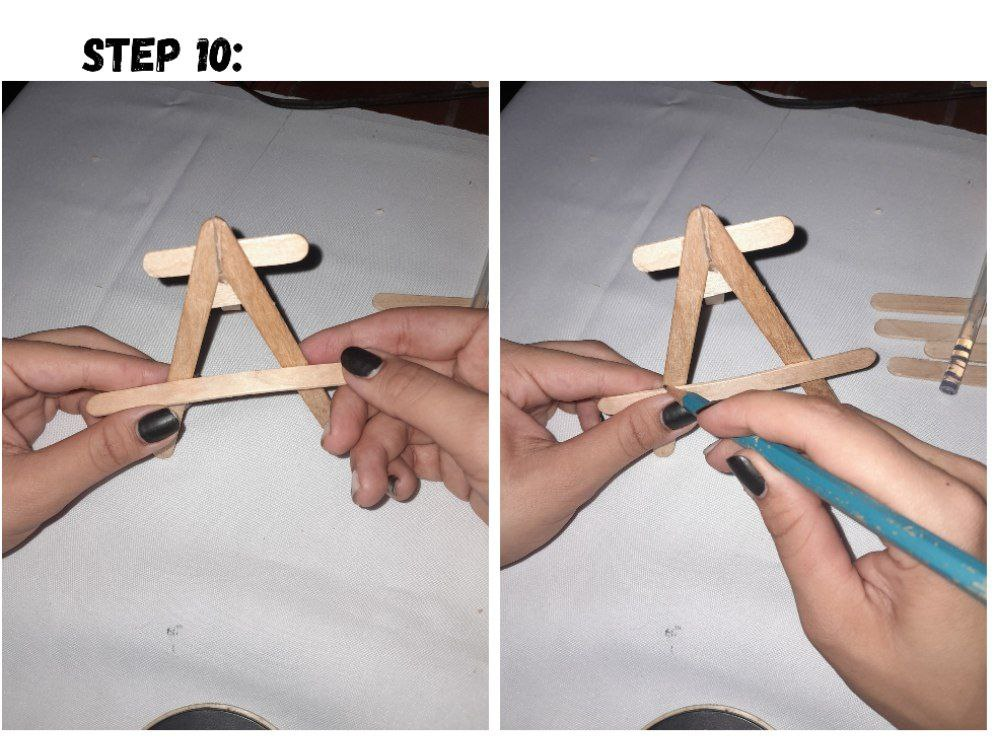
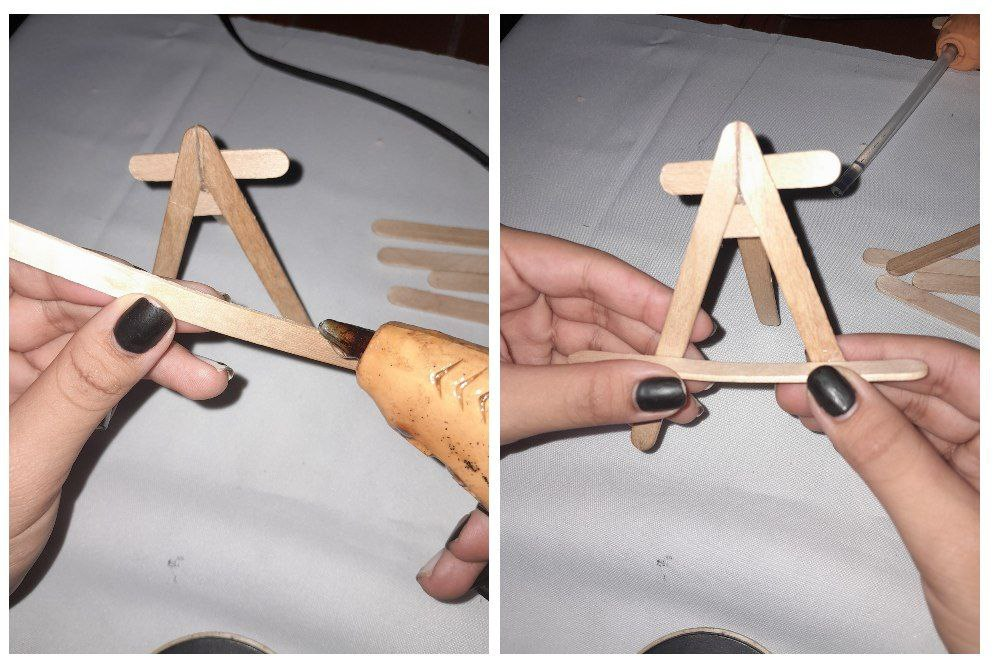
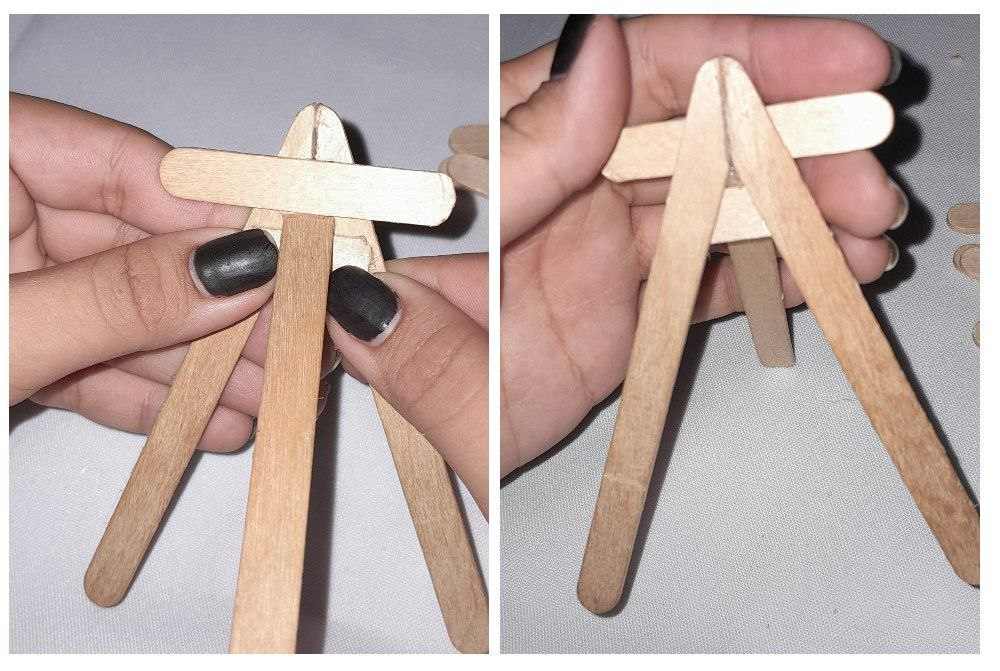
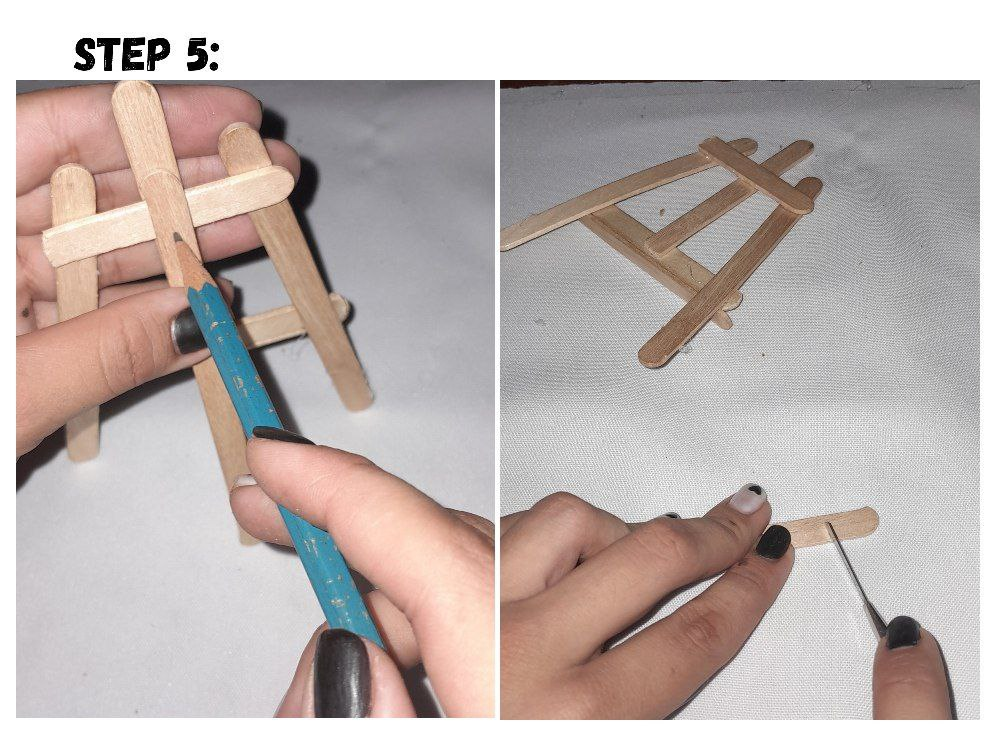
10.- We take another palette and we are going to use this complete one for the bottom part. We measure the space that will be attached to the other palettes and we place a little silicone, this is the part where we will place the photos.
10.- Tomamos otra paleta y esta si la vamos a usar completa para la parte inferior. Medimos el espacio que va a ir pegado a a las otras paletas y le colocamos un poco de silicon, esta es la parte en donde colocaremos las fotos.
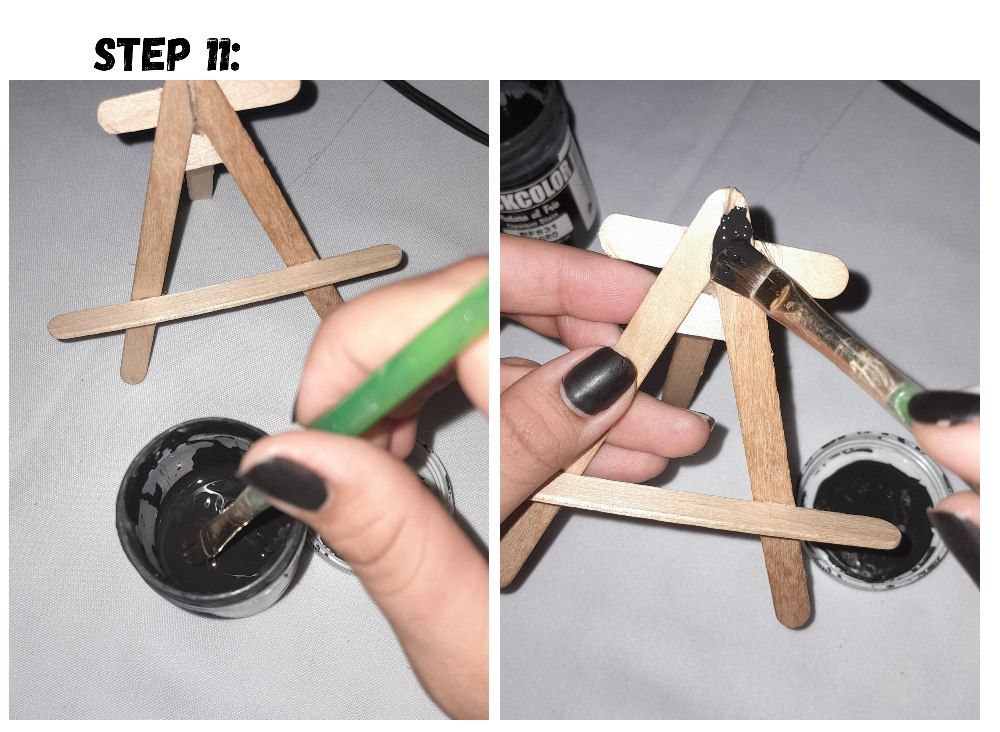
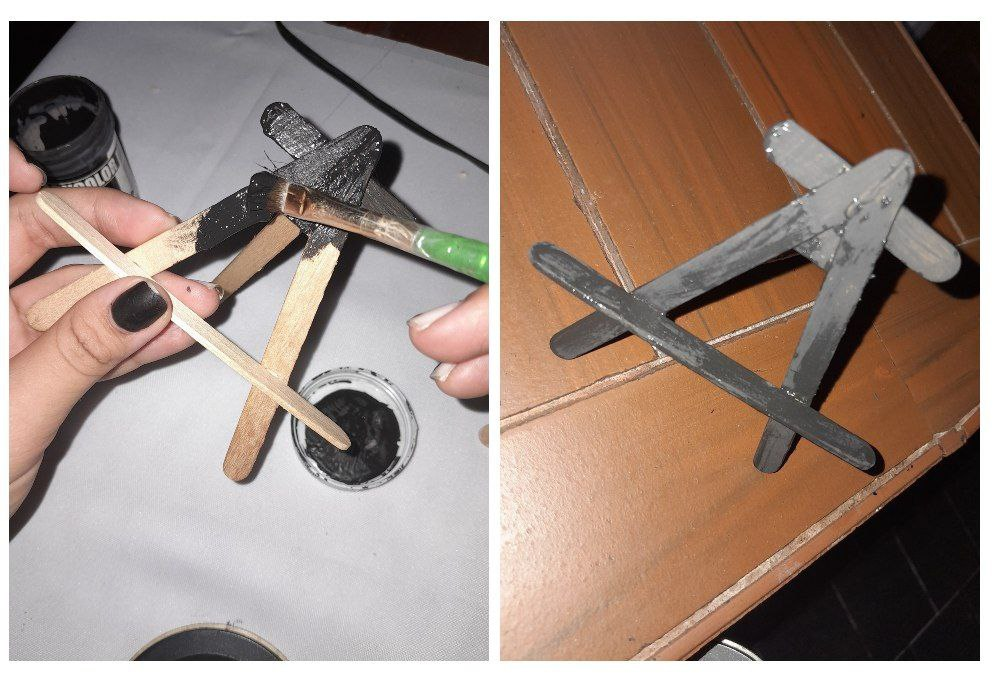
11.- And now our easel is ready, it is totally optional to take a cold paint color and we are going to paint it.
11.- Y ya listo nuestro caballete, es totalmente opcional tomar un color de pintura al frío y vamos a pintarla.
Now I will show you another model that we can make.
Ahora les mostraré otro modelo que podemos realizar.
1.- On this easel I am going to start by joining the two palettes with the palette at the bottom. Marked depending on the desired width and cut into a semicircle, I proceed to glue it.
1.- En este caballete voy a comenzar juntando las dos paletas con la paleta de la parte inferior. Marcó dependiendo del ancho deseado y corto en un semicírculo, procedo a pegarlo.
2.- Now I go with the base stick in the center, I take a palette and cut it according to the length I want, I only leave it 1cm higher than the others. I cut it out and proceeded to glue it in the center of the bottom pallet.
2.- Ahora voy con el palito base del centro, tomo una paleta y la recorto según el largo que quiera, yo solo lo deje 1cm más alto que los otros. Lo corte y procedí a pegarlo en el centro de la paleta inferior.

3.- Now let's go with the upper pallet, mark the distance from the side pallets and cut out. We put a dot of silicone on each end of the paddle and glue it.
3.- Vamos ahora con la paleta superior, marcamos a la distancia de las paletas laterales y recortamos. Echamos un punto de silicón de cada extremo de la paleta y pegamos.
4.- Now let's go for the palette for the base to mount the photos. We are going to place a little silicone under the lower palette and without trimming we glue another palette around the edges.
4.- Vamos ahora por la paleta para la base para montar las fotos. Vamos a colocar un poco de silicon por debajo de la paleta inferior y sin recortar pegamos otra paleta por los bordes.
5.- We only need the base where the easel is held, measured from the upper pallet and we cut it out, place a little silicone on the end and glue it. And now our two easels are left.
5.- Solo nos falta la base por donde se sostiene el caballete, medidos desde la paleta superior y recortamos, colocamos un poco de silicón en el extremo y pegamos. Y ya quedaron nuestros dos caballetes.
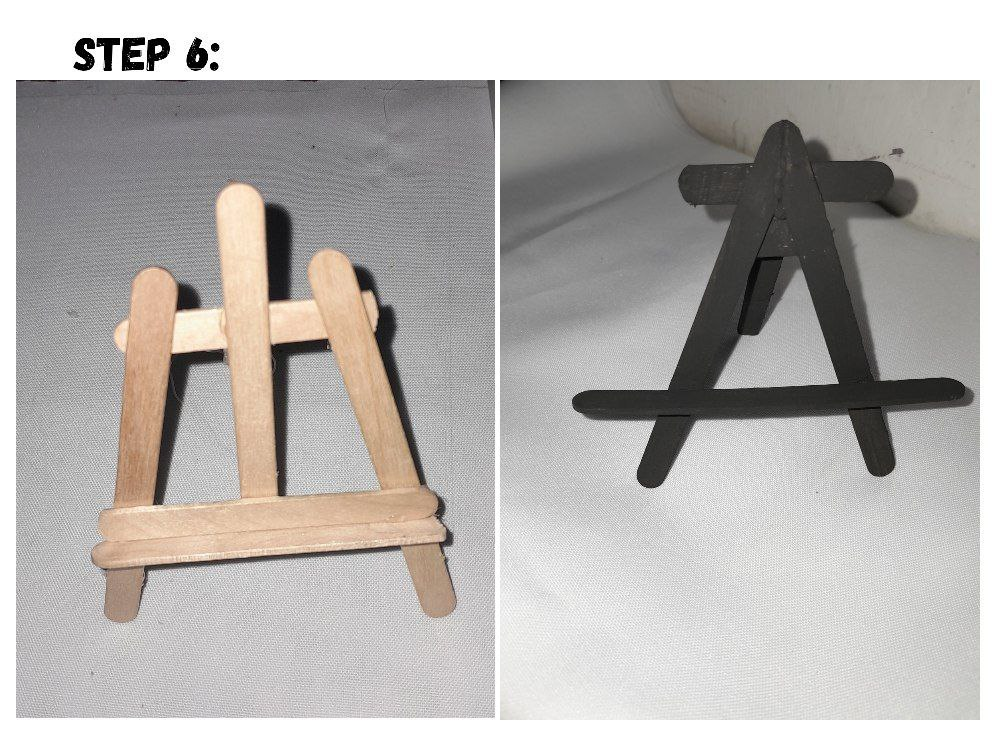
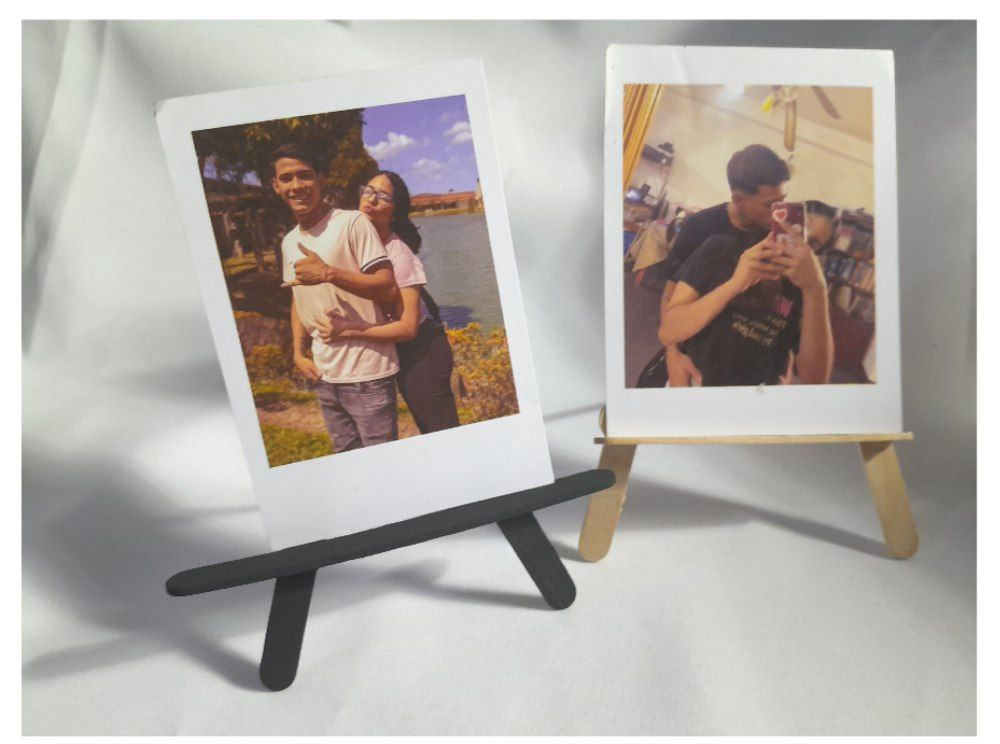
6.- They are now ready to be used, we look for some photos of our preference and place them.
6.- Ya están listos para ser usados, buscamos unas fotos de nuestra preferencia y la colocamos.
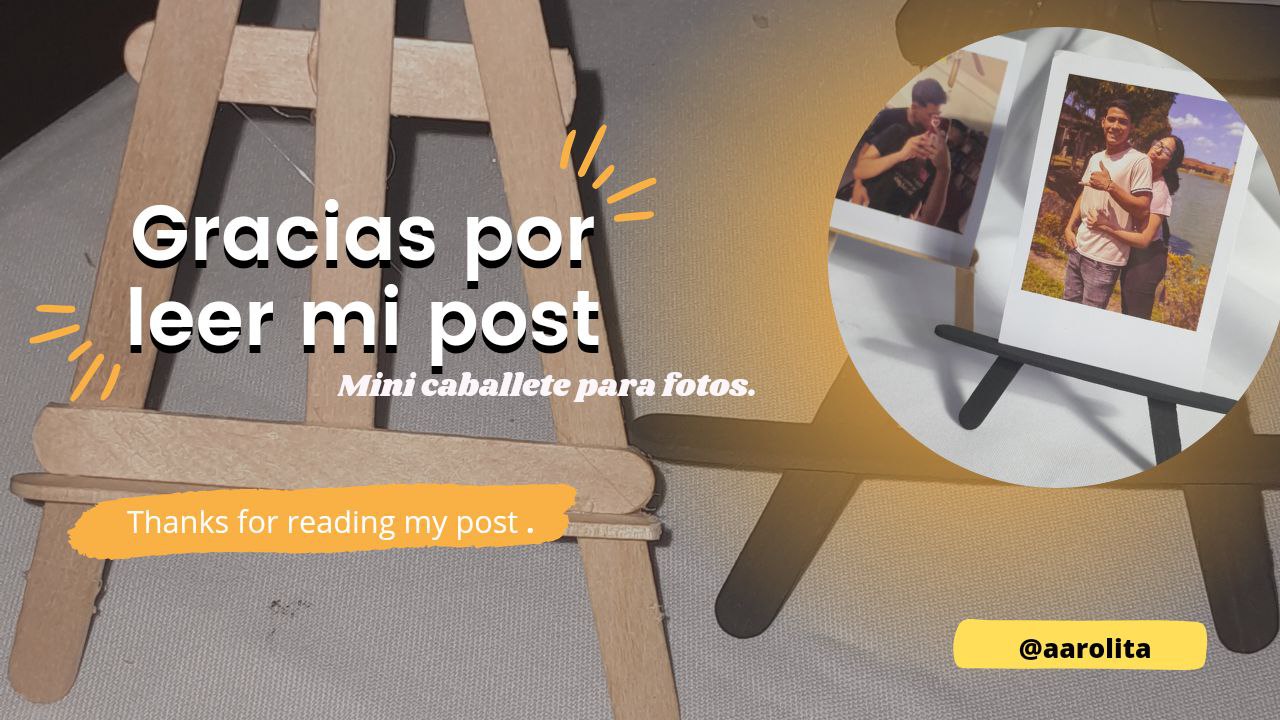
Thank you for reaching the end of this post, all the photos were taken from my Samsung a14 phone, and edited in the Canva app.
Gracias por llegar al final de este post, todas las fotos fueron tomadas desde mi teléfono Samsung a14, y editadas en la app de Canva.
Ay que lindos mini caballetes , me hacen recordar de mis años en la universidad. Saludos ☺️
This is a beautiful fame for your photos. Nice work
¡Enhorabuena!
✅ Has hecho un buen trabajo, por lo cual tu publicación ha sido valorada y ha recibido el apoyo de parte de CHESS BROTHERS ♔ 💪
♟ Te invitamos a usar nuestra etiqueta #chessbrothers y a que aprendas más sobre nosotros.
♟♟ También puedes contactarnos en nuestro servidor de Discord y promocionar allí tus publicaciones.
♟♟♟ Considera unirte a nuestro trail de curación para que trabajemos en equipo y recibas recompensas automáticamente.
♞♟ Echa un vistazo a nuestra cuenta @chessbrotherspro para que te informes sobre el proceso de curación llevado a diario por nuestro equipo.
🏅 Si quieres obtener ganancias con tu delegacion de HP y apoyar a nuestro proyecto, te invitamos a unirte al plan Master Investor. Aquí puedes aprender cómo hacerlo.
Cordialmente
El equipo de CHESS BROTHERS
I really liked your post friend, you have nice pictures, well explained step by step and the end result is lovely...loved the miniature easels 🥰. Good job 👍🏽
!discovery 45
!VSC
!DIY
@chacald.dcymt has sent VSC to @aarolita
This post was rewarded with 0.1 VSC to support your work.
Join our photography communityVisual Shots
Check here to view or trade VSC Tokens
Be part of our Curation Trail
@chacald.dcymt ha enviado VSC a @aarolita
Éste post fue recompensado con 0.1 VSC para apoyar tu trabajo.
Únete a nuestra comunidad de fotografía Visual Shots
Consulte aquí para ver o intercambiar VSC Tokens
Se parte de nuestro Trail de Curación
This post was shared and voted inside the discord by the curators team of discovery-it
Join our Community and follow our Curation Trail
Discovery-it is also a Witness, vote for us here
Delegate to us for passive income. Check our 80% fee-back Program
You can query your personal balance by
!DIYSTATSQue resultado tan lindo y con materiales muy prácticos. 😊 Me encantaron
What a cute result and with very practical materials. 😊 I loved them