Have a nice day my fellow hivers and crafters. In the community Diy Hub we have the invitation to participate in a wonderful contest motivated by the celebration of Women's Day. This contest expires on March 31.
These days my knitting spirit has been awakened and so I bring you to celebrate a bandana knitted with two needles but first I had to watch tutorials for beginners with the intention of remembering that time of fashionable knitting. They sold magazines and my mother bought the booklets to learn how to knit with two needles; with her I learned a little and I remember that I made a white sweater that by the way I was fascinated.
I thought about my hair to pick it up when I went to the gym and dance therapy. I was eager to start something, so I went for the quick and easy side by making a simple knit.
SPANISH
Reciban un feliz día amigos hivers manualistas. En la comunidad Diy Hub tenemos la invitación a participar en un maravilloso concurso motivado con la celebración del Día de la Mujer. Este concurso expira el 31 de marzo.
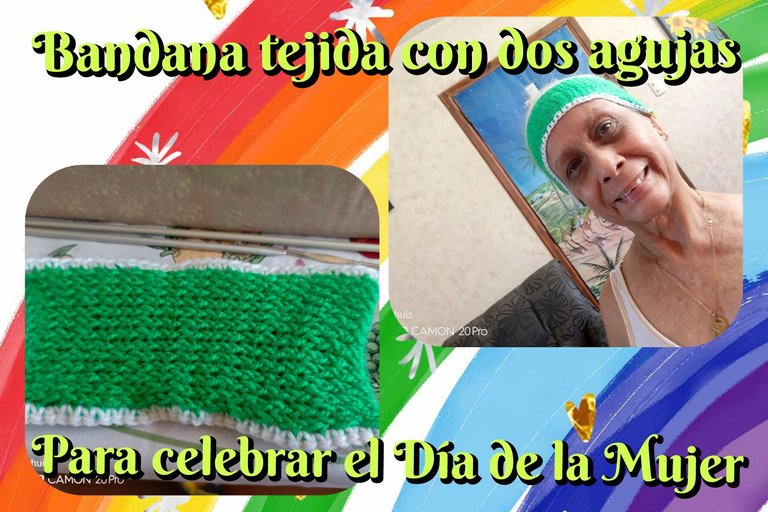
Por estos días se ha despertado mi espíritu tejedor y por eso les traigo para celebrar una bandana tejida con dos agujas pero antes tuve que ver tutoriales para principiantes con la intención de recordar aquel tiempo de furor de la moda del tejido. Vendían revistas y mi madre compraba los fascículos para aprender a tejer con dos agujas; con ella aprendí un poco y recuerdo que hice un suéter blanco que por cierto me fascinaba.
Pensé en mi pelo para recogerlo cuando vaya al gimnasio y a la bailoterapia. Estaba ansiosa por comenzar algo, entonces me fui por el lado rápido y fácil haciendo un tejido sencillo.
Knitted Bandana (Two Needle Knitting)
What do we need?
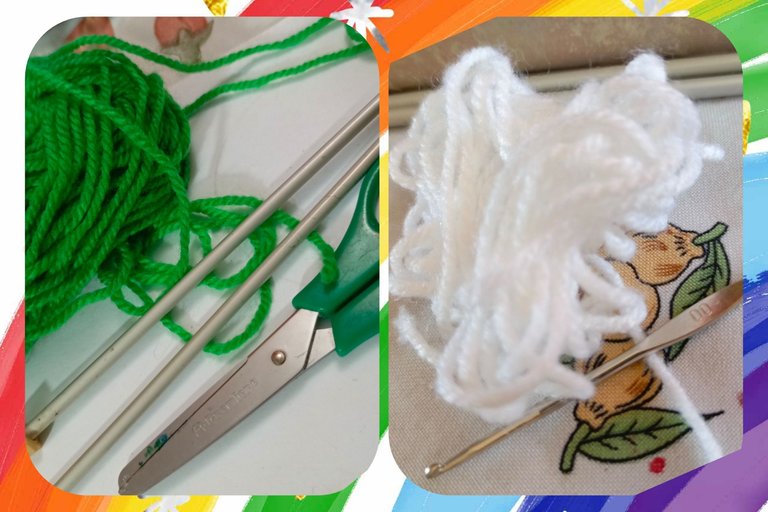
-Green wool
-White wool
-Scissors
-Crochet needle
-Knitting needles
SPANISH
Bandana tejida a punto (Tejido con dos agujas)
¿Qué necesitamos?
-Lana verde
-Lana blanca
-Tijera
-Aguja para ganchillo
-Agujas para punto

Procedure
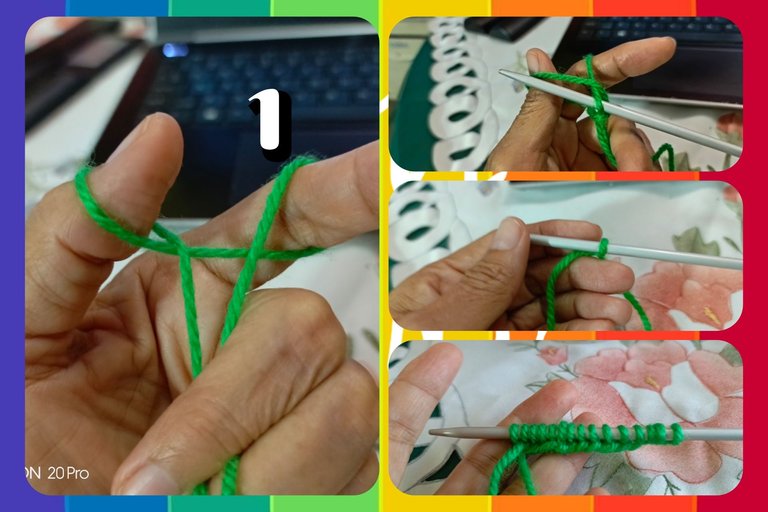
1- Measure 45 cms of wool to start assembling the stitches. Make a kind of triangle between the index finger and thumb. Pass a needle through the inside of the thumb circle to take the yarn from the index finger circle. Secure to the needle. Repeat the process until 15 stitches have been cast on.
SPANISH
Procedimiento
1- Medir 45 cms de lana para comenzar a montar los puntos. Hacer una especie de triángulo entre los dedos índice y pulgar. Pasar una aguja por dentro del círculo del pulgar para tomar la hebra del círculo del dedo índice. Asegurar a la aguja. Repetir el proceso hasta montar 15 puntos.

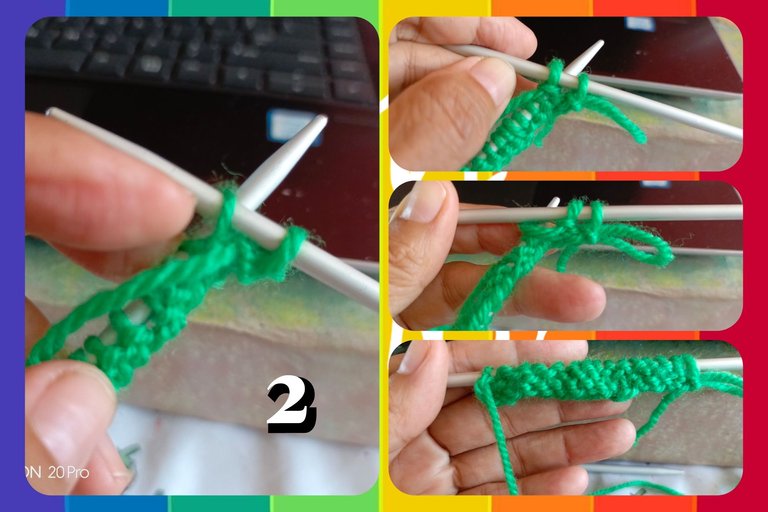
2- Row 1: Purl stitch: Pass the right hand needle through the inside of the first stitch leaving it in front of the other needle and loop the yarn to pull out the stitch and attach it to the right hand needle. Repeat until all the stitches of the left needle are passed to the right needle.
SPANISH
2- Vuelta 1: Puntos revés: Pasar la aguja de la derecha por dentro del primer punto dejándola por delante de la otra aguja y enlazar la hebra para sacar el punto y fijarlo a la aguja derecha. Repetir hasta que todos los puntos de la aguja de la izquierda pasen a la aguja de la derecha.
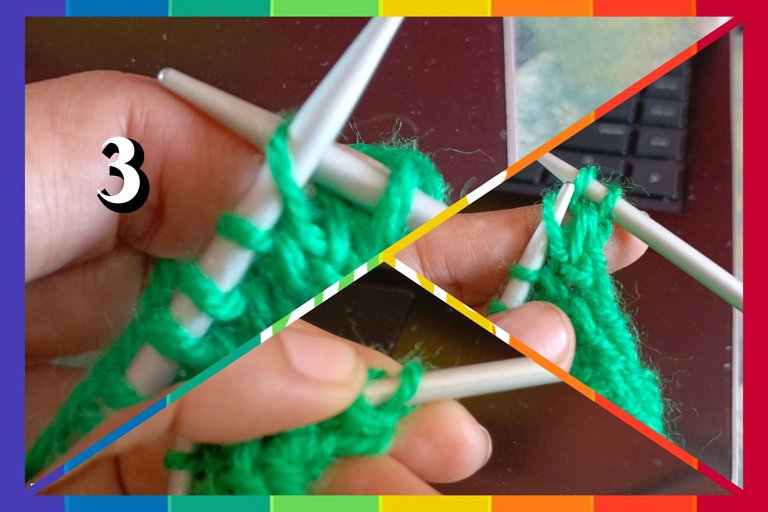
3- Row 2: Right-hand stitches: Pass the right-hand needle through the inside of the stitch, leaving the needle to the back. Loop the yarn, pulling out the stitch to leave it on the right needle. Repeat until all the stitches are on the right needle.
SPANISH
3- Vuelta 2: Puntos derechos: Pasar la aguja de la derecha por dentro del punto dejando la aguja hacia atrás. Enlazar la hebra sacando el punto para dejarlo en la aguja de la derecha. Repetir hasta que todos los puntos pasen a la aguja de la derecha.
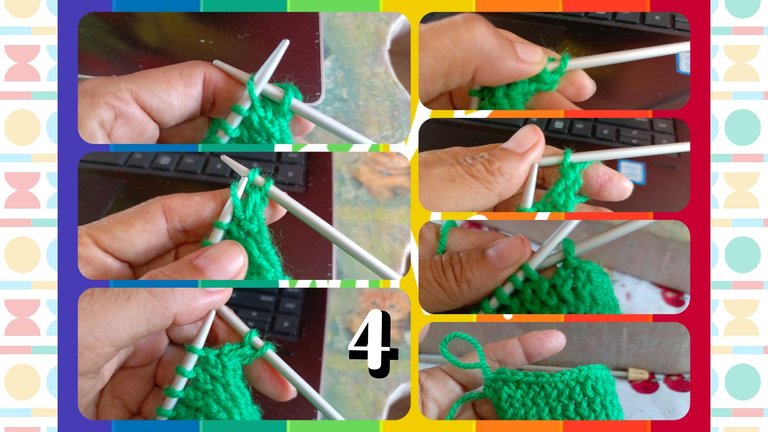
4- Repeat the process until you reach the last loop for the closing. Cast on without knitting the first stitch to the right hand needle. Stitch the needle into the second stitch by knitting a right-hand stitch. Of the two stitches on the right needle, the left stitch passes inside the right stitch to eliminate it, leaving only one stitch. Repeat the process until all the stitches are closed.
SPANISH
4- Repetir el proceso hasta llegar a la última vuelta para el cierre. Pasar sin tejer el primer punto a la aguja de la derecha. Clavar la aguja en el segundo punto haciendo un punto derecho. De los dos puntos que están en la aguja derecha, el punto izquierdo pasa por dentro del punto derecho para eliminarlo, quedando un solo punto. Repetir el proceso hasta que se cierren todos los puntos.
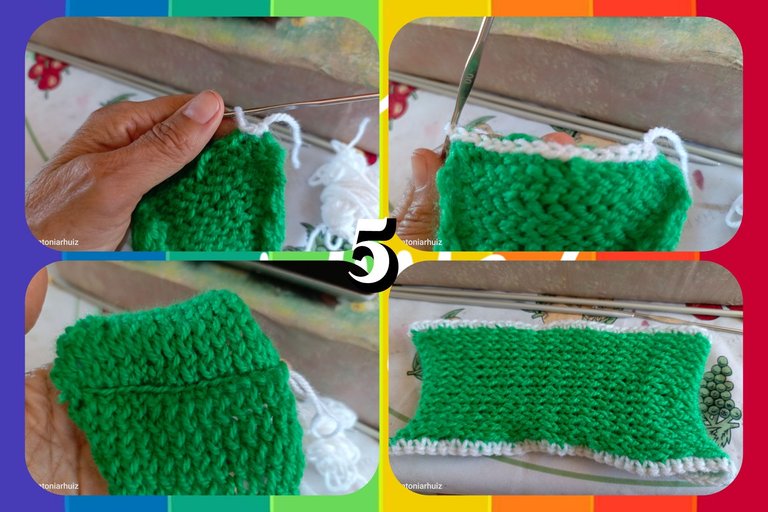
5- Seal the ends by joining them with crochet chain stitches. Weave the circumference with single crochet stitches.
SPANISH
5- Sellar los extremos uniéndolos con cadenetas a crochet. Tejer la circunferencia con puntos bajos.
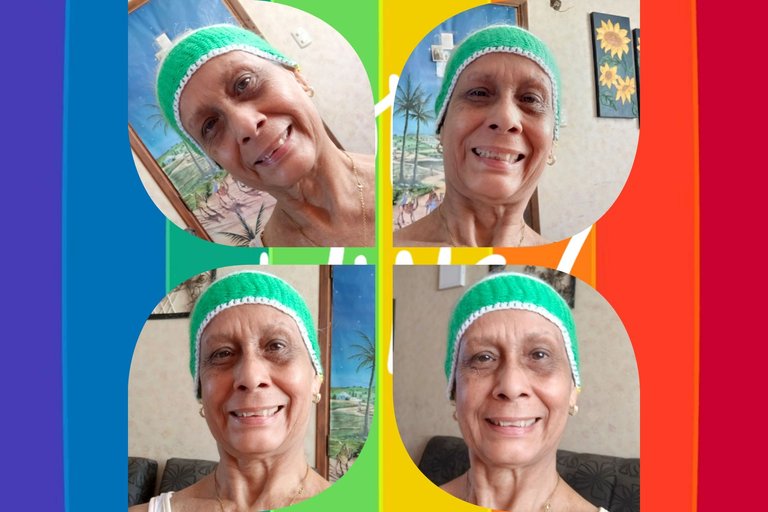
6- Ready to wear whenever you want. For my part I left the bandana on.
SPANISH
6- Listo para lucir cuando quieras. Por mi parte me dejé puesta la bandana.
I wanted to knit it with purl stitches in all the rows, so I started the first row with purl stitches but I thought it would take me too much time to understand, so I decided to knit the whole thing in the right side. Also in the step of closing the stitches it turned out that I didn't have enough yarn, so I used white yarn and it occurred to me to knit the border of the bandana with that color.
SPANISH
Quise hacer un tejido con puntos de revés en todas las vueltas, por tal motivo comencé la primera vuelta con puntos al revés pero creí que me llevaría mucho tiempo para entender; entonces decidí realizar el tejido todo al derecho. También en el paso de cerrar los puntos resulta que no me alcanzaba el hilo, así que le puse hilo blanco y se me ocurrió tejer el borde de la bandana con ese color.
|Información| Information|
|Todas las fotos son propias| All photos are my own|
|Imagen editada en GridArt del teléfono Tecno Camon 20 Pro| Imagen editada en GridArt del teléfono Tecno Camon 2 Pro|
|Traducción en traductor Deepl versión gratuita| Deepl translator free versión|
Amiga esa bandana te quedó muy hermosa, para el gym está perfecto, tejes muy bien, eres una total experta.
Yo tengo años sin hacerlos, aprendí a tejer y hasta allí llegué, no continúe, pero es un arte que te relaja y te apacigua el estrés.
Me encanto este atuendo para el cabello, gracias por compartirlo, saludos 😘🤗
En realidad no quedó como quería pero soy una novata porque hace mucho, mucho tiempo que no tejía con dos agujas, que lo he olvidado.
Me pasaron muchas cosas; no me alcanzó el hilo verde para unir los extremos y por no ponerme a inventar la hice muy sencilla pero quedó perfecta en mi cabeza, a la medida. Gracias por comentar hermana 🌹🌻💐💐❤️
Así quedó maravillosa, cada esfuerzo vale la pena, más si lo hacemos nosotros mismos, ya tienes tu bandana para entrenar en el gym , a lucirla como debe ser, fuerte abrazo 🤗🥰
Hola. Se ve muy bonita la bandana. Poco a poco irás recordando todo sobre el tejido a dos agujas. Yo nunca me he puesto a practicar. Mi hijo en su segundo intento tejió un amigurumi y yo me quedé impactada. Todo es querer hacer las cosas. Me quiero hacer una bandana nueva jejeje. Saludos.
Lingo trabajo amiga, gracias por compartir! Me encanta tejer y esta idea me gusta mucho. Saludos, éxitos y bendiciones! 🙏❤️
Qué linda!! Me complace que te guste la idea. Por mi parte voy a tejer otras para seguir practicando. Esto me hace tener viva a mi madre. Saludos 🌺🌹💐🌻🌷
https://reddit.com/r/blogs/comments/1bcl7bx/engesp_knitted_bandana_diy_hub_contest/
The rewards earned on this comment will go directly to the people( @antoniarhuiz ) sharing the post on Reddit as long as they are registered with @poshtoken. Sign up at https://hiveposh.com.
My dear, you look very beautiful modeling your creation and I can tell you put a lot of love into it.
How cute!!! Thank you for your comment, it fills my heart ❤️
¡Esooo, retomamos el tejido muy bien, querida! Quedó fina, chama.
Saludos.
Hola manita y con las agujas que heredé de mi mamá. Imagínate tienen todos los años del mundo, aparte que hacía mucho tiempo que no tejía. 🌹💐🌷❤️
Es muy bonito y te queda bien. Feliz Día Internacional de la Mujer.
Hola!!! Gracias por la felicitación. Realmente me gusta pero no era así que deseaba hacerlo; necesito practicar más para recordar los puntos de tejido. Saludos 🌺🌷💐🌺🌹
Aprenderás los puntos gradualmente. Qué tengas un lindo día.
It looks great. It is fashionable and comfortable to wear. Nice work! Keep it up!
Que lindo trabajo, tejer en dos agujas es muy relajante. Saludos ☺️
Hola amiga, el tejido no es muy grato para mí cuando se trata de algo grande pero con dos agujas es otra sensación. Quise retomar las dos agujas para recordar a mi madre. Las agujas eran de ella. Tener esas agujas en mis manos fue como tocar las de mi mamá. Gracias por el comentario. Saludos 🌹💐🌺🌹🌻