

Hello, hello creative friends and the @diyhub community, I hope you have an excellent and blessed weekend with your loved ones. I am happy to share a new sewing project inspired by the Splinterlands characters. It is a square blue and black toiletry bag. It is ideal for carrying pencils and personal items, and it is also very suitable for carrying lunch. Due to its shape and size, it is suitable for carrying a lunch cup and a juice container. It is a simple project to make and I used leftover fabric from previous projects. I invite you to join me in the making process.
The toiletry bag is inspired by the character Grumpy Dwarf who carries a blue cloth or blanket in his wardrobe, I took this as a reference to make the toiletry bag and the black color of the shirt and pants.

Hola, hola amigos creativos y comunidad @diyhub, deseo que tengan un excelente y bendecido fin de semana en unión de sus seres queridos, me siento feliz de compartir un nuevo proyecto de costura inspirado en los personajes de Splinterlands, se trata de un neceser cuadrado en color azul y negro, es ideal para llevar los lápices, productos de uso personal y también se adapta muy bien para llevar la comida, por su forma y tamaño es adecuado para llevar la taza de la comida y el envase del jugo, es un proyecto sencillo de hacer y en el cual empleé telas que sobraron de proyectos anteriores les invito me acompañen el proceso de elaboración.
El neceser está inspirado en el personaje Grumpy Dwarf que lleva en su vestuario un paño o manta azul, este lo tomé como rerencia para elaborar en neceser y el color negro de la camisa y pantalón


The materials used were:
Sandwich mesh fabric (black and blue)
Dacron fabric (lining)
Closure
Slider
Polyester tape
Scissors
Sewing machine
Los materiales usados fueron:
Tela malla sandwich (negra y azul)
Tela dacrón (forro)
Cierre
Slaider
Cinta poli
Tijera
Máquina de coser

Elaboration
The first step in making the bag was to cut two 12 x 10-inch rectangles from the main fabric and lining. Once the pieces were cut, I cut them right sides together and sewed them with a straight stitch.
Elaboración
El primer paso para elaborar el neceser fue cortar dos rectangulos de 30 * 25 centímetros, en tela principal y forro, cortadas las piezas enfrenté por los derechos y cosí con puntada recta.


I glued the zipper together, facing the right sides of the zipper to the main fabric and the right sides of the lining to the wrong side of the zipper. I pinned and sewed, also using a straight stitch. Then I turned the pieces over and overlocked them with two seams for extra strength.
When gluing the zipper it is important to leave a seam allowance of approximately 0.7 millimeters on the closure, which allows several stitches to pass through to secure the fabrics and prevent it from breaking when the zipper is opened or closed, also check the elongation of the fabric to prevent one side from being wider than the other, because when the fabric passes through the presser foot it tends to stretch a little, the ideal is to place the side that stretches upwards with the zipper, so the rigid part of the fabric maintains the shape of the toiletry bag or project being made, it happened to me on several occasions that I did not consider the elongation of the fabric and the pencil case was deformed on one side, from then on I am pending to check the elongation of the fabrics.
Another important element when gluing the closure is to fix the main and lining fabrics very well with the closure so that they do not move when the seam is passed. For best results, I prefer to sew slowly and thus check that the seam covers the three layers of fabric.
Unidas las piezas pegué el cierre, para ello enfrenté derecho del cierre con la tela principal y derecho del forro con el revés del cierre, sujeté con alfileres y cosí usando también puntada recta, luego volteé las piezas, y repisé con dos costuras para darle más fuerza.
Al momento de pegar la cremallera es importante dejar un margen de costura aproximado de 0,7 milimetros en el cierre, lo cual permite pasar varias puntadas para asegurar las telas y evitar que se rompa cuando se abre o cierra la cremallera, también verificar la elongación de la tela para evitar que un lado quede más ancho que el otro, porque cuando la tela pasa por el prensatelas tiende a estirar un poco, lo ideal es colocar el lado que estira hacia ariba con la cremallera , así la parte rígida de la tela mantiene la forma del neceser o proyecto que se realice, me pasó en varias oportunidades que no consideré la elongación de la tela y la cartuchera se deformó en un lateral, a partir de allí estoy pendiente de revisar la elongación de las telas.
Otro elemento importante cuando se pega el cierre es fijar muy bien las telas principal y forro con el cierre para que no se muevan cuando se pasa la costura, para mejores resultados prefiero coser lentamente y así voy revisando que la costura cubra las tres capas de tela.

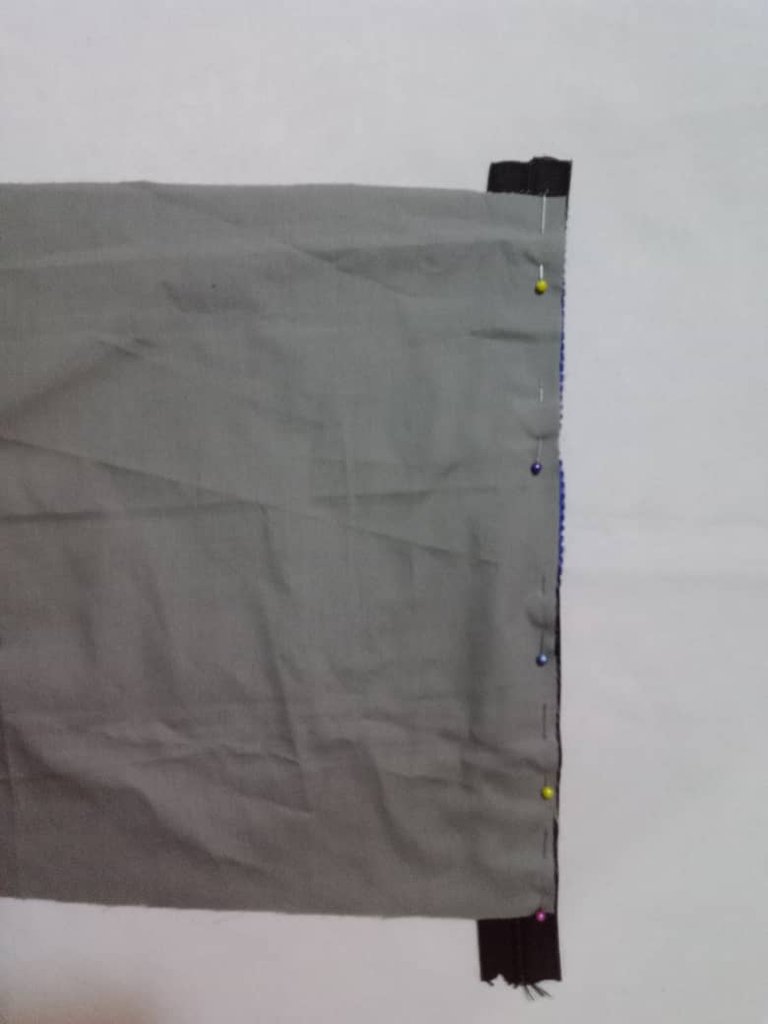


Once the zipper was attached, I pinned it in place and measured, matching the center of the zipper to the bottom center seam where the black and blue fabrics meet. I pinned it and closed the sides.
Pegado el cierre, sujeté con alfileres y medí haciendo coincidir el centro del cierre con la costura central de abajo, donde se unen las telas negras y azul, sujeté con alfileres y cerré los costados.


Then I turned it inside out and, using a 6 x 6 cm square, marked all the corners and cut the squares. This is how I made the base and shape of the bag.
Luego volteé por el revés y con un cuadro de 6 por 6 centímetros marqué todas, las esquinas y corté los cuadrados,así hago la base y forma del neceser.


Once I cut the squares, I faced the fabrics so the vertical seam lined up with the horizontal line. I pinned them together and sewed the bottom using a straight stitch.
Cortado los cuadrados, enfrenté las telas de tal forma que coincida la costura vertical con la línea horizontal, sujeté con alfileres y cosí la parte inferior usando puntada recta.

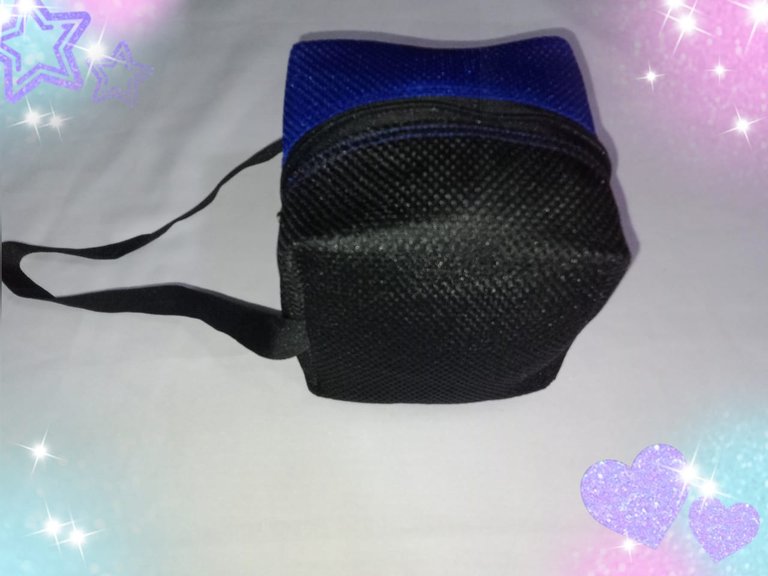
Finally, I sewed the top, placing the poly tape in the middle of both openings. I pinned them together, sewed several times with a straight stitch, turned them right side out, and that's how the Splinterlands-inspired makeup bag is finished.
Finalmente cosí la parte superior colocando la cinta poli en el medio de ambas aberturas, fijé con alfileres, pasé varias costuras con puntada recta, volteé por el derecho y así está terminado el neceser inspirado en el personaje de Splinterlands

I loved the result of the toiletry bag, the square shape and color combination looks great, I already have another model of toiletry bag or purse to use up the leftover fabric, I hope the tutorial is useful to you.
El resultado del neceser me encantó , la forma cuadrada y combinación de colores se ve muy bien, ya tengo otro modelo de neceser o bolso para aprovechar los sobrantes de tela, espero el tutorial les sea de utilidad.
Blessings!
Bendiciones!
Hasta luego!
Translated with https://www.deepl.com/translator
              All images are my own.


   Todas las imágenes son de mi autoría.
Thanks for the support
Delegate Tokens and HP to Fallen Angels to earn weekly rewards!
Delegate | Join to the guild
Thank you!
Once again, you've given us a whole new experience through your blog. The step-by-step instructions and the final result are perfect and inspiring. Thank you so much for always sharing your best in our DIYHub community!...
selected by @jesuslnrs
Greetings @diyhub and @jesuslnrs, thank you so much for appreciating my work and for the support. I'm happy with the result of the toiletry bag. I loved its square shape, it looks spectacular and elegant. I hope to make several in the future, using the leftover fabric I have in my super bag, hehe.
Happy weekend!
Such amazing bags can also be worn around the waist. Thank you for sharing this amazing bag made with smooth tissue bag-shaped colors.
Greetings @mdakash62, I loved the result. The square shape looks spectacular and the colors go together really well. ❤️😍
Happy weekend!
Yes my pleasure thank you
Greetings!
está genial, muy buen trabajo
It's great, very good work
Saludos amiga me alegra que te haya gustado, estoy feliz con el resultado ❤️🌺
Feliz fin de semana!