I like the idea of reusing, it is keeping in mind that things always transform and are never lost
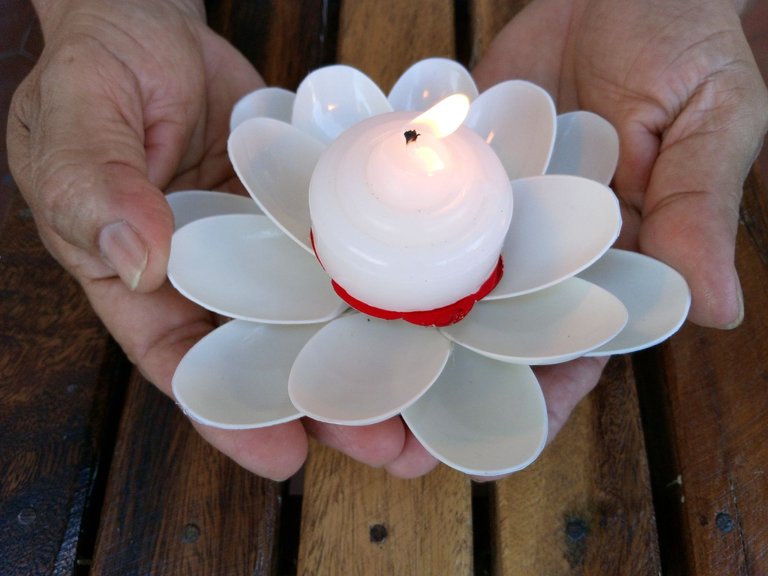
Bajo ese pensamiento que me llega muchas veces cuando elaboro o pienso en hacer alguna manualidad, les presento hoy mi proyecto de reciclaje que he elaborado durante la tarde. Se trata de un candelero o portavela, elaborado en su totalidad con material de reciclaje que incluye cucharas plásticas y una parte de un estuche antiguo de CD.
Under that thought that comes to me many times when I make or think about making a craft, I present to you today my recycling project that I created during the afternoon. This is a candlestick or candle holder, made entirely from recycling material that includes plastic spoons and part of an old CD case.
Pero antes de continuar al tutorial, quisiera saludar primeramente a todos los presentes en Hive, especialmente a la comunidad DIYHub. Estoy contenta de compartir hoy con ustedes mi proceso de elaboración del presente proyecto.
But before continuing to the tutorial, I would like to first say hello to everyone present at Hive, especially the DIYHub community. I am happy to share with you today my process of developing this project.
¡Del desecho al Lujo!
A primera vista no se le atina de manera fácil que este lindo candelero con aires florales ha sido elaborado con cucharillas desechables. Recientemente hubo un cumpleaños en casa, la nieta de mi hermana estaba cumpliendo 5 años y quisieron que fuese aquí la reunión familiar. Después de toda la alegre festividad me quedaron unas cuantas cucharillas desechables que sinceramente no iba a desechar porque las suelo lavar, secar y guardar para otra ocasión. Pero esta vez no sería así, las he lavado, secado y "ambientado" para convertirlas en lujo.
From waste to Luxury!
At first glance, it is not easy to see that this pretty candlestick with a floral air has been made with disposable spoons. Recently there was a birthday at home, my sister's granddaughter was turning 5 years old and they wanted the family reunion to be here. After all the happy festivities I had a few disposable spoons left that I honestly wasn't going to throw away because I usually wash them, dry them, and save them for another occasion. But this time it wouldn't be like that, I have washed them, dried them and "set" them to turn them into luxury.
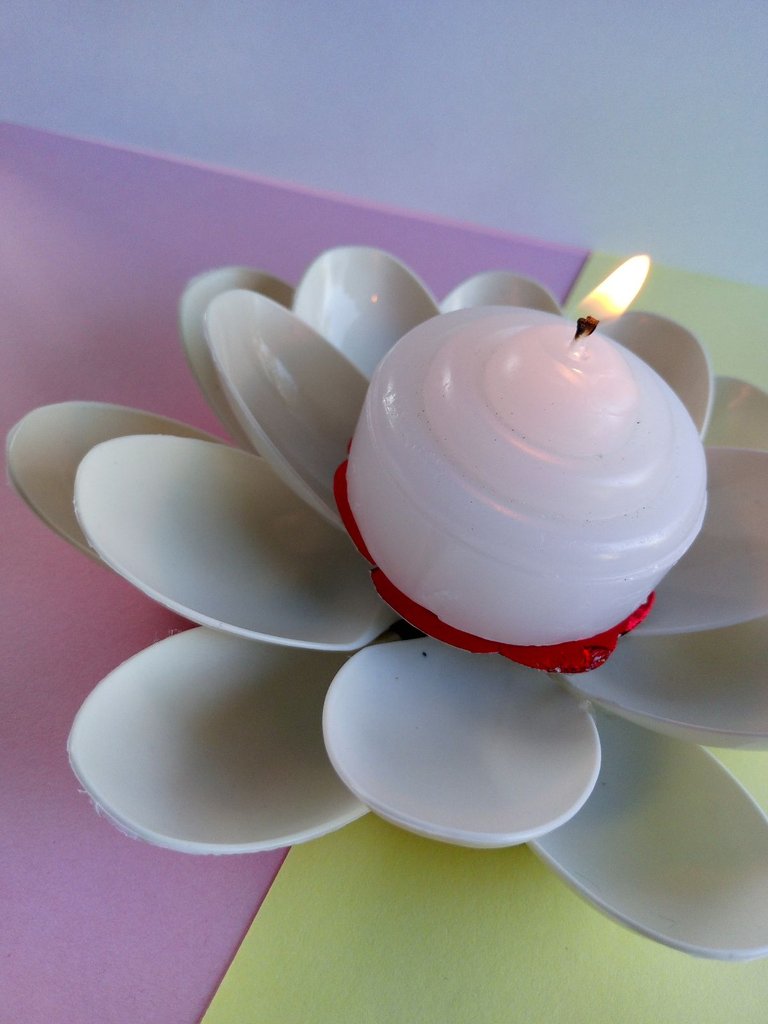
Estas cucharillas me parecieron bastante adecuadas para elaborar el candelero porque no eran como las comunes que se ven normalmente aquí. No se si en la foto puede notarse, pero son más gruesas y su color no es blanco absoluto, sino más bien con un color hueso muy lindo.
These spoons seemed quite suitable for making the candlestick because they were not like the common ones you normally see here. I don't know if it can be seen in the photo, but they are thicker and their color is not absolute white, but rather a very nice off-white color.
Materiales
- Cucharillas plásticas
- Un estuche de CD, o puedes reemplazar por cartón
- Foami rojo
- Cartulina espejo en rojo
- Silicon
- Tijera
- Yeskero o pistola para Silicon
Materials
- Plastic spoons
- A CD case, or you can replace it with cardboard
- Red foam
- Mirror cardboard in red
- Silicon
- Scissors
- Plaster or gun for Silicon

Proceso de Creación / Creation Process
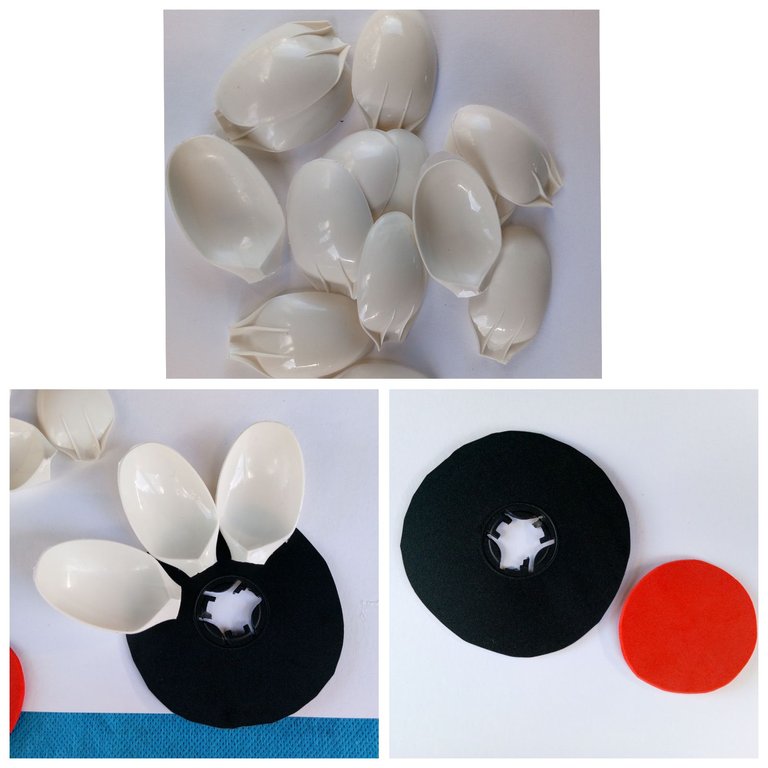
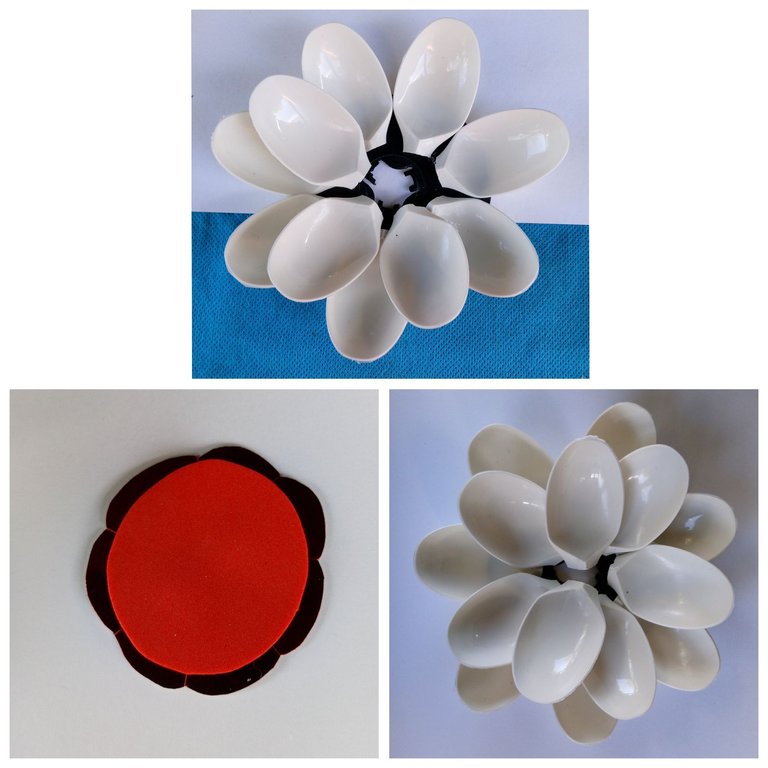
Collage 1
Cortaremos los palillos de las cucharillas, es decir que dejaremos solo la parte honda. Tratamos de cortar todas a la misma medida para que exista armonía en el tamaño. También cortamos en un circulo más pequeño el estuche de cd. Dicho tamaño determinará que tan amplio será el resultado final. Retiré la parte del medio para que quedase plano y sin relieve. Cortamos un circulo de foami que será similar al tamaño de la vela o velón que posteriormente colocaremos. Con el silicon, uniremos cada cucharilla a la base, siguiendo el contorno.
Collage 1
We will cut the sticks from the spoons, that is, we will leave only the deep part. We try to cut them all to the same size so that there is harmony in size. We also cut the CD case into a smaller circle. This size will determine how wide the final result will be. I removed the middle part so that it was flat and without relief. We cut a foam circle that will be similar to the size of the candle that we will later place. With silicone, we will attach each spoon to the base, following the contour.
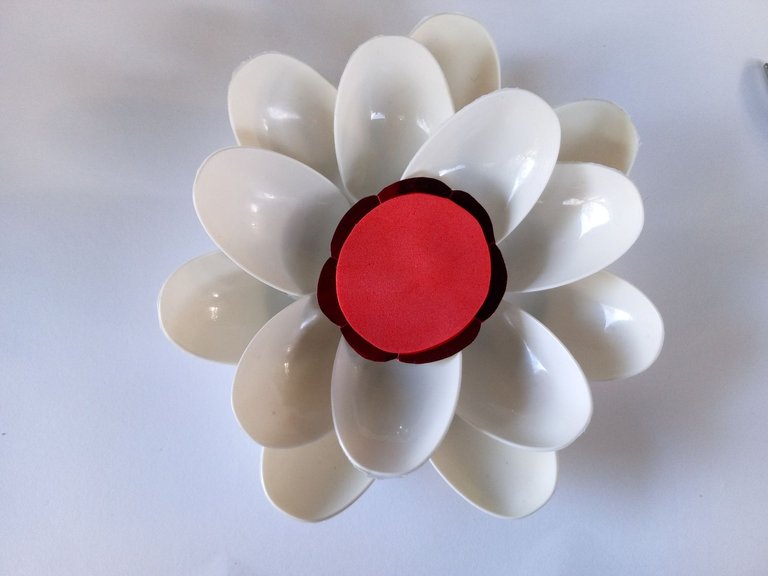
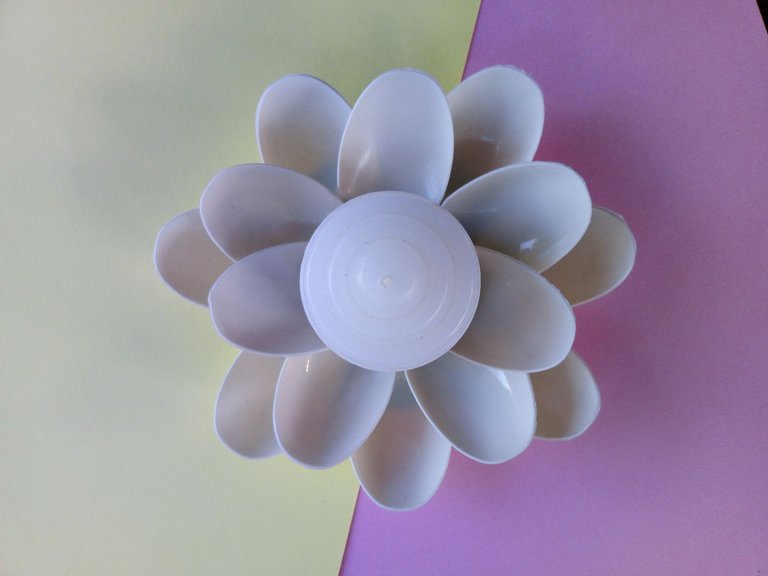
Collage 2
Seguimos pegando cada cucharilla y al dar la primera vuelta, continuamos con la segunda y de manera tipo intercalada. Así hasta completar y cubrir lo suficiente a gusto. Al circulo, le colocamos una base en cartulina espejo. Le he cortado algunos bordes y hecho piquetes para darle detalle. Este último lo pegamos sobre las cucharillas y listo. Recuerda que el tamaño de este va a variar según desees colocar velas finas, medias o gruesas.
Collage 2
We continue gluing each spoon and when we do the first round, we continue with the second and in an interspersed manner. Like this until complete and cover enough to taste. To the circle, we place a mirror cardboard base. I have cut some edges and made notches to give it detail. We stick the latter on the spoons and that's it. Remember that the size of this will vary depending on whether you want to place thin, medium or thick candles.
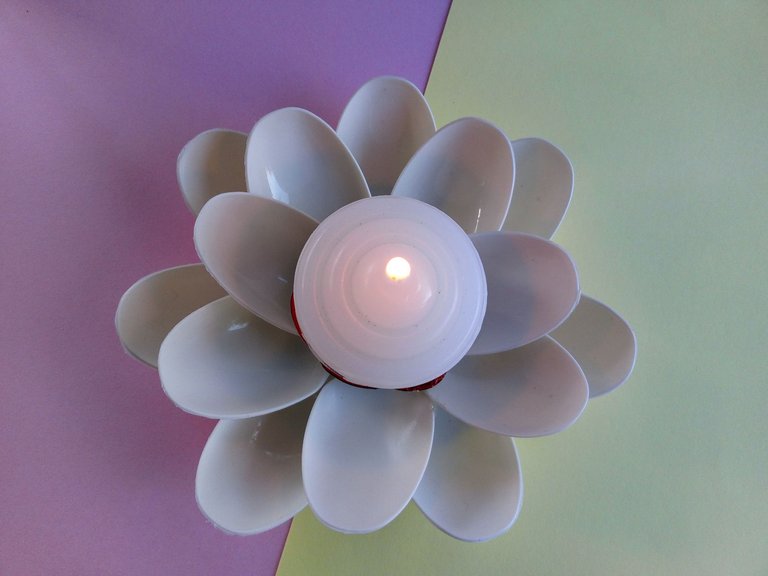
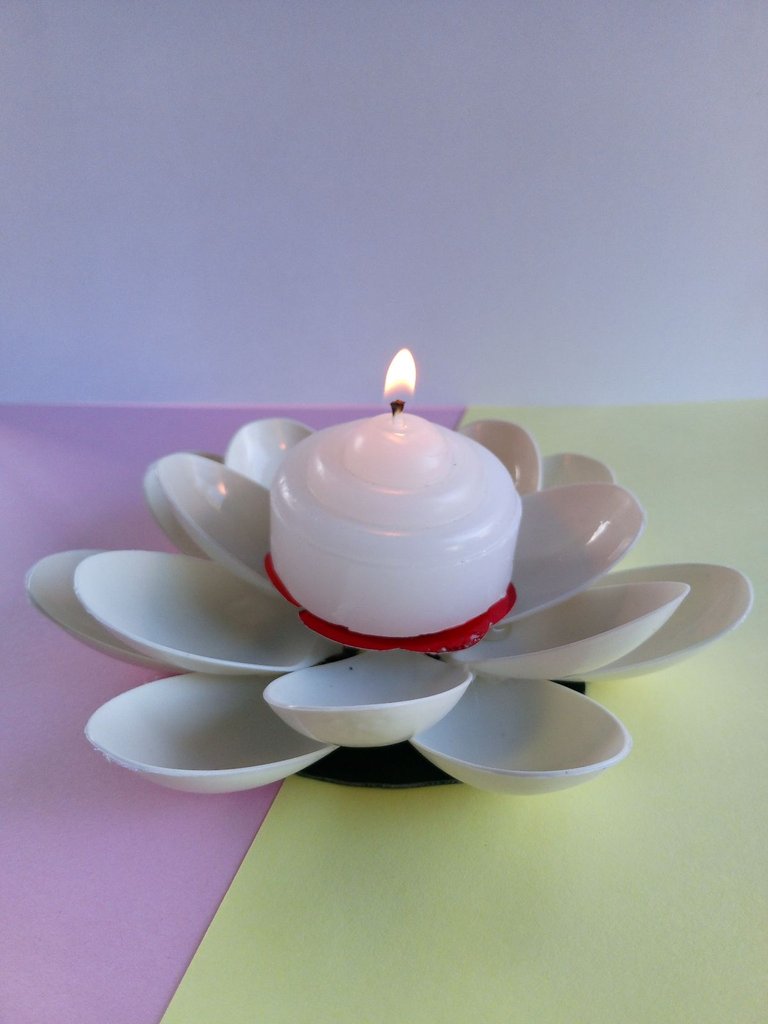
Aquí el Resultado de Nuestro Candelero:
Here is the Result of Our Candlestick:
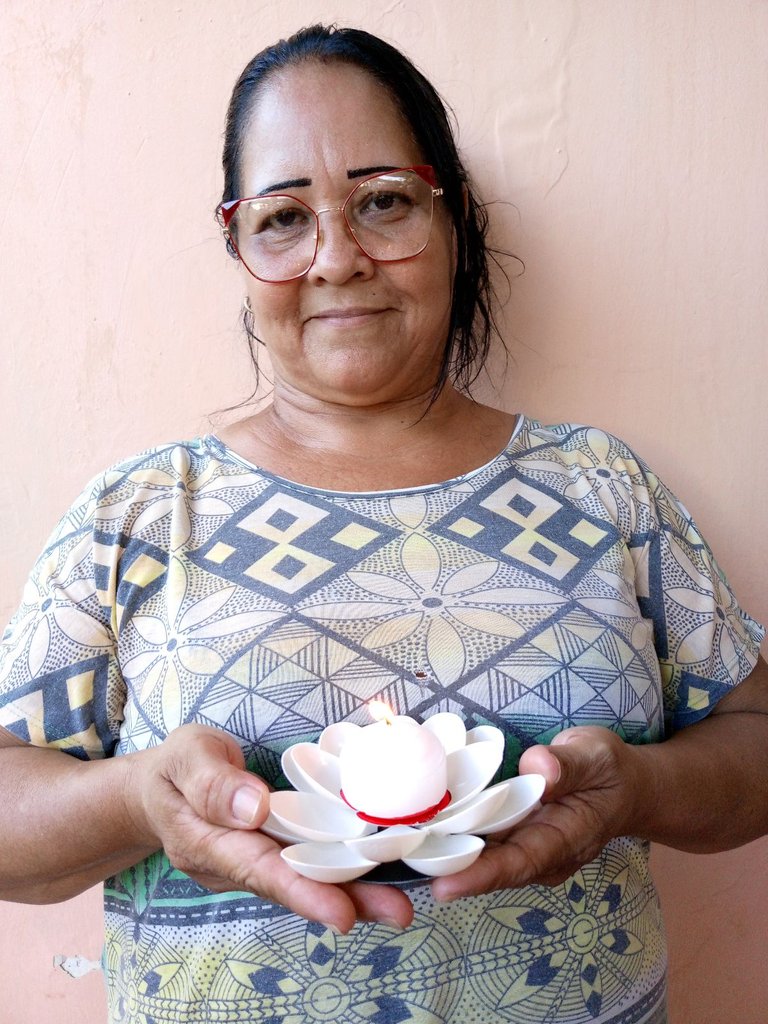
¡Y hasta aquí el tutorial!
Si tienes alguna duda o sugerencia, no dudes en dejar un comentario. Las fotos que he colocado a lo largo del texto, las he tomado desde mi móvil Infinix. Las versiones en collage, las he armado usando la aplicación GridArt.
¡Hasta la próxima!, tengan todos un bendecido día
And that's it for the tutorial!
If you have any questions or suggestions, don't hesitate to leave a comment. The photos that I have placed throughout the text were taken from my Infinix mobile. I put together the collage versions using the GridArt application.
Until next time, everyone have a blessed day
Muy hermosos candelabros, en esta época navideña haré algunos en colores verde y rojo para mi decoración, muy bonita idea @belkysmargarita gracias por compartirla🌹
Seguro en esos colores a tono con la navidad, quedarán perfectos! Me encanta esa idea, espero compartas prontamente tu proceso :)
Gracias por pasar amiga, bendiciones
This is really pretty and adorable, you also added a touch of different colors to make it decorative
I love this and will see what I will do with all the waste spoons that I have too.
Thank you so much. And that's great, I'm glad that you dare to reuse plastic spoons :)
Blessings!
Thanks dear
¡Qué belleza! ¡Parece mentira como esos elementos tan sencillos, gracias a tu ingenio, trabajo y dedicación, en lugar de terminar siendo desecho son un artículo hermoso, útil y realmente, como bien dices ¡De lujo! Me encantó visitar tu blog y aprender en él. En la zona en que vivo son muy frecuentes los apagones - y en mi familia, por ser numerosa, son muy frecuentes los cumpleañis- así que apenas tenga la oportunidad estaré haciendo un candelabro similar. Gracias por compartir. Éxito. Dios bendice.
Muchas gracias! Me satisface inmensamente que mi proyecto haya sido de agrado para ti. Aquí también es común tener cortes eléctricos, por eso siempre es grato tener una que otra velita por allí para echarse una mano en medio de la oscuridad. Espero pronto ver tus lindas creaciones, amén por tus bendiciones y maravillosos deseos. Éxitos y bendiciones para ti también, feliz noche!
I loved the transformation of the disposable spoons into this luxurious candlestick. The creative use of materials like the CD case, red foam, and mirror cardboard adds a unique and elegant touch to the final piece. Your dedication to sharing your creative process and encouraging others to explore their artistic side through DIY projects is appreciated.
Thank you so much. At this stage I have been discovering many things that I thought were missing, such as my patience for DIY activities, as well as creativity. I am pleased to know that my craft project has been enjoyable, thank you for the warm support. Infinitely grateful!
Gracias por el cálido apoyo, agradecida 🙏
Congratulations @belkysmargarita! You have completed the following achievement on the Hive blockchain And have been rewarded with New badge(s)
Your next target is to reach 2500 upvotes.
You can view your badges on your board and compare yourself to others in the Ranking
If you no longer want to receive notifications, reply to this comment with the word
STOP