English
Hi there, Hivers. Today I'll show you the last bits of work of this my 5th Venezuelan Cuatro. It's been an interesting project to say the least. I've experimented with some details, had my first major accident regarding the build, even had to stop at some point because I got sick. But the results are truly wonderful. The sound test will come in a later post. For now, sit tight and enjoy this.
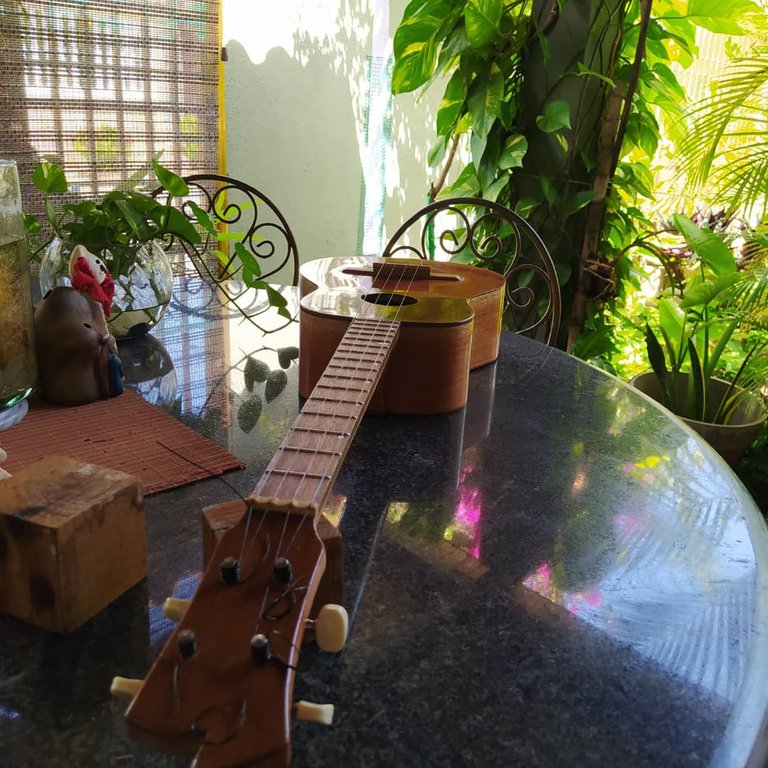
In my last post, showed the last bits of construction. We had a few things pending: the finish, bridge, saddle and nut, getting the tuning machines on the instrument, and the strings. Let's take a look at this steps!
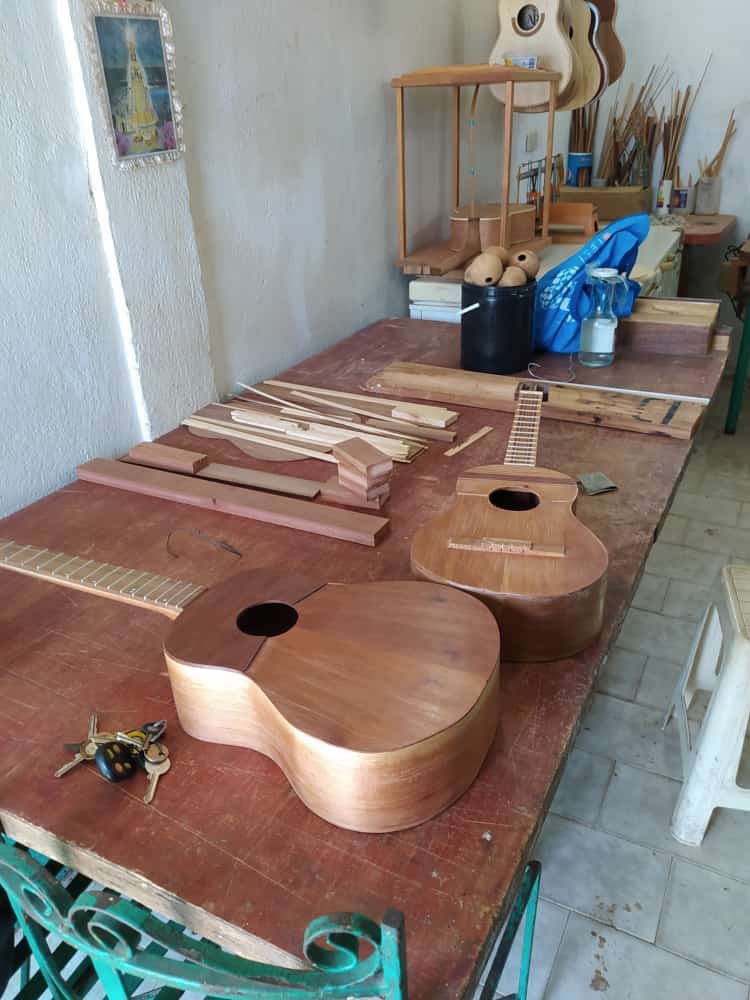
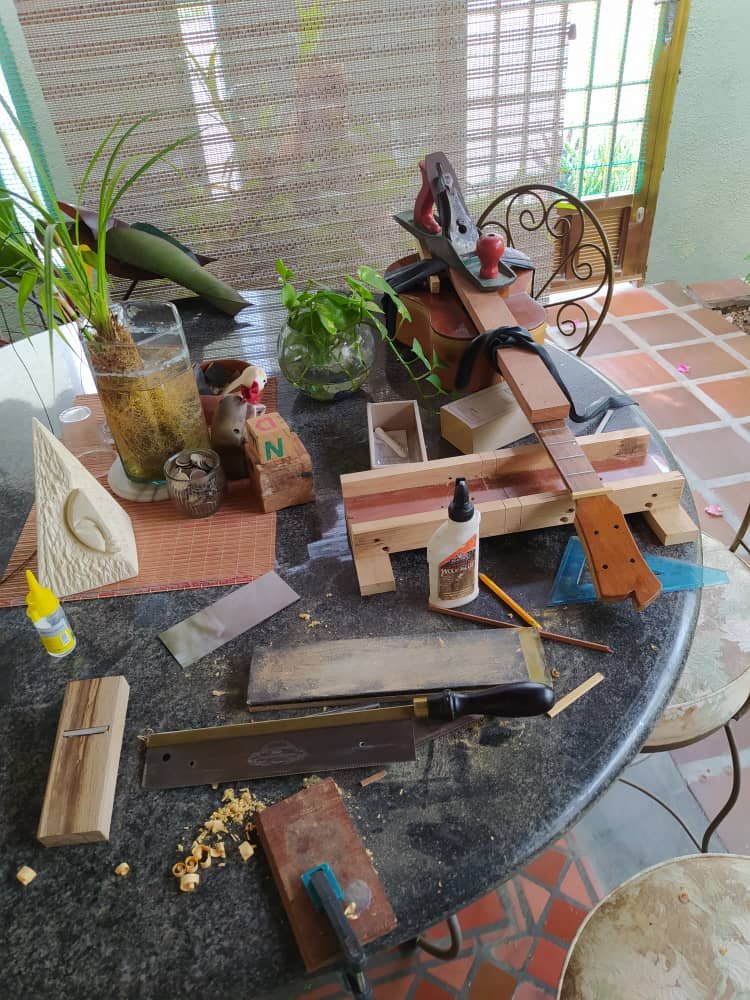
I went to the workshop last week to get on with the finish. Along the way I got another Venezuelan Cuatro that's been at home since I was a child. I thought it would be nice to sell it since it not being used. And I also found out there's more than one helper at the workshop. I introduce you to Perlita, Tita's spawn.
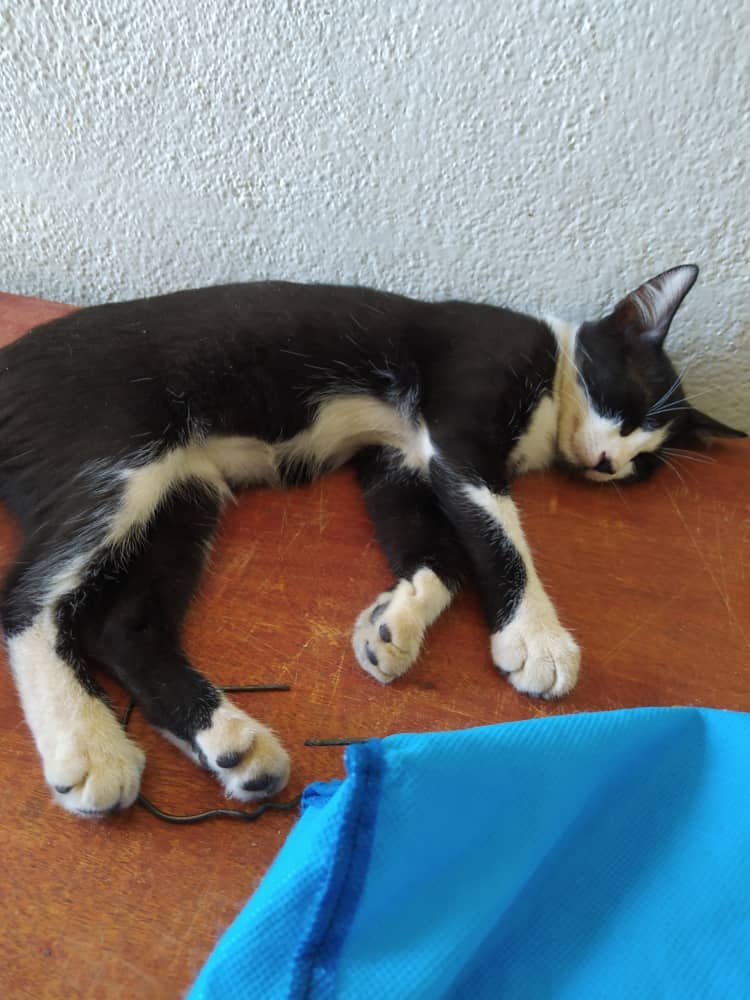
She looks docile, but she likes to play with pencils. Needless to say, I had some issues getting some marks in place since she was trying to take the pencil out of my hands.
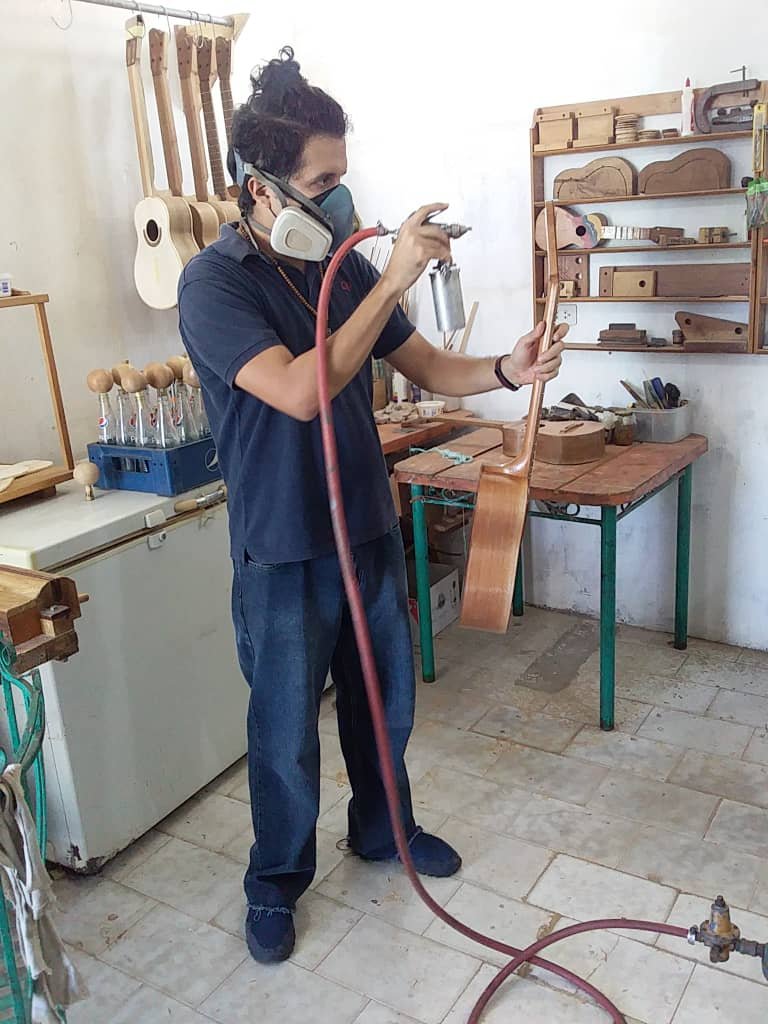
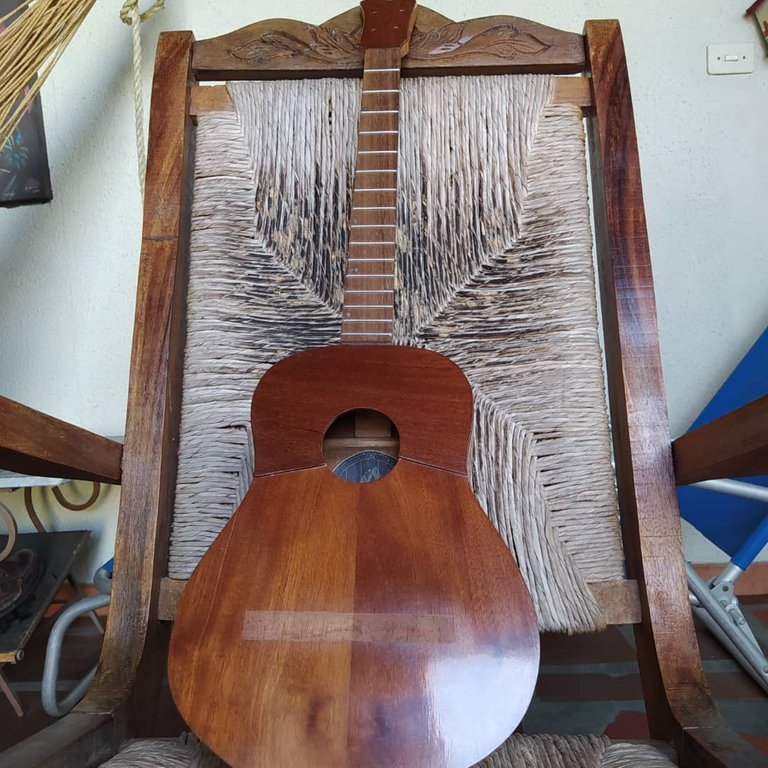
Regarding the finish of the instruments, it was done with an air gun and I have to say I'm getting the gist of it. However, the thing would get stuck from time to time since the compressor is very old. But it worked fine. The layers of varnish were applied with no problem.
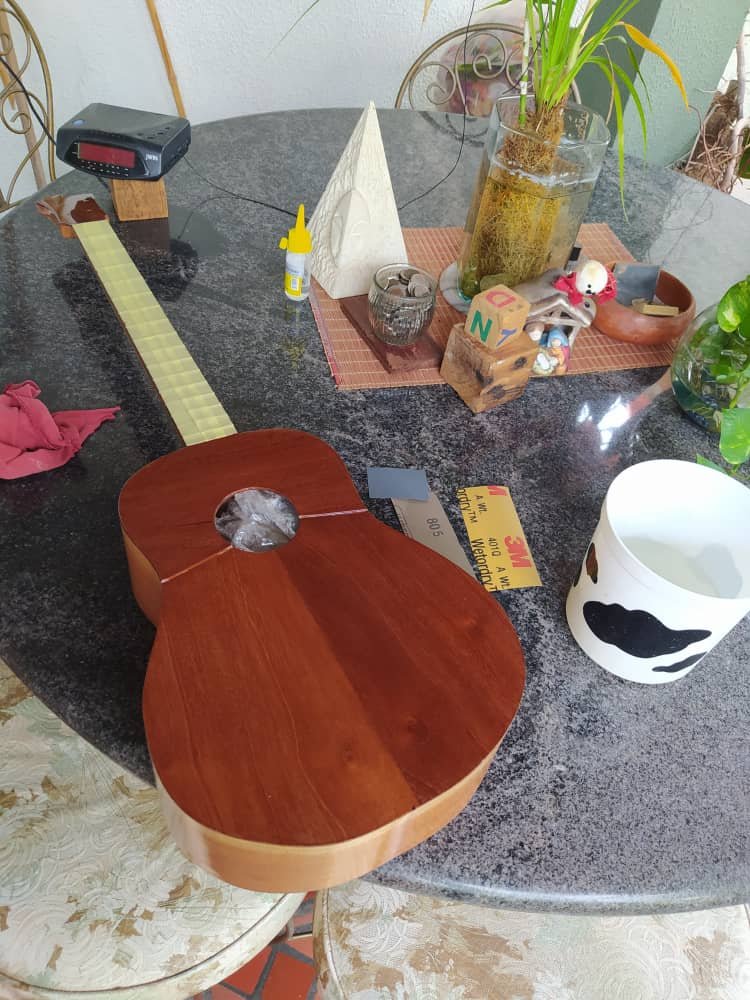
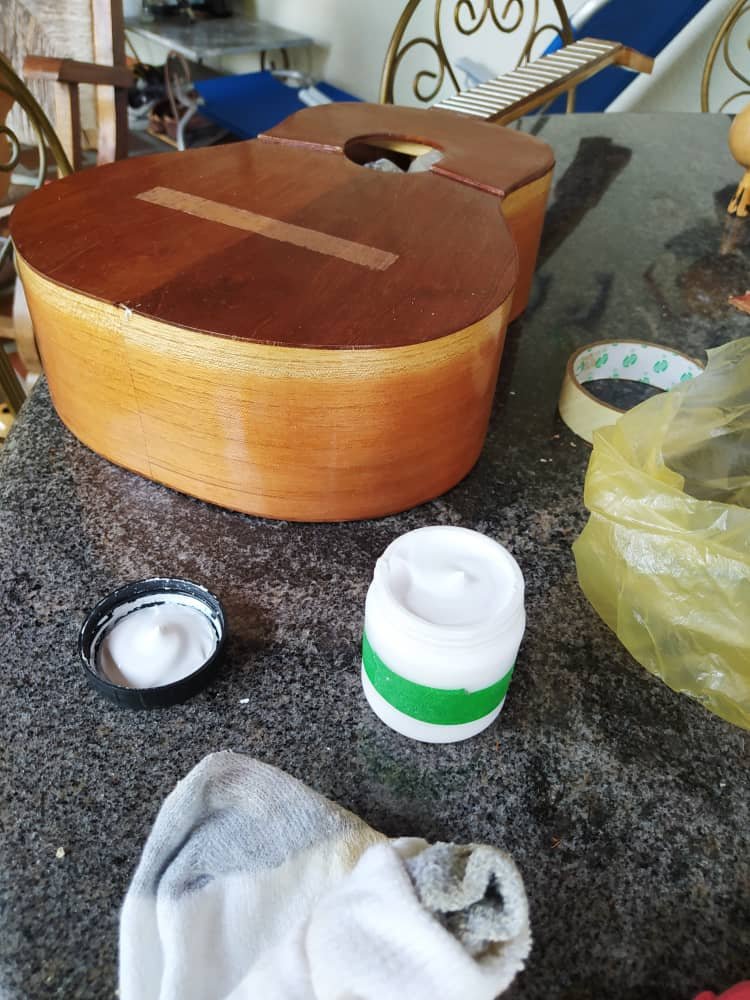
Back at home it was time to get that finish polished with water and sandpaper (grits 1200 and 1500). After sanding the varnish to remove the sticky first layer, we apply wax to polish and get a bright finish. The more wax you apply, the brighter the instrument will get.
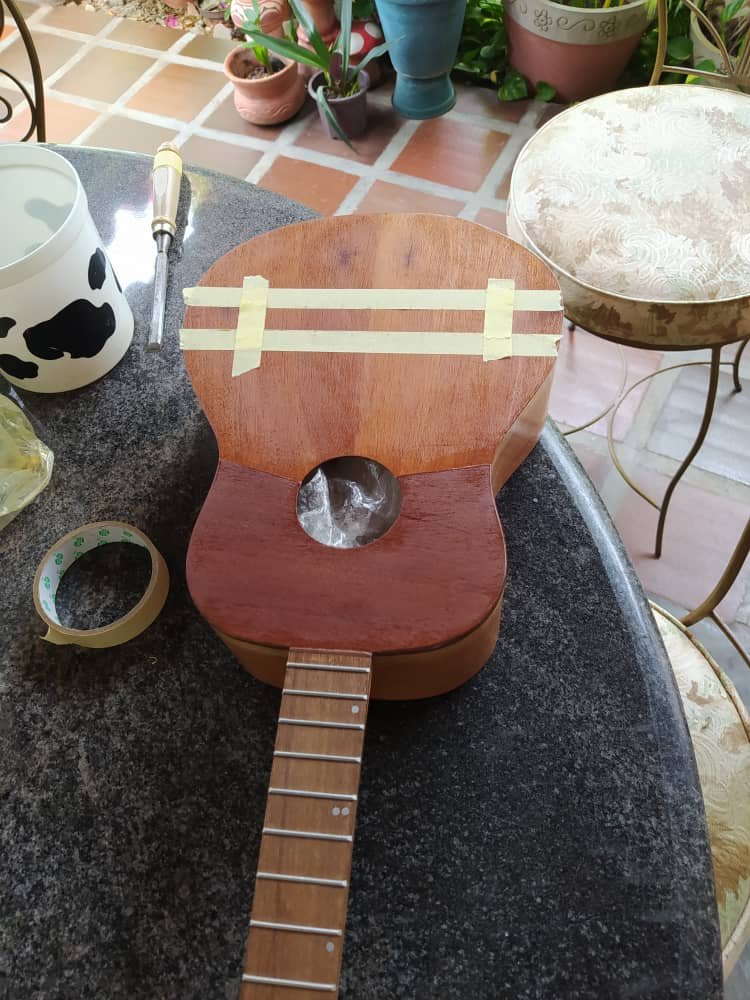
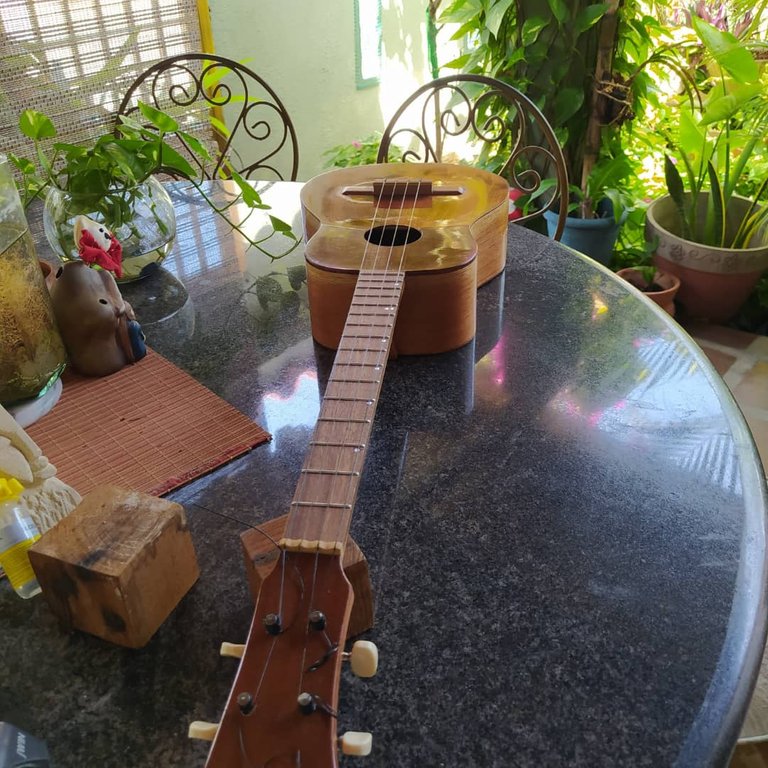
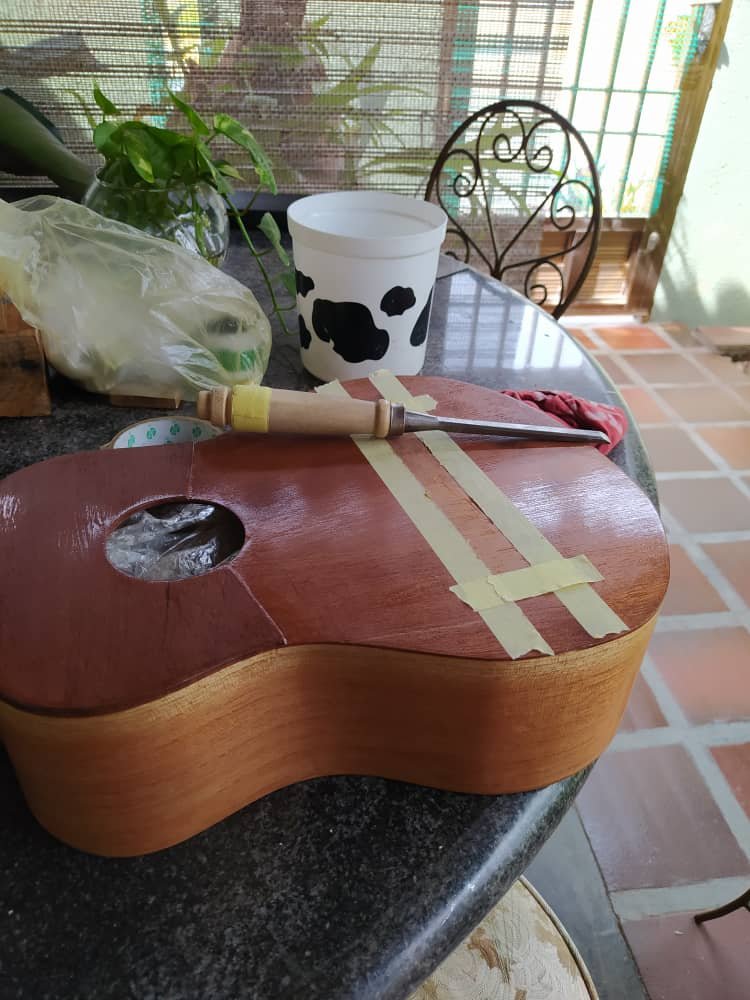
But before polishing, we need to mark out the position of the bridge. For this we measure from fret 0 (the nut), to fret 12 and use the same length from fret 12 to the sound board. This gives us the position of the saddle. With this information, we can now outline the bridge and use some masking tape to protect the rest of the finish. We need to remove this part of the varnish for the bridge to glue properly. It can be done with many tools. Here I used a wood chisel as a scraper.
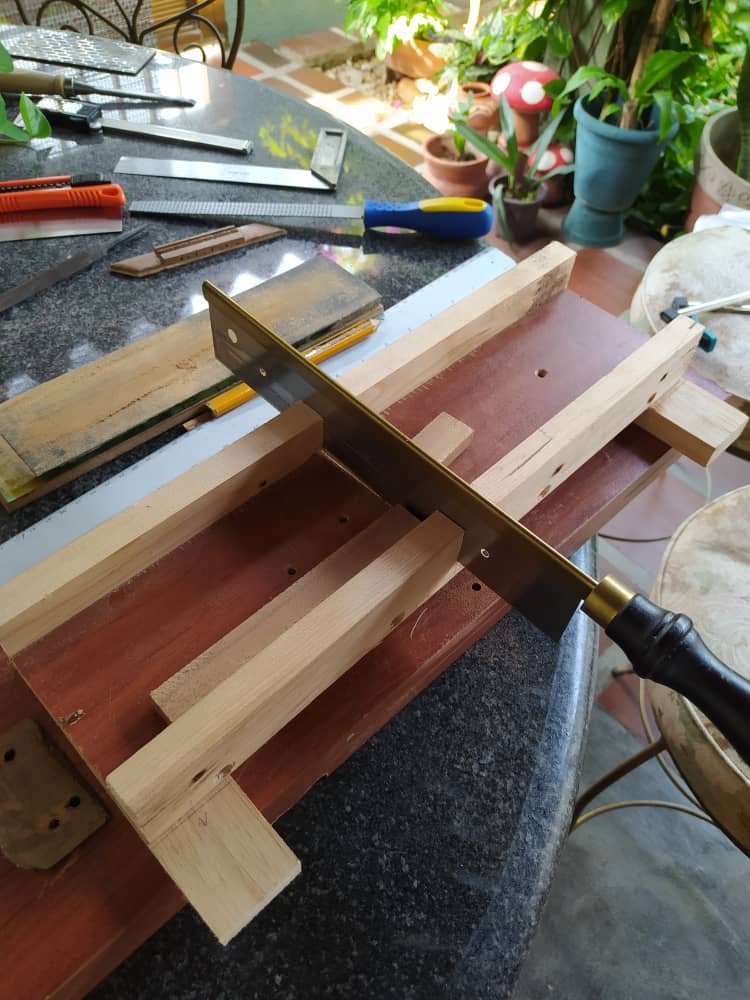
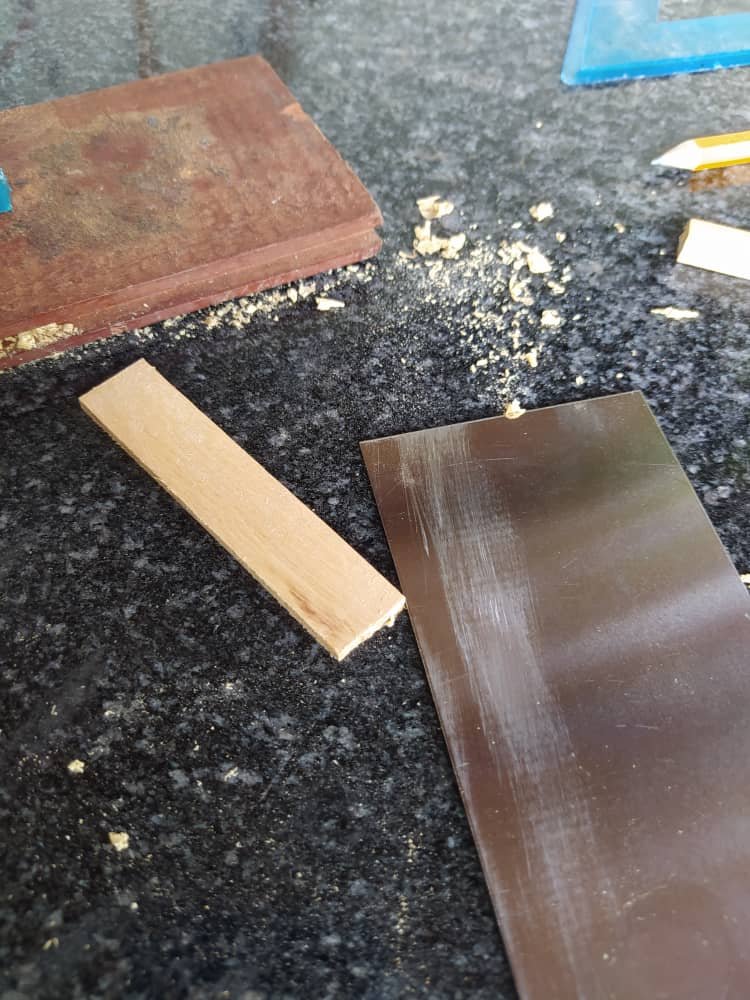
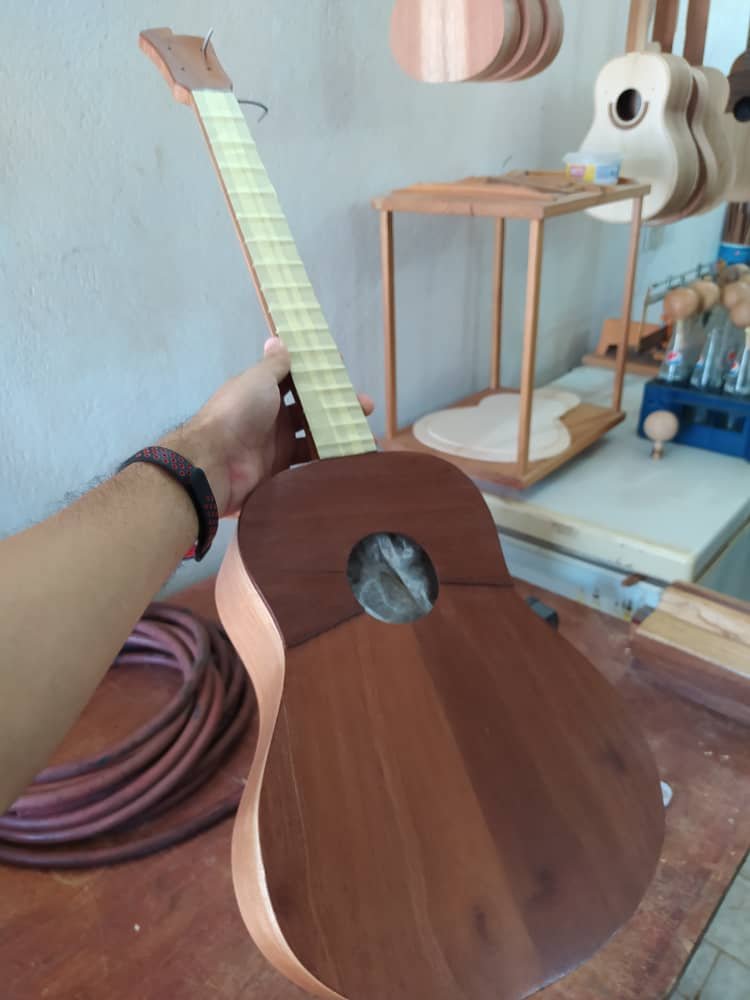
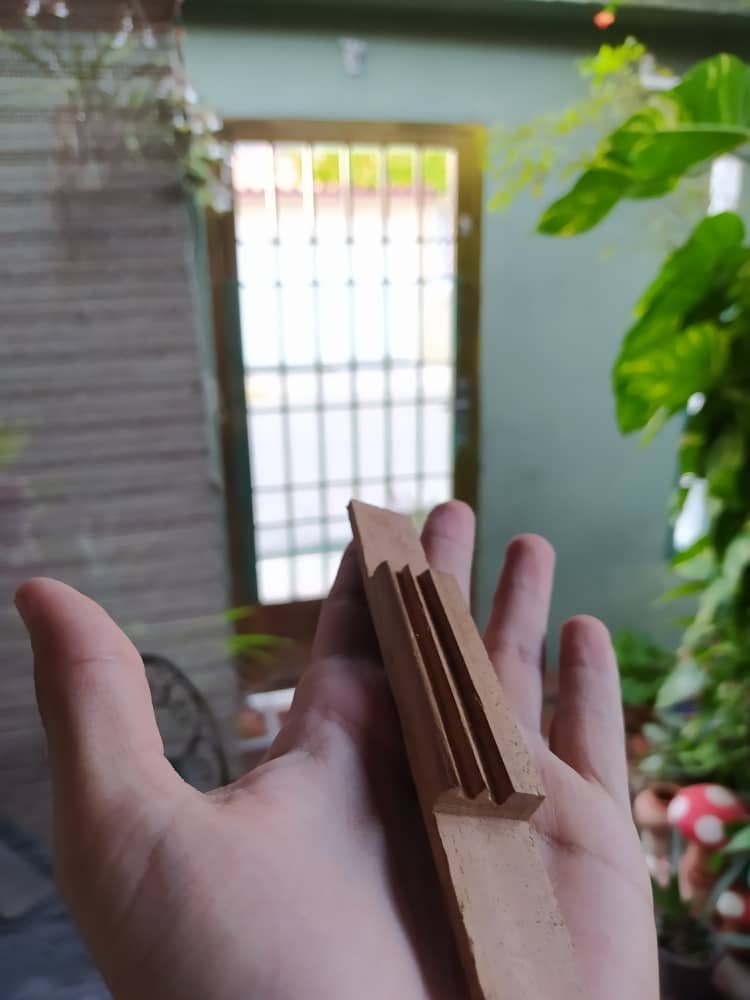
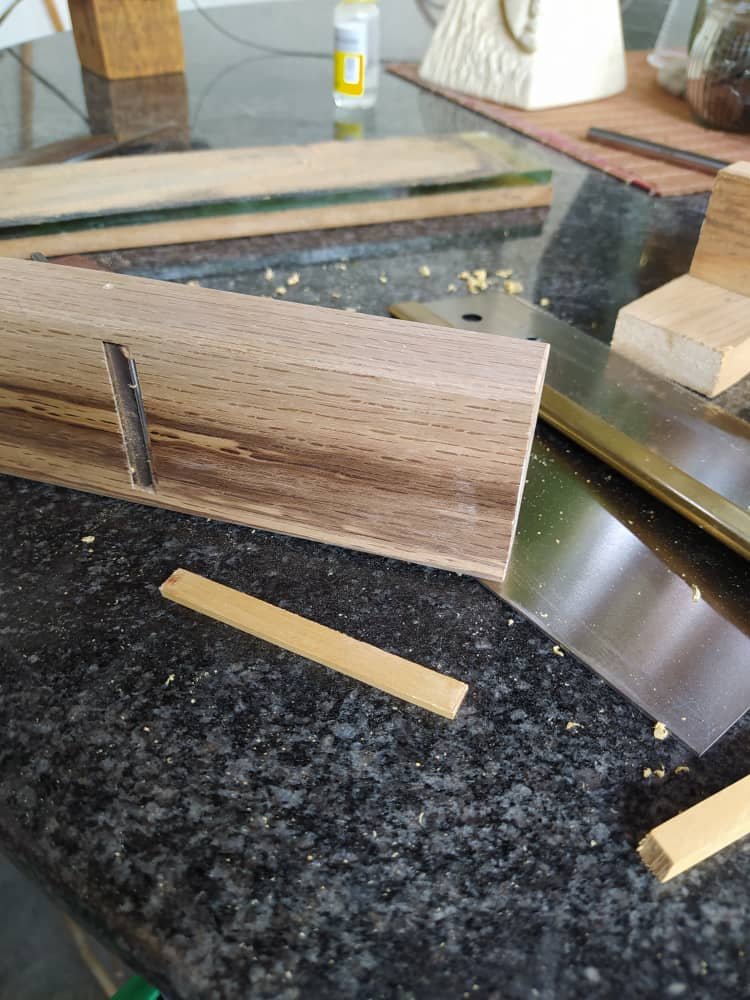
Then, moving from the instrument we start to make the bridge. The height of this piece is determined by the alignment of the fretboard and sound board. To make it, we need a piece of wood and carve out room for the saddle and make holes to tie the strings.
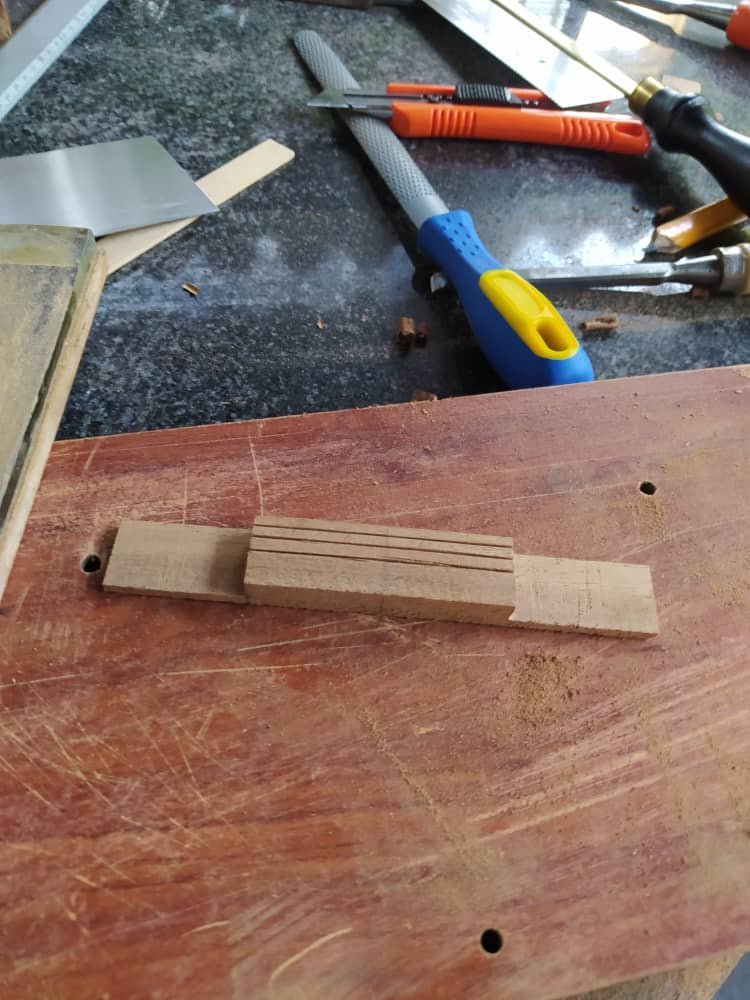
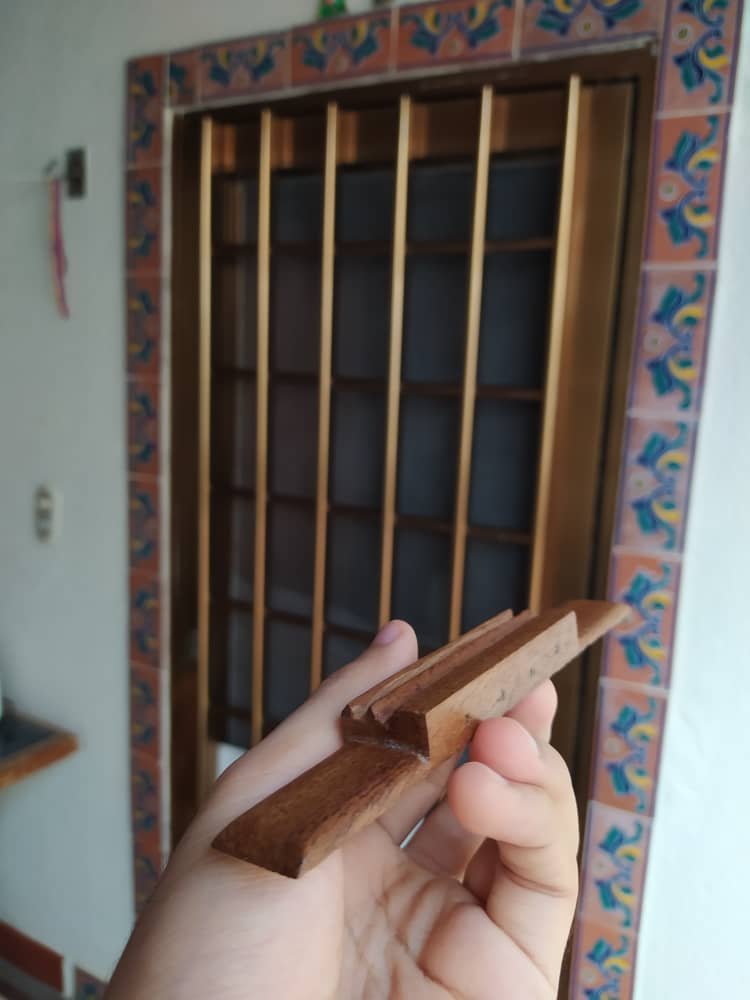
We go ahead and sand the piece. Then apply some coats of sealant.
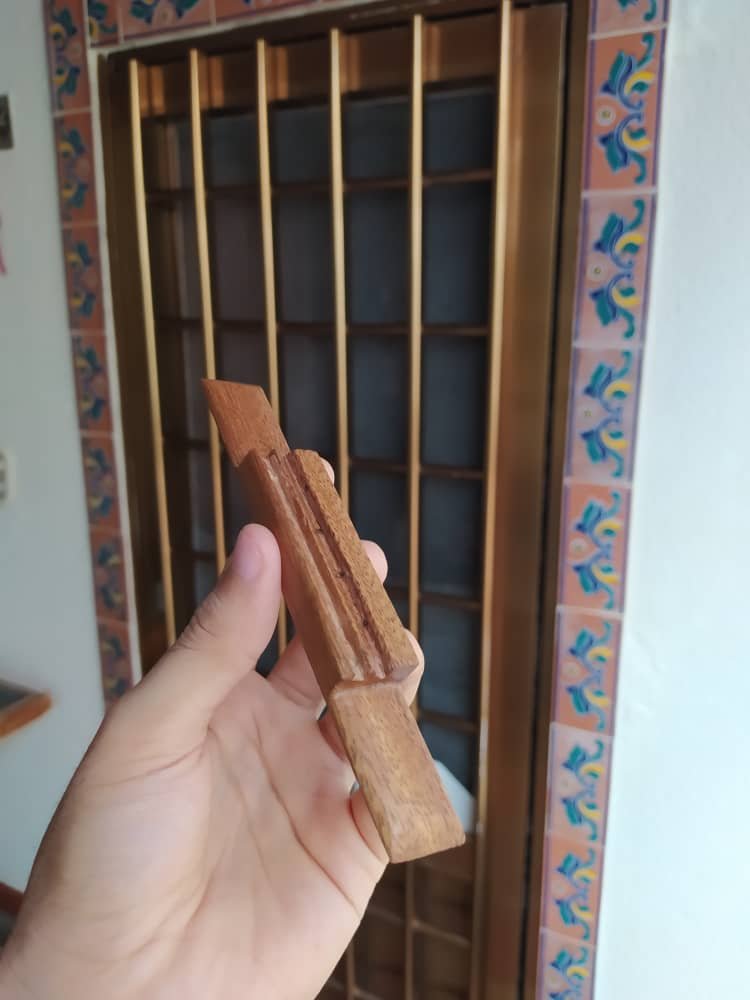
Afterwards, we go ahead and work on the saddle. This piece elevates the strings from the bridge and it's the one that determines the volume of the instrument. Usually, it has an even size. In this case, it has 6mm. 3mm of this sit inside the bridge and the other 3mm are above it.
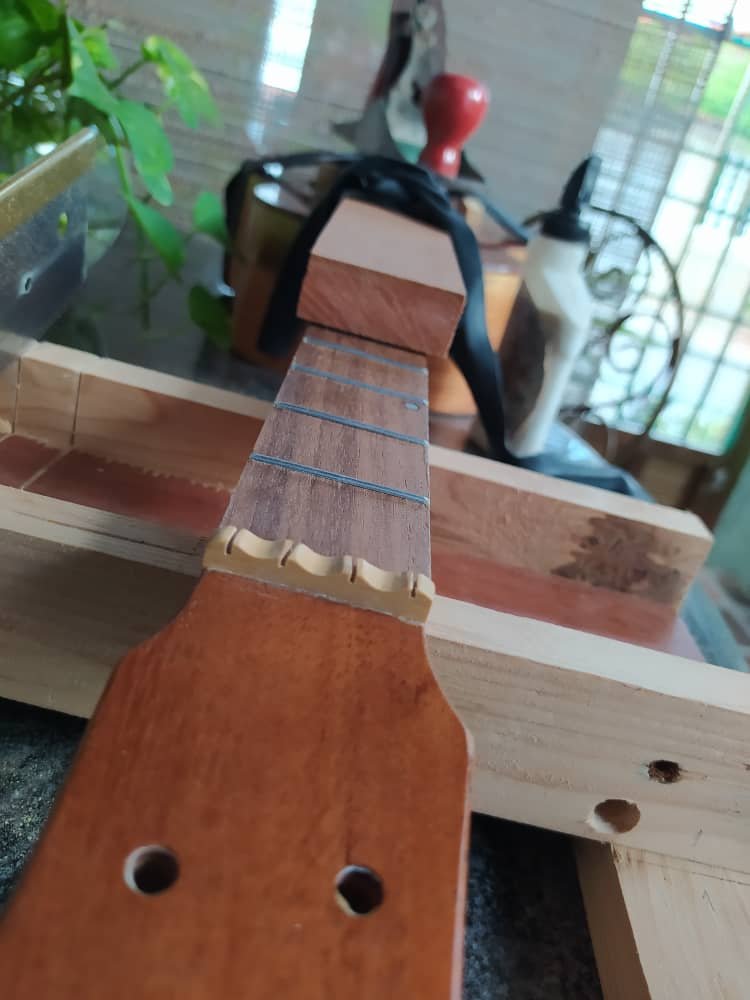
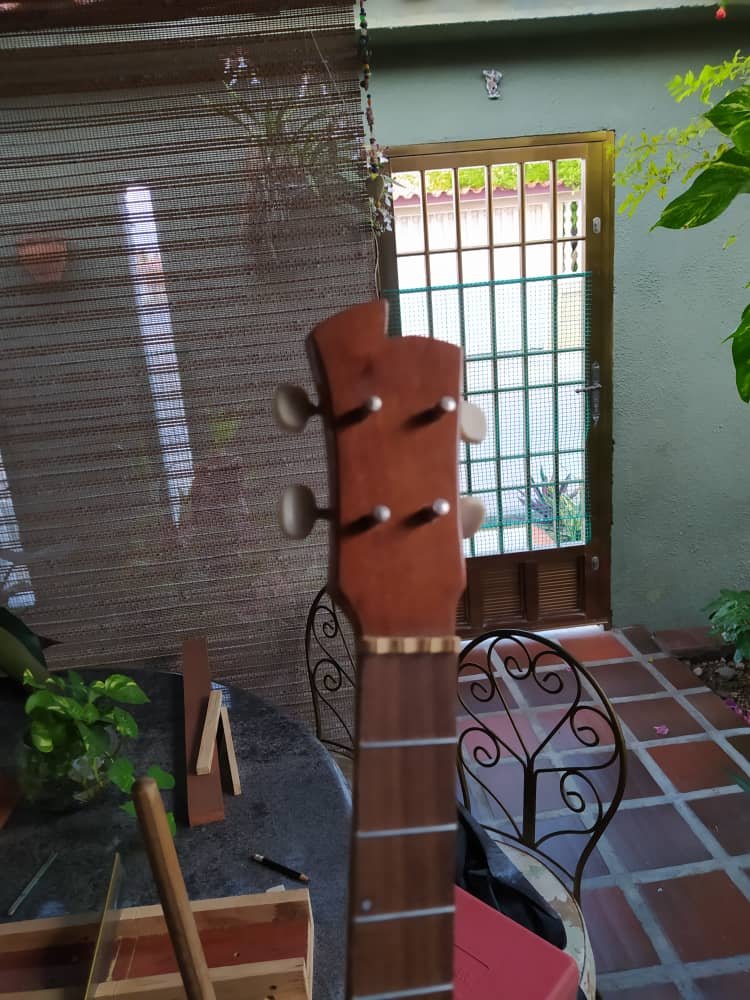
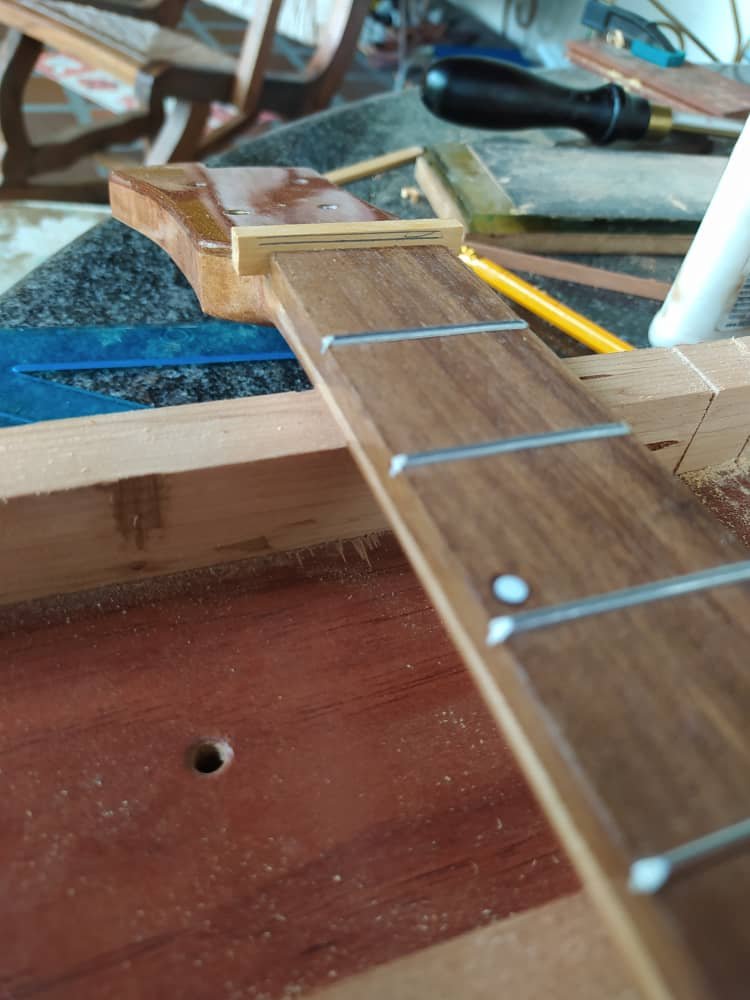
While the bridge glues, I worked on the nut. This is the division between the headstock and the fretboard. It also works as fret 0 for some instruments. It is set in place. Then we mark the height of fret 1 to have the depth marks for the string slots. The ornamental designs of it vary. A lot of luthier use flat nuts.
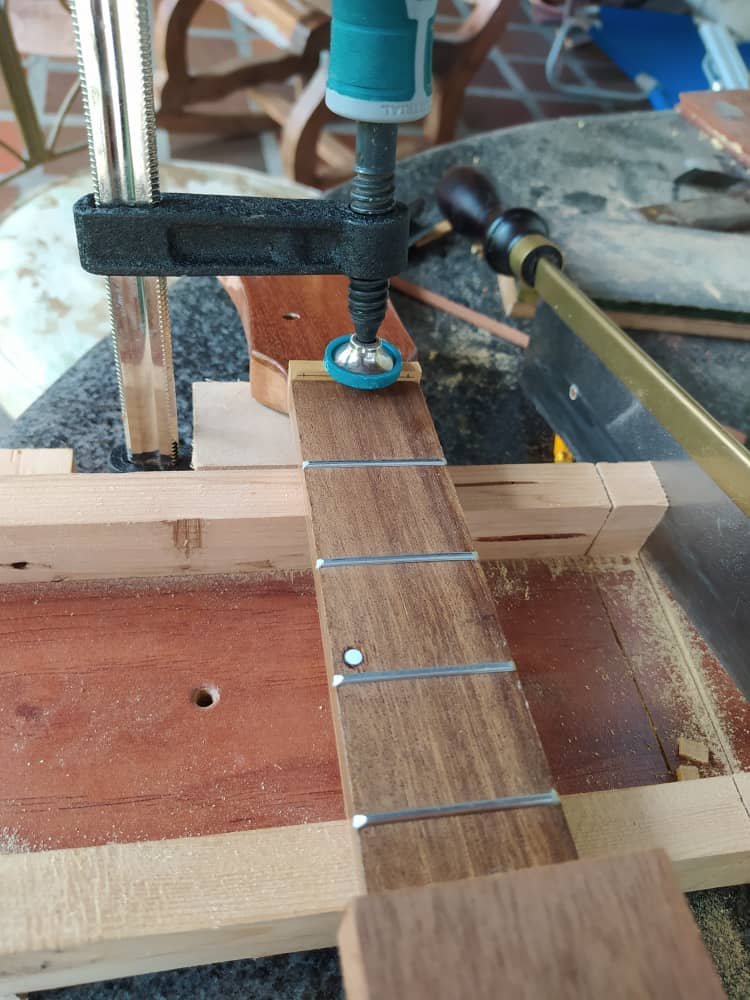
After this, we need to wait around 24 - 48 hours for the bridge to glue properly. Otherwise, the tension of the strings will pull it off the sound board. Once we are done waiting, we can install the tuning machines and get the strings of the instrument.
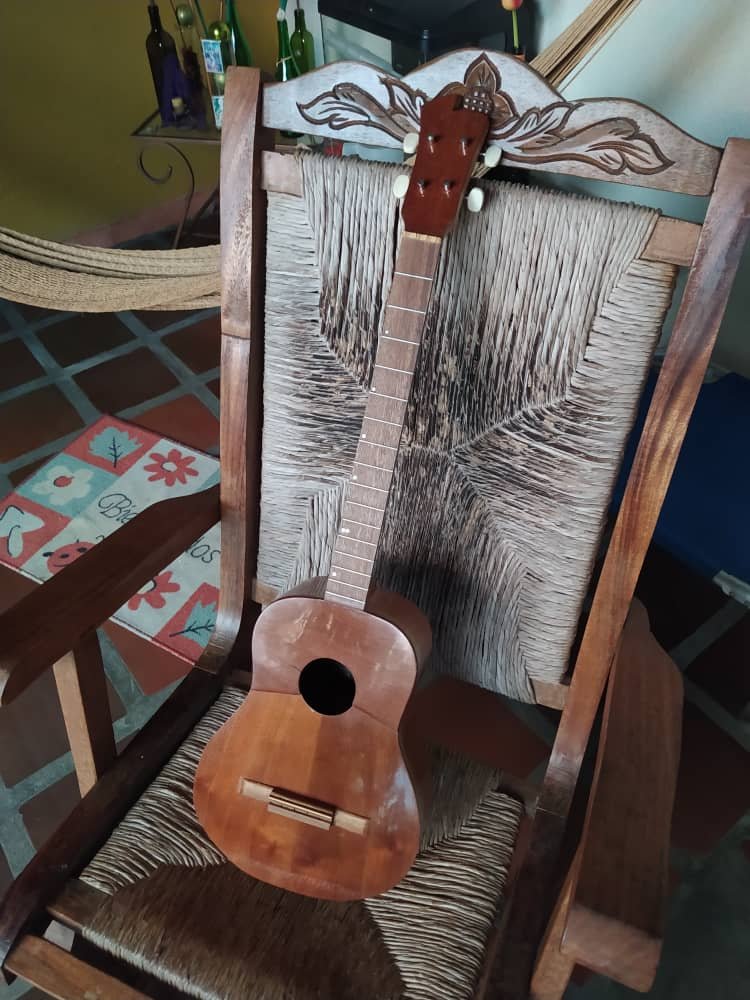
Thus getting and instrument ready to play.
Well, not exactly ready. While the strings are fresh they will go down in tuning very often until the material stretched properly. But that is no problem. I'll see you again with this instrument for a sound test. There are high hope for a very high volume and an interesting pitch. It's the first time I use mahogany for a sound board and I can't wait to listen to this little one making some sounds!
Spanish
¡Buen día, Hivers! Hoy terminamos nuestro recorrido de este proyecto, mi 5to Cuatro Venezolano. Puedo decir que ha sido uno bastante interesante. He experimentado con algunas cosas. Tuve mi primer accidente del taller. Hasta hubo una pausa forzada por enfermedad. Pero los resultados son prometedores. La prueba de sonido vendrá en otra publicación. Por ahora, pónganse cómodos y disfruten de este proyecto.
En mi última publicación, les había mostrado parte del proceso de construcción. Teníamos algunas cosas pendientes: el acabado, el puente, la cejilla y cejuela, colocar las clavijas y las cuerdas. ¡Echemos un vistazo a este proceso!
Pude ir al taller la semana pasada para barnizar unos cuatros. Llevé uno viejo que tiene tiempo en la casa para volver barnizarlo y ponerlo a la venta. También me encontré con la nueva asistente del taller, una hija de Tita, Perlita.
Parece muy tranquila, pero le gusta jugar con lápices. No es necesario decir que no me dejaba hacer nada con un lápiz. Siempre trataba de quitármelo.
Barnizar los instrumentos fue sencillo. Se utilizó una pistola de aire y debo decir que voy entendiendo cómo hacerlo mejor. Sin embargo, a veces se atoraba porque el compresor es muy viejo.
De vuelta en casa, era hora de pulir el acabado con papel de lija (grano 1200 a 1500) y cera. Después de remover la capa pegajosa del barniz, se aplican las manos de cera. Entre más cera se aplique más brillante quedará el instrumento.

Pero antes de pulir es necesario marcar la posición del puente. Para esto, se mide desde la cejilla (traste 0) hasta el traste 12. Esta medida se repite desde ese traste hasta la tapa armónica. Esto nos da la posición de la cejuela. Con esta información, podemos marcar dónde va el puente. Luego, usando cinta de enmascarar, podemos proteger el resto del acabado. Ahora removemos el barniz en el área rodeada por la cinta para que el puente pueda pegarse bien. Esto último se puede hacer de muchas maneras. Aquí utilicé un formón.
Es momento de dejar el instrumento a un lado y trabajar en el puente. La altura de esta pieza está determinada por la alineación entre el diapasón y la tapa armónica. Para hacerlo, necesitamos un listón y abrir una ranura para la cejilla y agujeros para las amarrar las cuerdas.

Una vez lista la estructura principal, solo resta lijar y sellar.
Al terminar esto, se puede trabajar en la cejilla. Esa pieza es responsable de la altura de las cuerdas. También la responsable del volumen del instrumento. Generalmente, se hace con una altura par. Esta tiene 6mm. 3mm van dentro del puente y los restantes sobresalen hacia arriba.
Mientras el puente se pega, se trabajó en la cejuela. Esta es la división entre la pala y el clavijero. Funciona como traste 0 en algunos instrumentos. Se coloca en su lugar. Luego, se marca la altura del traste 1 como referencia de profundidad para las ranuras de las cuerdas. El diseño ornamental de esta pieza varía. Muchos luthiers no hacen muchos cambios a esto y prefieren usar cejuellas planas.
Al terminar esto, debemos esperar de 24 a 48 horas para que el puente se pegue bien. De lo contrario, la tensión de las cuerdas acabará por despegarlo de la tapa armónica. Una vez haya transcurrido ese tiempo, podemos fijar las clavijas y colocar las cuerdas.
Y con esto, el instrumento está listo para empezar a sonar.
Bueno, no es exactamente así. Las cuerdas se van a desafinar bastante durante los primeros días. Esto sucederá hasta que el material se estire apropiadamente. Pero esto no es un problema. Este instrumento regresará más tarde para una prueba de sonido. Había muchas expectativas a la hora de hacer este proyecto. Un gran volumen y un timbre distinto eran las más altas. Es la primera vez que uso caoba para hacer una tapa armónica y no puedo esperar para escuchar cómo resuenan las notas tocadas en este pequeño.
Nice work there @bertrayo
Thanks a lot, @olubato 😄
Your content has been voted as a part of Encouragement program. Keep up the good work!
Use Ecency daily to boost your growth on platform!
Support Ecency
Vote for new Proposal
Delegate HP and earn more
Thank you!
Looks beautiful! amazing, looking forward to the sound check!
Thanks a lot. That will come next week!
can't wait to hear it! Enjoy your weekend!
Congratulations @bertrayo! You have completed the following achievement on the Hive blockchain and have been rewarded with new badge(s):
Your next target is to reach 60000 upvotes.
You can view your badges on your board and compare yourself to others in the Ranking
If you no longer want to receive notifications, reply to this comment with the word
STOPTo support your work, I also upvoted your post!
Check out the last post from @hivebuzz:
Nuestras coordenadas: