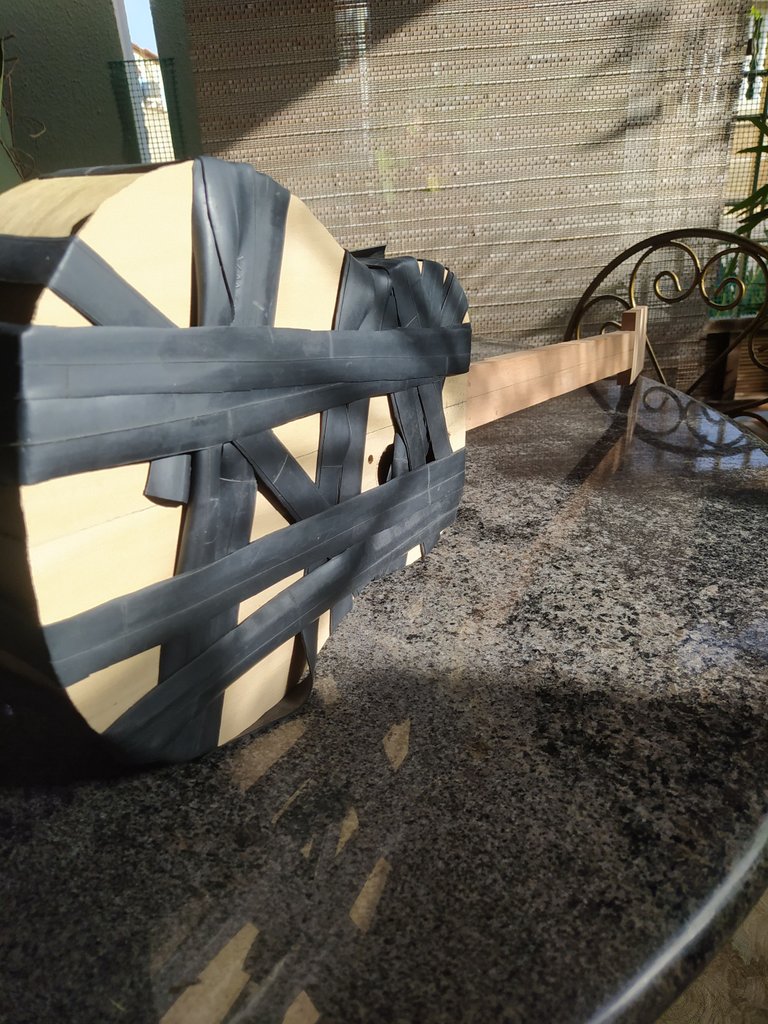
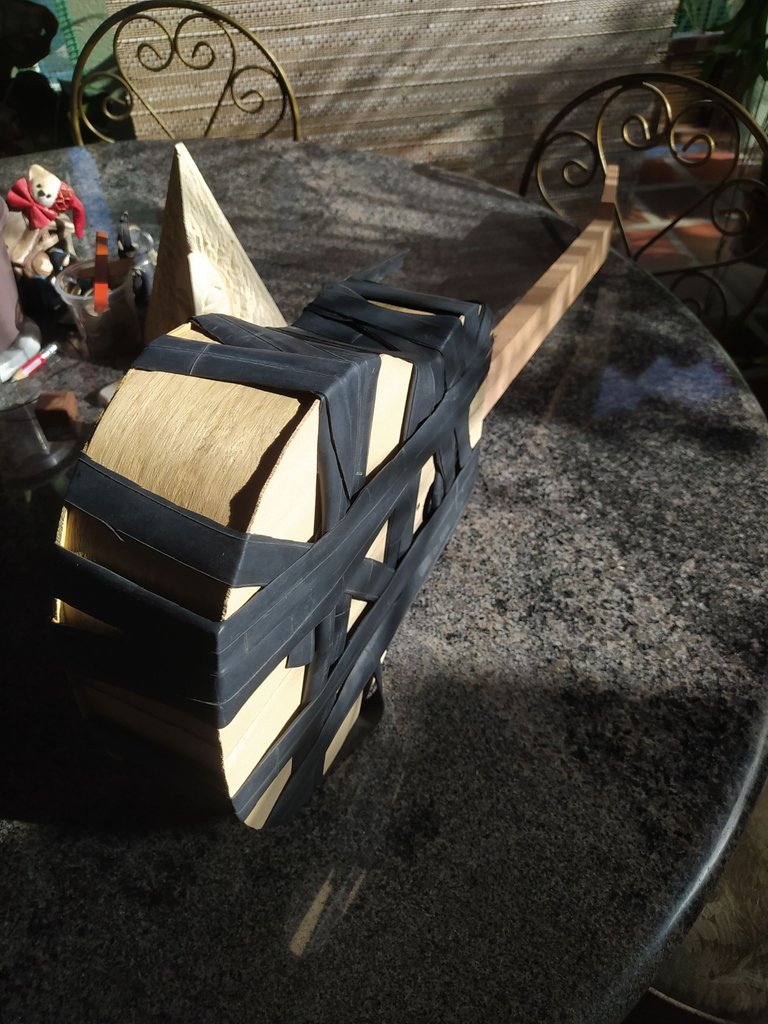
Inspecting this closely, it looks like I'm practicing bondage on an instrument. Don't be fooled by the photo, I already know my stuff.
Woodworking Wednesdays are back and today we jump into the assembly process of Experiment One . This instrument is currently on hold while I work on a commissioned project.

Words for the future
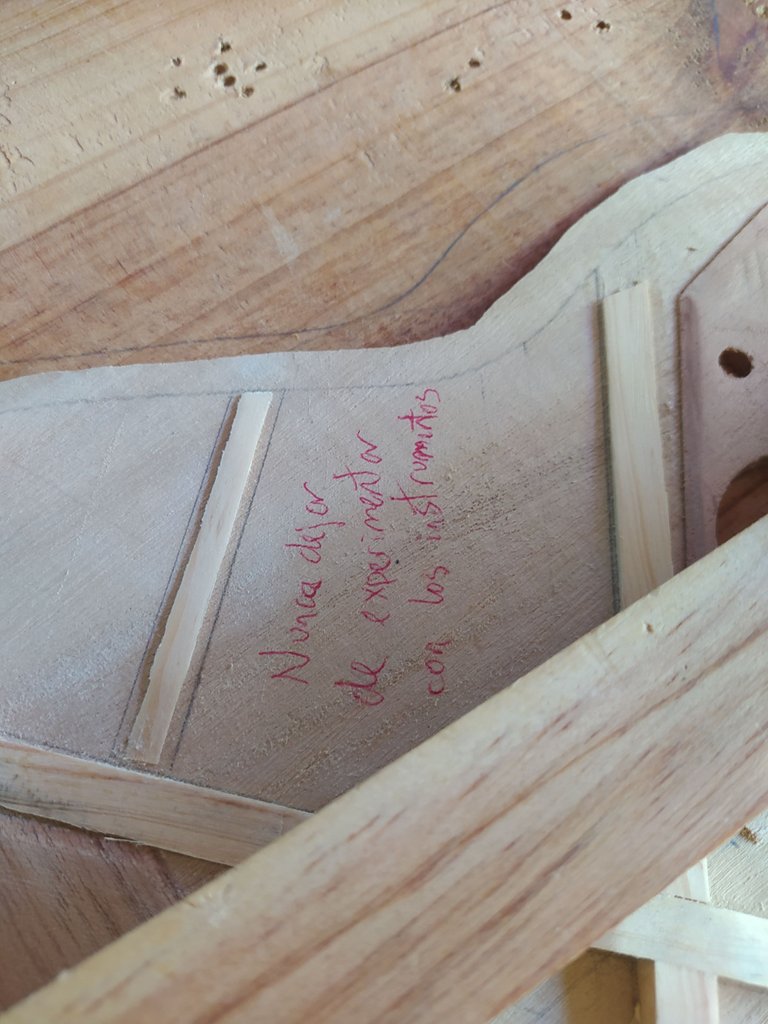
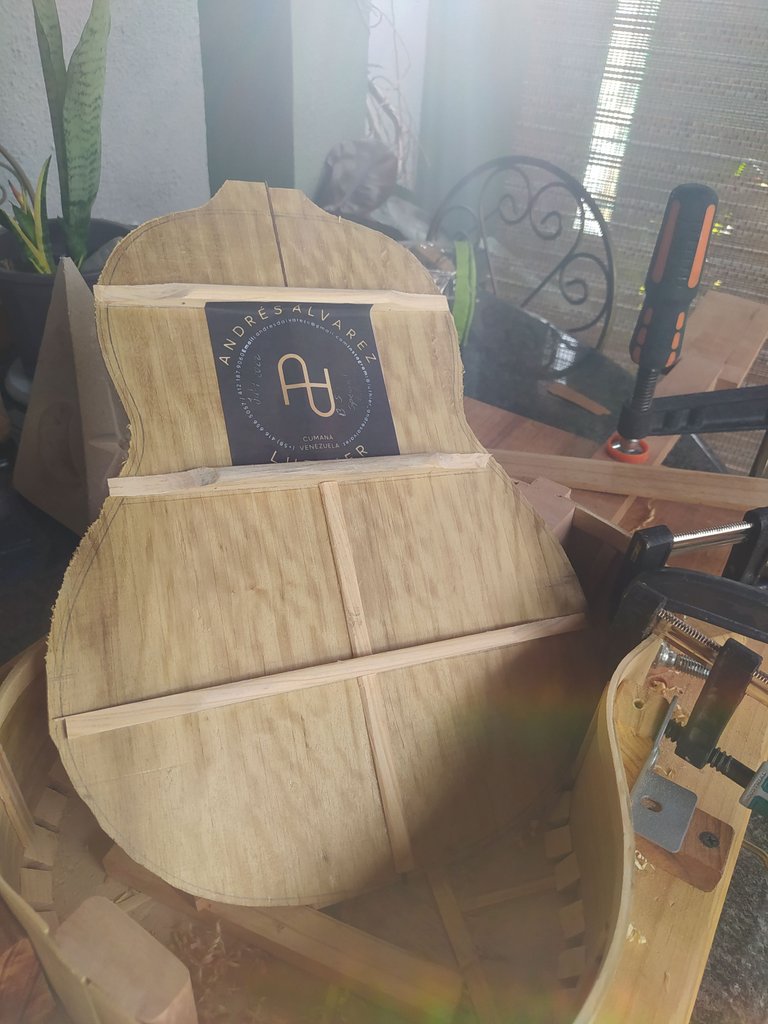
Before we start assembly, I need to write something on the inside of the sound board. This is a message to remember not turning away from experiments. Guitarlike instruments are without strict rules of construction, unlike orchestra instruments. So there's plenty of room for improvement and trying new things.
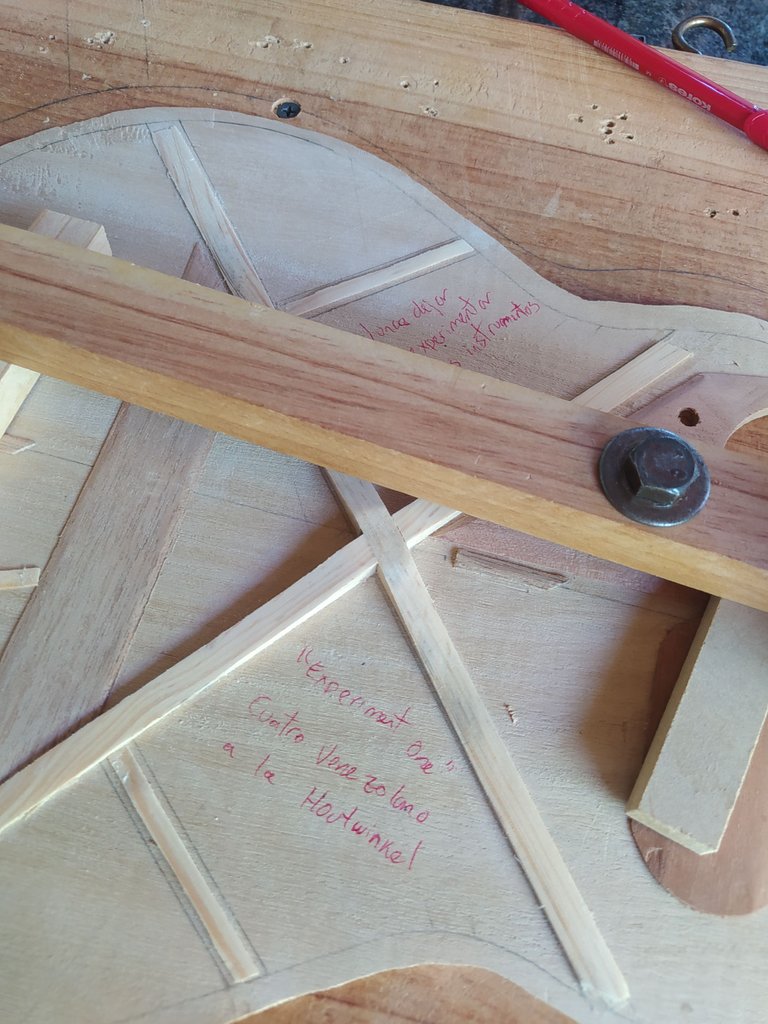
This one is dedicated to Houtwinkel. He's a luthier doing some amazing things and the idea of trying this on a Venezuelan Cuatro comes from an 5-strings baritone ukulele he was making. There's a ton of inspiration around Instagram. Just have a look at your trade you'll be amazed!
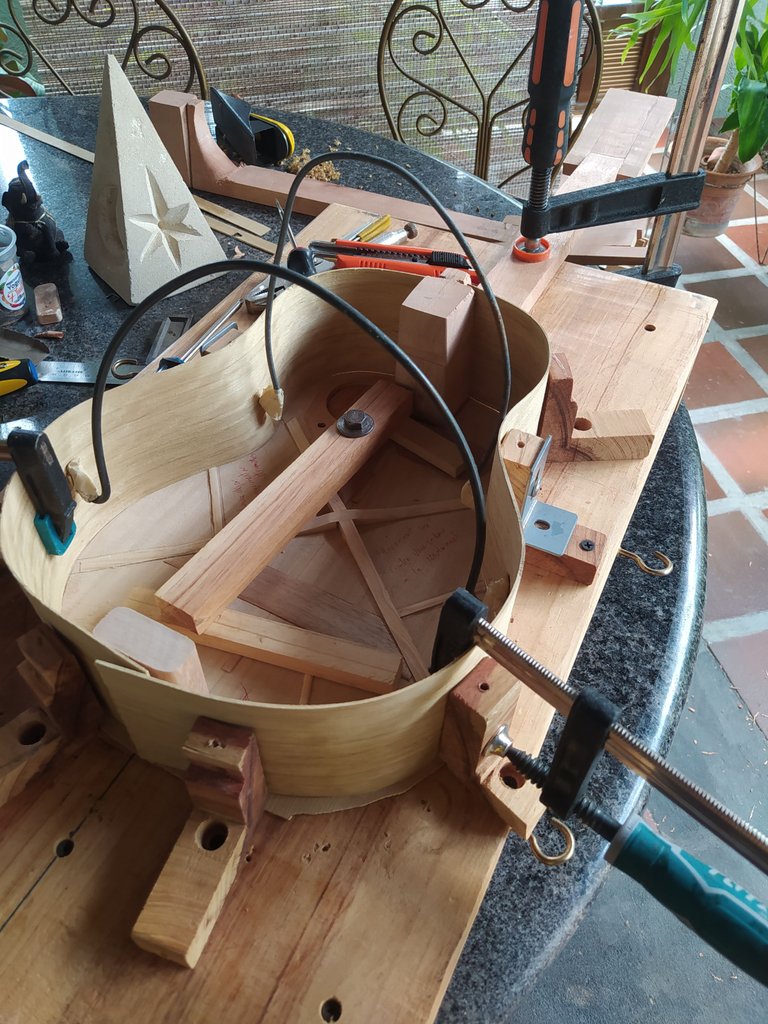
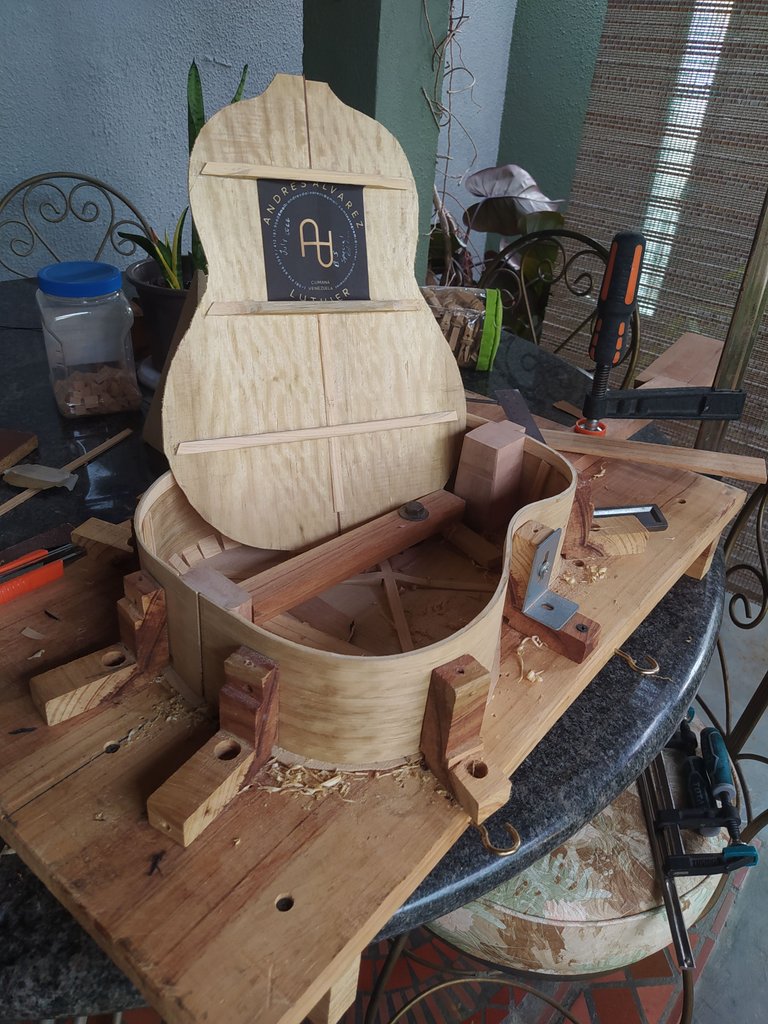
End Block
The end block is the second foundation of the body. The first is the heel. Here the sides and back will meet and close everything up. This one needed some preparation as the back of this instrument is arched. It has a 6000mm radius curvature.
That means the block is a bit shorter than the usual 9mm. We go with 8.8mm. after trimming it and making it look pretty, we glue it and hold it in place using another neck that's laying around.
Sides bent and placed.
These Louro sides need a but of trimming before placing them. They are at around 11cm wide. We only need 9cm. So a piece of this was removed and it could serve as purflings for this or another instrument.
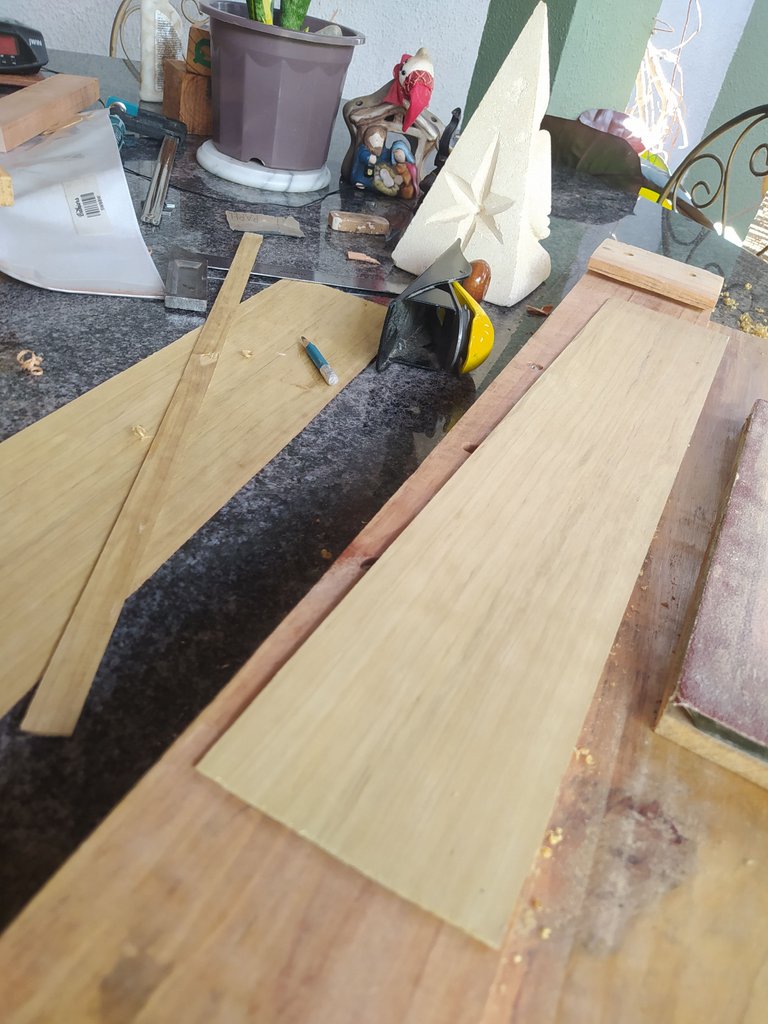
After, triming them, we hidrate the wood and prepare to bend. With lots of care we use our hot can to get them into the shape desired.

Then, need to make some adjustments to have them fit on the sound board. After all the measurements and cuts are ready, we proceed to glue them in place.

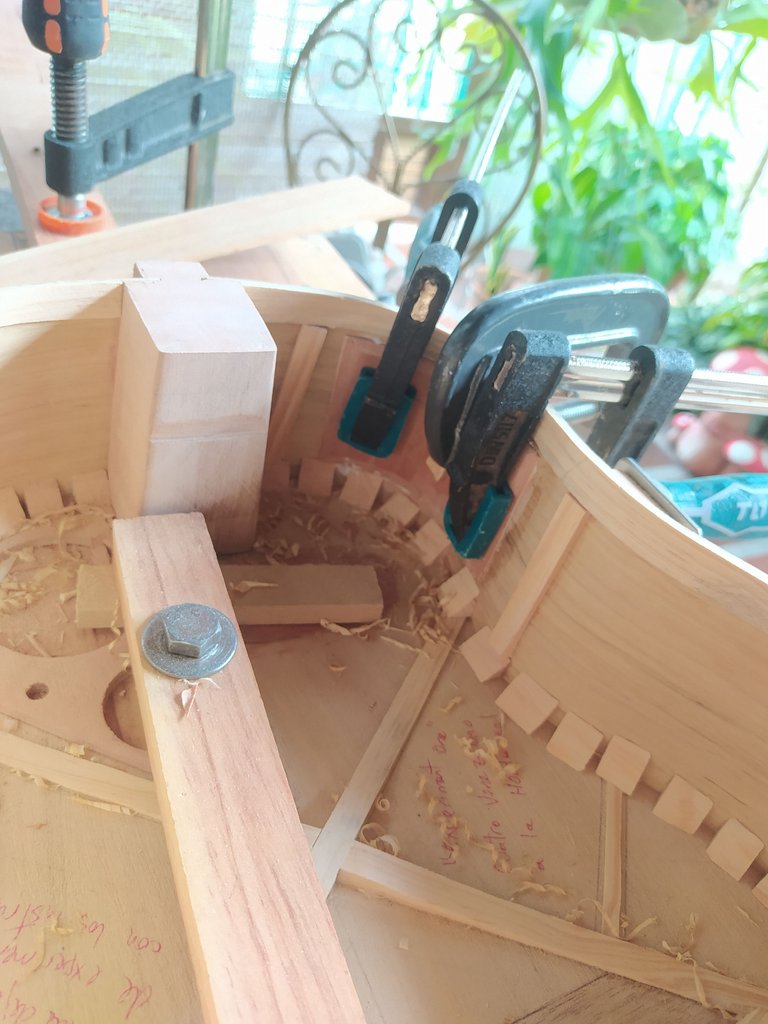
Kerfing and else
The reinforcements inside the body help strengthening the structure of the instrument and maximize the areas of contact between everything. We have the kerfing between sound board and sides, vertical bars on the sides and other reinforcements on the length of the sides to fit the back.
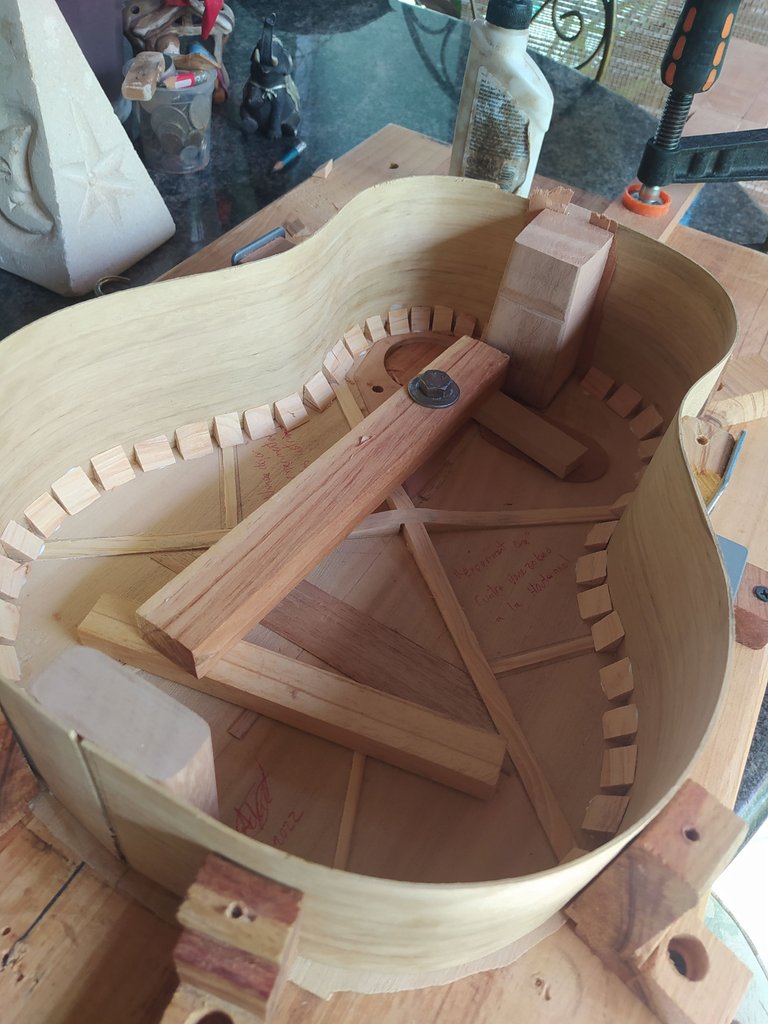
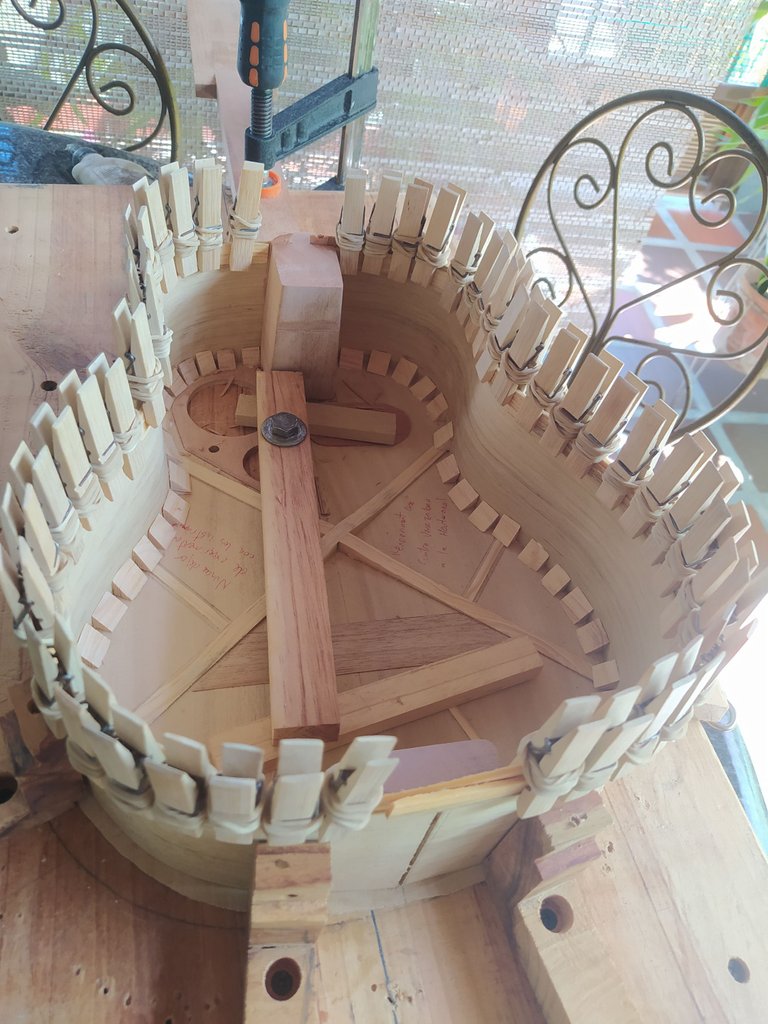
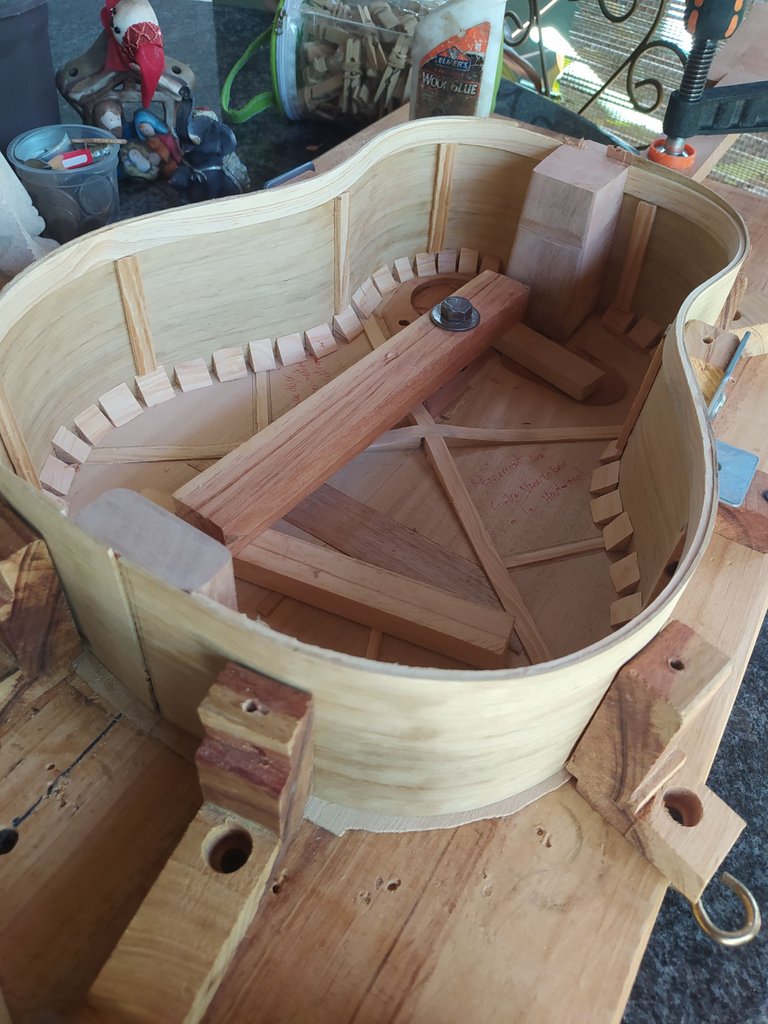
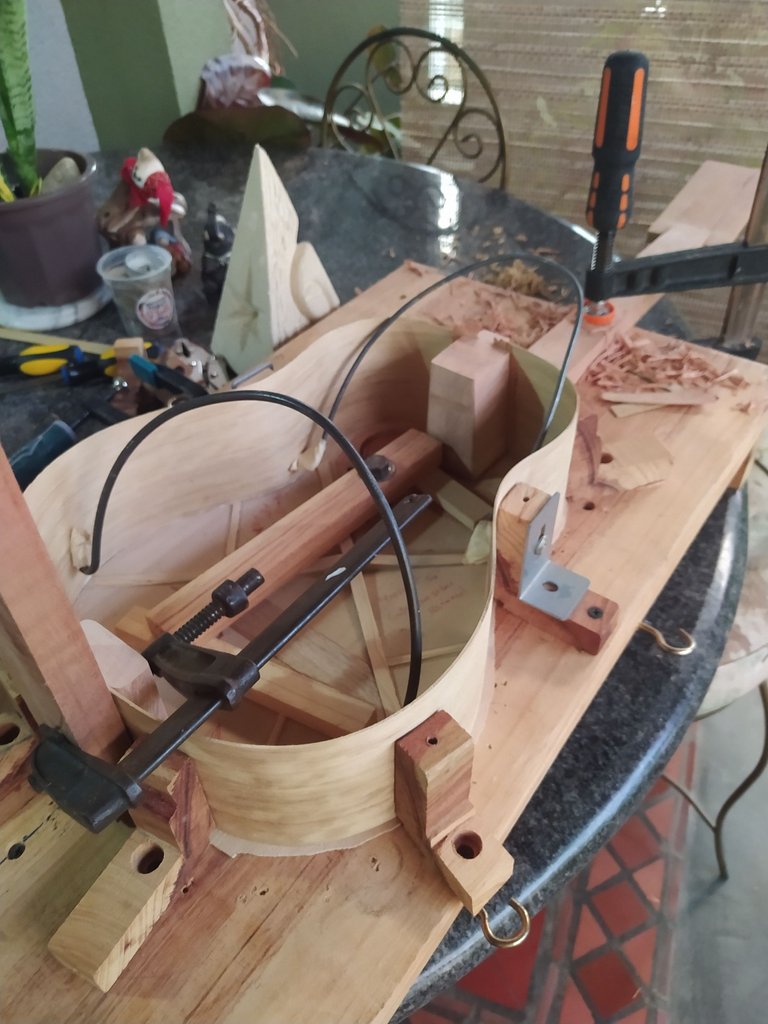
An extra reinforcement
I decided that Experiment One will have a monitor on the upper side. This means the instrument will have an extra sound hole on the side that faces the player. This is done to give a reference to the sound of the instrument. Just like a monitor is facing musicians and singers when they are playing and singing on stage to have a reference of how they sound.
To get this done, we need to add an extra reinforcement to the place where the hole will be placed.
Getting ready to close
To close this instrument we only need to get the sticker on the back. I placed it on the wrong place but that'll have to do. Also, we need to trim the sides to fit the curvatures of the back. This means going all the way in a slope to 8.6cm to the heel and 8.8cm to the end block. And the waist needs to keep its 9cm. These differences in height are the key to achieve a great sound projection.
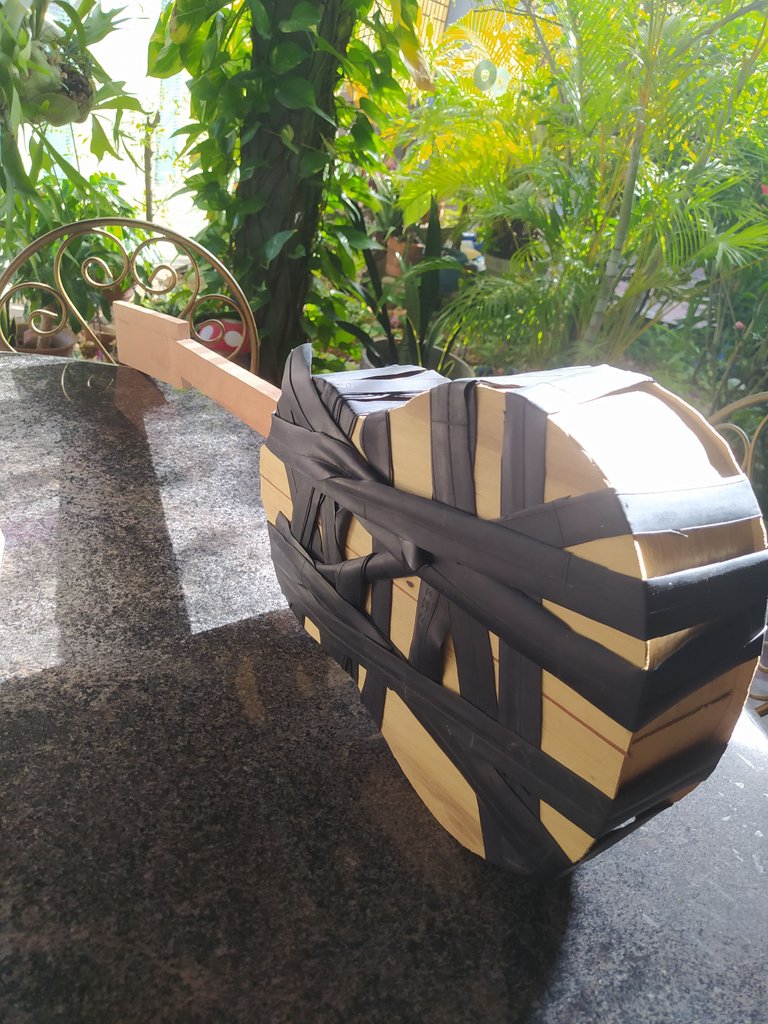
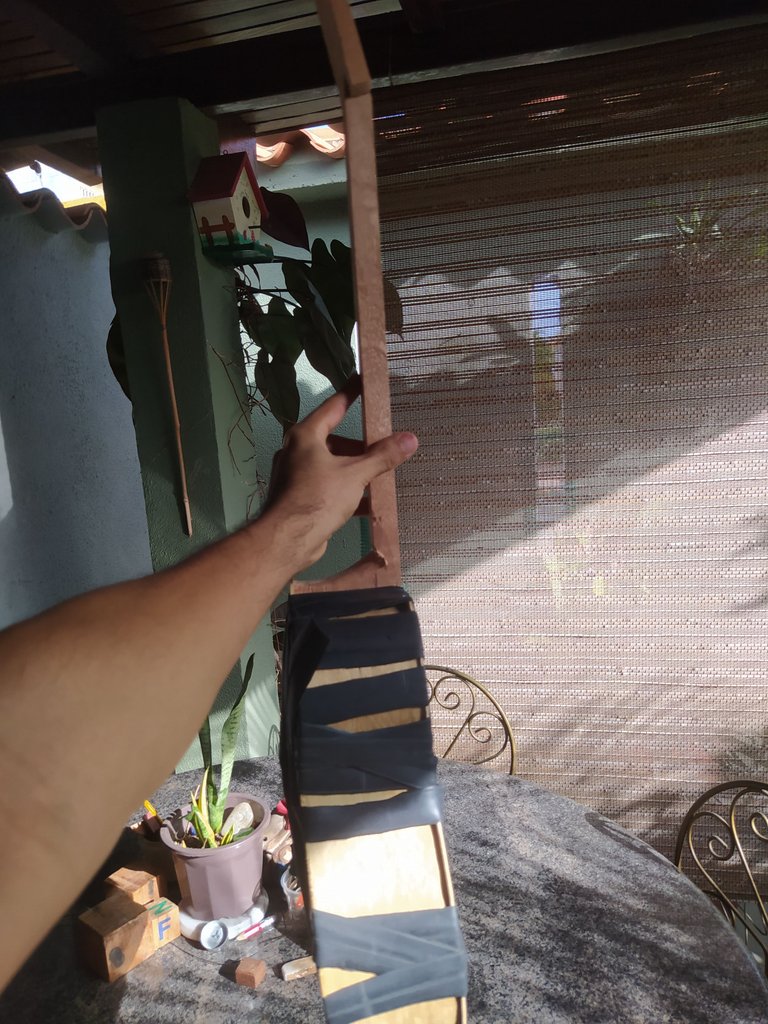
Instrument closed
I tried this technique which is reminiscent of old ways. I got instrument out of the solera mould without the back and then used this tire rubber press the back into the rest of the structure. Rubber doesn't damage the wood and it's pressure is similar to having your hands pressing down on the pieces.
I saw something similar some weeks ago but with rope and decided to try it out. As far as I can tell, the results are there. Since my solera mould doesn't have a good shape, it prevents me from pressing down the back with the required strength to get all of it glued to the sides. This way helps me achieve just that without too much trouble.
And that's all for this week. Next time I'm show you the summary of the next project that came around. I'm starting to worry about space at home since there's plenty of instruments laying around. But that might prove a good thing after I have everything ready. See you next week!
Follow me on Instagram for enquires and commission.
If you'd like to help the workshop grow, you can make a donation here. You can find me at discord as bertrayo#1763
That. Is so cool!
!discovery 47
Thanks a lot!
Thank you for your witness vote!
Have a !BEER on me!
To Opt-Out of my witness beer program just comment STOP below
View or trade
BEER.Hey @enforcer48, here is a little bit of
BEERfrom @isnochys for you. Enjoy it!Learn how to earn FREE BEER each day by staking your
BEER.This post was shared and voted inside the discord by the curators team of discovery-it
Join our community! hive-193212
Discovery-it is also a Witness, vote for us here
Delegate to us for passive income. Check our 80% fee-back Program
Your content has been voted as a part of Encouragement program. Keep up the good work!
Use Ecency daily to boost your growth on platform!
Support Ecency
Vote for new Proposal
Delegate HP and earn more
@brumest is the best!
Dude! This is SO cool! Man, what an incredible project. One on my future goals is to make my own guitar! This is amazing to see your process and how you're working. Hands on projects are so much fun, and nothing more rewarding than making something to enjoy, and learning some awesome skills along the way! I look forward to seeing how this turns out :) hopefully one day I will become a rock star and can commission you to make me one :D
Hey, thanks a lot!
And yeah, it is a rewarding activity. There's nothing like the connection we create with something we build with out own hands. It is some else. I guess your project is building an electric guitar. That's a cool project and s challenging one as well.
The commission of my workshop are always open!