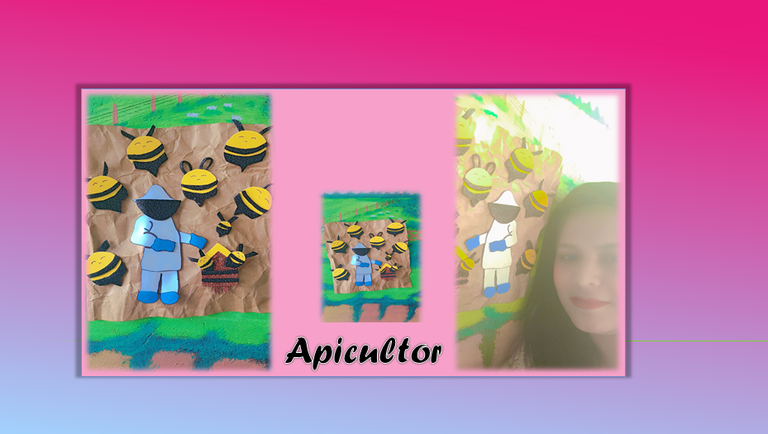
Hola amigos y amigas, saludos a todos, nuevamente @Brindyschi por aquí. Hoy les compartiré una creación en foami. El tema de hoy es un Apicultor, una persona que dedica a cuidar y mantener a las hermosas abejas, para que se tenga una buena producción.
Por esta razón, les quise realizar este arte y, por supuesto, para representar a esta gran familia Hive.
Espero que les guste a todos.
Y deseándole un lindo y feliz fin de semana.
WE BEGIN - COMENZAMOS
Materials:
Graphite pencil.
Silicon and scissors.
Black marker.
White foam.
Frosted black foam.
Blue foam.
Frosted brown foam.
Yellow cardboard.
Lápiz grafito.
Silicon y tijera.
Marcador negro.
Foami blanco.
Foami negro escarchado.
Foami azul.
Foami marron escarchado.
Cartón amarillo.

Paso 1:
First step, I started drawing with my graphite pencil. My beekeeper's suit uses white and for this I used white foam. Cutout.
Likewise, with the white foam I created the hat that will protect this beekeeper and with the blue foam I made the gloves.
Primer paso, comencé dibujando con mi lápiz grafito. El traje de mi apicultor utiliza blanco el traje y para ello usé el foami blanco. Recorté.
Asimismo, con el foami blanco cree el gorro que protegerá a este apicultor y con el foami azul le hice los guantes.


Paso 2:
As a second step, with the frosty brown foam I made the bee house where they deposit all the honey they generate. With the yellow cardboard I made the roof and the black foam I made two lines: structure of the bee house.
Como segundo paso, con el foami marrón escarchado realicé la casa de las abejas donde ellas depositan toda la miel que generan. Con el cartón amarillo le realicé el techo y el foami negro le hice dos líneas: estructura de la casa de abejas.


Paso 3:
As a third step, it's time to create the beautiful bees. Use the yellow cardboard by drawing several circles, some large and some small.
Likewise, with the frosted black foam, I made their black markings, their silhouette and their tails for each of them.
Below are the images.
Como tercer paso, es hora de crear las hermosas abejas. Utilice el cartón amarillo dibujando varios círculos, unos grandes y otros pequeños.
Asimismo, con el foami negro escarchado, le hice su marcado negro, su silueta y sus colas a cada una de ellas.
A continuación las imágenes.


Paso 4:
As a fourth and final step, having all my parts ready, I began to assemble our beekeeper and his bees using silicone as glue.
Finished work.
Enjoy it.
Como cuarto y último paso, al tener todas mis partes listas, empecé a armar nuestro apicultor y sus abejas utilizando como pegamento el silicon.
Trabajo finalizado.
Disfrútenlo.


FINAL ART / ARTE FINAL:

Fuente / Source:
Traductor
All photos are my property taken with my Oscal c70 Smartphone..📷
🌺 My name is @Brindyschi 🌺


Until a future opportunity
Success for all 👊
We are pleasantly thrilled by the quality of your post today. You have a lot of creativity and you know how to bring it to the physical through the combination of different materials. The colors highlight your work, thank you very much for your excellence and for being part of the DIYHub Community.
Muchas gracias un trabajo hecho con amor