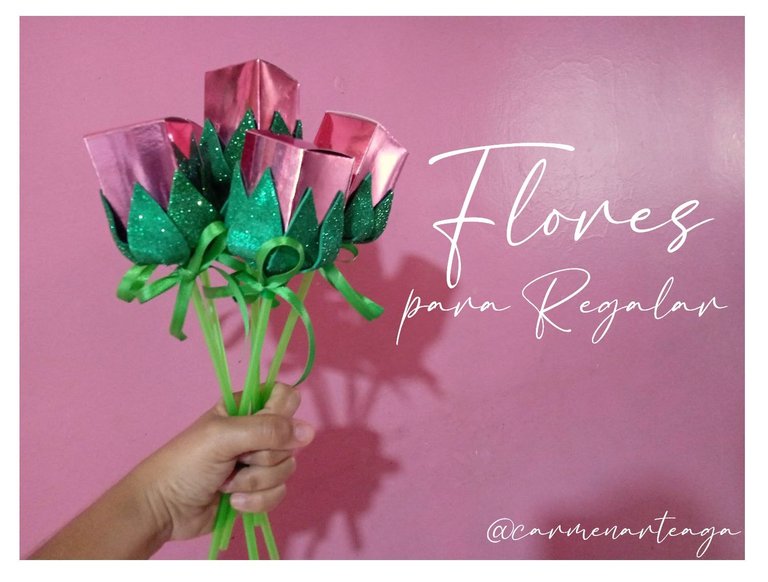
Hola todos, Feliz tarde, hoy les comparto el como elabore estas cajitas en forma de Rosas, ideales para obsequiar.
Les muestro el Proceso...🌷
Hello everyone, Happy afternoon, today I share with you how I made these little boxes in the shape of roses, ideal for gifts.I show you the process.🌷

- 🌷 Silicon de Barra.
- 🌷 2m de Cinta fina de color verde.
- 🌷 5 Palitos o Tubos de Plástico de 20cm de color verde con su porta globos.
- 🌷 1 Foami Escarchado de color verde.
- 🌷 1 Lamina de cartulina Rosada Metalizada.
- 🌷 Regla.
- 🌷 Tijera.
- 🌷Silicon by Barra.
- 🌷 2m of thin green tape.
- 🌷 5 Green 20cm Plastic Sticks or Tubes with their balloon holder.
- 🌷 1 Green Frosted Foami.
- 🌷 1 Metallic Pink Cardboard Sheet.
- 🌷 Rule.
- 🌷 Scissors.

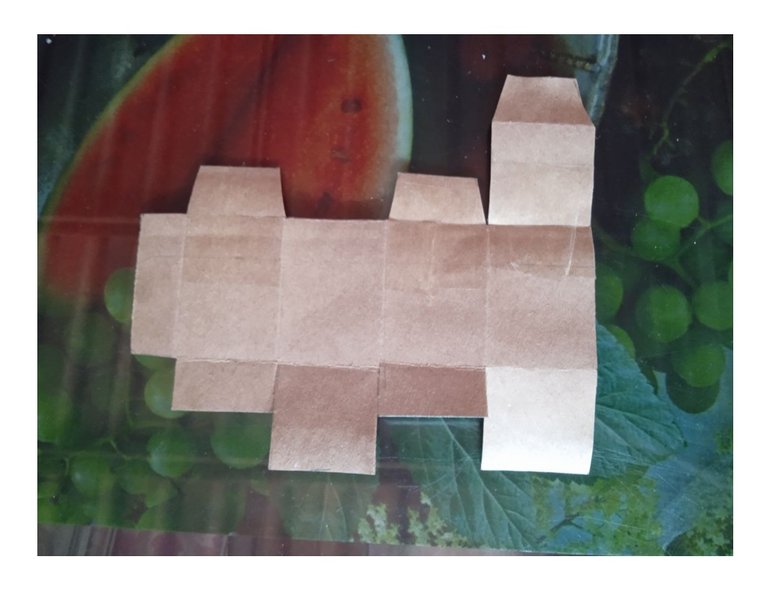
🌷 PASO 1: Con papel kraft elabore el patrón para la cajita que voy a necesitar con sus medidas.
🌷 STEP 1: With kraft paper, make the pattern for the box I will need with its measurements.
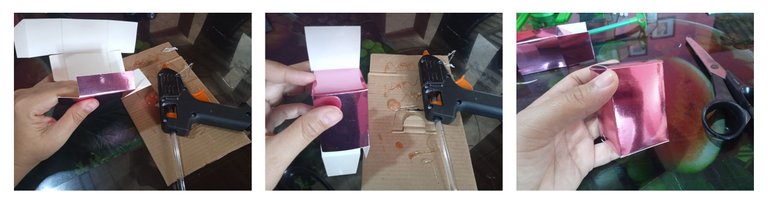
🌷 PASO 2: En la lamina de cartulina rosada y con ayuda de mi patrón dibuje y corte 5 cajitas.
🌷 STEP 2: On the pink cardboard sheet and with the help of my pattern, draw and cut 5 little boxes.
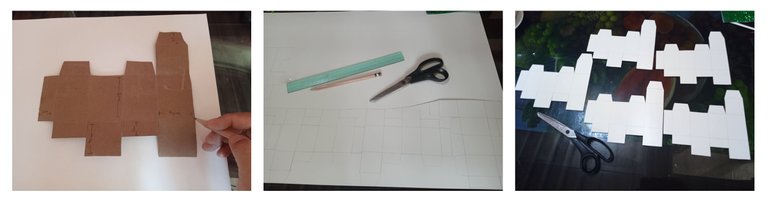
🌷 PASO 3: Una vez cortadas las cinco cajitas tome la regla y comencé a doblar todas mis líneas marcadas para darles así la forma que necesito.
🌷 STEP 3: Once the five boxes were cut, I took the ruler and started to bend all my marked lines to give them the shape I need.
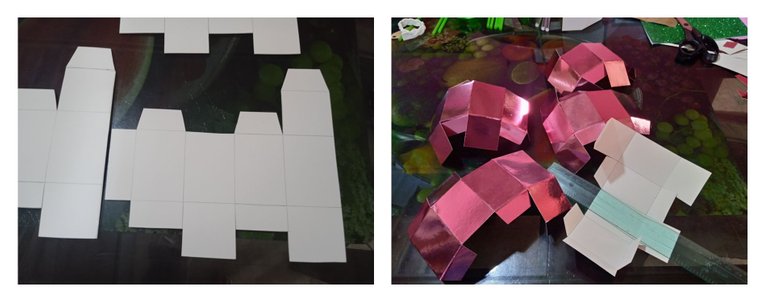
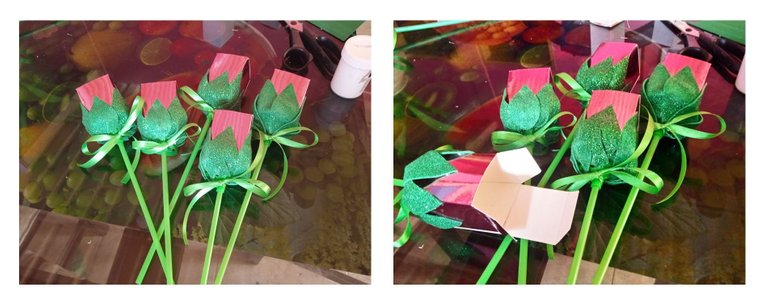
🌷 PASO 4: Tome cada una de las cajitas y las fui pegando, primero pegue un lado de la caja y la pestaña lateral, del mismo modo pegue la parte baja de las cajitas.
🌷 STEP 4: Take each of the boxes and glue them together, first glue one side of the box and the side flap, in the same way glue the bottom of the boxes.
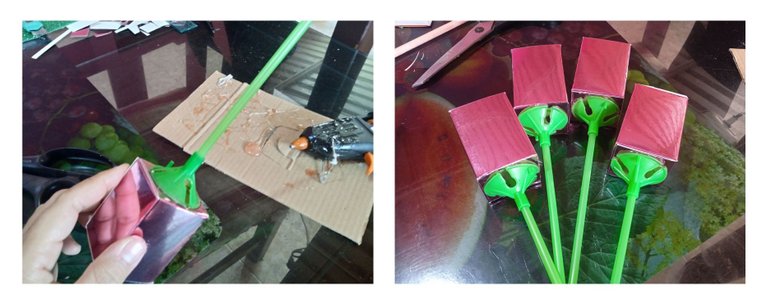
🌷 PASO 5: Tome los palitos y les puse su porta globos y los pegue cada palito en cada una de las cajitas.
🌷 STEP 5: Take the sticks and put the balloon holders on them and glue each stick to each of the boxes.
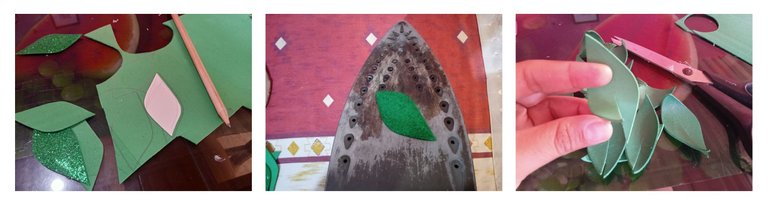
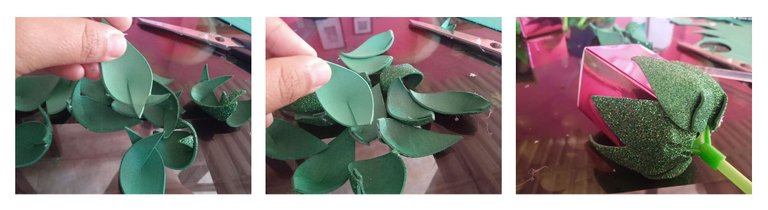
🌷 PASO 6: Con el foami verde escarchado dibuje y corte las hojitas siete hojas por cada cajita. las pase por la plancha para darles mejor forma, seguido les hice un pequeño corte a cada hoja y las fui pegando de forma cruzada, corte las puntas sobrantes y comencé a pegarlas a mis cajitas.
🌷 STEP 6: With the frosted green foami I drew and cut the leaves seven leaves for each box. I put them through the iron to give them a better shape, then I made a small cut on each leaf and glued them crosswise, cut the excess ends and began to glue them to my boxes.
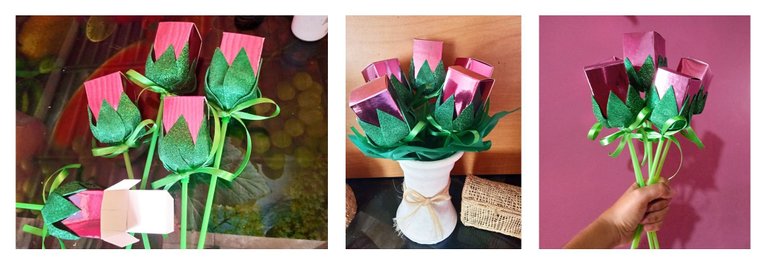
🌷 PASO 7: Una vez pegadas las hojas a cada cajita tome la cinta fina de color verde y corte tiras de 30cm de largo y se la coloque a cada cajita o rosa formando un lazo.
🌷 STEP 7: Once the leaves are attached to each box, take the thin green ribbon and cut strips of 30cm long and attach it to each box or rose forming a bow.
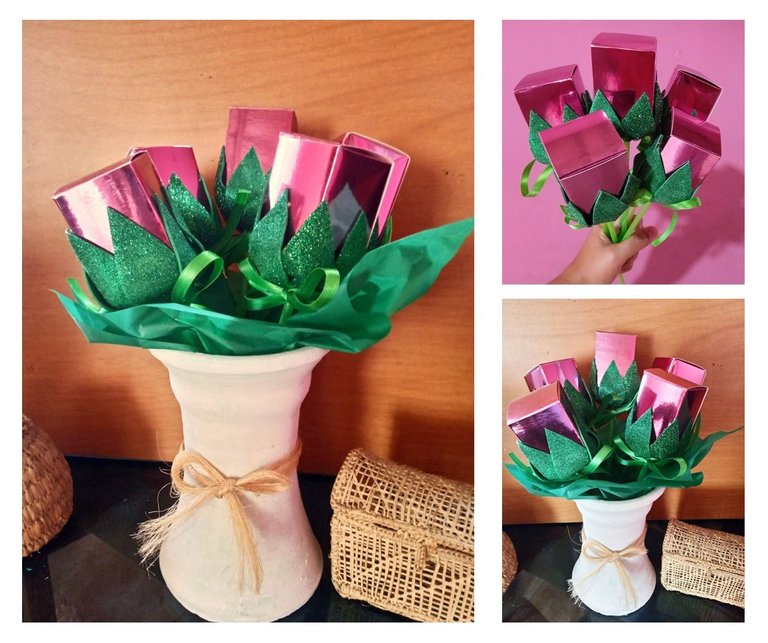
De esta manera quedaron estas cajitas en forma de Rosas que elabore...
This is how these little boxes in the shape of roses that I made for...
Gracias por leerme
Espero les guste...
Las Fotos son de mi Autoría.
Un Gran Abrazo...🌷
Thanks for reading I hope you like it... The Photos are my Author.A Big Hug...🌷

!discovery 28
!diy
This post was shared and voted inside the discord by the curators team of discovery-it
Join our Community and follow our Curation Trail
Discovery-it is also a Witness, vote for us here
Delegate to us for passive income. Check our 80% fee-back Program
thank you very much...😊
they truly are ideal for gifts. Looks very nice too.
Well done
thank you very much...😊
How nice... thank you very much.
Congratulations @carmenarteaga! You have completed the following achievement on the Hive blockchain And have been rewarded with New badge(s)
Your next target is to reach 2250 upvotes.
You can view your badges on your board and compare yourself to others in the Ranking
If you no longer want to receive notifications, reply to this comment with the word
STOPthank you very much.
que bonitas las cajitas de rosas ,te hizo gastar mucho silicon? saludos 😁
hola @lismarcarolina2 me alegra que te haya gustado... la verdad solo gaste una sola barra de silicón ya que las cajitas solo debía pegarlas de un lado y la parte de abajo... gracias por comentar.. un gran abrazo...😃
Que bellas, este es el tipo de regalos que me gustaría recibir, Unas flores que no mueran y que seguro por dentro tienen algo que sabe muy bien.
gracias @andreasalas si, muy cierto son muy practicas y no se van a marchitar jejejejeje... a parte de que le puedes agregar alguna sorpresa dentro de ellas, son una buena opción para obsequiar.😁
@tipu curate 2
Upvoted 👌 (Mana: 0/75) Liquid rewards.