Español.
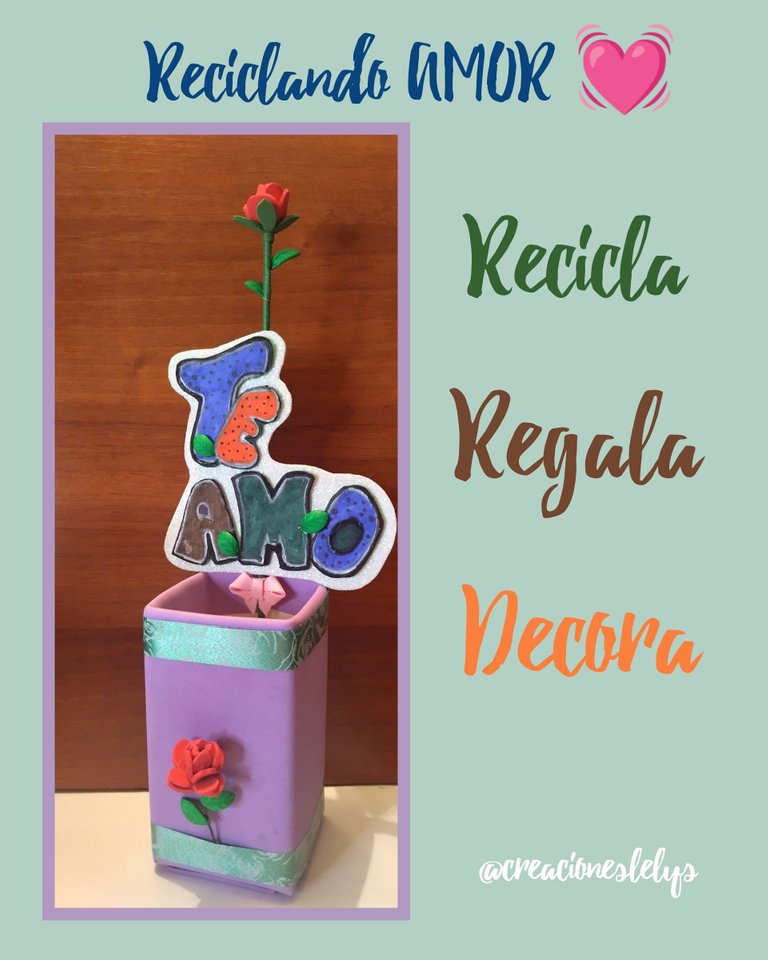
Hola amigos 🙋 espero que estén muy bien. Hace unos días estuve organizando la biblioteca y encontré mis marcadores 👏 los compré porque quiero empezar a dibujar y aprender técnicas para poner en práctica en las manualidades. La verdad es que no se me da mucho esto de dibujar. Así que paso a paso iré aprendiendo. Estos marcadores son de punta muy húmeda, dañan la hoja. Sin embargo ahí estuve practicando un poco. Con las letras que pude hacer decidí decorar un envase de cartón reciclado y así me quedó. Voy a mostrarles el procedimiento para hacerlo. Es una idea bastante sencilla, pero nos puede sacar de apuros para el momento de entregar un obsequio.
He pasado estos días un poco afligida, presentando malestar gripal. Muy pocas veces me da gripe, debe ser por el clima tan frío de estos dias. Por momentos siento deseos de hacer manualidades diferentes, así que me senté un rato con hojas y marcadores y me dispuse a dibujar algunas cosas. Entre ellas esta frase que les voy a mostrar hoy. Después que dibujé la frase la dejé secar. Pensé que no haría nada con ella. Entonces se me ocurrió montarla en una base de cartón y realicé esta cajita para obsequios.
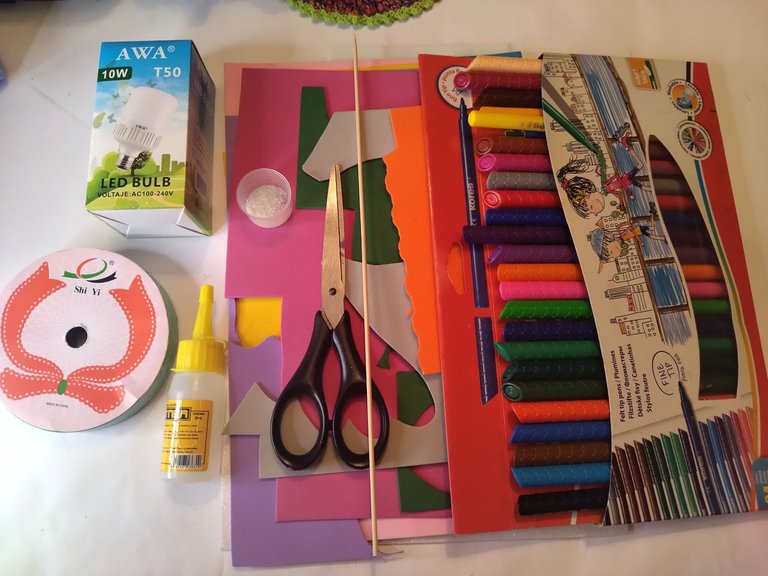
Materiales:
✨ Caja de cartón reciclado (de bombillo)
✨ Foami liso.
✨ Tijeras.
✨ Pegamento.
✨ Palito de altura.
✨ Plancha.
✨ Frase dibujada y recortada.
✨ Cinta de papel estampada.
PROCEDIMIENTO:
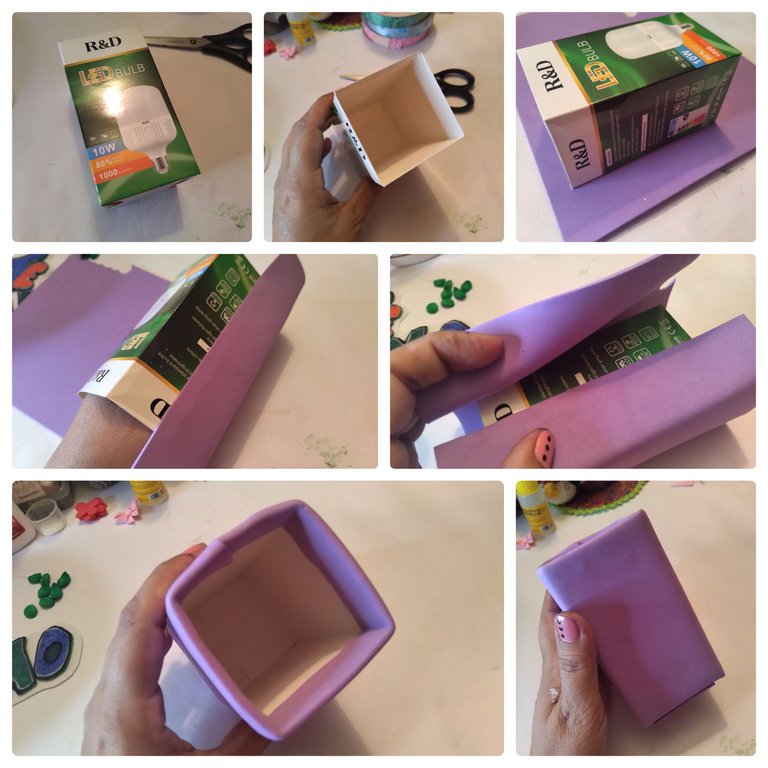
✨ Empecé forrando la caja de cartón con foami. Para ello monté sobre el foami la cajita, medí, corte y pegué procurando que el foami quedara fijo sin deformar la caja.
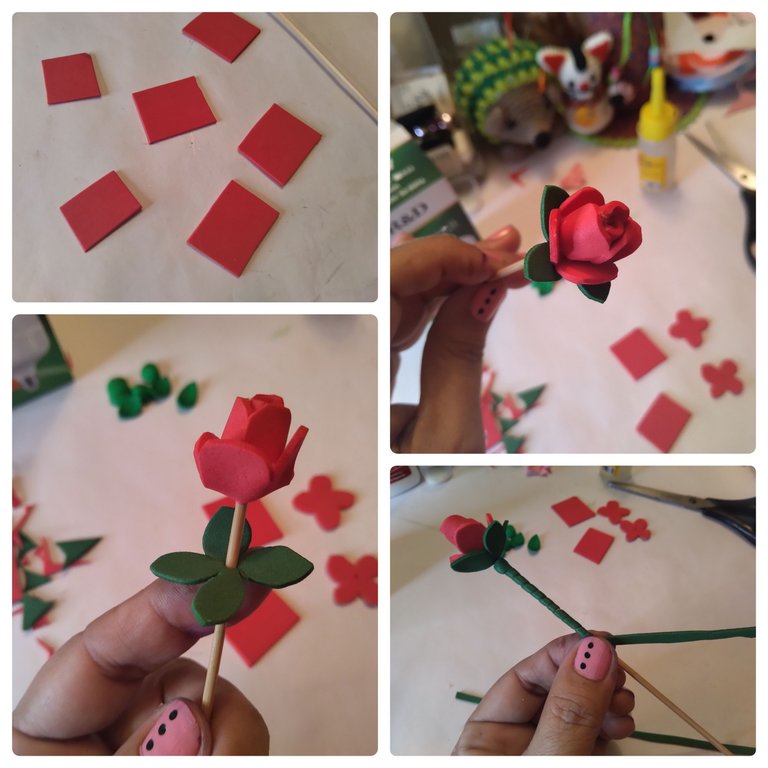
✨ Con algunos trozos de foami color rojo elaboré una florecita que luego monté sobre el palito de altura. Hice unos cuadritos de foami, luego elaboré cuatro pétalos en cada cuadro. Estos pétalos los pasé por el palito y fui dando forma a la vez que fui pegando.
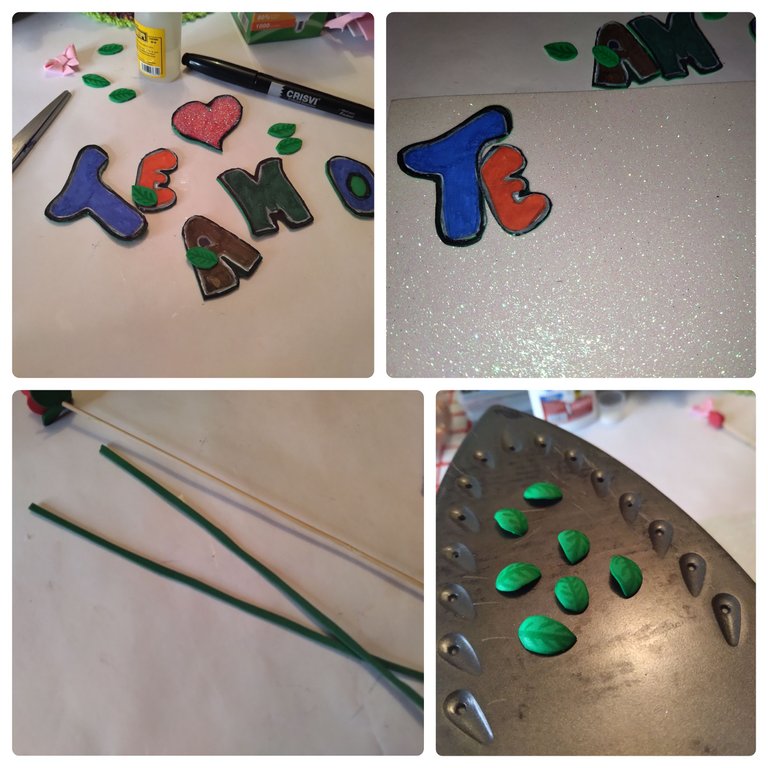
✨ La frase elaborada la pegué sobre un foami blanco escarchado. Luego la recorté solo por los bordes. También corté cuatro listones de foami verde de ½ cm cada uno, con ellos forré el palito de altura donde pegué la flor. Además recorté en foami verde varios trozos en forma de hojas y las pasé por la plancha.
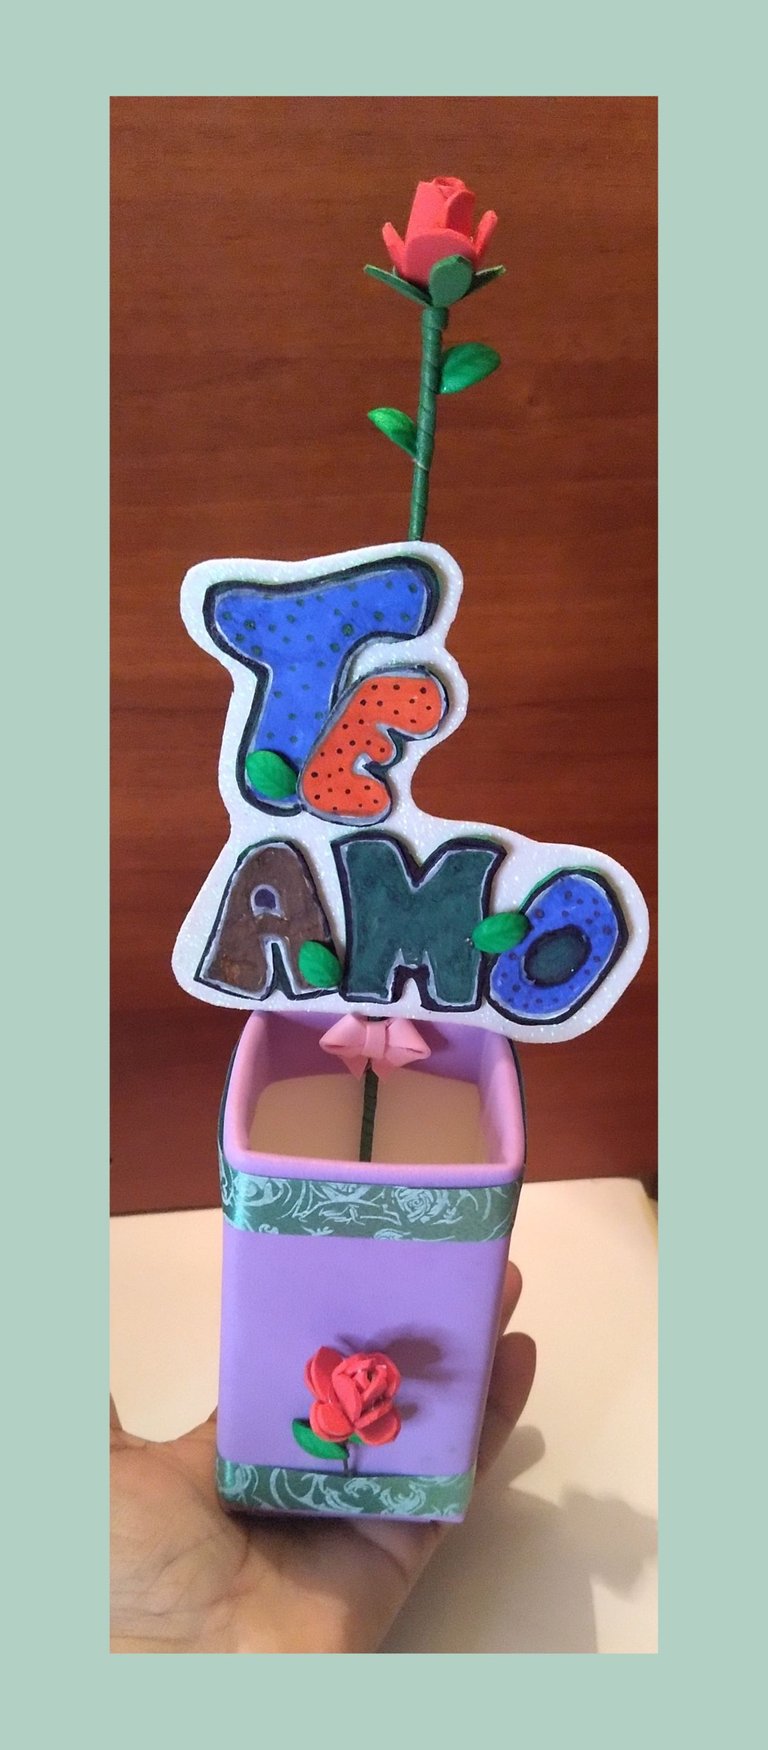
✨ Cuando tenía todos los adornos listos comencé a armar la cajita para decorarla. El palito (flor roja) lo coloqué por dentro en la parte de atrás de la caja. Pegué en la parte baja de la flor la frase dibujada.
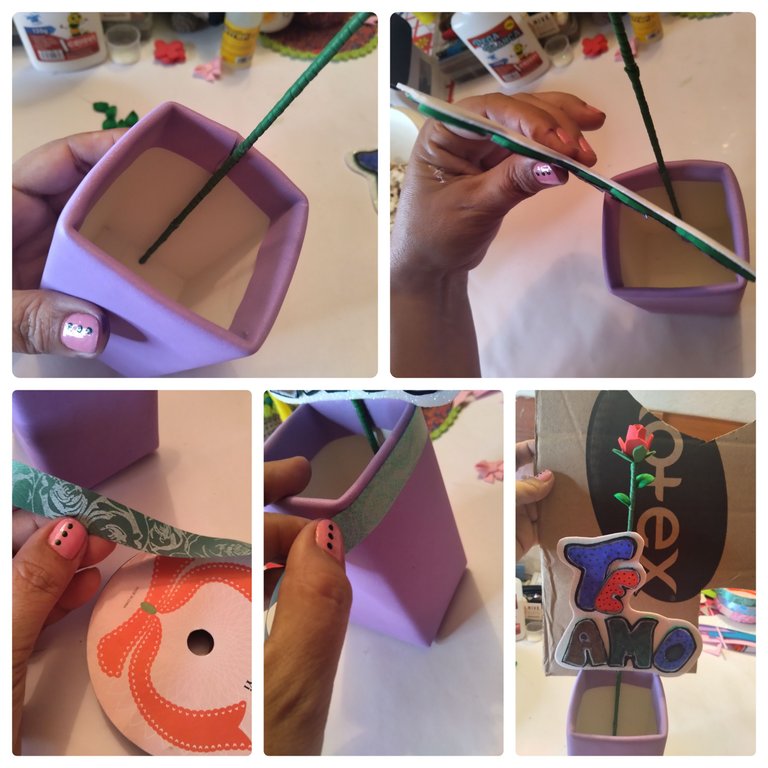
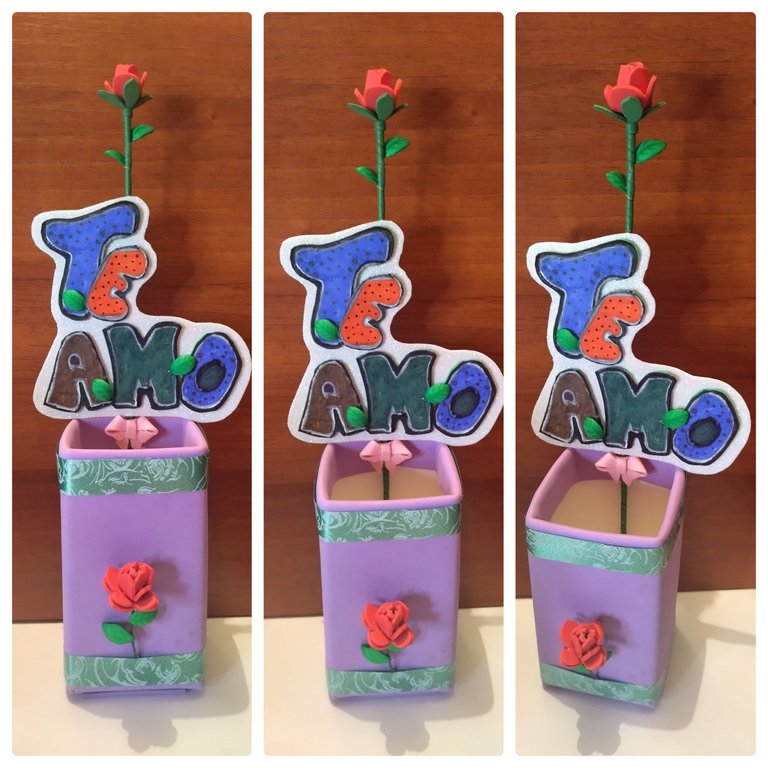
✨ Decoré con la cinta de papel la cajita por fuera. Agregué como detalle adicional otra flor roja en el frente de la cajita. Ahora solo resta llenarla de obsequios y disfrutarlos. Me encanta como se ve. Espero seguir aprendiendo a elaborar letras. Quizá usando los moldes queden mucho más bonitas. Mientras tanto seguiré guardando las cajas vacías de bombillos para darles un segundo uso haciendo cajas para obsequios.
Muchas gracias por tu apoyo. Todas las fotos son de mi propiedad. Edité con Polish. Usé el traductor de Deepl. Será hasta la próxima. Bendiciones. La frase utilizada dice TE AMO.
English.
Hello friends 🙋 I hope you are very well. A few days ago I was organizing the library and I found my markers 👏 I bought them because I want to start drawing and learn techniques to put into practice in crafts. The truth is that I'm not very good at drawing. So step by step I will be learning. These markers have a very wet tip, they damage the paper. However, there I was practicing a little. With the letters I could make I decided to decorate a recycled cardboard container and this is how it turned out. I am going to show you how to do it. It's a pretty simple idea, but it can get us out of trouble when it's time to give a gift.
I have been a bit afflicted these days, suffering from the flu. I rarely get the flu, it must be because of the cold weather these days. At times I feel like doing different crafts, so I sat down for a while with sheets of paper and markers and started to draw some things. Among them this phrase that I am going to show you today. After I drew the phrase I let it dry. I thought I wouldn't do anything with it. Then it occurred to me to mount it on a cardboard base and I made this little gift box.
Materials:
✨ Recycled cardboard box (from light bulb).
✨ Plain Foami.
✨ Scissors.
✨ Glue.
✨ Height stick.
✨ Iron.
✨ Phrase drawn and cut out.
✨ Stamped paper tape.
PROCEDURE:
✨ I started by lining the cardboard box with foami. To do this I mounted on the foami the little box, measured, cut and glued taking care that the foami was fixed without deforming the box.
✨ With some pieces of red foami I made a little flower that I then mounted on the stick. I made some squares of foami, then elaborated four petals on each square. I put these petals through the stick and gave them shape as I glued them.
✨ The elaborated phrase I glued it on a frosted white foami. Then I cut it out just around the edges. I also cut four green foami strips of ½ cm each, with them I lined the height stick where I glued the flower. I also cut out several pieces of green foami in the shape of leaves and put them through the iron.
✨ When I had all the ornaments ready I started to assemble the box to decorate it. I placed the stick (red flower) inside the back of the box. I glued on the bottom of the flower the drawn phrase.
✨ I decorated the outside of the box with the paper ribbon. I added as an additional detail another red flower on the front of the box. Now all that's left to do is fill it with gifts and enjoy them. I hope to continue learning how to make letters. Maybe using the molds they will be much prettier. In the meantime I will continue to save the empty light bulb boxes to give them a second use by making gift boxes.
Thank you very much for your support. All photos are my property. I edited with Polish. I used Deepl translator. See you next time. Blessings. The phrase used says I LOVE YOU.
~~~ embed:1623489101264523264 twitter metadata:MTQyMjQxMzkxNTI3NTgxMjg2NHx8aHR0cHM6Ly90d2l0dGVyLmNvbS8xNDIyNDEzOTE1Mjc1ODEyODY0L3N0YXR1cy8xNjIzNDg5MTAxMjY0NTIzMjY0fA== ~~~
The rewards earned on this comment will go directly to the people( @creacioneslelys, @mariajcastro28 ) sharing the post on Twitter as long as they are registered with @poshtoken. Sign up at https://hiveposh.com.
This is so cute. 😊 The design is so pretty. This is a perfect box for your marking pen.😊
Thanks you 💕🙏🤞🎉🙏👏☺️🤗
This is a beautiful creativity, it's looking so nice, thanks for sharing @creacioneslelys.
Thanks you 😃👋❣️
Yay! 🤗
Your content has been boosted with Ecency Points, by @creacioneslelys.
Use Ecency daily to boost your growth on platform!
Support Ecency
Vote for new Proposal
Delegate HP and earn more
Decoración y amor unidos, esta genial Lelys, esa rosa esta hermosa y la combinación de colores preciosa. Gracias!✨
🌷 Muchas gracias 🙂
❤️✨