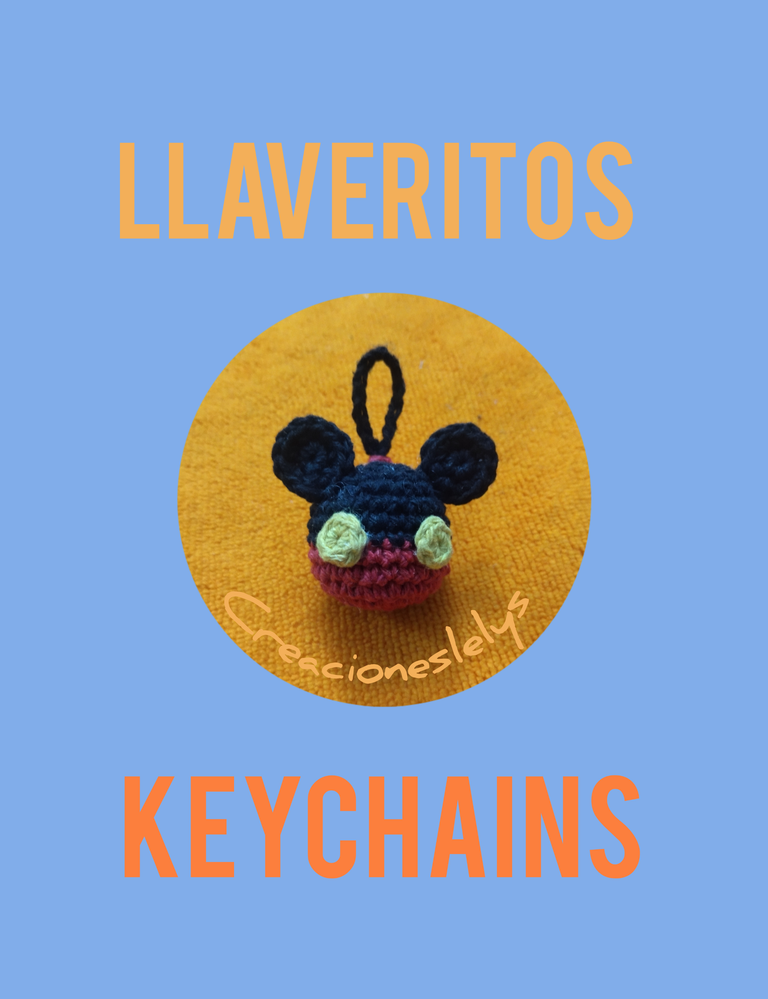
Hola. Feliz día para todos. Yo soy Lelys y el día de hoy quiero presentarles una de mis más recientes creaciones. Se trata de un mini llavero que realicé para una nena que me pidió una figura pequeña para colgar en el cierre de su mochila. Ella me dijo que fuera pequeña, sin destacar ningún personaje en particular. Como tenía restos de hilos de los colores negro y rojo decidí tejerle un Mickey Mouse, creo que se llama así 😱.
Hello, Happy day to all of you. I'm Lelys and today I want to present you one of my most recent creations. It is a mini keychain that I made for a little girl who asked me for a small figure to hang on the zipper of her backpack. She told me to make it small, without highlighting any particular character. As I had leftover black and red yarns I decided to knit her a Mickey Mouse, I think that's his name 😱.
LLAVERITOS PARA MOCHILAS.
KEYCHAINS FOR BACKPACKS.
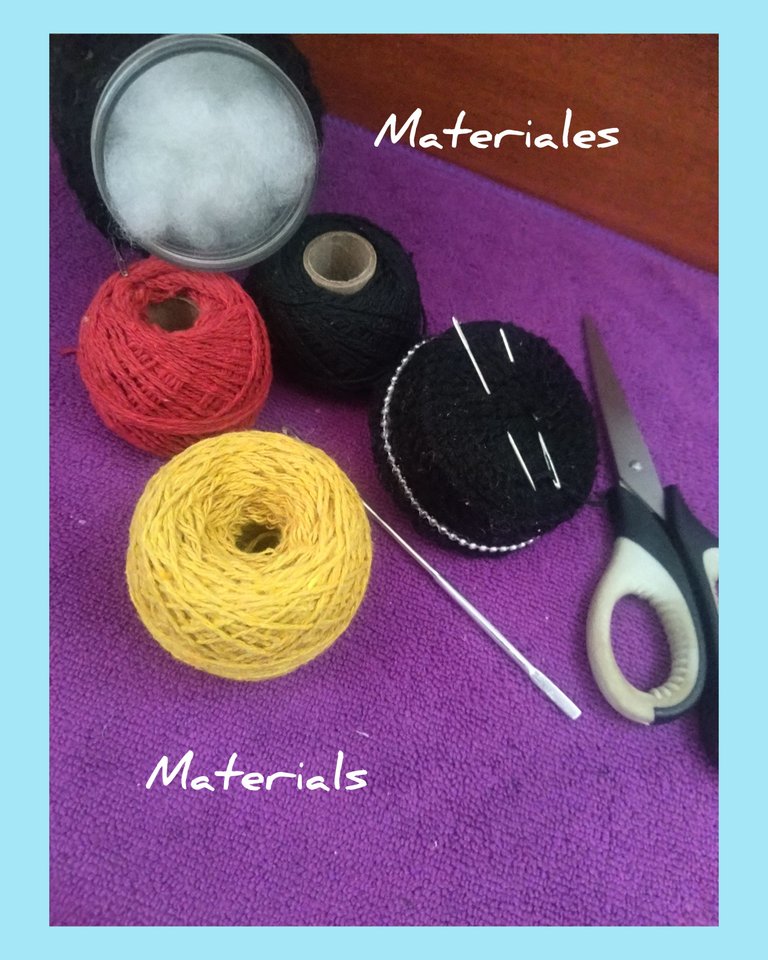
🐝 Para elaborar este pequeño llavero utilicé restos de hilos que tenía de los colores rojo y negro. También utilicé un poco de hilo color amarillo. Tejí con un gancho de crochet de 2,25mm. Usé las tijeras. La aguja lanera y un poco de fibra siliconada para rellenar.
🐝 To make this little keychain I used some leftover red and black yarn I had. I also used some yellow yarn. I knitted with a 2.25mm crochet hook. I used the scissors. The wool needle and some silicone fiber for stuffing.
🐝 El proceso de elaboración es bastante sencillo, puedo recomendar este proyecto para todos los principiantes en el tejido a crochet. Se teje facil y rápido.
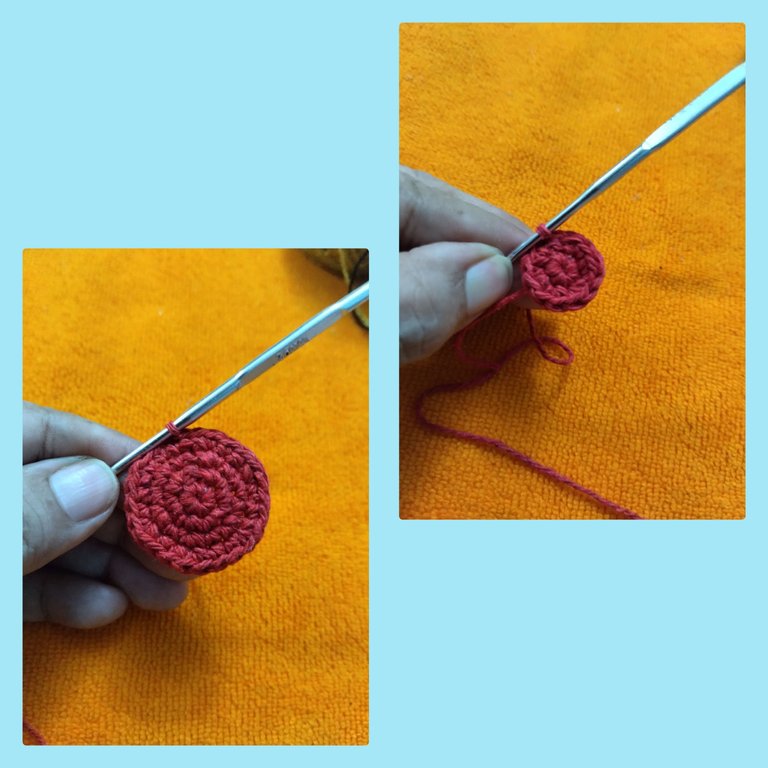
🐝 Empecé tejiendo con el hilo rojo. Inicié desde 6pb en un anillo mágico. Luego tejí una vuelta de 6aum de pb. Seguidamente tejí 1pb-1aum. Después 2pb-1aum. Después tejí dos vueltas de solo pb.
🐝 The process of making it is quite simple, I can recommend this project for all beginners in crochet knitting. It knits easy and fast.
🐝 I started by knitting with the red yarn. I started from 6pb in a magic ring. I then knit a 6aum round of bp. Next I knit 1pb-1aum. Then 2pb-1aum. Then I knit two rounds of single crochet.
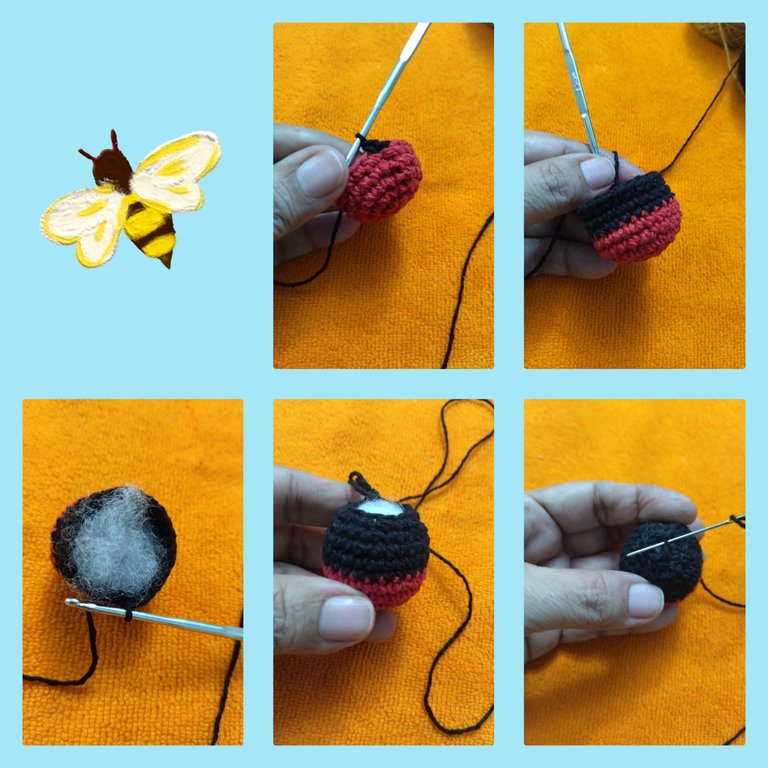
🐝 Luego de las dos vueltas de solo pb en color rojo realicé un cambio de color a negro. Tejí tres vueltas de solo pb en color negro y después empecé a tejer las disminuciones, empezando desde 2pb-1dism y finalizando con 6dism. Antes de realizar esta última vuelta de disminuciones coloqué el poquito de relleno.
🐝 Para cerrar totalmente el tejido me ayudé con la aguja lanera.
🐝 After the two single crochet rows in red I made a color change to black. I knit three rounds of single crochet in black and then started knitting the decreases, starting from 2pb-1dism and ending with 6dism. Before making this last round of decreases I placed the little bit of stuffing.
🐝 To completely close the knitting I helped myself with the knitting needle.
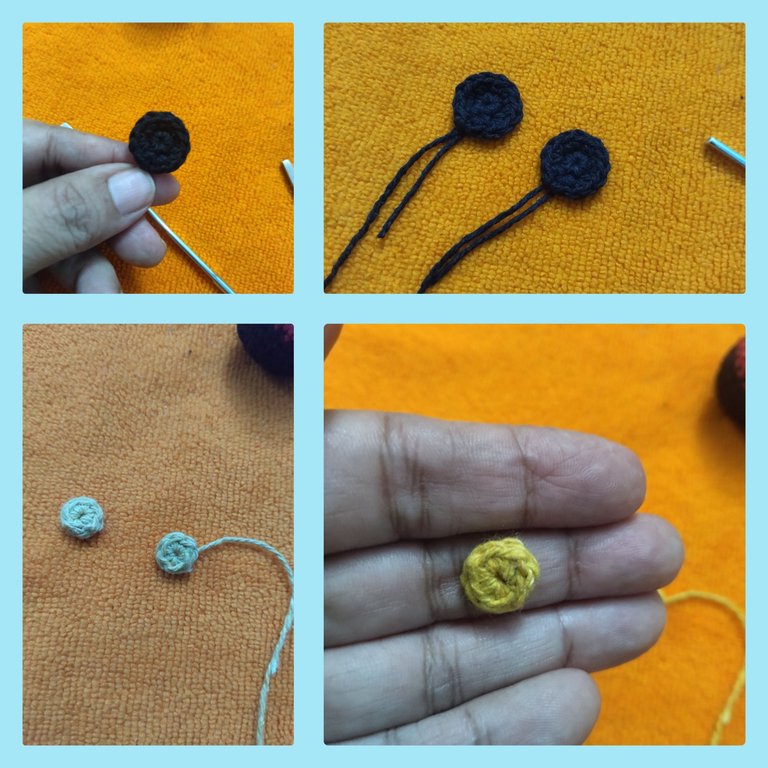
🐝 Corresponde tejer las orejas y los ojos.
🐝 Para las orejas utilicé el hilo color negro. Tejí dos piezas iguales. Inicié con 6pb en anillo mágico. Luego tejí una vuelta de 6aum de pb. Cerré con pd y dejé una hebra larga para coser a la cabeza.
🐝 Con el hilo color amarillo tejí los dos ojos. Inicié con 6pb dentro de un anillo mágico. Cerré con pd y dejé hebra para coser.
🐝 It's time to knit the ears and eyes.
🐝 For the ears I used the black yarn. I knitted two equal pieces. I started with 6pb in magic ring. Then I knit a round of 6aum of pb. I closed with pd and left a long strand to sew to the head.
🐝 With the yellow yarn I knitted the two eyes. I started with 6pb inside a magic ring. I closed with pd and left yarn for sewing.
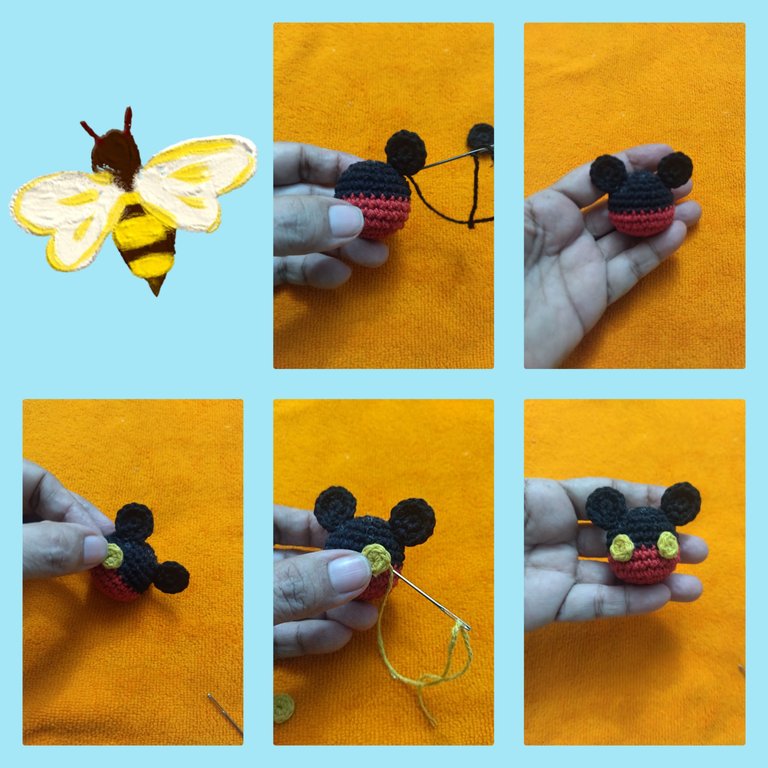
🐝 El siguiente paso fue coser las dos orejas sobre la cabeza del personaje y después coser los ojos. Cómo pueden ver cosí con la aguja lanera para no maltratar el tejido realizado. También puedes usar pegamento en los ojos por ser piezas pequeñas, es a tu elección.
🐝 The next step was to sew the two ears on the head of the character and then sew the eyes. As you can see I sewed with the wool needle so as not to mistreat the fabric. You can also use glue on the eyes because they are small pieces, it's your choice.
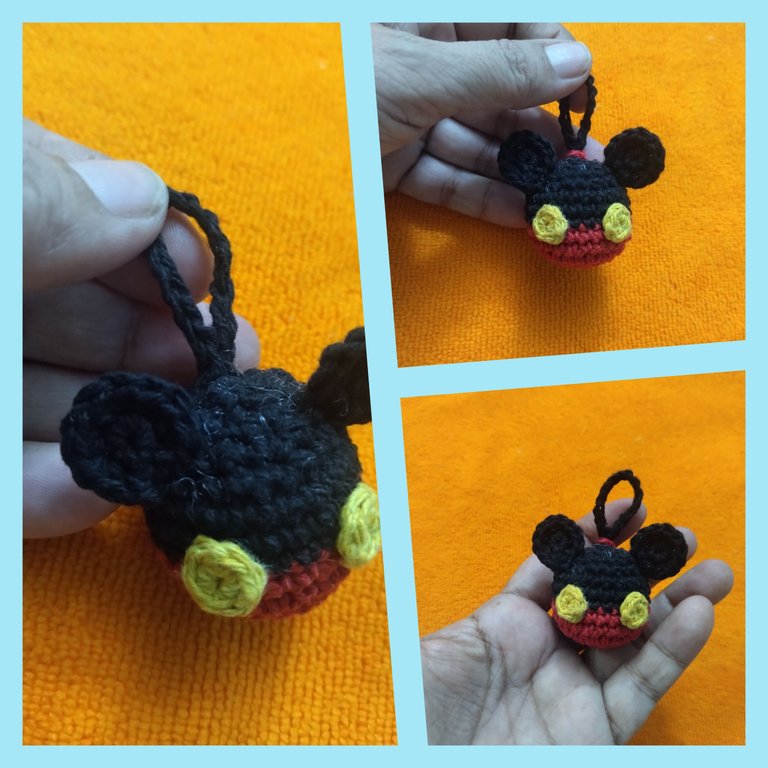
🐝 Para hacerlo llaveros lo que hice fue tejer sobre la cabeza casi en el centro 15 cadenas. Luego cerré con pd y escondí los hilos sobrantes. Con el hilo rojo envolví con dos vueltas el asa tejida e hice un nudito. Y así se ve este pequeño llavero para la mochila de la persona que lo pidió. ¿Qué les parece?
🐝 To make it keychains what I did was to weave over the head almost in the center 15 chains. Then I closed with pd and hid the leftover threads. With the red thread I wrapped with two turns the woven handle and made a little knot. And this is what this little keychain looks like for the backpack of the person who asked for it. What do you think?
Me gusta cuando alguien viene y pide una creación en concreto. Antes había hecho de estás mismas figuras, pero solo para usar como tapaborras, es decir, se le colocan a los lápices para proteger la borra del sucio y evitar que los niños se la lleven a la boca. Este es el primero llavero que hago de Mickey Mouse.
Muchas gracias por el apoyo. Todas las fotos son de mi propiedad. Edité con Polish. Usé el traductor de Deelp. Bendiciones 🙏🏽
I like it when someone comes and asks for a particular creation. Before I had made these same figures, but only to be used as a cover, that is, they are placed on the pencils to protect the eraser from dirt and prevent children from putting it in their mouths. This is the first Mickey Mouse keychain I've made.
Thank you very much for your support. All photos are my property. I edited with Polish. I used Deelp translator. Blessings 🙏🏽
Creatividad y más creatividad, que cosita más linda y hasta para decorar, me encanta siempre ver el proceso. Que termines super bien el día, buenas noches!!🤗
Buenas noches 💖 para ti también. Que descanses mucho amiga.
😘
Ay pero que cositaaaaaaaaa mas cute!!!!! 😍
Muchas gracias 🫂
que lindo, está genial como quedo!
how cute, it's great how it turned out!
Hola. Me alegra que te guste ☺️ muchas gracias.
Your post is very detailed and engaging. The creativity and effort put into this are truly commendable. Thanks for sharing this inspiring content.
selected by @stevenson7
Thank you so much for the support. I like to share my creations with you. 🫂
Well done, nice work
Thank you 🙋
Thanks to You