ENGLISH
Hello my friends, I am pleased to greet you and wish you a happy and prosperous new year. I would like to share with you the step by step process during the creation of a tool that can be used both by professionals and housewives, because as you will see below, it can be used for many purposes.
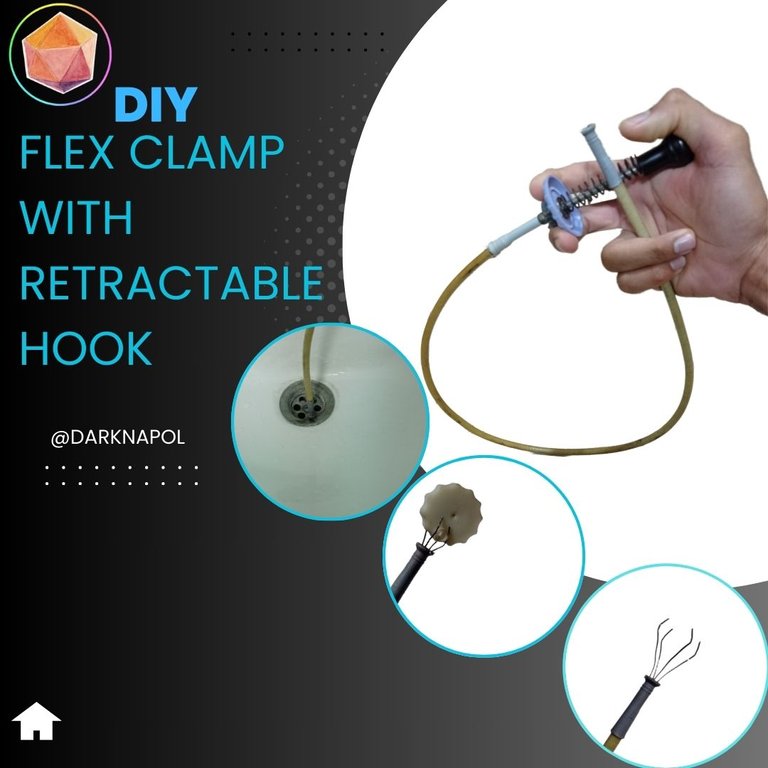
The tool I'm talking about is a flex clamp with retractable hook with which you can reach objects in hard to reach places, as well as remove blockages from the sink, toilets, pipes, sinks, etc.. It is undoubtedly a tool that facilitates the solution of many problems at home or at work.
For the construction of this tool I was inspired by one of the tweezers in my electronic suitcase, which is a kind of pen with a retractable hook to grab small objects in inaccessible places, when I saw it I got the idea and automatically did a search on the internet to see if there was something similar and at the same time take some ideas and adapt them to what I had in mind. During my search I discovered that there are indeed several types of these flexible tools with hooks, and they are marketed in online stores. In my country we don't have access to this type of stores, so I decided to implement the idea using recycled materials and in the following I will describe the step by step during the creation of the tool.
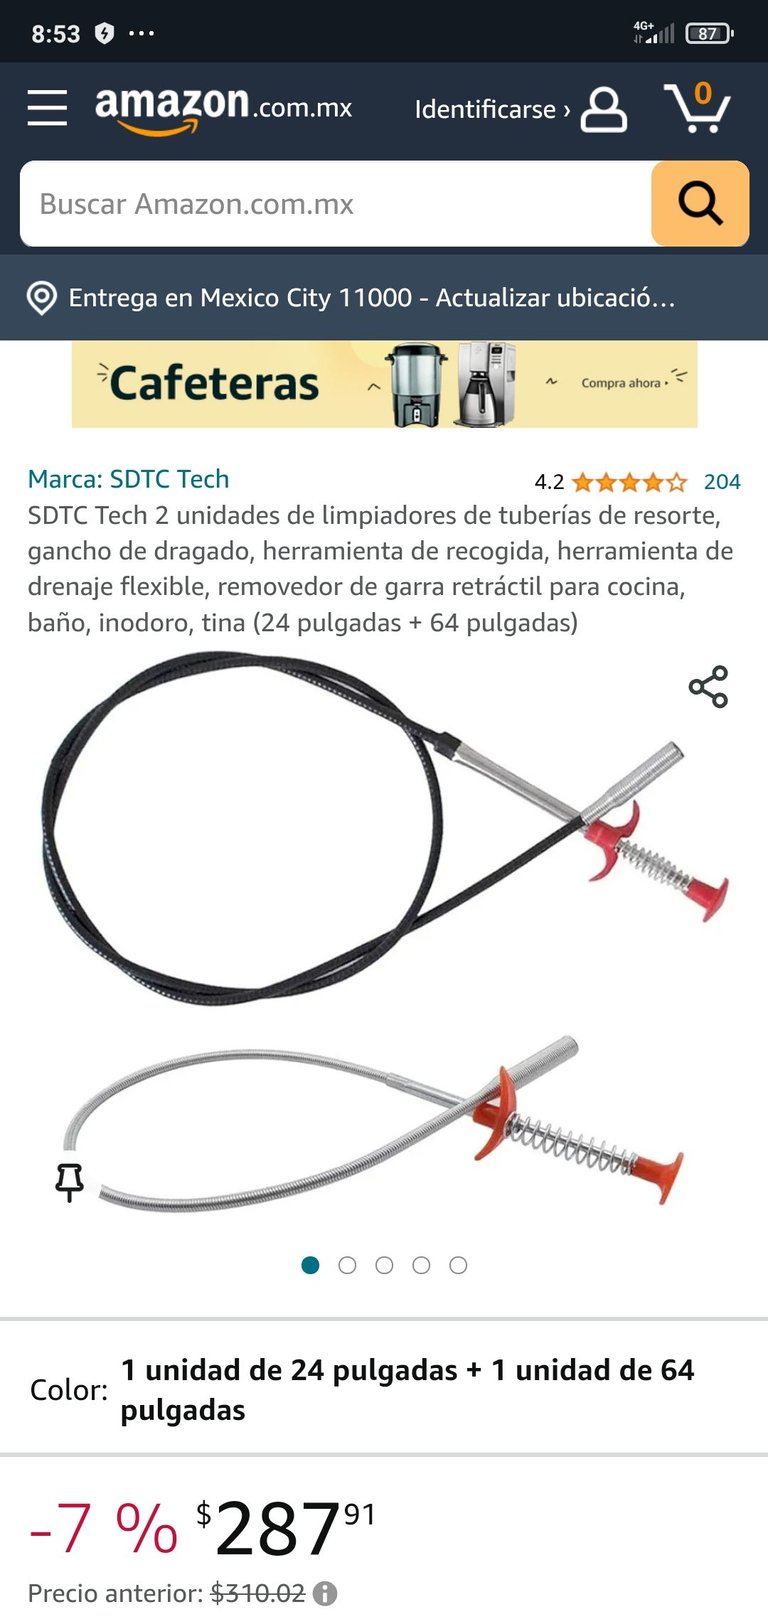
Screenshot of my phone showing the sale of a retractable hook flex clip in an online store.
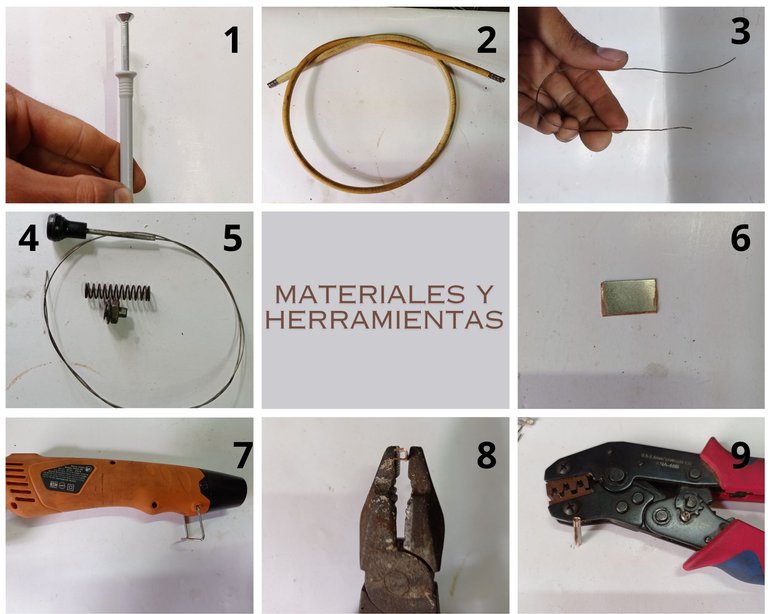
Recycled materials and tools.
1 - 8x120 mm. shock block.
2 - 90 cm length of sheath or hose for motorcycle brake cable.
3- 25 cm section of steel wire, extracted from the multi-wire motorcycle brake cable.
4- Car choke cable.
5- Spring.
6- Copper sheet of 1 x 1.5 cm.
7- Heat gun.
8- Pliers.
9- Crimping pliers for terminals.
STEP BY STEP
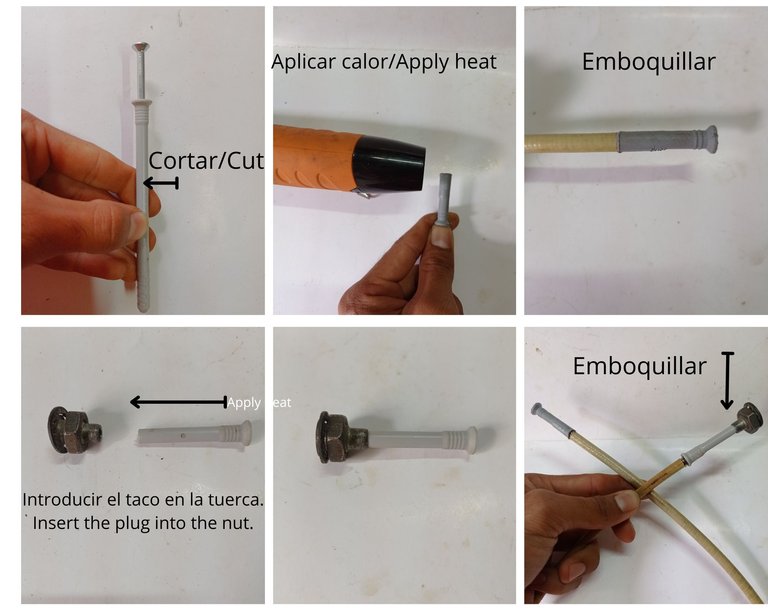
- First, I cut two lengths of the lugs, one of 5 cm and the other of 6 cm.
- I applied heat to the dowels with the heat gun to crimp the ends of the brake cable sleeve.
- The 6 cm dowel I inserted it into the car choke cable plunger fixing nut to guide the plunger.
- The next step was to cut four lengths of steel wire (it is necessary that this wire be steel, as it has greater elasticity), each length being 6 cm long.
- I cut a copper sheet of 1x1.5 cm, whose function will be to join the four sections of steel wire with the steel wire of the choke.
- With the help of pliers and crimping pliers I gave a cylindrical shape to the copper sheet.
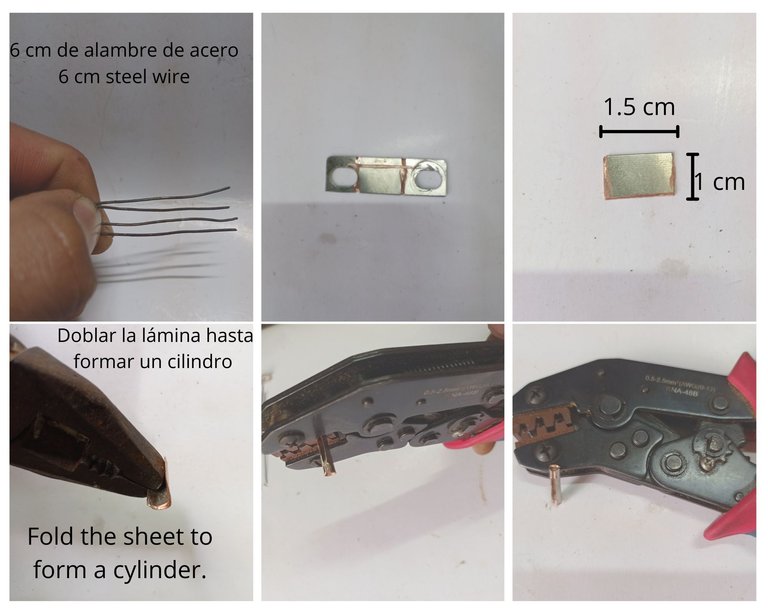
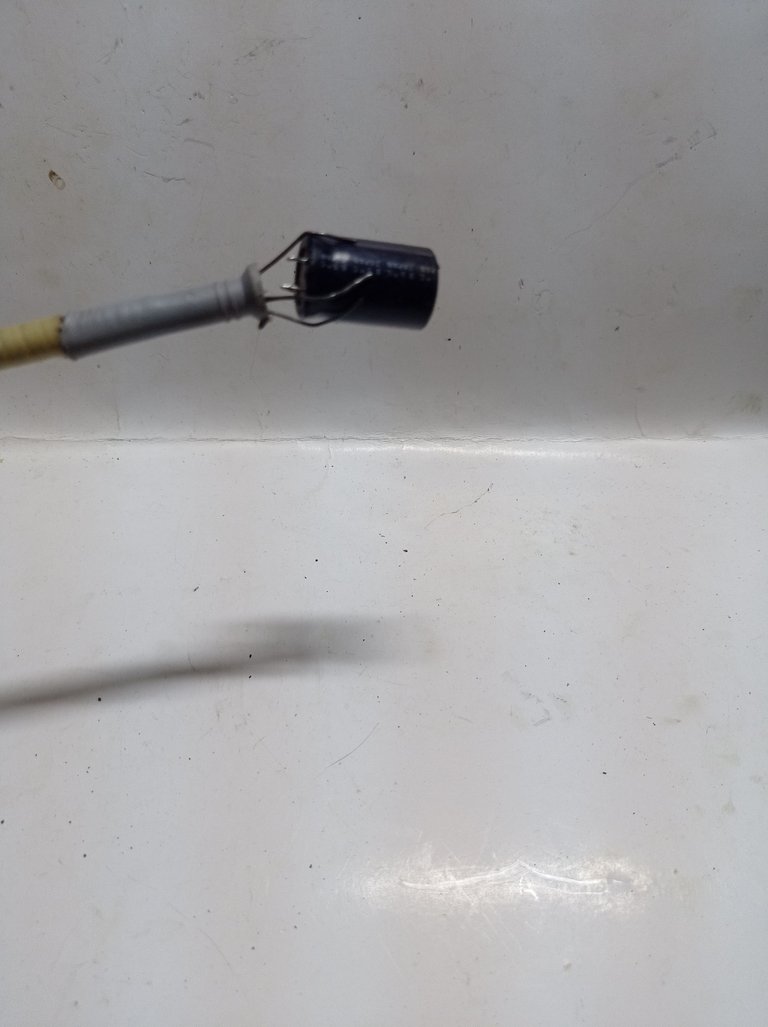
- At one end of the cylinder I inserted the four lengths of steel wire and then with the crimping pliers I crimped them .
- At the other end of the cylinder I inserted the choke wire and also crimped it, in this way I was able to splice the four lengths of steel wire with the main wire.
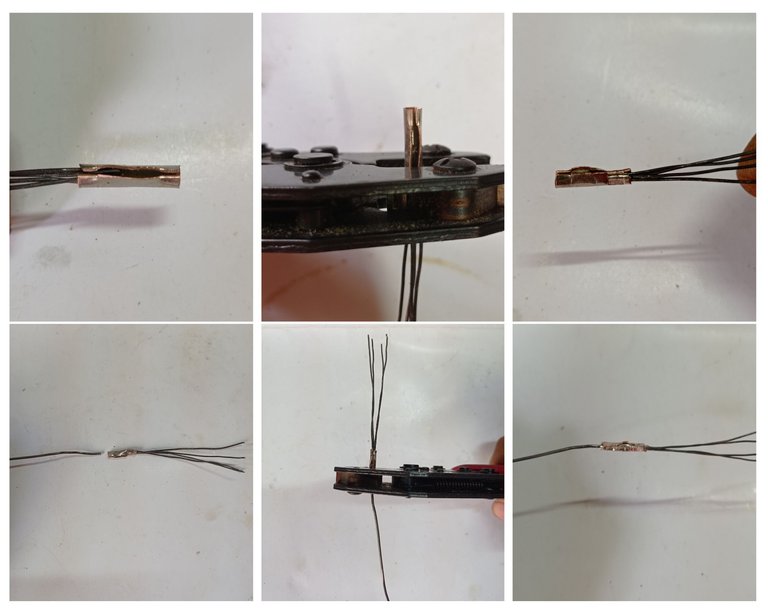
- After splicing the wires, I inserted them through the spring and the sheath.
- At the opposite end of the sheath, the four ends of the wires must be arched and separated so that they are equally spaced apart.
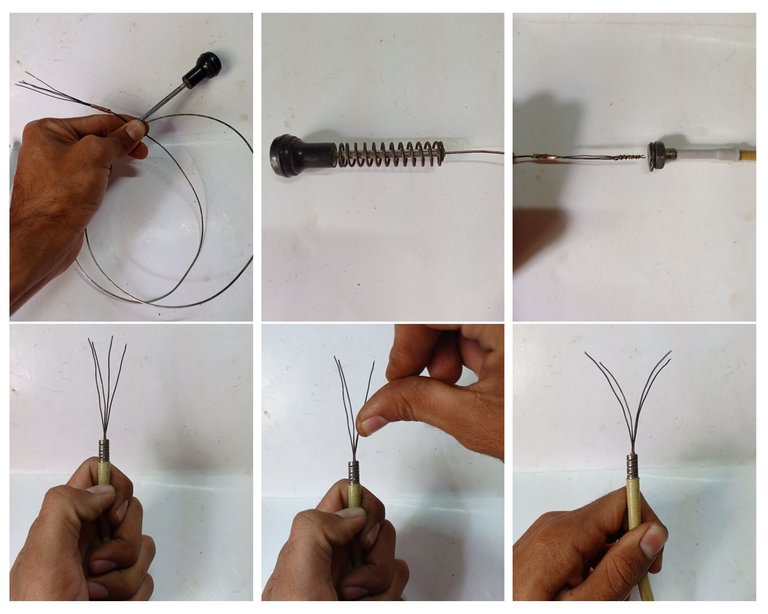
- With the help of pliers, the ends of the wires are bent to form a four-point claw.
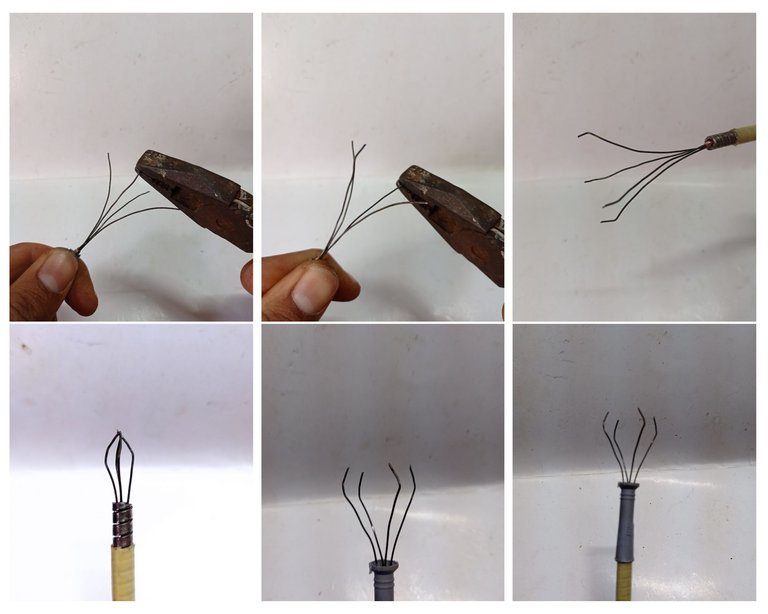
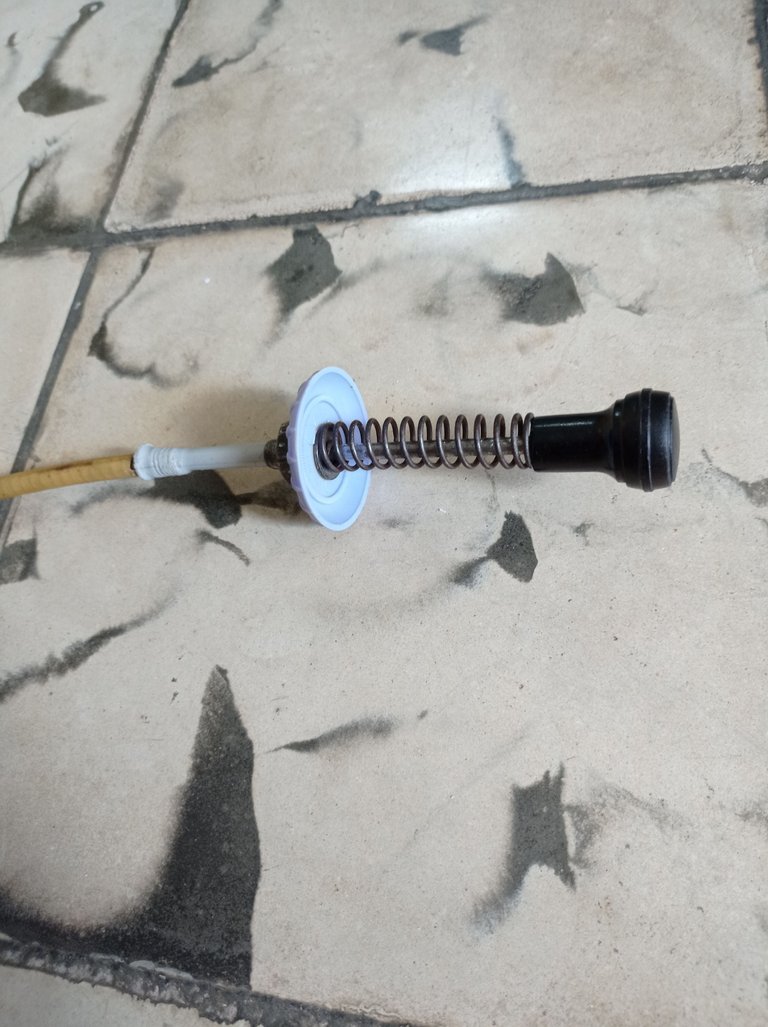
Well, after having done all the previous process, the next thing was to test the operation of the clamp and although it worked as expected, I had to add one more piece to improve the comfort during its use.
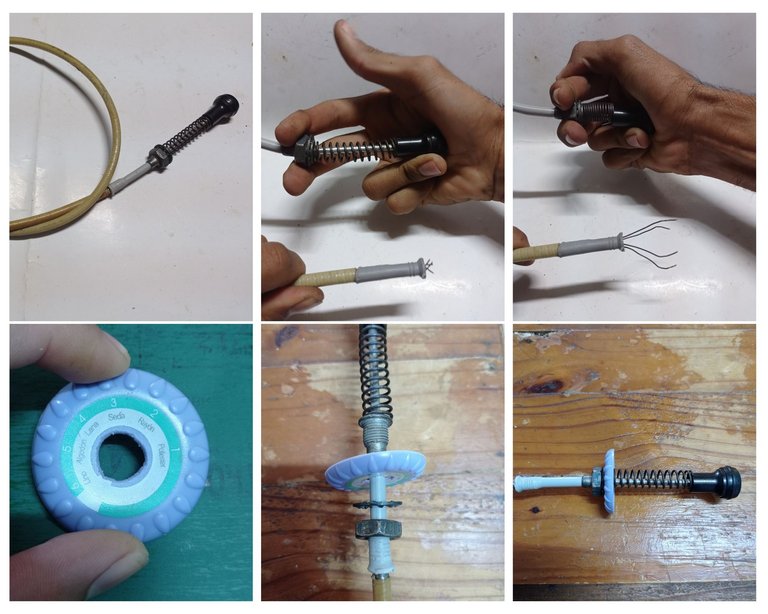
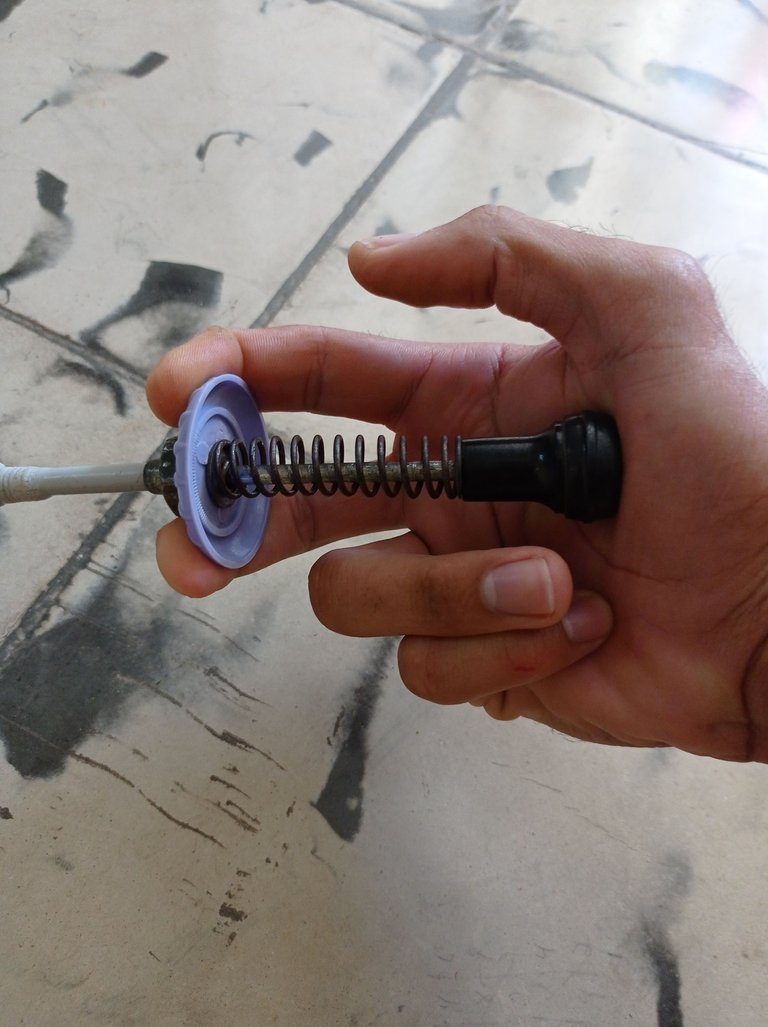
In the first three photos you can see how it looked initially, but for a better comfort I added a recycled piece of an iron, which can be seen in the last three photos of the collage..
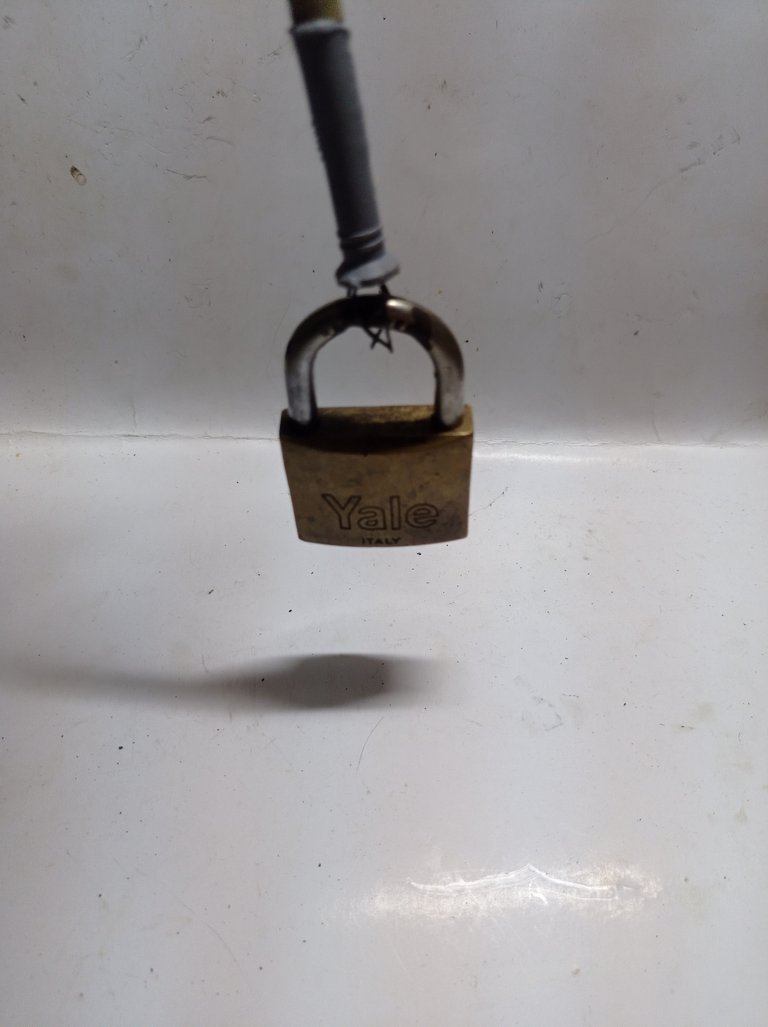
Here are some images where I show the tests I did with some objects; however, as I said, this tool is perfect for removing blockages from pipes.

Well, if someone decides to build his own flex clamp, he can use the materials he has at hand, not necessarily the ones I used, as long as they meet the same objectives, others can be used.
If you have found the publication useful, let me know in the comments, for the moment I say goodbye wishing you a happy new year. See you next time 😉.
The images are of my authorship and were taken with a Xiaomi Redmi Note 9 cell phone.
Images edited in the application "GIF MAKER" and Canva.
Text translated to English in Deepl translator.
You can see me on Facebook
ESPAÑOL
Hola mis amigos, me complace saludarlos y desearles un feliz y próspero año nuevo. Quiero compartir con ustedes el paso a paso durante la creación de una herramienta que sirve tanto para profesionales como para amas de casa, ya que como verás más adelante se le pude dar muchos usos.
La herramienta de la que les hablo es una pinza flex con gancho retráctil con la que se puede alcanzar objetos en lugares de difícil acceso, así como eliminar las obstrucciones del lavabo, inodoros, cañerías, fregaderos, etcétera. Sin duda es una herramienta que facilita la solución de muchos problemas en casa o durante el trabajo.
Para la construcción de esta herramienta me inspiré en una de las pinzas de mi maleta de electrónica, que es una especie de bolígrafo con un gancho retráctil para agarrar objetos pequeños en lugares inaccesibles, al verlo me surgió la idea y automáticamente hice una búsqueda en internet para ver si existía algo similar y al mismo tiempo coger algunas ideas y adecuarlas a lo que tenía en mente. Durante mi búsqueda descubrí que efectivamente existen varios tipos de estas herramientas flexibles con ganchos, y son comercializadas en las tiendas online. En mi país no tenemos acceso a este tipo de tiendas, así que me propuse poner en práctica la idea utilizando materiales reciclados y en lo adelante describiré el paso a paso durante la creación de la herramienta.
Captura de pantalla de mi teléfono dónde se muestra la venta de una pinza flex de gancho retráctil en una tienda online
Materiales reciclados y herramientas.
1- Taco de golpe de 8x120 mm.
2-Tramo de 90 cm de funda o latiguillo para cable de freno de una motocicleta.
3- Tramo de 25 cm de alambre de acero, extraído del cable multihilo para freno de motocicleta.
4- Cable de estrangulador para auto.
5- Resorte o muelle.
6-Lámina de cobre de 1 x 1.5 cm.
7- Pistola de calor.
8- Alicate.
9- Tenaza crimpadora de terminales.
PASO A PASO
- Primeramente corté dos tramos de tacos de golpe, uno de 5 cm y otro de 6 cm.
- Apliqué calor a los tacos con la pistola para emboquillar los extremos de la funda del cable para freno.
- El taco de 6 cm lo introduje en la tuerca de fijación del émbolo del cable del estrangulador para auto, con el objetivo de que sirva de guía al émbolo.
- Lo siguiente fue cortar cuatro tramos del alambre de acero(es necesario que este alambre sea de acero, pues tiene mayor elasticidad) cada tramo con una longitud de 6 cm.
- Corté una lámina de cobre de 1x1.5 cm, cuya función será la de unir los cuatro tramos de alambre de acero con el alambre de acero del estrangulador.
- Con ayuda del alicate y la tenaza crimpadora le di una forma cilíndrica a la lámina de cobre.
- Por un extremo del cilindro introduje los cuatro tramos de alambre de acero y luego con la tenaza crimpadora los crimpé.
- Por el otro extremo del cilindro introduje el alambre del estrangulador y también le realicé un crimpado, de esta forma logré empalmar los cuatro tramos de alambre de acero con el alambre principal.
- Después de empalmar los alambres los introduje a través del resorte y de la funda.
- En el extremo opuesto de la funda se deben arquear y separar las cuatro puntas de los alambres de forma tal que queden separados entre sí a la misma distancia.
- Con la ayuda de un alicate se doblan las puntas de los alambres formando una garra de cuatro puntos.
Bueno, después de haber realizado todo el proceso anterior, lo siguiente fue probar el funcionamiento de la pinza y a pesar de que funcionó como esperaba, tuve que adicionar una pieza más para mejorar la comodidad durante su empleo.
En las tres primeras fotos se aprecia como quedó inicialmente, pero para una mayor comodidad, le agregué una pieza reciclada de una plancha, lo que se aprecia en las tres últimas fotos del collage.
A continuación les dejo unas imágenes donde muestro las pruebas que hice con algunos objetos; sin embargo, como les comentaba, esta herramienta es perfecta para eliminar las obstrucciones de las tuberías.
Bueno, si alguien se decide a construir su propia pinza flex, pude utilizar los materiales que tenga a mano, no necesariamente debe utilizar los que yo empleé, siempre y cuando cumplan los mismos objetivos se pueden utilizar otros.
Si te ha sido útil la publicación déjamelo saber en los comentarios, yo por el momento me despido deseándote un feliz año nuevo. Hasta la próxima 😉.
Las imágenes son de mi autoría y fueron tomadas con un celular Xiaomi Redmi Note 9.
Imágenes editadas en la aplicación "GIF MAKER" y Canva
Puedes verme en Facebook
Wowowo wait a minute, this is a thing that Pudge players in dota 2 will love😅! Anyways well done tutorial.
untitled.gif
,😂 Hello, I'm glad you like it, thank you for stopping by and commenting. Greetings
!DIY
!discovery 30
Hello friend, thanks for the support. Regards
This post was shared and voted inside the discord by the curators team of discovery-it
Join our Community and follow our Curation Trail
Discovery-it is also a Witness, vote for us here
Delegate to us for passive income. Check our 80% fee-back Program
Hello, thank you for your support. Happy New Year to all the team.
You can query your personal balance by
!DIYSTATSHi @stevenson7, thanks for the support, it's a pleasure to be here in the community. Happy new year
This is truly a useful tool to reach places that one might not be able to reach. Nice work.
Yes, indeed this tool will facilitate my work at home. Thanks for commenting, best regards
Congratulations @darknapol! You have completed the following achievement on the Hive blockchain And have been rewarded with New badge(s)
Your next target is to reach 2500 upvotes.
You can view your badges on your board and compare yourself to others in the Ranking
If you no longer want to receive notifications, reply to this comment with the word
STOPCheck out our last posts:
Genial!. Feliz año nuevo.
Gracias amiga por pasar y comentar, Feliz año para ti tambien,