

Hello friends!
Today I am sharing with you my idea of an original and unique jewelry, which you can create with your own hands, having at hand a small number of tools. I came up with such jewelry a few years ago and since then I have tried many variants to make and wear these jewelry pieces. I can say with certainty that such earrings and brooch are practical, perfectly wearable and do not lose their appearance, as well as attract the attention of others and collect a lot of compliments.
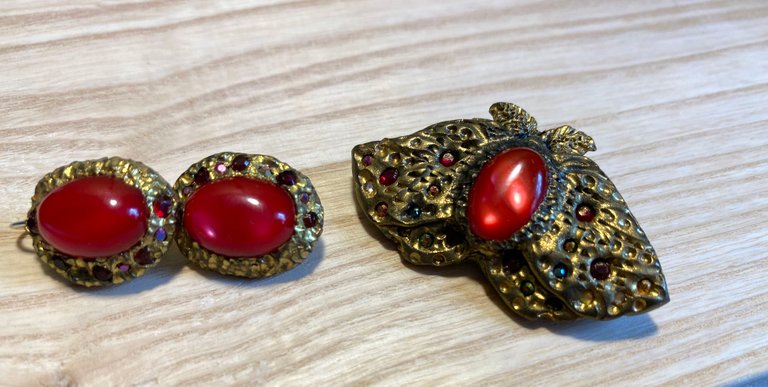
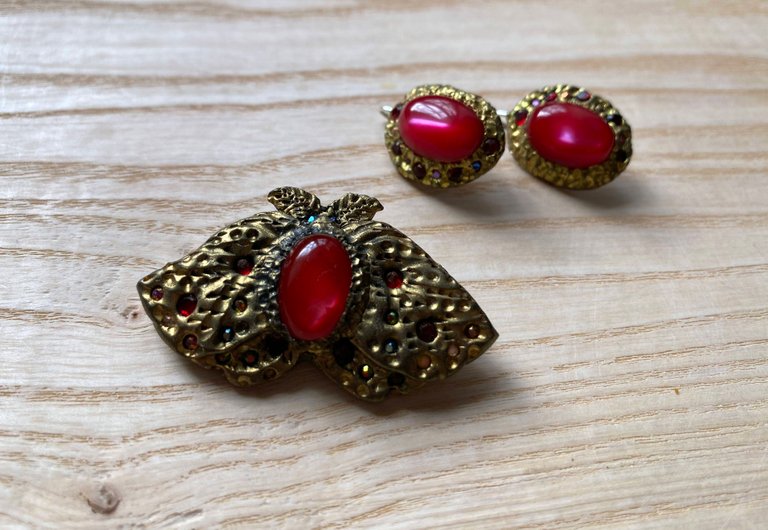
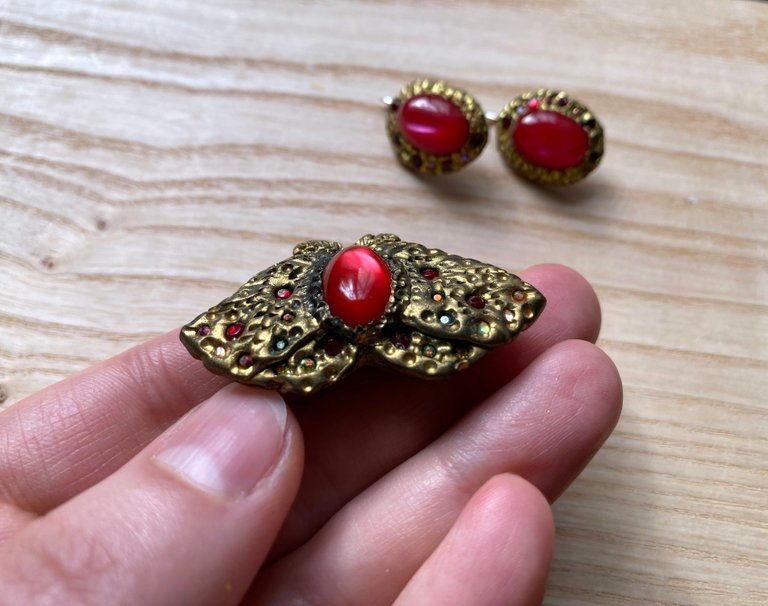
I personally really like this type of earrings and the butterfly brooch to go with them. In the same technique you can make pendants, rings, bracelets - do not limit your imagination.
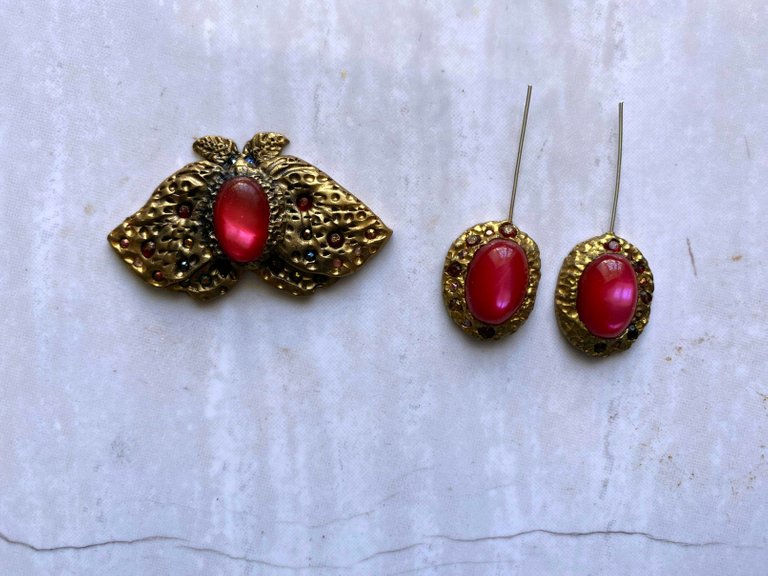
I want to show you as an example, my previous works:
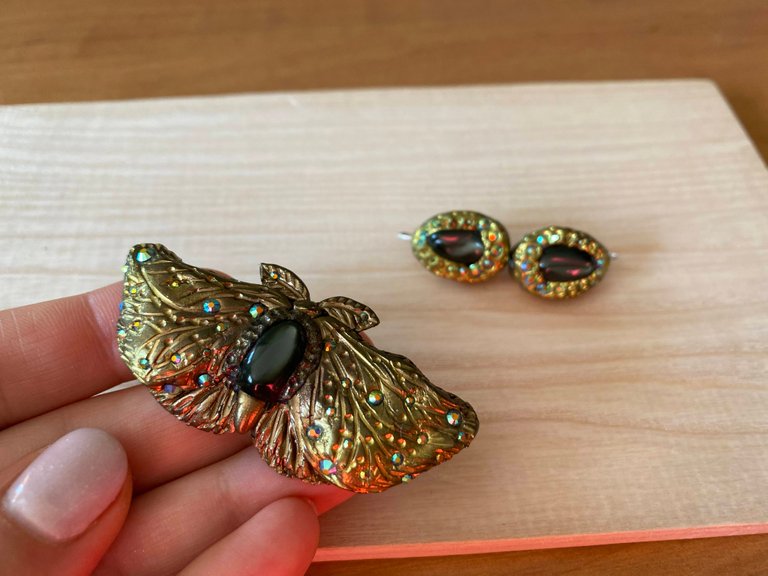
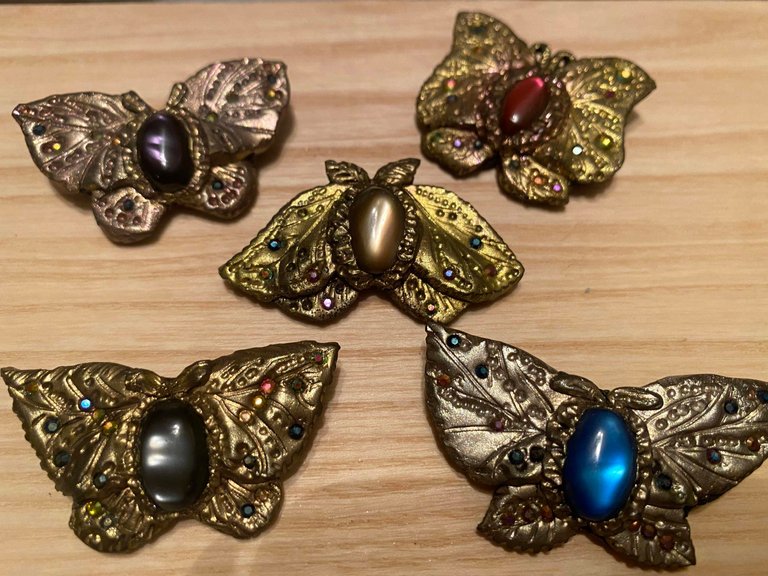

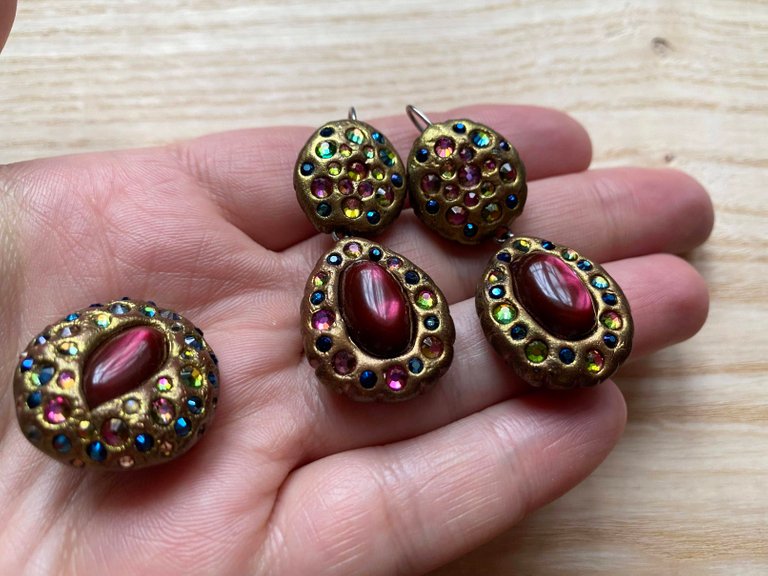
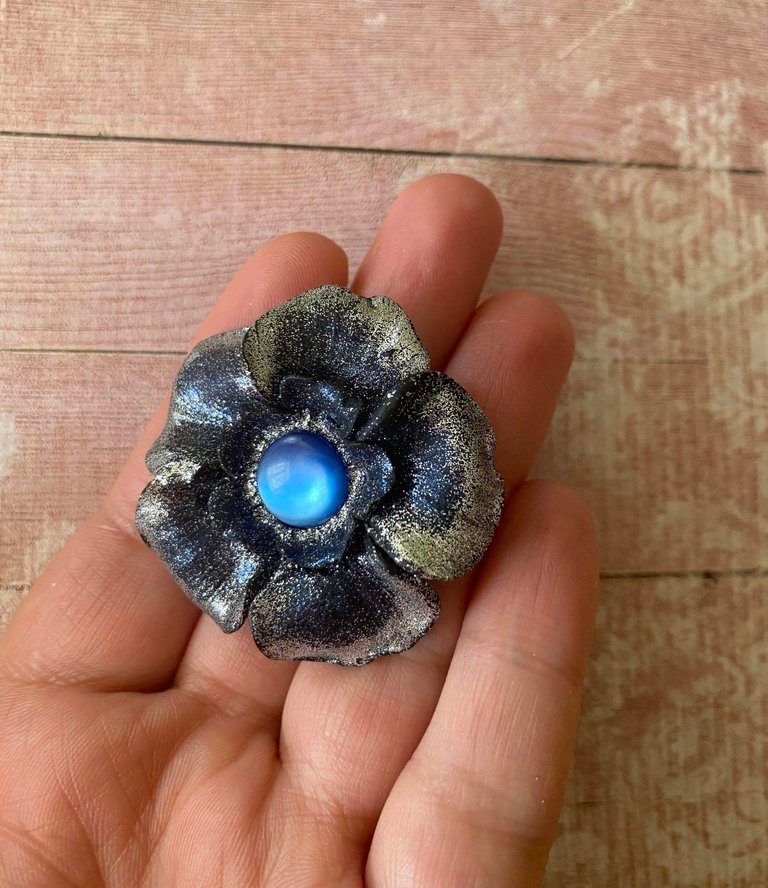

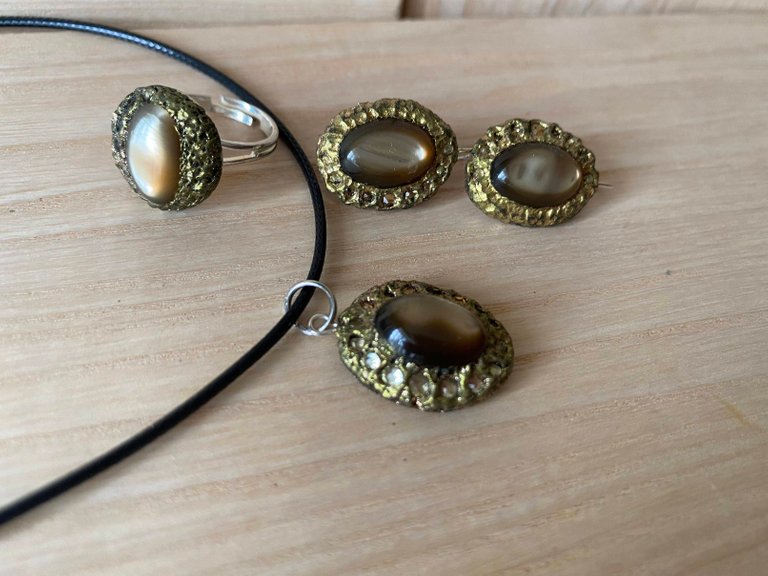
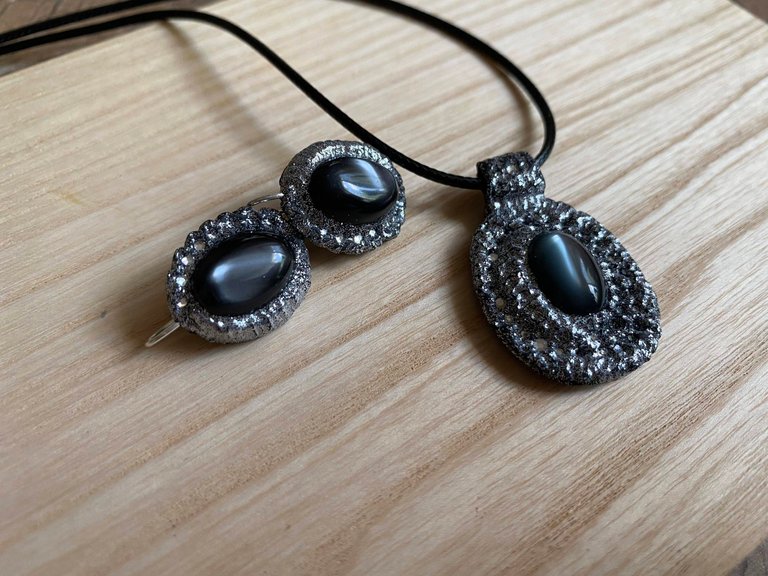
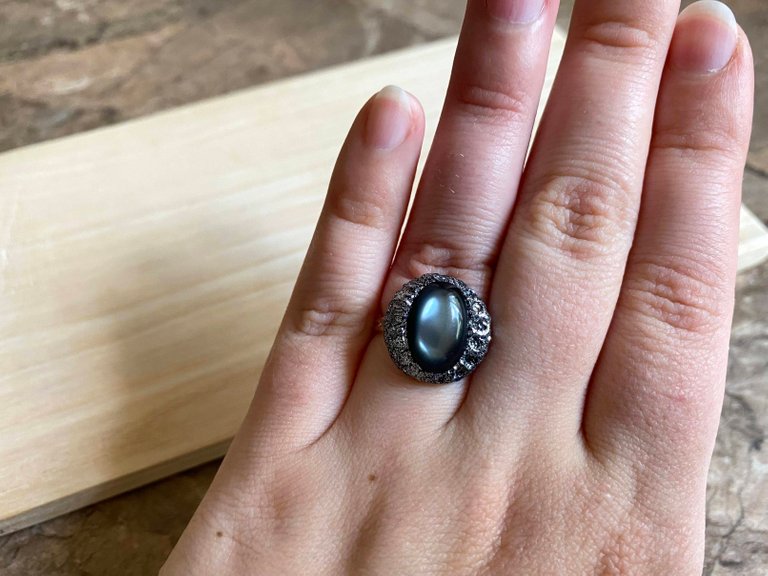
As you can see, you can use different shapes and colors. You can tint with a metallic effect or just leave the color of the polymer clay. You can add rhinestones or make a decoration without them at all, just adding texture.
Required Tools and Materials
You will definitely need polymer clay. You can use almost any brand of polymer clay, for this work there are no special requirements for polymer clay, as long as it is not dried out.
You will also need a centerpiece. I used regular cat-eye buttons for this one. Buttons are good for this because they can be baked in the oven at up to 130 degrees and they don't melt or lose their appearance. You can use buttons, beautiful beads or even semi-precious stones as cabochons.
To work you will need:
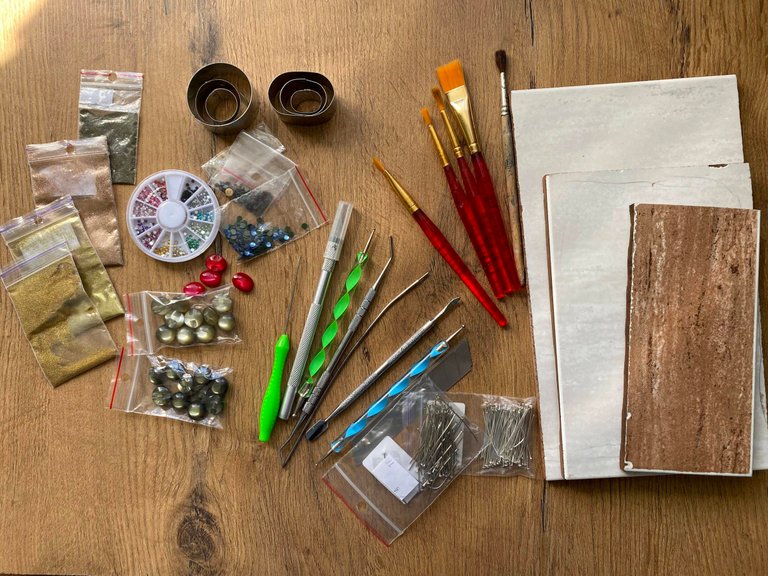
- polymer clay
- work surface (tile, sheet of paper)
- forms (can be replaced with caps from cosmetics)
- rhinestones
- wax pencil or piece of wax
- cabochon (button, bead or something similar)
- brushes
- brilliant pigment for tinting (can be replaced with shadows or sparkles for manicure)
- scalpel or stationery blade
- dots with a drop at the end (can be replaced with a toothpick)
- ring pins or clove pins
- pin-base for a brooch (can be bought at a fabric store)
- rolling pin or pasta machine for rolling plastics
- round nose pliers
- electric oven
Difficulty level: Medium.
Working time: 2-3 hours.
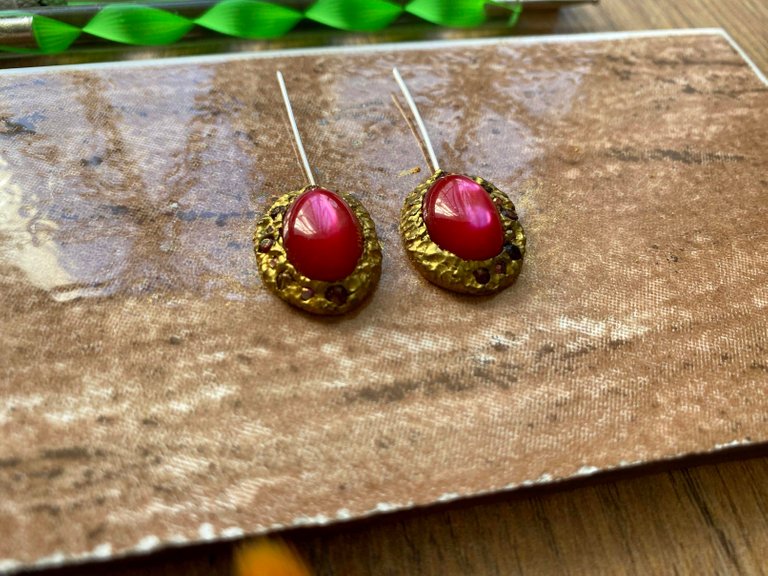
Step 1
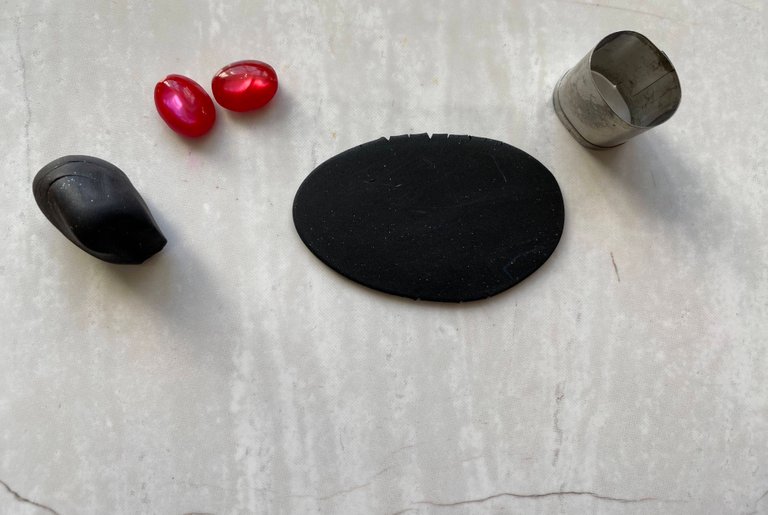

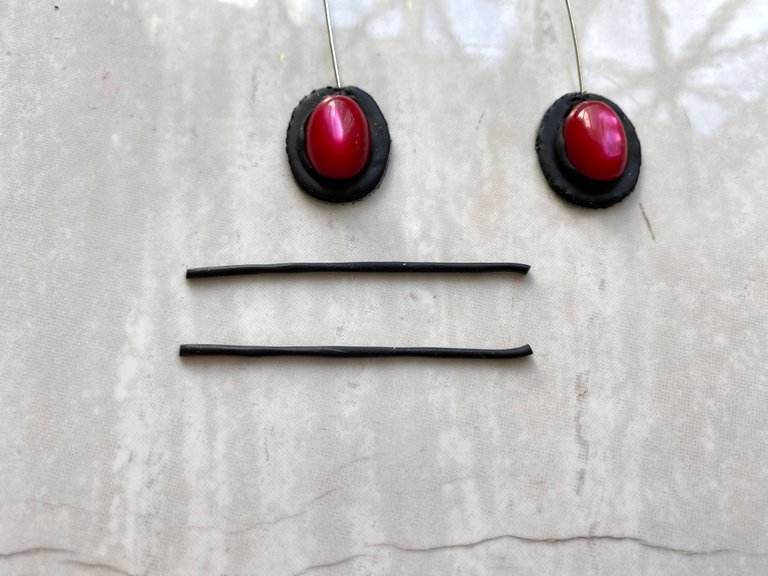
To work on the earrings I took polymer clay in black. To start working, I first kneaded the clay in my hands to make it soft and malleable.
I rolled out the clay layer thickness of about 2 mm. and cut out two oval-shaped blanks for earrings.
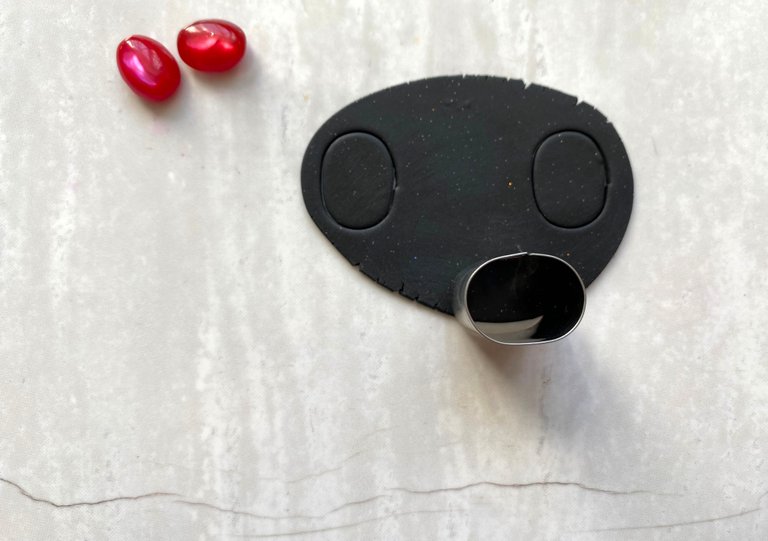
Step 2
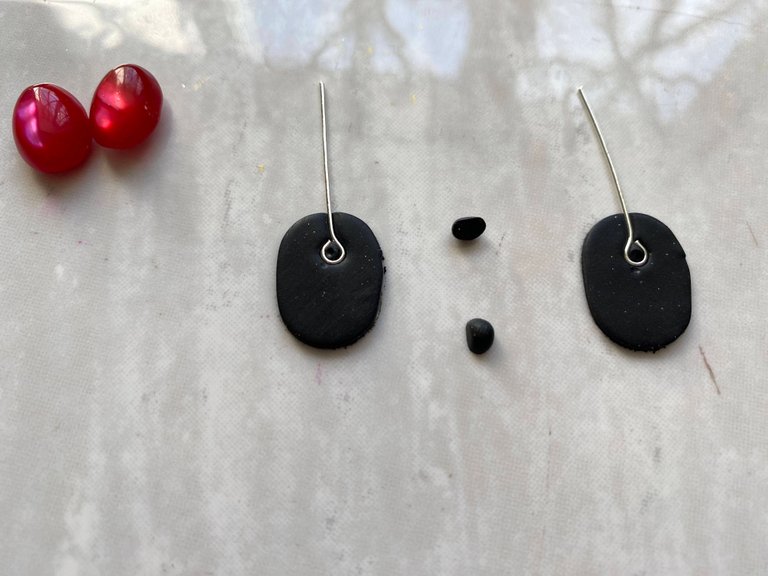
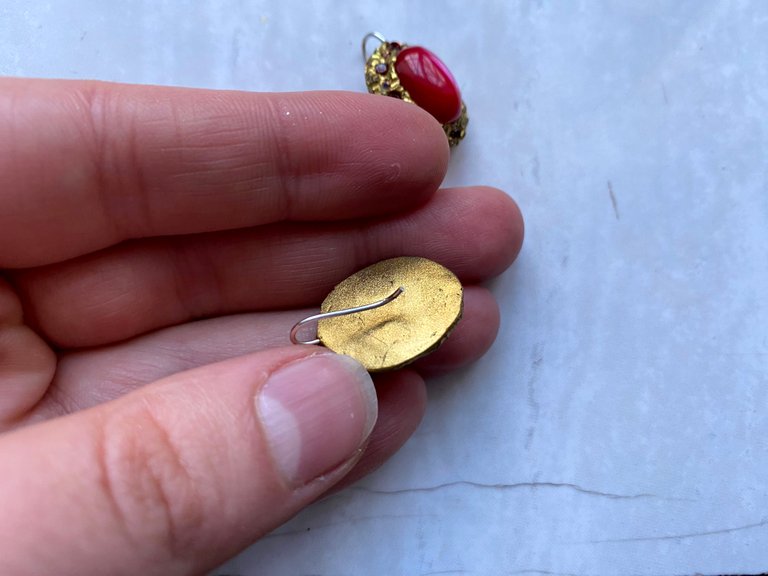
Then I took the pins with an ear on the end and pressed them into the oval blanks. These are the future hooks that will be inserted in the ears, so it is important to fix them well. To do this, I covered the pin ring with black polymer clay, as you can see in the photo.
I also added another small piece of polymer clay and pressed in the red cabochons.
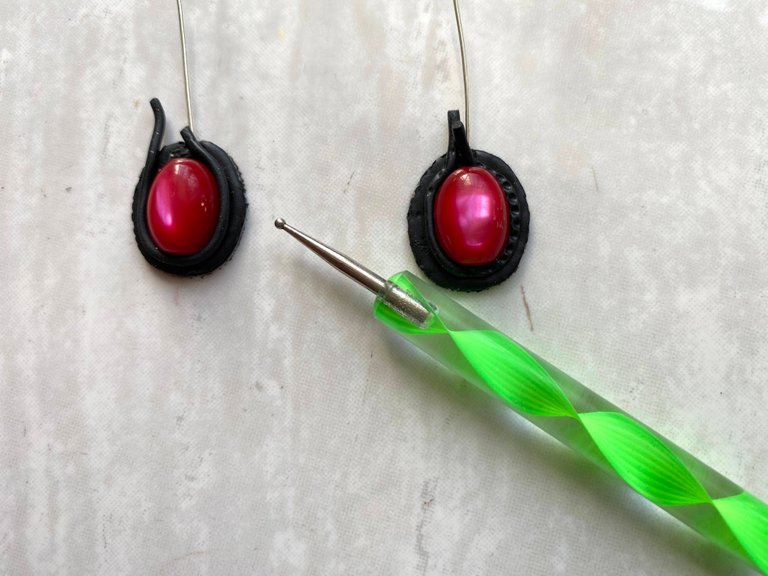
Step 3
I roll out two thin strips of clay and use a tool to wrap them around the red cabochons. I press down well, so that these strips will hold.
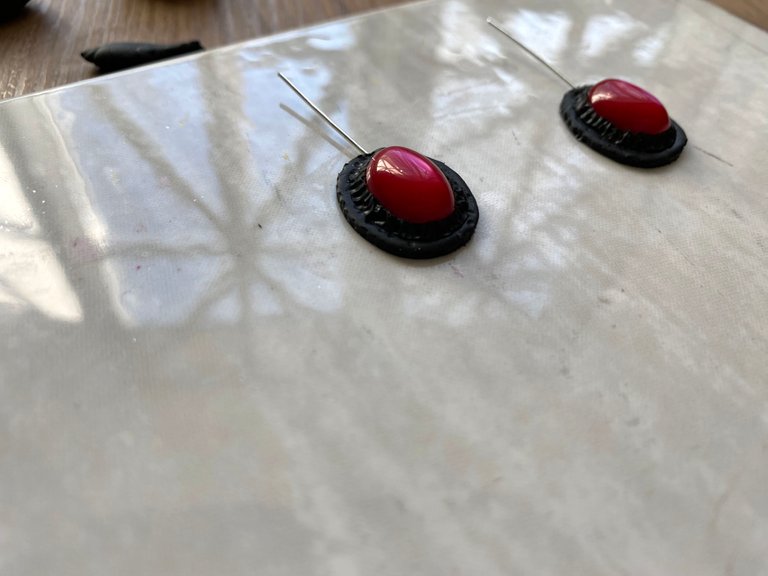
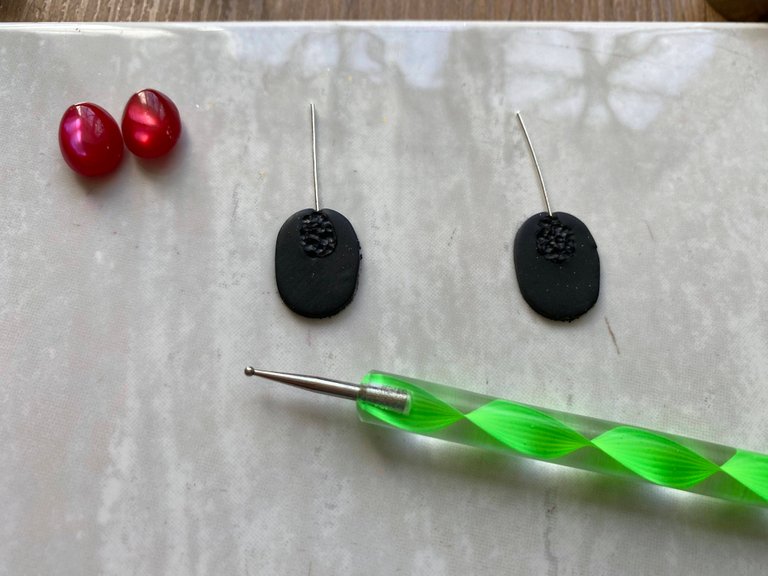
Step 4

I add red rhinestones to one side of each earring. This is easy to do with a wax pencil, you can pick up a rhinestone and move it to the right place.
Step 5
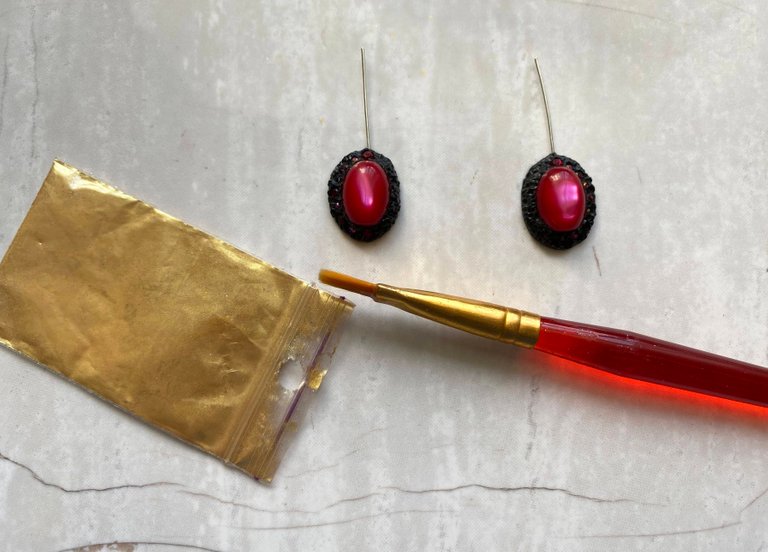
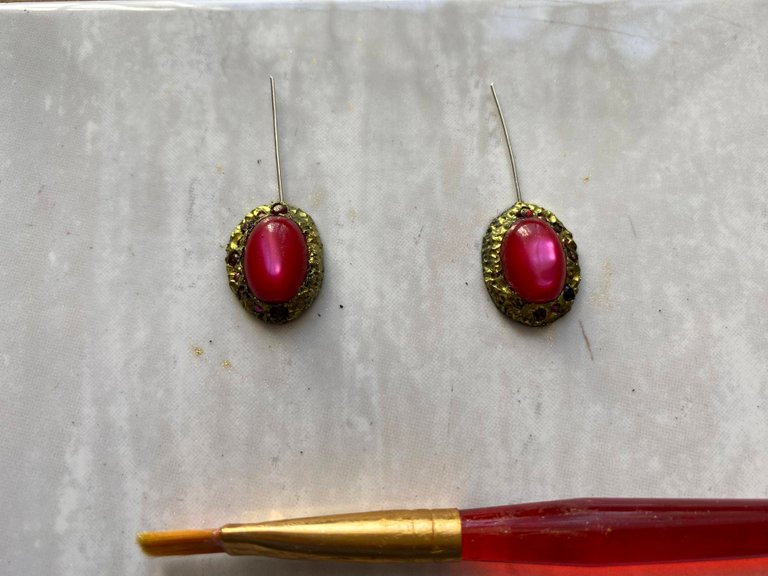
I tint the earrings with gold pigment using a regular brush.
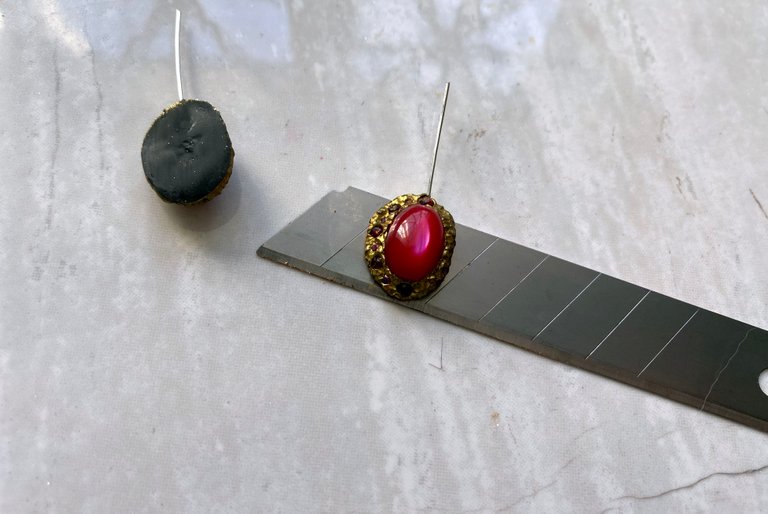
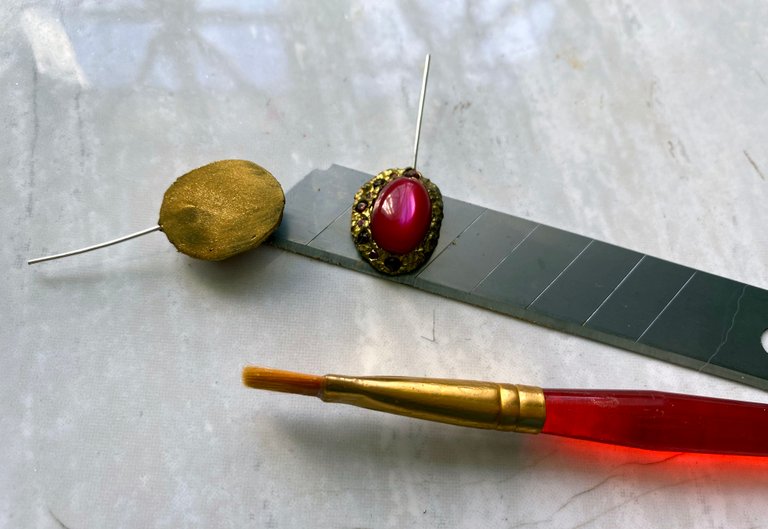
Also, I don't forget about the back side - for this, I carefully remove the earrings from the surface with a stationery blade and also tint them with gold.
The earrings are ready to be baked
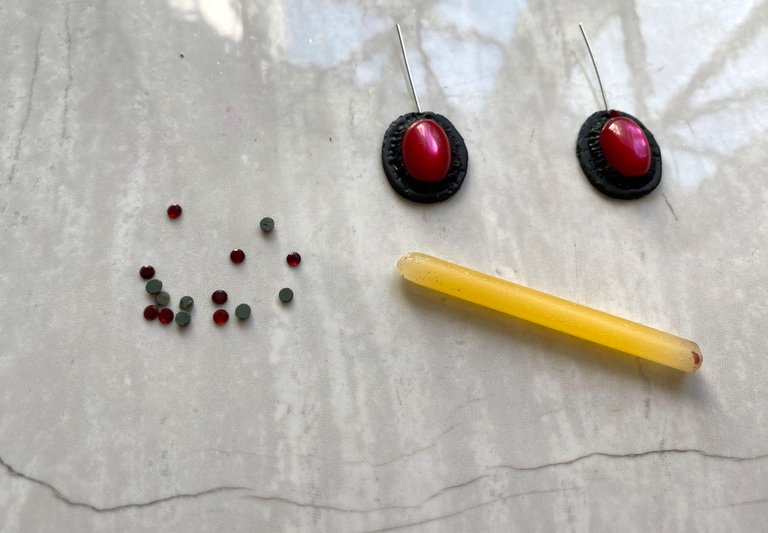
Step 6
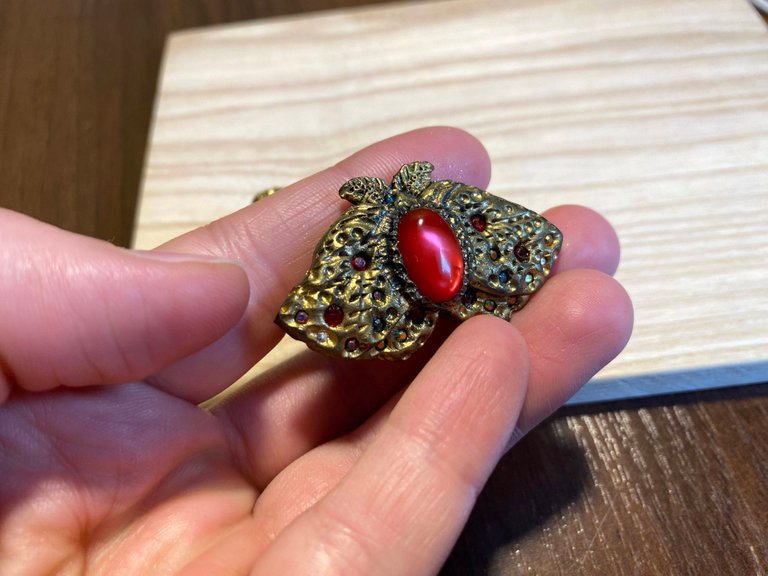
When the earrings are ready I start working on the butterfly brooch

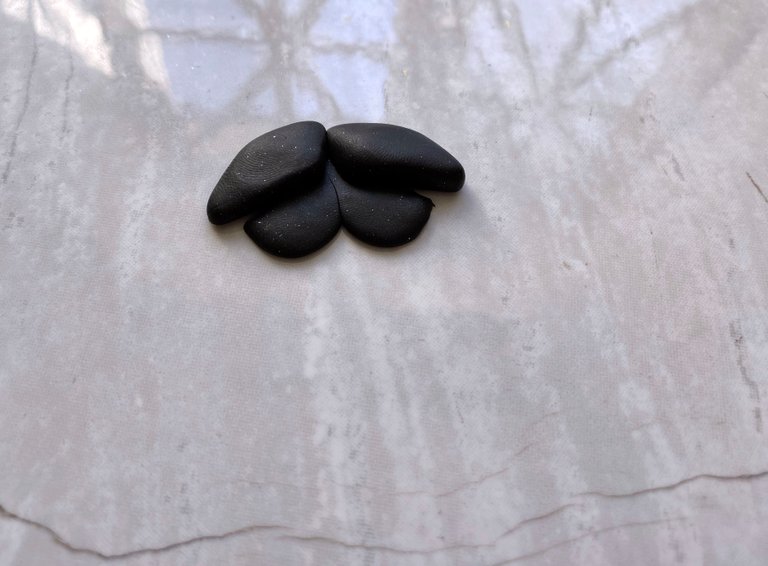

I make the lower and upper wings from black polymer clay. I don't use any blanks or templates, I just mold them by hand.
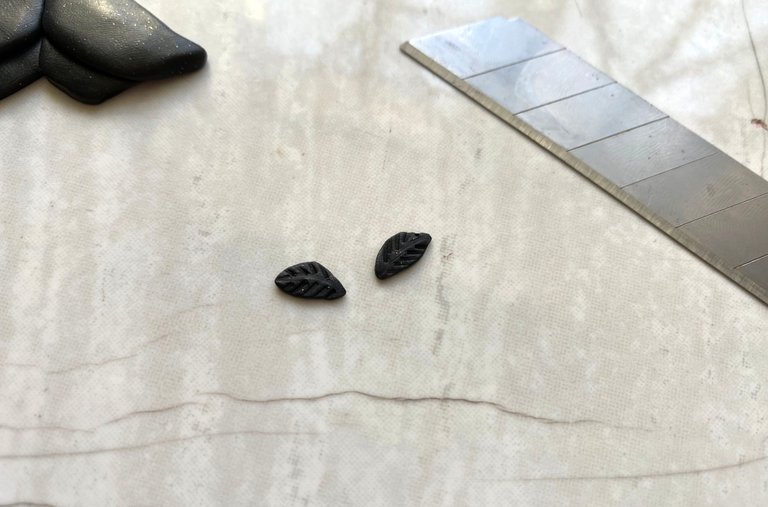
I take two small pieces of clay and put strips on them with the blunt side of the blade - these will be the antennae of the butterfly.
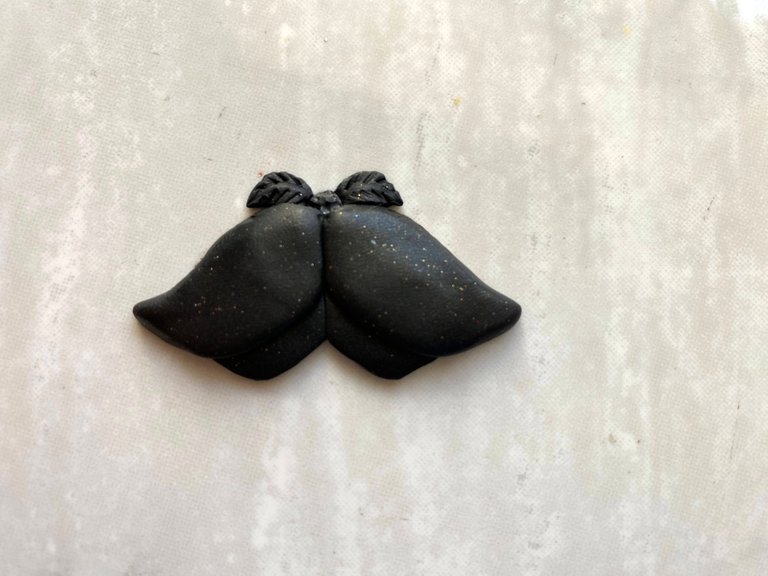
Step 7
I add the same bright red cabochon as in the earrings.

And I "trace" the veins with a dots. I do it randomly, but I try to make the pattern on both wings symmetrical and mirror-like.
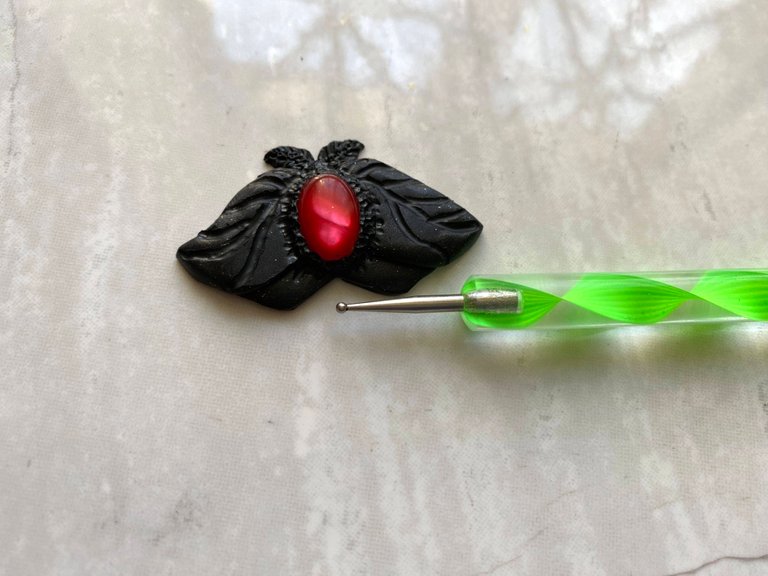
Step 8
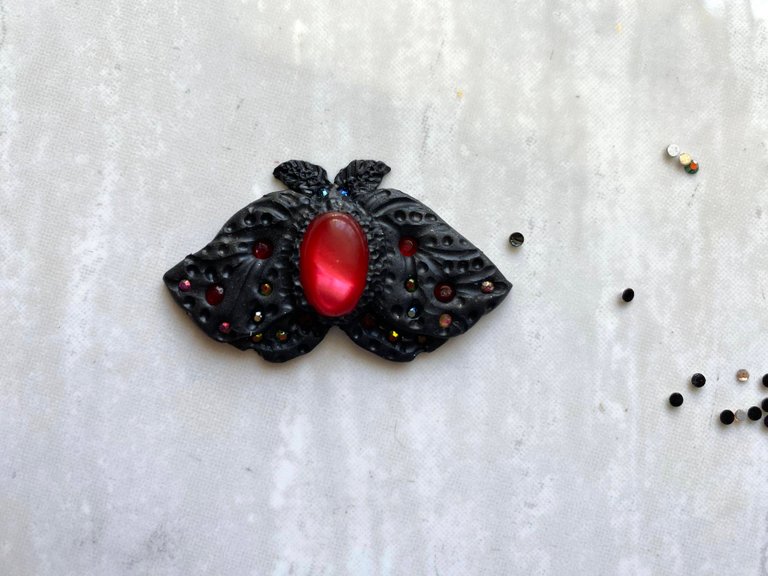

I add rhinestones and tint with gold, just like the earrings.
Now the butterfly and earrings are ready to bake in the oven.
Bake according to the instructions on the package of polymer clay. I bake on a tile, it is very convenient and practical.
IMPORTANT: Always follow exactly the temperature and baking time of polymer clay, which is listed on the packaging. It may vary from brand to brand, so be careful. The strength and durability of your jewelry depends directly on the baking.
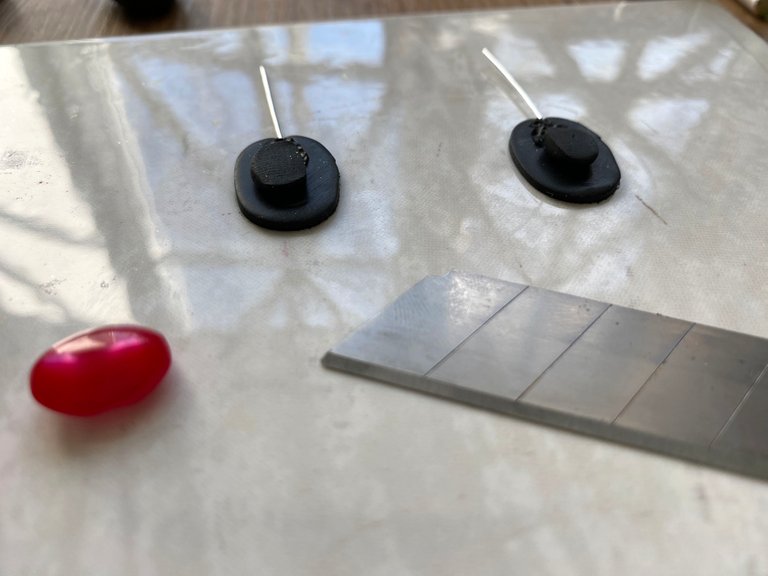
Step 9
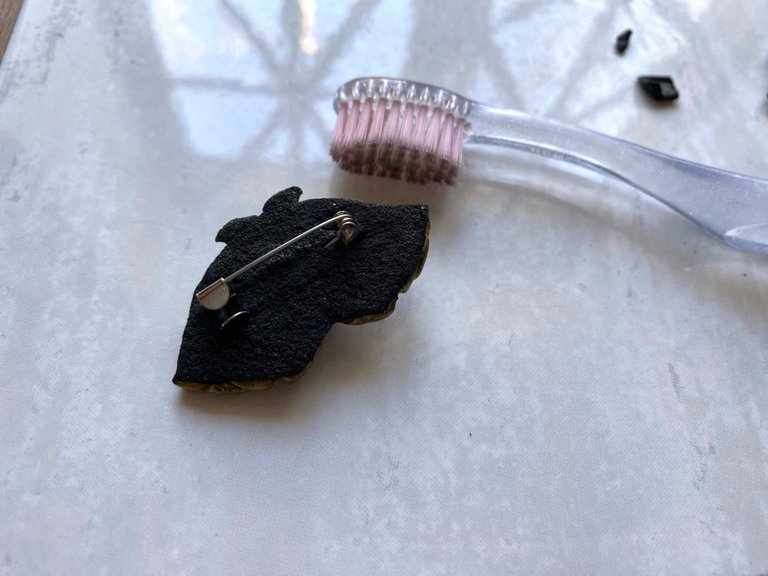
To make the butterfly into a brooch, you need to decorate the back side after baking and attach the pin. To do this, I rolled out a thin layer of black clay, cut holes in it for the pin, and glued the clay to the butterfly.
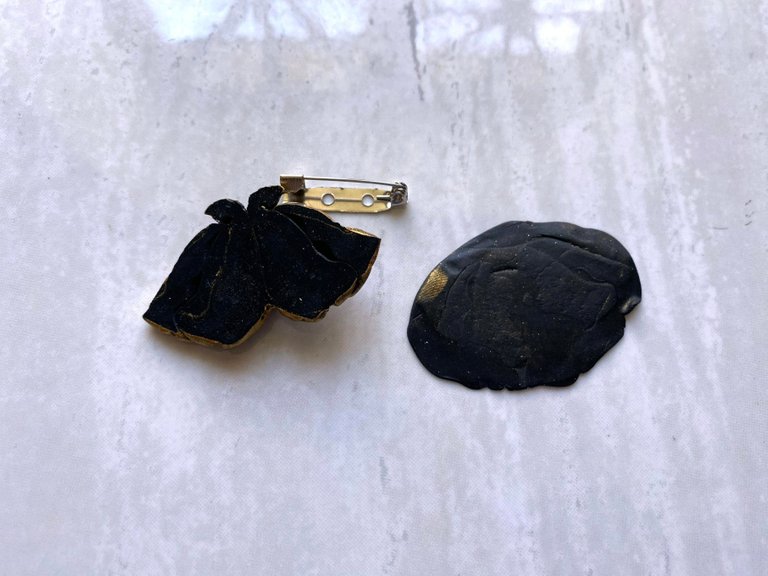

Using a toothbrush, I gave texture and tinted with gold.
After that, I bake the butterfly brooch again in the oven at the same temperature. One of the great things about polymer clay is that the work can be baked several times. This is very convenient because it is impossible to attach a pin to an unbaked butterfly so as not to deform it. And when the front side is already hard, you can safely work with the back side without fear of damaging anything.

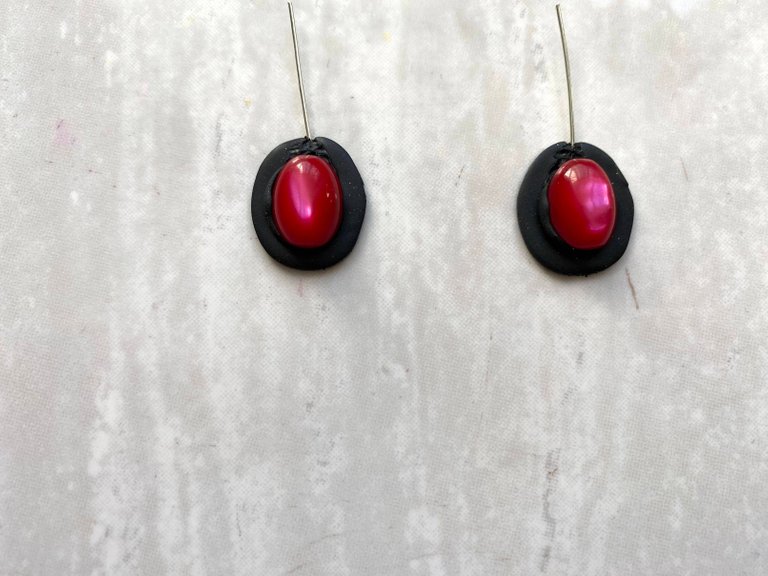
Step 10
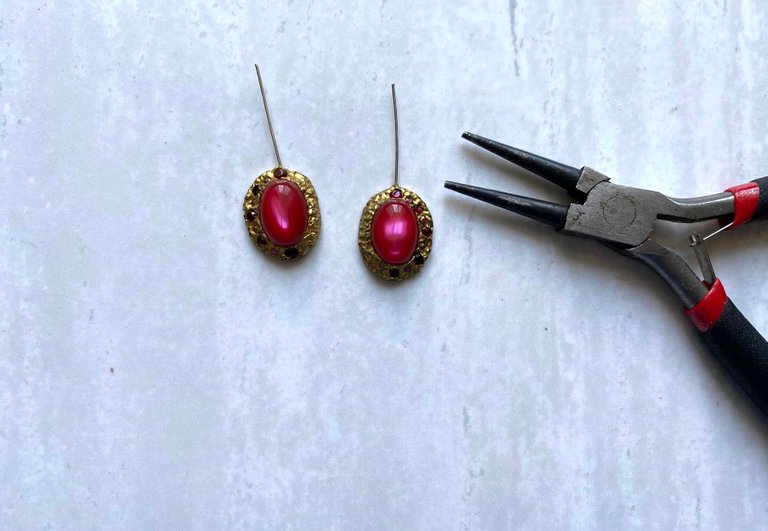

Using round pliers, I bend the pins in the already baked earrings so that they can be worn in the ears.
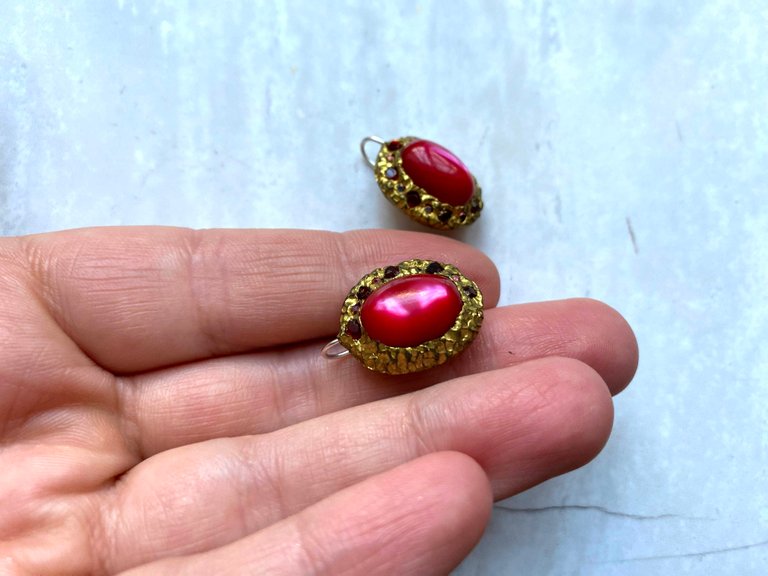
That's it! The earrings and butterfly brooch are ready!
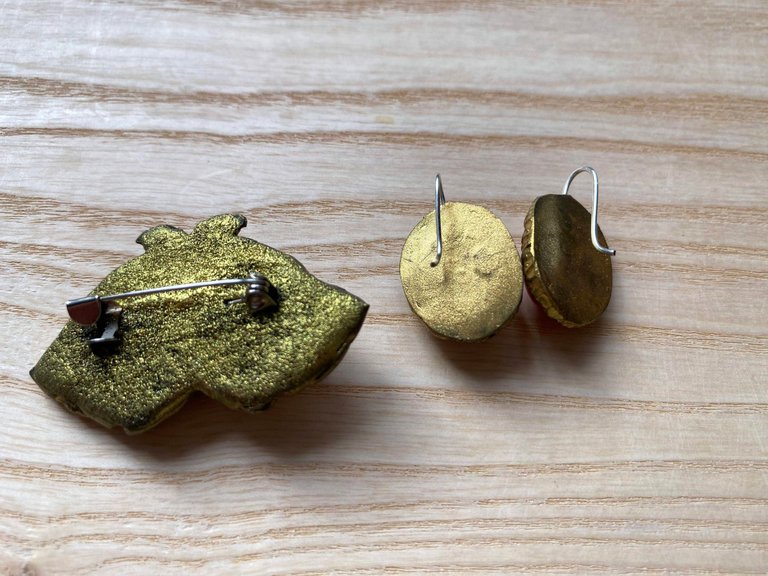
Backside:

Thank you for your attention!
I hope that my idea and workshop will be useful for you!
Best wishes for inspiration!!!
wow, this is so impressive. The detailing and quality is impressive
Thank you so much! I tried very hard to make my article useful so that any reader could understand how to make such an ornament with their own hands.
Thank you for your support! This is very nice for me!!!
!discovery 30
Thank you for your support!
My pleasure 🙂
😊
This post was shared and voted inside the discord by the curators team of discovery-it
Join our Community and follow our Curation Trail
Discovery-it is also a Witness, vote for us here
Delegate to us for passive income. Check our 80% fee-back Program
Thank you!
Your support is very valuable to me!!!
Yay! 🤗
Your content has been boosted with Ecency Points, by @anri-avgustino.
Use Ecency daily to boost your growth on platform!
Support Ecency
Vote for new Proposal
Delegate HP and earn more
Thank you!
I must say that your craftsmanship is very unique. You did a very impressive work and you past world also look incredible.
You're really outstanding. Thanks for sharing ✨
I must say that your craftsmanship is very unique. You did a very impressive work and your previous works also look incredible.
You're really outstanding. Thanks for sharing ✨
Thank you for your praise, dear friend!!!
I am very pleased with your attention and kind words)❤️
You're very much welcome lovely ✨
🌺🌺🌺