
💖¡ Hola Comunidad #DIYHub!
💖¡ Hello #DIYHub Community!
💖Spanish
El planeta tierra es un lugar increíble, adornado con paisajes Hermosos, un jardín que vale la pena cuidar y admirar.
Este bello jardín es la fuente perfecta de inspiración para una persona que expresa su talento a través de las manualidades.
Para conmemorar su día me uno al CONCURSO DE BRICOLAJE del Día Mundial de la Tierra - Invierte en nuestro planeta.
Después de pensar un poco y colocar en orden mis ideas, decidí dar rienda suelta a mi creatividad y asumir por primera vez un desafío dentro de esta alegre Comunidad de Artesanos, no me considero una experta, sin embargo, este trabajo está realizado Con mucho Amor, espero lo disfruten.
💖English
Planet Earth is an amazing place, adorned with beautiful landscapes, a garden worth caring for and admiring. This beautiful garden is the perfect source of inspiration for a person who expresses her talent through handicrafts.
To commemorate their day, I am joining the DIY COMPETITION of the World Earth Day - Invest in our planet.
After thinking a bit and putting my ideas in order, I decided to give free rein to my creativity and take on a challenge for the first time in this joyful Community of Artisans, I do not consider myself an expert, however, this work is made with a lot of love, I hope you enjoy it.
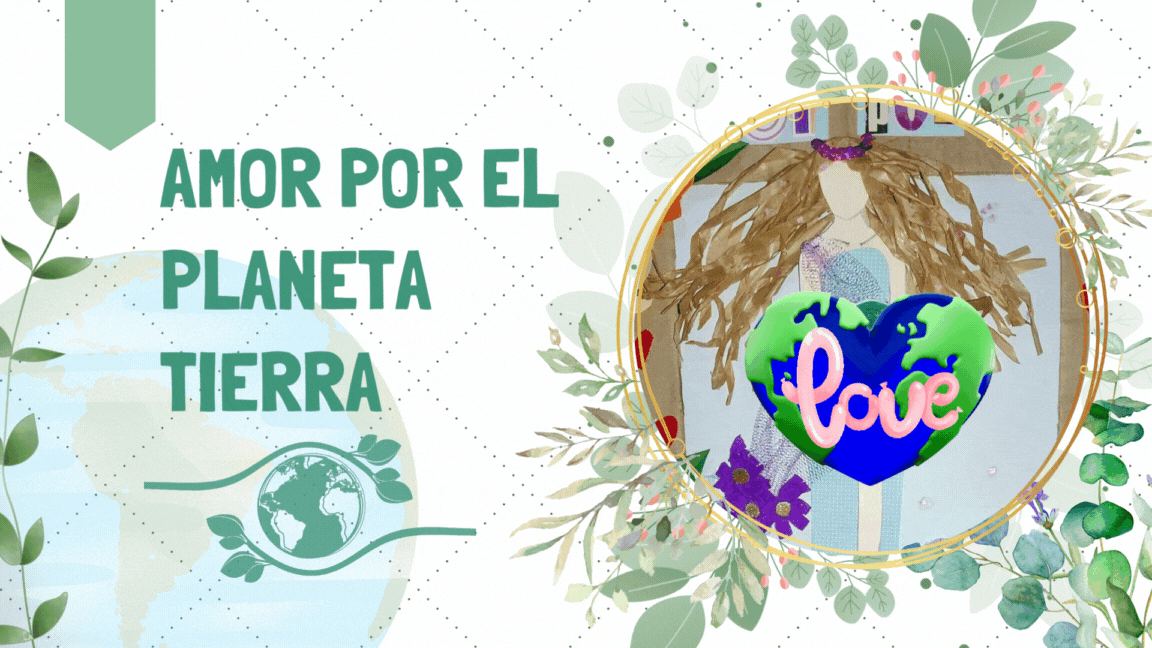
💖Cartelera Amor por el Planeta tierra
💖Love for Planet Earth Billboard
En esta ocasión les presento una pequeña cartelera hecha con materiales reciclables, para empezar la elaboración de esta manualidad necesitamos una lista de materiales, a continuación la lista de ellos:
¿Qué Materiales Necesitas?
✔️ 1- Lápiz
✔️ 1- Color piel
✔️ 2- Hojas de papel blanco recicladas
✔️ 3- Retazos de Foami o goma Eva (retazos), rosado, azul, verde.
✔️ 4- Cartulina Escolar (retazos), verde, morado, amarillo, azul, estampada.
✔️ 1- Tijeras
✔️ 1- Silicona
✔️ 1- Pega Blanca
✔️ 1- Bolsa de papel mediana de panadería
✔️ Cartón
✔️ 1- Revistas
✔️ 1- Caja de Bombillo
¿What materials do you need?
✔️ 1- Pencil
✔️ 1- Skin color
✔️ 2- Recycled white paper sheets
✔️ 3- Pieces of Foami or Eva rubber (scraps), pink, blue, green.
✔️ 4- School cardboard (scraps), green, purple, yellow, blue, stamped.
✔️ 1- Scissors
✔️ 1- Silicone
✔️ 1- White Paste
✔️ 1- Medium paper bakery bag
✔️ Cardboard
✔️ 1- Magazines
✔️ 1- Cylinder Box
Diseñado a través de Canva por @elisaday7
👉Empecemos
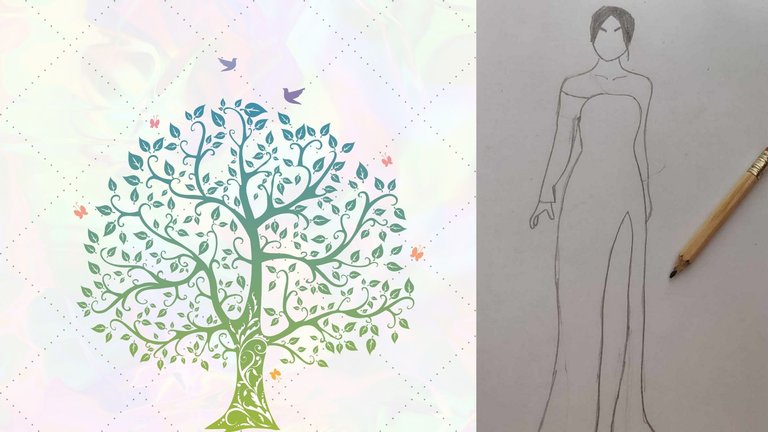
Paso 1
En algunas Culturas la tierra es representada como una Mujer, madre de la vida y Diosa de la Fertilidad, tomando en cuenta estos detalles, toma papel y lápiz y diseña la silueta de una mujer en una hoja de papel Blanca.
Tomando esos detalles me inspire y Dibuje la silueta que verán en la Imagen.
👉Let's start
Step 1
In some Cultures the earth is represented as a Woman, mother of life and Goddess of Fertility, taking into account these details, take paper and pencil and design the silhouette of a woman on a white sheet of paper. From these details I was inspired and I drew the silhouette that you will see in the image.
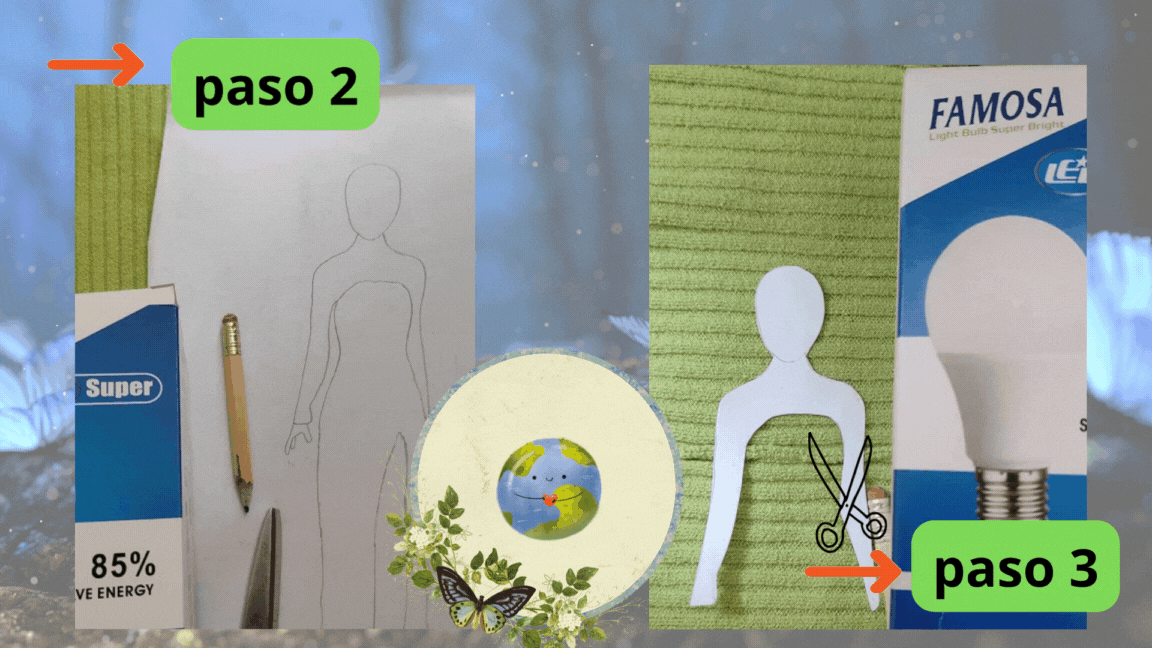
Paso 2
Cuando diseñes la silueta traspasa la imagen a una nueva hoja en blanco porque desde allí vamos a separar cada detalle para usar el material reciclado.
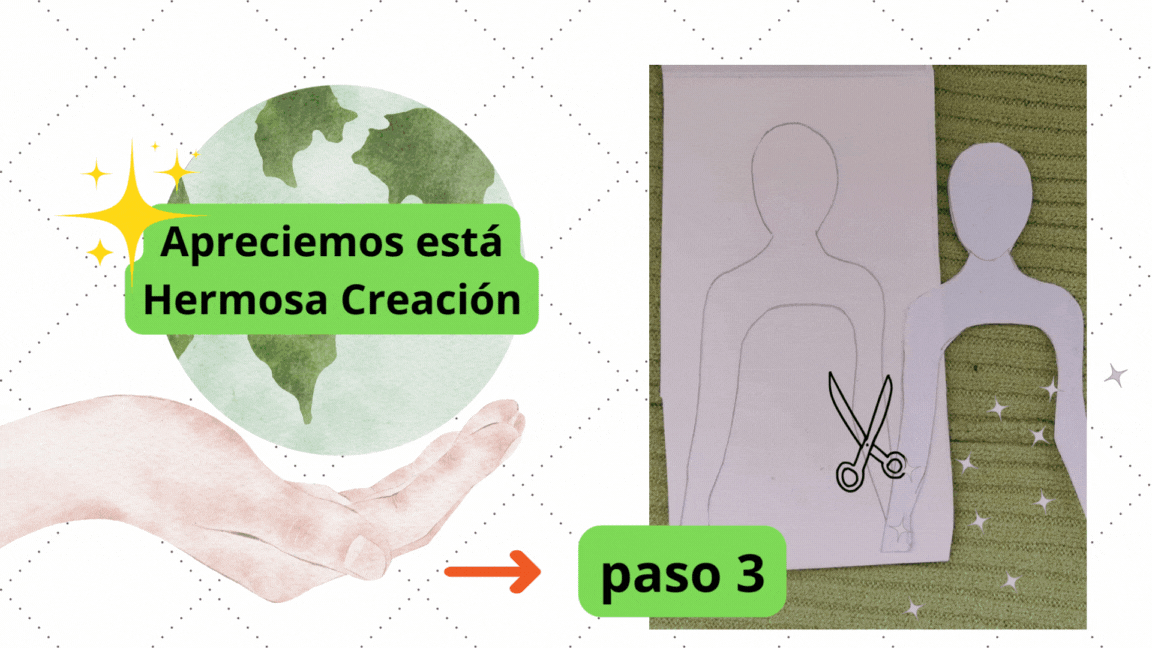
Paso 3
A continuación separamos la parte superior de la silueta para usarla como molde sobre una porción de la caja de una bombilla.Con ayuda de un Color piel puedes darle la tonalidad que necesita, si eres un buen dibujante puedes destacar más detalles de este Molde.
Step 2
When you design the silhouette transfer the image to a new blank sheet because from there we will separate each detail to use the recycled material.
Step 3
Then we separate the upper part of the silhouette to use it as a mold on a portion of a light bulb box.With the help of a Skin Color you can give it the tonality it needs, if you are a good drawer you can highlight more details of this Mold.
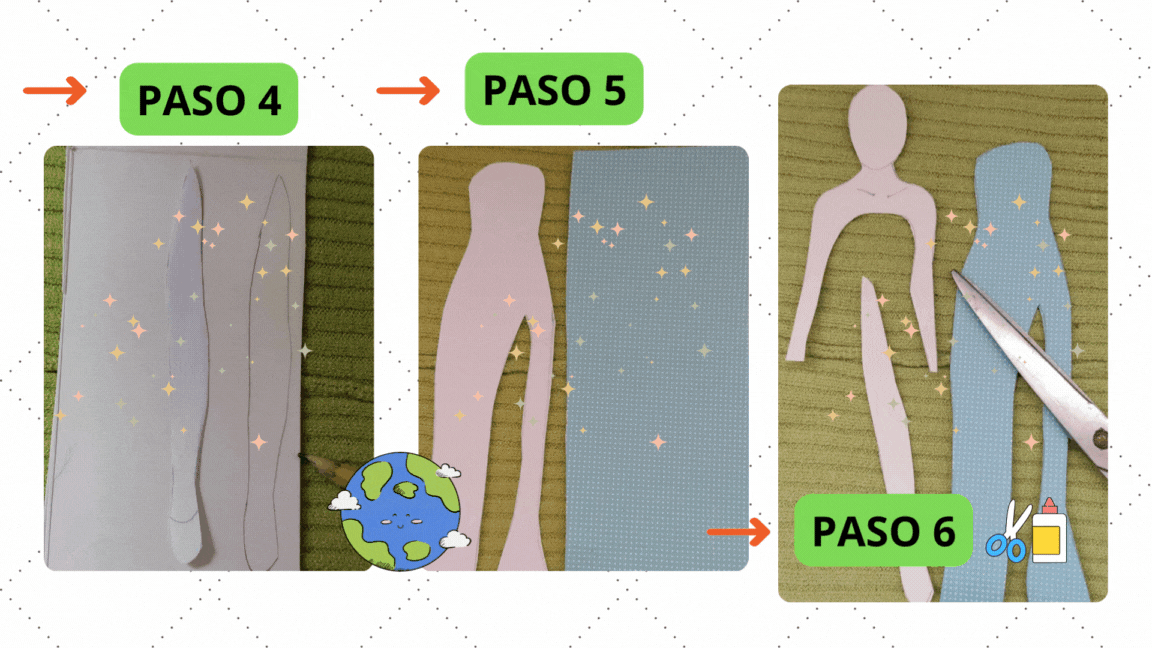
Paso 4
La silueta también expone una porción de su pierna, un detalle que resalta en la silueta. Al igual que el paso anterior se recortará el molde de la pierna de la silueta y se dibujará en una porción de la caja de la bombilla. Se ejecutará el mismo procedimiento con el color para darle tonalidad a la piel.
Paso 5
Una vez realizados los moldes de la parte superior y pierna de la silueta podemos decorar el vestido. En esta parte tome un retaso de cartulina decorada que quedo de un trabajo anterior y dibuje el molde del vestido.
Paso 6
Al terminar cada molde podemos unir con ayuda de pegamento cada pieza para pasar a más detalles de esta Madre tierra.
Step 4
The silhouette also exposes a portion of its leg, a detail that stands out in the silhouette. As in the previous step, the silhouette's leg mold will be cut out and drawn on a portion of the bulb box. The same procedure will be executed with the color to give tonality to the skin.
Step 5
Once the molds of the top and leg of the silhouette have been made, we can decorate the dress. In this part take a scrap of decorated cardboard left over from a previous work and draw the mold of the dress.
Step 6
When each mold is finished, we can glue each piece together to move on to more details of this Mother Earth.
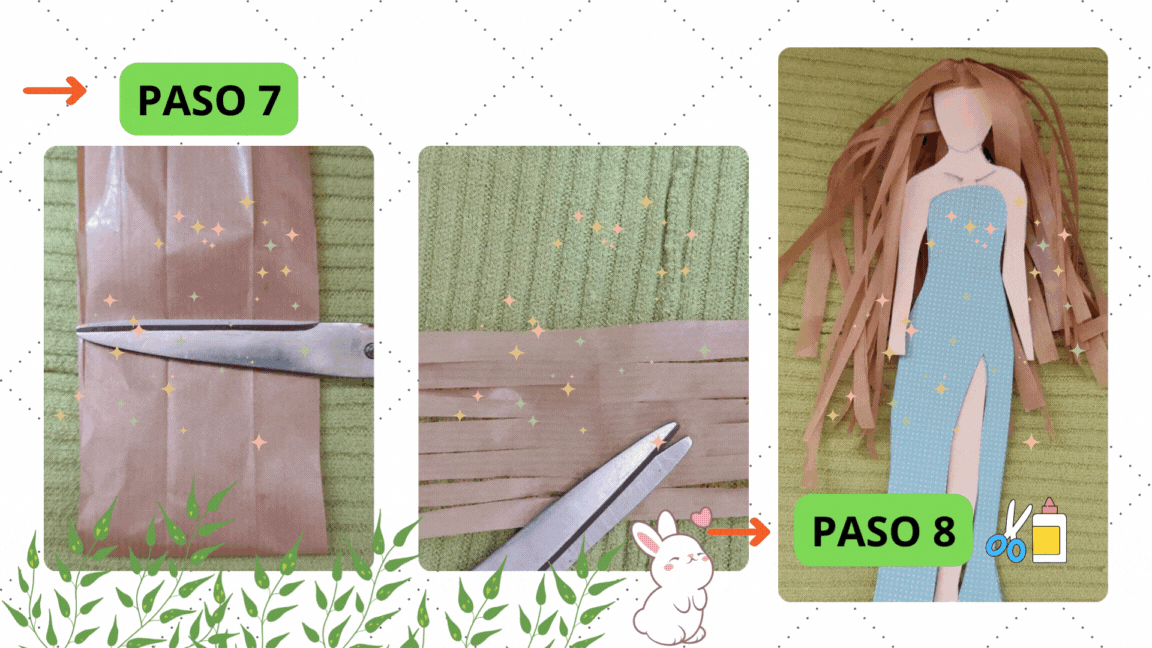
Paso 7
Aunque originalmente quería colocarle un cabello negro a mi Madre tierra, no encontré material para ello, así que mire una bolsa de panadería y me pareció buena idea colocarle cabello con ese material.
Con ayuda de una tijera, divides la bolsa de panadería o papel craft en dos partes para luego seleccionar la cantidad de material que desees usar para hacer el cabello.
Paso 8
Cuando le ha dado forma al cabello, puedes diseñarle un peinado, en lo personal deje este modelo de cabello suelto, porque quería que tuviera semejanza a la linda madre naturaleza de Moana.
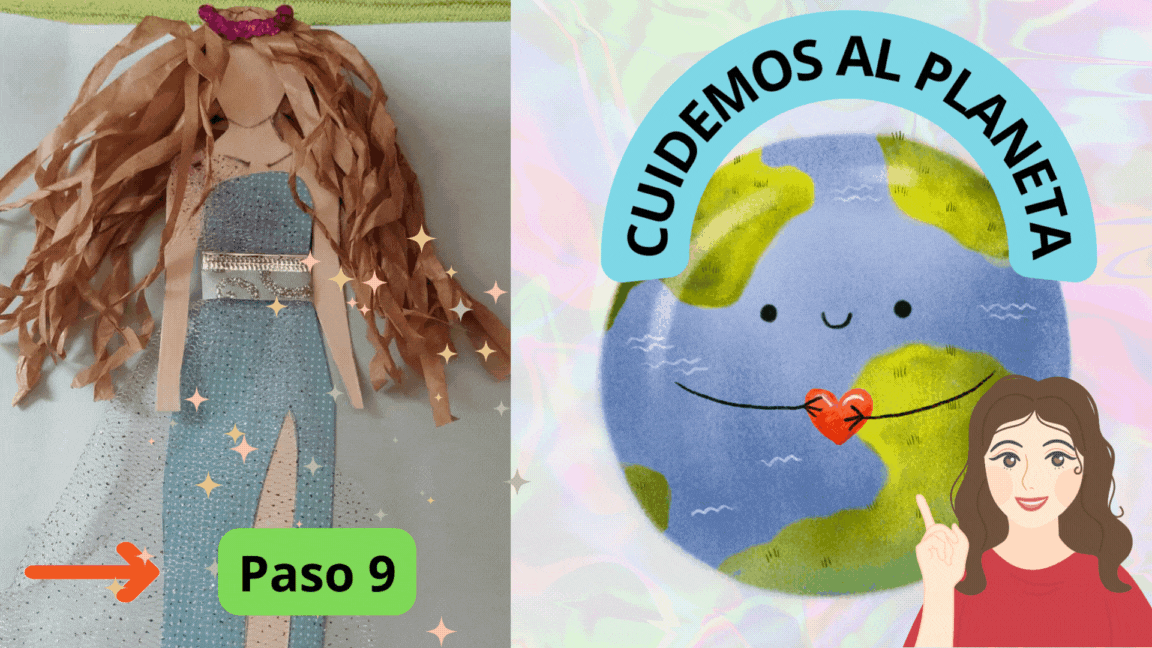
Paso 9
Con el cabello listo puedes agregar un toque personal a las prendas, para el cabello use lentejuelas para hacer una especie de corona. Al vestido le coloque un retaso de delantal hecho con un retaso de malla escarchada.
Step 7
Although I originally wanted to put a black hair on my Mother Earth, I couldn't find the material for it, so I looked at a bakery bag and it seemed like a good idea to put hair on it with that material. With the help of a scissors, you divide the bakery bag or craft paper in two parts and then select the amount of material you want to use to make the hair.
Step 8
When you have shaped the hair, you can design a hairstyle, personally I left this hair model loose, because I wanted it to look like Moana's cute mother nature..
Step 9
With the hair ready you can add a personal touch to the garments, for the hair I used sequins to make a kind of crown. To the dress I attached an apron trim made with a frosted mesh trim.
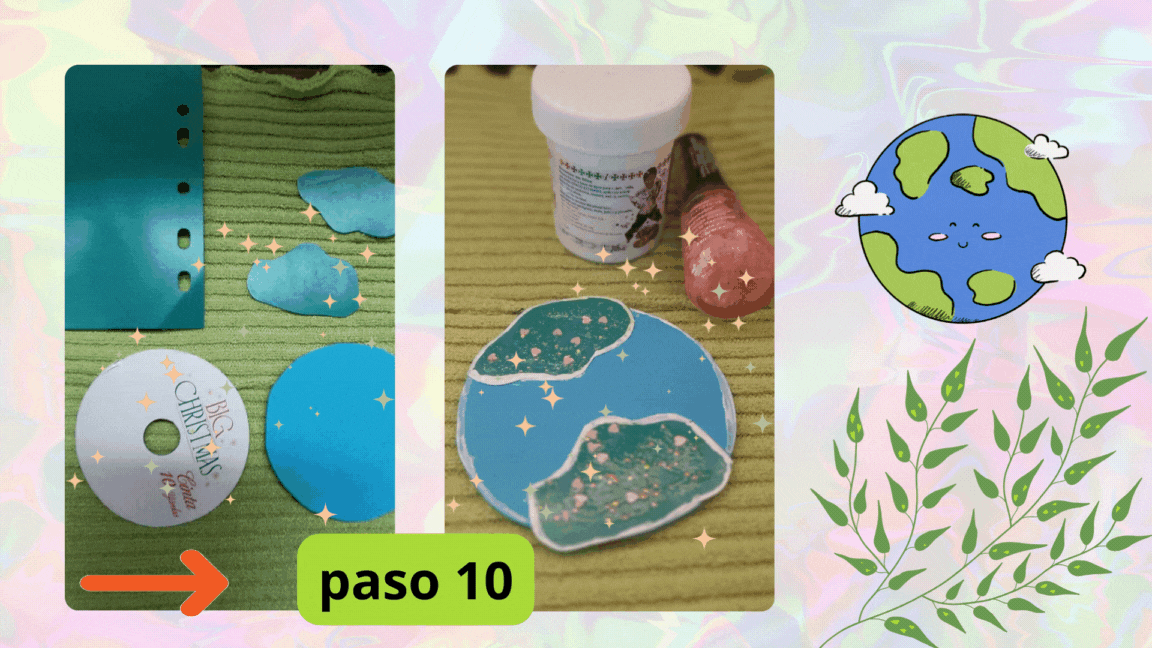
Paso 1O
Lista nuestra dama, podemos agregar una tierra hecha con foami azul y retazos de separador de carpeta verde. Para agregar un borde utilice pintura al frío blanca y con una pintura de uña escarchada con corazones rosados agregue detalles.
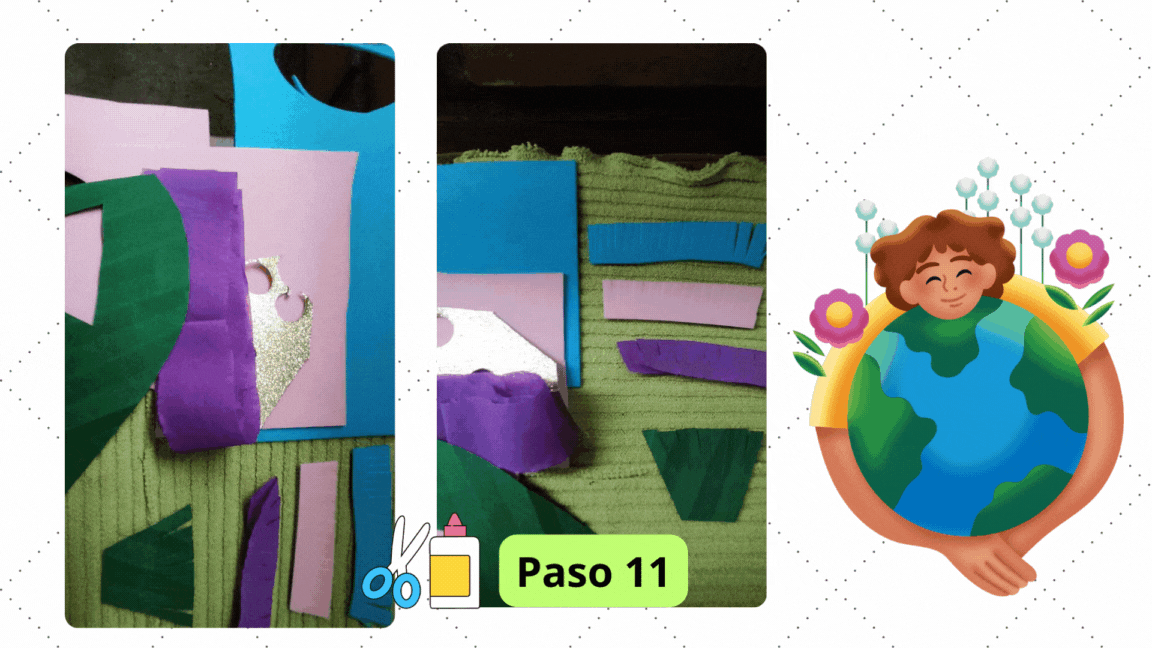
Paso 11
Como se trata de una cartera es importante agregar otros detalles como flores, corazones, hierba, el resto de retazos de foami y cartulina ayudan a dar ese toque.
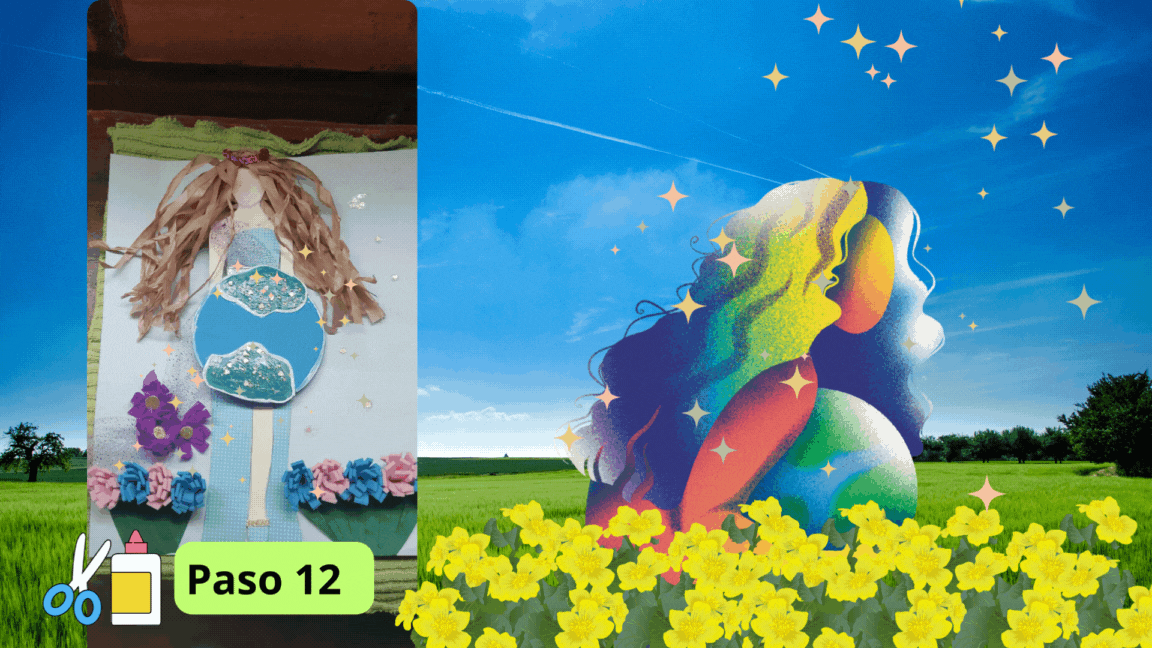
Paso 12
Una vez que terminamos nuestros detalles podemos colocarlos sobre una pieza de cartulina, en mi caso tome un cuadrado azul claro como fondo de la cartelera
Step 1O
Ready our lady, we can add a ground made with blue foami and scraps of green folder separator. To add a border use white cold paint and with a frosted nail polish with pink hearts add details.
Step 11
As it is a wallet, it is important to add other details such as flowers, hearts, grass, the rest of the scraps of foami and cardboard help to give that touch.
Step 12
Unce we finish our details we can place them on a piece of cardboard, in my case I took a light blue square as the background of the billboard.
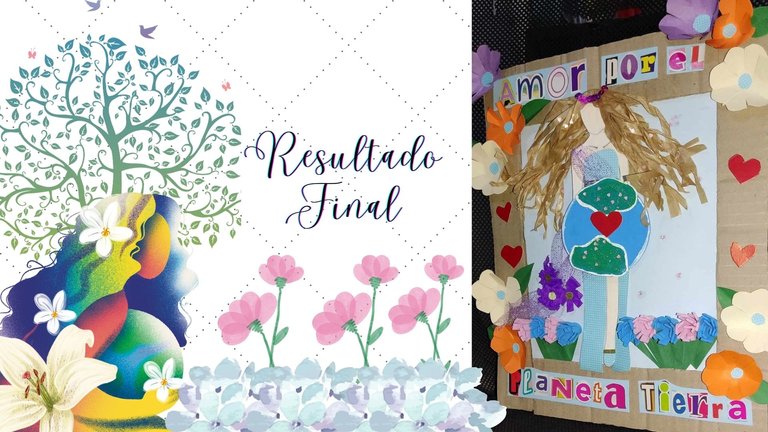
Ultimos pasos para la elaboración de la Cartelera Amor por el Planeta Tierra
Last steps for the elaboration of the Love for Planet Earth Billboard
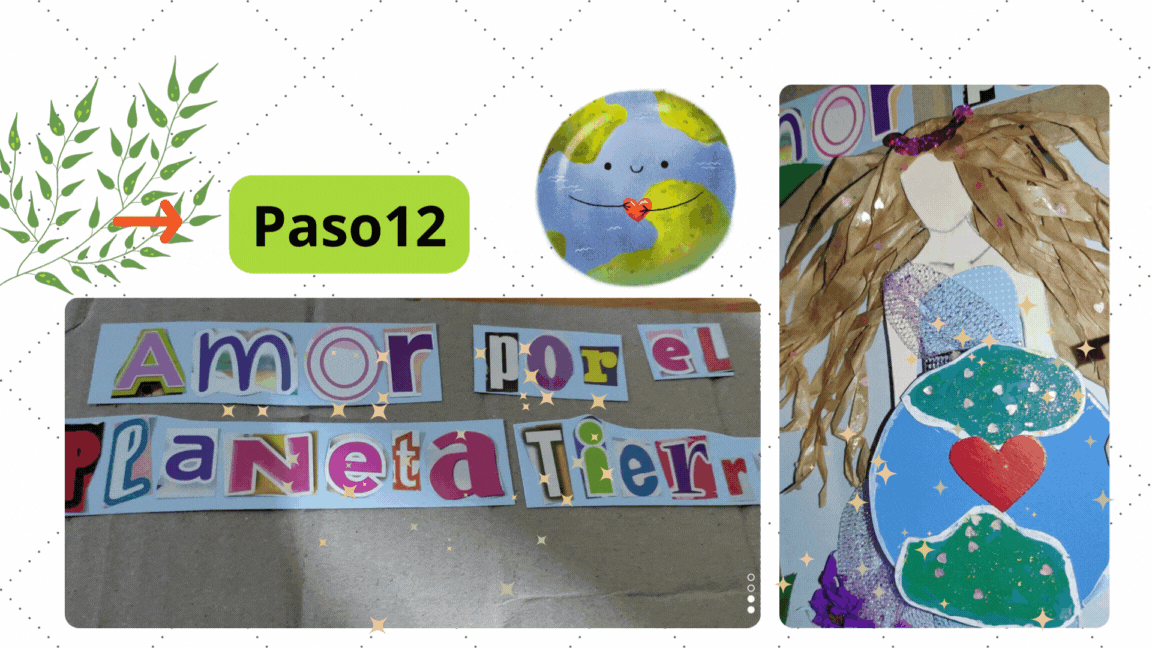
Paso 12
Finalmente, podemos hacer el uso del cartón para armar nuestra cartelera, a esta pieza como detalle final le agregue un mensaje con letras recortadas de revistas.
Con todos los detalles finalizados podemos ver el resultado final.
Step 12
Finally, we can use the cardboard to make our billboard, to this piece as a final detail I added a message with letters cut out of magazines. With all the details finished we can see the final result.
💖Conoce la Comunidad #DIYHub, ven y comparte tus hermosas Manualidaes
💖Imagen de portada diseñada con la versión gratuita de Canva por @elisaday7 . .
💖Separadores y presentaciones hechos en Canva.
💖Fotofrafias de mi propiedad
💖Traductor DeepL.
Que bonito diseño, y con materiales reciclados... Debemos cuidar a nuestro hermoso planeta 🌎 🌍... Nuestra casa, nuestro hogar
MUCHAS GRACIAS .Asi es debemos cuidar nuestro hermoso planeta😀
This is beautiful, nice job.
thank you very much
U welcome.
Congratulations @elisaday7! You received a personal badge!
You can view your badges on your board and compare yourself to others in the Ranking
Check out our last posts: