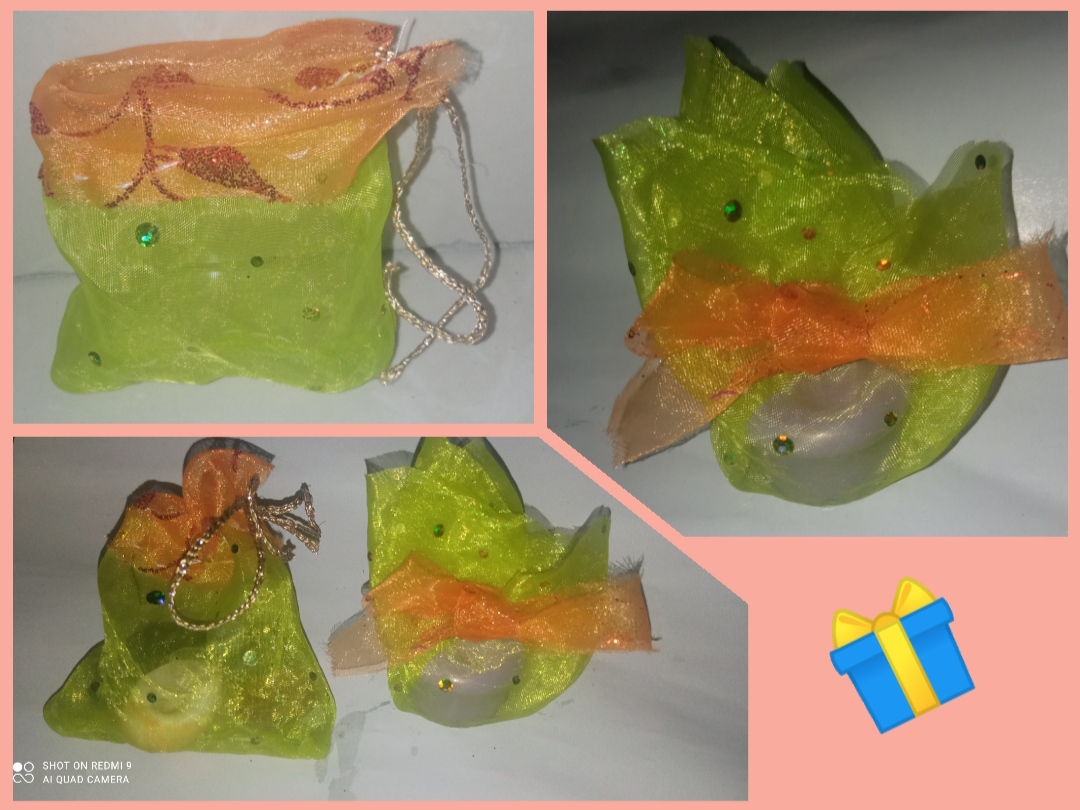
Saludos queridos amigos miembros de esta bella comunidad, es un gran placer volver a saludarlos y tener una nueva oportunidad de compartir con todos ustedes, aprendiendo y mostrando mis sencillas creaciones, los que ya me conocen saben que a mí me encanta elaborar joyería, pero el día de hoy les traigo un lindo complemento, pues muchas veces queremos realizar un lindo detalle y no tenemos una bolsita de regalo ni dinero para comprar pues acá está la solución.
Unas hermosas y creativas bolsitas de regalo elaboradas con retazos de tela, ven y te muestro en paso a paso como podremos obtener este delicado resultado.
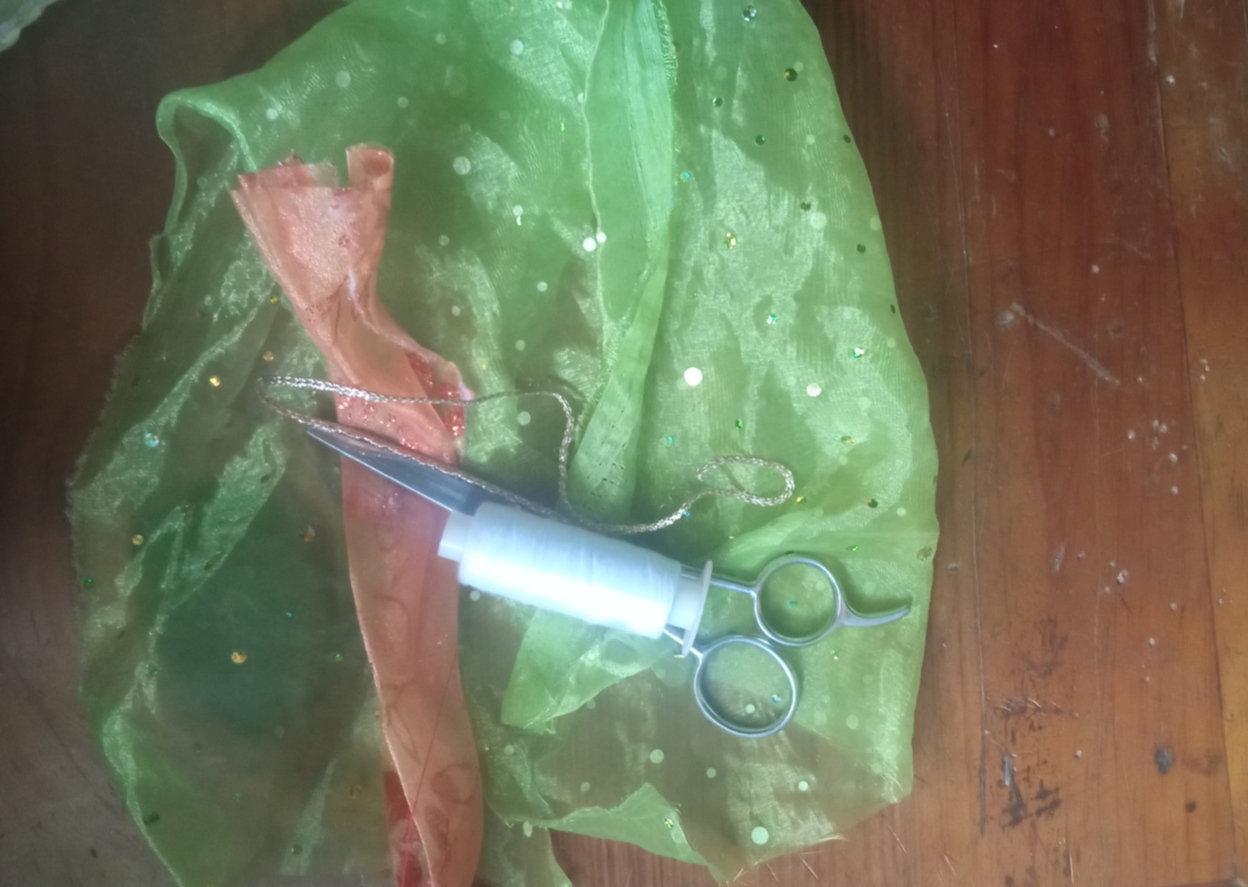
✴️ What Materials do you need:
- Fabric of two different colors.
-Thin tape. - needle and thread.
- Scissors.
- tape measure.
✴️ Que Materiales necesitas:
- Tela de dos colores diferentes.
-Cinta delgada.- aguja e hilo.
- Tijera.
- cinta para medir.
😊 Step by step
😊 paso a paso
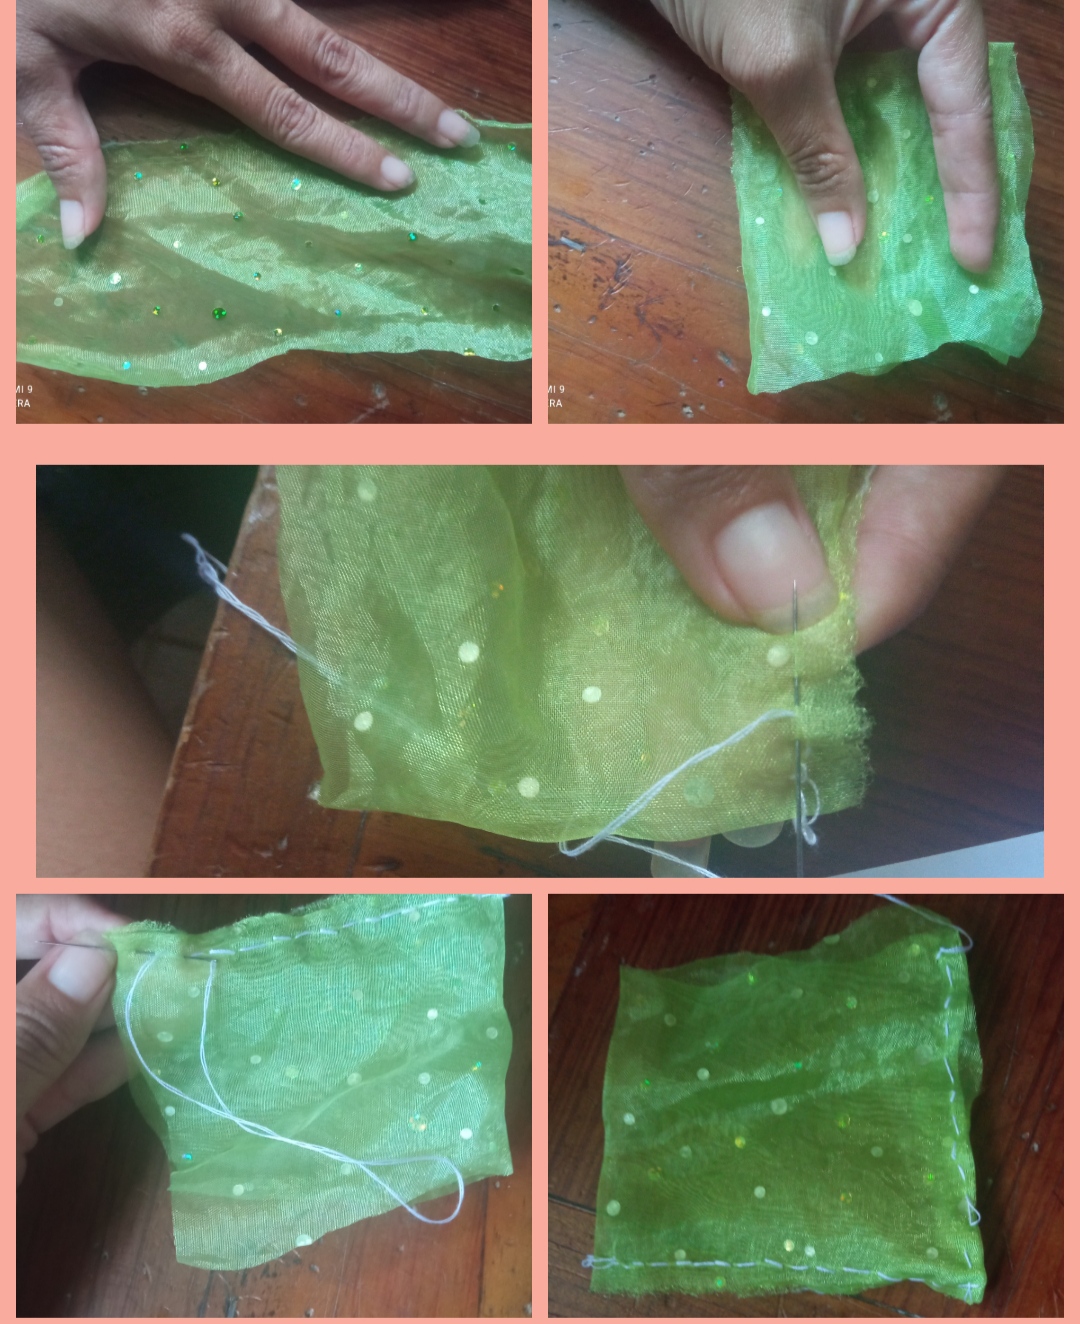
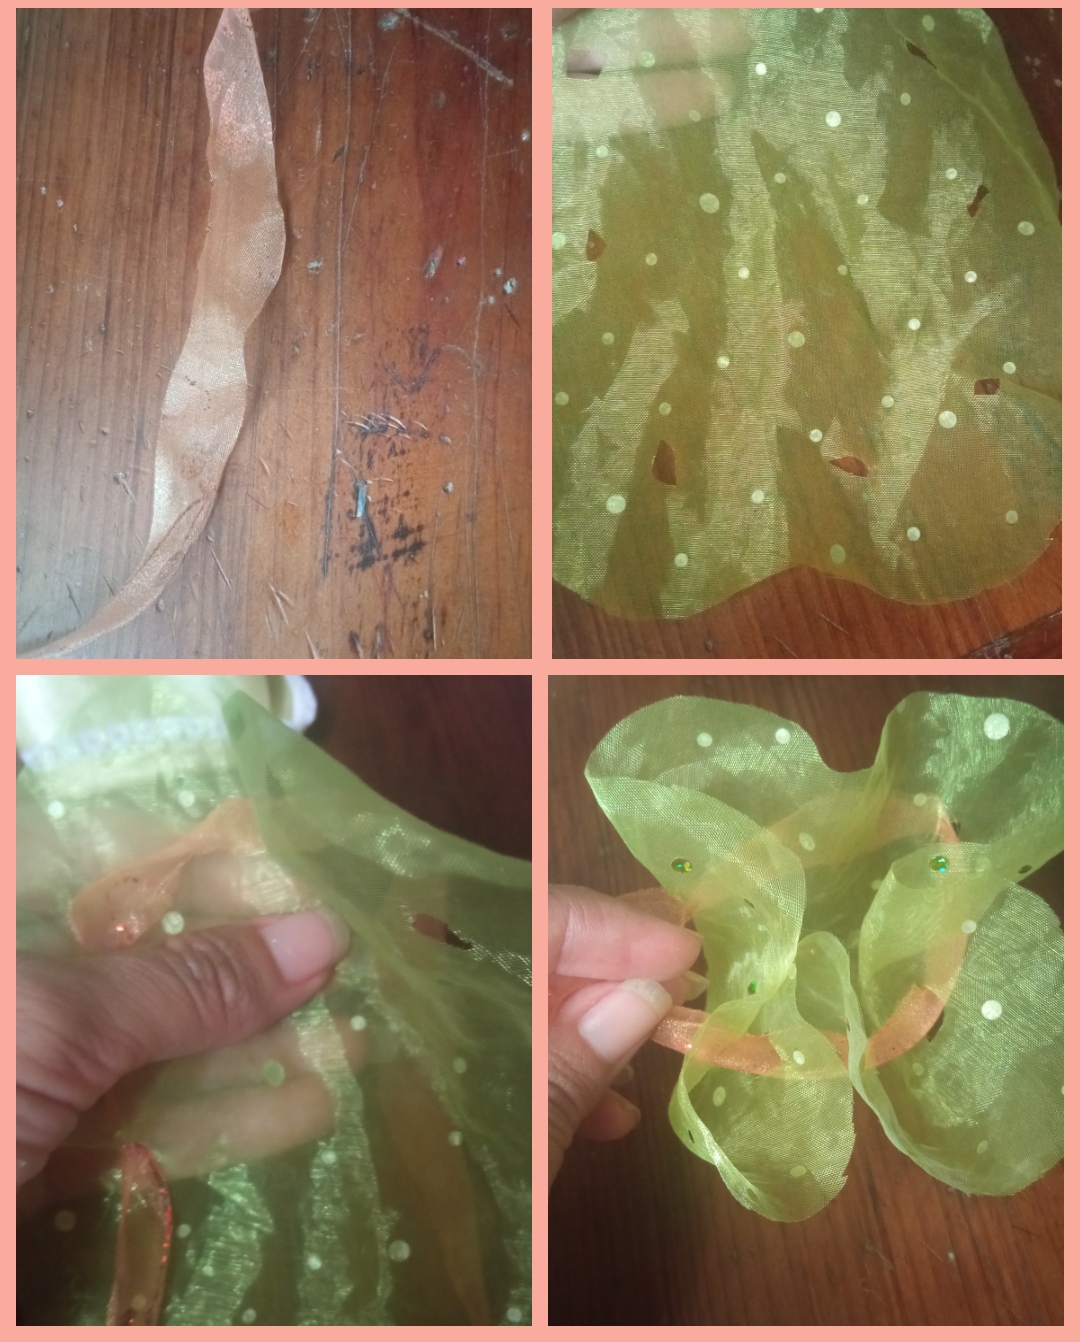
⭐ Step 1: First we take the piece of green fabric that is a larger piece, we measure and cut a rectangular piece of the desired size.
We are going to fold this piece into two completely identical pieces and with the fabric turned inside out we will begin to sew along the two edges that would be the bottom paste and one side.
⭐ Paso 1: Primeramente tomamos el retazo de tela color verde que es un pedazo más grande, medimos y recortamos una pieza rectangular del tamaño deseado.
Esta pieza la vamos a doblar en dos pedazos totalmente idénticos y con la tela volteada alrevez comenzaremos a coser por los dos bordes que serían la paste de abajo y un lateral.
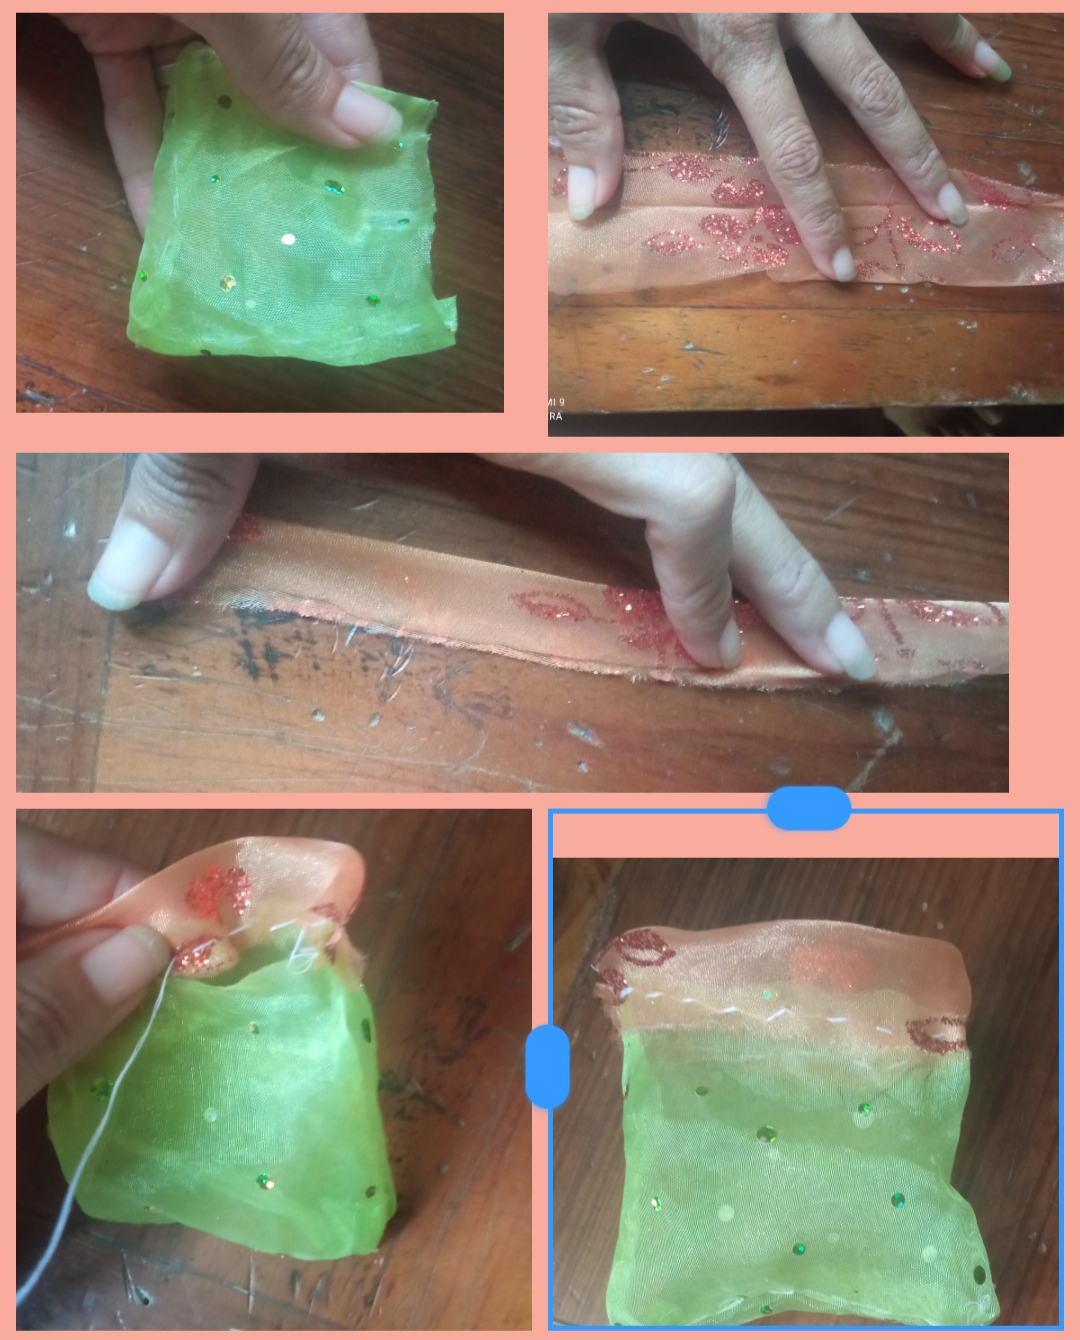
⭐ Step 2: After having our first seam ready, we turn our fabric to the right and we will see our cute little bag. Next, we proceed to cut a thin strip of 3 or 4 cm thick from the orange fabric.
We will also fold this thin strip in two and begin to sew it along the upper edge of our green fabric, starting with a tie on the side.
We will sew all over the upper part until we turn around and reach where we started, without joining both ends.
⭐ Paso 2: Luego de tener nuestra primera costura lista volteamos nuestra tela al derecho y veremos nuestro lindo saquito, Seguidamente procedemos a recortar de la tela naranja una franja delgada con un grosos de 3 o 4 cm.
Esta franja delgada también la doblaremos en dos e iniciaremos a coserla por el borde superior de nuestra tela verde, iniciando por en empate de la parte lateral.
Coseremos por toda la parte superior hasta dar la vuelta y llegar a dónde iniciamos, sin unir ambas puntas.
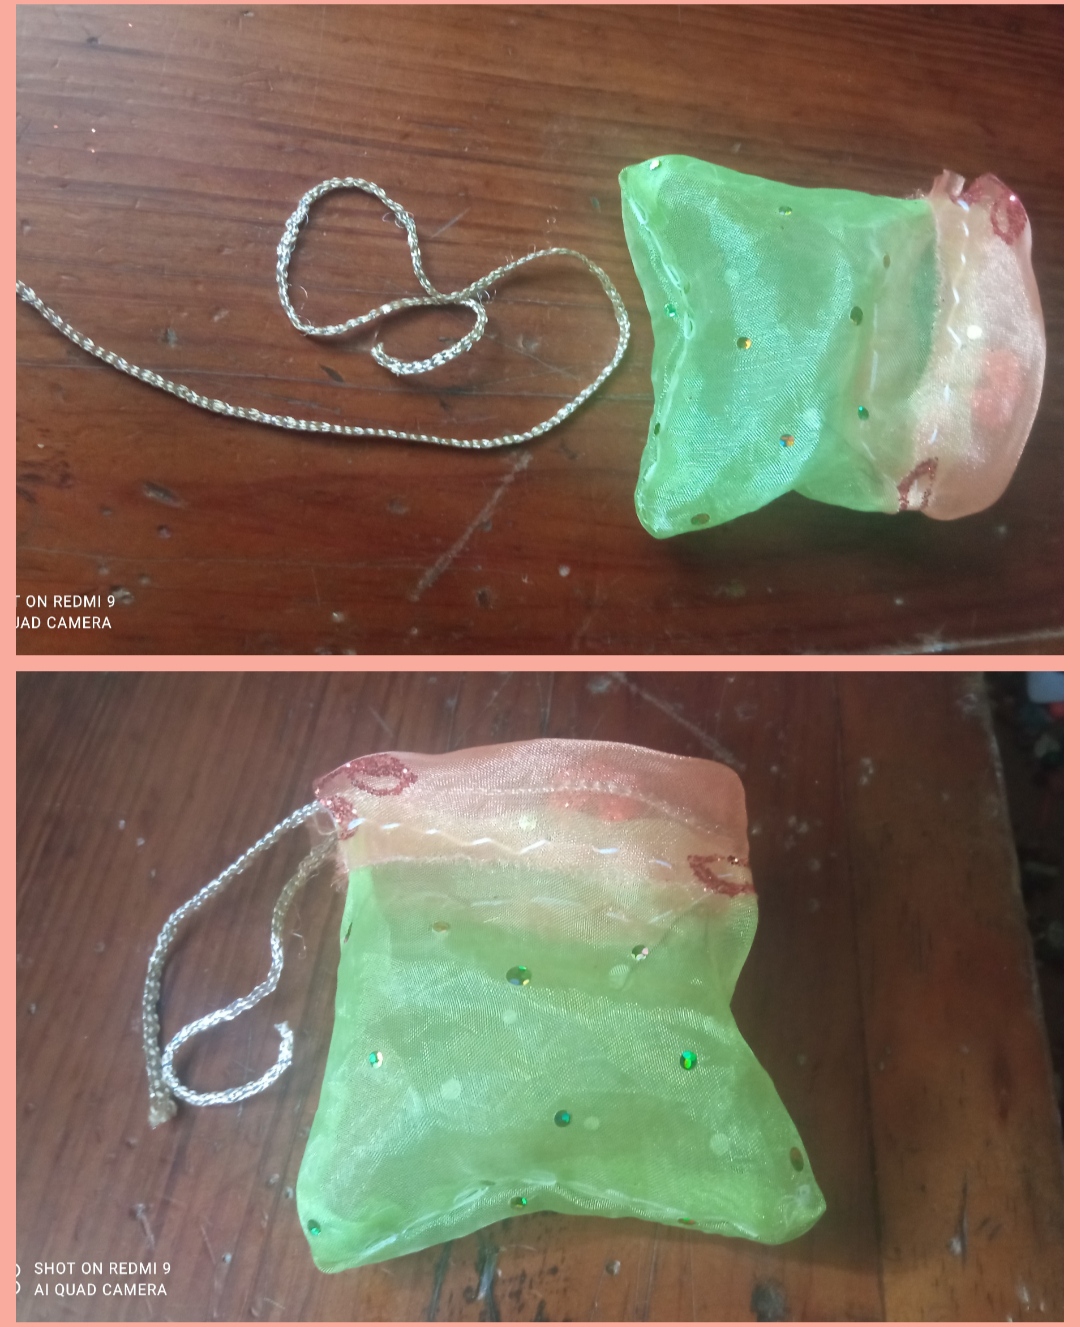
⭐ Step 3: to complete our first gift bag, we will take the ribbon and introduce it through this part, which we make orange with great care and we will leave both ends of the ribbon to one side and we will give you our first creation, just place the gift Inside our bag, we pull the ribbon and make a nice bow and that's it.
⭐ Paso 3: para culminar nuestro primer saquito de regalo tomaremos la cinta y la Introducimos por esta parte que realizamos color naranja con mucho cuidado y dejaremos ambas puntas de cinta hacia un lado y te daremos lista nuestra primera creación, solo de colocar el regalo dentro de nuestra bolsita, jalamos la cinta y realizamos un lindo lazo y listo.
⭐ Step 4: to make the round bag, we make a circular shape on a piece of paper to serve as a mold to cut out the same shape from the fabric, once we cut out our circle in the fabric we make a series of holes around it leaving a small upper edge.
If we do not have ribbon we can cut a very thin strip from a fabric of another color or
Which we introduce through the zip-zap shaped holes and pull to collect and form our other gift bag design.
⭐ Paso 4: para la elaboración de la bolsita redonda, realizamos en un papel una forma circular esto para que nos sirva de molde para recortar de la tela la misma forma, una vez que recortemos nuestro círculo en tela le realizamos una serie de agujeros alrededor de la misma dejardo un pequeño borde súperior.
Si no tenemos cinta podemos recorta de una tela de otro color una tira muy delgada o
La cual Introducimos por los agujeros en forma de zip-zap y jalamos para recoger y formar nuestro otro diseño de bolsita de regalo.

⭐ Cute and creative gift bags
⭐ Lindas y creativas bolsitas de regalo
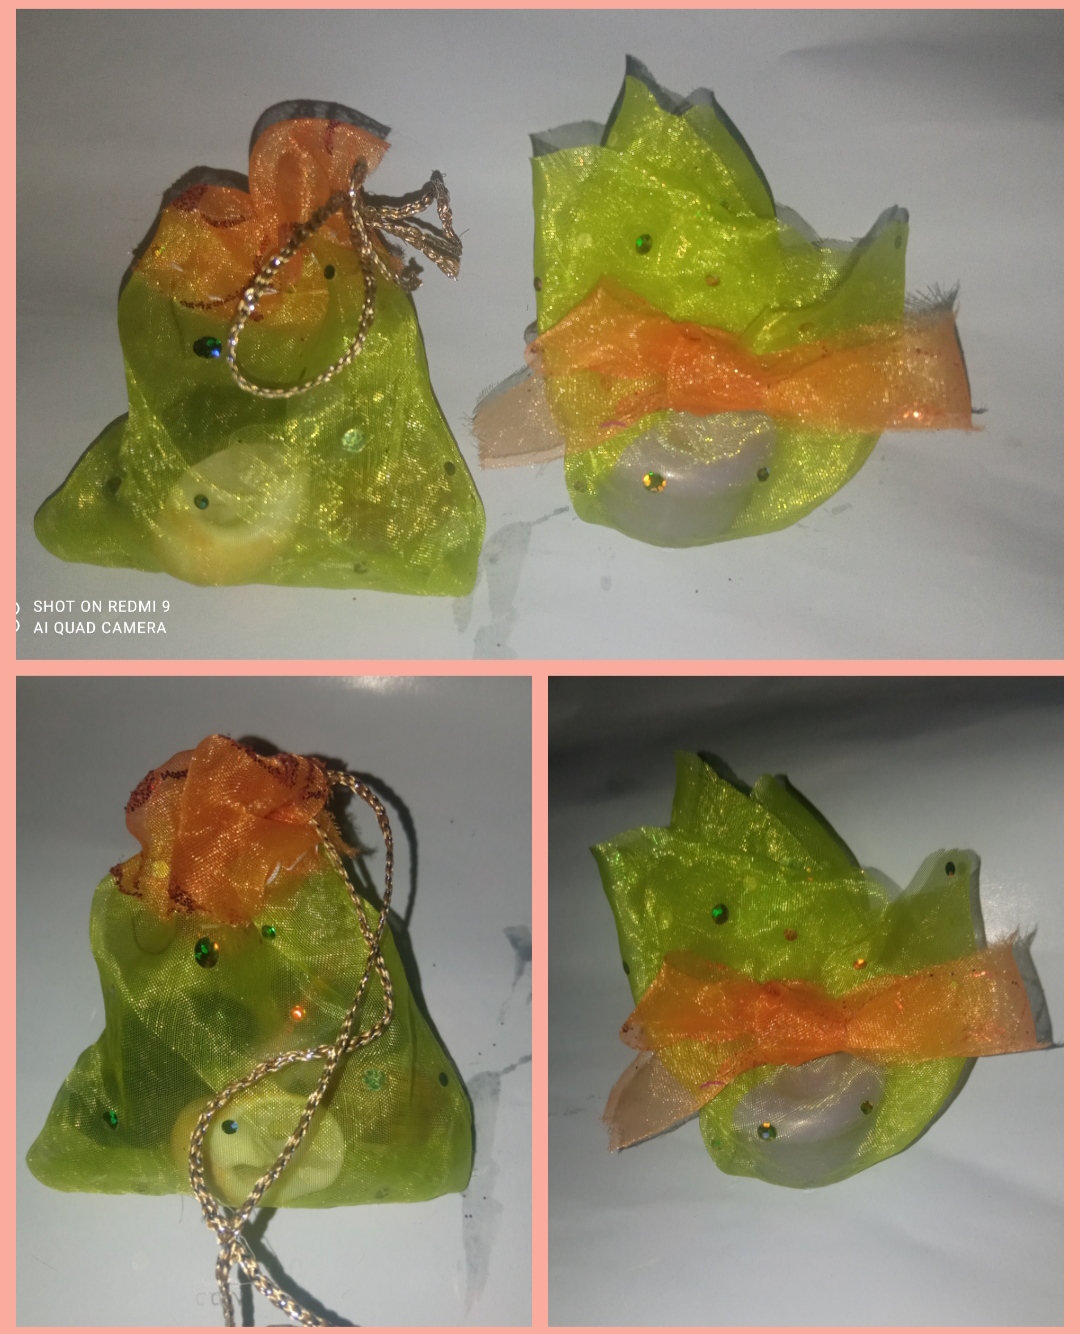
Here I share two beautiful designs that are very simple and easy to make at home, ideal for giving a small gift.
Dear friends, it has been my creation today for all of you, I say goodbye for this opportunity, wishing this beautiful creation is to the liking of all of you, I wish you an excellent day and thank you for your visit and support.
Greetings and blessings to you.
Acá les comparto dos lindos diseños muy sencillo y fácil de elaborar en casa, ideales para regalar un pequeño detalle.
Queridos amigos está a Sido mi creación de hoy para todos ustedes,Me despido por esta oportunidad deseando está linda creacion sea del agrado de todos ustedes, les deseo un excelente día y agradecida por su visita y apoyo.
Saludos y bendiciones para ustedes.
photos were taken with my Redmi 9 phone, exclusive content for Hive. And the translation was done through Google.
las fotos fueron tomadas con mi teléfono Redmi 9, contenido exclusivo para Hive. Y la traducción fue realizada a través de Google.
Thank you for sharing this post in the DIYHUB Community!
Your content got selected by our fellow curator elizacheng & you just received a little thank you upvote from us for your great work! Your post will be featured in one of our recurring compilations which are aiming to offer you a stage to widen your audience within the DIY scene of Hive. Stay creative & HIVE ON!
Please vote for our hive witness <3
Designing handbags and jewelry is really good at saving, so your choice is my favorite. Have a nice day.
Gracias por su apoyo.😊
Very nice bags that you show us @emmaris, and at this time it is more than necessary to learn to do this kind of things because it is the month in which abound small details to give away.
Thanks for sharing your work✨.
Muy lindas las bolsitas que nos muestras @emmaris, y en este momento es mas que necesiario aprender a realizar este tipo de cosas ya que es el mes en que abundan los pequeños detalles para obsequiar.
Gracias por compartirnos tu trabajo✨
Saludos...
Te quedaron preciosas amiga @emmaris 🙌. Me encanta ver este tipo de tutoriales, es una manera muy chévere de reciclar y aprovechar lo que ya tenemos en casa. ¡Saludos!
Wow this look so beautiful. Keep it up a good work
This is so nice and easy to learn. I can easily say I can make a gift bag all thanks to you 🥰.
Thank you so much for sharing this, I found your post thanks to @diyhub and also thanks to #dreemport for putting me to the challenge of sharing love by visiting my fellow bloggers ❤️.