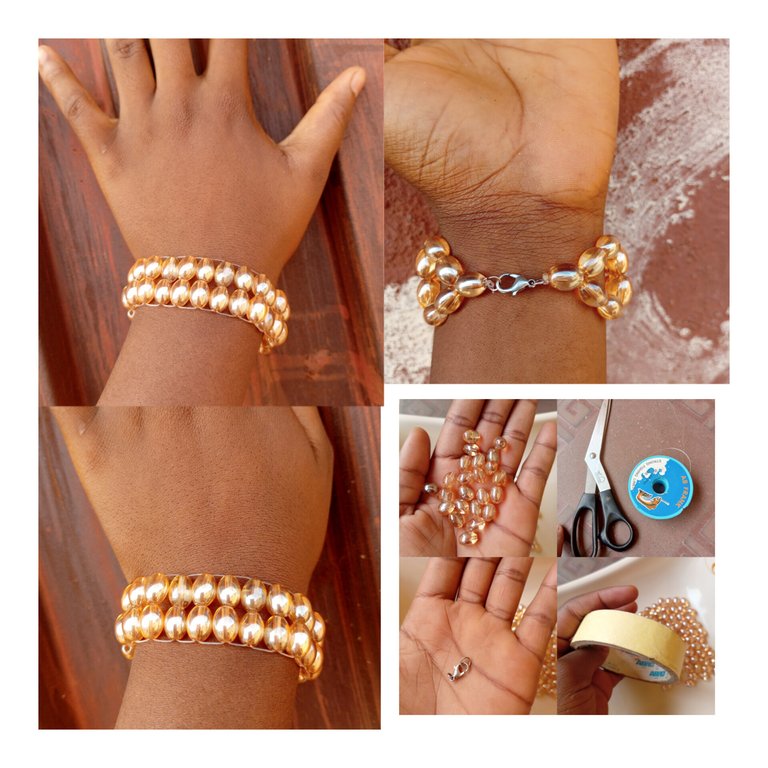
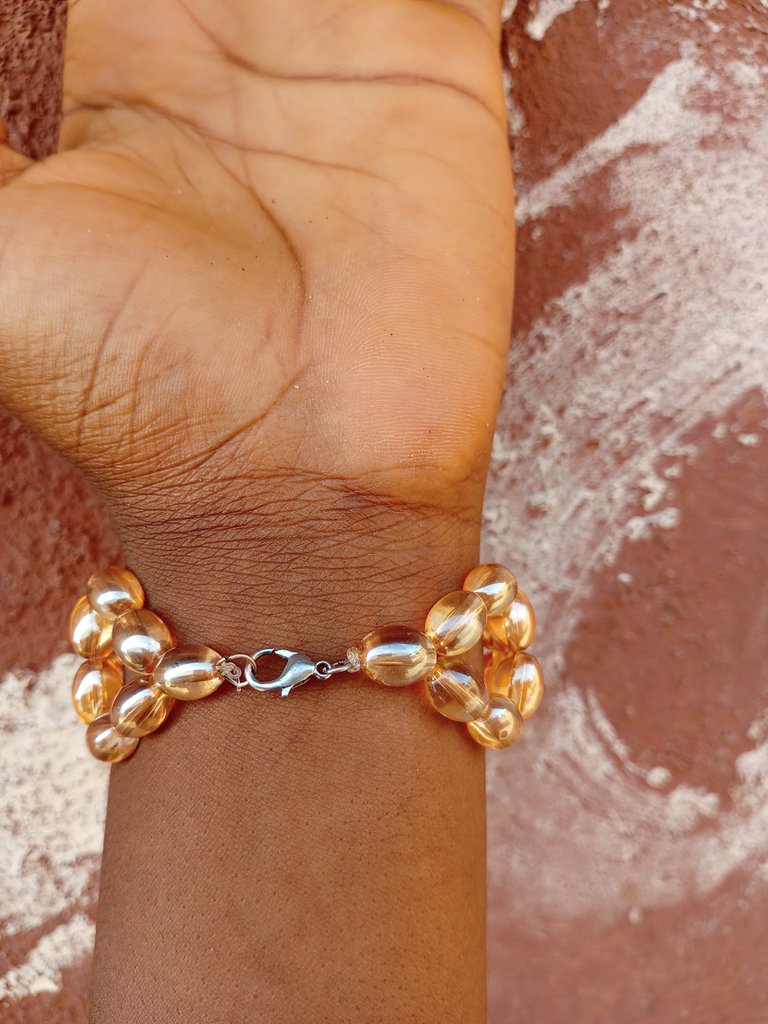
Happy Sunday gorgeous @Diyhub members. It's another exciting day to share with us all the bracelet I made for my mom.

Oh no I feel so bad right now! How can I be my mother's only female child, yet I can't recall the last I made something for her with my hands. Please don't get me wrong, I do buy her gifts but it's been long I gave her a beaded bracelet, Knowing fully well mom is my biggest motivation ever. But hell no am not gonna let that happen again I said to myself so I decided to gift her a bracelet, as an indication of her love and appreciation.
I recently went to the market to sort for new beads, I bought a gold pear bead alongside others and ever since my mom saw it she just can't help but keep talking about the color and how she love it. Aha now I know just the right bead to use to execute my plan I said. All through the process I was busy telling my mom the bracelet belongs to a client cause I don't want to give her any little hint or impression it belongs to her and not any client.
As at the time I was through, I handed over the bracelet woven with love and gratitude to the woman who meant the world to me. the bundle of joy expressed on her face knew no bound and she appreciates the lady I have become.
To begin with the bracelet, these were the materials I used:
*gold pear beads
*fishing line
*scissor
*claps (hook)
*masking tape

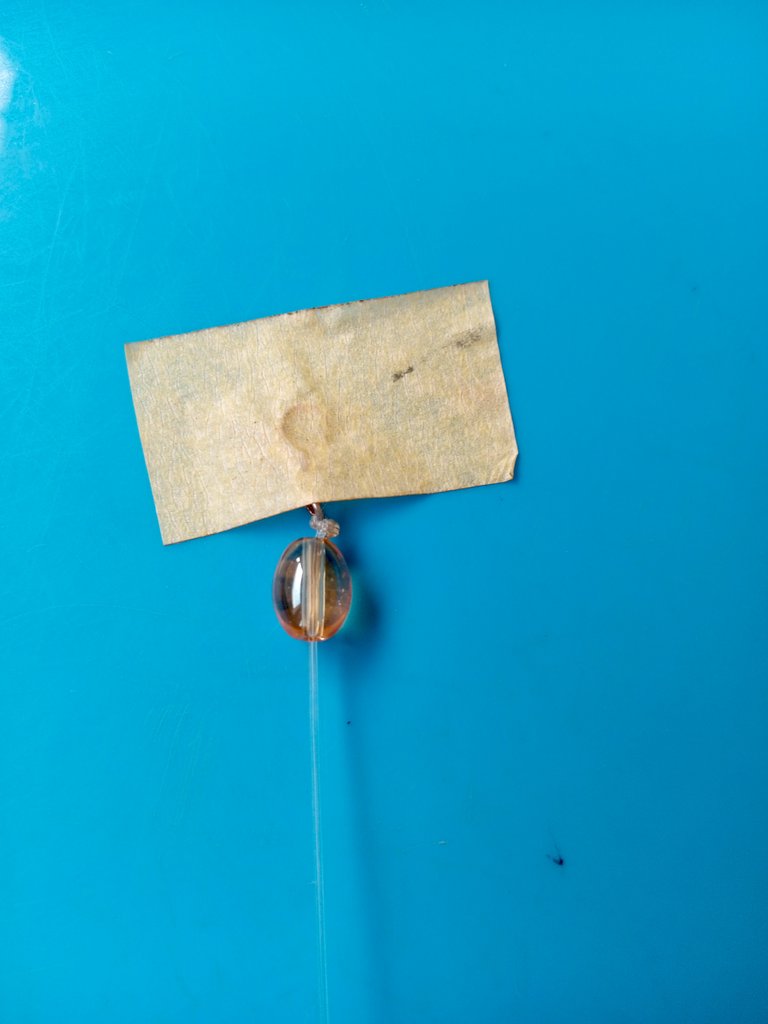
**PROCEDURES**
Firstly, after arranging all the materials I cut two lengthy strong fishing line, put my claps and thigh it twice so It would be strong and then I use the masking to hold it firm on the board for comfort.

Secondly, I joined both lines together and inserted one gold pearl bead.
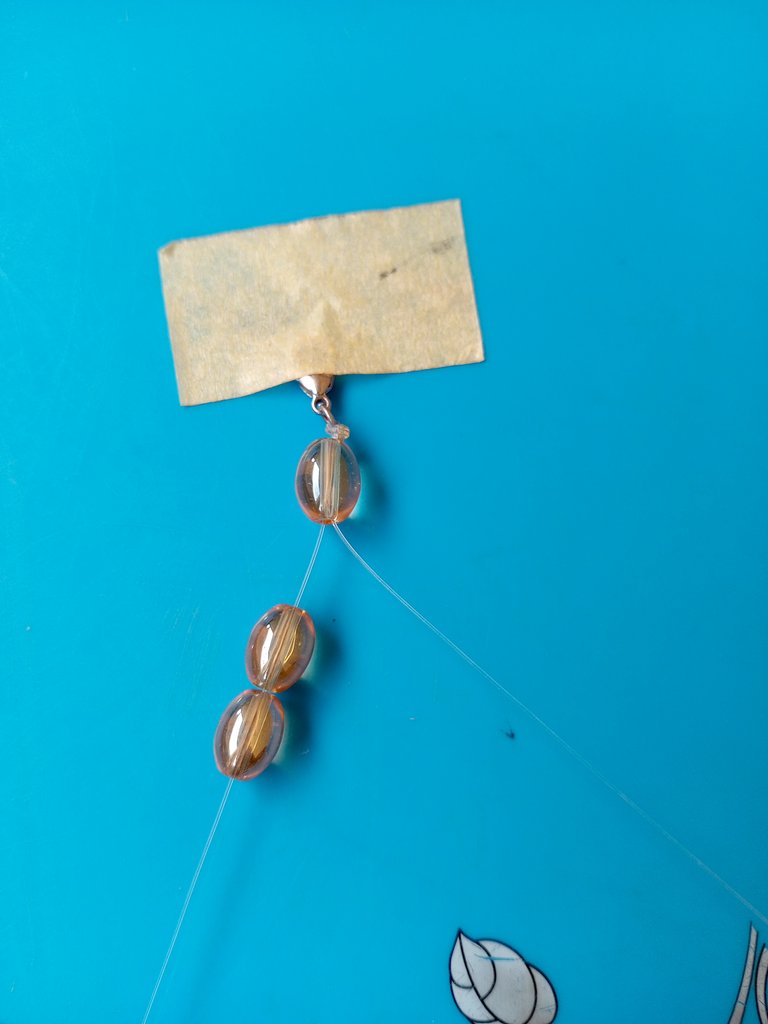
Thirdly, I again separated the lines and put two pearl beads each on both lines. I inserted two beads on one of the line and then used the other line to cross the beads.

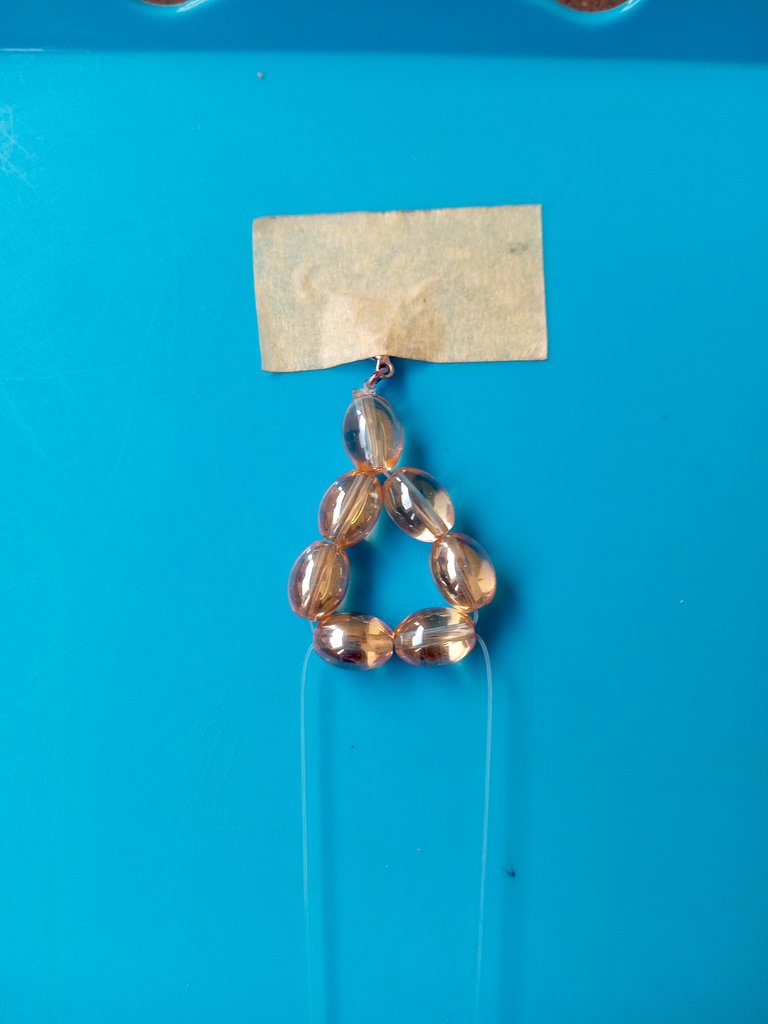
Fourthly, I inserted two pearl beads in the right line and put the left line into each beads for it to cross.
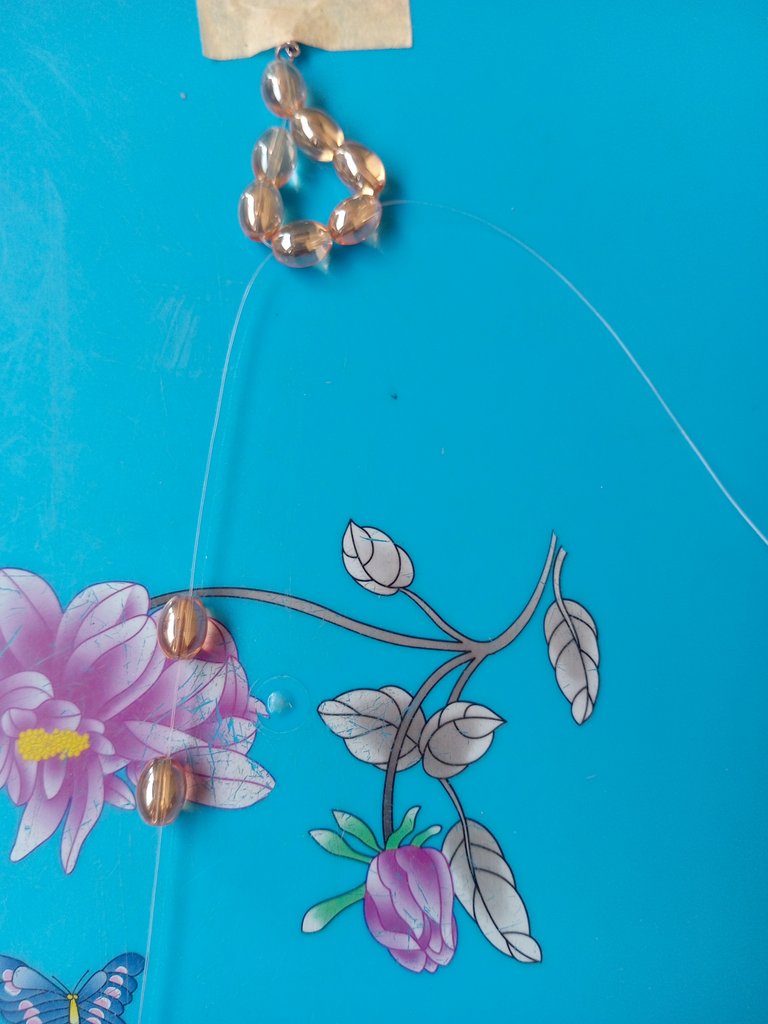

I continued inserting the beads same way as step four till I got the desired length for the hand bracelet.


Fifth, after I got the desired length I put two beads each on both sides of the line, joined the line together and inserted one bead. I put the claps again tight properly and cut off the excess line with a scissor.

Thank you for your time, peace 🕊️
Shows how to make a bracelet with great skill. Which is a really nice design. This art is generally marketable I think. Thank you so much for indulging us in smoothing every step with extraordinary skill and creativity. May God always bless you with all abilities.
Thank you
you are most welcome
Nothing as beautiful as making a gift for a loved one. Beautiful bracelet
Thank you
Congratulations @ene22! You have completed the following achievement on the Hive blockchain And have been rewarded with New badge(s)
Your next target is to reach 200 upvotes.
You can view your badges on your board and compare yourself to others in the Ranking
If you no longer want to receive notifications, reply to this comment with the word
STOPCheck out our last posts:
Beautiful bracelet, thank you for sharing the process with us
My pleasure. 😊