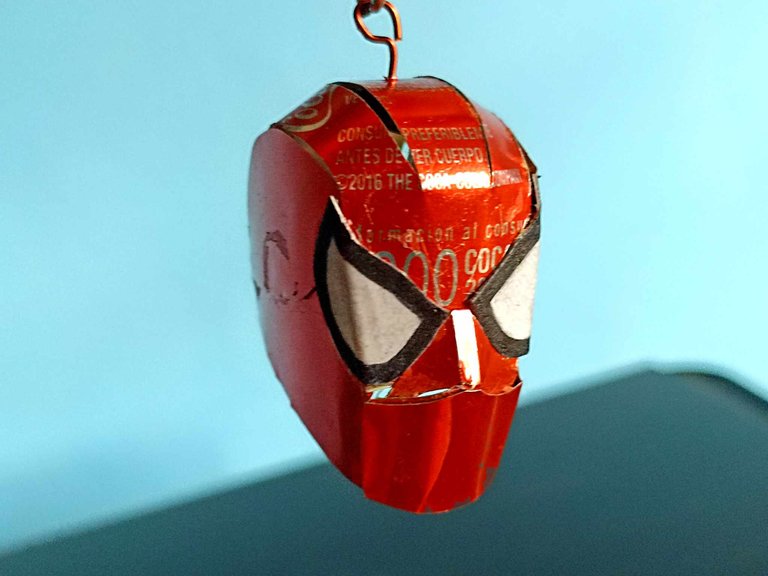
Hello friends, I hope you are feeling very well, I also hope that you had good end-of-year holidays and that this year 2024 will be one of many successes and blessings for you. I am starting this year by sharing a new publication of a manual work, I have made a keychain with the figure of Spiderman, especially the mask, I took as a reference Tom Holland's Spiderman who has appeared in the latest films and is very close to Iron Man. This is a project that I have had in mind for a long time, to make a full body figure of Spiderman style Iron Man, but for that I needed to learn how to make the head, since I felt that it was not easy. I share with you the beginning of this project, starting with this keychain. Let's get started!
Hola amigos, espero que se encuentren muy bien, también espero que hayan tenido buenas fiestas de fin de año y que este año 2024 sea de muchos éxitos y bendiciones para ustedes. Yo comienzo este año compartiendo una nueva publicación de un trabajo manual, he realizado un llavero con la figura de Spiderman, especialmente la máscara, tomé como referencia el Spiderman de Tom Holland quien ha salido en las últimas películas y tiene mucho acercamiento con Iron man. Este es un proyecto que tengo en mente desde hace tiempo, el de hacer una figura de cuerpo completo de Spiderman estilo Iron Man, pero para eso necesitaba aprender como hacer la cabeza, ya que sentía que no era fácil. Comparto con ustedes el inicio de este proyecto, comenzando con este llavero. Comencemos!

 |  | |
|---|---|---|
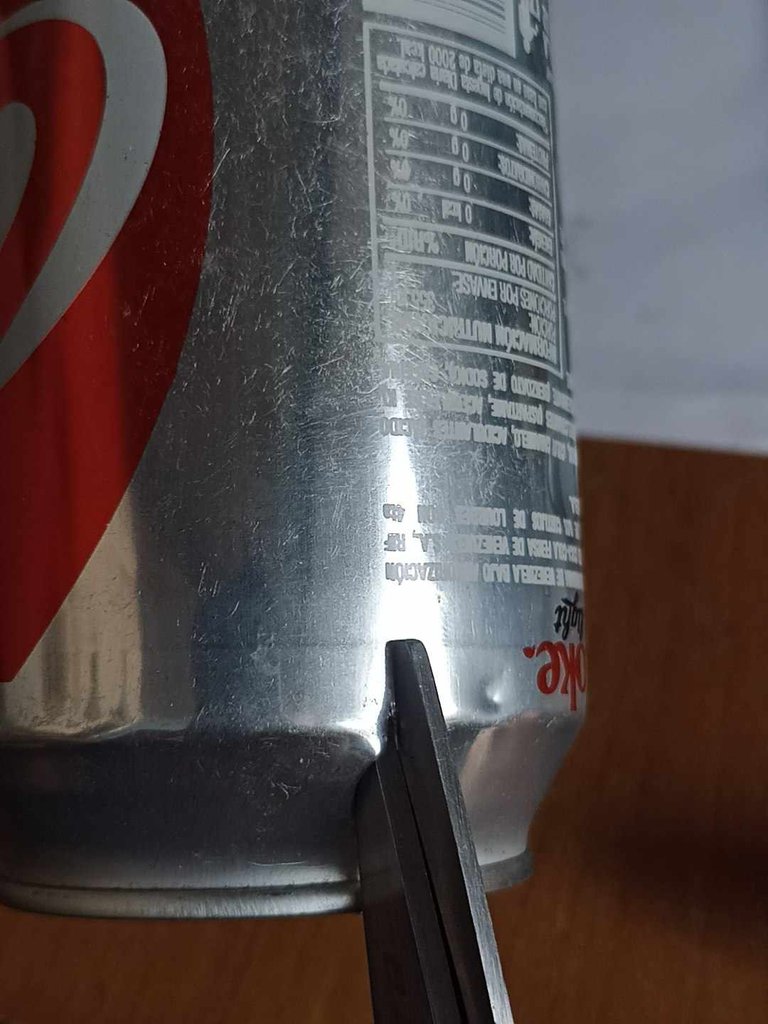 | 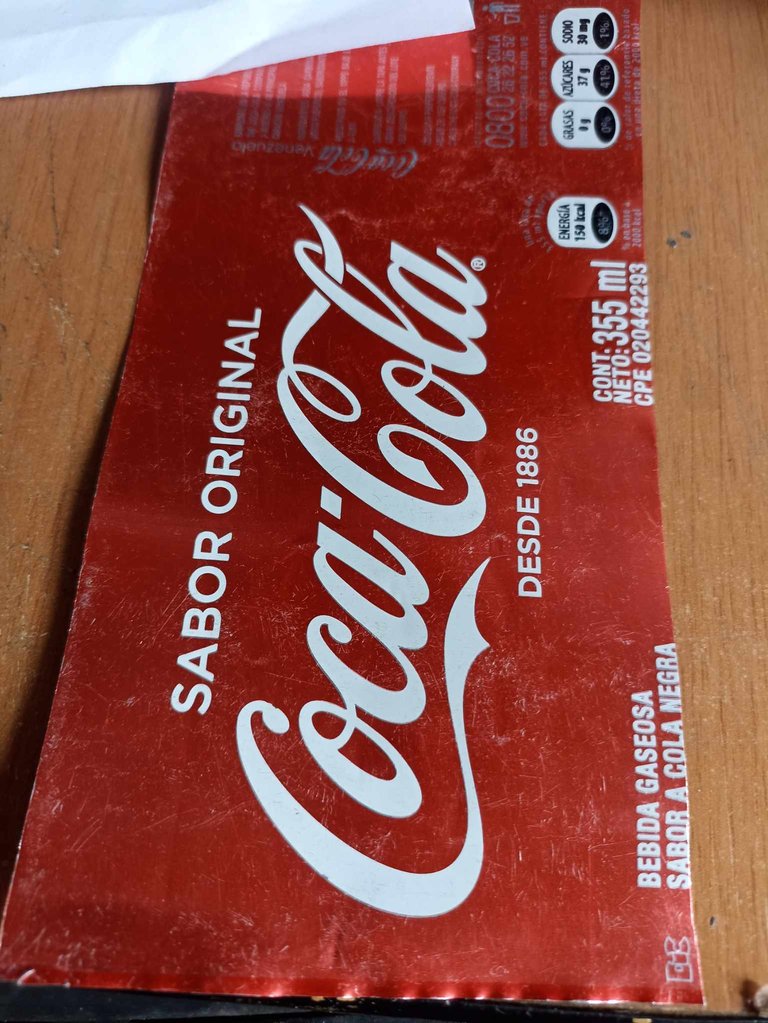 |
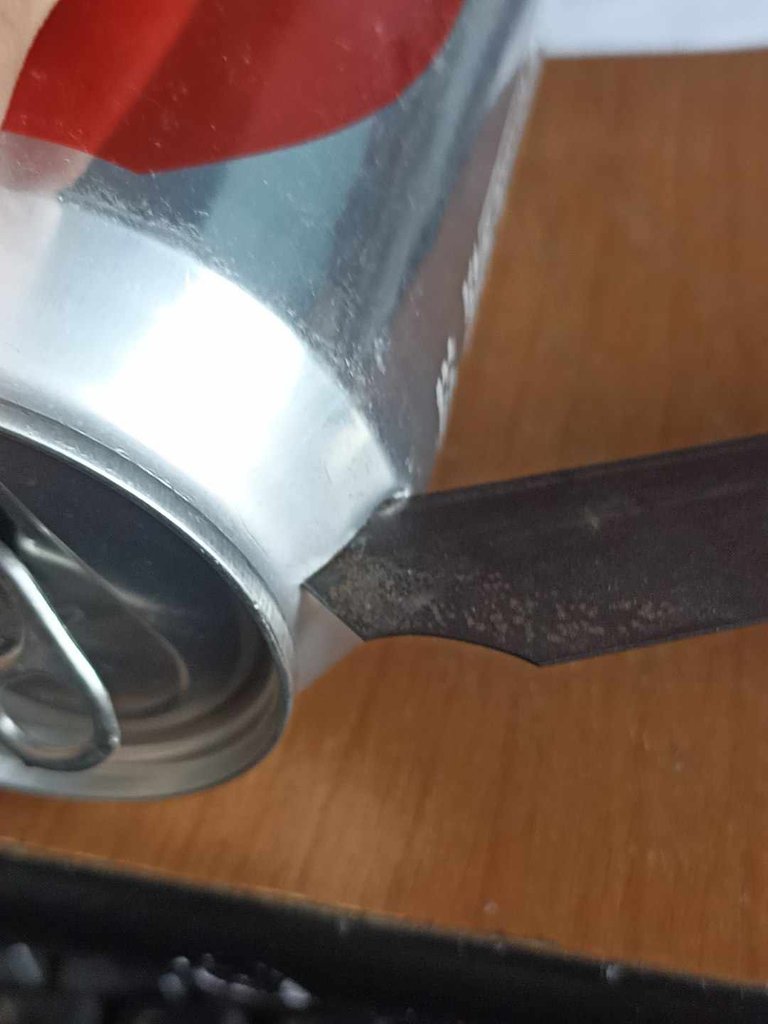
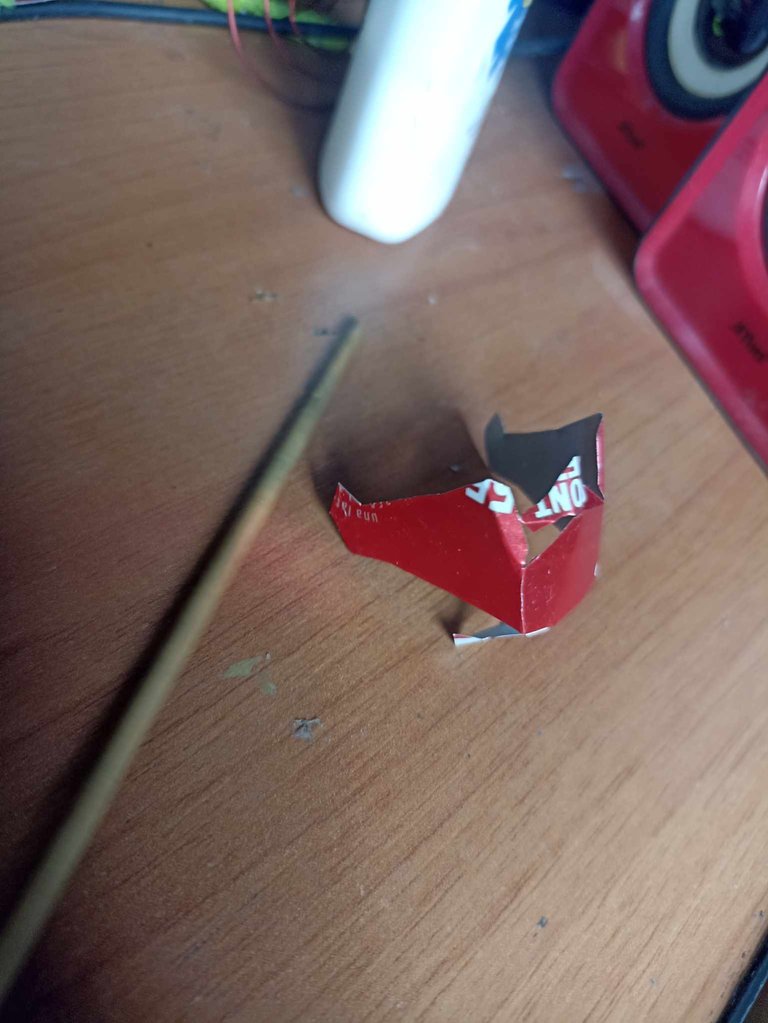
I started by cutting two cans of Coca Cola, to take advantage of the red color, I only had one can and to ensure that there was no shortage of material I got another one, which I bought and drank it hehehe, it's all for the art. So that way I was able to start the project by cutting both cans until transforming them into sheets so I could work better.
Comencé cortando dos latas de coca cola, para aprovechar el color rojo, solo tenía una lata y para asegurar de que no faltara material conseguí otra, la cual compré y me la tomé jejeje, todo sea por el arte. Así que de esa forma pude comenzar el proyecto cortando ambas latas hasta transformarlas en láminas para poder trabajar mejor.
 |  |  |
|---|---|---|
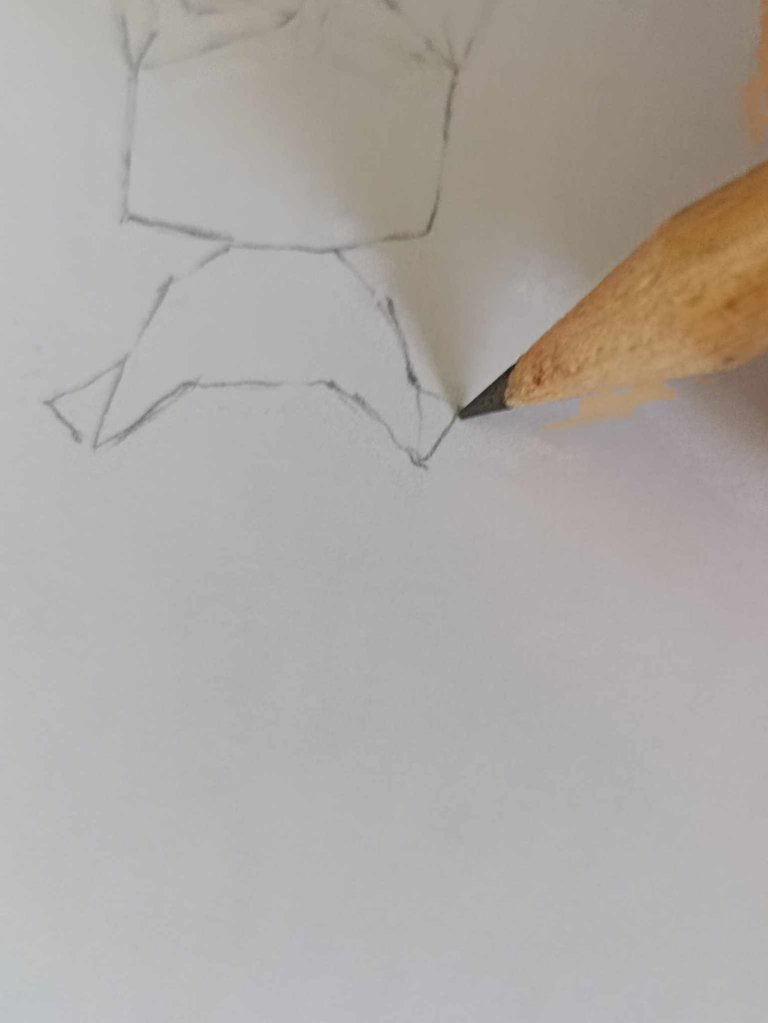 | 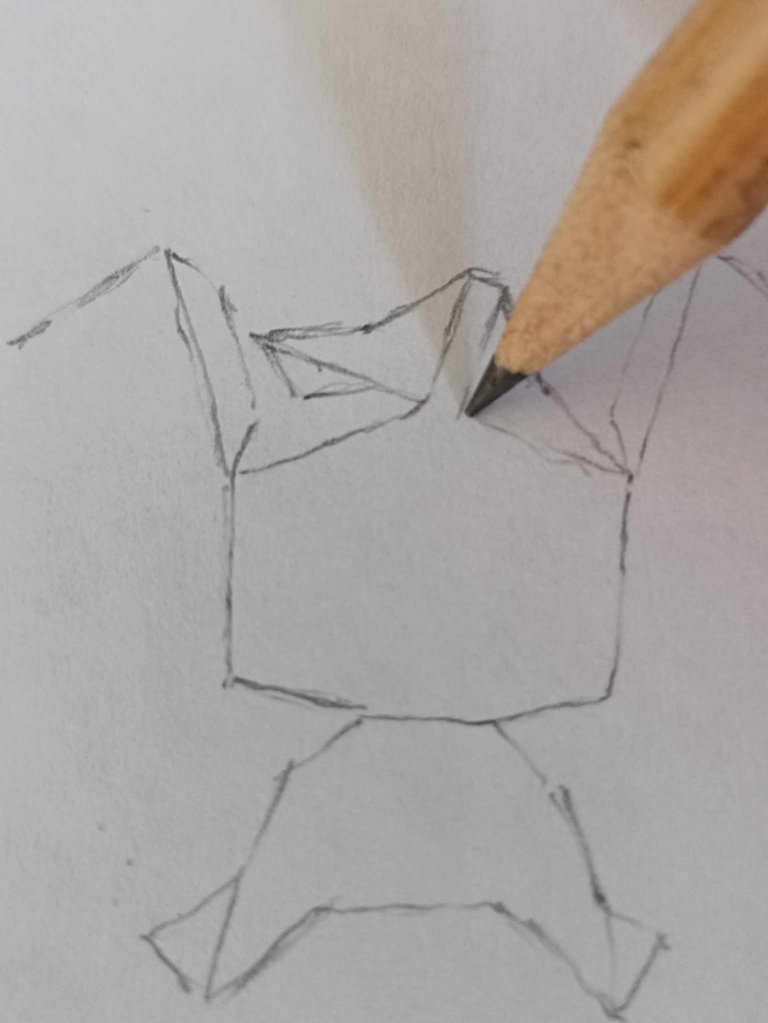 | 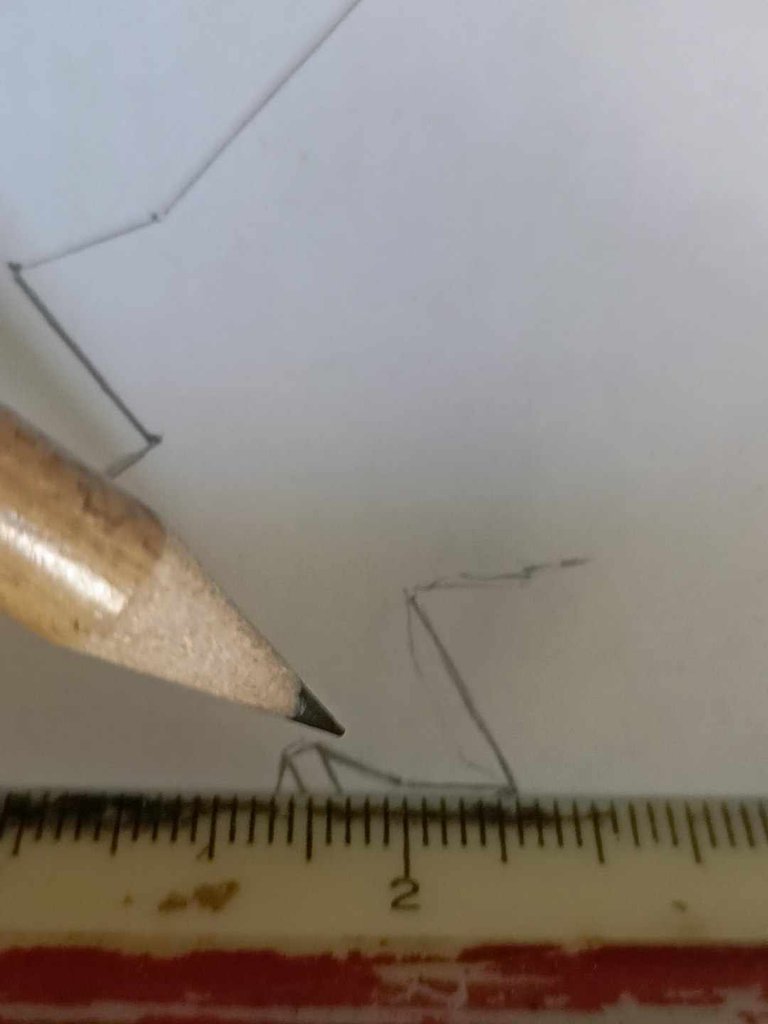 |
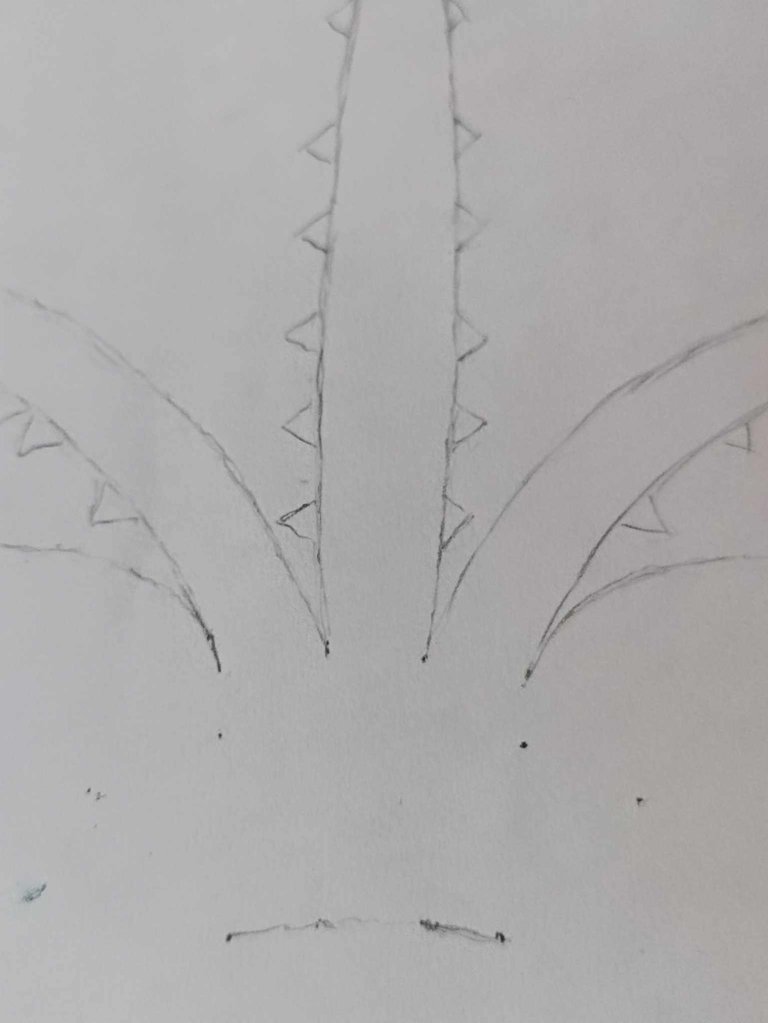
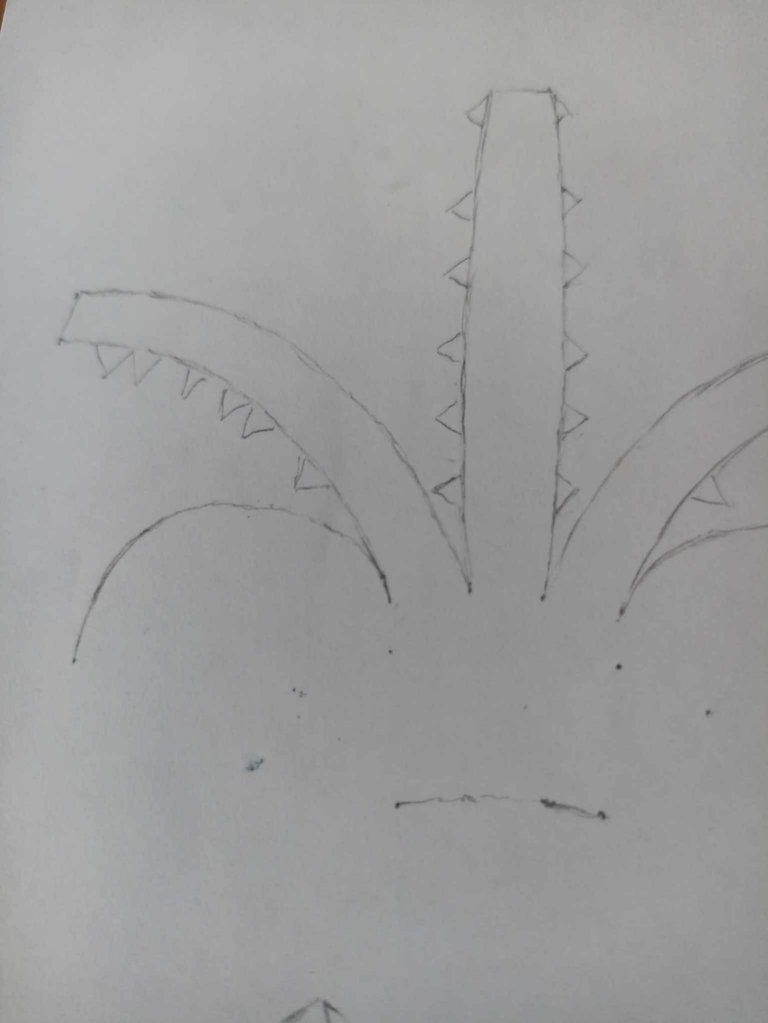
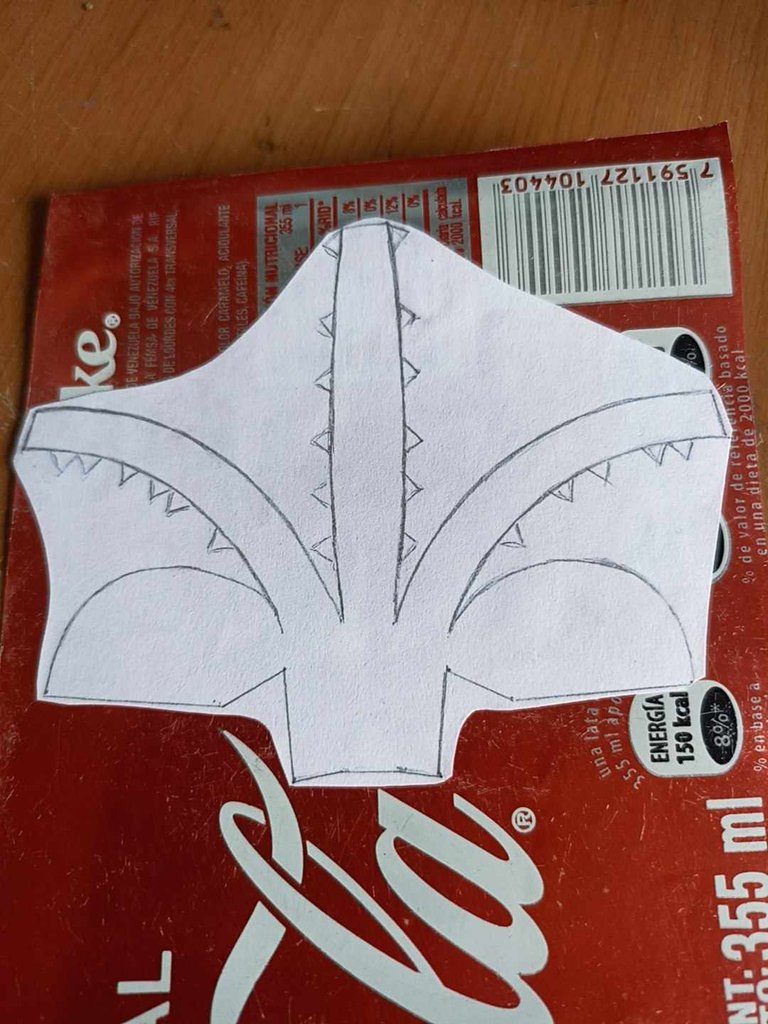
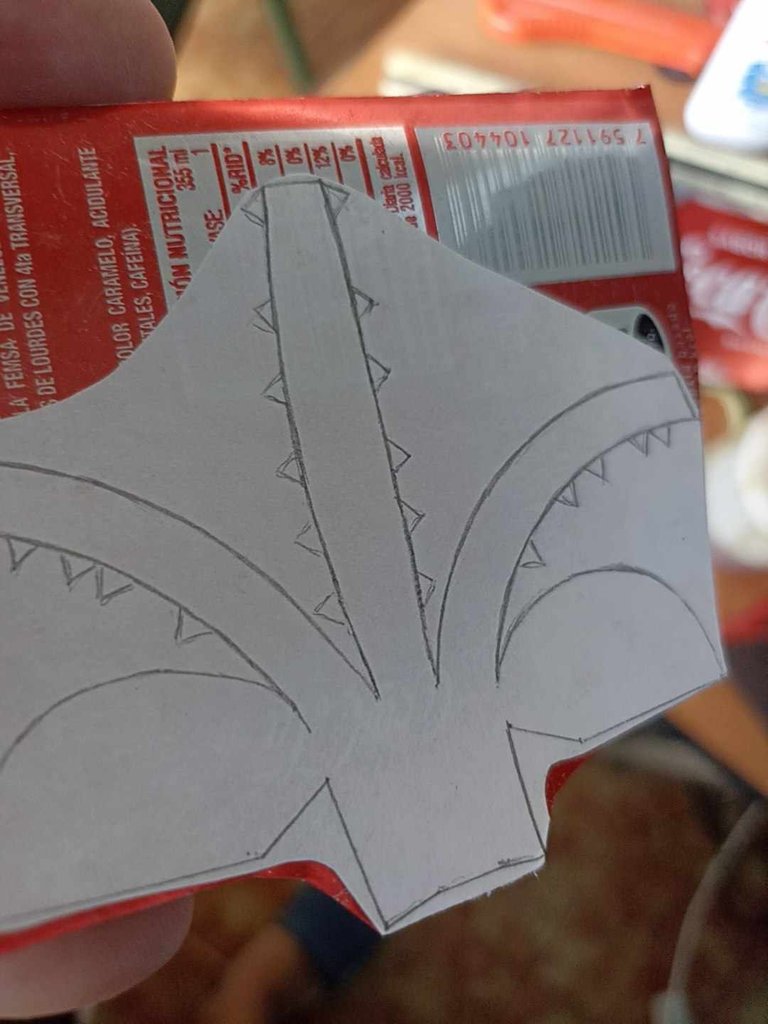
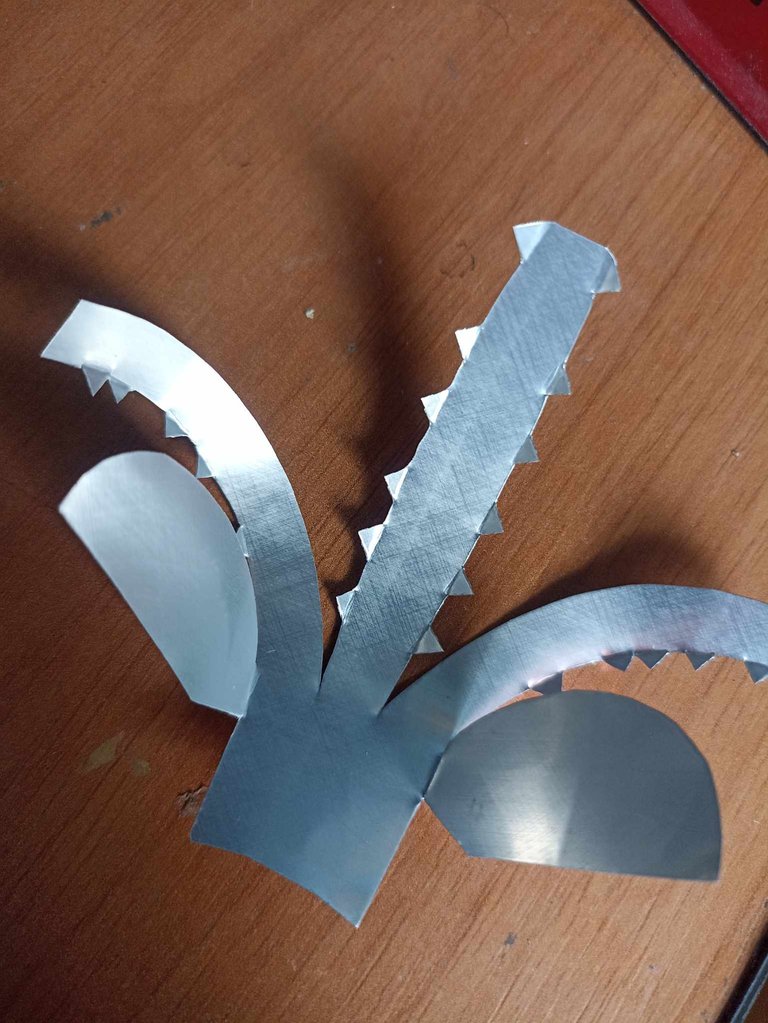
The next step was to make the templates for Spiderman's head. As a model I used previous models of Iron Man's helmets which I modified to achieve a resemblance to Spider-Man. I drew on paper and after sketching I only had to highlight the lines with another stronger pencil and then I would have the patterns ready. In the end my head was left in two pieces.
El siguiente paso fue hacer las plantillas para la cabeza de Spiderman, como modelo usé anteriores modelos de los cascos de Irón Man los cuales yo modifiqué para lograr un parecido al Hombre Aráña. Dibujé sobre papel y luego de bocetear solo me toco remarcar las líneas con otro lápiz más fuerte y así tendría listos los patrones. Al final la cabeza me quedó de dos piezas.
 |  |  |
|---|---|---|
 | 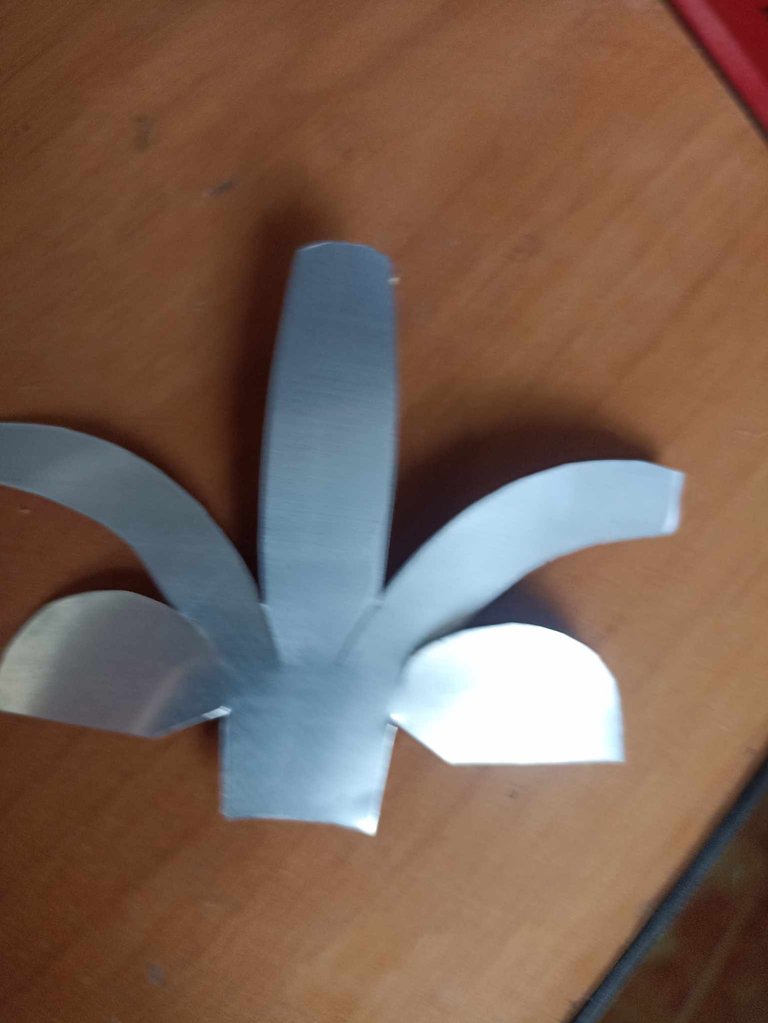 |  |
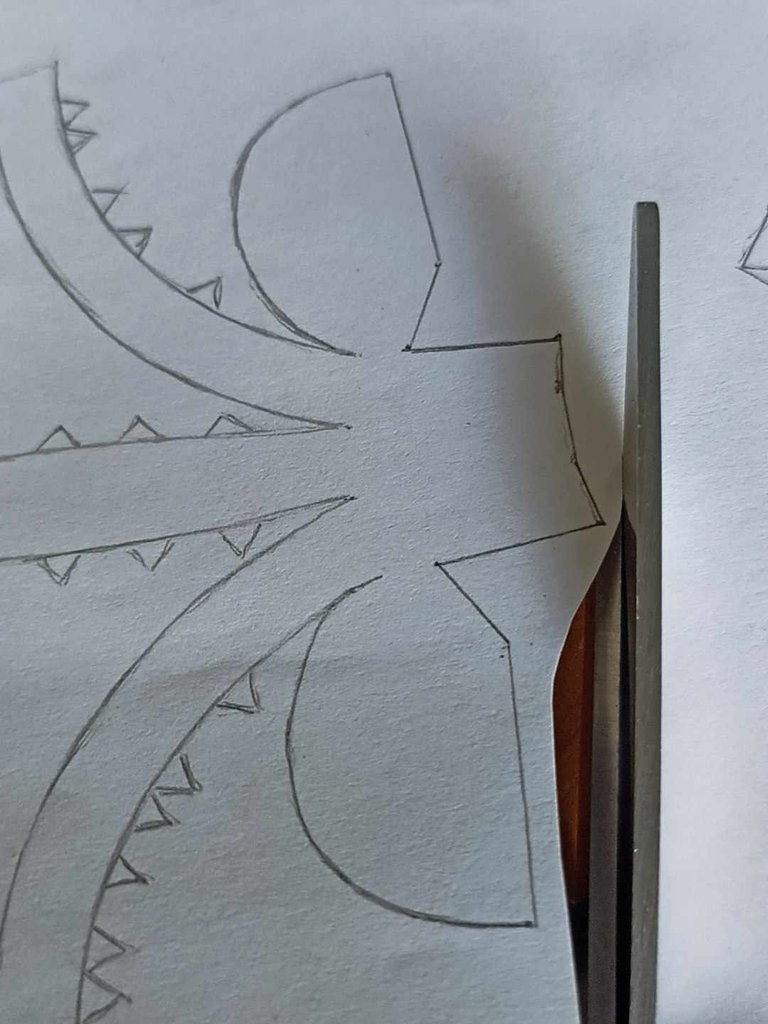
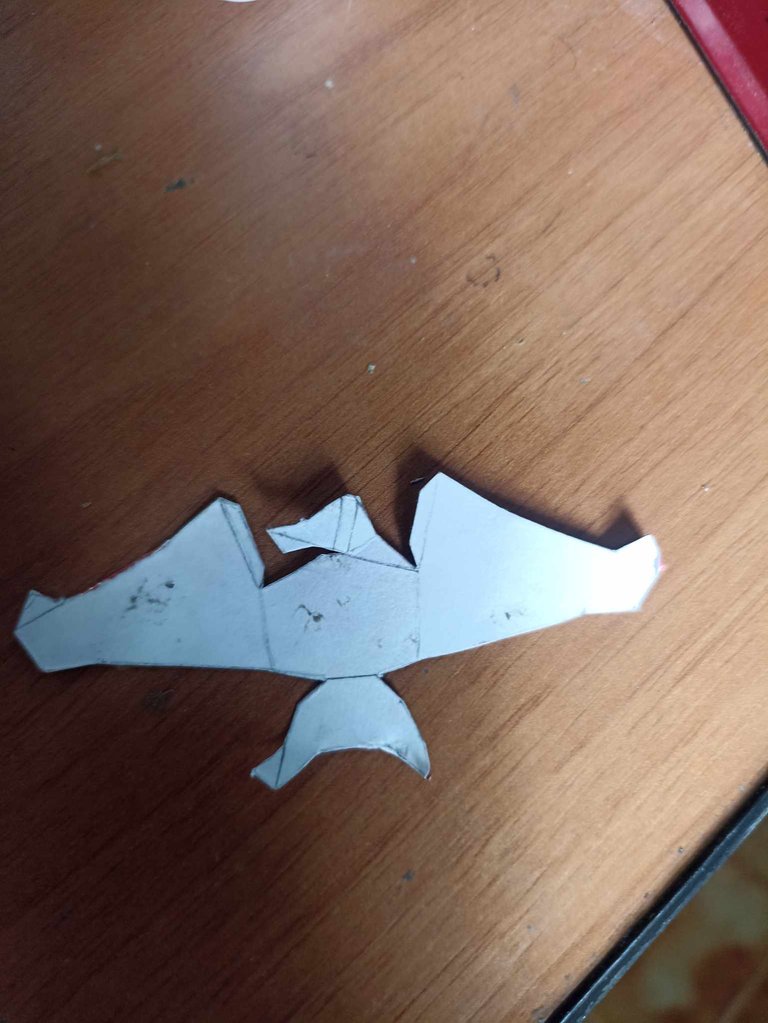
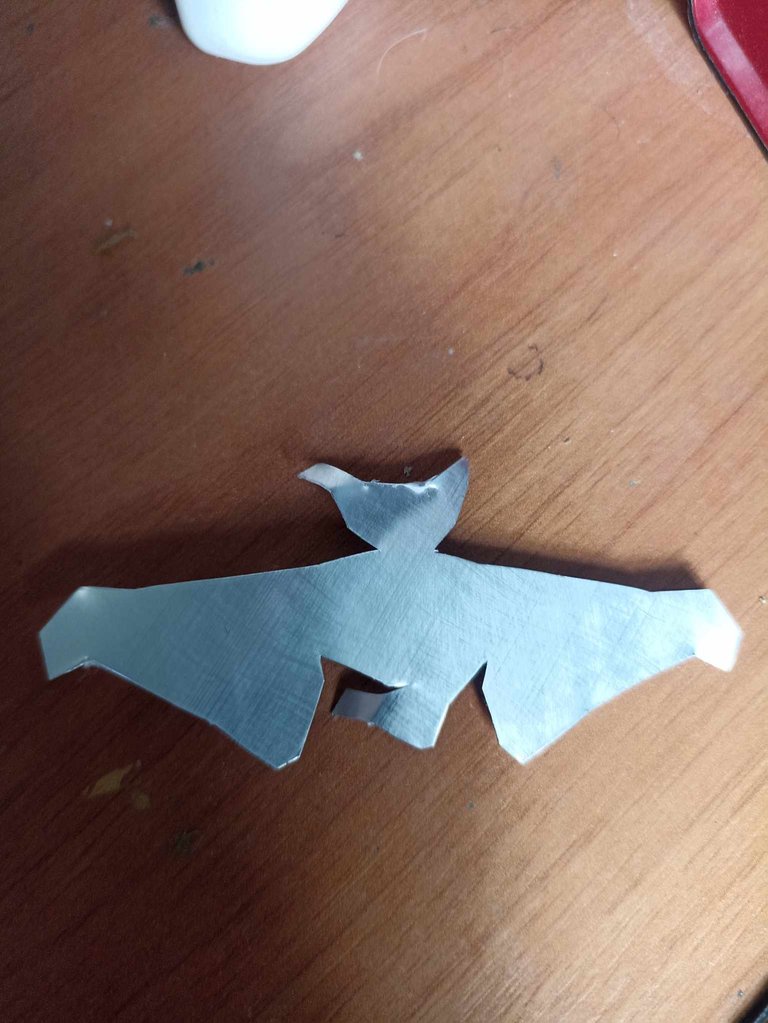
The next step is to cut the pattern of the drawing and place it and glue it on top of the can. Once this is done, cut out with scissors, and then precisely cut each of the pieces following the line that has been drawn. Then remove the paper and model, for that I use a pen to trace the can and thus fold better and then glue.
El siguiente paso es cortar el patron del dibujo y ponerlo y pegarlo encima de la lata. Una vez hecho esto recortar con la tijera, para luego cortar de forma precisa cada una de las piezas siguiendo el trazo que se ha dibujado. Después quitar el papel y modelar, para eso utilizo un bolígrafo para trazar la lata y así doblar mejor para luego pegar.
 |  |  |
|---|
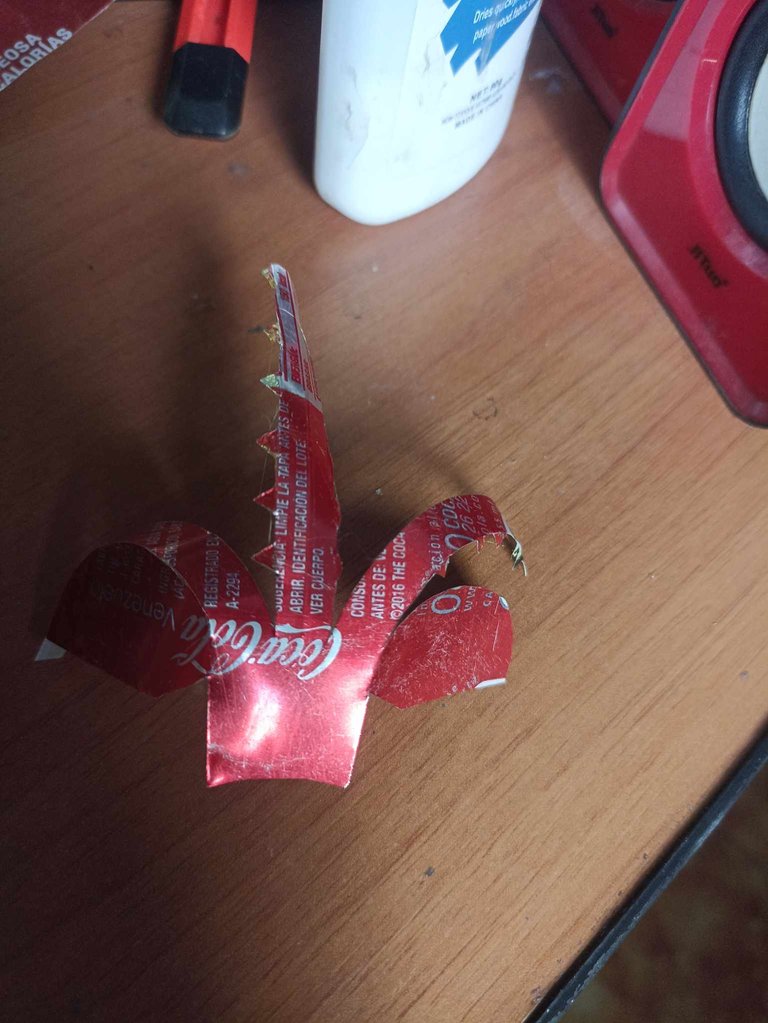
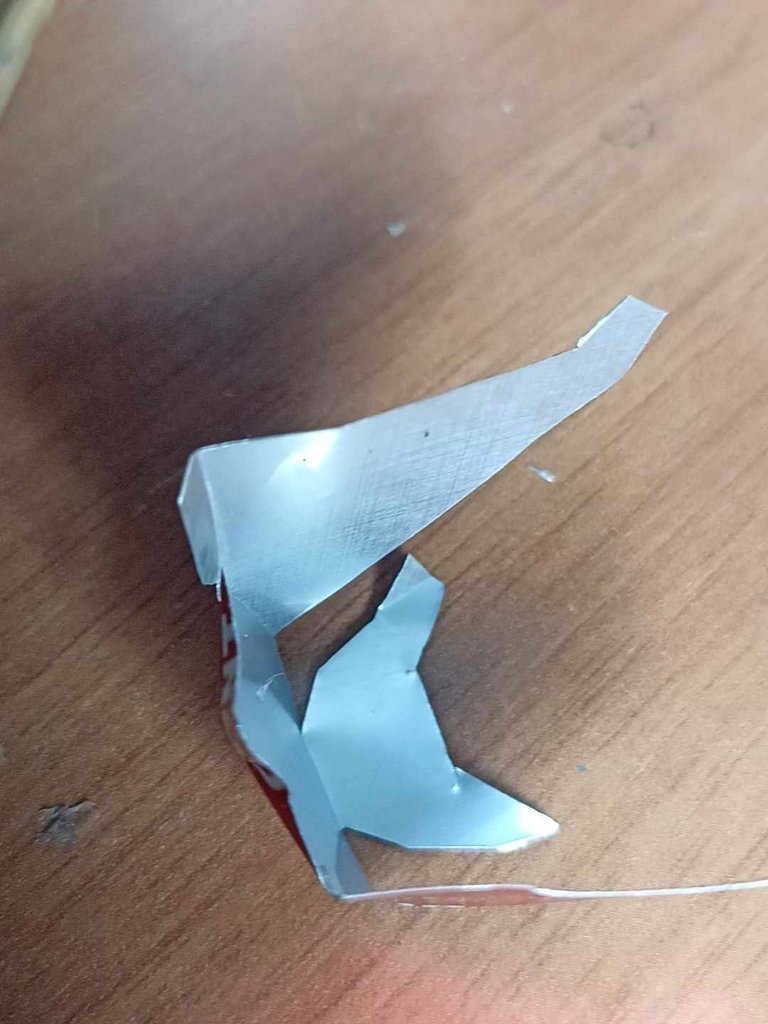
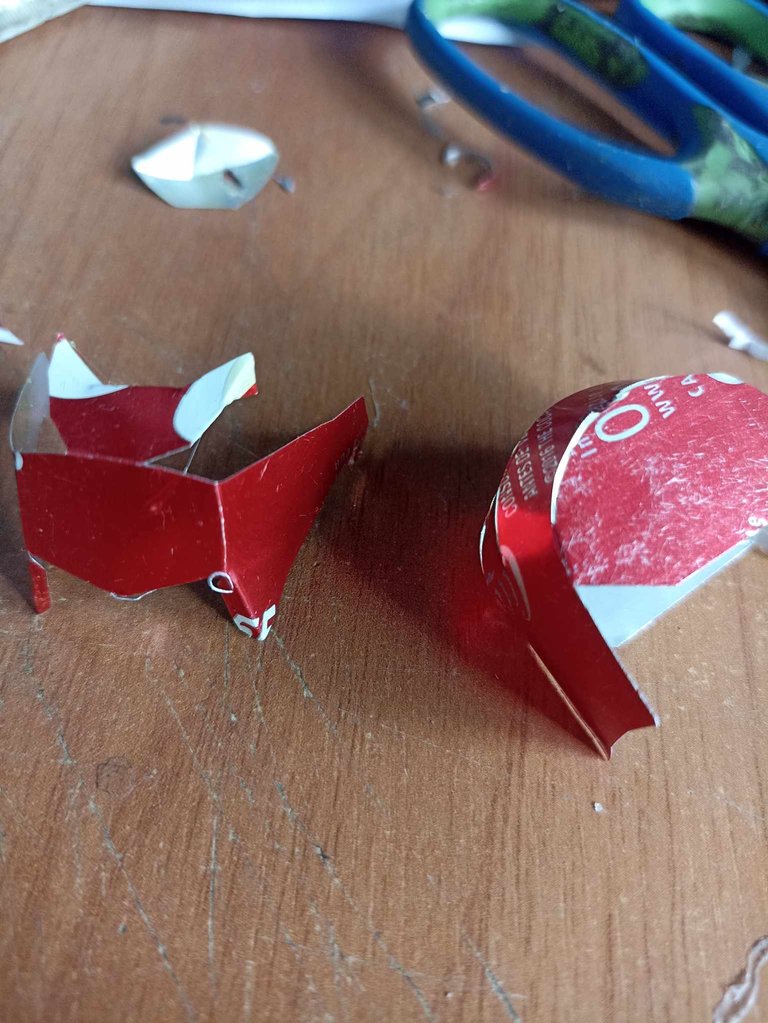
After molding, the next step is simpler, it involves placing glue on the inside and also on the folds that each piece has. After drying, we begin to apply one by one until it is well fixed.
Después de moldear, el siguiente paso es mas sencillo, se trata de colocar pegamento por la parte interior y tambien por los pliegues que tiene cada pieza, después de secar comenzamos a poner una a una hasta que quede bien fijado
 |  | |
|---|---|---|
 |  |
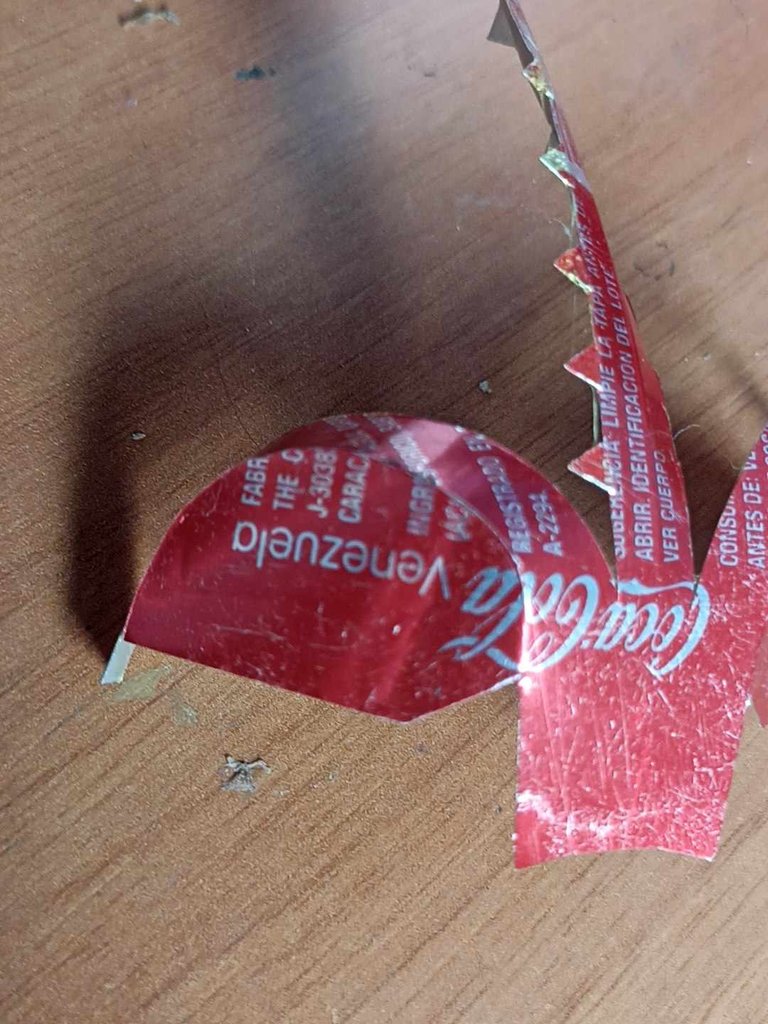
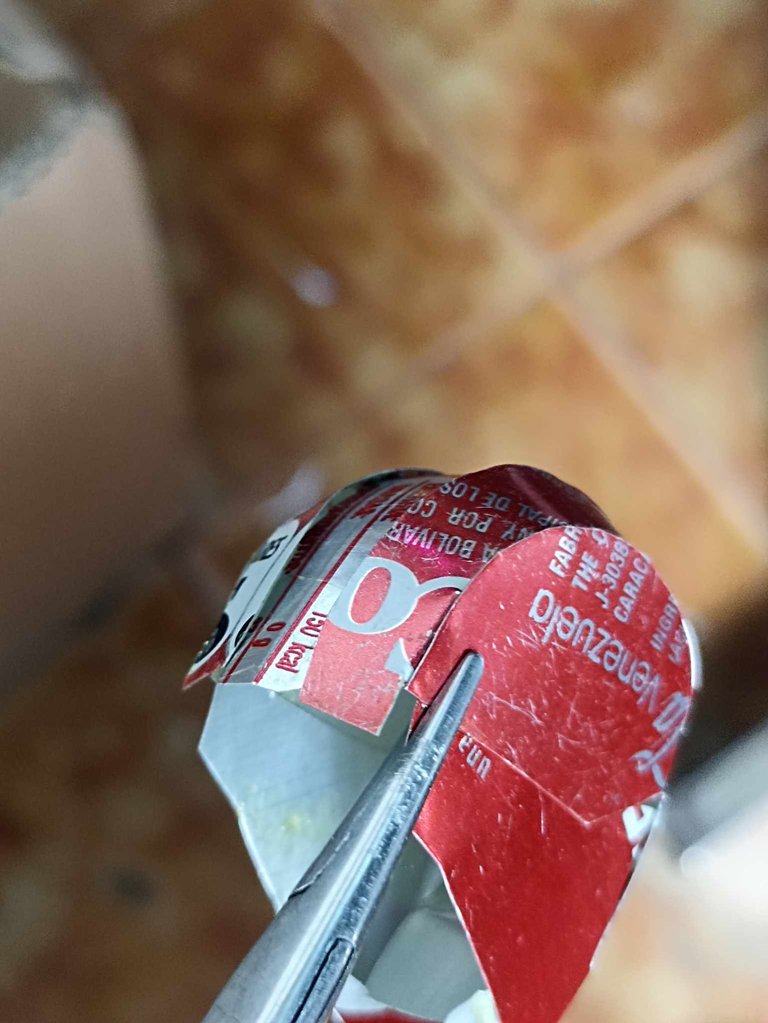
Now it is the turn of the lower part of the head, following the previous process I cut and shape it with the pen, then I can bend it with tweezers until the entire piece is removed.
Ahora es el turno de la parte inferior de la cabeza, siguiendo el proceso anterior voy cortando y moldeando con el bolígrafo, luego puedo doblar con una pinza hasta sacar toda la pieza.
 |  |  |
|---|---|---|
 | 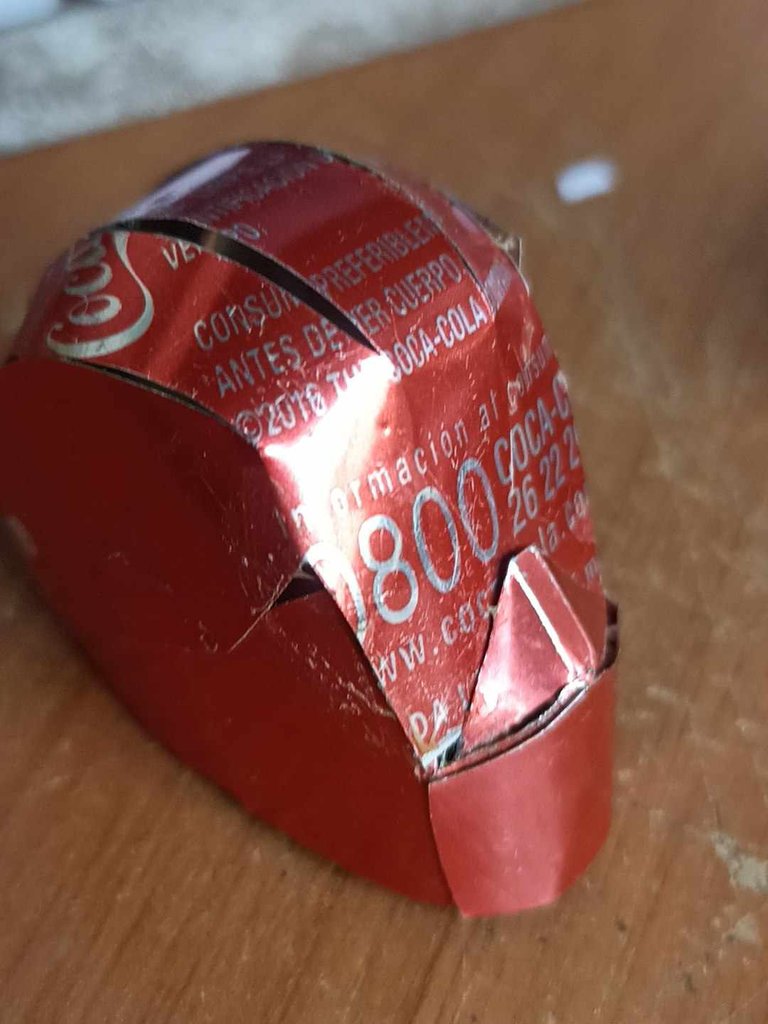 | 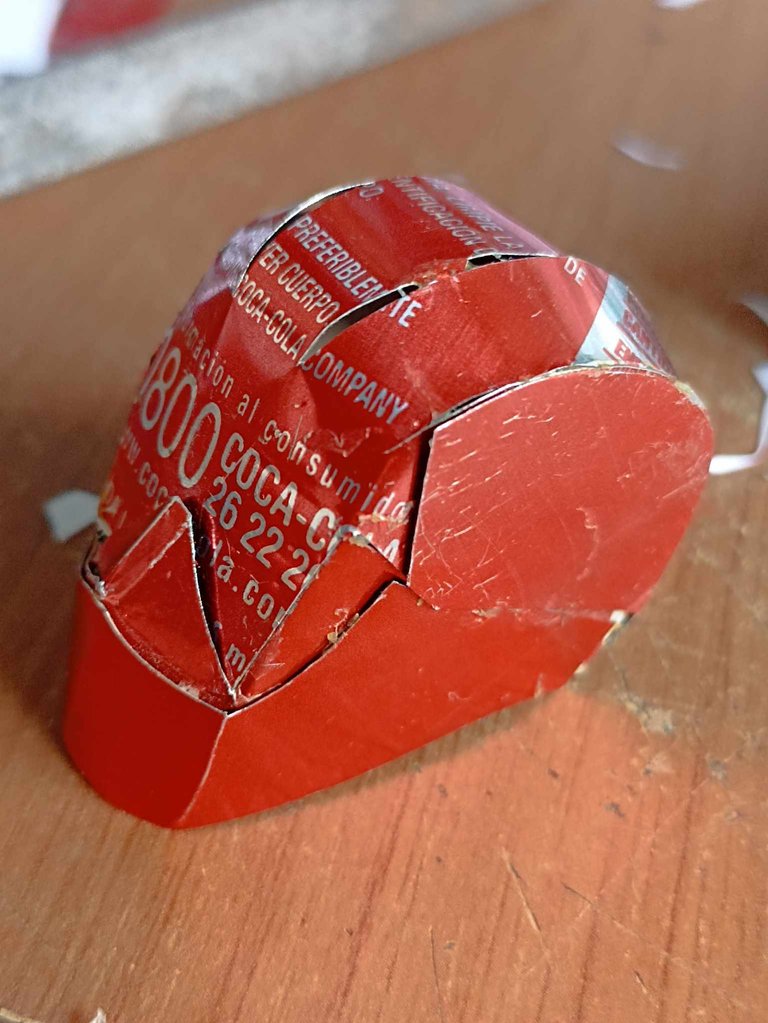 |
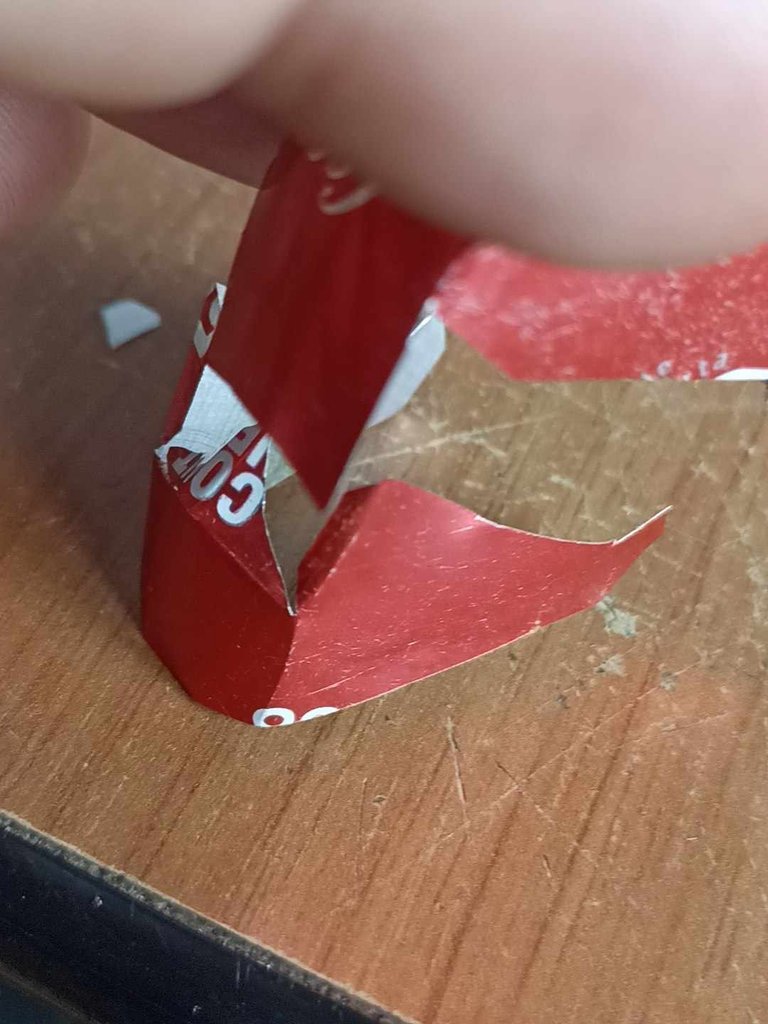
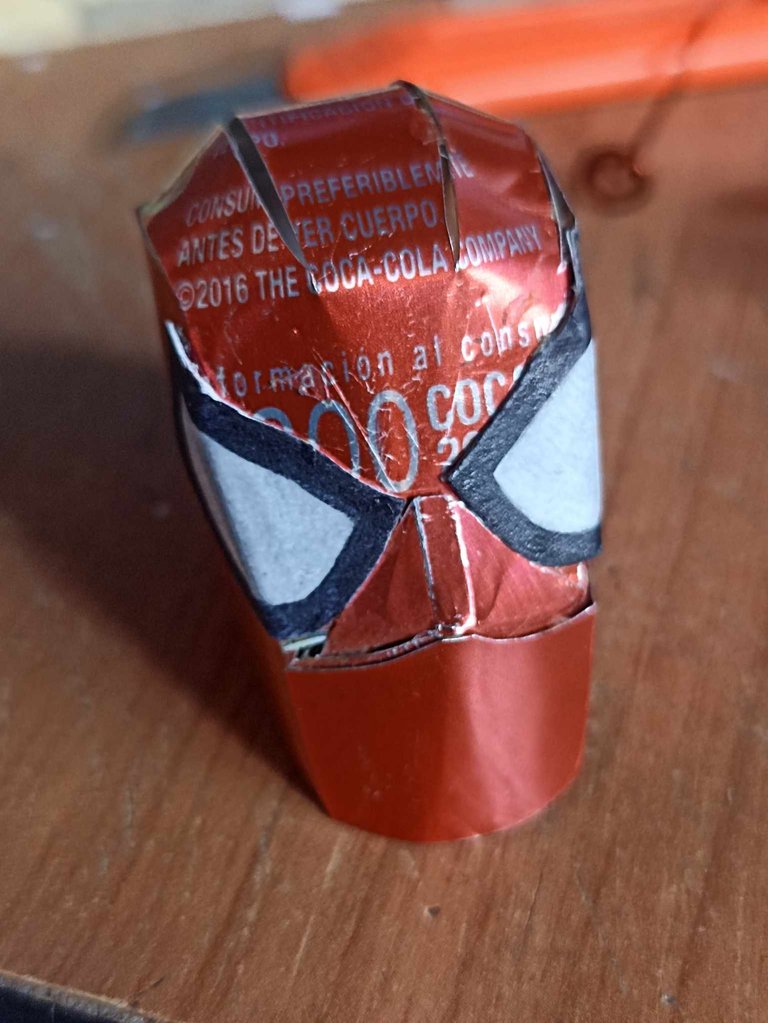
Once the pieces are ready, I begin to join them together, I put the glue in the indicated area and after stopping to dry for a few minutes I begin to glue some parts little by little. Finally, with a precision tweezer I hold the pieces so that they are well fixed.
Una vez listas los piezas comienzo a unirlas entre ellas, pongo el pegamento en la zona indicada y después de dejar de secar unos minutos comienzo a pegar por algunas partes poco a poco. Por último, con una pinza de precisión sostengo las piezas para que queden bien fijadas.
 |  |  |
|---|---|---|
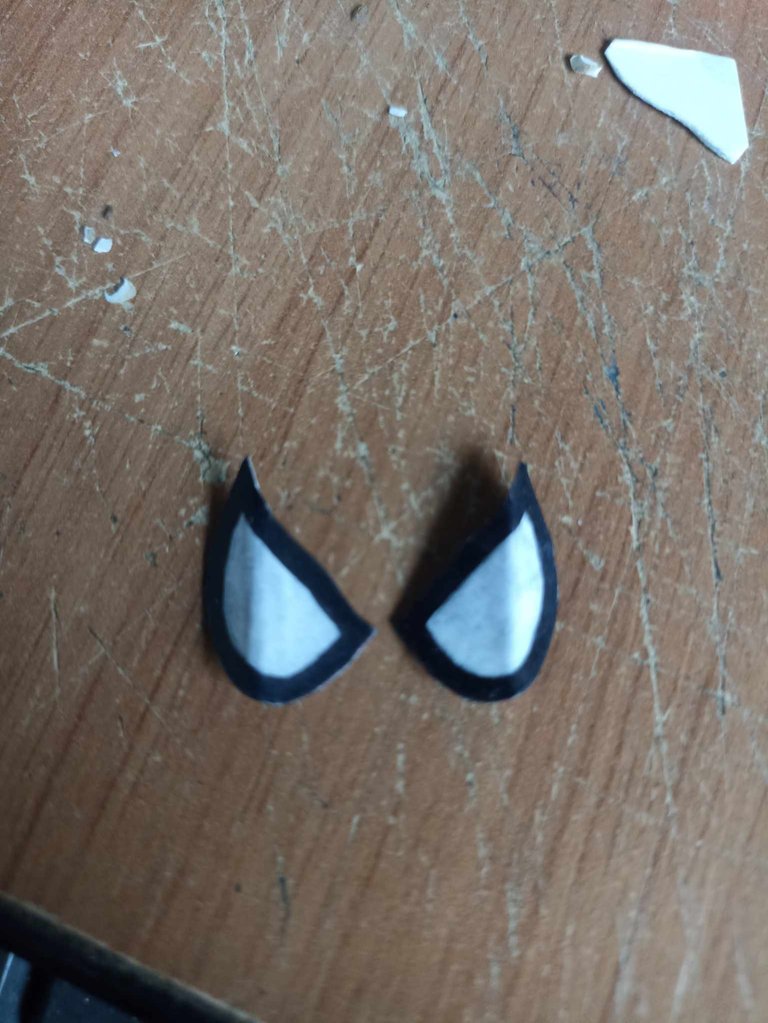 | 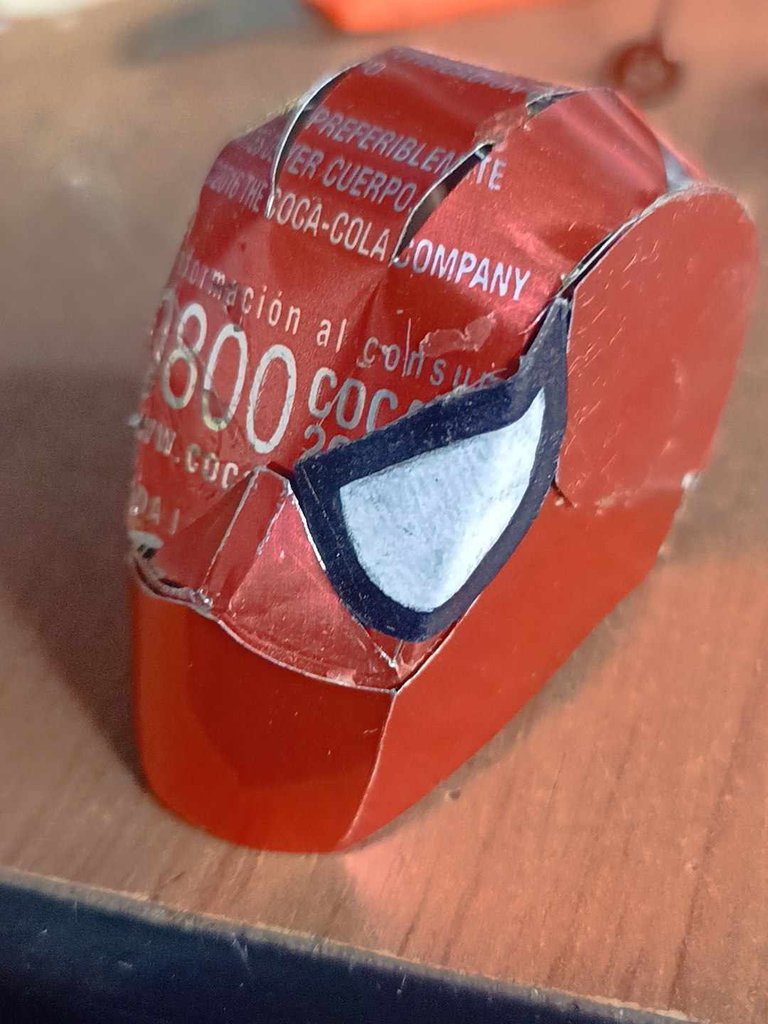 |  |
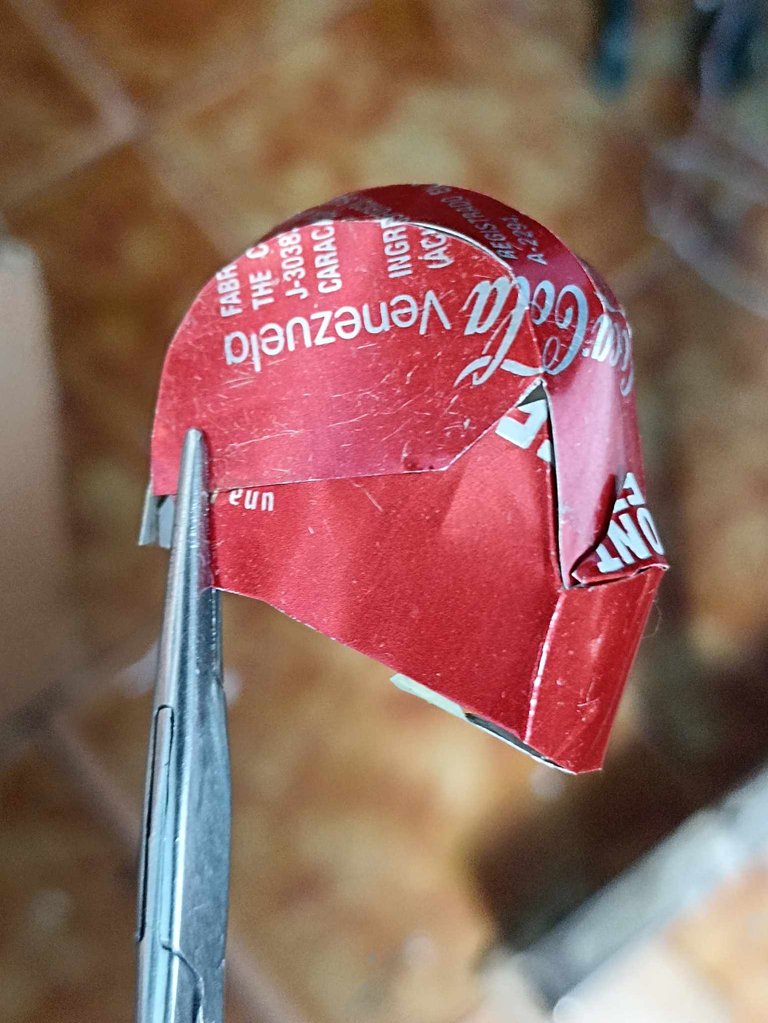
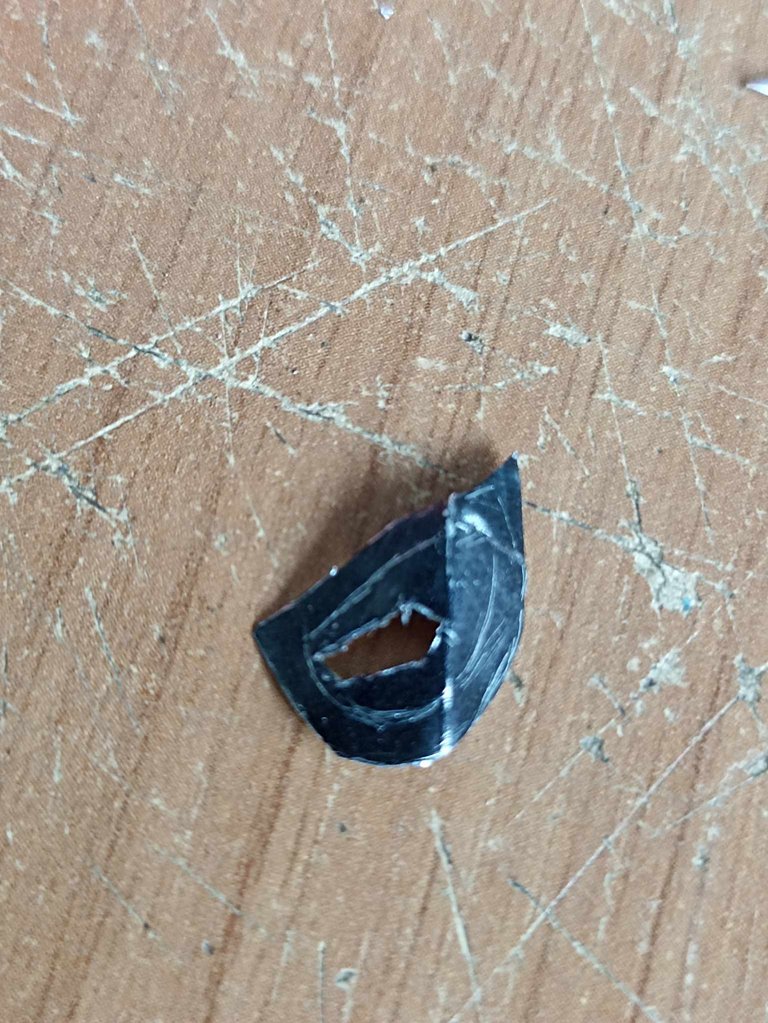
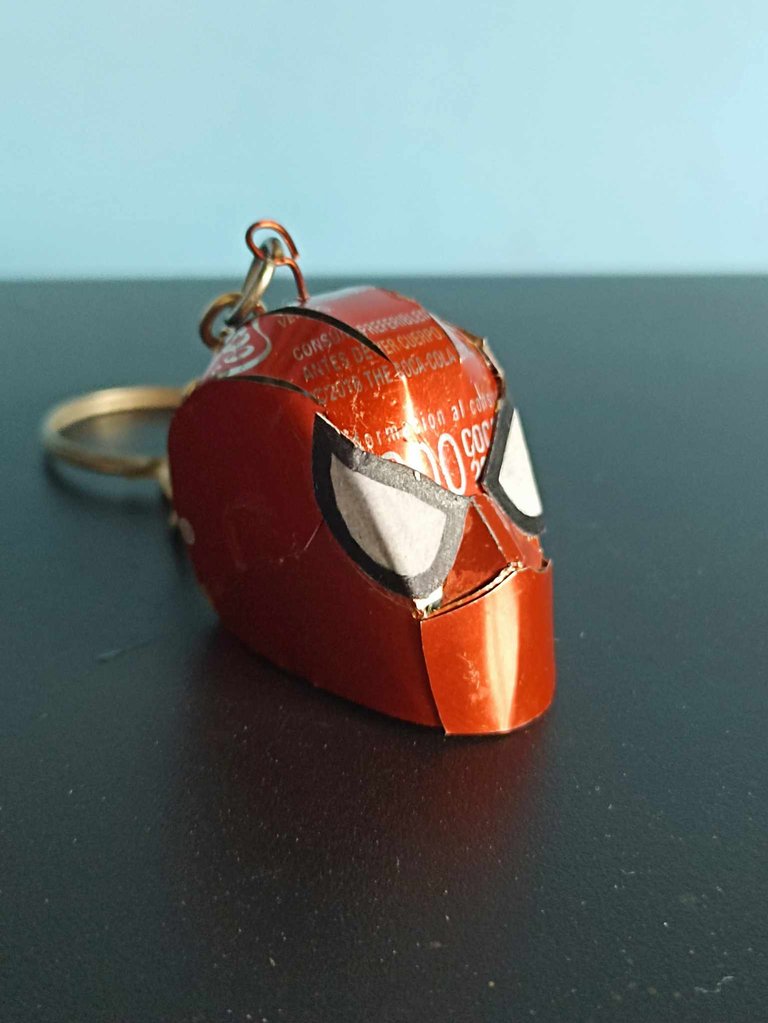
Next I start to make the eyes, since it is an important part to differentiate them from other superheroes, first I cut a piece of tin to make the template, but unlike the other pieces I will make the eyes out of cardboard, since I needed to paint the edge black in color and the can does not absorb the marker like it does with other kinds of paints. So I take advantage of modeling on the cardboard, drawing each eye and painting only the edge with the marker and leaving the rest unpainted. Once the eyes are finished, I measure them with the mascara to make a small fold so it can fit on the entire face.
Seguidamente comienzo a hacer los ojos, ya que es parte importante para diferenciarlos de otros súper héroes, primero corto un trozo de lata para hacer la plantilla, pero al contrario de las otras piezas los ojos los haré de cartón, ya que necesitaba pintar el borde de color negro y la lata no absorbe el marcador como lo hace con otras clases de pinturas. Así que aporvecho de modelar en el cartón dibujando cada ojo y pintando con el marcador solo el borde y el resto lo dejo sin pintar. Una vez terminado los ojos los mido con la máscara para hacer un pequeño doblez y así pueda caber en todo el rostro.
 |  | |
|---|---|---|
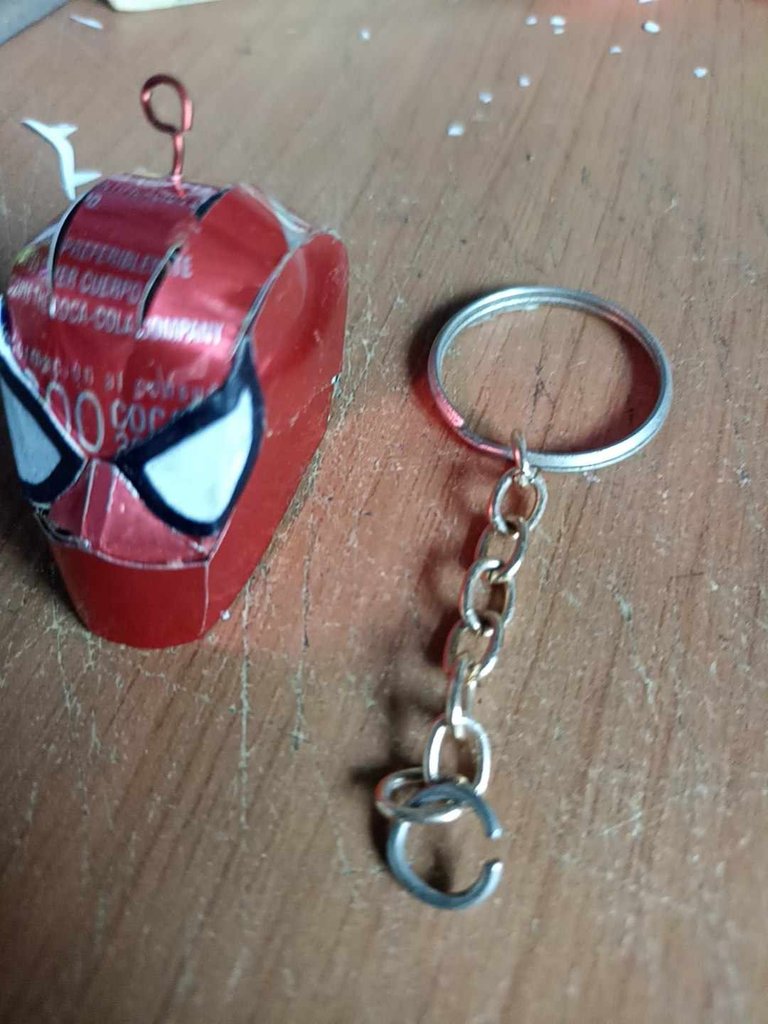 | 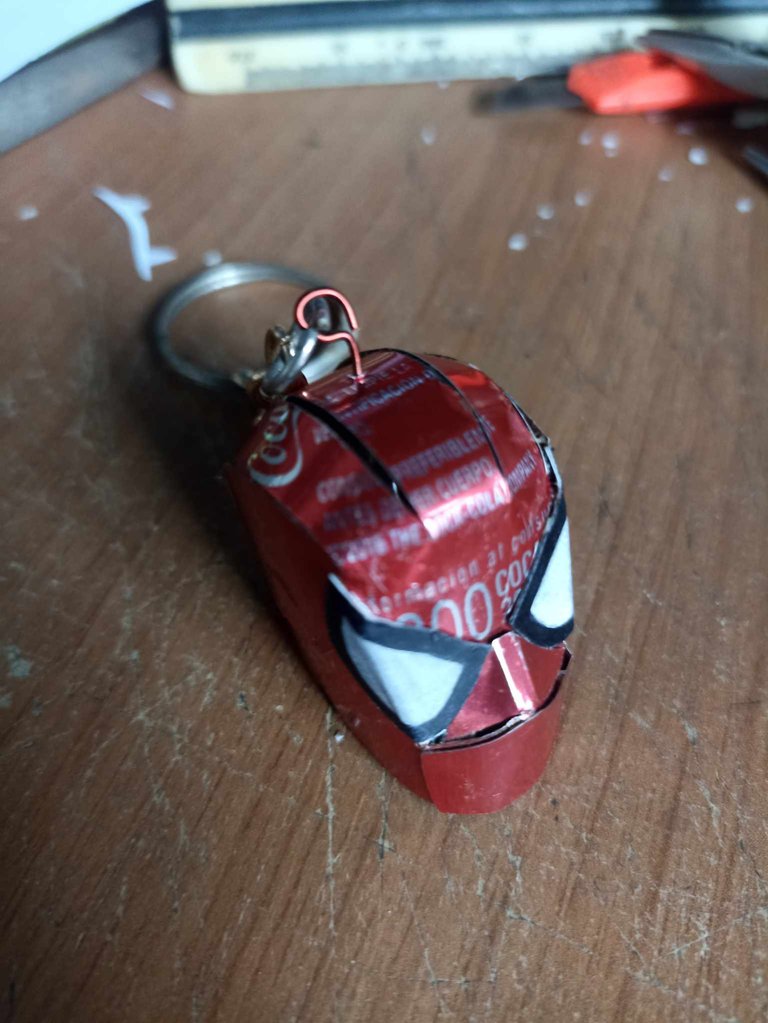 |
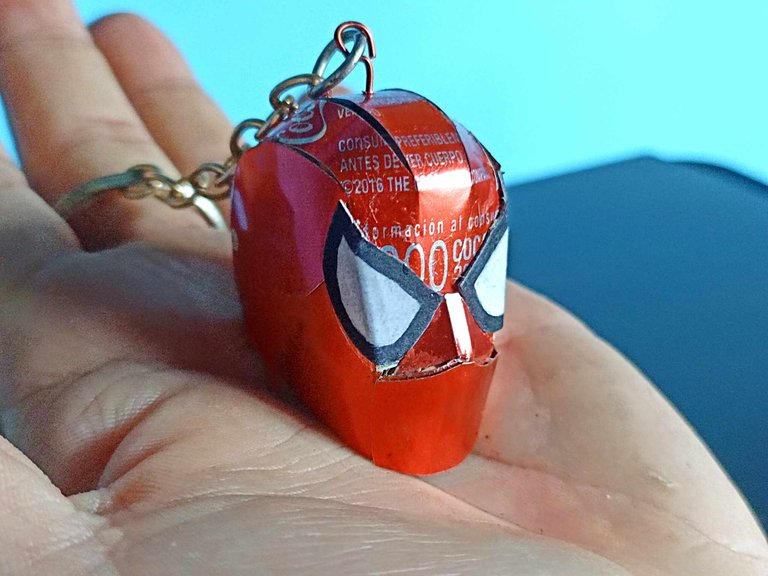
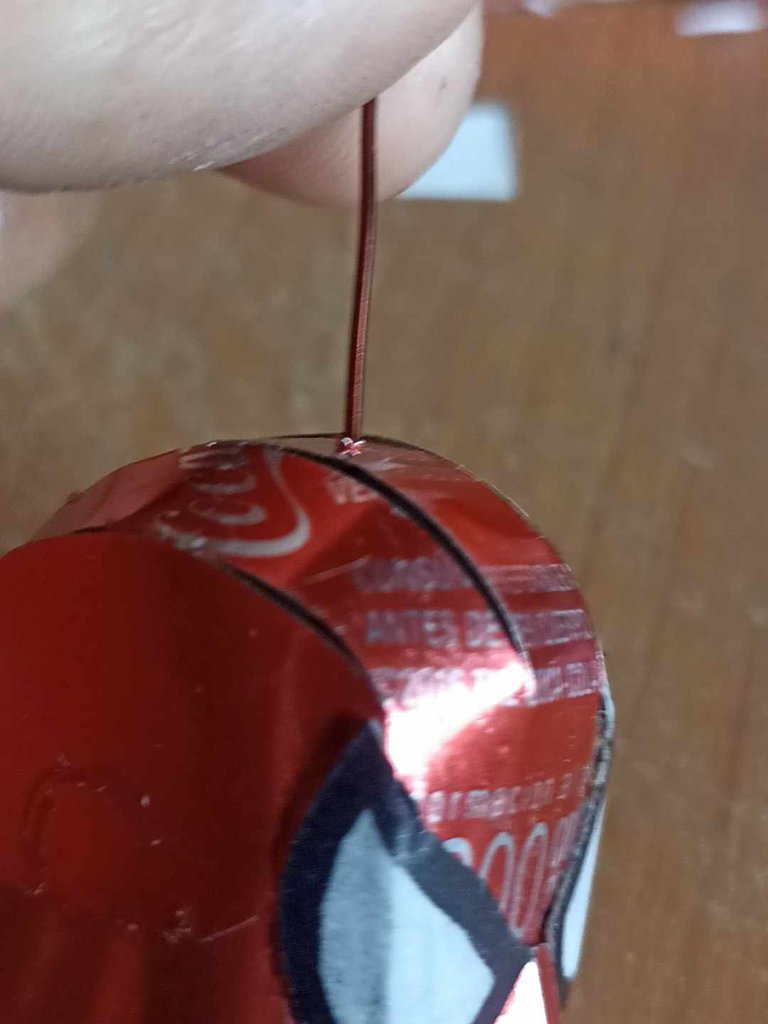
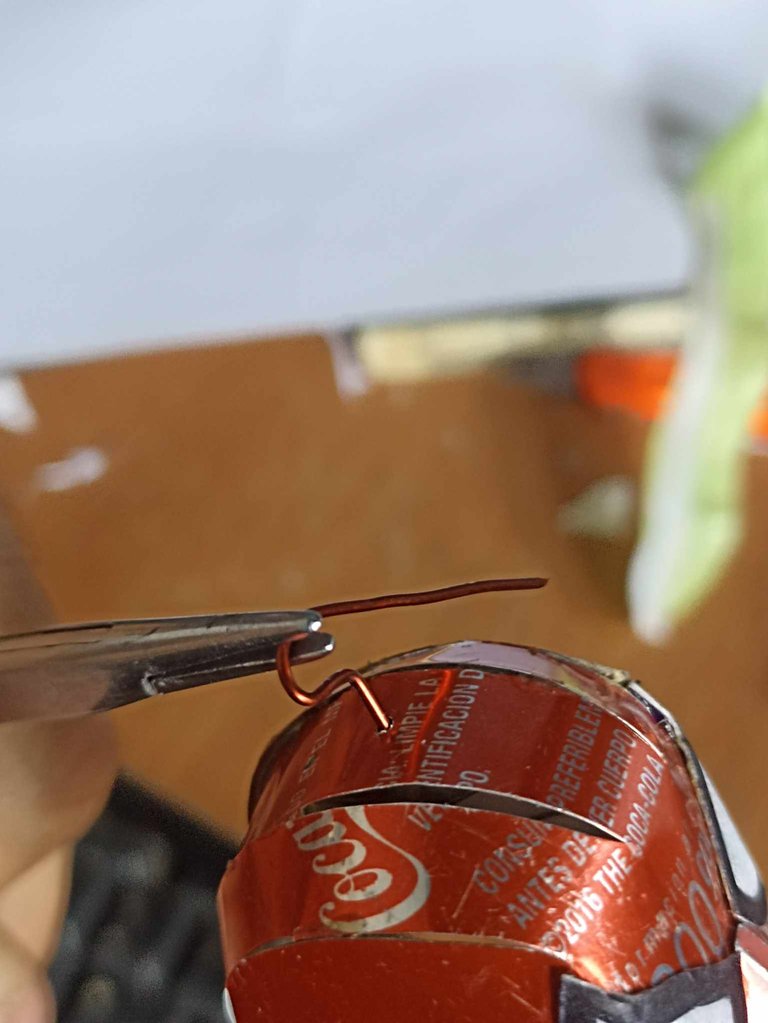
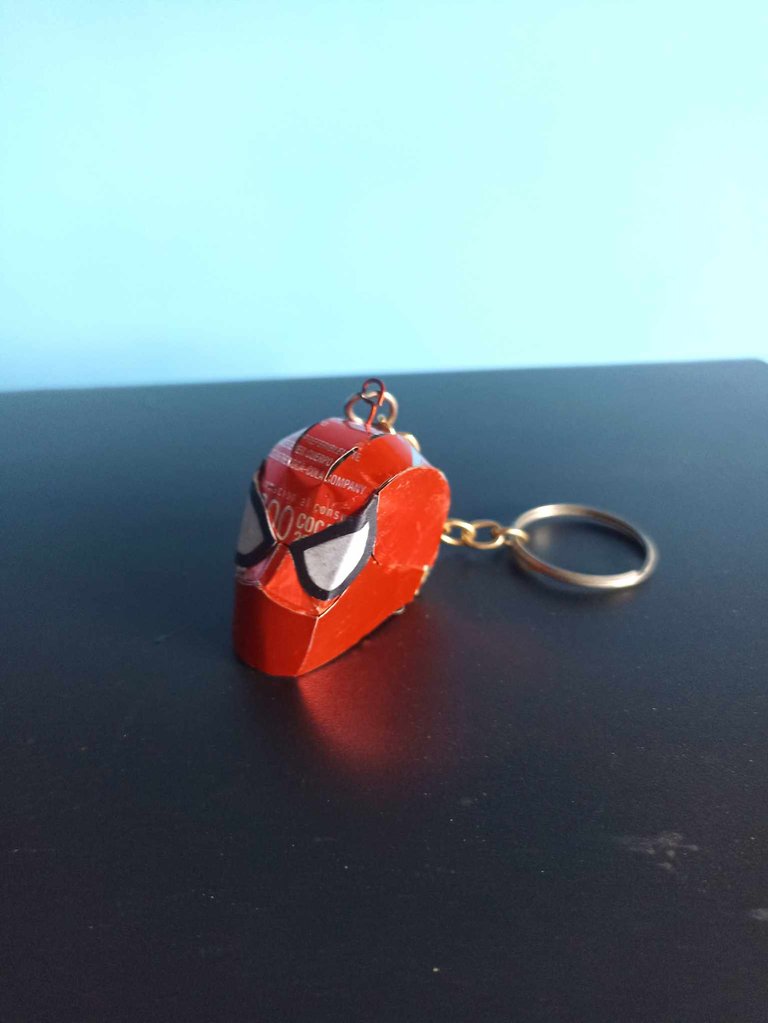
Finally, the most important detail to turn it into a keychain is to put a small ring with a chain on it, but in the head open a small hole through which to insert a copper wire. Then make a small ring through which to place the chain and that's it.
Por último el detalle más importante para convertirlo en un llavero, es ponerle un pequeño aro con cadena, pero en la cabeza abrir un pequeño hoyo por donde introducir un alambre de cobre. Luego hacer una pequeña argolla por donde colocar la cadena y listo.
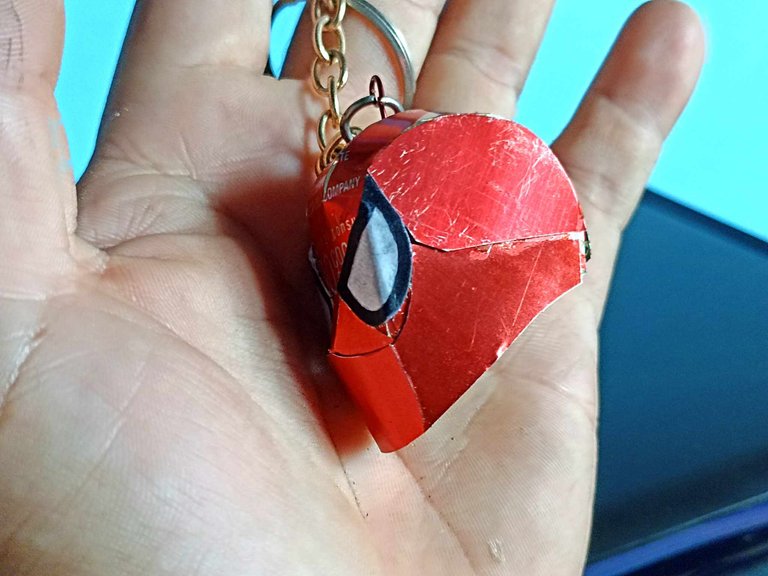
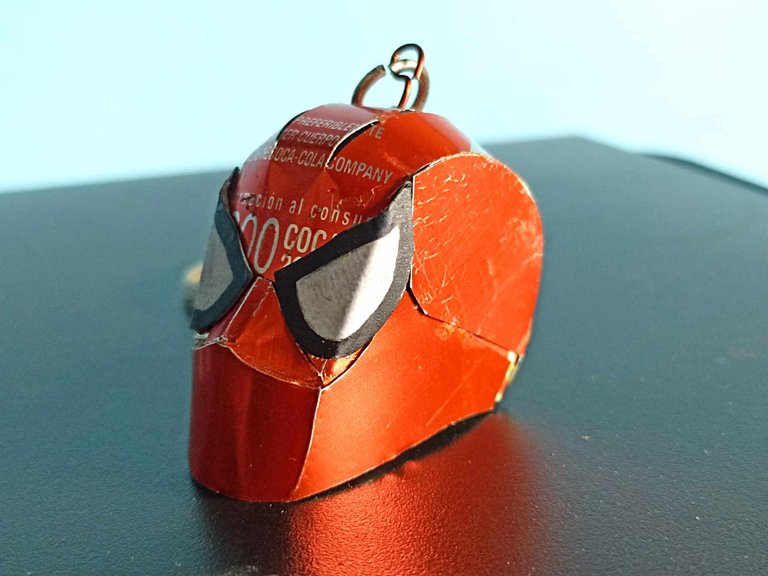
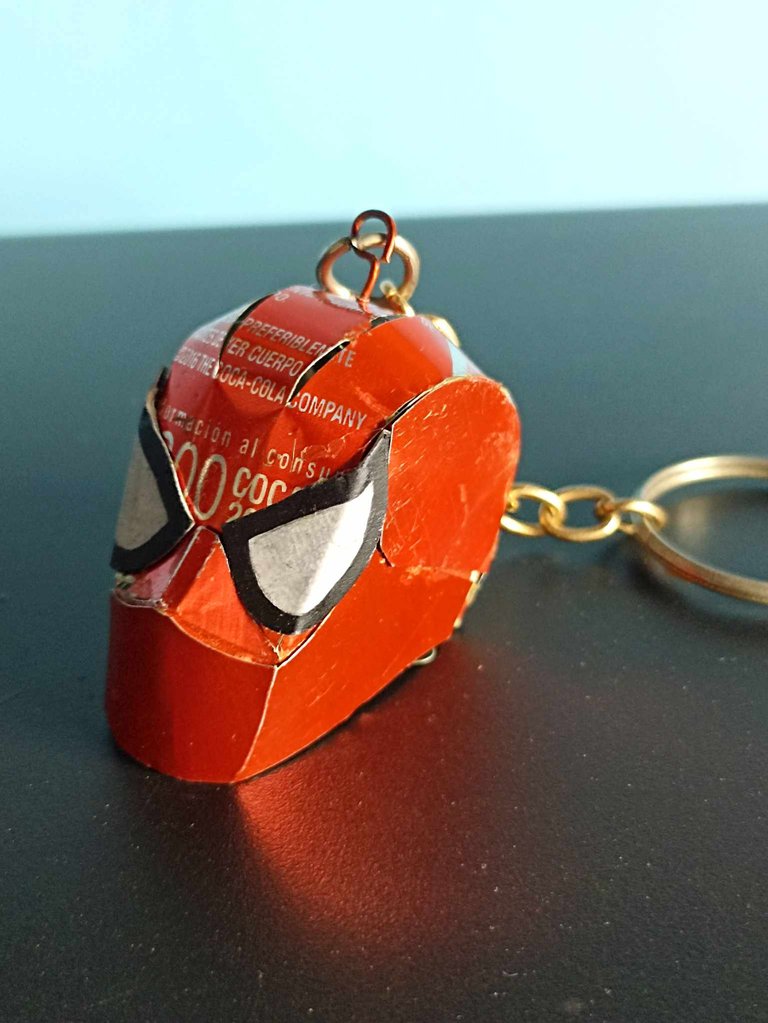
This is how it was finished, I was amazed and very satisfied to be able to achieve it, since I did not find predetermined papercraft templates on the internet. So I was very happy to be able to do it, it was what stopped me to start my project of a complete figure of Spider-Man, which I hope to gather all the material to be able to start soon and share it with this community. I hope you liked it, have a happy start to the year, see you soon!
Así quedó finalizado, quedé maravillado y muy satisfecho de poder lograrlo, ya que no encontré plantillas predeterminadas de papercraft en internet. De manera que quede muy a gusto de poder hacerlo, era lo que me detenía para comenzar mi proyecto de una figura completa del Hombre Araña, que espero reunir todo el material para poder comenzar pronto y compartirla con esta comunidad. Espero que les haya gustado, que tengan un feliz inicio de año, me despido hasta pronto!
Doing this with a coca cola can is impressive! :)
And the final result is very very good!
Thank you very much, I'm glad you liked how it turned out.
Ante todo un feliz y bendecido año 2024, que este plagado de éxitos y todo lo mejor para ti.
Grandioso trabajo para comenzar el año. Y te cuento que si llegas a hacer un Spiderman con cuerpo de Iroman, mi hija caerá desmayada ya me imagino eso 😂😂😂
Un Saludo inmenso para ti...
!DIY
Feliz año nuevo amiga bella, tambien deseo muchísimos éxitos en todo y especialmente por aquí. Ya volviendo al ruedo, jejeje tu crees? pues dile que se prepare porque eso lo va a ver muy pronto!
Ese llavero del Hombre Araña quedó muy bonito, muy buena explicación del paso a paso, gracias por compartir tus proyectos con materiales reciclables.
Muchas gracias, es el comienzo de un proyecto más largo, espero también lo puedas ver
Gracias a ti por compartirlo, trataré de estar atenta a tus proyectos. Saludos
Espectacular...un trabajo asombroso. Como siempre impecable amogo. Feliz año y que sea de exitos y grandes trabajos como este.
!DIY
!discovery 50
muchas gracias querida amiga, y tambien te deseo un feliz año full éxitos!
You can query your personal balance by
!DIYSTATSCongratulations @fixie! You have completed the following achievement on the Hive blockchain And have been rewarded with New badge(s)
Your next target is to reach 5500 replies.
You can view your badges on your board and compare yourself to others in the Ranking
If you no longer want to receive notifications, reply to this comment with the word
STOPCheck out our last posts:
This post was shared and voted inside the discord by the curators team of discovery-it
Join our Community and follow our Curation Trail
Discovery-it is also a Witness, vote for us here
Delegate to us for passive income. Check our 80% fee-back Program
Thanks for your support
You can query your personal balance by
!DIYSTATSThanks for your support
Muy bonito, esta genial
Muchas gracias, Saludos y éxitos!
Grandioso trabajo!
Para pintar las latas lo único que se me ocurre es pintura en aceite. Pero, creo que sale mucho mejor como lo haces, así tal vez puedas colocarles algunos gadgets que suelen utilizar como binoculares y esas cosas.
!LOLZ
!PIZZA
lolztoken.com
They just work on so many levels.
Credit: reddit
@fixie, I sent you an $LOLZ on behalf of flquin
(1/4)
Delegate Hive Tokens to Farm $LOLZ and earn 110% Rewards. Learn more.
Thanks for being a supporter of The LOLZ Project.
BUY AND STAKE THE PGM TO SEND A LOT OF TOKENS!
The tokens that the command sends are: 0.1 PGM-0.1 LVL-0.1 THGAMING-0.05 DEC-15 SBT-1 STARBITS-[0.00000001 BTC (SWAP.BTC) only if you have 2500 PGM in stake or more ]
5000 PGM IN STAKE = 2x rewards!
Discord
Support the curation account @ pgm-curator with a delegation 10 HP - 50 HP - 100 HP - 500 HP - 1000 HP
Get potential votes from @ pgm-curator by paying in PGM, here is a guide
I'm a bot, if you want a hand ask @ zottone444
dejar la pintura de la publicidad de la lata hacer ver mejor el resultado pero a veces si toca pintar
$PIZZA slices delivered:
@flquin(1/5) tipped @fixie
This is absolutely stunning. The final result is really original.
!diy
I'm glad you liked it a lot
You can query your personal balance by
!DIYSTATSthank you!
Lo amo.... 😍☺️💓 Me encanta spiderman y sobre todo la version de Ton Holland
Excelente, a mi también, es un nuevo diseño que me gusta mucho, y así espero poder hacer la figura completa!
Wow... Seguro se verá genial 😁
Si la sumerges en resina de seguro que le haces más resistente, es un excelente trabajo, felicitaciones, amigo.
Congratulations, your post has been upvoted by @dsc-r2cornell, which is the curating account for @R2cornell's Discord Community.
Enhorabuena, su "post" ha sido "up-voted" por @dsc-r2cornell, que es la "cuenta curating" de la Comunidad de la Discordia de @R2cornell.