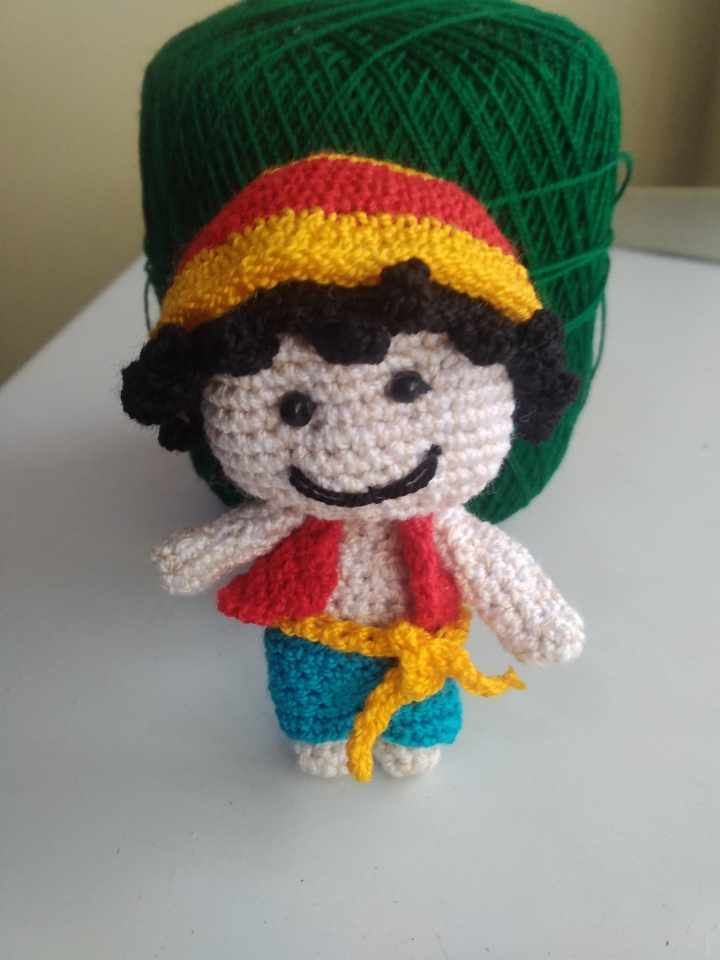

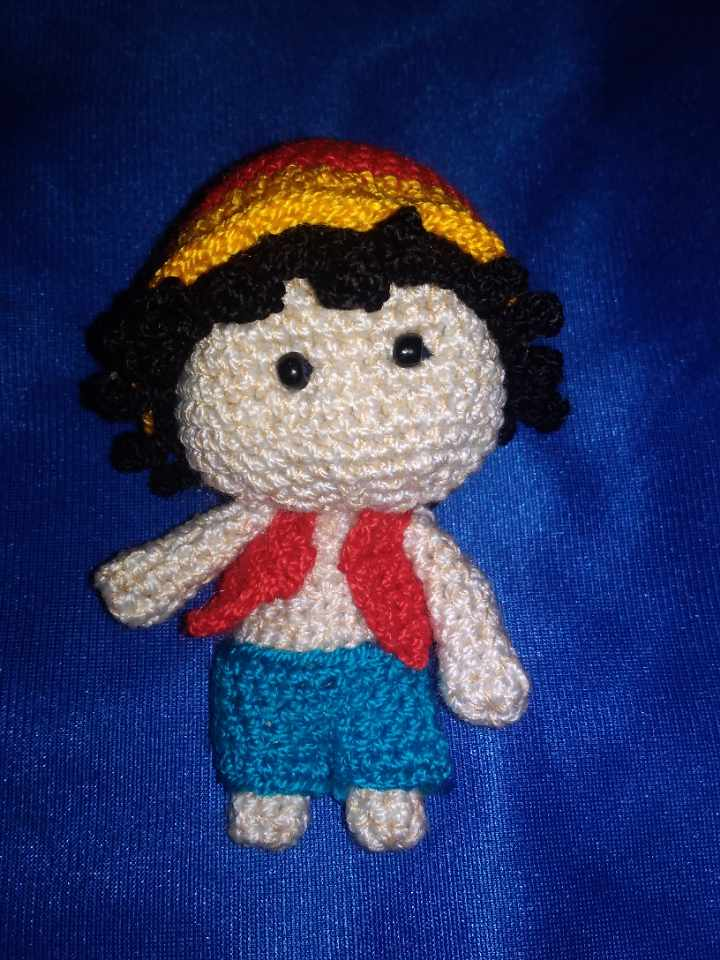
Saludos, hivers manualistas, ya culminando el martes. Un martes en el que tenemos nuevo encuentro para compartir un nuevo proyecto que, por mi parte, es de crochet. La verdad es que en estos días he estado un poco enferma del colon, lo cual me crea insomnio, así que como terapia ocupacional tengo hilos y agujas para tejer y consentir a mis seres queridos. En esta ocasión le toco el turno a mi sobrino Mateo quien es fan de del manga One Piece donde el personaje principal es Monkey D. Luffy por lo que deseo sorprenderlo con este pequeño obsequio como muestra de mi amor y apoyo a sus intereses, sin más que decir vamos a ver como elabore a Luffy con la técnica del amigurumi.
Greetings, handmade hivers, as Tuesday comes to an end. A Tuesday in which we have a new meeting to share a new project that, for my part, is crochet. The truth is that these days I have been a little sick with my colon, which makes me insomnia, so as occupational therapy I have yarns and needles to knit and pamper my loved ones. This time it's the turn of my nephew Mateo who is a fan of the manga One Piece where the main character is Monkey D. Luffy so I want to surprise him with this little gift as a token of my love and support for his interests, without more to say let's see how I knit Luffy with the amigurumi technique.
Materiales:
Hilo de crochet en colores blanco, beige, rojo, negro, amarillo y agua marina.
Hilo de coser color negro
2 mostacillas grandes en color negro
Relleno
Tijera
Aguja para crochet
Aguja lanera
Aguja de coser
Materials:
Crochet thread in white, beige, red, black, yellow and seawater colors.
Black sewing thread
2 large black beads
Stuffing
Scissors
Crochet needle
Wool needle
Sewing needle
Pasos/Steps
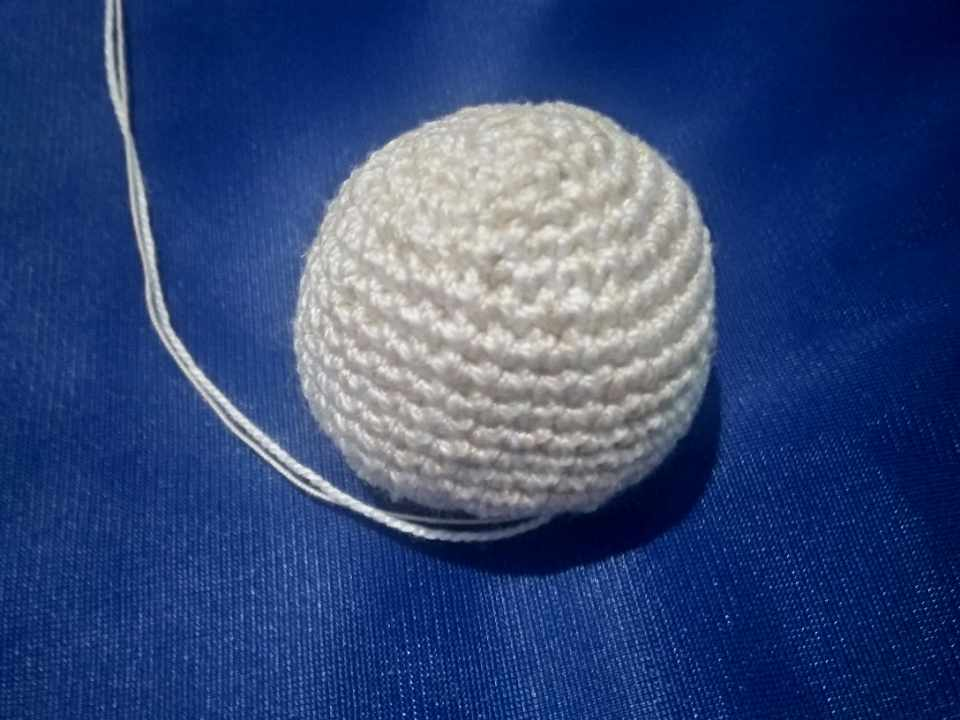
Iniciamos creando la cabeza del personaje y para ello usé hilo blanco y beige juntos porque este personaje tiene un color de piel poco definido, así que me pareció mejor mezclar estos colores para dar con un aproximado.
We started creating the head of the character and for this I used white and beige yarn together because this character has a poorly defined skin color, so I thought it was better to mix these colors to give an approximation.
Entonces comenzamos un anillo mágico de 6 puntos bajos, la próxima vuelta será de aumentos para obtener 12 puntos, seguidamente hacemos una vuela de 1 puto más aumento y con ello obtenemos 18 puntos, en siguiente vuelta hacemos lo mismo para conseguir 24 puntos, continuamos y esta vez son 3 puntos más aumentos con 30 puntos en total y por último otra vuelta de 2 puntos más aumentos consiguiendo así 36 puntos. Lo siguiente será realizar 9 vueltas de 36 puntos cada una.
Then we start a magic ring of 6 low stitches, the next round will be of increases to obtain 12 stitches, then we make a round of 1 more increase and with it we obtain 18 stitches, in the next round we do the same to obtain 24 stitches, we continue and this time there are 3 more increases with 30 stitches in total and finally another round of 2 more increases obtaining 36 stitches. The next step is to make 9 rows of 36 stitches each.
A partir de esta vuelta vamos con disminuciones, así que; será 2 puntos y disminución para lograr 30 puntos, en la siguiente vuelta 3 puntos y disminución consiguiendo 24 puntos, las próximas 2 vueltas serán de 1 punto y disminución cada una, con un total de 18 y 12 puntos respectivamente, acá rellenamos la pieza y culminamos con una última vuelta de disminuciones para llegar a 6 puntos, rematamos, dejamos hebra larga para colocar en la aguja lanera y terminar de cerrar.
From this round on we go with decreases, so; it will be 2 stitches and decrease to achieve 30 stitches, in the next round 3 stitches and decrease getting 24 stitches, the next 2 rounds will be of 1 stitch and decrease each one, with a total of 18 and 12 stitches respectively, here we fill the piece and finish with a last round of decreases to reach 6 stitches, we finish off, we leave long yarn to place in the wool needle and finish closing.
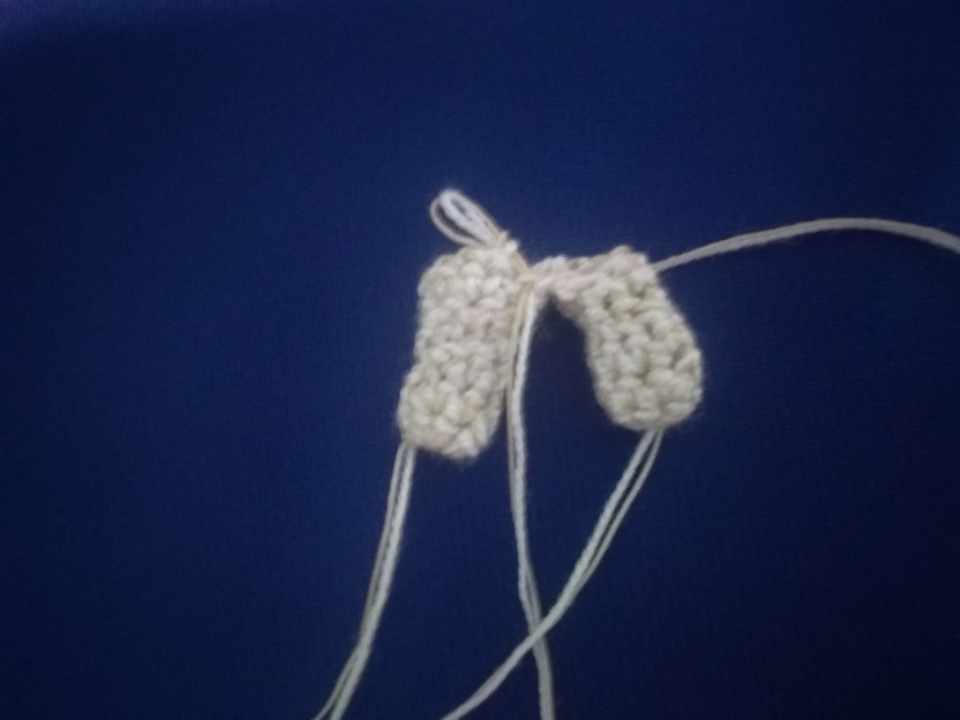
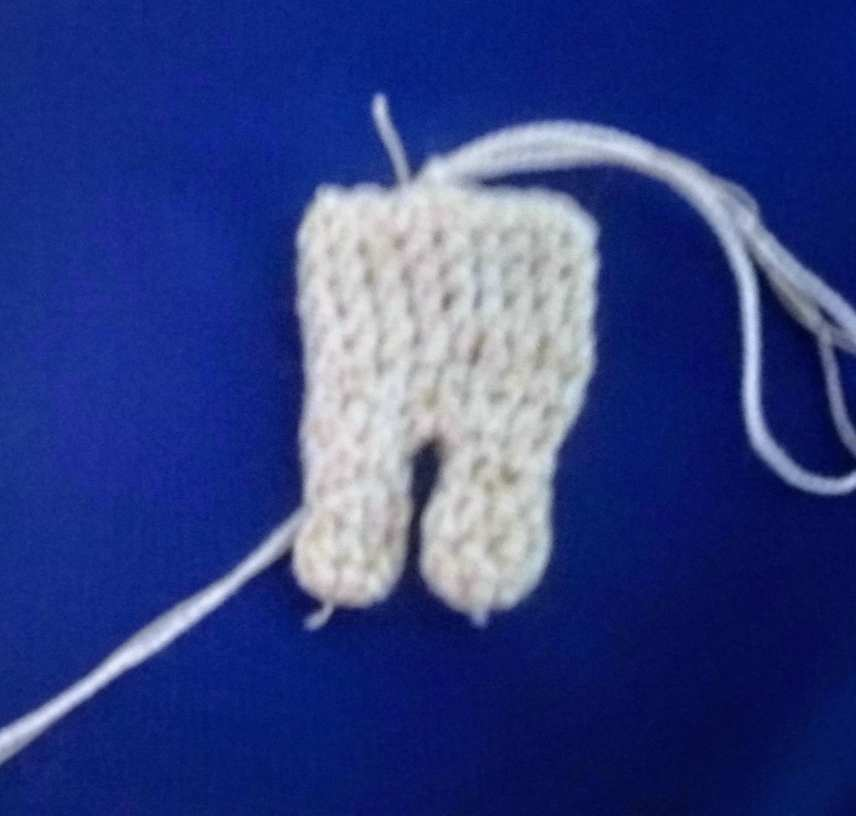
Ahora vamos a trabajar en las piernas, comenzando con un anillo mágico de 6 puntos bajos, y en las siguientes 3 vueltas trabajamos con 6 puntos en cada una. Las próximas 2 vueltas, 2 puntos mas aumento con un total de 8 puntos cada una. Así logramos ambas piernas, las cuales vamos a unir tejiendo alrededor de una de ellas 8 puntos más 1 cadeneta. Seguidamente, tomamos la otra pierna y tejemos en ella 8 puntos más 1 cadeneta para completar la unión y así obtener 18 puntos en total.
Now we are going to work on the legs, starting with a magic ring of 6 single crochet stitches, and in the next 3 rows we work with 6 stitches in each row. The next 2 rounds, 2 more increase stitches for a total of 8 stitches each. This way we achieve both legs, which we are going to join by knitting around one of them 8 stitches plus 1 chain. Next, we take the other leg and knit around it 8 stitches plus 1 chain stitch to complete the union and thus obtain 18 stitches in total.
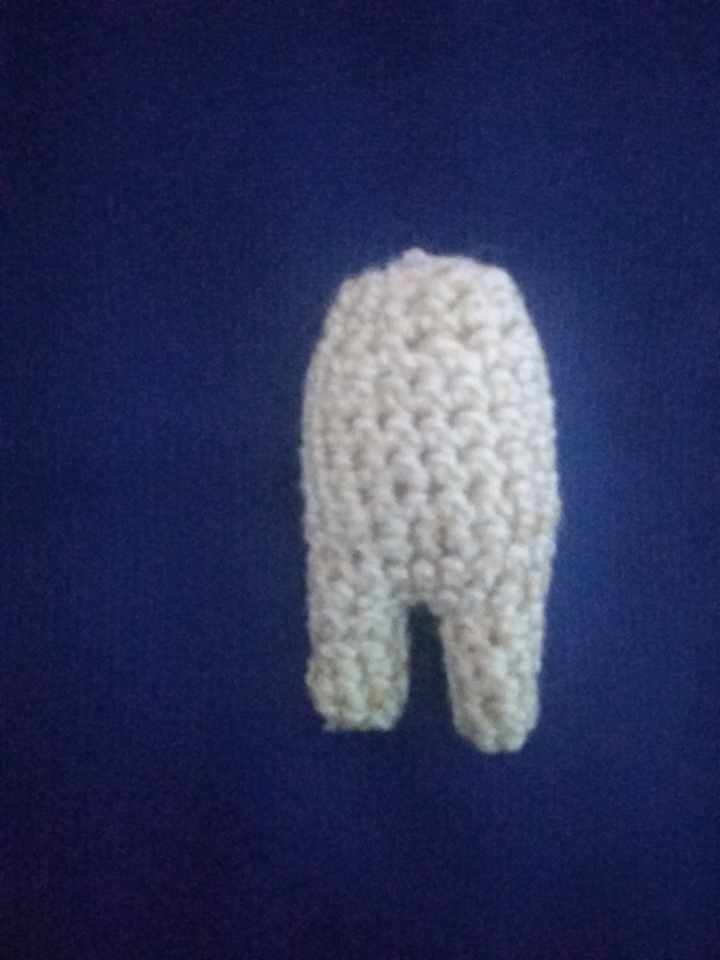
Continuamos tejiendo el cuerpo sobre las piernas y para ello levantamos 6 vueltas de 18 puntos en cada una de ellas. La próxima vuelta será 1 punto y disminución para obtener 12 puntos y la última vuelta es de 12 puntos; rematar, rellenar y con la aguja lanera terminar de cerrar.
We continue knitting the body over the legs and for this we cast on 6 rows of 18 stitches in each one of them. The next row will be 1 stitch and decrease to obtain 12 stitches and the last row is of 12 stitches; finish off, fill in and with the knitting needle finish closing.
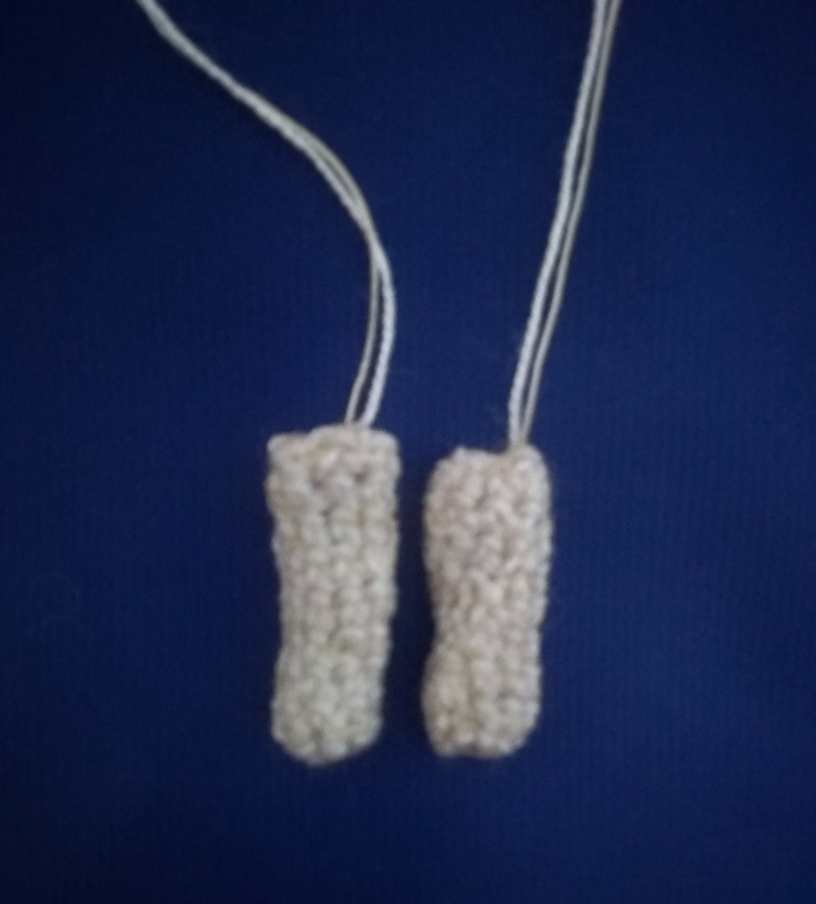
Los brazos son muy sencillos de realizar. Comenzamos con un anillo mágico de 6 puntos y las próximas 8 vueltas serán de 6 puntos cada una; no es necesario rellenar por lo angosto de las piezas, así que rematamos y cerramos con aguja lanera.
The arms are very easy to make. We start with a magic ring of 6 stitches and the next 8 rows will be of 6 stitches each; it is not necessary to fill in because of the narrow pieces, so we finish off and close with a knitting needle.

Con el hilo amarillo vamos a elaborar el sombrero, así que comenzamos por trabajar en la base. Hacemos un anillo mágico de 6 luego la otra vuelta será de aumentos con un total de 12 puntos, seguidamente 2 vueltas de 1 punto más aumento consiguiendo así 18 y 24 puntos respectivamente, luego vuelta de 3 puntos más aumento obteniendo 30 puntos; las 2 últimas vueltas de la base serán de 2 y 5 puntos más aumentos con un total de 36 y 42 puntos respectivamente.
With the yellow yarn we are going to make the hat, so we start by working on the base. We make a magic ring of 6 then the other round will be of increases with a total of 12 stitches, then 2 rounds of 1 stitch plus increase obtaining 18 and 24 stitches respectively, then round of 3 stitches plus increase obtaining 30 stitches; the last 2 rounds of the base will be of 2 and 5 stitches plus increases with a total of 36 and 42 stitches respectively.
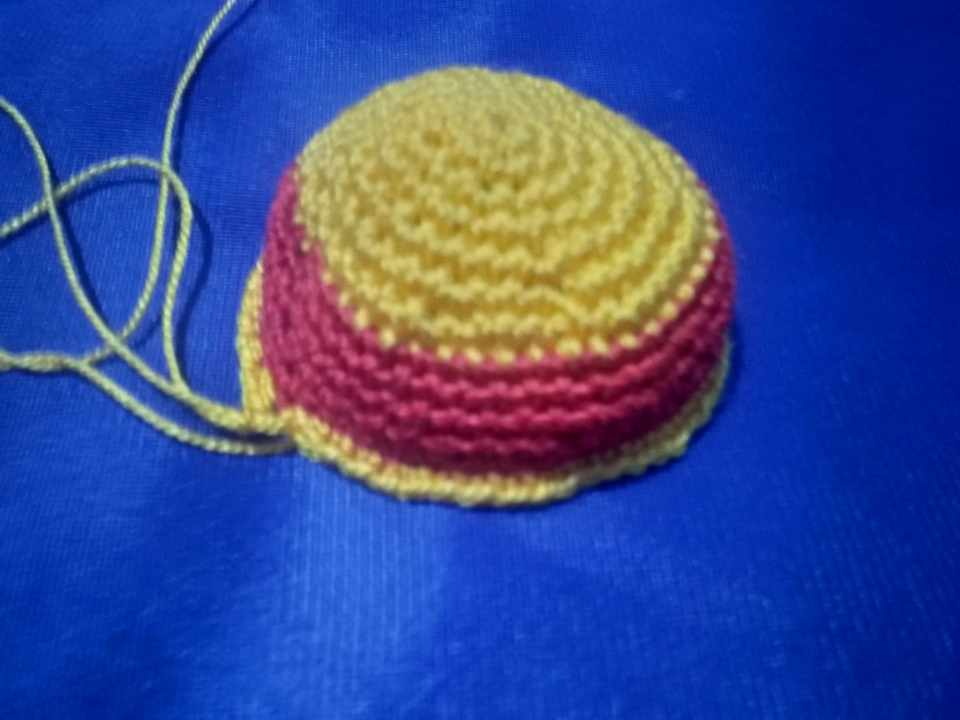
Acá vamos a cambiar al hilo de color rojo para tejer 5 vueltas de 42 puntos cada una, luego incorporamos nuevamente el hilo de color amarillo tomando la hebra delantera del tejido haciendo 3 puntos más aumento consiguiendo 48 puntos.
Here we are going to change to the red yarn to knit 5 rows of 42 stitches each, then we incorporate again the yellow yarn taking the front strand of the fabric and knitting 3 more stitches to obtain 48 stitches.
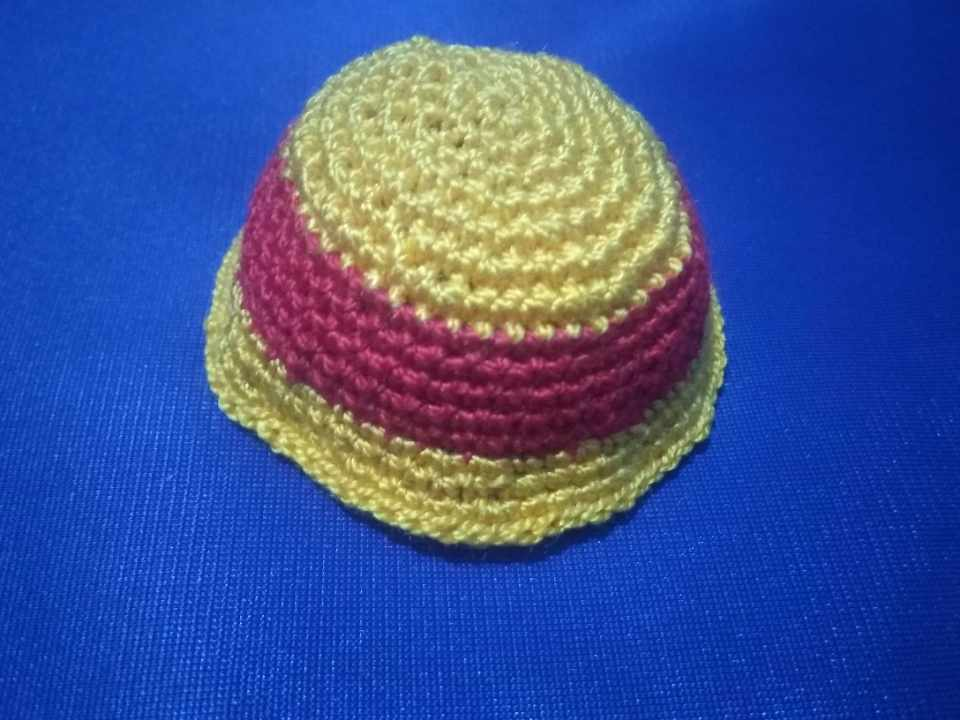
Para culminar el sombrero seguimos tejiéndolo en la siguiente vuelta; 7 puntos más aumento con un total de 54 puntos, luego hacemos otra vuelta de 4 puntos más aumento y obtenemos 60 puntos; por último, una última vuelta de 60 puntos deslizados, rematamos y cortamos hilo.
To finish the hat we continue knitting it in the next round; 7 stitches plus increase with a total of 54 stitches, then we knit another round of 4 stitches plus increase and we obtain 60 stitches; finally, a last round of 60 slipped stitches, we finish off and cut the yarn.
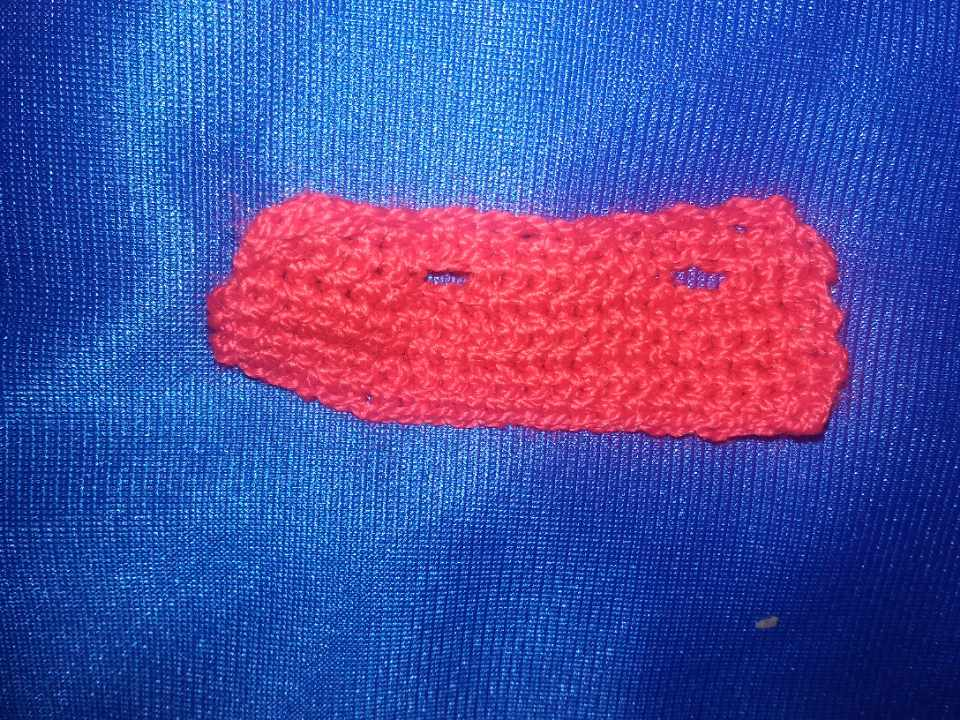
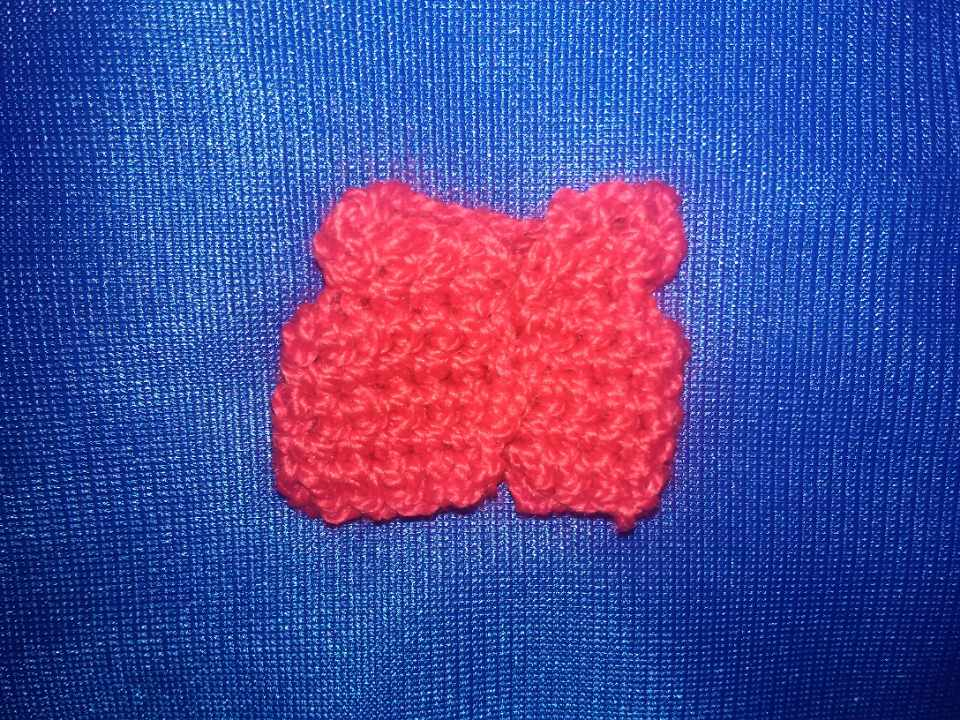
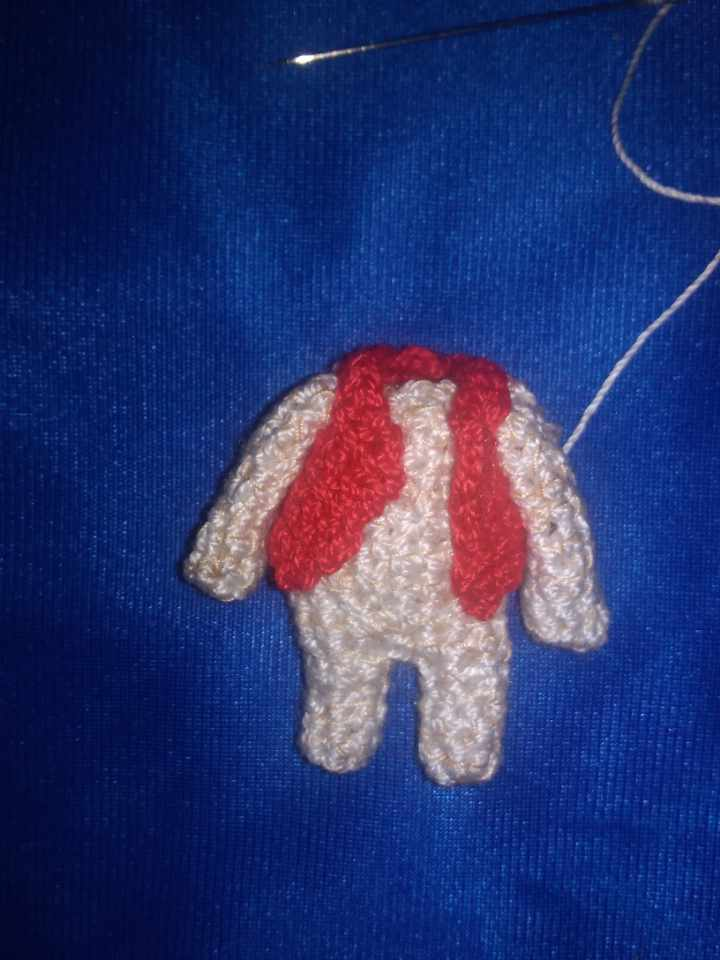
Es el turno de trabajar el chaleco que es de color rojo. Tejer 18 cadenetas, nos regresamos tejiendo en la cadeneta número 2, 17 puntos bajos, luego giramos el tejido hacemos 1 cadeneta nuevamente, 3 puntos bajos, 4 cadenetas, dejamos 2 espacios sin tejer y entramos en el siguiente espacio desde donde haremos 7 puntos bajo por separados, 4 cadenetas, 2 espacios sin tejer y 3 puntos bajos por separado; con un total de 21 puntos. Seguidamente, 4 vueltas de 21 puntos cada una. Como pueden ver en el tejido, se muestran dos orificios que son por donde van los brazos y al cerrar la pieza queda la forma del chaleco.
It is the turn to work the vest which is red. Knit 18 chains, we go back knitting in chain number 2, 17 single crochet stitches, then we turn the fabric, we knit 1 chain again, 3 single crochet stitches, 4 chains, we leave 2 spaces without knitting and we enter in the next space from where we will knit 7 single crochet stitches, 4 chains, 2 spaces without knitting and 3 single crochet stitches; with a total of 21 stitches. Next, 4 rows of 21 stitches each. As you can see in the knitting, there are two holes where the arms go through and when we close the piece we get the shape of the vest.

Lo siguiente será hacer el short que es de color agua marina. Comenzamos haciendo 21 cadenetas, donde haremos 20 puntos bajos y unimos los extremos formando un círculo, tejemos 5 vueltas de 20 puntos cada una y en la última vuelta dividimos el tejido en 2 partes para trabajar cada pierna por separado y nos de la forma. En cada pierna hacemos 2 vueltas de 10 puntos cada una.
The next step is to make the sea water colored shorts. We start by making 21 chains, where we will make 20 single crochet stitches and join the ends forming a circle, we knit 5 rows of 20 stitches each and in the last row we divide the fabric in 2 parts to work each leg separately and give us the shape. In each leg we knit 2 rounds of 10 stitches each.
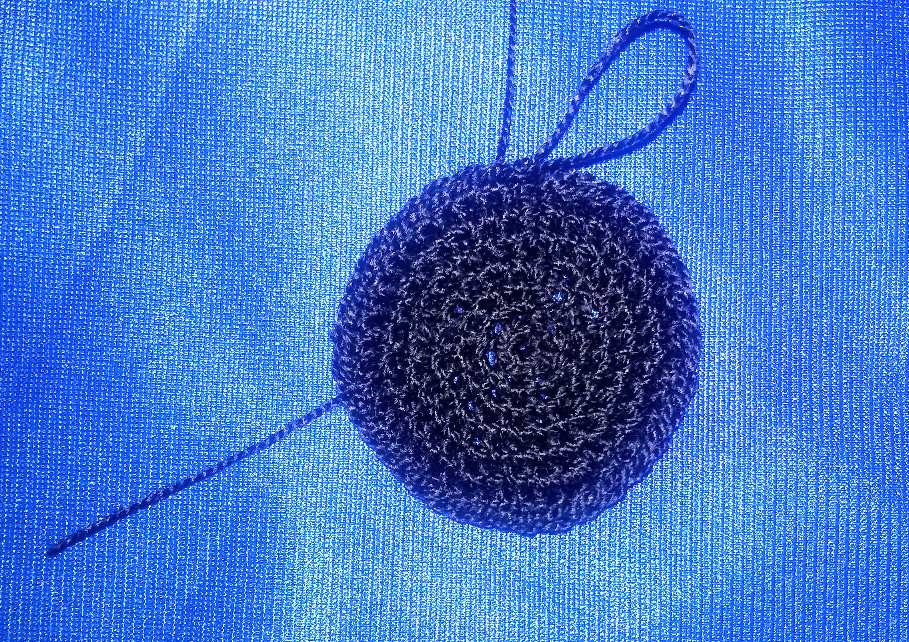
Comenzamos hacer la base de lo que será el cabello que va de color negro; entonces vamos a crear un anillo mágico de 6 puntos, la siguiente vuelta será de aumentos con un total de 12 puntos, luego dos vueltas de 1 punto más aumento cada una con un total de 18 y 24 puntos respectivamente, en otra vuelta de 3 puntos más aumento con 30 puntos en total, seguimos en la próxima vuelta con 2 puntos más aumento obteniendo 36 puntos.
We start making the base of what will be the black hair; then we will create a magic ring of 6 stitches, the next round will be of increases with a total of 12 stitches, then two rounds of 1 stitch plus increase each one with a total of 18 and 24 stitches respectively, in another round of 3 stitches plus increase with 30 stitches in total, we continue in the next round with 2 stitches plus increase obtaining 36 stitches.
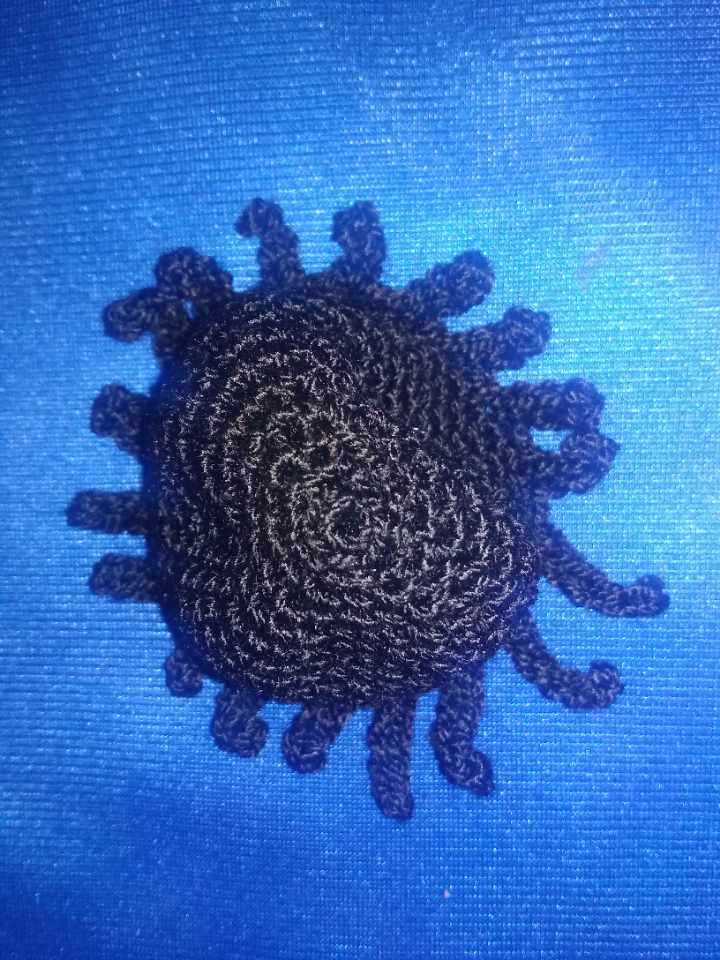
Sobre la base del cabello continuamos con 7 vueltas de 36 puntos cada una, para luego comenzar a trabajar lo que son los mechones, que van de la siguiente manera: 6 mechones de 4 cadenetas y en ella 3 puntos bajos, entramos en el siguiente punto de la base con punto deslizado y en siguiente punto vamos con los otros mechones. Un mechón de 5 cadenetas, 2 mechones de 6 cadenetas, un mechón de 5 cadenetas y 6 mechones de 4 cadenetas; tejiendo todos los mechones como lo expliqué anteriormente.
On the base of the hair we continue with 7 rows of 36 stitches each, to then start working on the locks, which are as follows: 6 locks of 4 chains and in it 3 low stitches, we enter the next stitch of the base with slipped stitch and in next stitch we go with the other locks. One strand of 5 chains, 2 strands of 6 chains, one strand of 5 chains and 6 strands of 4 chains; knitting all the strands as I explained before.
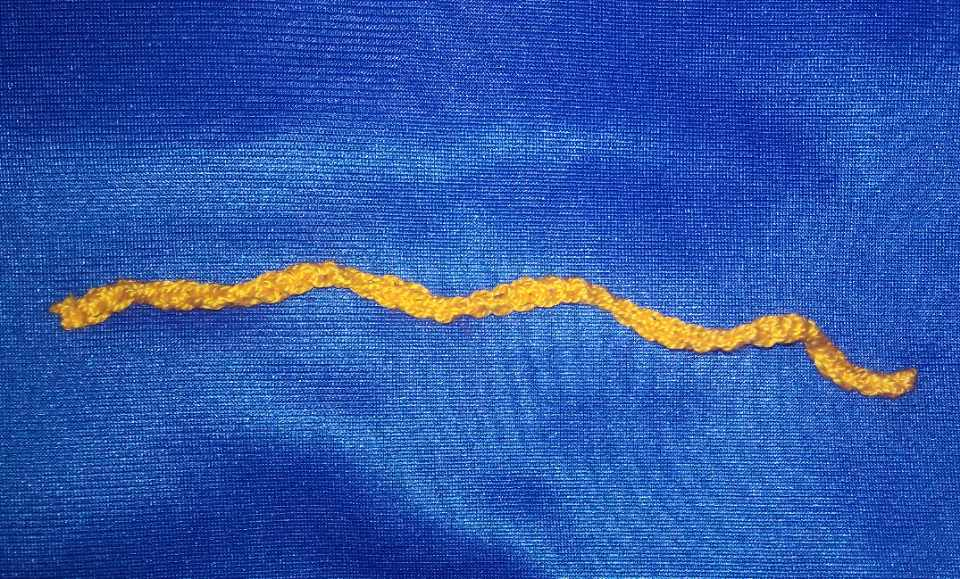
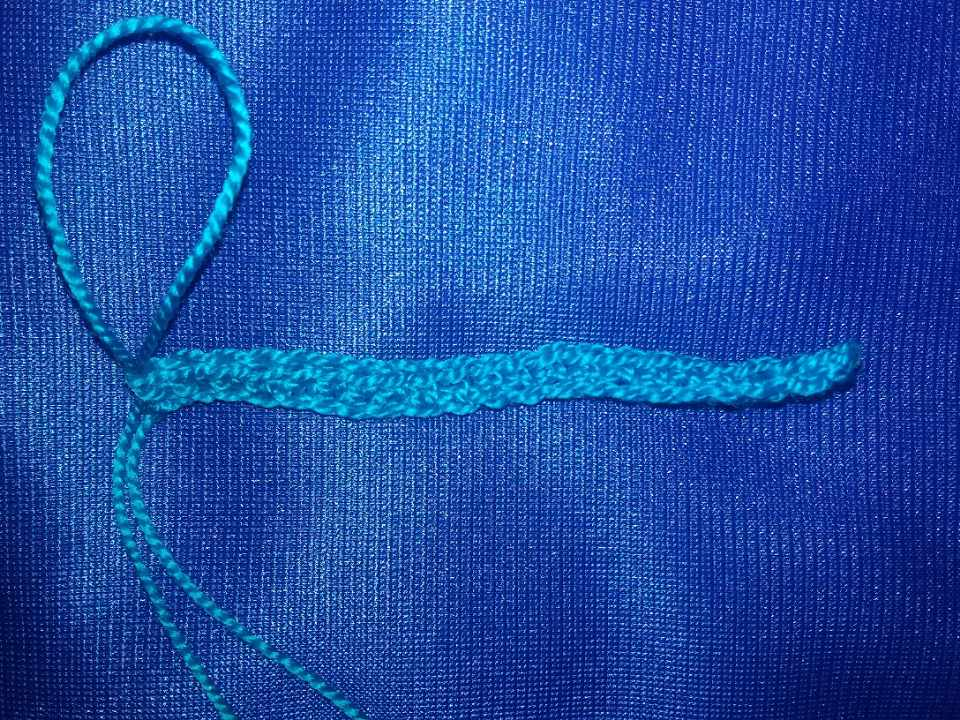
Por último, vamos a hacer el cinturón de color amarillo, así que creamos 40 cadenetas y en ellas 39 puntos bajos, rematamos y cortamos hilo.
Finally, we are going to make the yellow belt, so we create 40 chain stitches and on them 39 single crochet stitches, finish them off and cut the yarn.

Con ayuda de la aguja lanera vamos a unir los brazos al cuerpo e inmediatamente colocamos el chaleco.
With the help of the wool needle we will attach the arms to the body and immediately put on the vest.
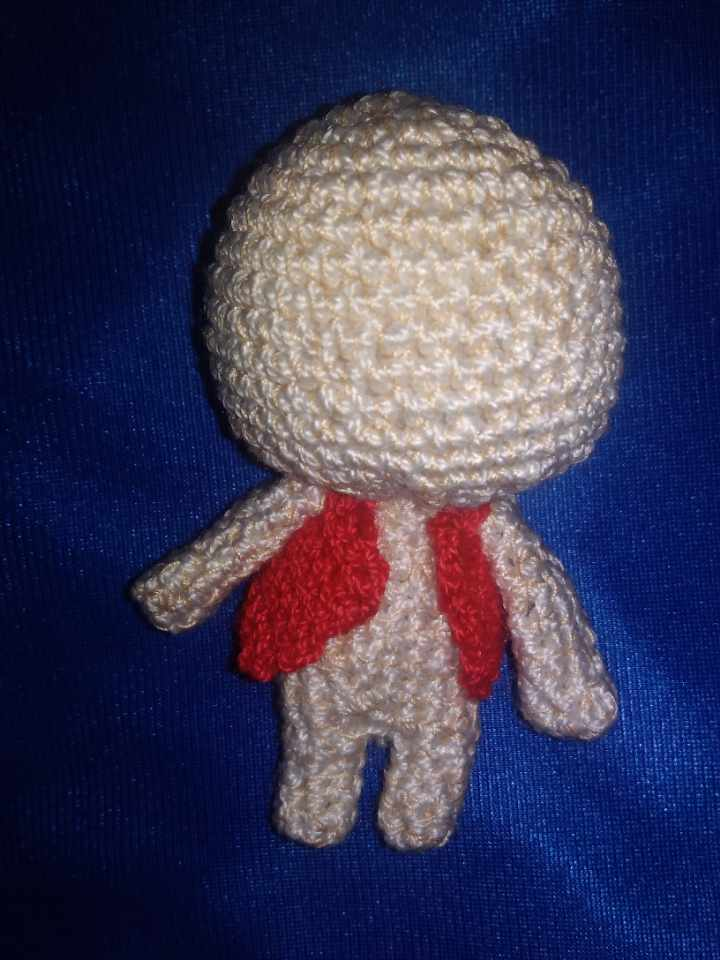
Sobre el cuerpo va la cabeza la cual aseguramos con puntadas que hacemos con la aguja lanera.
Over the body goes the head which we secure with stitches we make with the wool needle.
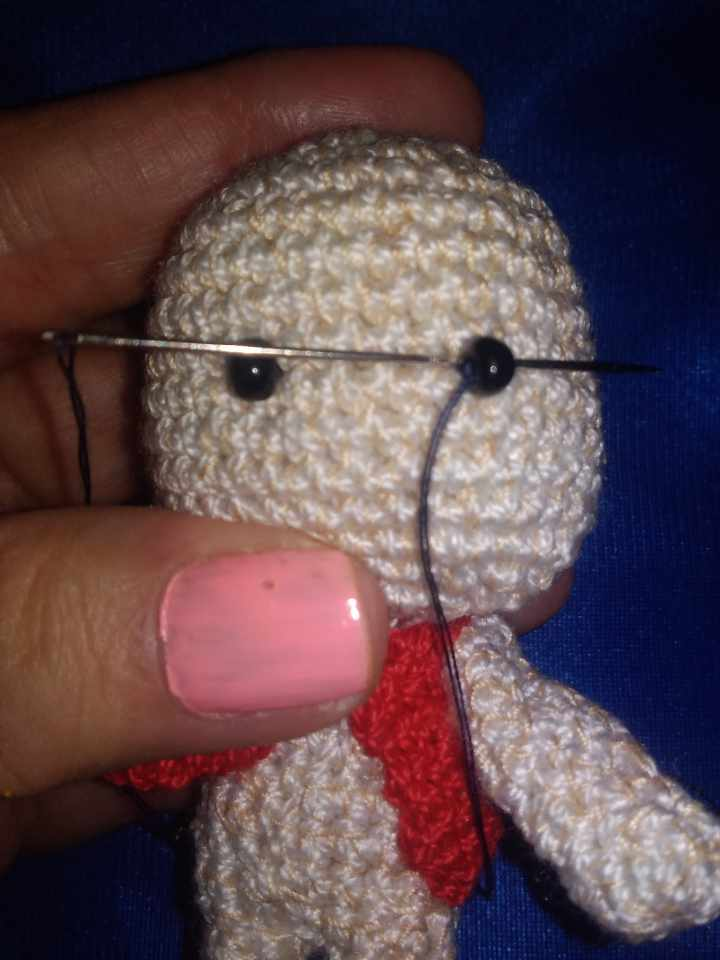
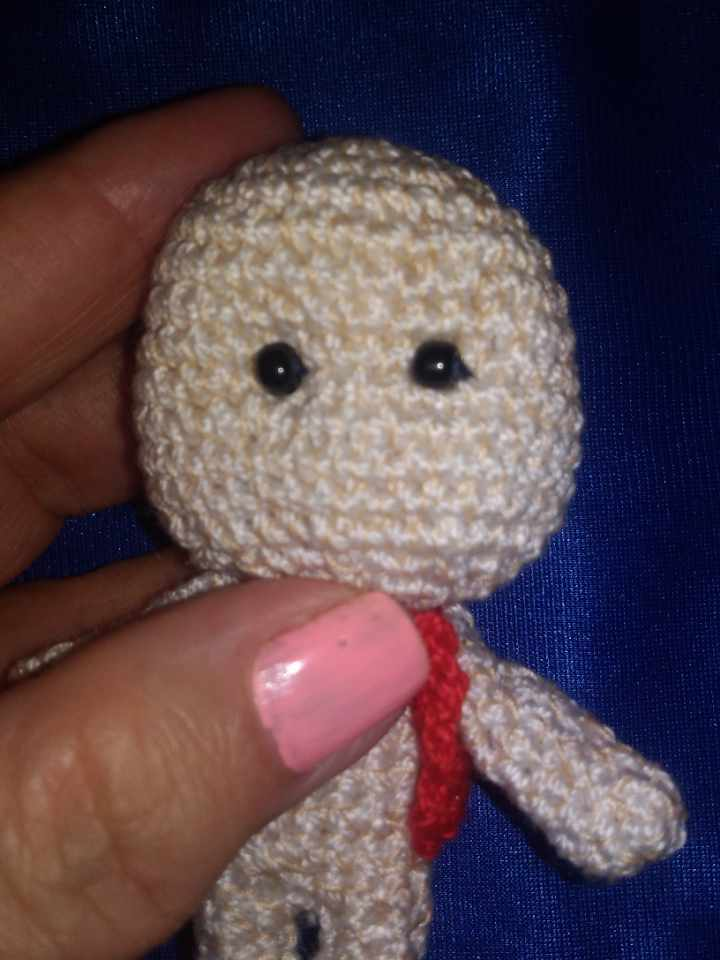
Los ojos los creamos con las mostacillas y estas las cosemos con hilo negro y aguja, halando un poco fuerte y asegurando por la parte trasera de la cabeza para darle ese toque tierno.
The eyes are created with the beads and these are sewn with black thread and needle, pulling a little hard and securing at the back of the head to give it that tender touch.
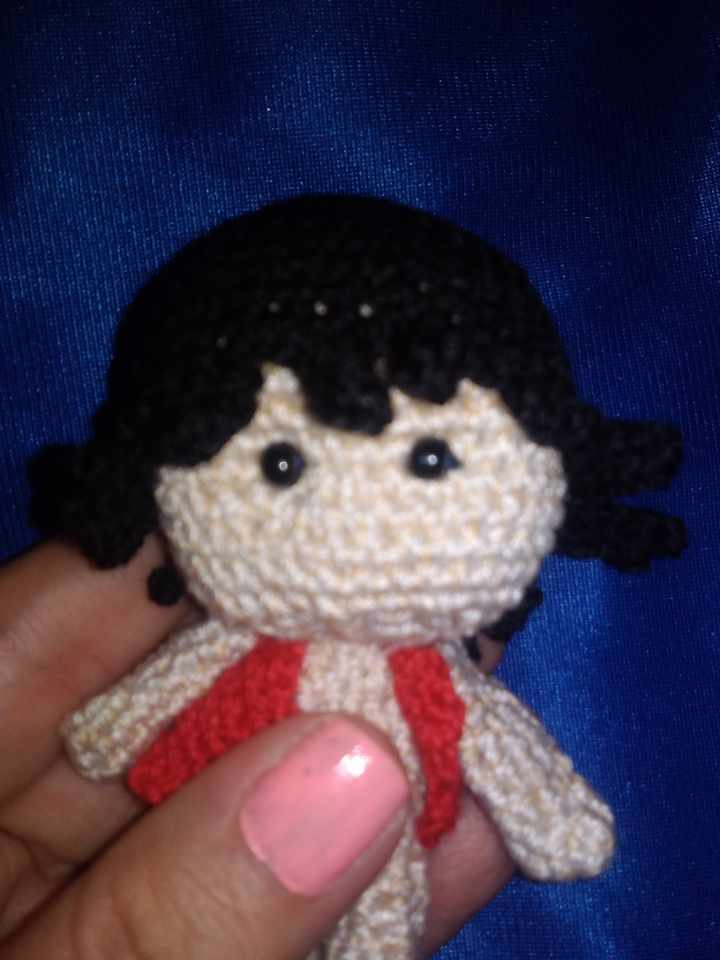
Lo que sigue es coser el cabello a la cabeza de manera que los mechones más largos queden en la frente del personaje.
The next step is to sew the hair to the head so that the longest strands are on the character's forehead.
Continuamos colocando el sombrero sobre el cabello y aseguramos con unas puntadas en hilo amarillo, y lo otro será colocarle el short, lo cual no será necesario coser.
We continue placing the hat over the hair and secure it with a few stitches in yellow thread, and the other thing will be to place the shorts, which will not be necessary to sew.
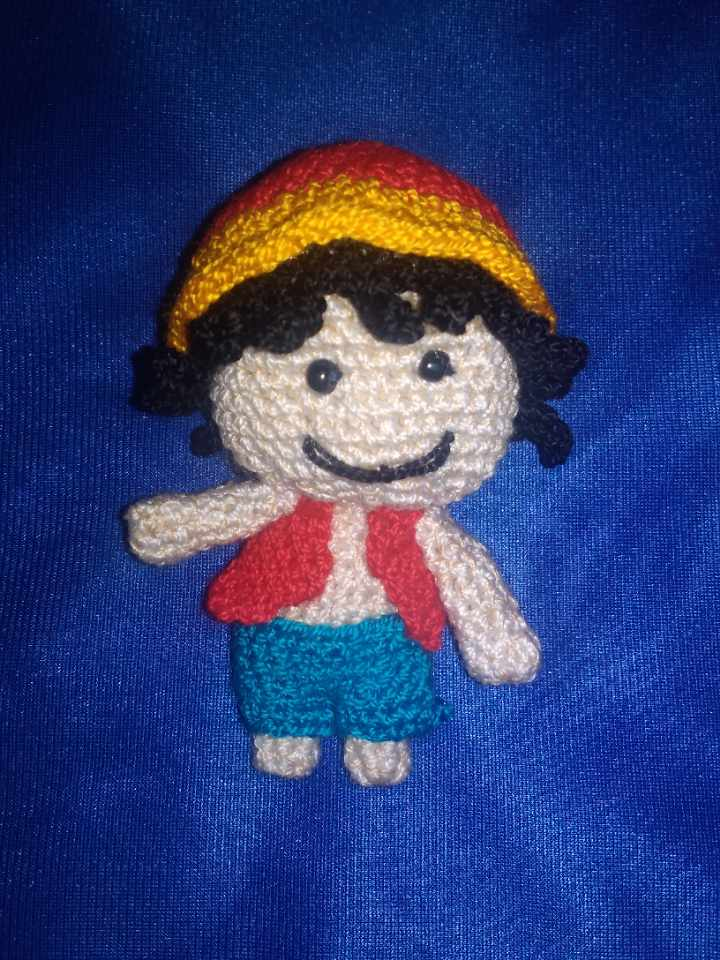
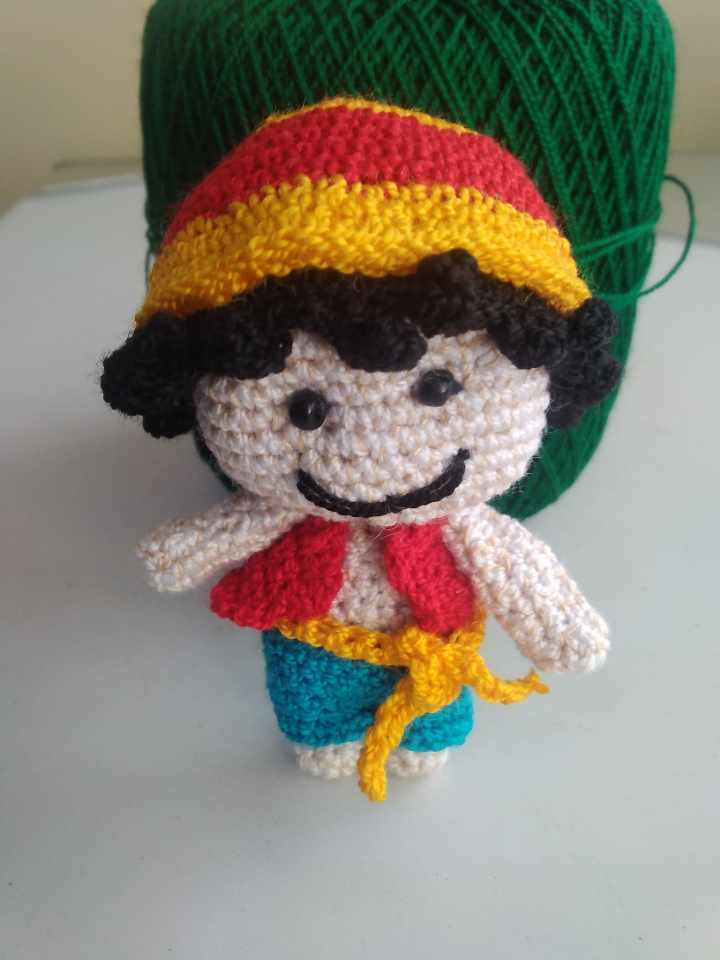
Con hilo de crochet y aguja lanera creamos la boca en el rostro de Luffy y por último, colocamos el cinturón atado con un nudo en la cintura.
With crochet thread and wool needle we create the mouth on Luffy's face and finally, we place the belt tied with a knot at the waist.
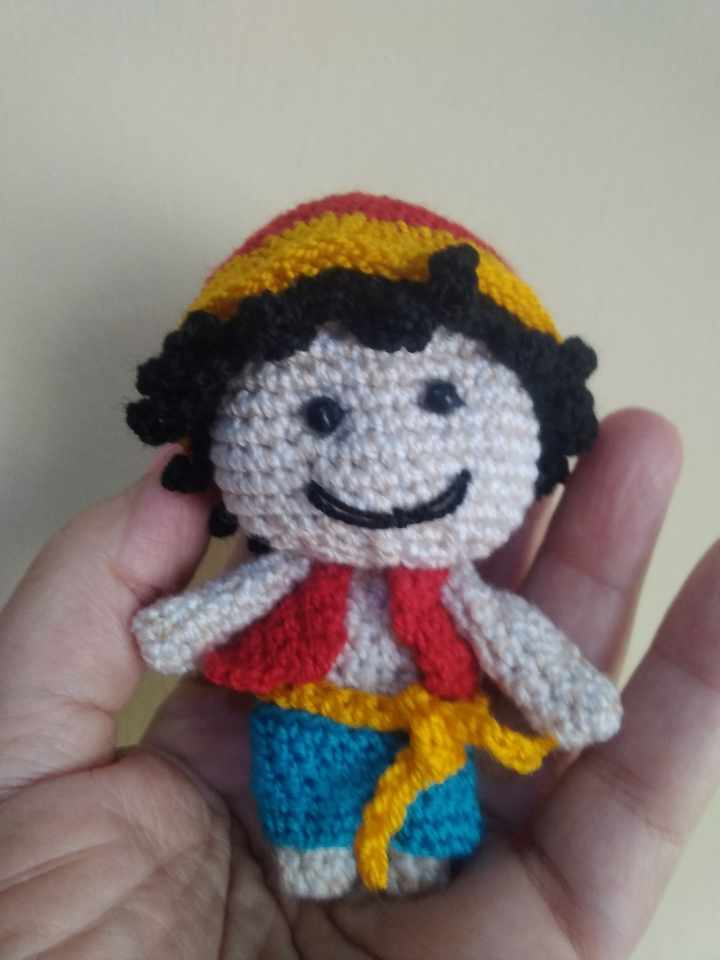
Este personaje de One Piece te quedó espectacular! A tu sobrino le va a encantar. Tejer es un arte demasiado hermoso y versátil. Te felicito por este talento.
Aún no se lo entrego, pero sé que llegado el momento se va a alegrar mucho. Gracias por la visita.
¿ᴺᵉᶜᵉˢᶦᵗᵃˢ ᴴᴮᴰ? ᵀᵉ ˡᵒ ᵖʳᵉˢᵗᵃᵐᵒˢ ᶜᵒⁿ
Agradezco mucho el apoyo a mi trabajo.
Awww está bonito debe ser difícil hacer personitas minis
Cuando le tomas amor a lo que haces, no hay dificultad que valga, todo es cuestión de proponerse.
aaah que hermoso, gran trabajo 😍👏
aaah what a beautiful, great job 😍👏
Gracias, gracias, gracias!
From Venezuela, our witness drives decentralization and the adoption of Web3 technology, creating opportunities for the local community and contributing to the global ecosystem. // Desde Venezuela, nuestro testigo impulsa la descentralización y la adopción de la tecnología Web3, generando oportunidades para la comunidad local y contribuyendo al ecosistema global.
Sigue, contacta y se parte del testigo en: // Follow, contact and be part of the witness in:
Wow, this is a great quality work, we are proud to have it in the DIYHub Community feed, thank you very much for being here Giocondina!.
Qué cosita tan hermosa.
Me encantó el resultado.
Es admirable la habilidad que tienen todas las tejedoras, y también la paciencia. Felicidades amiga.
Muchas gracias!