Good morning everyone,
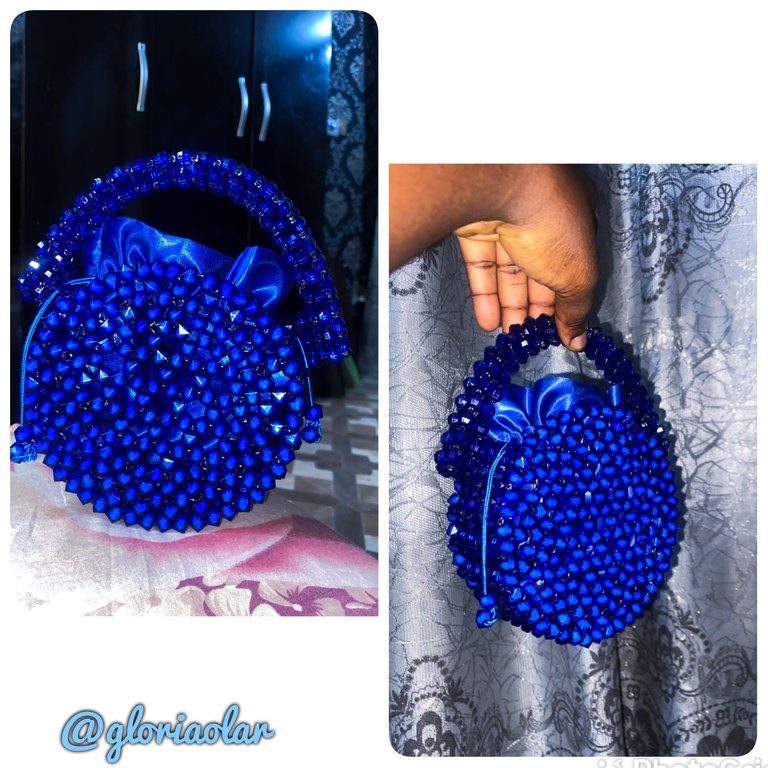
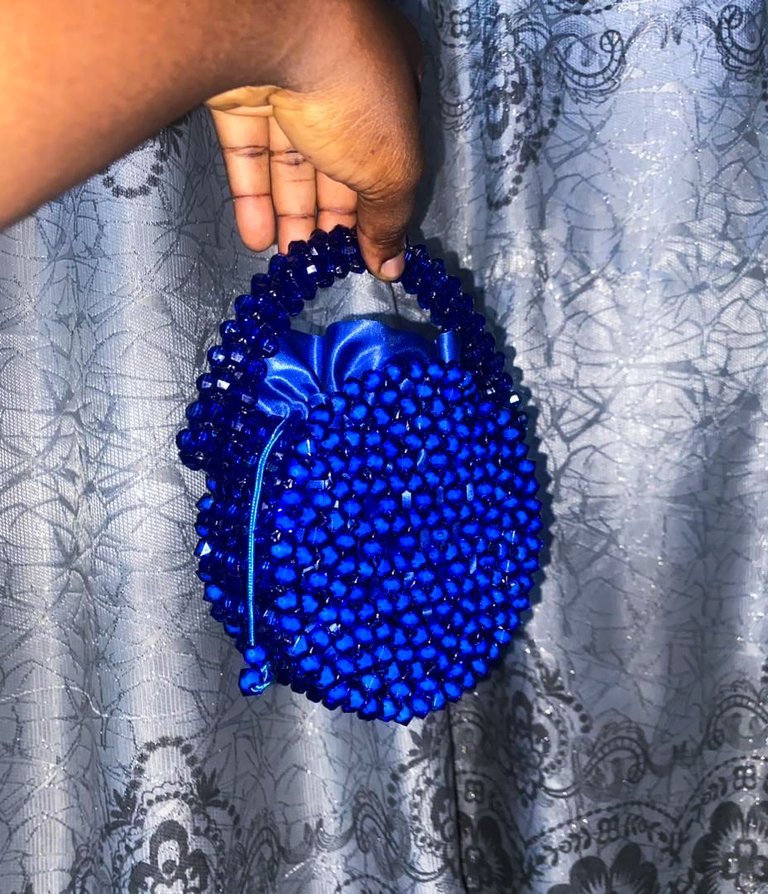
It's been so long I shared one of my beautiful creations here and I'm super excited to be able to do that today. I've had so many commitments which makes it difficult for me to keep up but thankfully, I'm able to to salvage some time to my own end now. Today, I'll be sharing with us one of the designs I made few weeks ago. I got a message from a client requesting for one of my beaded bags but he wants a mini size. The bag is for his niece and he doesn't want something that will be too big for her. He specifically mentioned he want exactly the rounded design below but a smaller version of it.
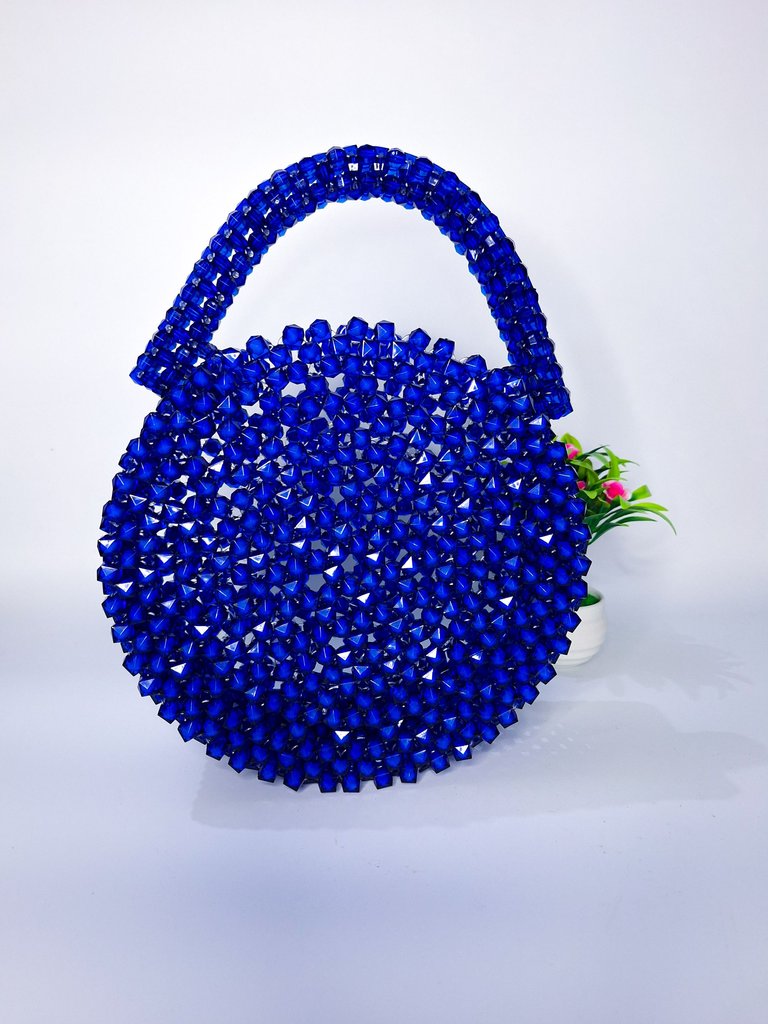
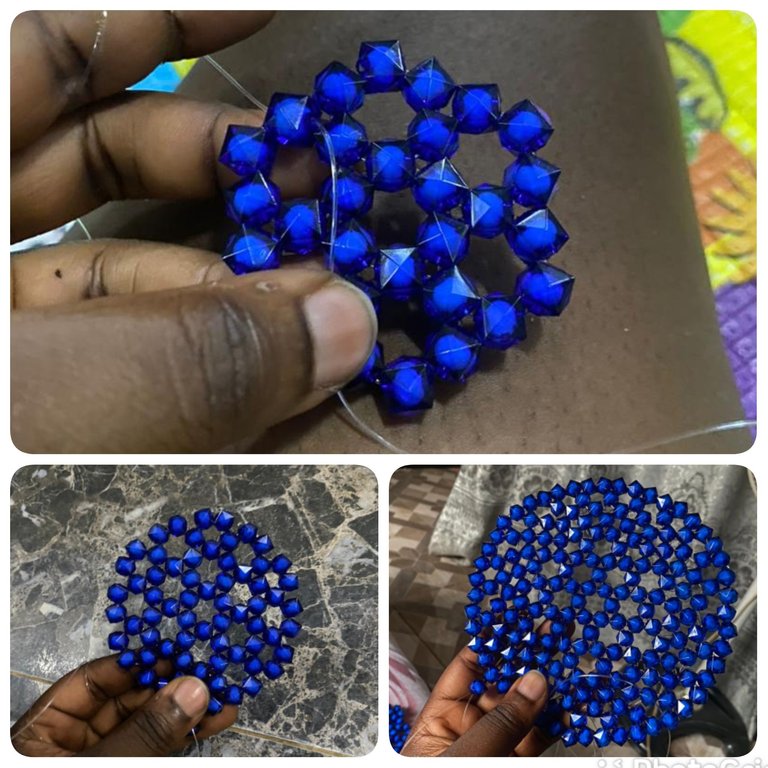
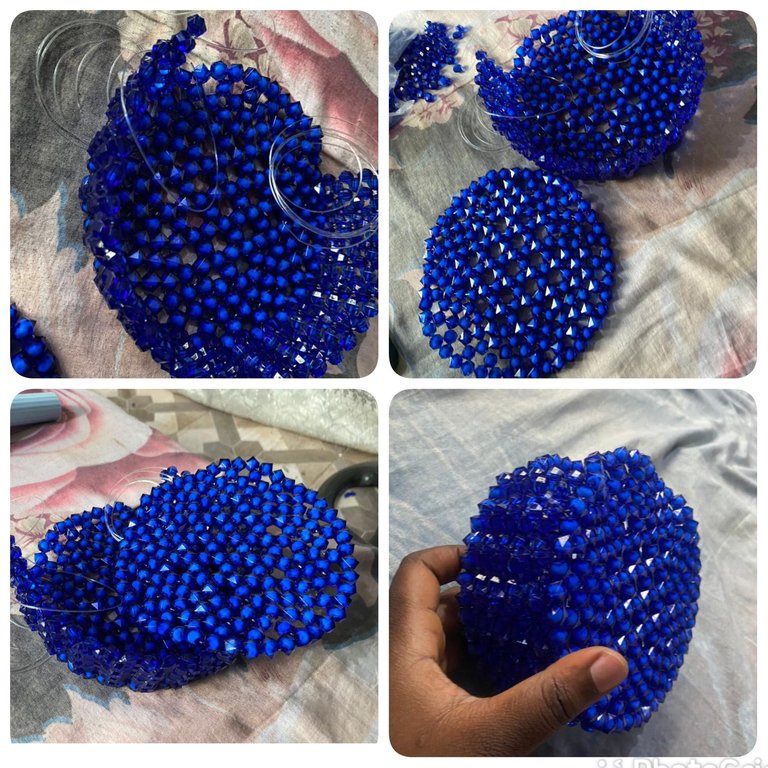
Now creating a smaller design of the style below isn't going to be easy. Every row have a specific number of beads and you have to follow a specific number of rows in order to get a sturdy and firm bag. If I will be creating a smaller design, it means I won't complete the row. I took out two of the outer rows and I stopped at a point where the circle wasn't strong enough. In order to strengthen the bag, I went for a different and smaller type of beads. The use of that is for it to pull the bigger beads together and give it a firm look. To some extent, that worked and I loved the result. Thankfully. The client also love the bag which makes me so happy.
Below, I will be sharing the materials I used to create the bag and the process within.
MATERIALS USED.
- Crystal beads
- Sugar beads
- O.7mm fishing line
- Pouch
PROCESS
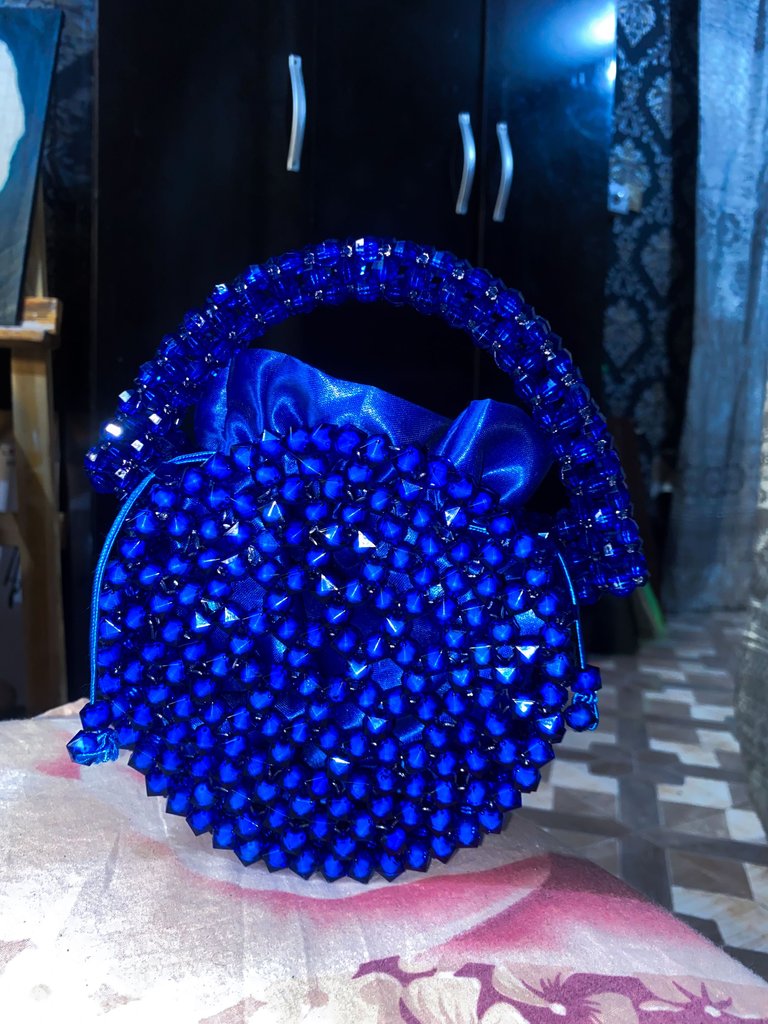
- The first thing I did was to create the first row which is a row of 6 with the Crystal beads. After that. I started layering the beads row by row till i got the desired circle.
- Next, I built on the side of the circles using sugar beads(the smaller beads) till I got the desired width.
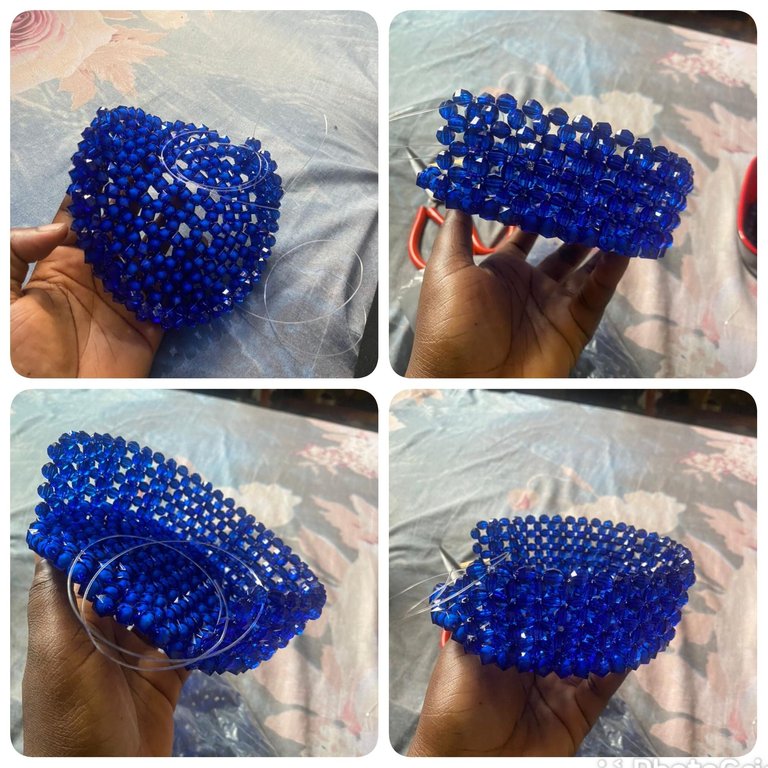
- Once that was set, I made the second circle and I joined them together as seen below to form the bag.
- Finally, I made the short handle and I attached them to both ends of the bag.
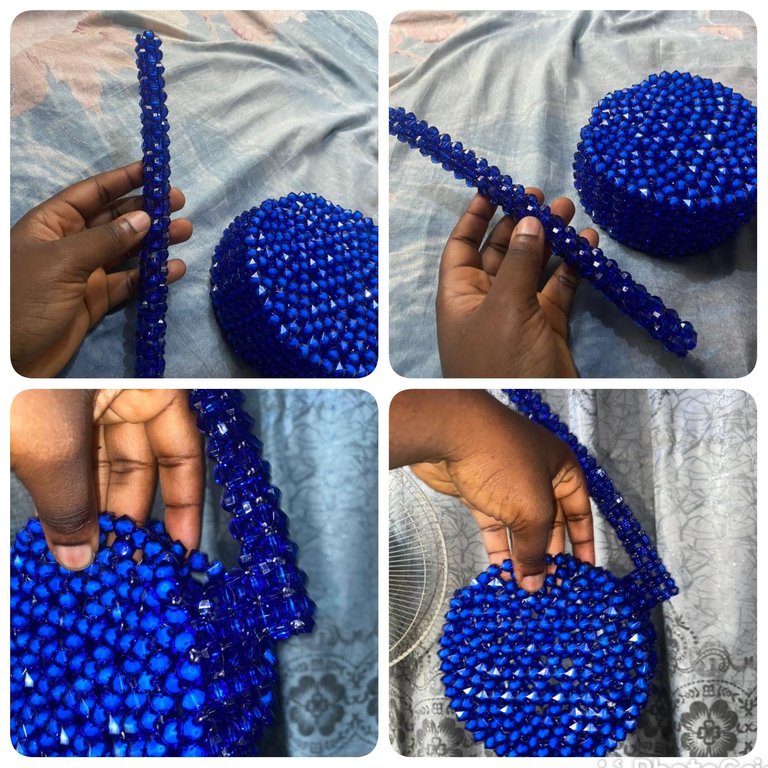
- Since I don't have a sewing machine, I asked a tailor to sow me a pouch which I put inside after designing the ropes with beads.
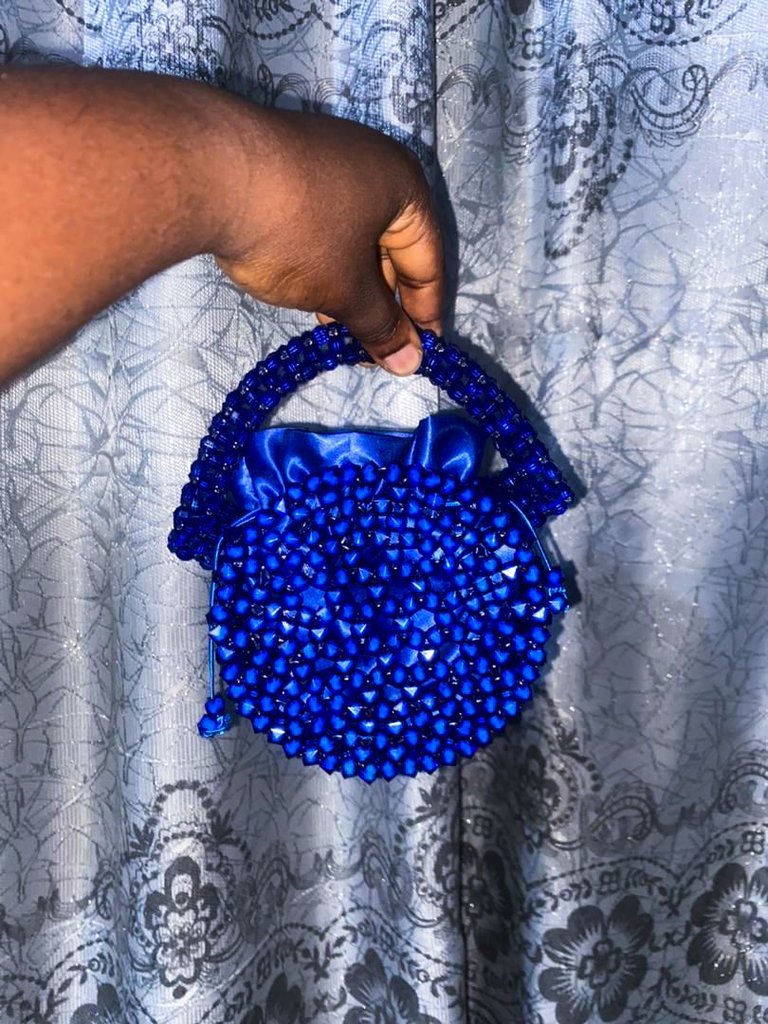
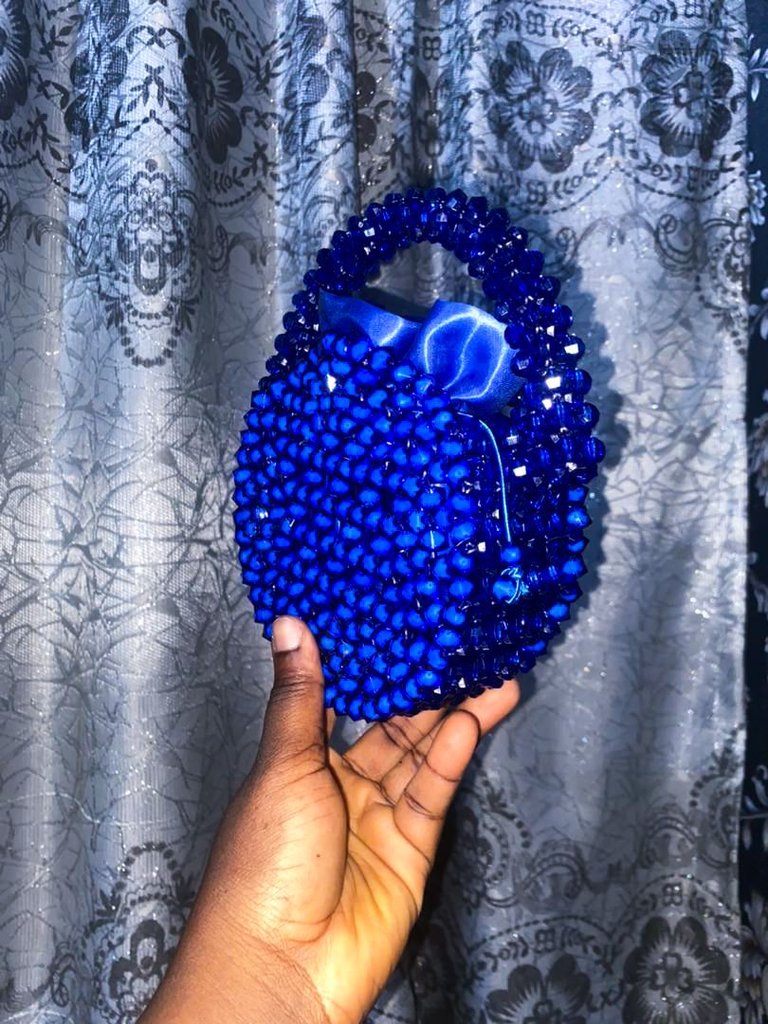
FINAL LOOK

Your bag looks amazing and beautiful to me. The way the bag is made is a testament to your taste and skill. I came to know from you that such a beautiful bag can be made by weaving puthi with my own hands. thank you
Awwwww, that's makes me so happy. Thank you so much for this wonderful comment
yes my friend you are most welcome. I am so happy to see your wow. may god bless you with my heart.
This is so beautiful... Well done
Thank you so much🙏
Very nice as always. The little girl will be thrilled.
She sure was thrilled. Thank you so much my friend🥰
This very creative and beautiful
Thank you so much sis
Beautiful card, you did a great job making it🤗