ENGLISH VERSION
Hello #DIYHub community, today I have the pleasure of publishing again in this community and this time I bring you a step by step on how to make a surprise box. Without further ado, I'll tell you how I made it.
Materials
- 1 cardboard
- 2 white sheets
- 1 piece of cardboard
- 1 ruler
- markers
- glue
- blade
- polyfoam
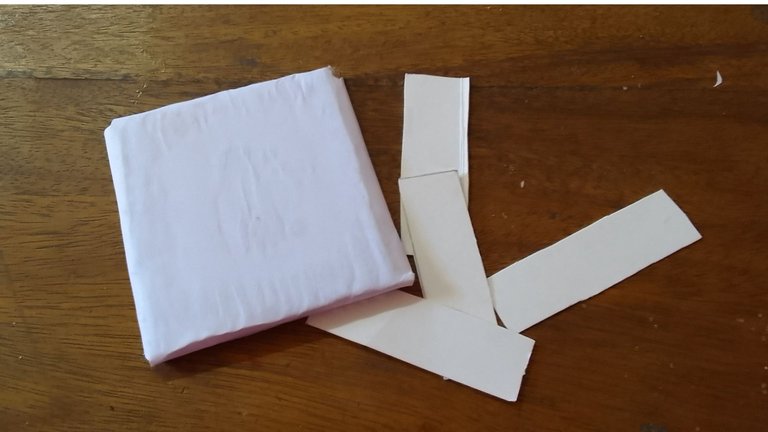
First step
I started by marking a 10cm x 10cm square on a sheet of paper, then I cut it out and traced this square five times on the cardboard. So that I am left with
Second step
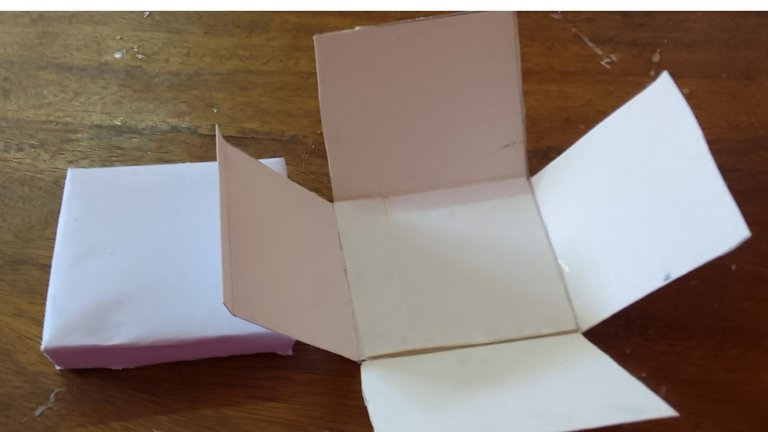
After this I proceeded to make the cover of my surprise box to make it I used a piece of cardboard measuring 10.50cm x 10.50cm
Half a millimeter bigger than the box. I cut out four strips of cardboard the same length as the cardboard and with the help of a knife I made cuts of the same length as the cardboard strips and inserted these into the slots I made and to fix them to the cardboard I spread glue. Provide a background for the box with another piece of cardboard the same size as the square on the sheet.
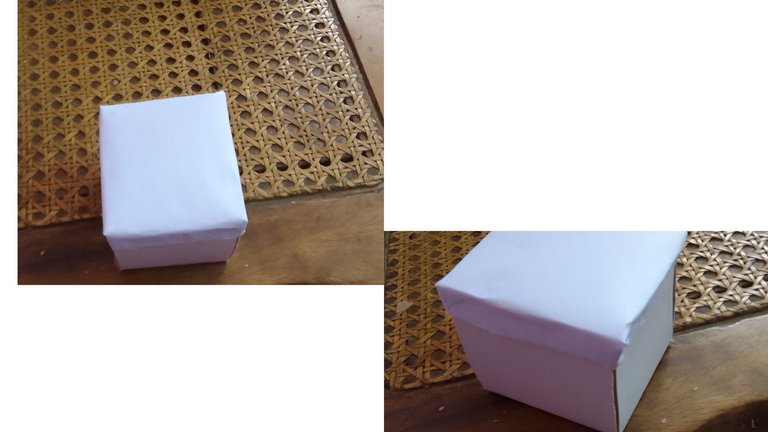
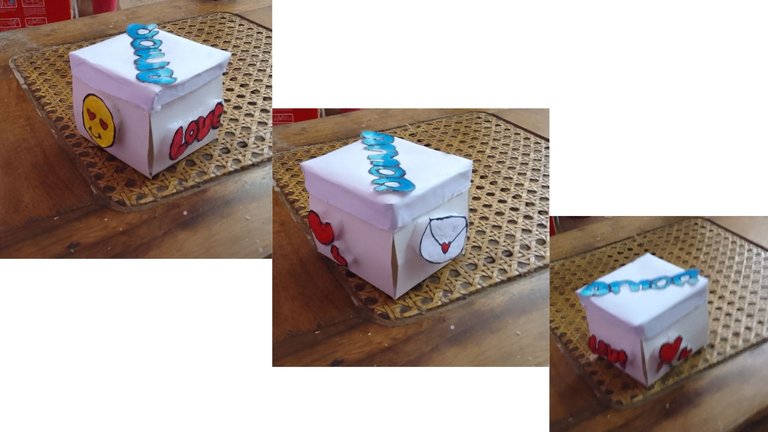
And our surprise box is ready. You just need to decorate it. You can make the decoration to your liking. I'll show you how I made mine.
Decor
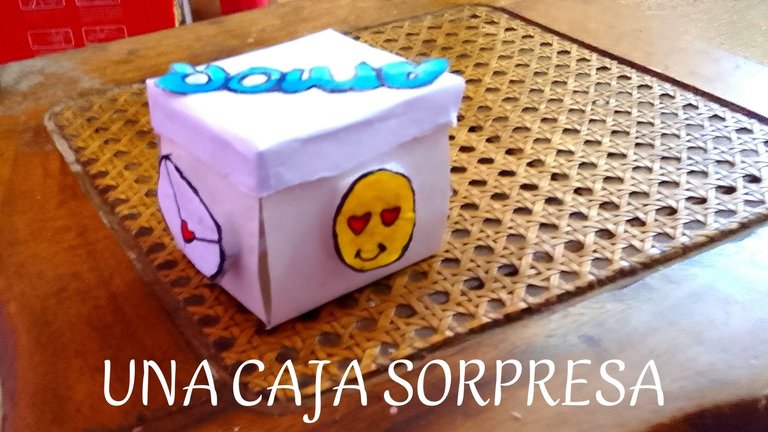
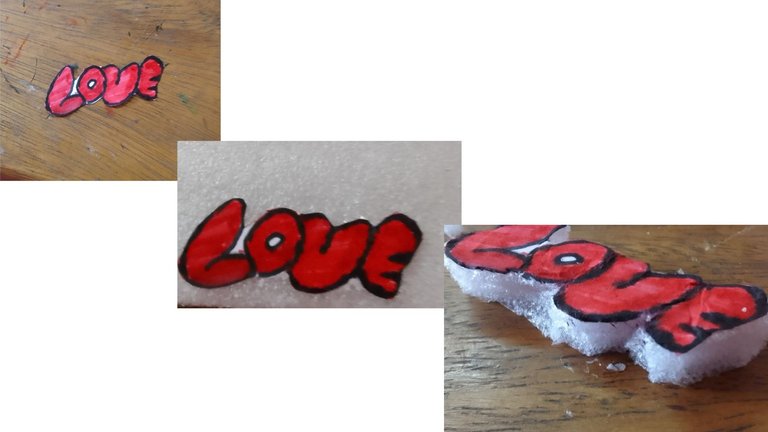
I started by writing the word love with bubble letters. (I did it since the surprise box was to give to my partner on February 14) then cut it out and glue it on a polyfoam base, then cut it out as well, giving it a relief shape
I used the same procedure in all the other drawings that were in the form of a letter, a love emoticon, the word love on the cover and hearts.
This was the result of my drawing. I just have to wish you a happy day
The photos were taken by my Samsung Galaxy A 03 Core phone and edited in canva
The text was translated by Deepl
VERSION EN ESPAÑOL
Hola comunidad de #DIYHub hoy tengo el placer de publicar nuevamente en esta comunidad y esta vez les traigo un paso a paso de como realizar una caja sorpresa . Sin mas preámbulos les cuento como fue que la realicé
Materiales
- 1 cartulina
- 2 hojas blancas
- 1 pedazo de cartón
- 1 regla
- plumones
- pegamento
- cuchilla
- poliespuma
Primer Paso
Comencé marcando sobre una hoja un cuadrado de 10cm x 10cm,luego lo recortė y tr acė cinco veces este cuadrado sobre la cartulina . De tal forma que me queda así.

Segundo Paso
Después de esto procedí a realizar la tapa de mi cajita sorpresa para hacerla utilicé un pedazo de cartón de 10.50cmm x10.50cm
Medio milímetro mas grande que la caja . recorte cuatro tiritas de cartulina del mismo largo que el carton y con ayuda de una cuchilla realicé cortes de el mismo largo que las tirita de cartulina e introduje estas en las ranuras que hice y para que se fijarlas al cartón le pegue usando pegamento. Le proporcionė un fondo a la cajiga con otro pedazo de cartulina con el mismo tamaño del cuadrado de la hoja .
Y ya esta lista nuestra caja sorpresa. Solo falta decorarla. Pueden realizar el decorado a su gustos. Yo les mostrare como hice el mio.
Decoración
Comencé escribiendo la palabra love con letra burbuja . (Lo realicé asi ya que la caja sorpresa era para regalarle a mi pareja el 14 de febrero) después la recortė y la peguė en una base de poliespuma luego recorte esta, también dando le una forma de relieve.
Utilicé el mismo procedimiento en todo los demás dibujos que fueron en forma de carta, un emoticón enamorado , la palabra amor en la tapa y corazones .
Este fue el resultado de mi dibujo .
Solo me queda desearles un feliz día
Las fotos fueron tomadas por mi teléfono Samsung Galaxy A 03 Core y editadas en canva
El texto fue traducido por Deepl
Customizing the decoration, especially for a special occasion like Valentine's Day, adds a charming touch to the gift.