
Hello!! Good evening, DIYHub family and all lovers of handmade crafts! Today, I'm going to teach you how to make the charming Hello Kitty in her most Christmas-ready version using moldable foam (foam clay). I hope you all like the creation—the whole community is welcome—and I'm super excited to share my experience working with this flexible material. Join me!
Next I will show you step by step the realization of my work. To begin with, I will mention all the materials used:
Hola!! Buenas Noches familia @diyhub, amantes de los trabajos manuales y artesanías, el día de hoy les enseñaré a realizar con foami moldeable (foam clay) a la carismática gatita Hello Kitty en su versión más navideña. Espero les guste la creación, a toda la comunidad en general y yo súper contento en presentarles mi experiencia con este material flexible. ¡Acompáñame!
A continuación les mostraré paso a paso la realización de mi trabajo. Para empezar, mencionaré todos los materiales utilizados:


The reference image is of Hello Kitty, one of the most famous kitties in the world. I love her design—that girl raised in the suburbs of London, with her distinctive red bow on her left ear. So I decided to create her using foami clay, a technique I really enjoy, especially during this Christmas season. I know it's not much, but it's my way of expressing myself through art.
La imagen de referencia es de Hello Kitty, una de las gatitas más famosas del mundo. Me encanta su diseño, esa niña criada en los suburbios de Londres, con su distintivo lazo rojo en la oreja izquierda. Pues decidí crearla en foami clay, una técnica que disfruto muchísimo, especialmente en esta época navideña. Sé que no es mucho, pero es mi manera de expresarme mediante el arte.
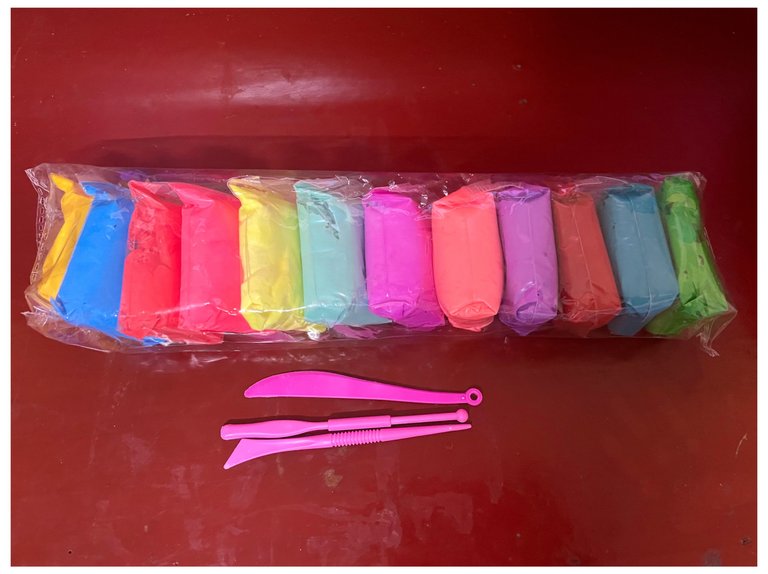
Materiales / Materials
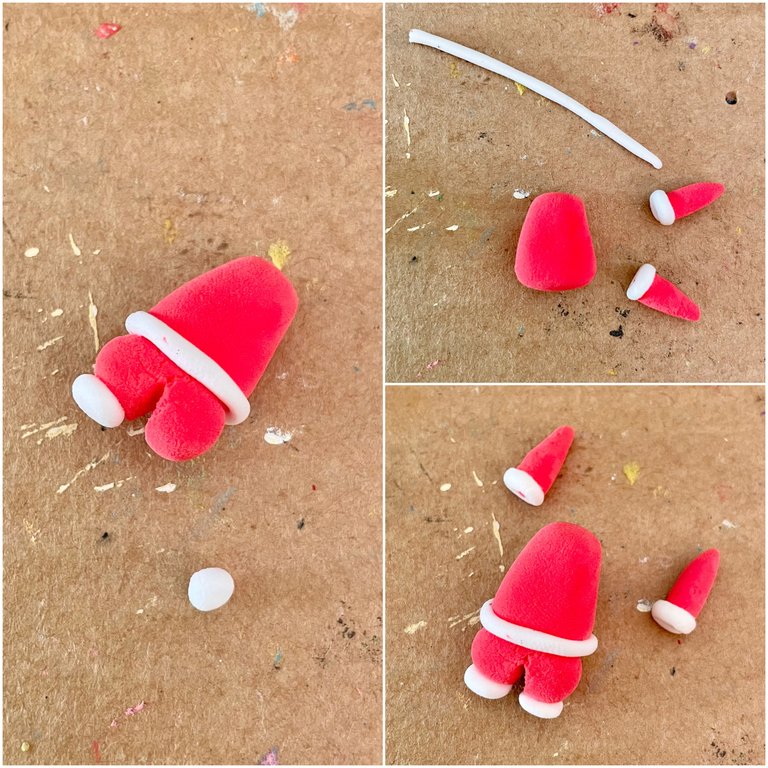
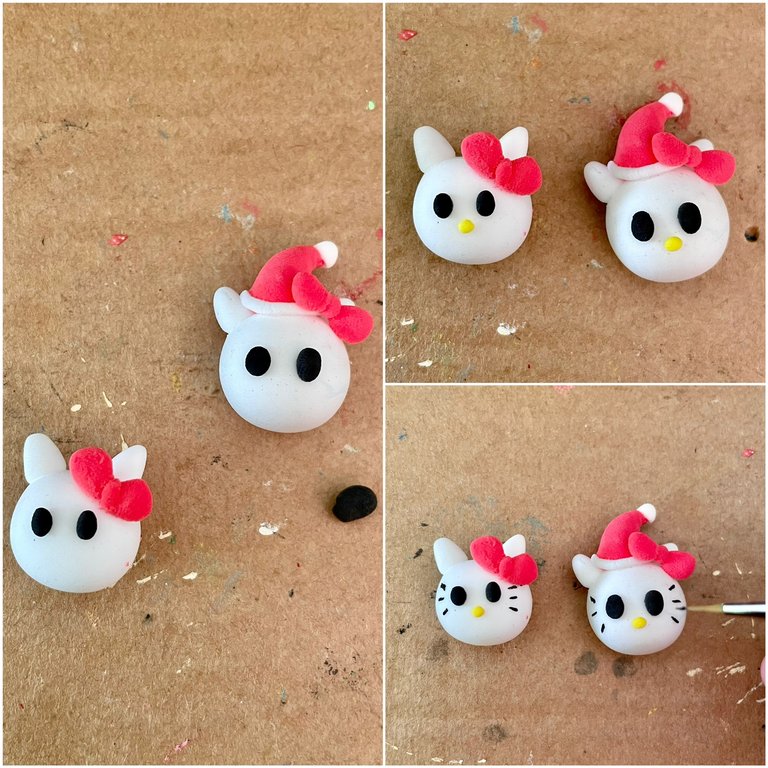
STEP/PASO 1
In the initial phase, I start by taking a portion of clay in white and red colors for the body of the animated ones. Then, with his hands he molded each color into balls, giving them a curious finish.
En la fase inicial, comienzo tomando una porción de arcilla en colores blanco y rojo para el cuerpo de los animados. Luego, con las manos moldeó cada color en forma de bolas, dándoles una terminación curiosa.


STEP / PASO 2
Next, I'll craft the different parts of the figurine: its head, ears, Santa suit, bows, Christmas hat, gifts, paws, and hands, using new shades of green and always giving it my very best.
Seguidamente, desarrollo las partes del cuerpo en las figuritas, su cabeza, sus orejas, el traje de Santa, los lazos, gorro navideño, regalos, las patas y manos, con nuevas tonalidades de verde, siempre dando lo mejor de mi.


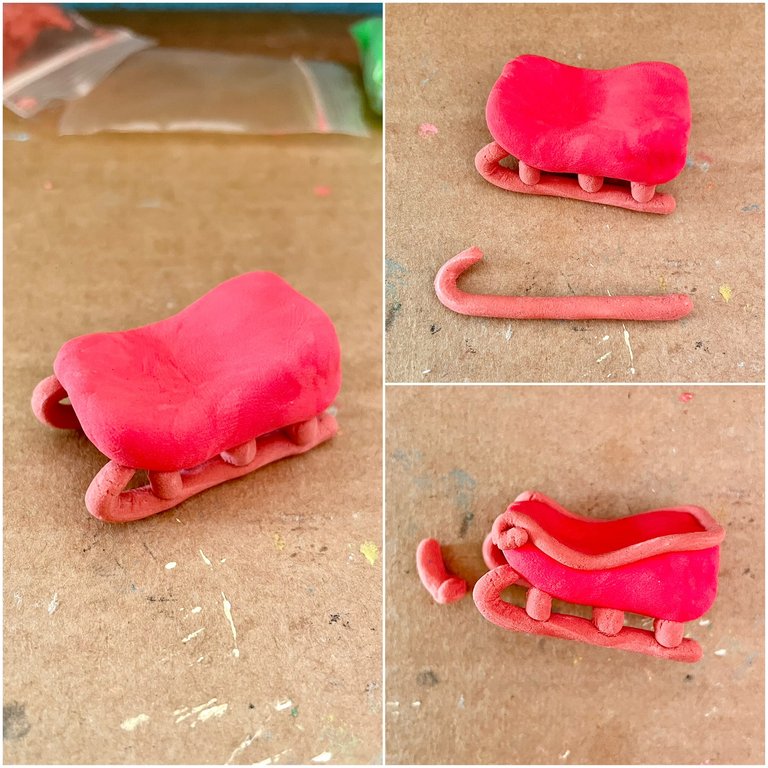
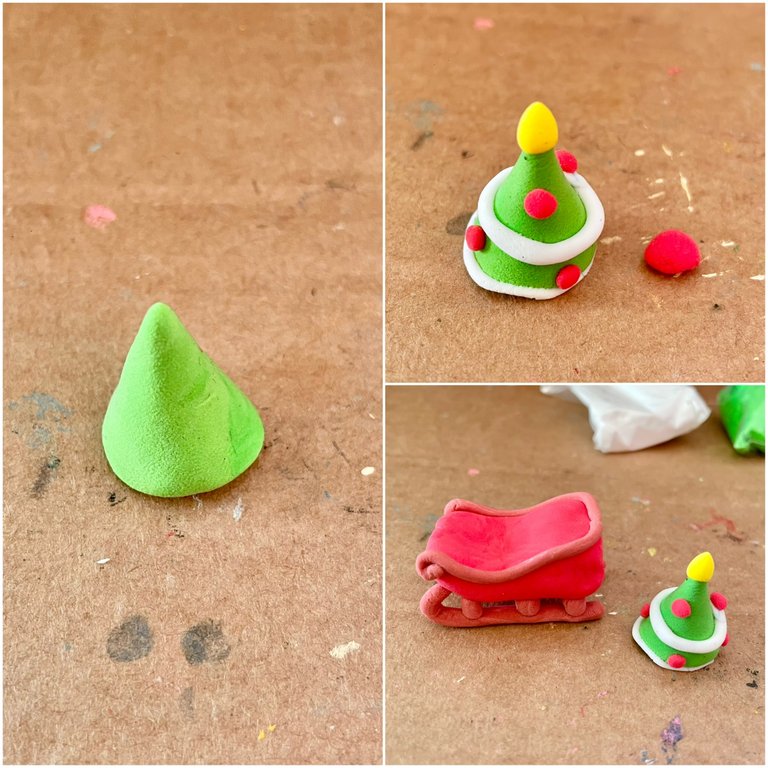
STEP / PASO 3
Finally, we made the eyes, whiskers, little tree, and Santa's sleigh, using the colors yellow, red, black, and white for the shine of both little figures. This design is a bit more complex, as the parts are smaller when it comes to molding.
Ya por último, realizamos los ojos, bigotes, arbolito y carroza de Santa, utilizando los colores amarillo, rojo, negro y blanco para el brillo de ambos muñequitos. Este diseño es un poco más complejo, pues son más pequeñas las partes a la hora de moldear.


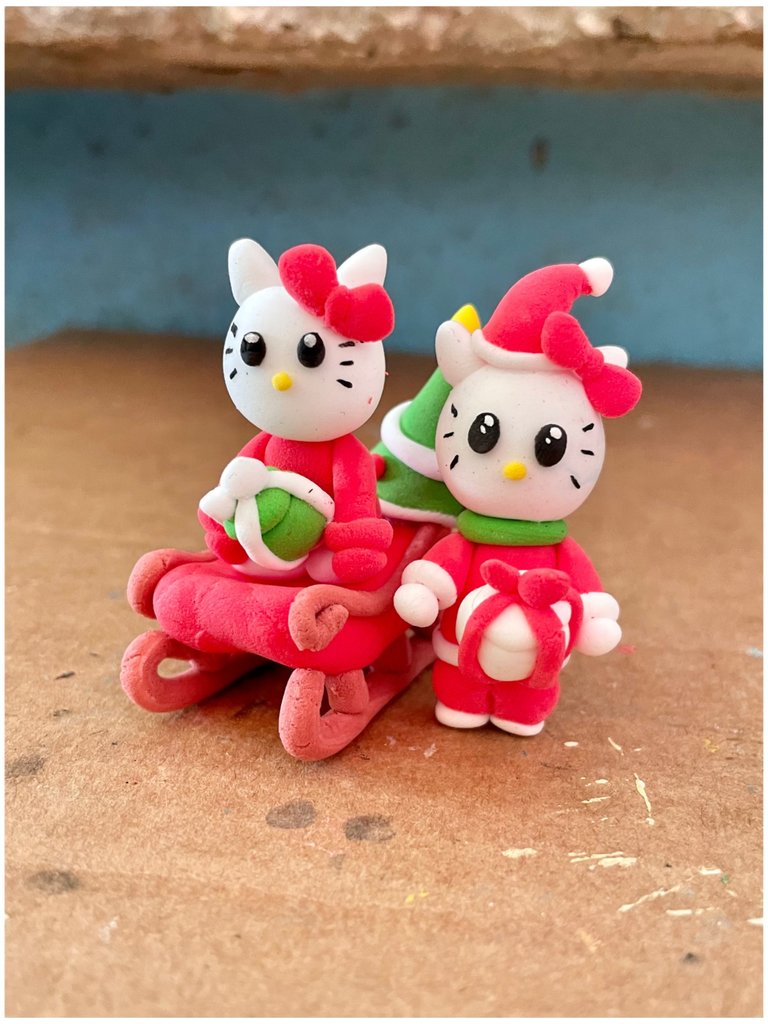
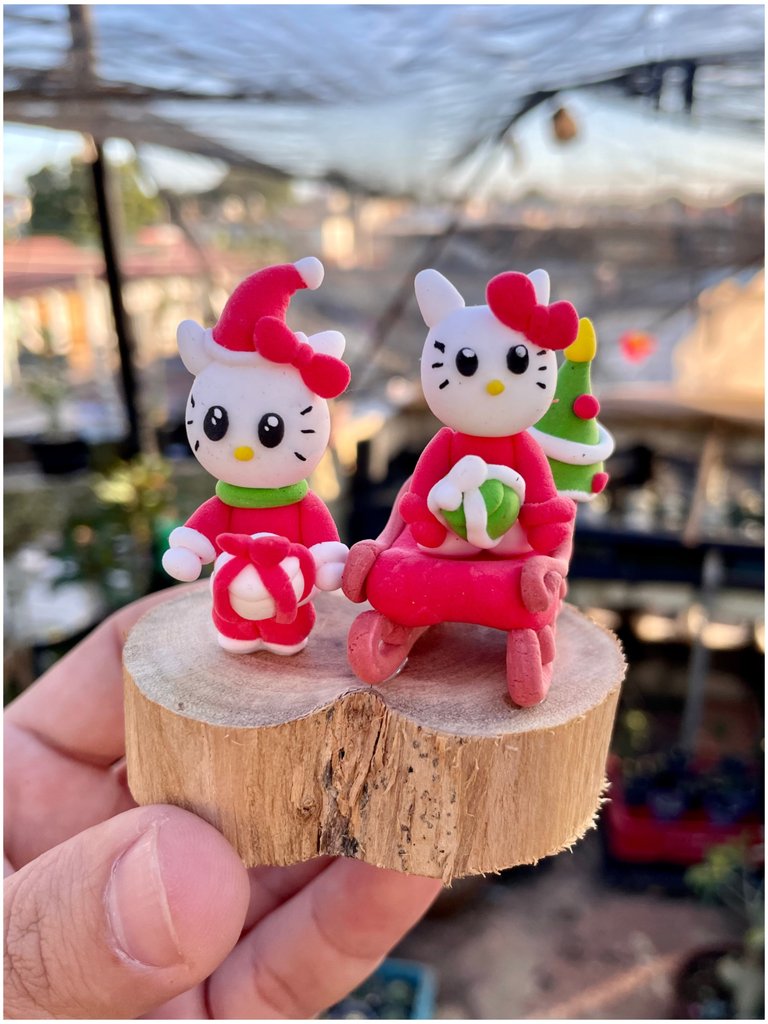
Final result / Resultado final
It should be noted that this design was searched on Pinterest; but the realization of the animations are made by me, with dedication to make them look more beautiful in your home or bedroom.
Cabe destacar que este diseño fue buscado en Pinterest; pero la realización de los animados son hechos por mí, con dedicación para que luzcan mas bonitos en tu hogar o dormitorio.


If you liked it, don't forget to leave a comment and follow me for future posts. I'd love to know your opinion and ideas for the next one. Regards
Si te ha gustado, no olvides dejar tu comentario y seguirme para próximas publicaciones. Me encantaría saber tu opinión e ideas para el siguiente. Saludos


This post has been shared on Reddit by @ibarra95 through the HivePosh initiative.
Thanks you so much @redditposh for the support family!! 😉🤝
Saludos amigo, es un proceso minucioso elaborar este personaje, te quedó muy bonito.
Muchas gracias @cetb2008 por tu apoyo, que bueno saber que te gusto este pequeño trabajo, pero muy curioso jjj. Saludos bro y feliz día 😉🤝
SO cute... 😍
just wondering,, would it work if you put a string at the back or on the hat so you can hang them on Christmas tree?? 😁
Well yes @vvodjiu, they can also be hung on Christmas trees. It's a soft material and weighs very little. I'll make some for my tree later lol. I'll post them and if I don't forget, I'll tag you so you can see them. Greetings, friend, and have a lovely day!! 🤗☺️🙏🏻
ohh, that's nice.. ❤️
Quedó súper Cuchi, de niña era muy fan de Hello Kitty y tenía varios peluches de ella. Buena explicación para hacerla en foami moldeable.
Muchas gracias @valsalazar por tu apoyo, si esta gatita es bien tierna, y pues su color blanco y tierno, me era perfecto para un diseño navideño. Que bueno saber que te gusto, aquí en mi ciudad también he visto varios peluches bonitos.
Saludos y feliz día para ti !! 🤗😊🙏🏻
Congratulations @ibarra95! You have completed the following achievement on the Hive blockchain And have been rewarded with New badge(s)
Your next target is to reach 600 posts.
You can view your badges on your board and compare yourself to others in the Ranking
If you no longer want to receive notifications, reply to this comment with the word
STOPThanks you so much @hivebuzz for the support family!! 🤗☺️🫶
All good @ibarra95! You're amazing on Hive! Don't stop now, achieve that new goal!
Son una costita adorable amor estas me 3ncantaron
Muchas gracias amor
Thanks for expressing yourself through art and for walking us through the creation process of this amazing pieces. Great job!
selected by @ibbtammy
Thanks you so much @ibbtammy and @diyhub for the support family!! 🫶🤗☺️
Thanks you so much @ibbtammy and @ecency for the support family!! 🤗🫶