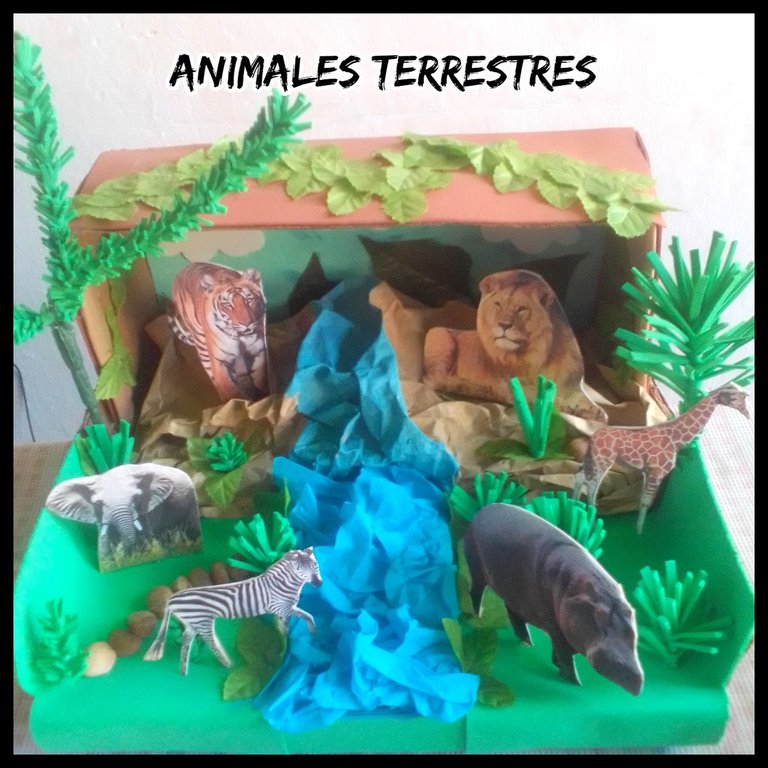
First of all, I'm going to send a good morning to all my friends, and to the members that make up this appreciated community. To start today I leave you with this.
Yesterday I spent the entire afternoon making a school model for a neighbor, who has an exhibition about terrestrial animals at her school. Among them I placed different animals such as the elephant, tiger, lion, giraffe, hippopotamus, I tell you that it is the first time I make a model in this way, I see it very dynamic at the same time, because we put our mind into creativity, and we imagine being there in that place as in a beautiful landscape where these animals live, well here I leave you to enjoy how I make it.
Primero que nada, le voy a enviar unos buenos días a todos mis amigos, y para los miembros que conforman esta apreciada comunidad. Para comenzar el día de hoy lo dejo con esto.
En el día de ayer me dediqué toda la tarde en hacer una maqueta escolar, para una vecina, la cual tiene en su escuela una exposición, sobre los animales terrestres. Entre ellos le coloqué diferentes animales como el elefante, tigre, león, jirafa, hipopótamo, les cuento que primera vez que hago una maqueta de esta forma, lo veo muy dinámico a la vez, porque ponemos en creatividad nuestra mente, y nos imaginamos estar allí en ese lugar como en un paisaje hermoso donde habitan estos animales, pues aquí los dejo para que disfruten como la elabore.
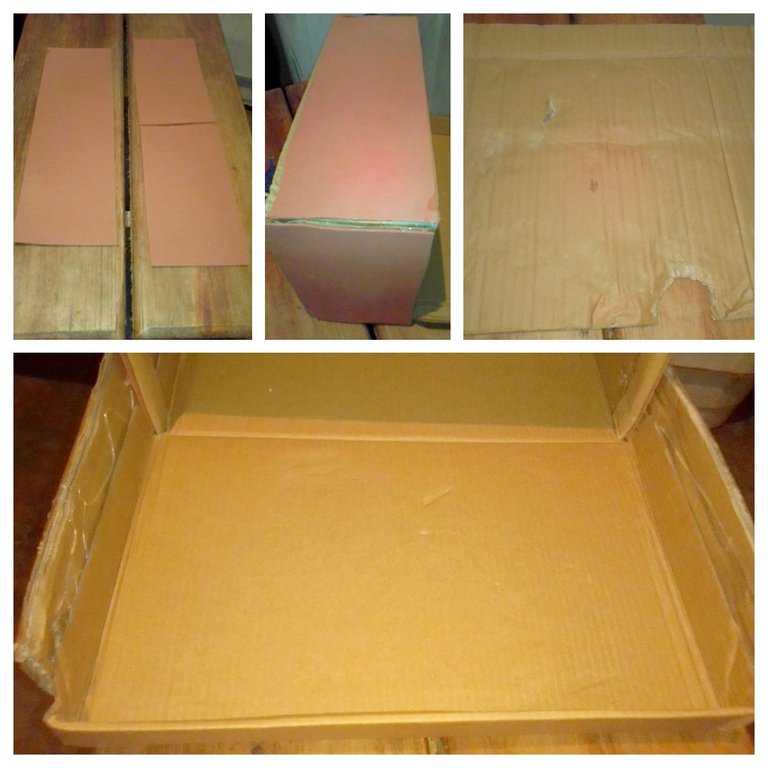
Step 1:
Cut 2 rectangles, one 10cm high x 31cm wide, and the other 2 10cm high x 18cm wide. I glue them to the surface of the box, to line the edge, then use a thick cardboard to make the support of the box.
Paso 1:
Corte 2 rectángulos, uno de 10 cm de alto x 31 cm de ancho, y los otros 2 de 10 cm de alto x 18 cm de ancho. Los pego a la superficie de la caja, para forrar el borde, luego utilice un cartón grueso para hacer el soporte de la caja.
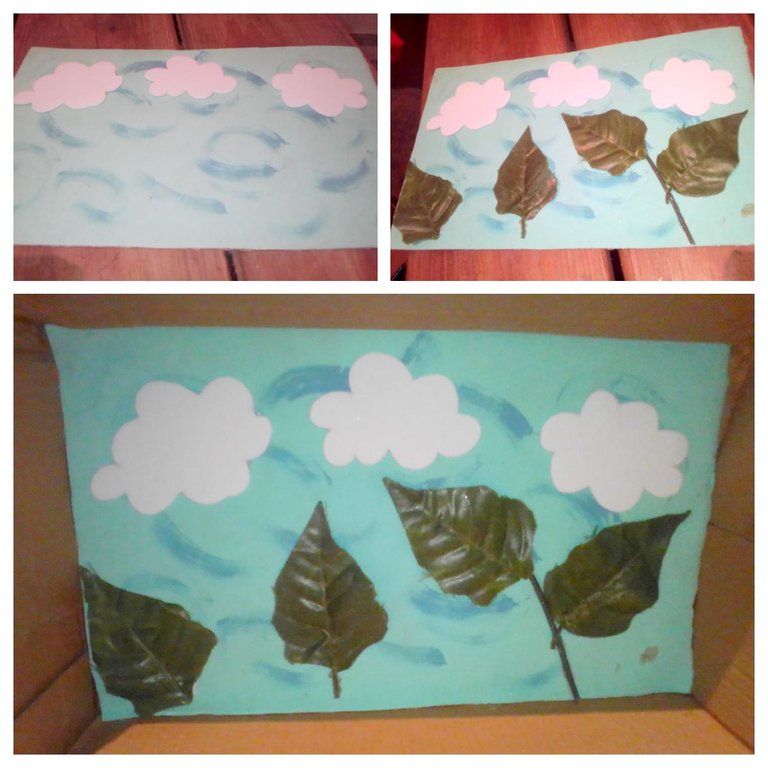
Step 2:
I proceeded to color a species of the sky, on top of a light blue EVA foam, use a white EVA foam, draw 3 clouds and cut out.
Paso 2:
Procedí a colorear especie del cielo, encima de una goma eva azul claro, utilice una goma eva blanco, dibuje 3 nubes y recorte.

I glue the 3 clouds to the blue EVA foam, then some artificial leaves, to make a kind of landscape and I take it to place it at the bottom of the box.
Las 3 nubes las pego a la goma eva azul, luego unas hojas artificiales, para hacer especie de un paisaje y este mismo lo lleve a colocarlo al fondo de la caja.
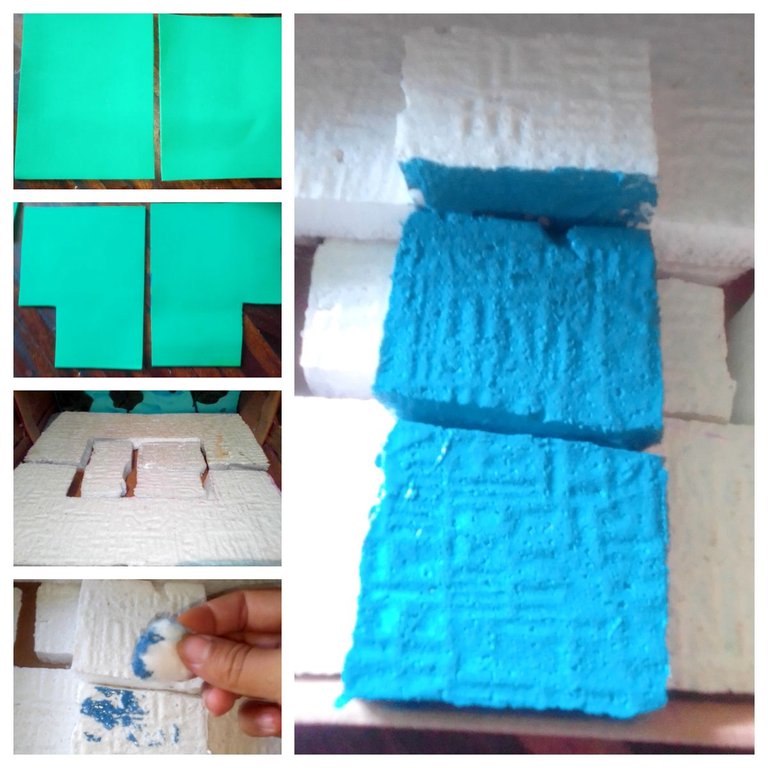
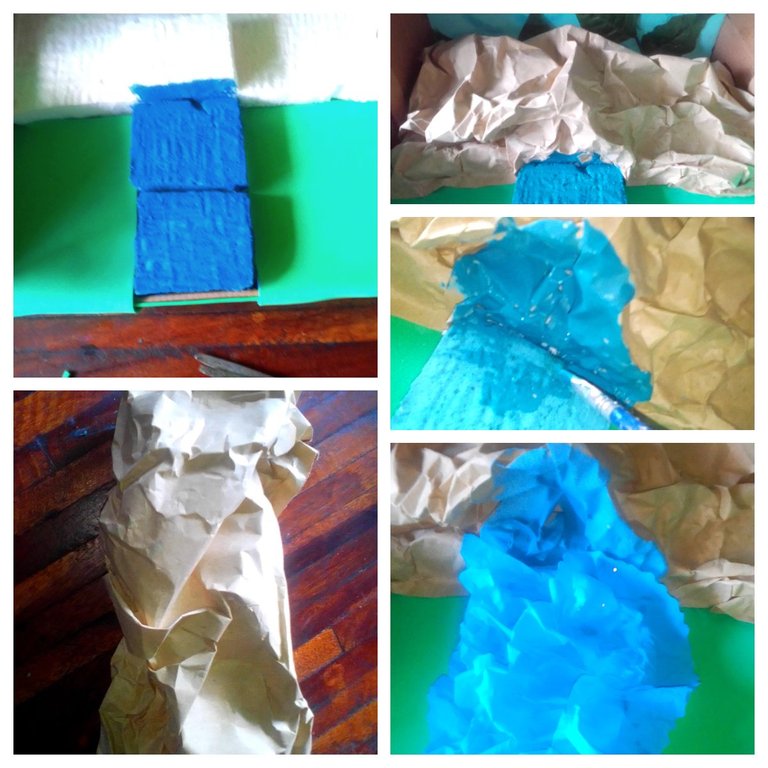
Step 3:
Use the green EVA foam, and cut 2 squares 17 cm long x 17 cm wide, cut each one in both corners a rectangle 6 cm long x 4 cm wide. Then I proceeded to fill the box with anime and made the shape of a waterfall, I painted said waterfall blue.
Paso 3:
Use la goma eva color verde, y corte 2 cuadrados de 17 cm de largo x 17 cm de ancho, a cada uno le corte en ambas esquinas un rectángulo de 6 cm de largo x 4 cm de ancho. Luego a la caja procedí a rellenarla de anime e hice forma de una cascada, dicha cascada pinte de color azul.
Here I started by making the forest, placing the green EVA foam like grass, then I used a paper bag and crumpled it to stick it to the bottom of the box making a hill.
Aquí comencé por hacer el bosque, colocando la goma eva verde como la grama, luego use una bolsa de papel y arrugue para pegarla al fondo de la caja haciendo un cerro.
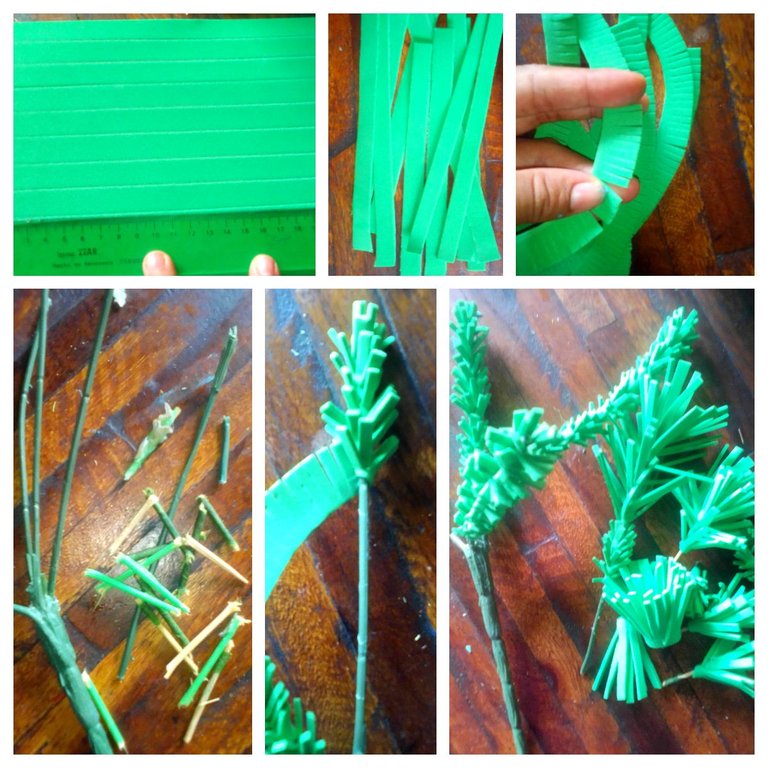
Step 4:
I measured several strips 1 cm long by 17 cm wide, and I made a half cut for each one, I used a plastic stem and pieces of sticks, so I proceeded to glue them on each one in a spiral shape, to form branches, just as I did. I made with each of the sticks.
Paso 4:
Medí varias tiras de 1 cm de largo por 17 de ancho, y a cada una le hice una medio cortada, use un tallo plástico y trozos de palos, así procedí a pegarlos en cada uno en forma de espiral, para formar ramas, tal cual lo hice con cada uno de los palitos.
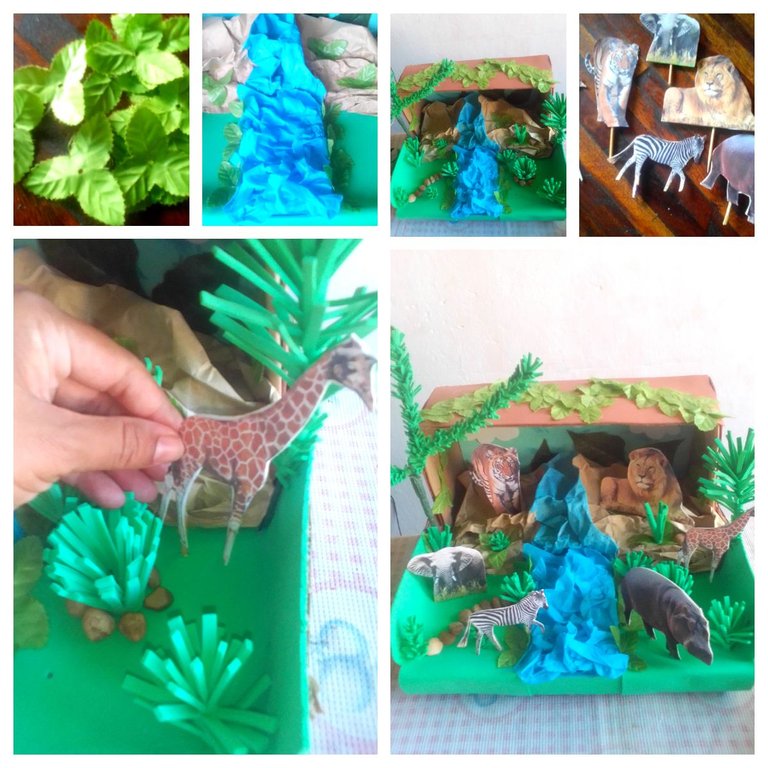
Step 5:
I placed the other artificial leaves on the hill, part of the waterfall, just as I added the branches that I had made, to form the forest, then the different animals already mentioned, here I finish, this is the final result of this model, The truth is that it took a little work to make it, because it involves a lot of details and well the important thing was that I achieved the objective I was looking for, and the most interesting thing was that my neighbor loved her model, and what I was looking for was that same thing, to surprise her like I also know that he will defend his model very well, because he will be able to identify some land animals.
That's it, I'll say goodbye, see you next time.
Paso 5:
Las demás hojas artificiales, las coloqué en el cerro, parte de la cascada, tal cual agregue las ramas que había hecho, para así formar el bosque, luego los diferentes animales ya mencionados, aquí termino, este es el resultado final de esta maqueta, la verdad llevo un poco de trabajo hacerla, porque lleva muchos detalles y bueno lo importante fue que logre el objetivo que buscaba, y lo más interesante fue que a mi vecina le encanto su maqueta, y lo que yo buscaba era eso mismo, sorprenderla como también sé que va a defender muy bien su maqueta, porque podrá identificar algunos animales terrestres.
Hasta aquí me despido, nos vemos en la próxima.
Collage making program: Fotojet Link
Translated from google translator Link
Photo editing program: PhotoFiltre 7
Las fotos fueron tomadas desde un Xiaomi Mi A2.
Programa para hacer el collage: Fotojet Enlace
Traducido del traductor de Google Enlace
Programa para editar fotos: PhotoFiltre 7
I say goodbye until another opportunity.
Thanks for your support.
Me despido hasta otra oportunidad.
Gracias por su apoyo.
Copyright @imargasa. All rights reserved.
Está muy linda ❤️😍 también la he hecho y me encanta este tipo de trabajo manual. Felicidades y que Dios guarde tu creatividad amiga... 😉🙏✨❤️
Excelente idea, para los niños en tiempo de clases 😃 buen trabajo ✌🏽
Hermoso amiga!!! admiro tu creatividad. Casualmente a uno de mis niños me toca exponer este tema, si le mandan una maqueta tengo un buen modelo 🤭. Saludos
This looks really beautiful.
!diy
You can query your personal balance by
!DIYSTATS!DIY
Nice work. Thank you for leaving your creative process and sharing it in our community....
Guaoooo hermoso se ven los animales me gustó mucho tu explicación