

Hello dear friends happy evening to all, kisses from afar, today I want to be part of the new contest of the month of Christmas themed, I wanted to do something different, I thought of a tree, a carpenter friend gave me some boards and I came up with the brilliant idea to decorate my home with a small wooden tree, I tell them that it was a little difficult for me and a little tiring because I do not work much with the saw, even tell them what I hammered my fingers on several occasions, but I enjoyed doing it, I wanted to show that we women if we can work with wood and strong materials.
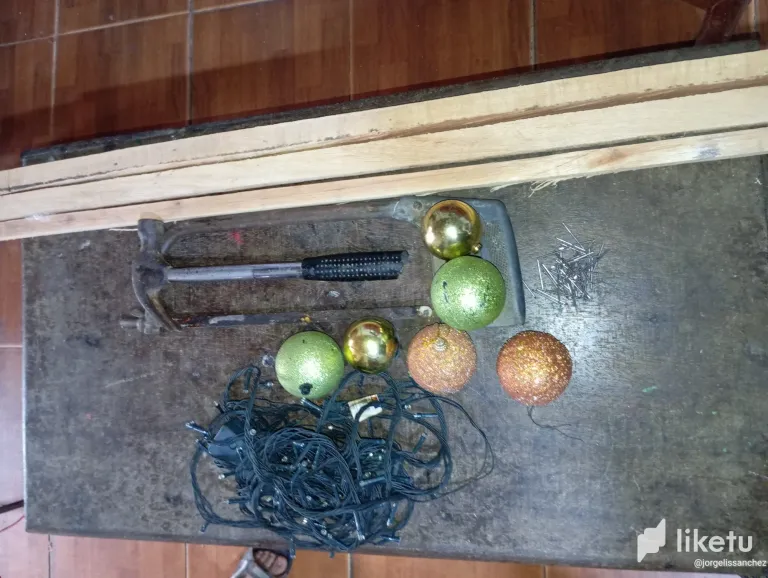
Materials I used:
-Wooden boards
-Nails
-Hammer
-Saw
-Christmas lights
-Christmas spheres
Here are the steps to follow:
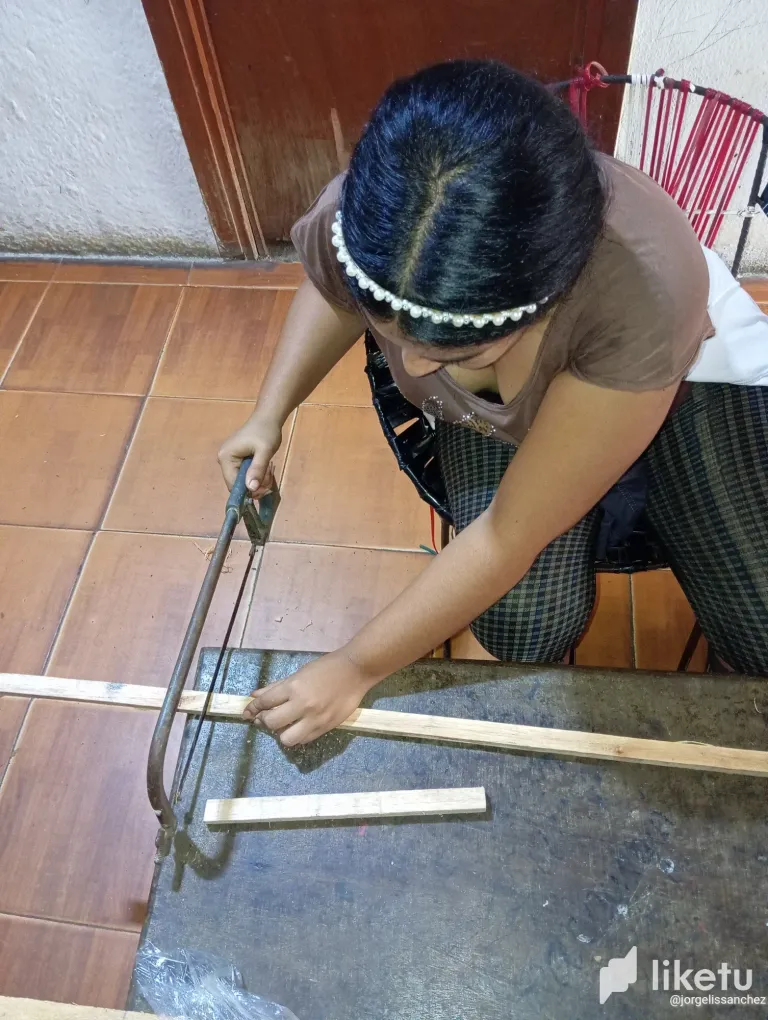
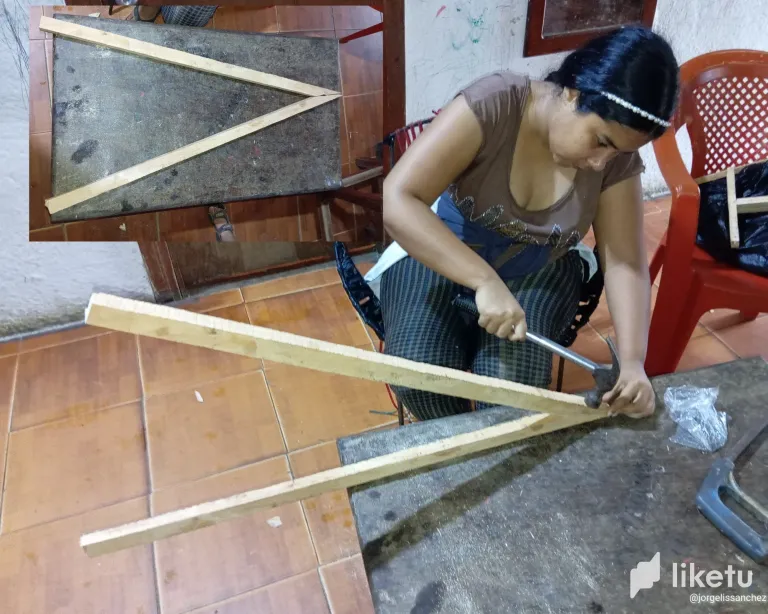
We will start by cutting four small boards to make the base and feet of the tree, for the base cut them of 25 centimeters and 23 centimeters for the feet.
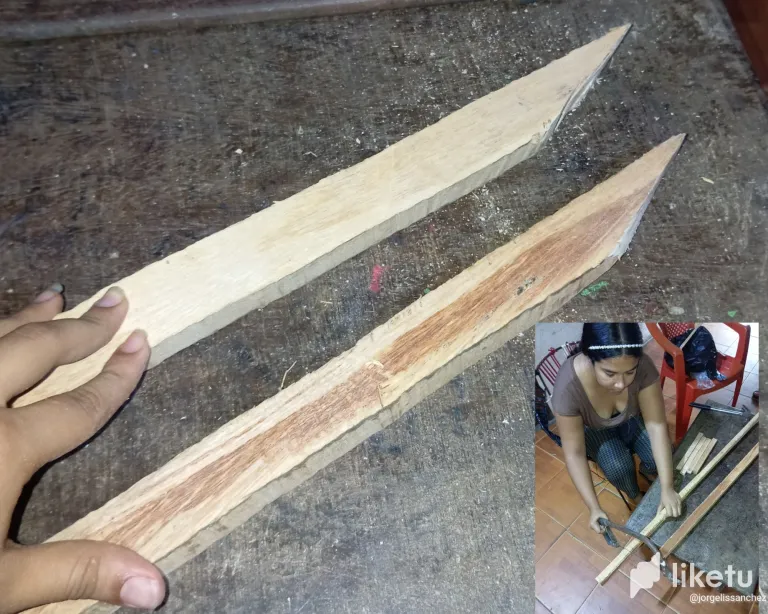
Then continue cutting a little bit the boards that would form the Christmas tree, at the top cut them in a pointed shape so that when glued the top is pointed and has the shape of a pine tree, the measures I used were 60 centimeters high.
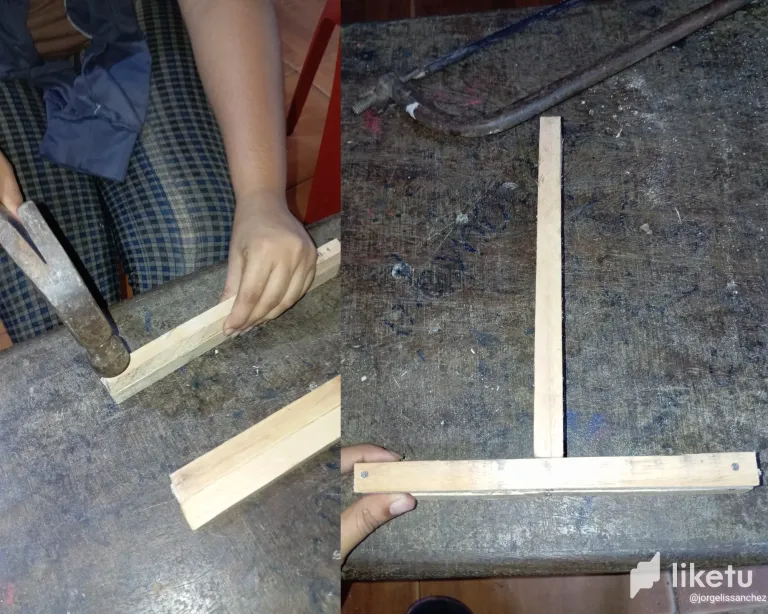
Next, we are going to glue and form the parallel or feet of the tree, I took two small boards, I placed them both in the same position squaring that they are straight and I placed two small nails in each end so that it will be attached and it will be stronger, then continue gluing them to the base with our hammer, the base will be horizontal and the parallel will be vertical.
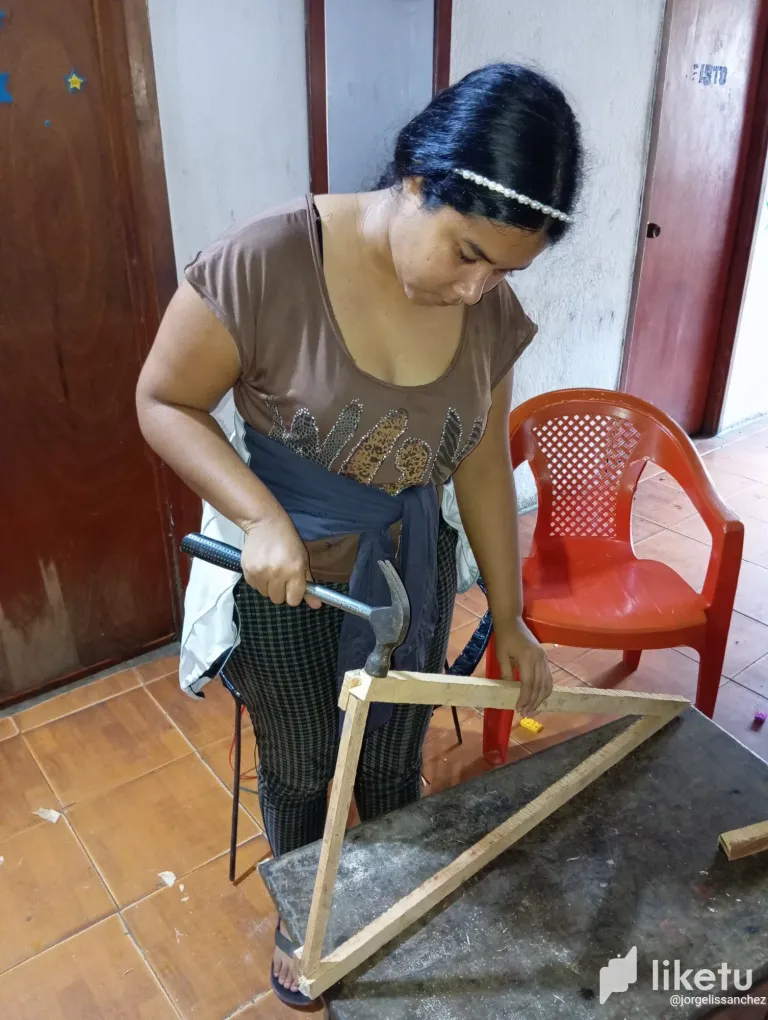
Then we will continue gluing the boards with which we will form the tree in the shape of a pine tree, we will take our hammer and drive 3 nails near the tip, forming a figure similar to a triangle.
Then at the bottom we will glue a board horizontally to be the base where we will place the tree's feet.
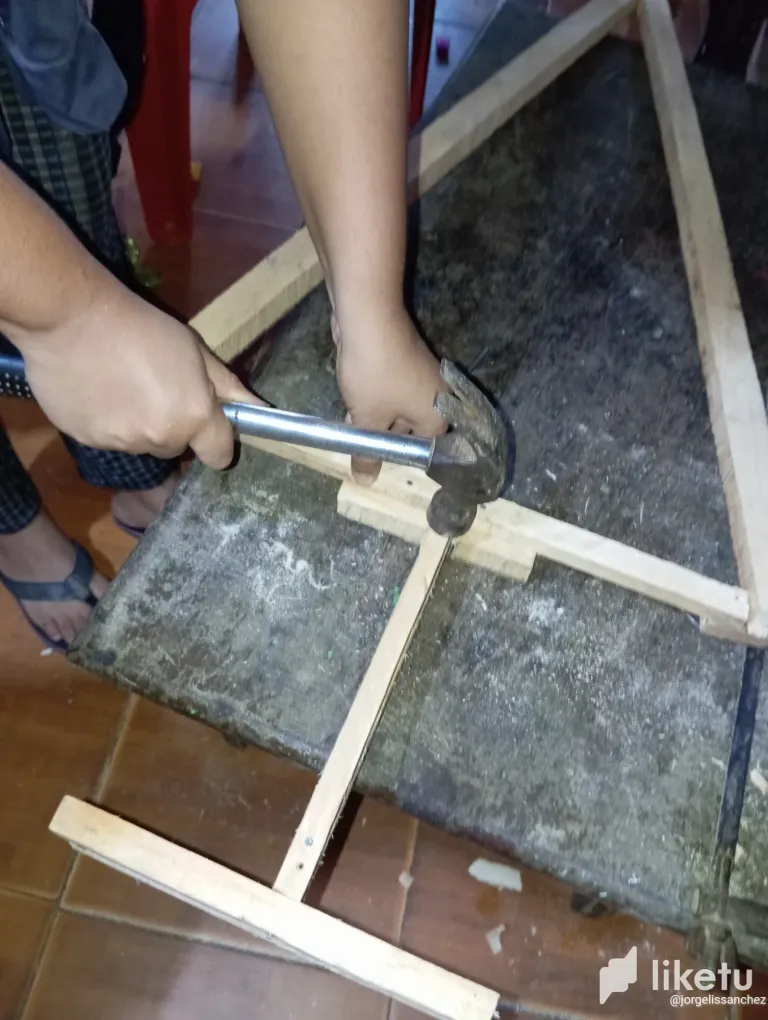
Finally we will take the base of our tree and glue it again with our hammer and nails in the center of the tree.
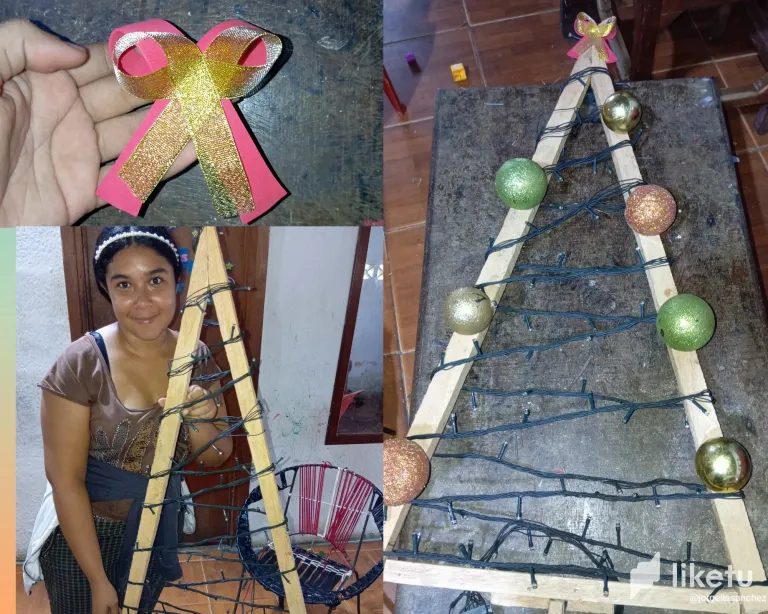
Being a Christmas tree could not miss decoration and that looks striking, for this I used lights and spheres, I placed the lights rolled all around and separate spheres on the sides.
This is the final result of my beautiful wooden tree ideal for decorating in this wonderful time, and do something different and renewed, I invite my friends @moisesrojas @yagelybr to be part of this excellent initiative.
I took the photos with my redmi 12 and I made the collages with the GridArt application, I translated my texts with the deepl translator, happy night.
Spanish
Hola queridos amigos feliz noche para todos , besos desde la distancia, hoy quiero formar parte del nuevo concurso del mes de con temática navideña , quería realizar algo diferente , pensé en un arbolito ,un amigo carpintero me obsequió unas tablitas y se me ocurrió la brillante idea decorar mi hogar con un pequeño árbol de madera , les cuento que fue un poco difícil para mí y algo cansón porque no se trabajar mucho con el serrucho ,incluso les cuento qué me martille los dedos en varias ocasiones,pero disfrute mucho hacerlo , quería demostrar que nosotras las mujeres si podemos trabajar con madera y materiales fuertes
Materiales qué utilicé:
-Tablitas de madera
-Clavos
-Martillo
-Serrucho
-Luces navideñas
-Esferas navideñas
A continuación los pasos a seguir:
Iniciaremos primeramente cortando cuatro tablitas para realizar la base y pies de el árbol , para la base las corte de 25 centímetros y 23 para los pies
Luego continúe recortando un poco las tablas con las que formaría el arbolito navideño , en la parte de arriba las recorte en forma puntiaguda para que al pegarlas quede la parte de arriba puntiaguda y tenga forma de pino , las medidas que utilice fueron de 60 centímetros de altura
A continuación vamos a pegar y formar el paral o pies del árbol , tomé dos tablitas , las coloque ambas en la misma posición cuadrando que estén derechas y les coloqué dos clavitos en cada punta de modo que este quedará sujeto y se observé más fuerte , seguidamente continúe pegando las a la base con nuestro martillo , la base quedará de forma horizontal y el paral de forma vertical
Luego vamos a continuar pegando las tablas con las que formaremos el árbol en forma de pino , tomaremos nuestro martillo y clavaremos 3 clavos cerca de la punta , formando una figura similar a un triángulo
Luego en la parte de abajo vamos a pegar una tabla de forma horizontal para que sea la base donde ubicaremos el paral o pies del árbol
Por último vamos a tomar la base de nuestro arbolito y lo pegaremos nuevamente con nuestro martillo y clavos en todo el centro del arbolito
Por ser un arbolito navideño no podía faltar decoracion y que se vea llamativo , para esto utilicé luces y esferas , las luces las coloque enrolladas por todo el alrededor y las esferas separadas a los lados
Este es el resultado final de mi hermoso arbolito de madera ideal para decorar en esta maravillosa época , y hacer algo diferente y renovado , le hago la invitación a mis amigos @moisesrojas @yagelybr que formen parte de esta excelente iniciativa.
Las fotos las tomé con mi redmi 12 y realicé los collages con la aplicación GridArt, traduje mis textos con el traductor deepl, feliz noche
For the best experience view this post on Liketu
Quedó muy lindo te felicito por la creatividad
Muchas gracias
Gracias amiga