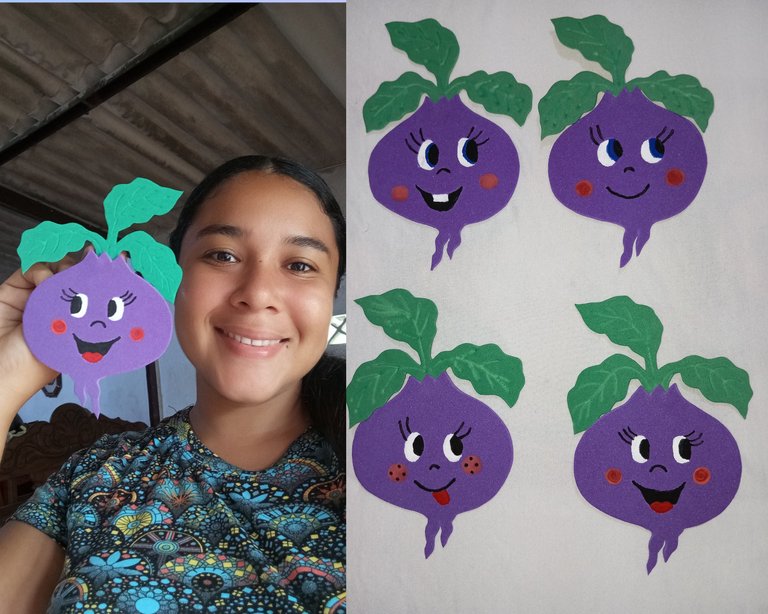
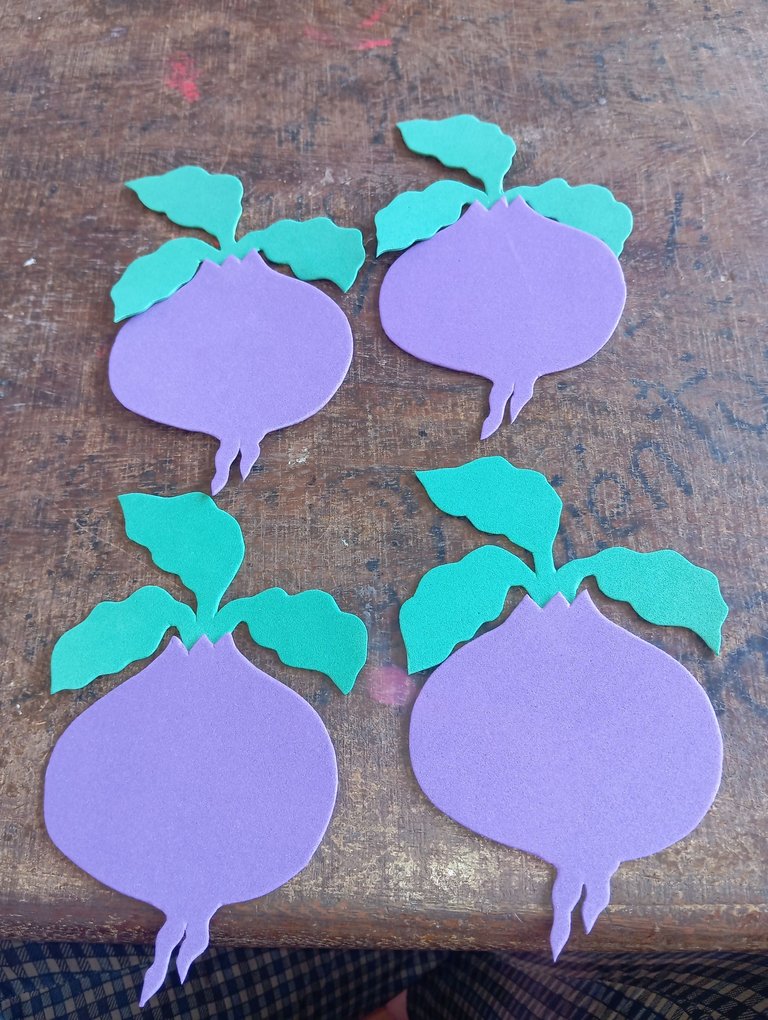
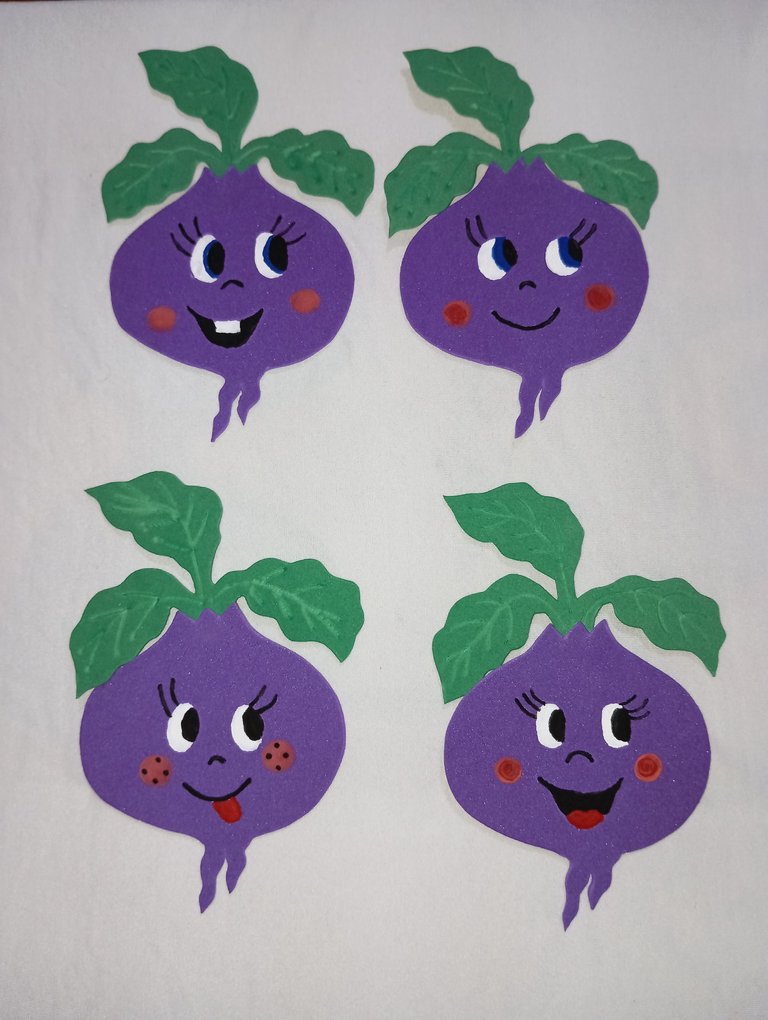
Hola amigos buenas tardes para todos , feliz inicio de semana , espero que se encuentren bien , hoy les quiero compartir unas hermosas remolachas que realicé para un encargo como emprendedora , estas bellas remolachas se irán a adornar las neveras de cuatro hogares , más adelante les presentaré otras hortalizas ya que es un encargo , desde que inicié en hive me dí a reconocer en mi pueblo como una persona talentosa y desde entonces me hacen encargos ,no solo trabajo de ello sino que vivo y mantengo mi hijo
Hello friends good afternoon to all , happy start of the week , I hope you are well , today I want to share some beautiful beets that I made for an order as an entrepreneur , these beautiful beets will go to decorate the refrigerators of four homes , later I will present other vegetables as it is an order , since I started in hive I gave me to recognize in my people as a talented person and since then they make me orders ,not only work from it but I live and support my son.
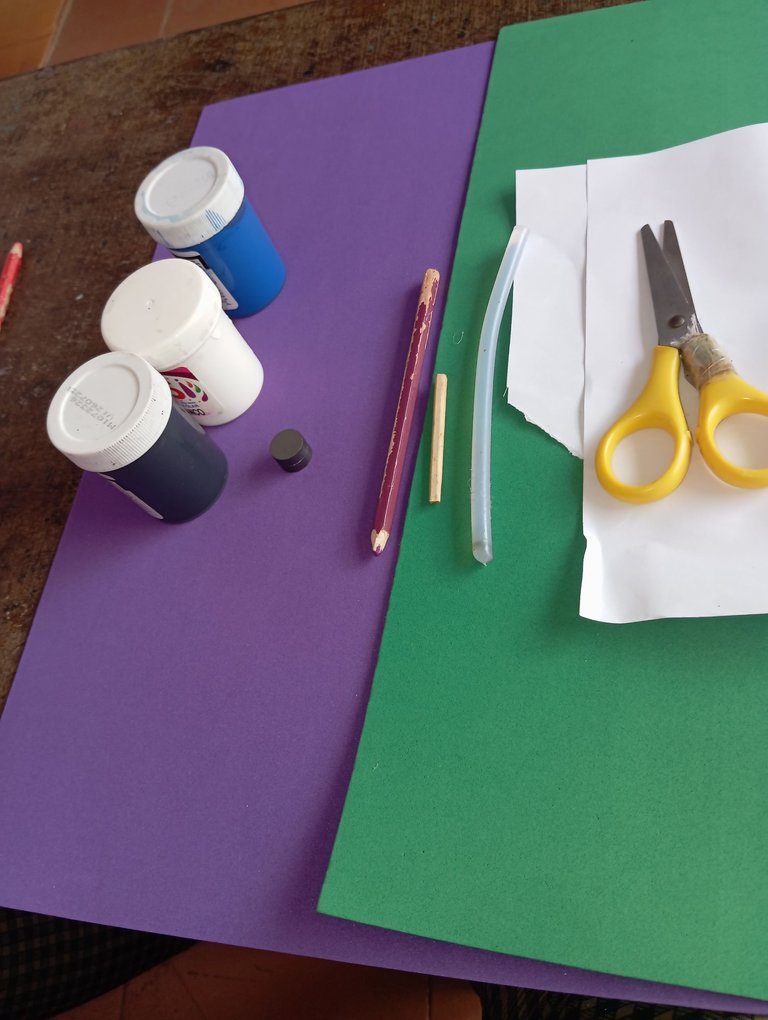
Materiales qué utilicé:
-Foamis
-Iman
-Pinturas
-Tijera
-Silicon
-Lapiz y papel
Materials I used:
-Foamis
-Iman
-Paints
-Scissors
-Silicon
-Paper and paper
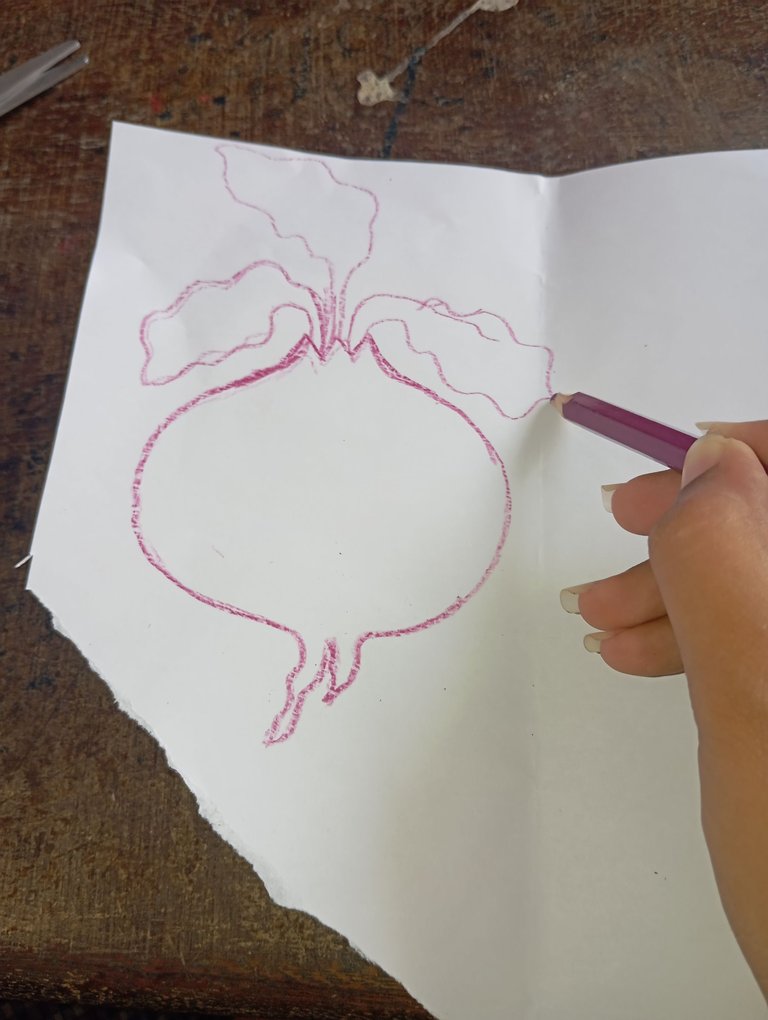
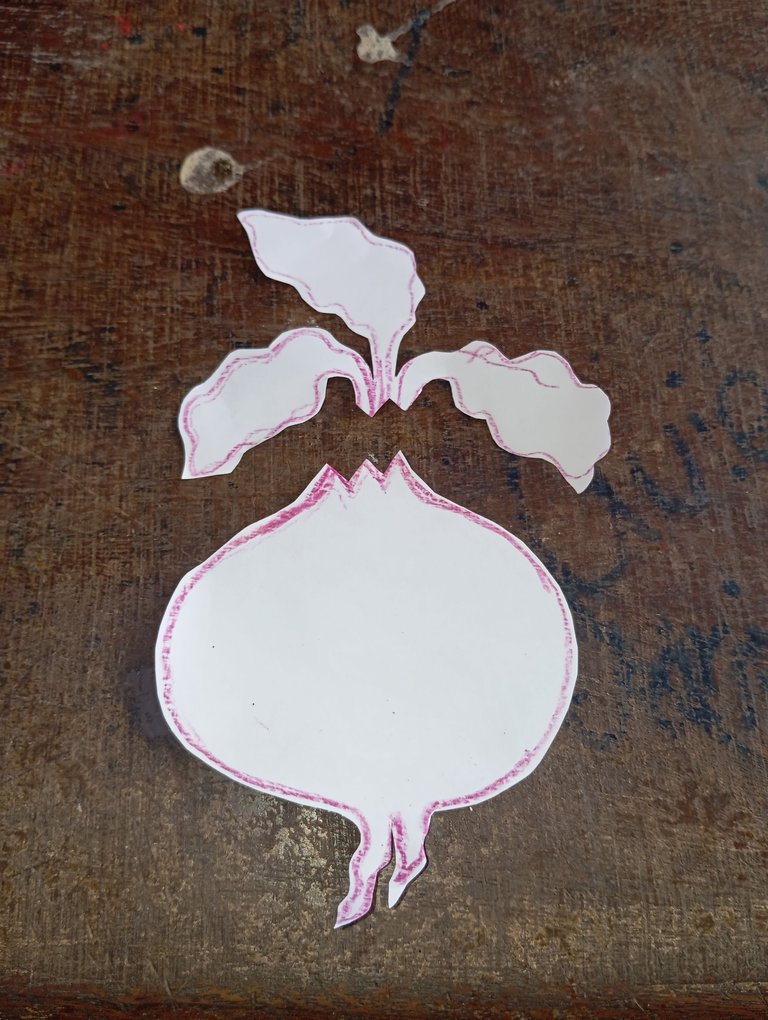
A continuación los pasos a seguir:
Iniciaremos dibujando un patrón, esta será la temática con la que vamos a trabajar, una adorable remolacha con tres hojas moldeadas , una vez que hagamos nuestro patrón lo vamos a recortar para comenzar a trabajar
Here are the steps to follow:
We will start by drawing a pattern, this will be the theme we are going to work with, an adorable beet with three molded leaves , once we make our pattern we are going to cut it out to start working.
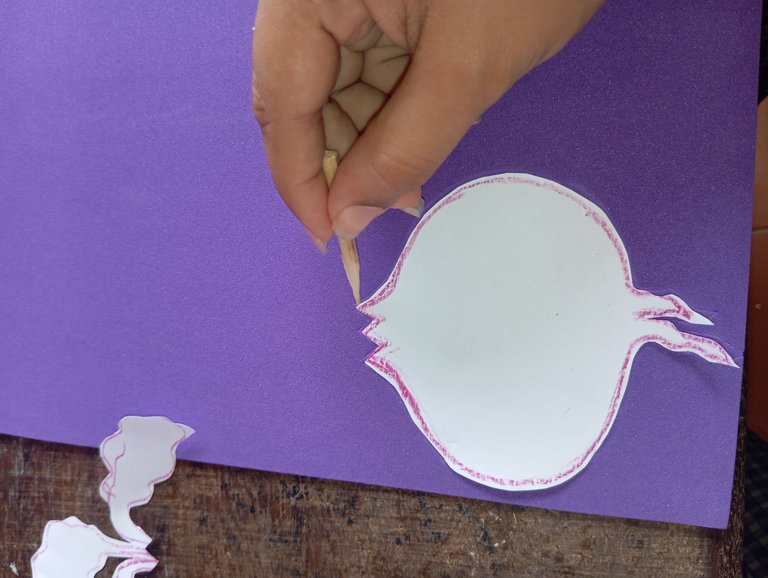
Seguidamente vamos a iniciar tomando nuestro foamis y marcando cuatro remolachas , para marcar utilicé un palito de esta manera el foamis no se ensucia como con el lápiz y hacemos un trabajo sumamente limpio y lindo
Next we are going to start by taking our foamis and marking four beets, to mark I used a stick, this way the foamis does not get dirty like with the pencil and we do a very clean and nice job.
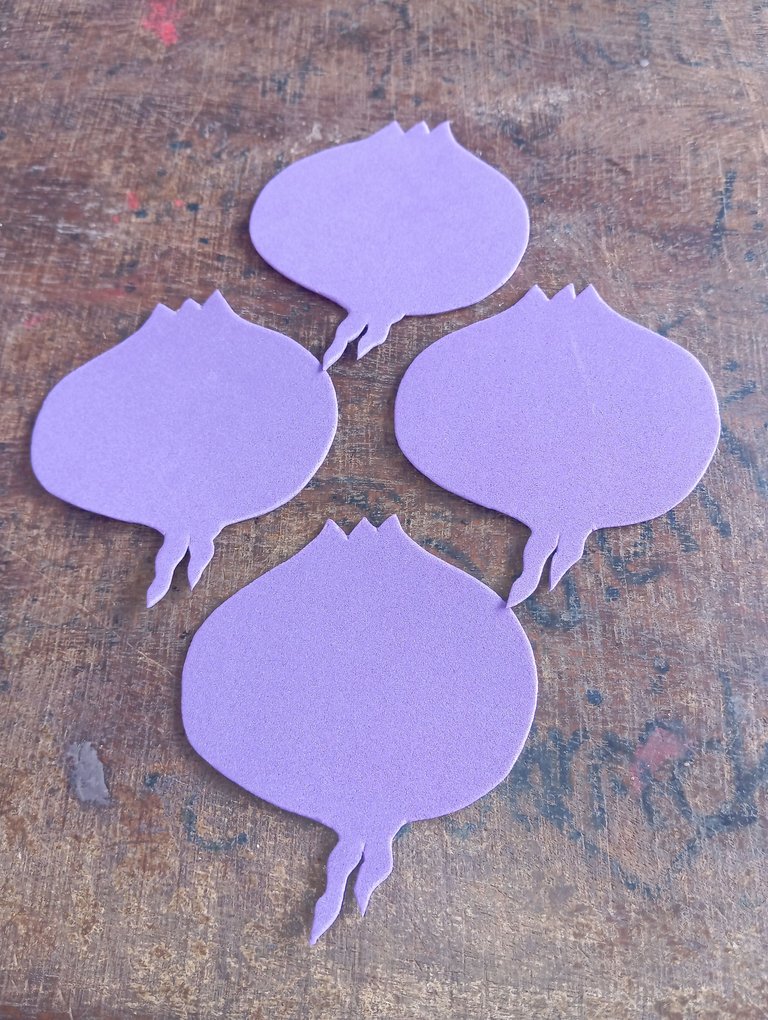
Luego que marcamos nuestras remolacha vamos a continuar recortando las con la ayuda de una tijera
After marking our beets we will continue cutting them out with the help of a scissors.
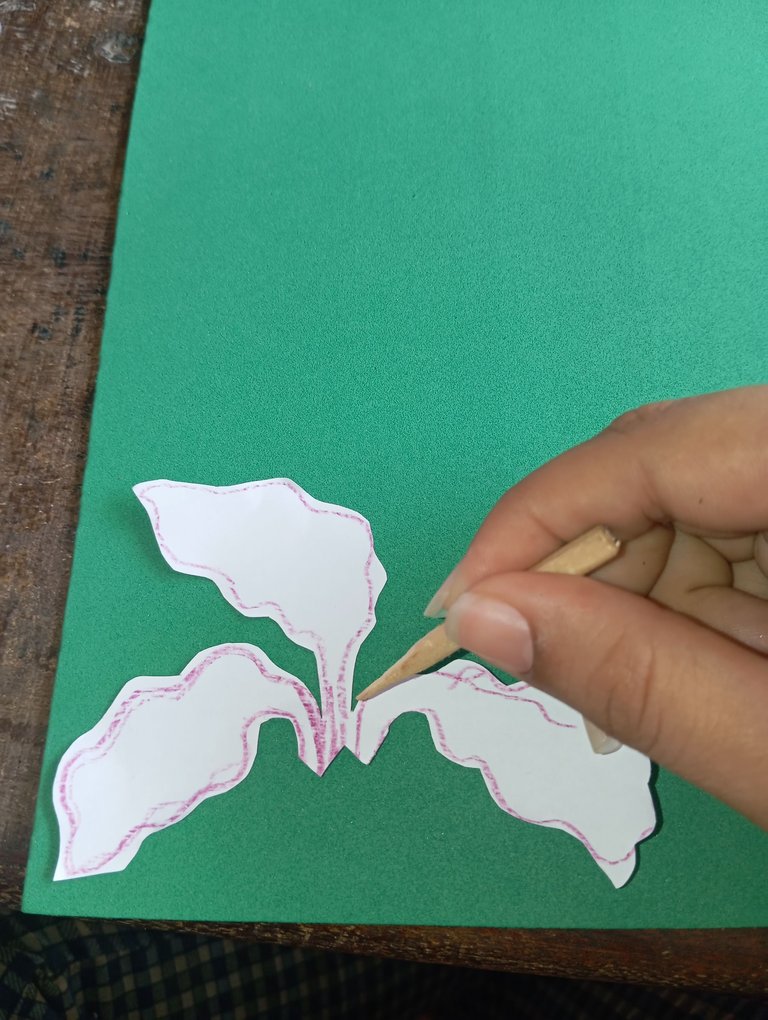
En este siguiente paso vamos a continuar marcando las hojas en el foamis verde, de la misma manera que hicimos al principio con la remolacha, debemos marcar cuatro de estas tres hojas
In this next step we will continue marking the leaves on the green foamis, in the same way that we did at the beginning with the beet, we must mark four of these three leaves.
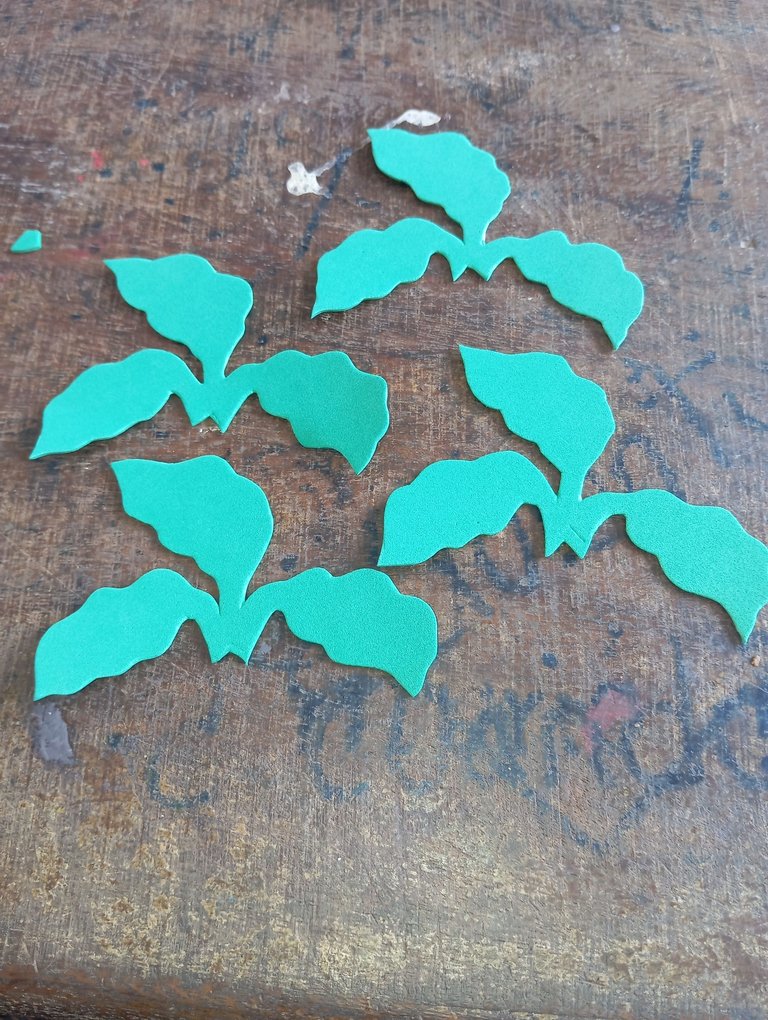
Cuando finalicemos de marcar nuestras remolachas continuaremos recortando las con la ayuda de una tijera
When we finish marking our beets we will continue cutting them with the help of a scissors.
A continuación pegaremos la hoja en todo el centro de la remolacha
Next we Will glue the leaf throughout the Center of the Beet
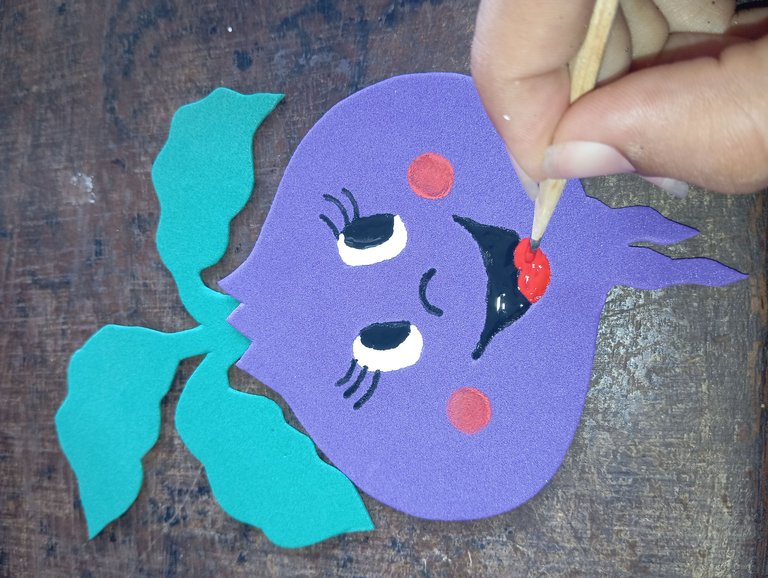
Seguidamente vamos a continuar pintando sus rostros alegres con las pinturas , para variar el diseño realice diferentes caritas ,unas sonriendo , otra mostrando su diente y así sucesivamente
Then we will continue painting their happy faces with the paints, to vary the design make different faces, one smiling, another showing its tooth and so on.
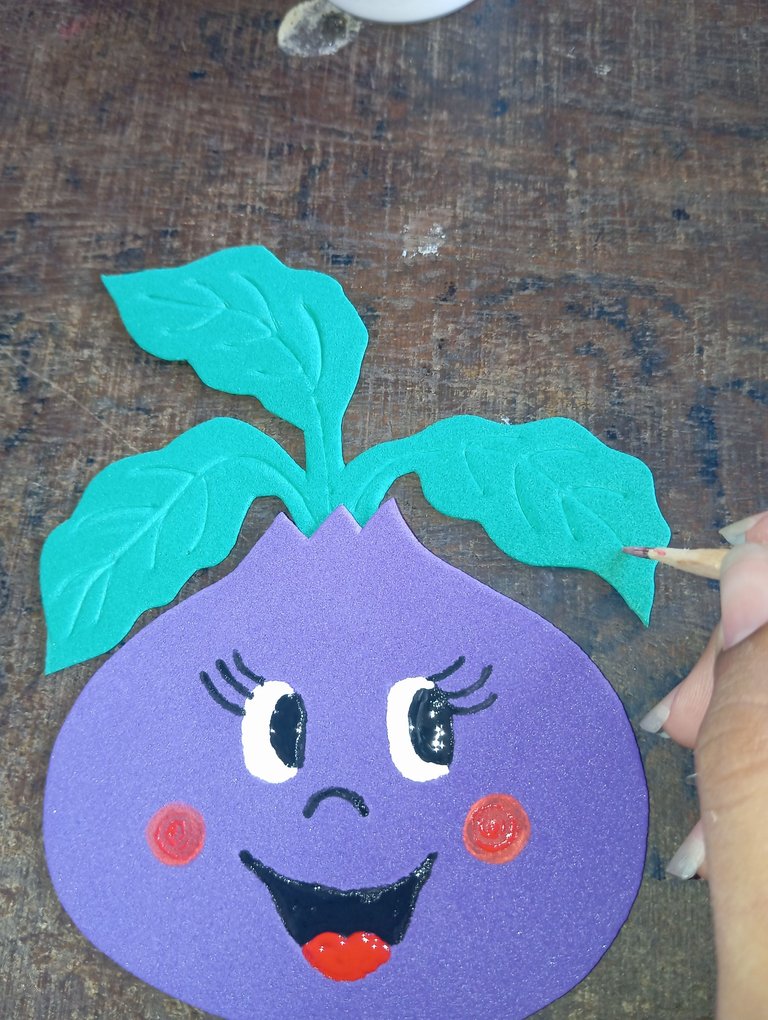
Cuando nuestras remolachas hayan secado, vamos a continuar marcando unas siluetas a las hojas con el palito , para que queden moldeadas y se note más el relieve en la hoja
When our beets have dried, we will continue marking some silhouettes on the leaves with the stick, so that they are molded and the relief is more noticeable on the leaf.
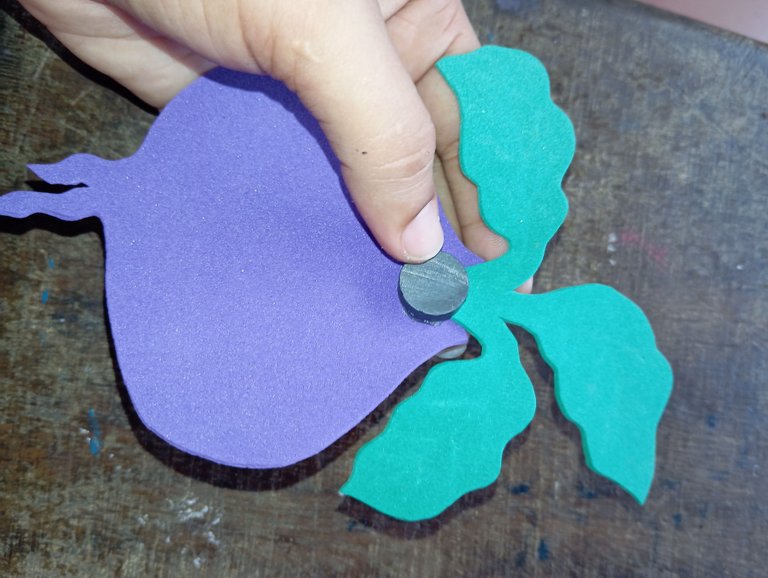
Por último tomé el imán y lo pegue en la parte de atrás exactamente arriba , para que se pueda colocar el la nevera
Finally, I took the magnet and glued it on the back exactly at the top, so that it can be placed on the fridge.
De esta manera quedaron mis hermosas remolachas con caritas adorables y divertidas , mi cliente quedó satisfecha, contenta con mi trabajo , me siento orgullosa de todo lo que e aprendido en hive y como he crecido en mi conocimiento, las fotos las tomé con mi redmi 12 y traduje los textos con el traductor deepl, feliz tarde
In this way my beautiful beets with adorable and funny faces, my client was satisfied, happy with my work, I am proud of everything I have learned in hive and how I have grown in my knowledge, I took the pictures with my redmi 12 and translated the texts with the translator deepl, happy afternoon.
Quedaron realmente lindas 😊 y que bien que tú emprendimiento este resultando tan bien 😁👍💃
Muchas gracias,saludos
This looks so cute!! It's great to know how Hive has impacted your life positively✨
Have a great day today✨❤