Hola mis queridos amigos feliz día para todos , espero que se encuentren bien en esta bella tarde , hoy les quiero compartir un hermoso multifuncional en forma de cámara, ideal para guardar en un lugar seguro y fijo los lápices de colores , tijeras entre otros objetos , a continuación les mostraré los pasos que realice y materiales qué utilice
Hello my dear friends happy day to all, I hope you are well in this beautiful afternoon, today I want to share a beautiful multifunctional camera-shaped, ideal for storing in a safe place and fixed crayons, scissors and other objects, then I will show you the steps to perform and materials you use

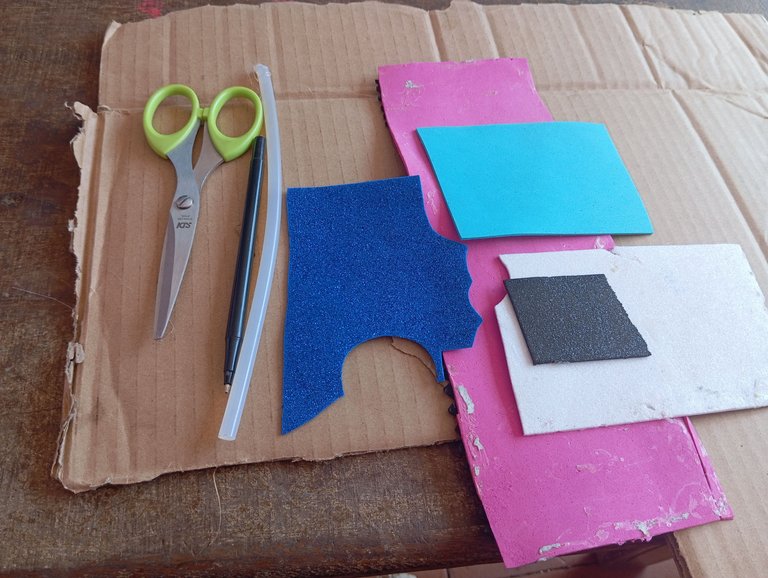
Materiales que utilice:
-Carton
-Foamis
-Silicon
-Tijera
-Lapiz
Materials used:
-Carton
-Foamis
-Silicon
-Scissors
-Pencil
A continuación los pasos a seguir:
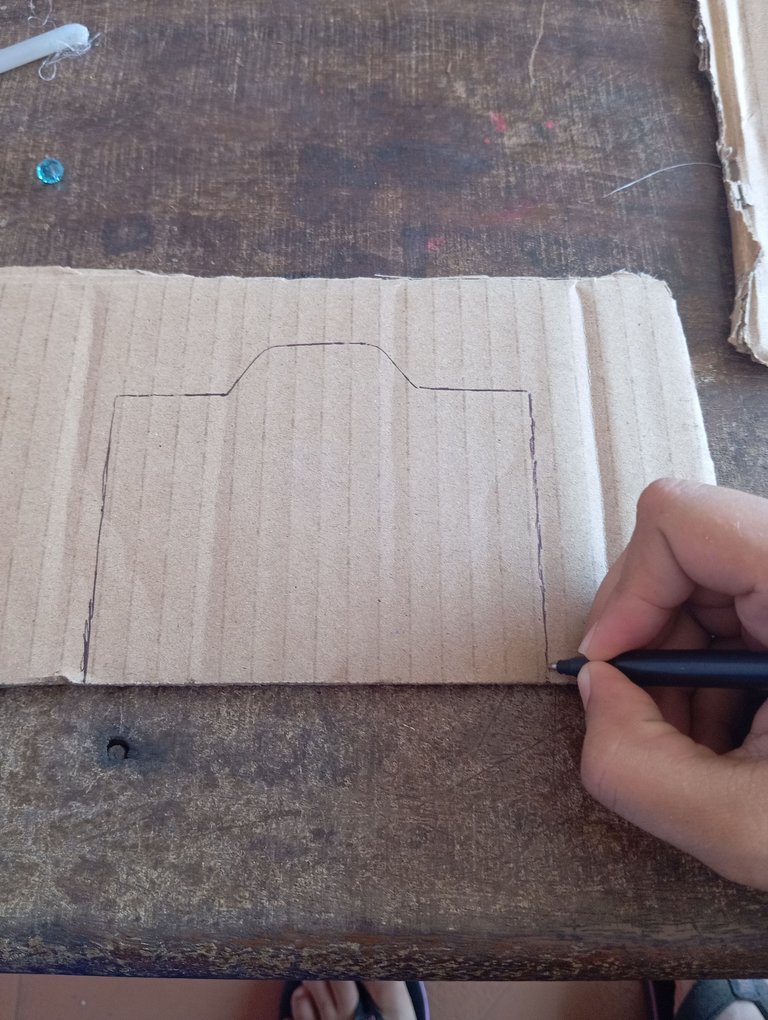
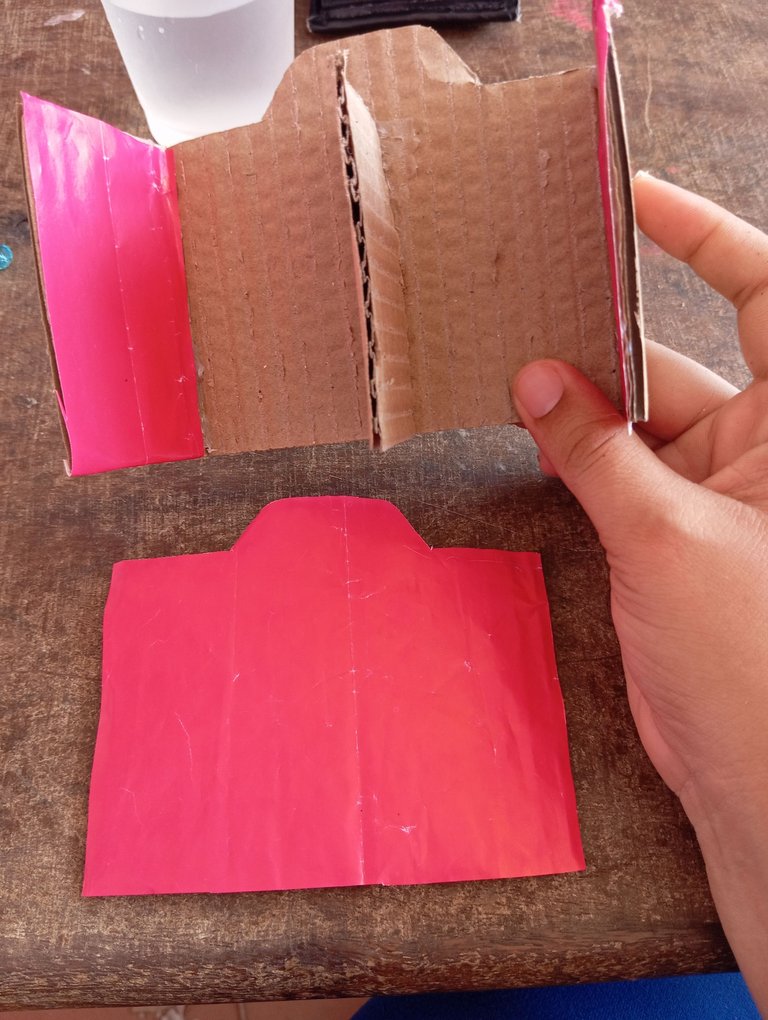
Iniciaremos tomando nuestro cartón y en el dibujaremos la forma de una cámara
Here are the steps to follow:
We will start by taking our cardboard and drawing the shape of a camera on it.
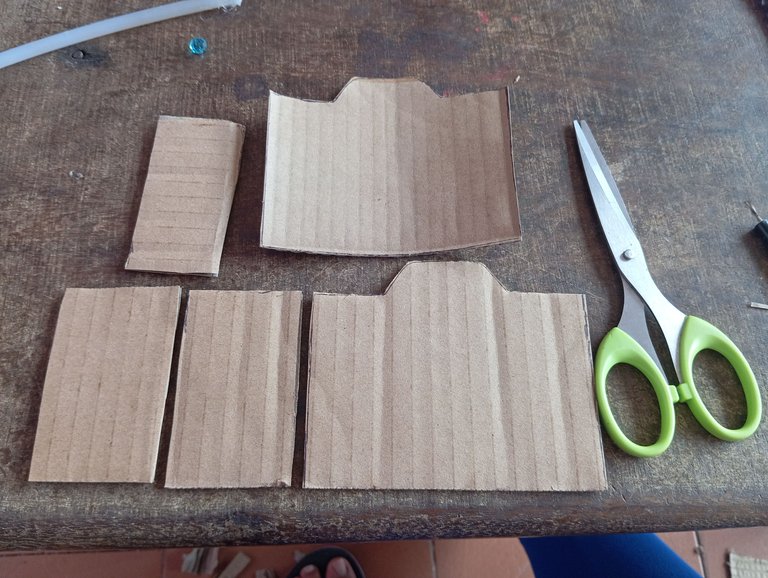
Luego vamos a proceder recortando las piezas que marcamos , en total recortaremos dos cámaras, cuatro tiras para armar la cámara completa , dos para los lados , una para el centro y la otra para la base
Then we will proceed by cutting out the pieces that we marked, in total we will cut out two chambers, four strips to assemble the complete chamber, two for the sides, one for the center and the other for the base.
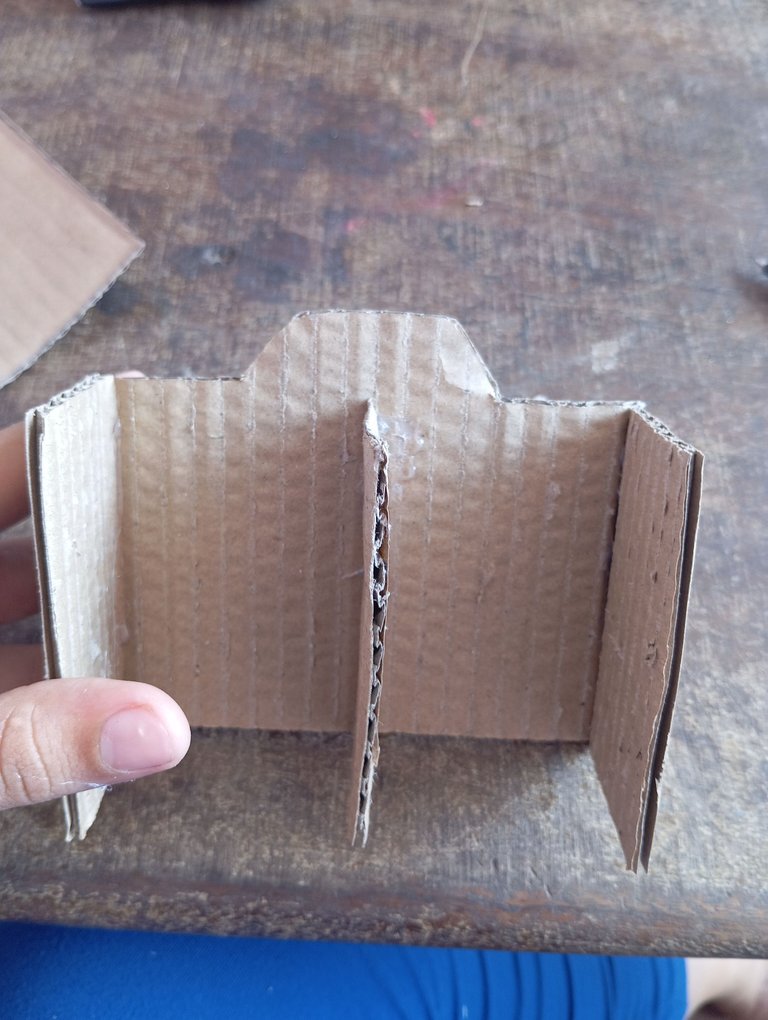
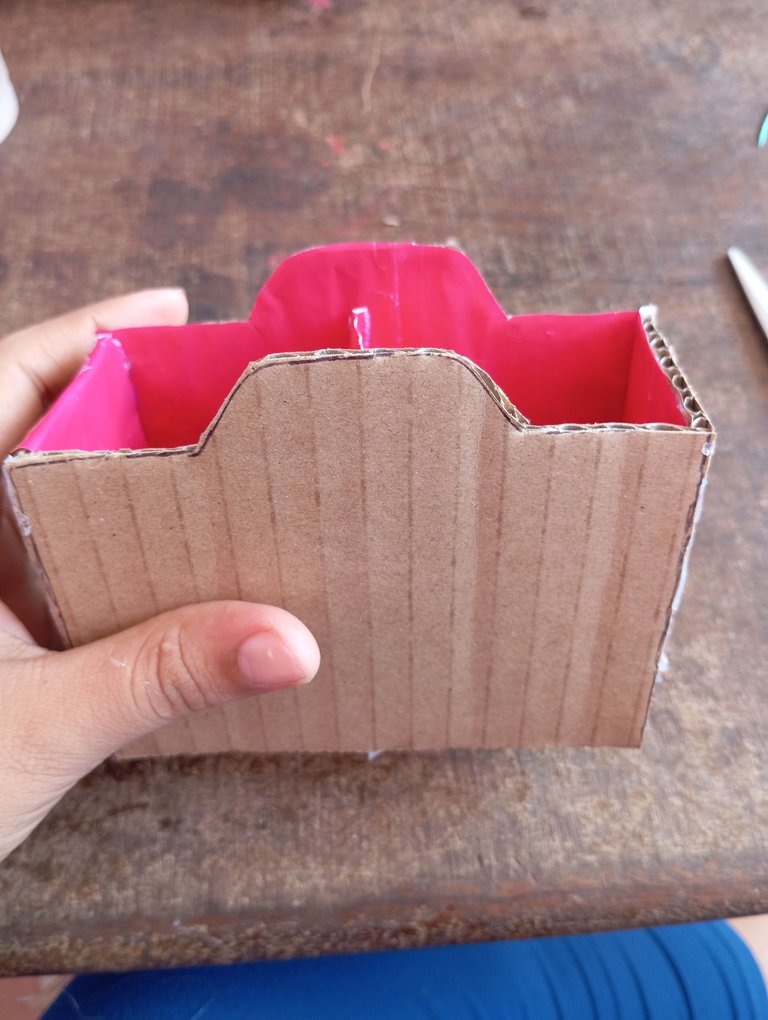
Seguidamente vamos a continuar pegando las tiras a los lados de la cámara y otra en el centro para dividir el multifuncional en dos
Then we will continue gluing the strips to the sides of the camera and another one in the center to divide the multifunctional in two.
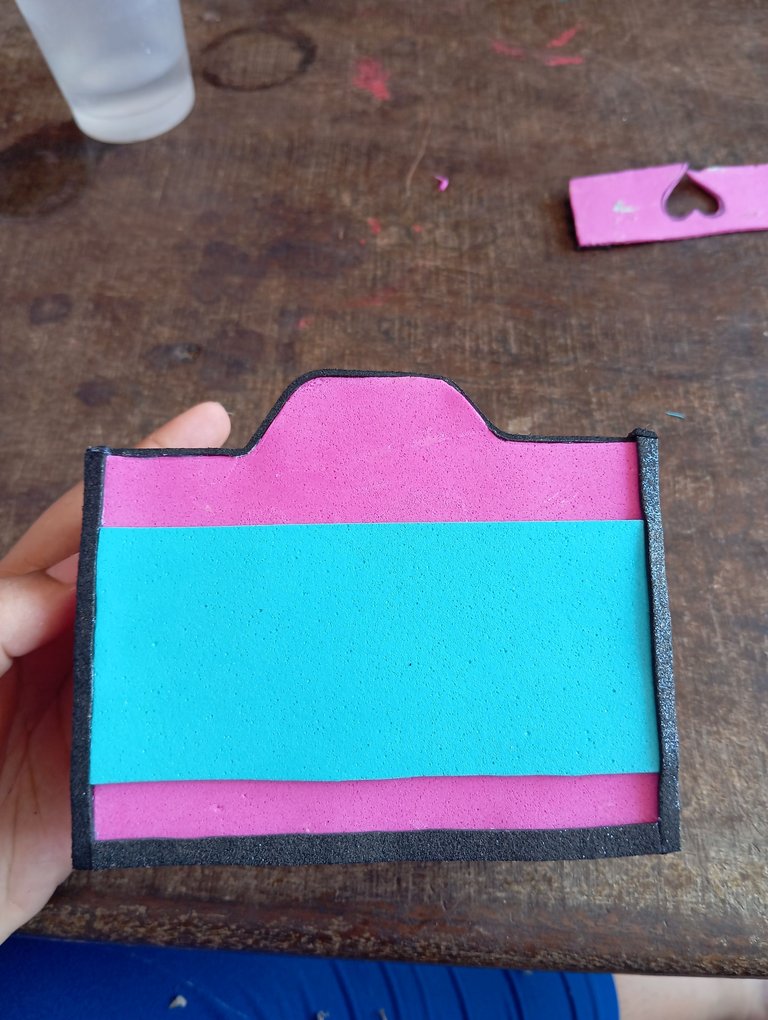
A continuación vamos a continuar forrando las piezas de la cámara por dentro con papel rosado para que el fondo no se note el cartón
Then we will continue lining the inside of the camera with pink paper so that the cardboard is not visible at the bottom.
Luego tomaremos la otra pieza de la cámara y la pegamos para formar por completo el multifuncional
Then we will take the other piece of the camera and glue it to completely form the multifunctional
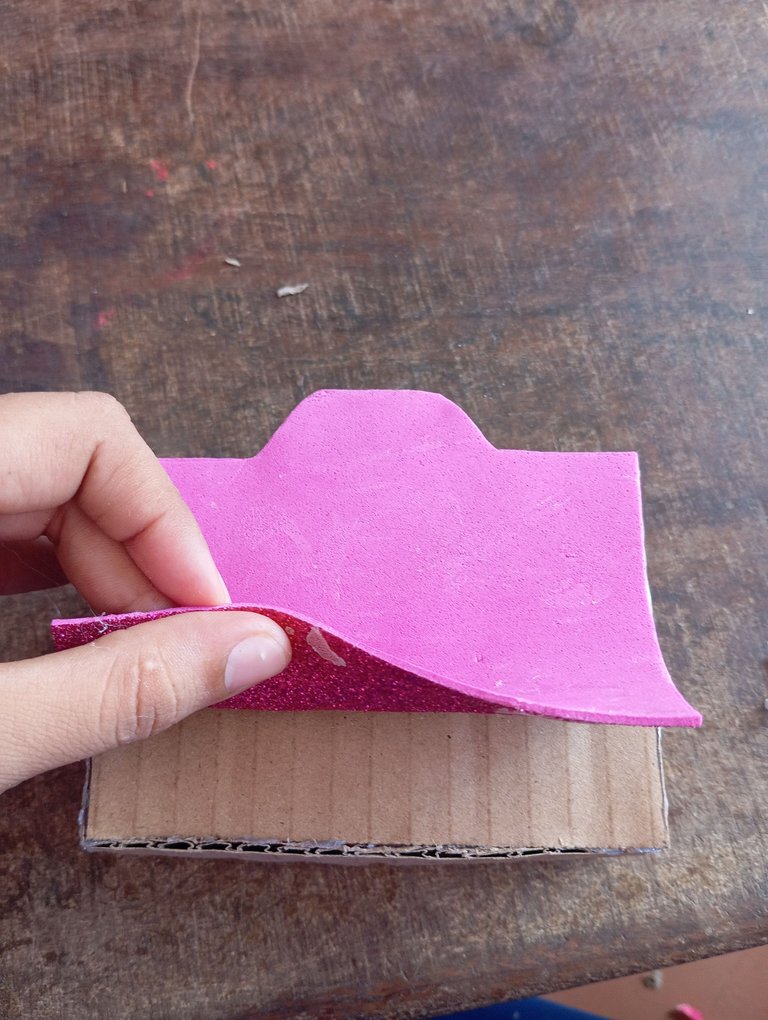
Continuamos recortando en foamis la forma de la cámara y la llevaremos a pegar en la parte de adelante y la de atrás como lo aprecian
We continue cutting the shape of the camera out of foamis and glue it on the front and the back as you can see.
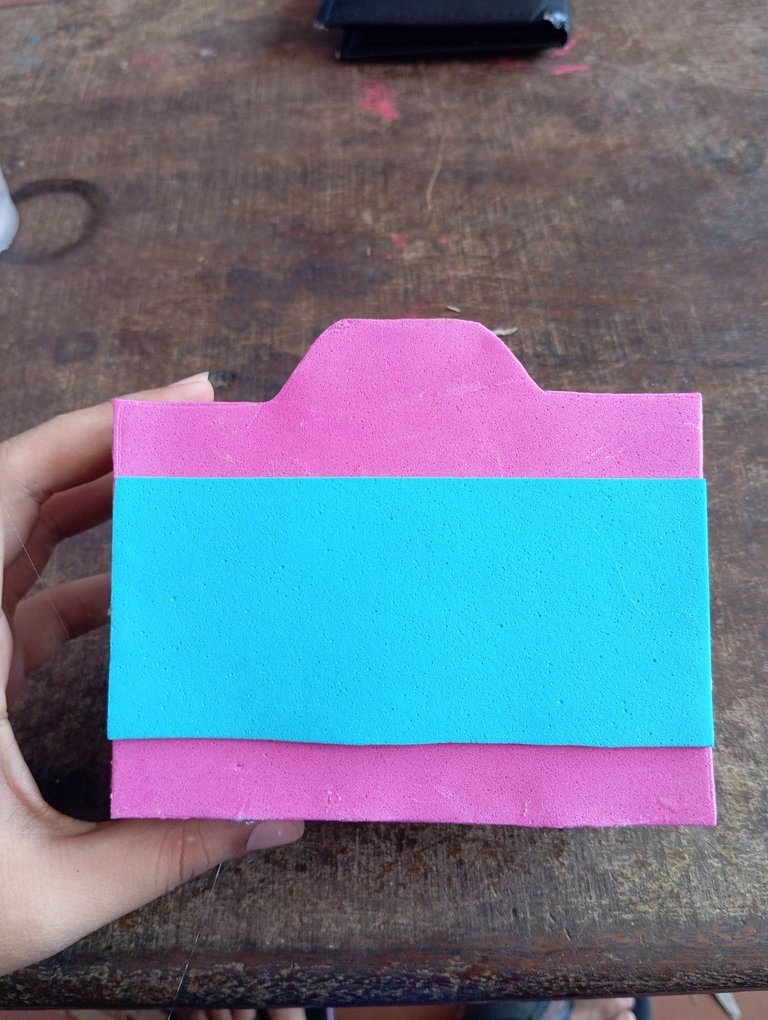
Para decorar la cámara en tonos distintos vamos a pegar en el centro una tira de foamis color azul , en todo el centro
To decorate the camera in different tones we will glue a strip of blue foamis in the center, in the whole center.
Luego continuaremos pegando los bordes negro por todo el alrededor de la cámara para que tenga un tono diferente y llamativo
Then we will continue gluing the black borders all around the camera to give it a different and striking tone.
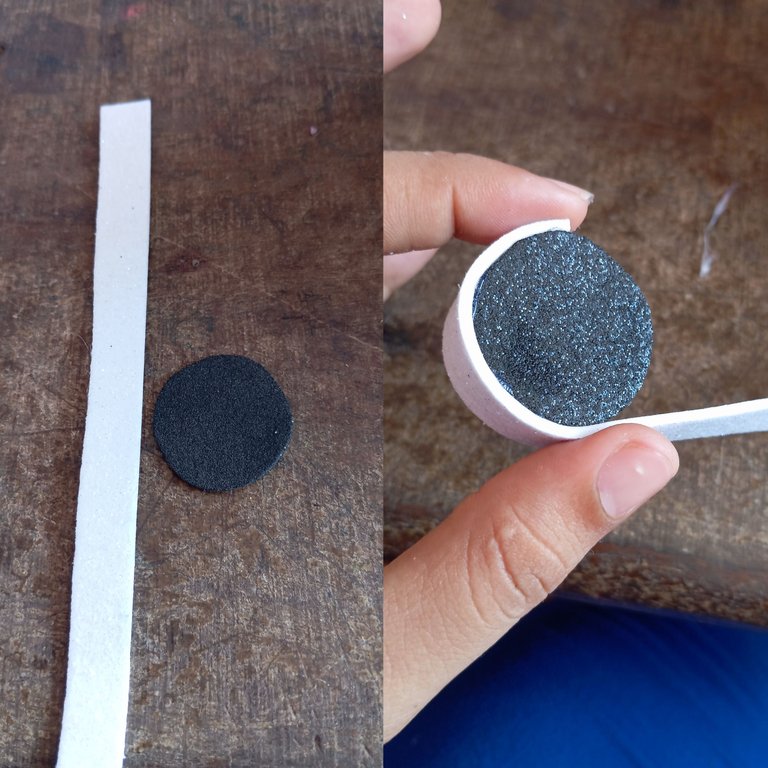
Para decorar el centro y realizar el lente de la cámara, tomaré un círculo negro y una tira blanca , por todo el alrededor de el círculo pegamos la tira para formar el lente de la cámara
To decorate the center and make the lens of the camera, I will take a black circle and a white strip, all around the circle we glue the strip to form the lens of the camera.
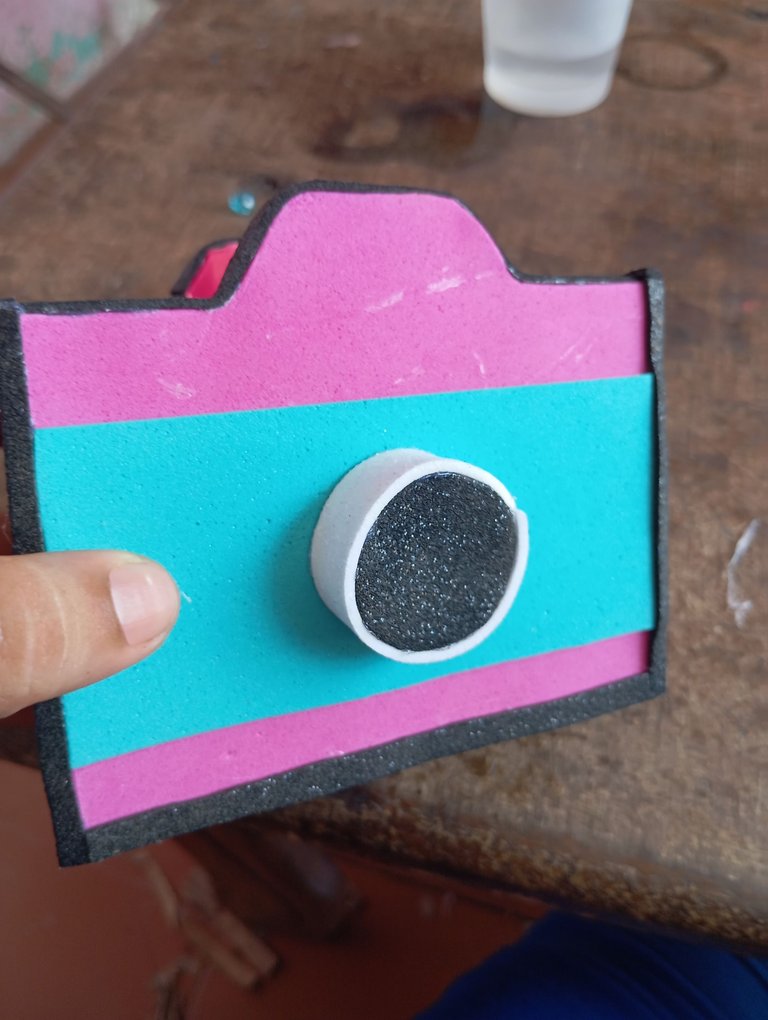
Luego continuamos pegando el lente en todo el centro de la cámara como lo pueden apreciar en la fotografía
Then we continue gluing the lens all around the center of the camera as you can see in the picture.
Para finalizar con la decoración de la cámara vamos a continuar pegando en la parte de arriba en una esquina un rollito que será el botón de disparo y la otra esquina un cuadro pequeño que será el flash de la cámara
To finish with the decoration of the camera we will continue gluing in the top corner a little roll that will be the shutter button and the other corner a small square that will be the flash of the camera.
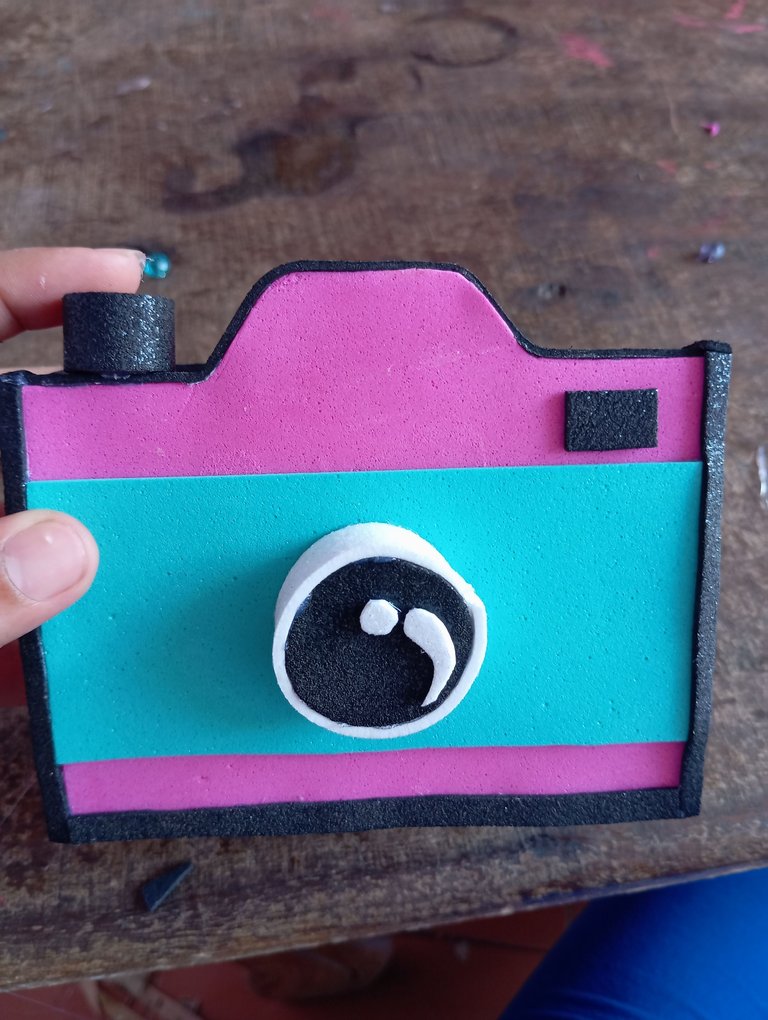
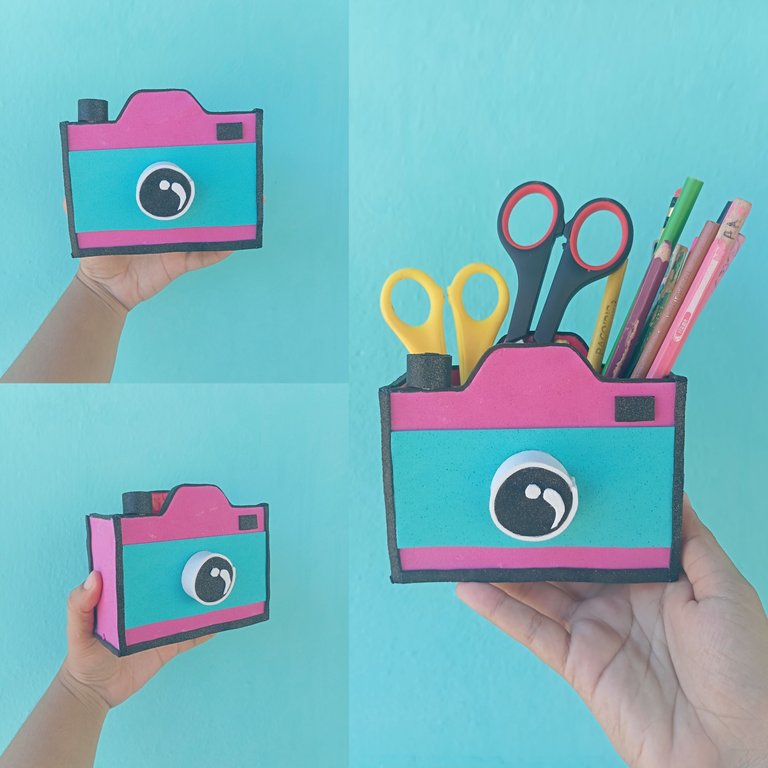
Este es el resultado final de mi hermosa cámara multifuncional utilizando cartón y foamis como material de apoyo , ideal para decorar cualquier espacio de nuestra habitación y guardar los objetos deseados , las fotos las tomé con mi redmi 12 y los textos los traduje con el traductor deepl, feliz tarde
This is the final result of my beautiful multifunctional camera using cardboard and foamis as support material, ideal for decorating any space in our room and store the desired objects, the photos were taken with my redmi 12 and the texts were translated with the translator deepl, happy afternoon.
Que bonito!! Está súper creativo ese portalápices , me agrado mucho tu idea y está chévere para realizarlo y ordenar los colores y marcadores a los niños en este regreso a clases. Gracias por compartir.
Me alegra que te haya gustado querida amiga
This is so lovely. Would make someone want to store tools and put them away neatly. Very nice work. Bravo 👏🏿
thank you very much, happy afternoon
This post has been manually curated by @bhattg from Indiaunited community. Join us on our Discord Server.
Do you know that you can earn a passive income by delegating to @indiaunited. We share more than 100 % of the curation rewards with the delegators in the form of IUC tokens. HP delegators and IUC token holders also get upto 20% additional vote weight.
Here are some handy links for delegations: 100HP, 250HP, 500HP, 1000HP.
100% of the rewards from this comment goes to the curator for their manual curation efforts. Please encourage the curator @bhattg by upvoting this comment and support the community by voting the posts made by @indiaunited.