¡Bienvenidos a mi blog!
Hola a todos los hivers de esta linda comunidad #diyhub,deseo que estén bien, en estos momentos descansando en la comodidad de su casa, muchas bendiciones.
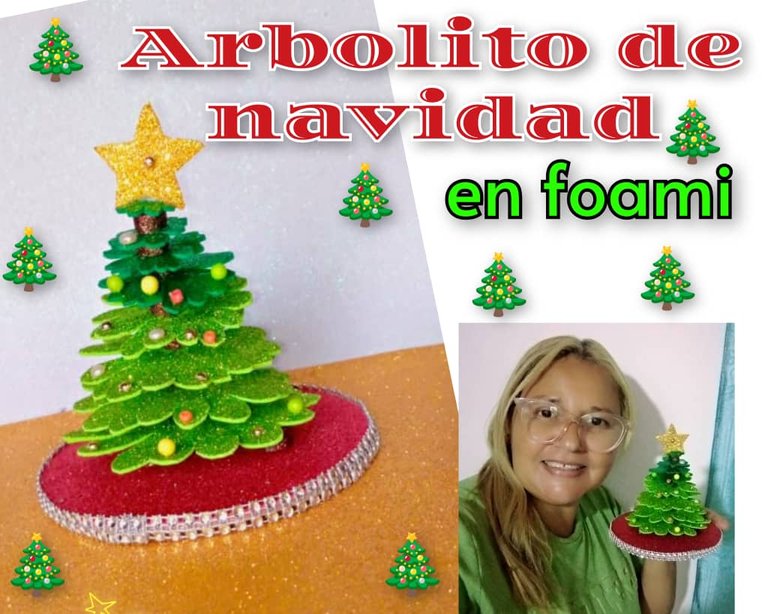
Hoy quiero mostrar a través de un tutorial como hacer un hermoso Árbol de Navidad con foami de colores y escarchado, especial para estos días, sirve de adorno en nuestra casa , oficina, escuela u otras.
El Árbol de Navidad anuncia que ha llegado la época más linda del año y con él, los aguinaldos y gaitas, así que vamos a ver lo fácil que es elaborar un lindo Árbol de foami.
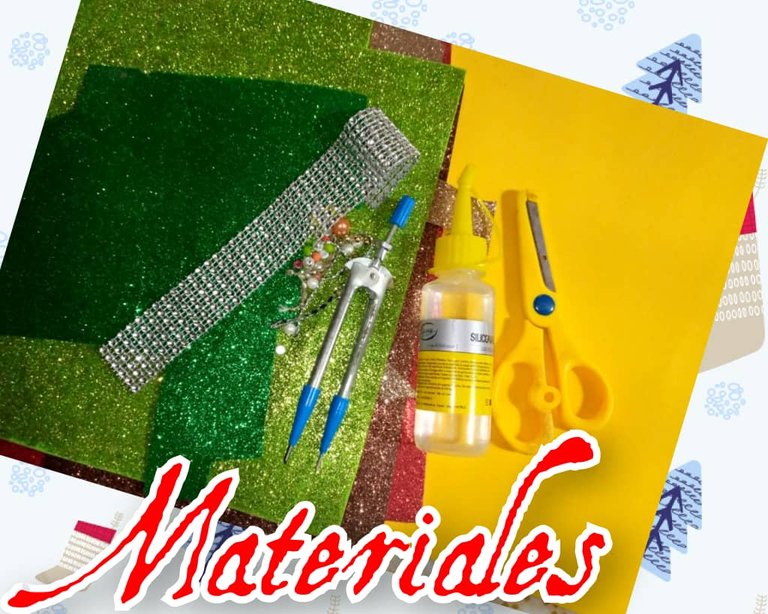
Materiales para la elaboración del hermoso Árbol de Navidad:
- Foami de colores escarchados: amarillo, rojo,marrón, verde oscuro y claro.
- Tijera.
- Mostacillas de colores: verde, anaranjadas,doradas,amarillas, blancas, perlas chatas.
- Tela de brillante.
- Silicona líquido.
- Pedazo de cartón.
- Compás.
- Regla.
Pasos para la elaboración:
- Necesitamos hacer 8 círculos con el foami verde oscuro y claro.El primero grande y los demás que vayan disminuyendo de tamaño.
- Tomamos el compás para hacer un circulo grande y vamos acomodando o disminuyendo hasta llegar al 8 circulo o el más pequeño.
- Recortar con las tijeras cada uno.
- Ahora tomamos el foami marrón, con la regla medir 5 centímetros de largo por 1 cm ancho, des estos recortamos 8.
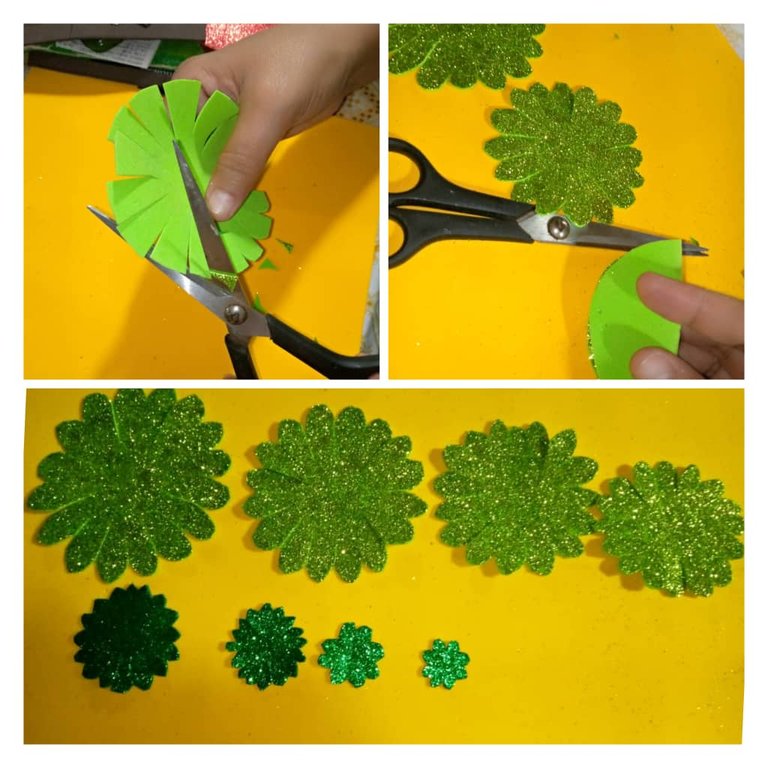
- Comenzamos a darles varios cortes con la tijera a los círculos verde en forma de pétalos de flor, pueden guiarse por la imagen.
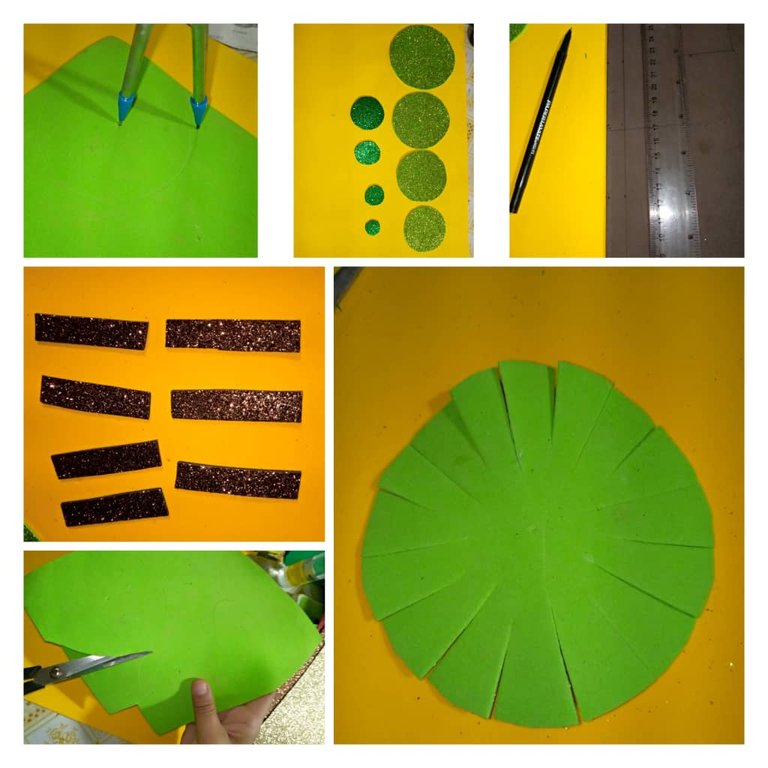
- Ya tenemos listos los 8 pétalos en forma de flor.
Marcamos con el compás un circulo con el pedazo de cartón, más grande que los demás, esto será la base del Árbol.
Luego recortamos con las tijera , recortamos el foami rojo y con silicona lo pegamos.
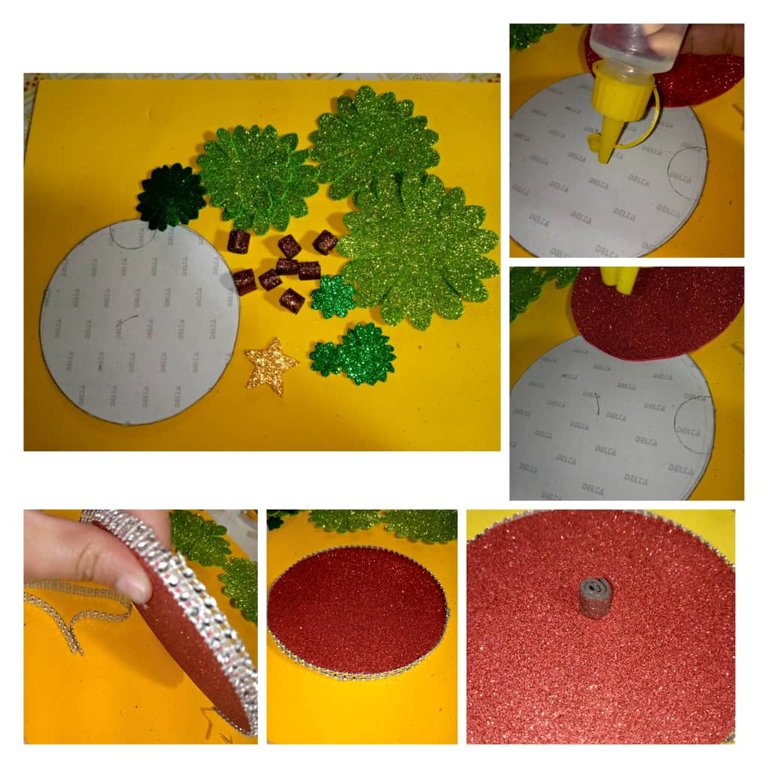
- Teniendo la base lista , procedemos a pegar cada una de los pétalos de flor, una sobre de otra, pero primero debemos enrollar los rectángulos marrón que recortamos y pegar con silicona.
- Vamos colocando desde el más grande hasta llegar arriba con el pétalo mas pequeño
- Después de pegar todos los pétalos , ir agregando o pegando cada uno de las mostacillas, distribuyendo en cada pétalos y por último marcamos la estrella , recortamos y pegamos en la parte de arriba, para así terminar el hermoso Árbol de Navidad.
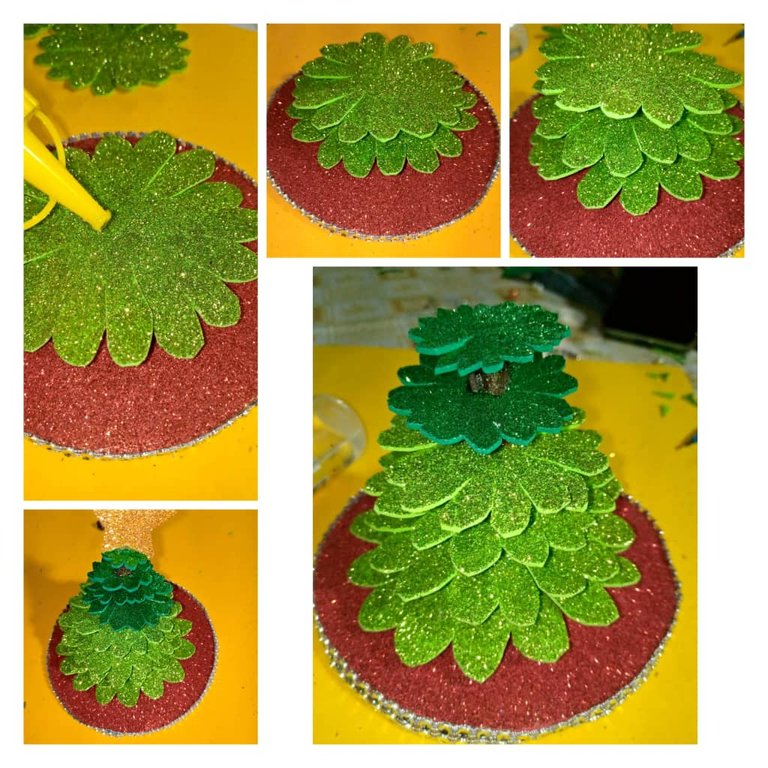
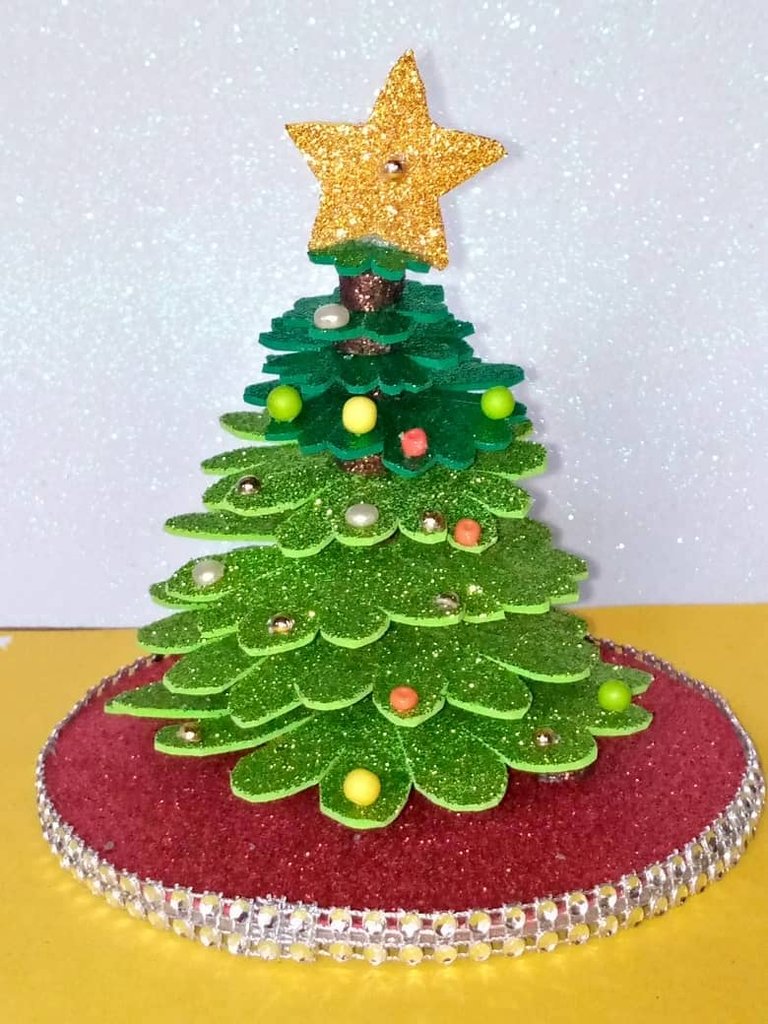
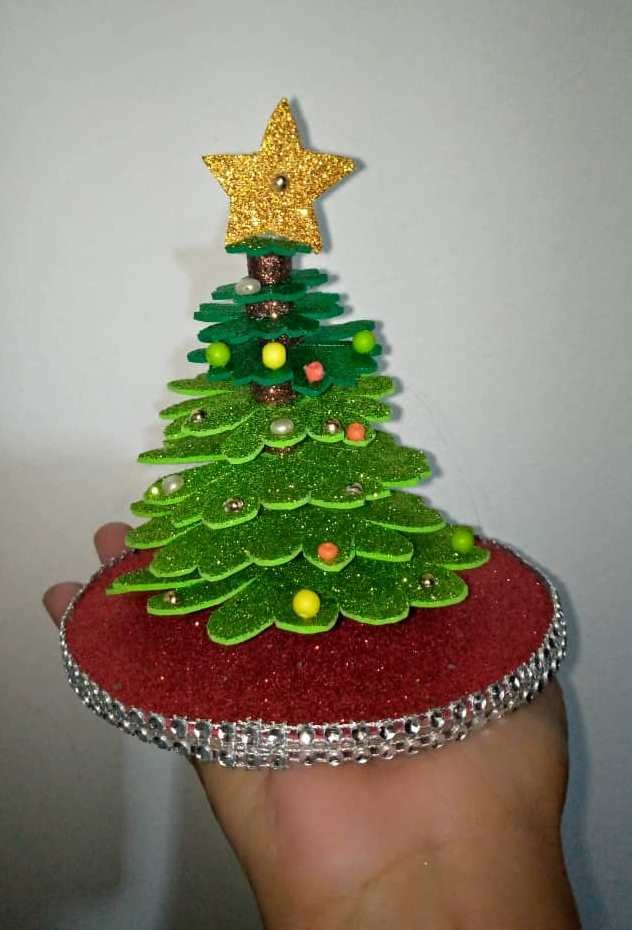
Aquí podemos observar el resultado final del hermoso Árbol de Navidad hecho con foami.

¡Espero que se a de su agrado!

Gracias por leer mi post, muchas bendiciones, hasta la próxima.
Las fotos son mías, tomadas con teléfono Infinix, editadas con Incollage y traducidas con DEEPL.

Versión Inglesa
Welcome to my blog!
Hello to all the hivers of this nice community #diyhub,wish you all well, at this time resting in the comfort of your home, many blessings.
Today I want to show through a tutorial how to make a beautiful Christmas Tree with colored and frosted foami, special for these days, serves as an ornament in our home, office, school or other.
The Christmas tree announces that the most beautiful time of the year has arrived and with it, the aguinaldos and bagpipes, so let's see how easy it is to make a nice foami tree.
Materials for making the beautiful Christmas Tree:
- Foami frosted colors: yellow, red,brown, dark and light green.
- Scissors.
- Colored beads: green, orange, gold, gold, yellow, white, flat pearls.
- Glitter fabric.
- Liquid silicone.
- Piece of cardboard.
- Compass.
- Ruler.
Steps for the elaboration:
- We need to make 8 circles with the dark and light green foami.The first one big and the others decreasing in size.
- We take the compass to make a large circle and we go accommodating or decreasing until we reach the 8 circle or the smallest one.
- Cut out with the scissors each one.
- Now we take the brown foami, with the ruler measure 5 centimeters long by 1 cm wide, from these we cut out 8.
- We begin to give them several cuts with the scissors to the green circles in the shape of flower petals, you can be guided by the image.
- We now have the 8 flower-shaped petals ready.
We mark with the compass a circle with the piece of cardboard, bigger than the others, this will be the base of the tree.
Then we cut with the scissors , we cut the red foami and with silicone we glue it.
- Having the base ready, we proceed to glue each of the flower petals, one on top of the other, but first we must roll the brown rectangles that we cut out and glue with silicone.
- We are placing from the largest until we reach the top with the smallest petal.
- After gluing all the petals , go adding or gluing each of the beads, distributing in each petal and finally mark the star , cut out and glue on top, to finish the beautiful Christmas Tree.
Here we can see the final result of the beautiful Christmas tree made with foami.
I hope you like it! !
Thank you for reading my post, many blessings, until next time.
The photos are mine, taken with Infinix phone, edited with Incollage and translated with DEEPL.
Hermoso árbol navideño ideal para adornar en esta navidades su hogar ....genial idea amiga @josdelmi
Lindo resultado 🎄 me encantó
Gracias por leer mi post y comentar amiga @marile21 . Muchas bendiciones
Lindísimo amiga. Me encanta como te quedó. El lado a paso muy comprensible y se ve que es fácil de hacer. Muchas gracias por compartir con nosotros 🙏 te deseo mucha suerte.
Gracias amiga @creacioneslelys . Saludos.
¡Felicitaciones!
Estás participando para optar a la mención especial que se efectuará el domingo 3 de diciembre del 2023 a las 8:00 pm (hora de Venezuela), gracias a la cual el autor del artículo seleccionado recibirá la cantidad de 1 HIVE transferida a su cuenta.
¡También has recibido 1 ENTROKEN! El token del PROYECTO ENTROPÍA impulsado por la plataforma Steem-Engine.
1. Invierte en el PROYECTO ENTROPÍA y recibe ganancias semanalmente. Entra aquí para más información.
2. Contáctanos en Discord: https://discord.gg/hkCjFeb
3. Suscríbete a nuestra COMUNIDAD y apoya al trail de @Entropia y así podrás ganar recompensas de curación de forma automática. Entra aquí para más información sobre nuestro trail.
4. Visita nuestro canal de Youtube.
Atentamente
El equipo de curación del PROYECTO ENTROPÍA
Gracias por el apoyo @entropia . Saludos
Congratulations @josdelmi! You have completed the following achievement on the Hive blockchain And have been rewarded with New badge(s)
Your next target is to reach 97000 upvotes.
You can view your badges on your board and compare yourself to others in the Ranking
If you no longer want to receive notifications, reply to this comment with the word
STOPTo support your work, I also upvoted your post!
Check out our last posts:
Gracias @hivebuzz . Saludos
¡Eso es genial @josdelmi! ¡Estamos encantados con tu progreso en Hive! ¡No te detengas ahora para lograr este nuevo objetivo!
A beautiful and colourful little tree. Very ideal for decorating one's personal space. Bravo.
Qué idea tan grata nos comparte, para cuando hay poco espacio, se puede aprovechar y colocar el árbol en el escritorio o una repisa. Es apropiado para compartir un poco más del espíritu navideño.