(ENG)
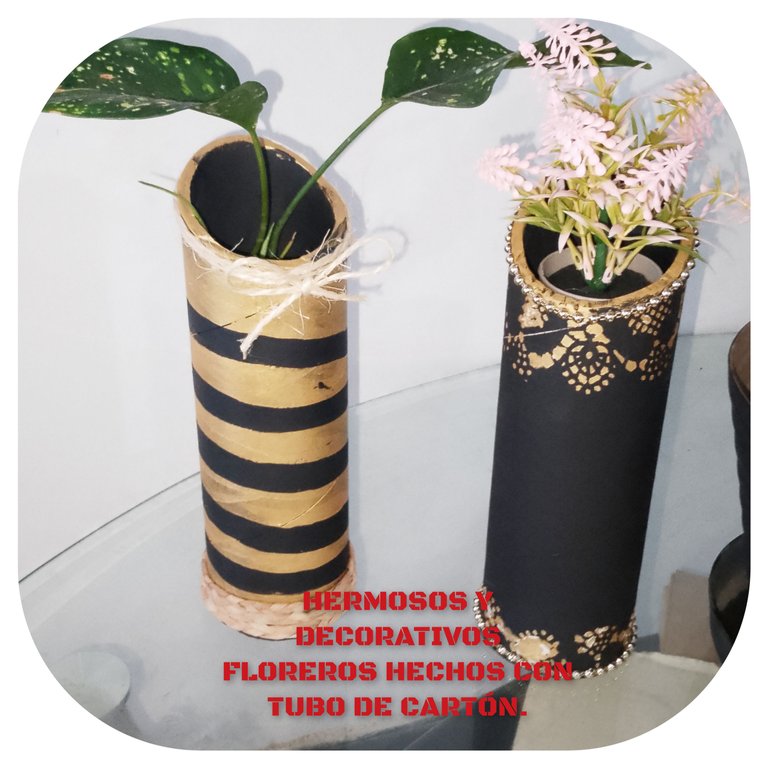
Hello everyone, I hope this is a great week, full of much benefit, in the @diyhub community, I am pleased to start it, with my good wishes for you, and also to show you a very nice step by step, on how to make some Beautiful vases, made with cardboard tubes, where useful and recyclable materials are used, ideal for decorating any space in the place. I invite you to follow me and you will see how easy and beautiful the result is.
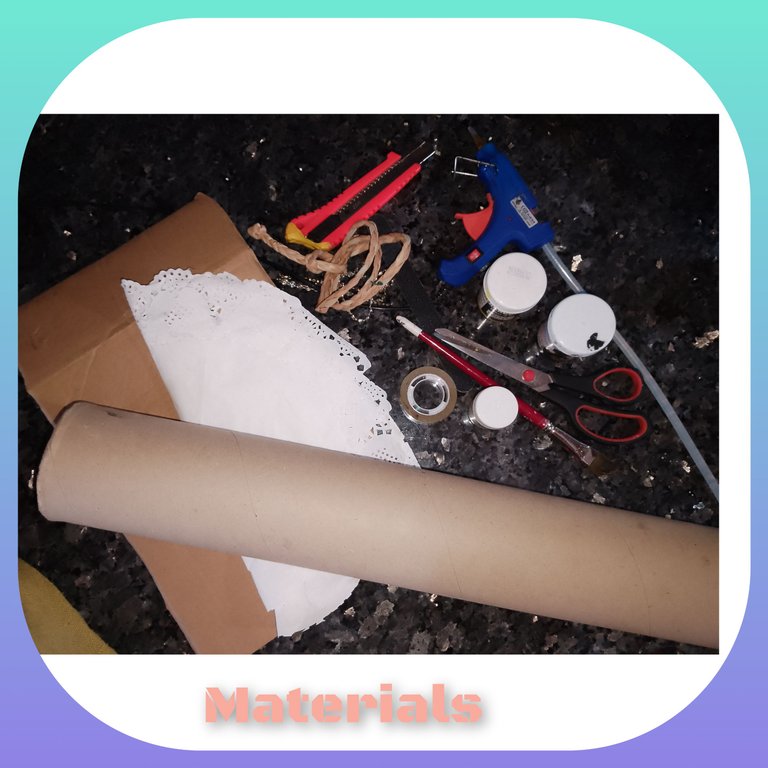
Materials used for its preparation.
. Large cardboard tube, this one used for wrapping paper.
. Cold colored paints (black, yellow and gold.
. Brush.
. Mecatillo.
. Hot silicone.
. Golden running half pearls.
. Paper cake tablecloth.
. Transparent celoven teipe.
. Scissors.
. Cardboard.
.exact.
. Emery.
. Nail file.
Steps:
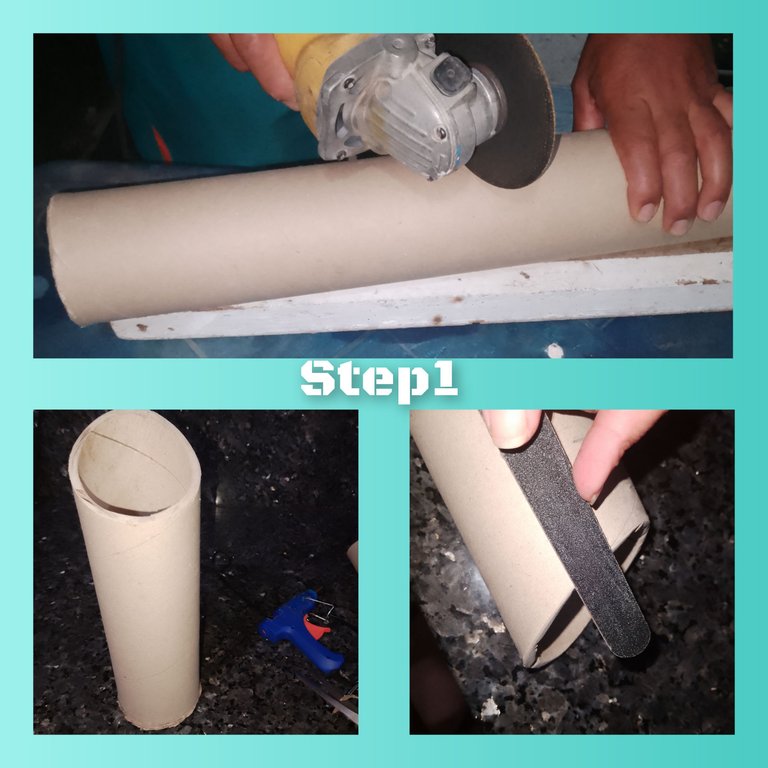
1.) Initially, I start by cutting two equal parts of the cardboard tube with the grinder. This one measures 80cm, and is cut into two 40cm pieces. At one end, make an inclined cut. Then I use the nail file to give a nice finish to what was cut with the emery board. I always look for help, when I need to use the grinder, I have a unique fear of it. I recommend that if you do not feel safe, seek help to avoid an accident.
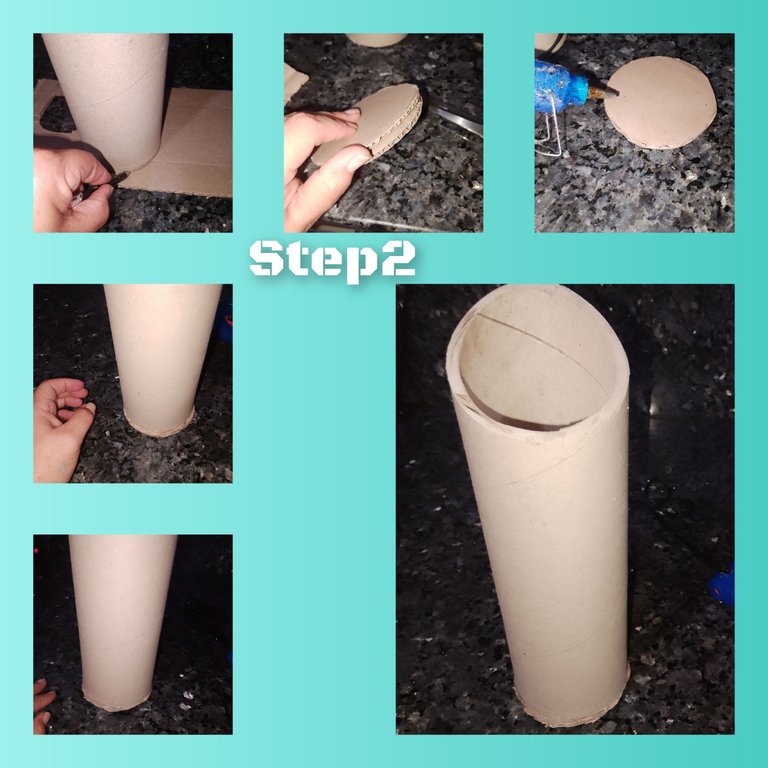
2.) done the above. Taking the hole in each of the tubes as a reference, I marked and cut out two circles for each piece of tube, glued them with plenty of silicone in a group of two and covered the bottom of the tube.
3.) The next thing will be to give color to each vase. To do this, I apply paint, with the brush, to one black tube and to the next, gold. I carefully let it dry for a time, necessary and continuous, for the short, black vase, with the scissors the shine of the cake paper tablecloth. And I glue on the top and bottom. Once this is done, I put gold paint, with gentle strokes, so that the paint enters through the holes. Once this is done, I let it dry, while for the next one, I draw black spiral stripes.
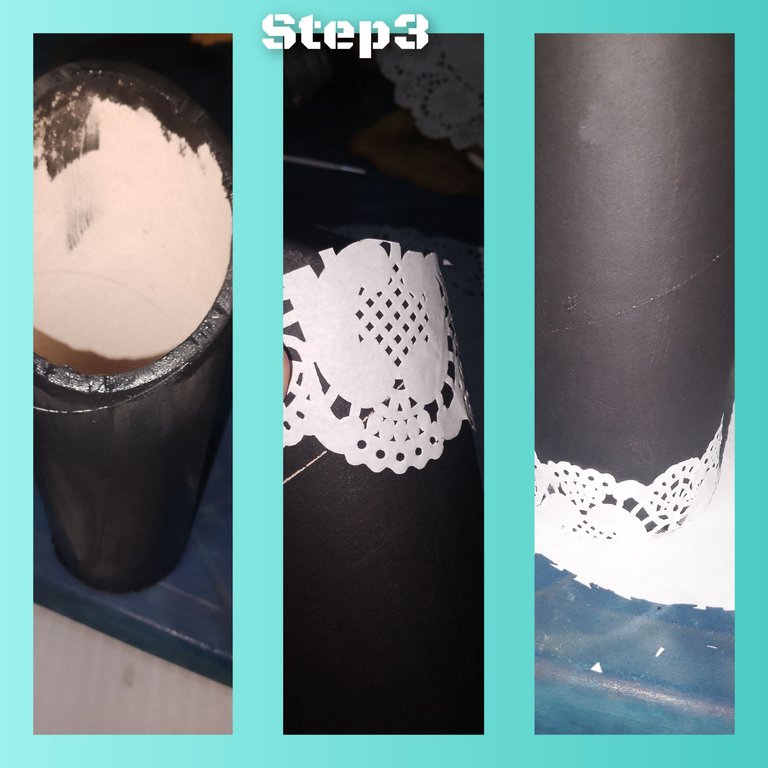
4.) Once the vase is dry, I remove the paper from the tablecloth to continue decorating. 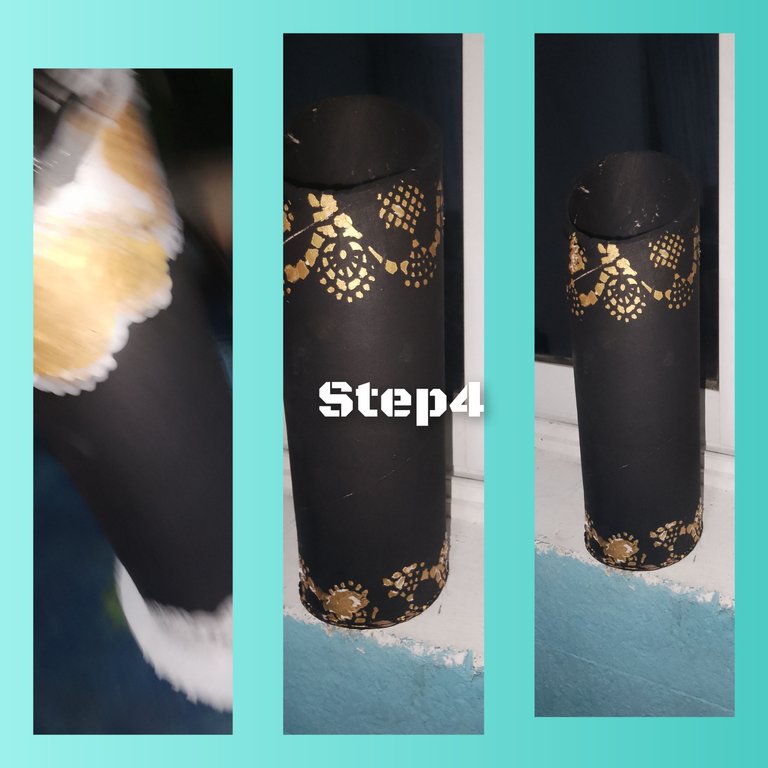
5.) For the gold-colored vase, I place two loops of twine at the top, and two at the top, making a nice bow. For the black vase, I glue a chain of golden half pearls on the upper edge and in the same way, on the edge of the upper part.
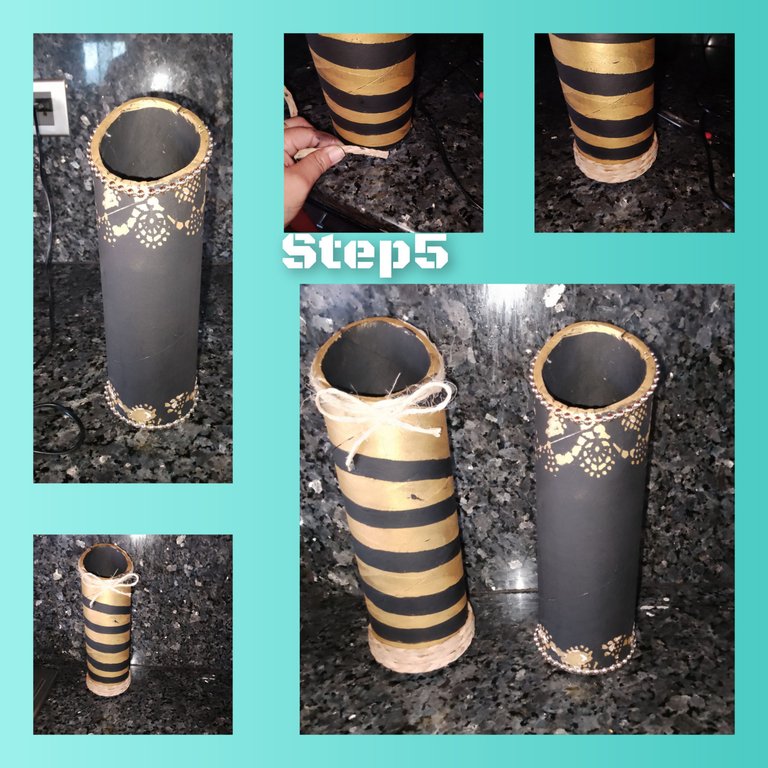 Having completed the previous steps, now you can place it in the place you need and use it for flowers, spikes, among other things that allow us to highlight and see the space beautifully.
. All photos are my property.
. Use incollage to show step by step.
. Use gif videos to end the post.
. Use language translator.
Grateful as always to you for visiting my blog. It will be until a next opportunity.
(ESPAÑOL)
Hola a todos, deseo está sea una gran semana, llena de mucho provecho, en la comunidad de @diyhub, me complace, iniciarla, con mis buenos deseos para ustedes, y además para mostrarles un muy bonito pasos a pasos, de Como hacer unos hermoso Floreros, hechos con tubos de cartón, dónde use materiales de provecho y reciclables, ideal para decorar cualquier espacio en el lugar. Les invito a seguirme y verás, lo fácil y bonito de su resultado.
Materiales, utilizados para su elaboración.
. Tubo grande de cartón, este ara utilizado, para papel envoplas.
. Pinturas al frio de colores ( negra, amarilla y dorada.
. Pincel.
. Mecatillo.
. Silicón caliente.
. Medias perlas corridas doradas.
. Mantel de papel para torta.
. Teipe transparente celoven.
. Tijeras.
. Cartón.
.exacto.
. Esmeril.
. Lima de uñas.
Pasos:
1.) Inicialmente, comienzo cortando con el esmeril, dos partes, iguales de el tubo de cartón. Este tiene una medida de 80cm, y corto en dos de 40cm. En uno de los extremos Haci un corte inclinado. Luego paso la lima de uñas, para dar un bonito acabado en lo cortado con el esmeril. Siempre, busco ayuda, cuando necesito, usar el esmeril, le tengo un miedo único. Les recomiendo su no se sienten segura, busquen ayuda, para evitar algún accidente.
2.) hecho lo anterior. Tomando como referencia el orificio de cada uno de los tubos, marco y recortó dos círculos, para cada pieza de tubo, pego con abundante silicón en grupo de dos y tapo la parte inferior de el tubo.
3.) lo siguiente será, dar color a cada florero, para ello, coloco pintura, con el pincel, a un tubo de color negro y a el siguiente, dorado. Dejo secar prudentemente por un tiempo, necesario y continuo, para el florero de color negro, corto, con las tijeras el brillo de el mantel de papel para tortas. Y pego en la parte superior e inferior. hecho esto, pongo pintura de color dorada, con suaves golpes, para que entre la pintura por los orificios. Hecho esto dejo secar, mientras que para el siguiente, dibujos franjas en espiral de color negro.
4.) secos el florero, desprendo el papel de el mantel,para seguir decorando.
5.) Para el florero de color dorado, coloco en la parte superior, dos vueltas de mecatillo, y en la parte superior, dos haciendo un bonito lazo. Para el florero de color negro, pego en el borde superior, cadena de medias perlas doradas y de igual manera, en el borde de la parte superior.
Hecho los pasos anteriores, ahora sí puede usted, colocar en el lugar que le sea necesario y usarlo para flores, espigas, entre otras cosas que nos permiten resaltar y ver lindo el espacio.
. Todas las fotos, son de mí propiedad.
. Use incollage para mostrar el paso a paso.
. Use videos gif, para finalizar el post.
. Use traductor lenguaje.
Agradecida como siempre con ustedes por la visita a mí blog. Será hasta una próxima oportunidad.
Waaao this vase is looking nice. You really did a great job . Leep it u0 dear
Muy agradecida que bueno le haya gustado...saludos, hermoso dia
Wow! This is so beautiful, I love your creativity and the outcome is really nice.
Se ven muy lindos. Útiles y decorativos. Hiciste un bonito trabajo de reciclaje. Felicidades 🎉
Wow! These vases look really lovely and beautiful.
El correcto que tenga usted cuidado con el esmeril, es una herramienta muy peligrosa, de hecho encarecidamente le recomiendo que no lo use para estos trabajos. Trabaje por años como mecánico industrial y se tiene que respetar mucho esa herramienta, lo más requerido son unas buenas lentes de seguridad, cuando el disco se parte va a la cara, ya me ha pasado un par de veces.
Un buen trabajo, ingenioso.