


Hello my dear readers, I hope you are having or have had an excellent day. I'm here again, with a new entry to participate in the contest provided by the friends of @diyhub and here is the link.
This time I come to show you how to make a cobra. The truth is that I am not a snake lover, or any kind of crawling reptile for that matter. It's not because of a phobia or anything like that, but as long as they are far away from me it's better.
Although my mum does have a phobia of these animals, to the point that she can't even see them in a picture on her phone. Every time she happens to be looking at social networks on her phone and a video or image of any kind of snake appears, she drops the phone and screams in terror.
When my mother was young and lived in the countryside, she tells us that when she was pregnant, she was walking along a path with a lot of vegetation and a snake appeared, she ran away screaming, but the snake chased her for quite a long way. As best she could, she returned to the house and my grandmother, as soon as she realised it, went out to help her and chased the snake away. This was a trauma for her that she never got over, and to this day she is still afraid of it.
According to stories told by those who live in the countryside, there is a yellow-tailed snake that chases pregnant women and whips them with its tail in the belly, making them sick and some may even lose the baby. According to it, it is a myth, nothing more, but still, if the story is true, it is terrifying.
But I didn't come here to talk about myths and legends, I just came to show you how I made a cobra out of paper. I know that this cobra is not going to bite me, nor is it going to whip me with its tail, so without further ado I will show you how I made it.

STEP BY STEP:
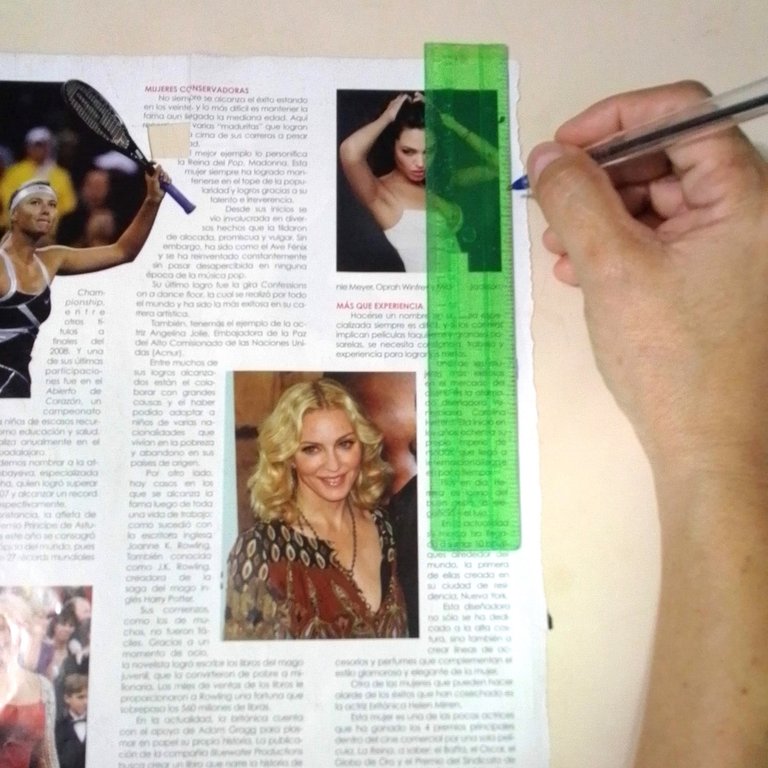
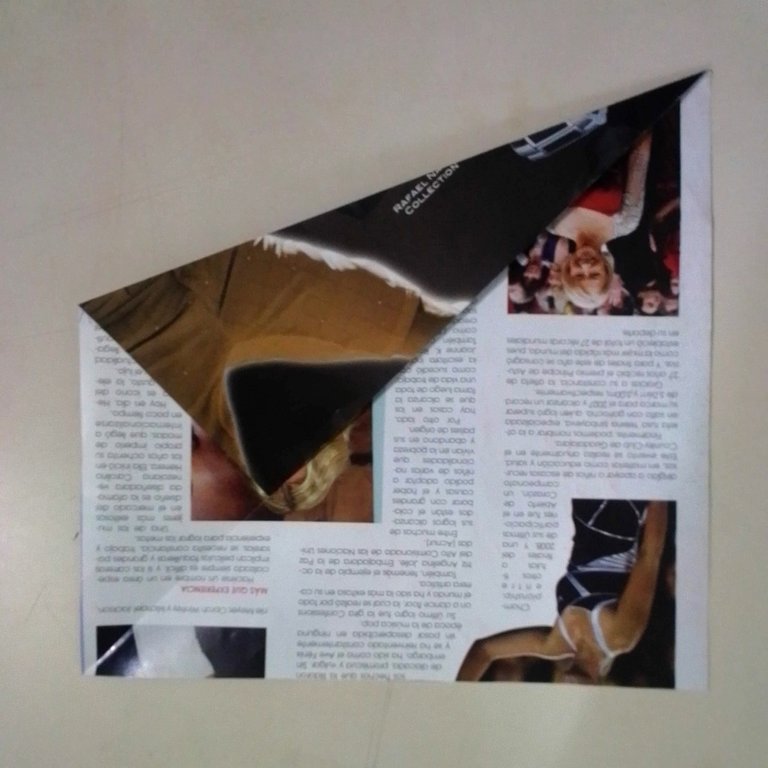
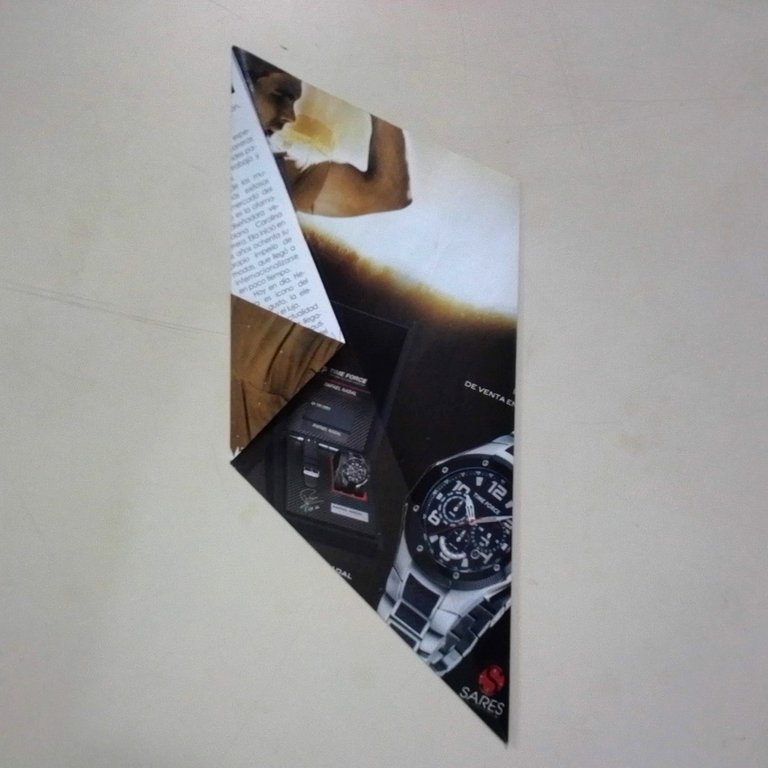
From an old magazine, which I only use to do homework for my daughter, cutting out the letters or something like that. I decided to cut out a sheet of paper and make the cobra, it is a very soft and manageable paper. I peeled off a sheet of paper and with the ruler, I made a square of the size that the paper would give me. It doesn't have to be a specific size, but this one was approximately 20 x 20 cm.
I'll take the square and fold it diagonally, as shown in the picture. And I unfold it again, because I just want to make the mark.

Now I'm going to fold the corners and bring them to the centre, right at the mark I made earlier.

I flip the piece over, as you can see I have two ends. On the shorter end, I'm going to bring the corners to the centre.

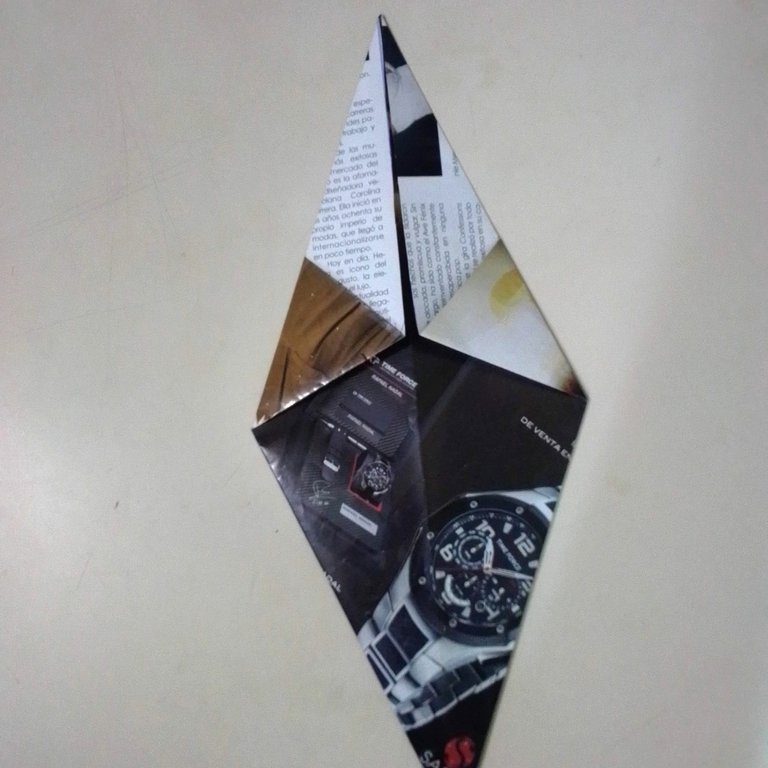
Now I am going to do the same step as above, with the other longer end, as shown in the picture.
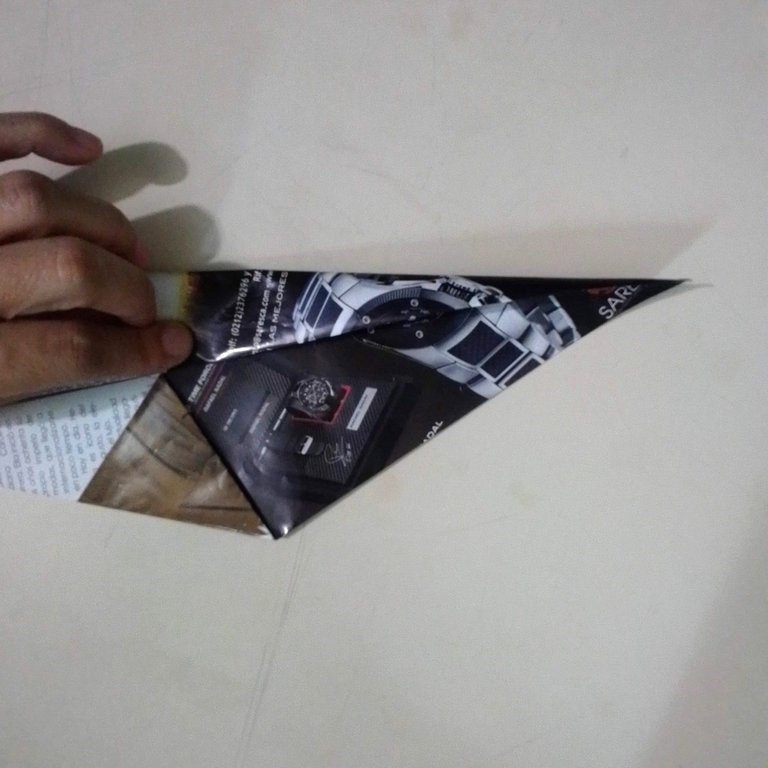
At the widest point, I'm going to bend the tip about a centimetre. And then I'll bend the same tip again, but this time by 2 cm.
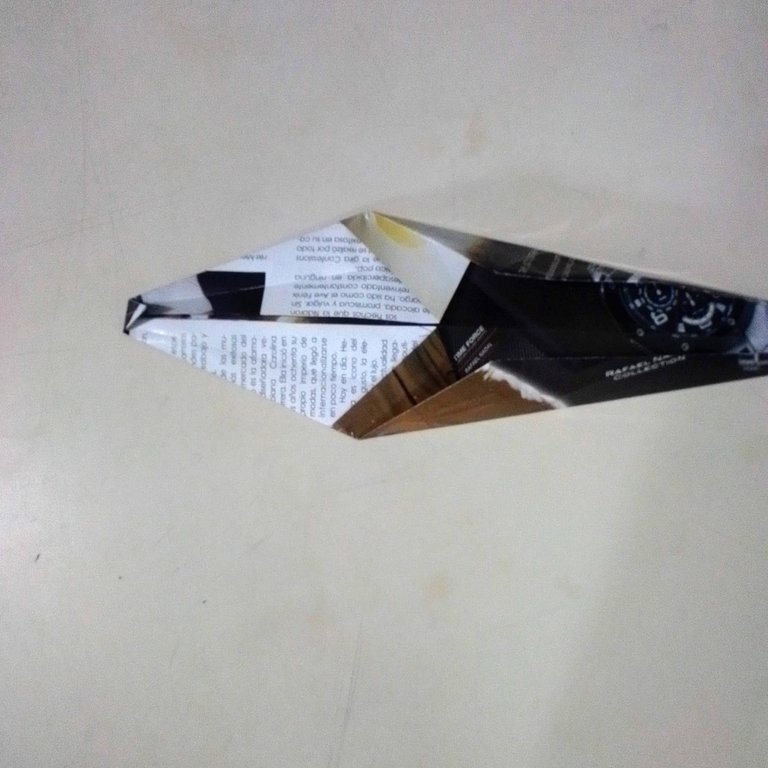

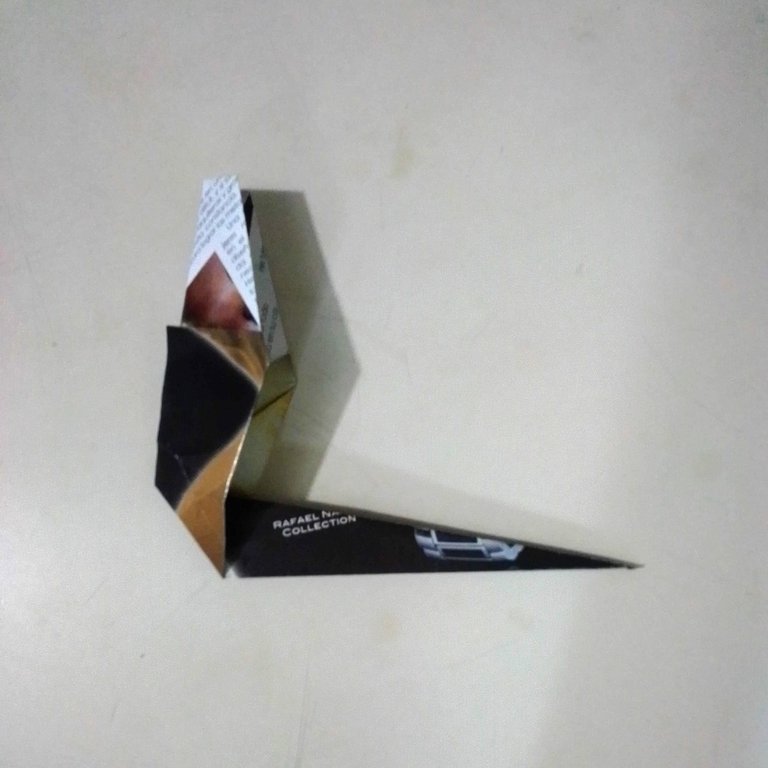
I will make a fold right at the junction of what will be the tail and the head of the cobra, as you can see in the picture.
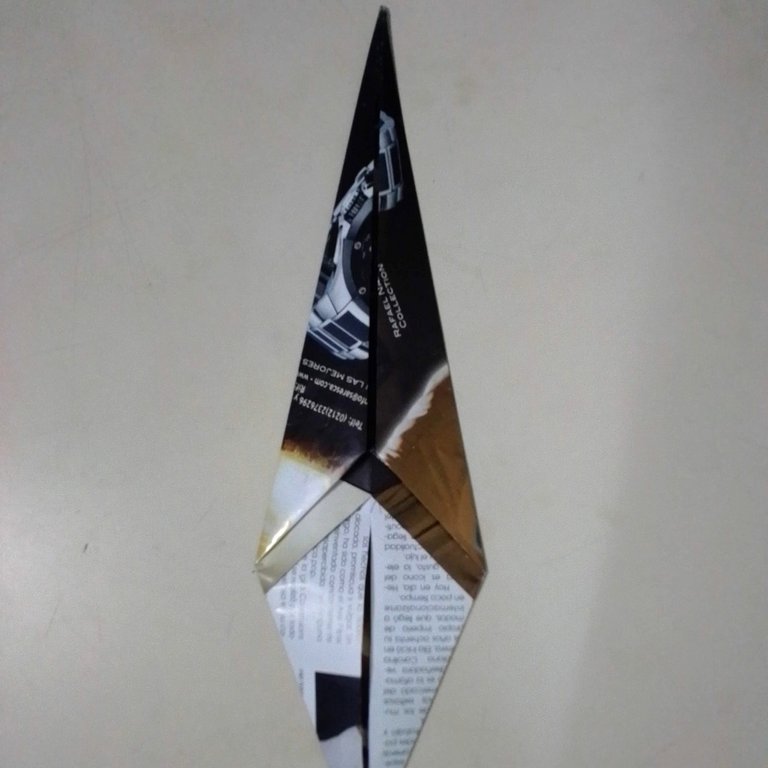
Then I folded it in half to make a long strip.
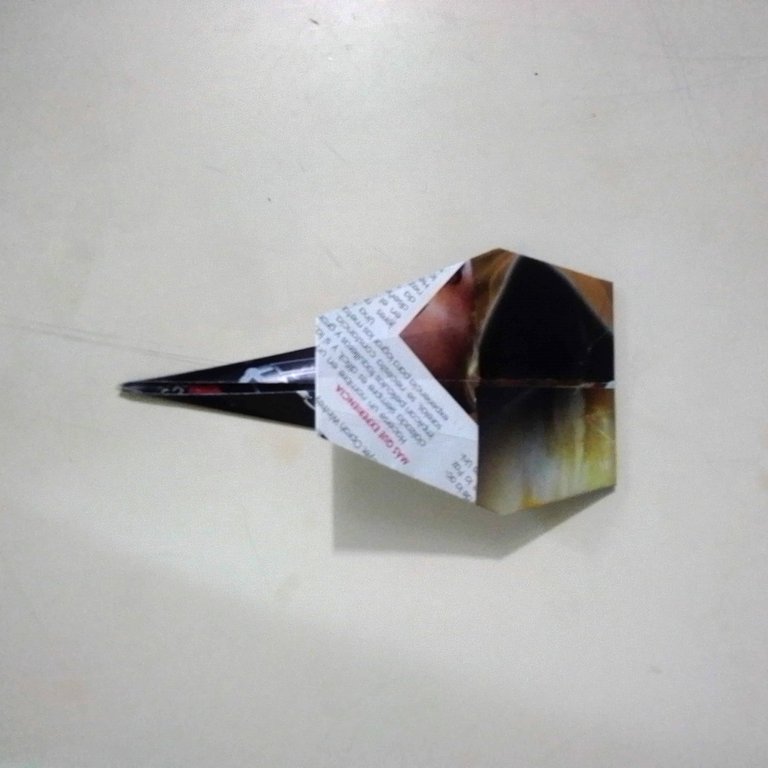
Now I am going to raise what will be the head of the cobra, diagonally, as shown in the picture.
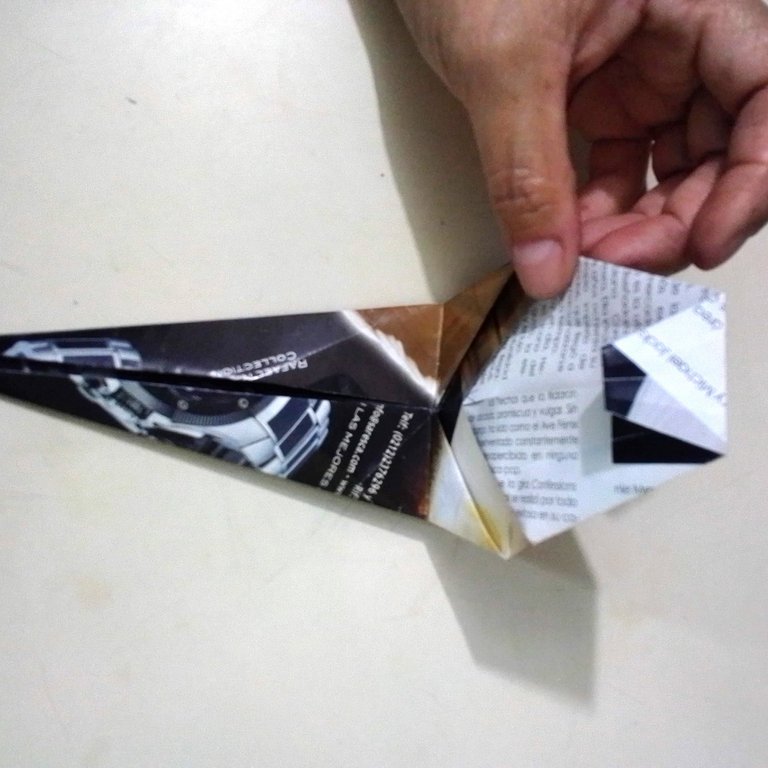
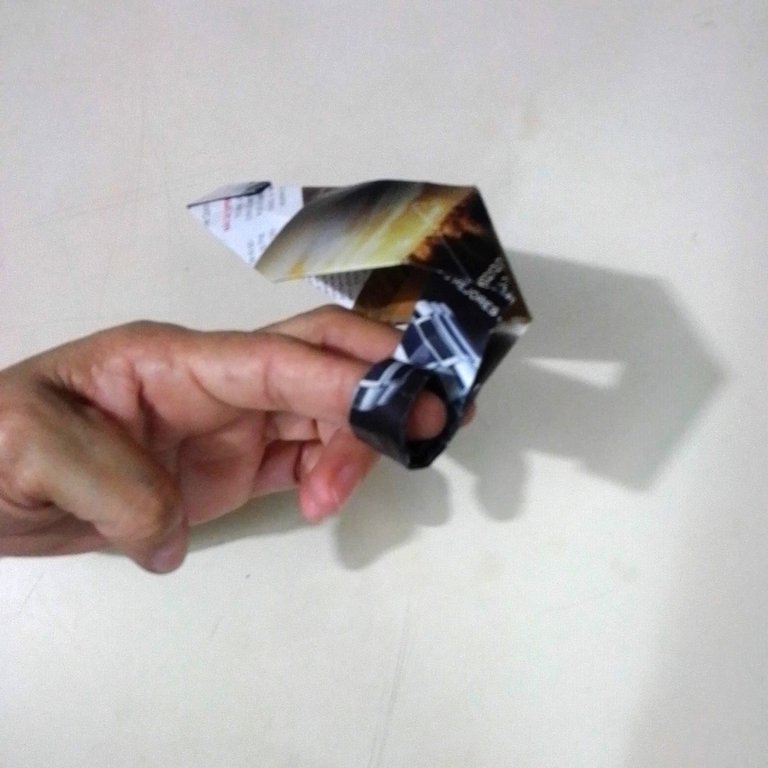
To make the tail look more realistic, I will take the tip and wrap it around my finger, giving it a curved shape.
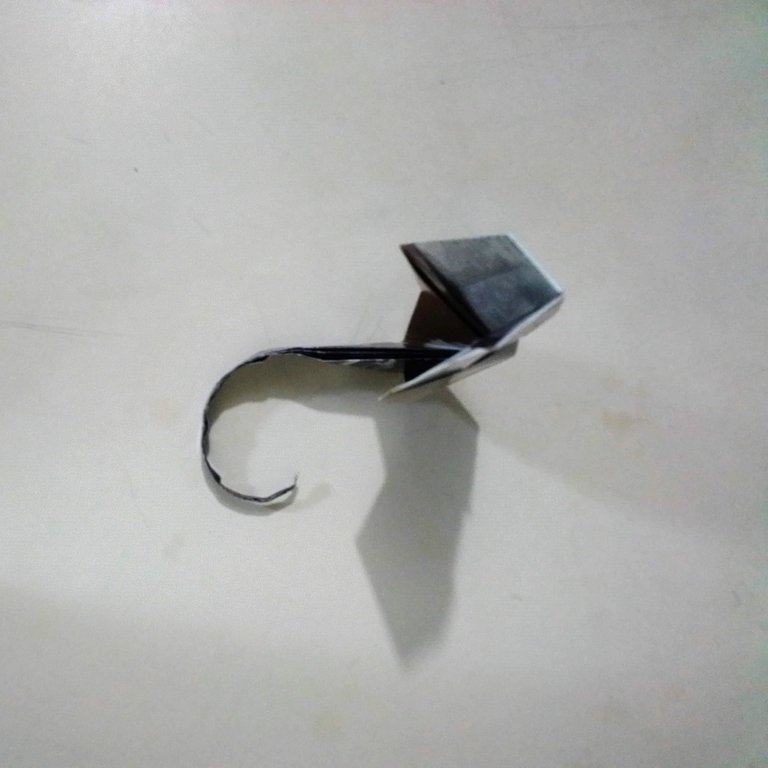
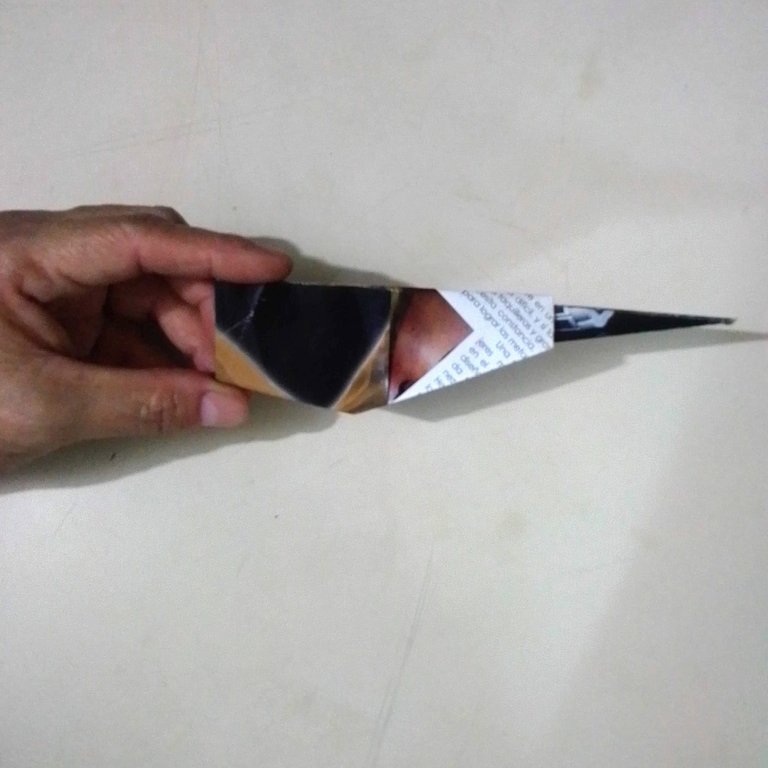
Note: This is where I realised that I had made a mistake in folding the cobra's head. So when bending the cobra's head, bend it the other way. I apologise for that, to err is human. Here's how I fixed it and this is how it should look.
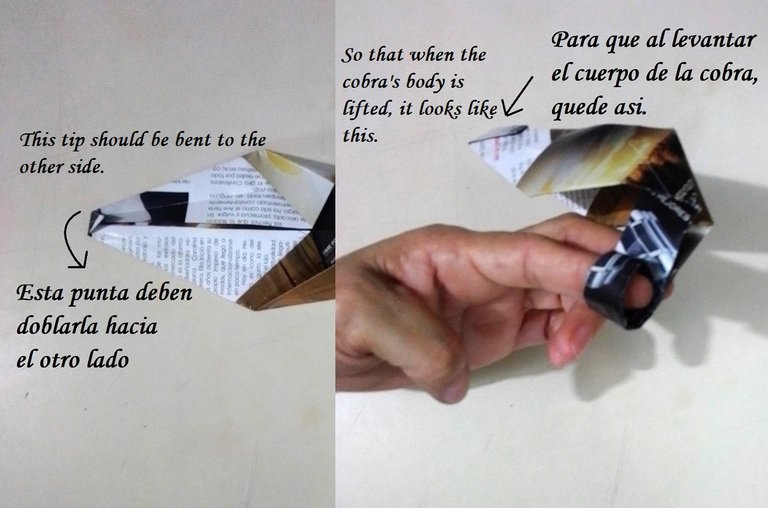
I lift the cobra's face a little and the cobra is ready.

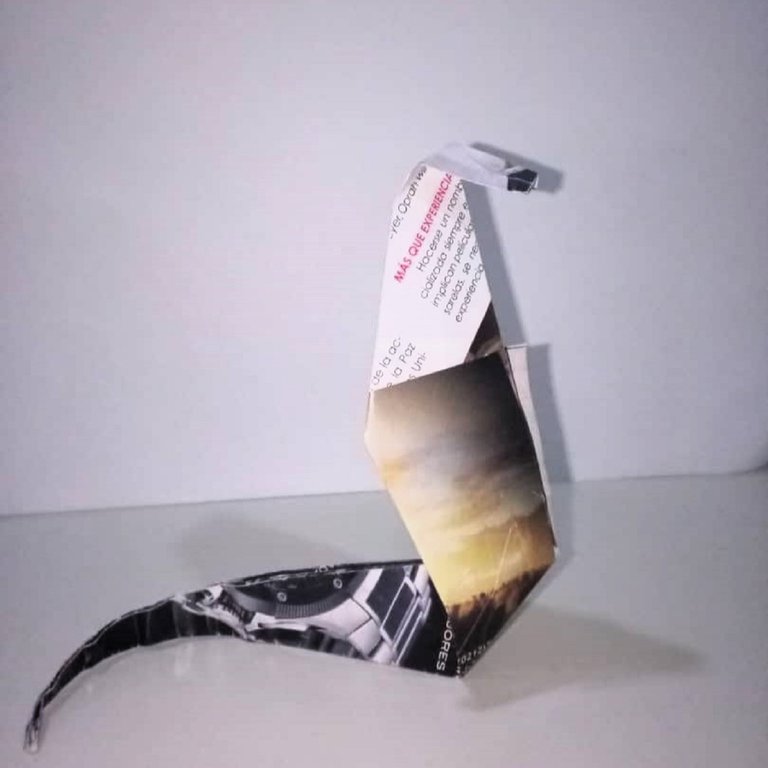
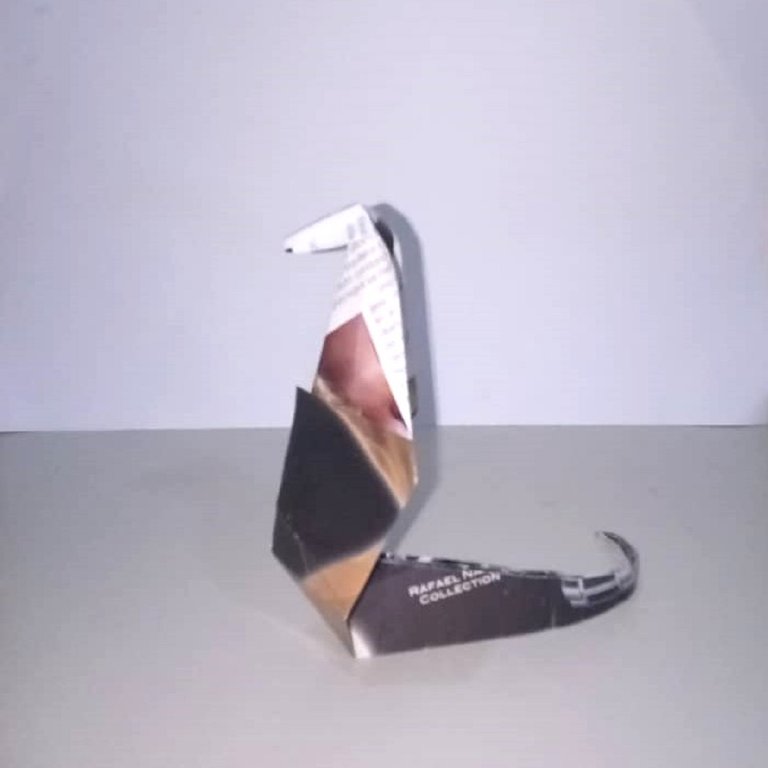
As you can see, it is easy to make and looks great as a decoration on a desk or anywhere else.
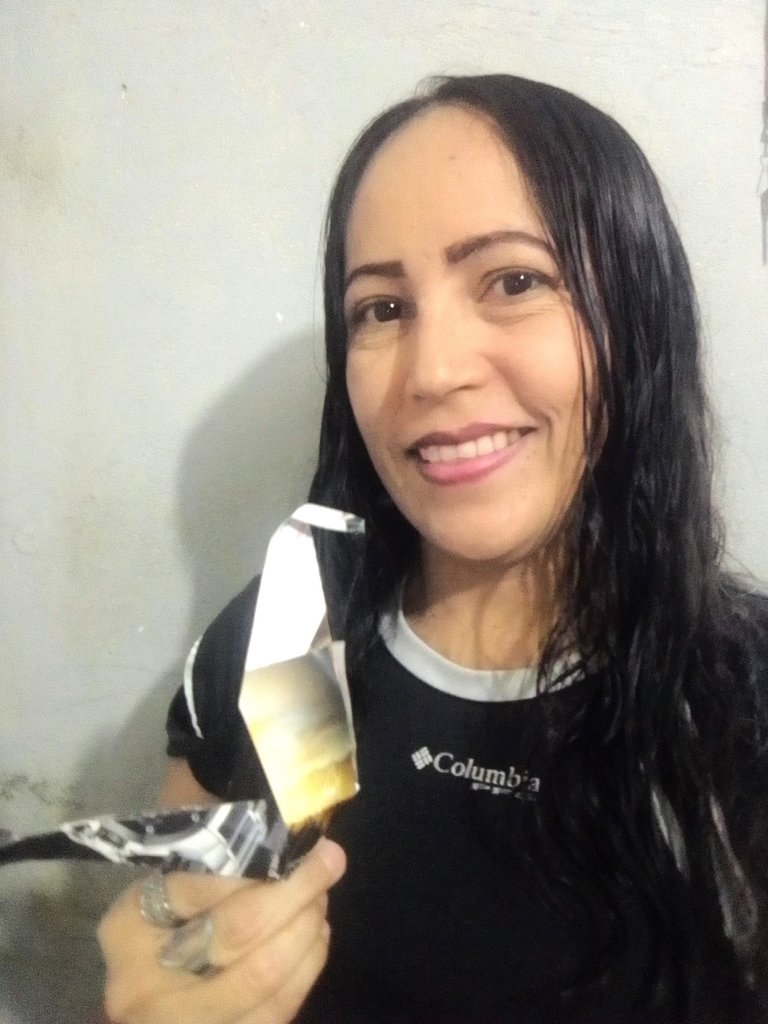
I hope you liked this tutorial that I gladly prepared for you. I say goodbye as always, but not before thanking you for taking a little of your valuable time to visit my blog and support me. Be well and take care of yourselves.
Content of the original creation:
🐍 All photos are mine taken and edited with my Alcatel phone.
🐍 The cover image, was made with the Canva app and edited by me.
🐍 The images of the splitter are taken from the website https://www.glitter-graphics.com/
🐍 The English translation was made with the help of DeepL.
🐍 The letters indicating the languages were taken from https://cooltext.com/.
Hola mis queridos lectores, espero que tengan o hayan tenido un excelente día. Me encuentro nuevamente por aquí, con una nueva entrada para participar en el concurso que nos proporcionan los amigos de @diyhub y aquí les dejo el enlace.
Esta vez vengo a mostrarle como realice una cobra. La verdad es que no soy amante de las serpientes, y de ningún tipo de reptil que se arrastre. No es por fobia ni nada por el estilo, pero mientras estén bien alejados de mí es mejor.
Aunque les cuento que mi mamá sí les tiene fobia a estos animales, al punto que no los puede ver ni en una imagen por el teléfono. Cada vez que por casualidad está viendo las redes sociales por el teléfono y aparece algún video o imagen de cualquier tipo de serpiente, va y suelta el teléfono, pegando aquellos gritos aterradores.
Mi mamá cuando era joven vivía en el campo, ella nos cuenta, que estando embazada, iba por una camino con bastante vegetación y le apareció una serpiente, ella salió corriendo y gritando, pero la serpiente la persiguió un tramo bastante largo. Como pudo regreso a la casa y mi abuela en lo que se dio cuenta salió ayudarla y a espantar la culebra. Eso para ella fue un trauma que nunca pudo superar, pues hasta el sol de hoy aún le tiene miedo.
Según historias que se cuentan los que viven en el campo, es que hay una serpiente Rabo amarillo, que persigue a las mujeres embarazadas y les da latigazos con su cola, en la barriga malográndolas y algunas hasta pueden perder el bebe. Según es un mito, nada más, pero igual, da terror de ser cierta la historia.
Pero yo no vine a hablarles de mitos y leyendas, yo solo vine a mostrarle como hice una cobra con papel. Se que esta cobra no me va a morder, ni me va a dar un latigazo con su cola, así que sin más preámbulos les muestro como lo hice.

PASO A PASO:
De una revista bastante vieja, que solo uso para hacer tareas escolares para hija, recortando las letras o algo así. Pues decidí recortar una hoja y realizar la cobra, es un papel bastante suave y manejable. Despegue una hoja y con la regla la empareje para que quedara recto y aproveche a sacar un cuadrado del tamaño que me diera la hoja. No tiene que ser un tamaño específico, pero este me quedo de aproximadamente de 20 x 20 cm.
Tomaré el cuadrado y lo doblaré en diagonal, tal como se muestra en la imagen. Y desdoblo nuevamente, porque lo que quiero es hacer la marca nada más.
Ahora voy a doblar las esquinas y las llevaré hasta el centro, justo en la marca que hice anteriormente.
Volteo la pieza, como se pueden fijar tengo dos puntas. En la punta más corta, voy a llevar las esquinas hasta el centro.
Ahora voy a hacer el mismo paso anterior, con la otra punta más larga, tal como se aprecia en la imagen.
En la punta más ancha, voy a doblar la punta un centímetro aproximadamente. Y luego volveré a doblar la misma punta, pero esta vez, de 2 cm.
Haré un doblez justo en la unión de lo que será la cola y la cabeza de la cobra, tal como pueden ver en la imagen
Para luego hacer un doblez por la mitad y me quede como una tira larga.
Ahora voy a levantar lo que será la cabeza de la cobra, quedando en diagonal, como se muestra en la imagen,
Para hacer la cola y que se vea más real, tomaré la punta y la enrollaré en mi dedo, dándole una forma curvada.
Nota: Aquí en esta parte fue que me di cuenta de que había cometido un error al hacer el doblez de la cabeza de la cobra. Así que al doblar la cabeza de la cobra, dóblenla hacia el otro lado. Les pido disculpa por eso, errar es de humano. Aquí hice el arreglo y así debería de quedar.

Levanto un poco la cara de la cobra y ya queda lista la cobra.
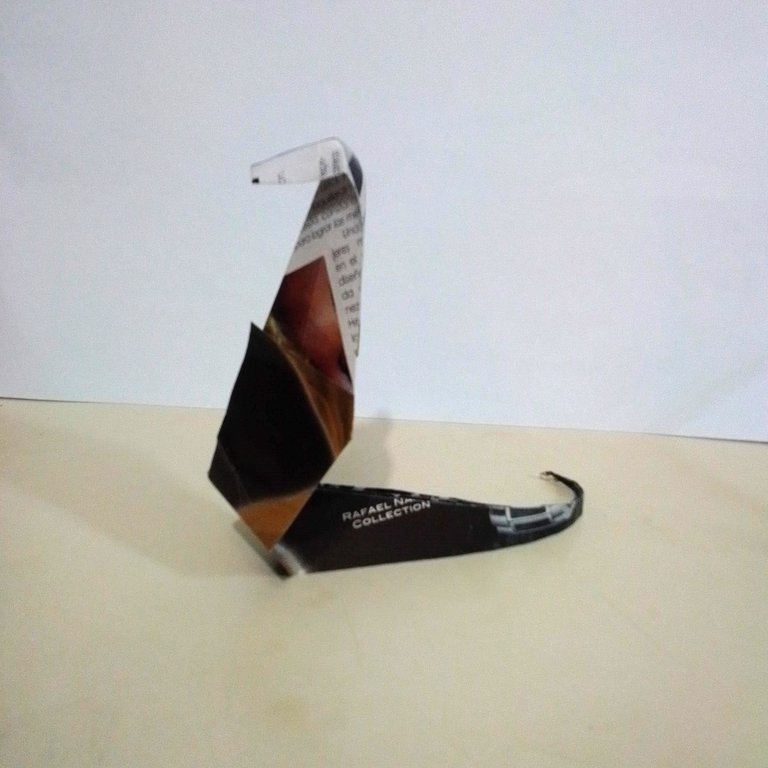
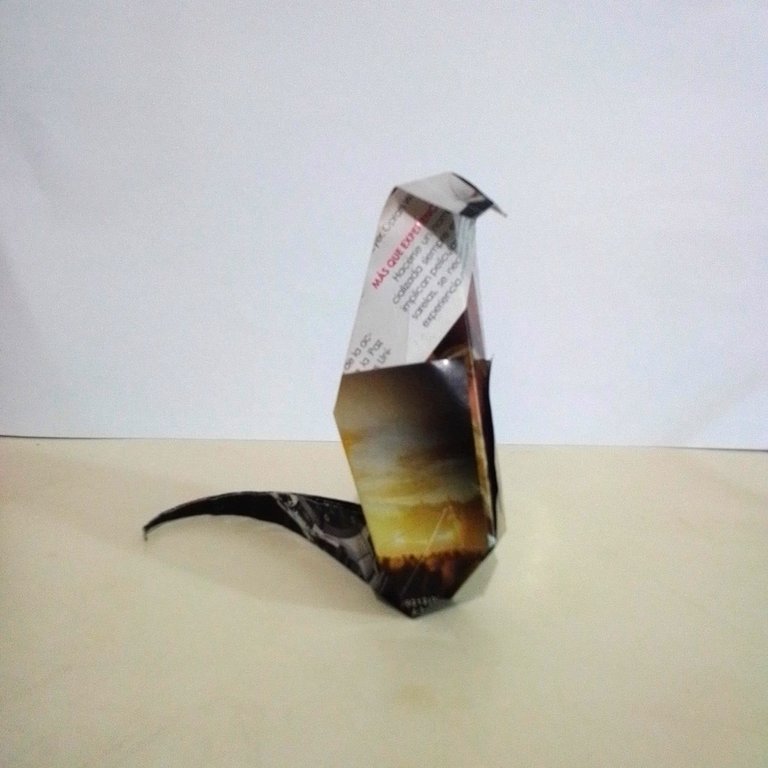
Como pueden ver, es fácil de hacer y queda muy bien, como para colocar de decoración en un escritorio o en cualquier otro lugar.
Espero que les haya gustado este tutorial que con mucho gusto preparé para ustedes. Me despido como siempre, no sin antes agradecerles por tomarse un poco de su valioso tiempo, para visitar mi blog y apoyarme. Pórtense bien y cuídense mucho.
Contenido de la creación original:
🐍 Todas las fotos son mías tomadas y editadas con mi teléfono Alcatel.
🐍 La imagen de portada, fue hecha con la app Canva y editada por mi.
🐍 Las imágenes del divisor están sacadas de la web https://www.glitter-graphics.com/
🐍 La traducción al inglés fue hecha con la ayuda de DeepL.
🐍 Las letras que indican los idiomas fueron tomadas de https://cooltext.com/.
Esta muy original tu cobra 🐍 , me gusto mucho, el origami tiene muchas cosas interesantes, gracias por compartir, te deseo mucha suerte en el concurso 🥰
Me alegra mucho que te haya gustado. El origami se presta para hacer bellezas, solo hay que dedicarse y tener paciencia. Gracias a ti por la visita y apoyo.
Cobra looks scary! It is fun to do something like this. Nice work! 😊
Si quedo aterradora, pero es cariñosa, ja ja ja.
Congratulations @kdelvaeg! You have completed the following achievement on the Hive blockchain And have been rewarded with New badge(s)
Your next target is to reach 1000 upvotes.
You can view your badges on your board and compare yourself to others in the Ranking
If you no longer want to receive notifications, reply to this comment with the word
STOP