
Designing a hair bow for Amanda
Hello community.
I greet with much respect and admiration to all members, since it is the first time I post in this community, where the creation at home shows us the great capabilities we humans have to transform and make wonderful things.
I tell you that a few days ago I passed by a haberdashery, I could not resist the temptation to enter and remember those moments when I used to design bows with ribbon, so I decided to design one for my daughter Amanda to match her school uniform.
The first thing I must admit is that I bought the ribbons very confident of what I would do, however, when I was ready to make the ribbon, I didn't know how to start, I didn't remember the techniques, so I took some of Amanda's ribbons and detailed them very well and started the work.
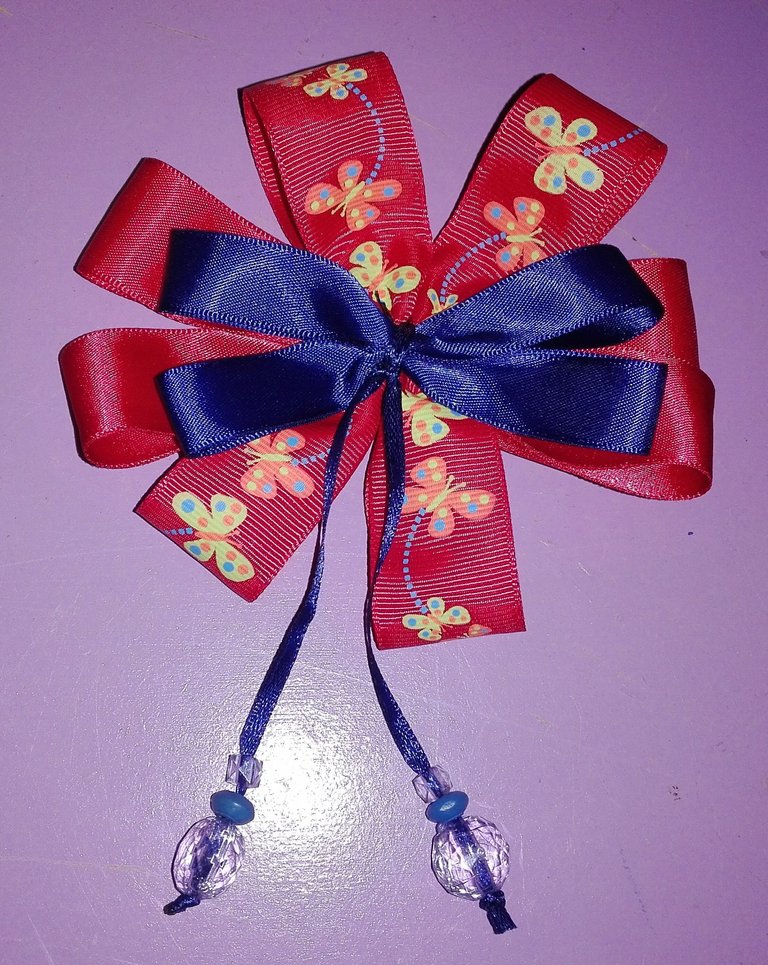
At the beginning I had an idea of how I would make the design, but along the way I modified it, I decided to make it simpler to avoid the thickness to be exaggerated, I had also selected a star to place it in the center and when I noticed that it did not fit very well I preferred not to place it.
Here I tell you the materials I used and the process:
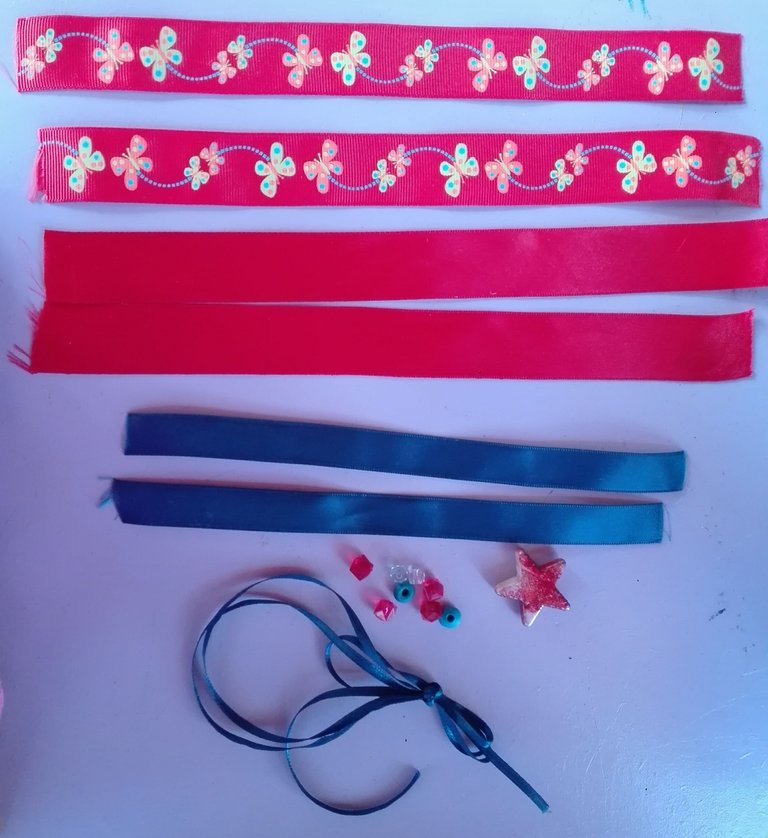
Materials:
2 ribbons of 25 cm red color (3 cm thick).
2 ribbons of 25 cm red color (3 cm thick).
2 ribbons of 20 cm of blue color (2 cm thick).
1 ribbon of 20 cm blue color (0.5 cm thick).
Beads of your choice.
Blue and red sewing thread
Needle
Scissors
Tinder.
Procedure:
Step 01: I sealed the edges of the ribbons with the help of a tinder to prevent fraying or wear.
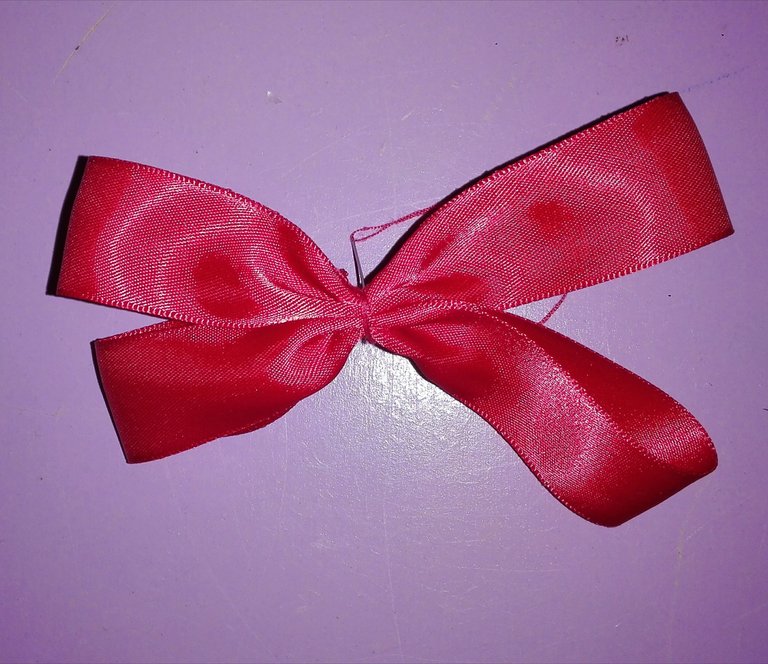
Step 02: Join both edges of the ribbon using needle and thread, so I obtained a circle.

Step 03: I made the loops by tying the center with needle and thread, first making 3 stitches to secure and then edging with the thread.
I did this procedure with all three types of ribbons.
Step 04: Once I got these loops 2 red, 2 red patterned and 2 blue, I joined the pairs using the same technique as in step 3.
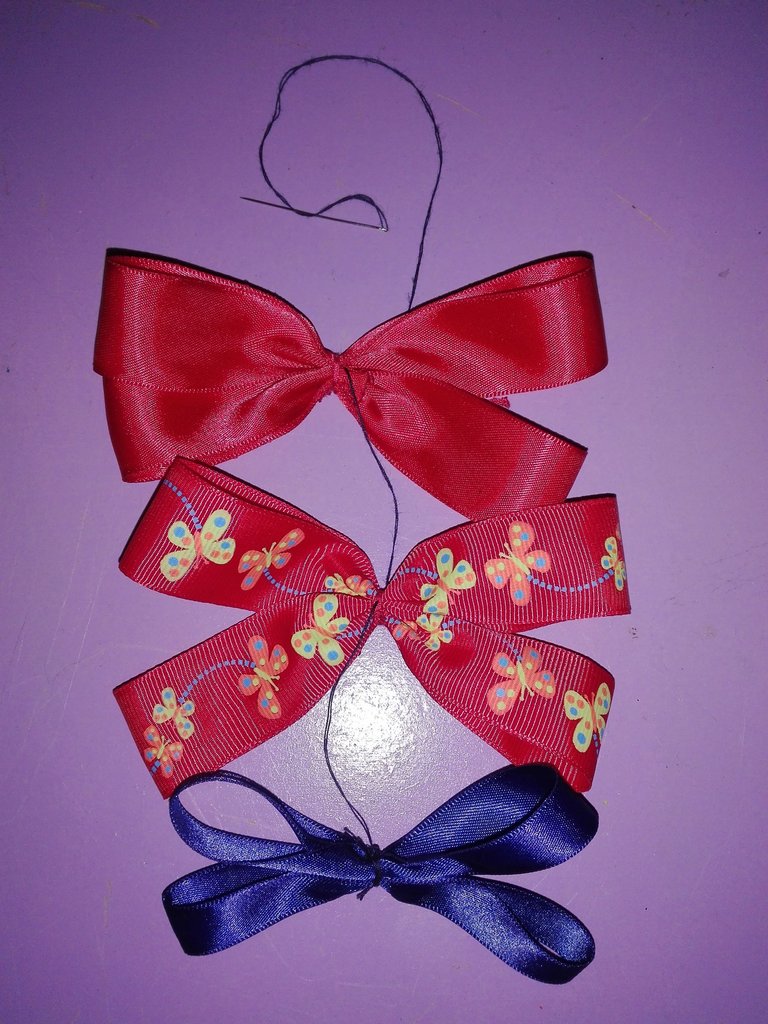
Step 05: Next, I attached the loops, placing the blue loop first, then the patterned loop and finally the red loop. I made the stitching trying to hide the thread, this will give us the quality in the finish.
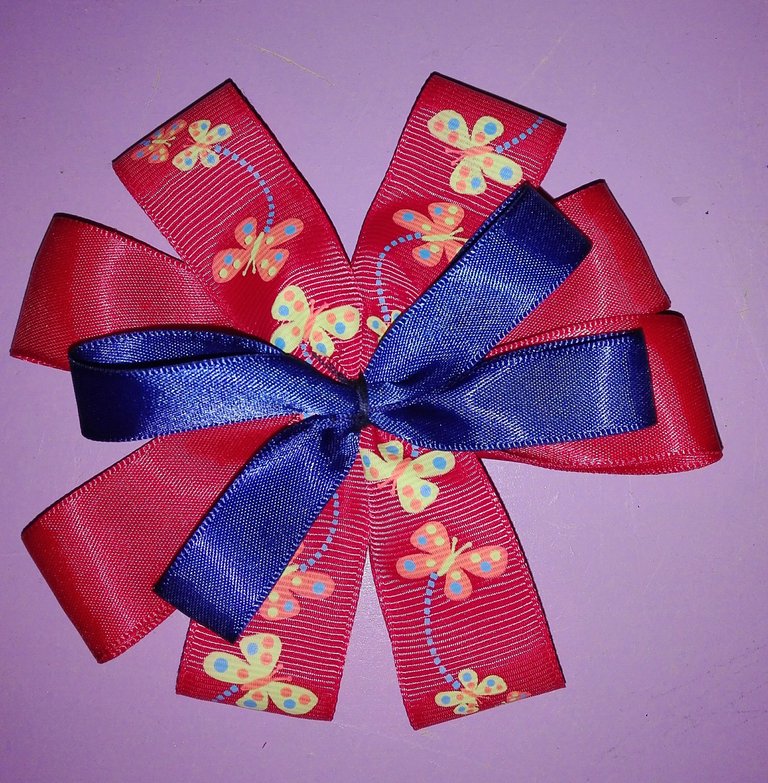
Step 06: With the thinnest ribbon I covered the center, (one turn is enough as long as it is well fixed) I closed with a knot and made sure that the excess ribbon was both the same size.
Step 07: I inserted the beads into the ribbons, tied a knot and sealed the ends with tinder.
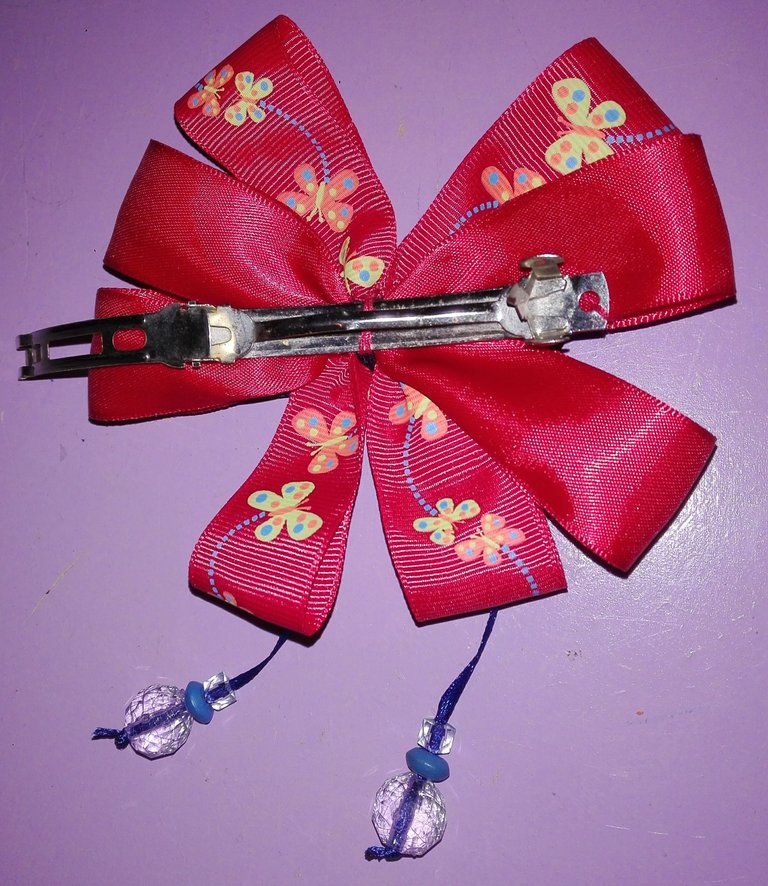
Step 08: I placed the hook using needle and thread to fix it better and therefore, more durable, always taking care of the details so that the thread does not look bad.
These hair bow are very accessible in the market, they cost about 1 $, however, what led me to design this one was:
Show Amanda the step by step design and have her participate.
Take it on as a do-it-yourself initiative.
To do something different, stimulate my creativity and take up handicrafts again.
What did you think?
I know it's very simple, I've just lost practice, it's been several years since I've made them, I hope the next one will be much easier to create hehehehehehe.
I say goodbye thanking you for reaching the end of the post, I hope you liked it.
I look forward to your comments and suggestions, I will value them.
A hug in the distance.
Version Spanish
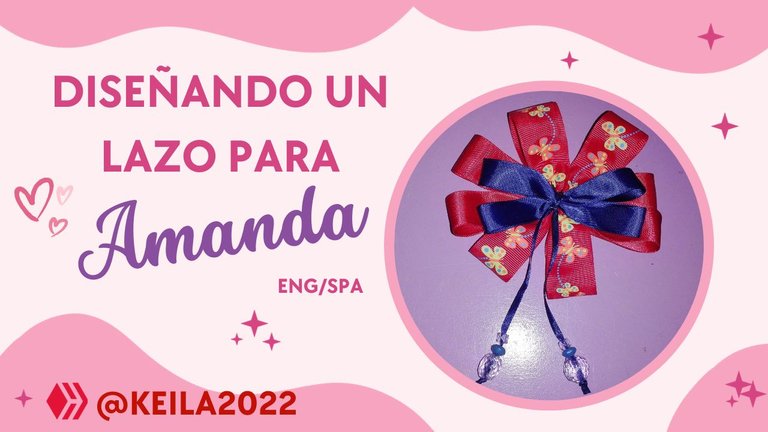
Diseñando un Lazo para Amanda Eng/Spa
Hola comunidad.
Saludo con mucho respeto y admiración a todos los miembros, ya que es primera vez que publico en esta comunidad, donde la creación en casa nos muestra las grandes capacidades que poseemos los seres humanos de transformar y hacer cosas maravillosas.
Les cuento que hace unos días pasé por una mercería, no contuve la tentación de entrar y recordar aquellos momentos en los que diseñaba lazos con cinta, así que decidí diseñarle uno a mi hija Amanda para combinarle con su uniforme de clases.
Lo primero que debo admitir es que compré las cintas muy confiada de lo que haría, sin embargo, al disponerme a realizar la confección, no sabía cómo iniciar, no recordaba las técnicas, así que tomé algunos lazos de Amanda y los detallé muy bien e inicié el trabajo.
Al principio tenía una idea de cómo realizaría el diseño, pero en el transcurso lo fui modificando, decidí hacerlo más sencillo para evitar que el grosor se notara exagerado, también había seleccionado una estrella para colocarla en el centro y al notar que no se ajustaba muy bien preferí no colocarla.
Acá les cuento los materiales que usé y el proceso:
Materiales:
2 cintas de 25 cm color rojo (3 cm de grosor)
2 cintas de 25 cm color rojo estampado (3 cm de grosor).
2 cintas de 20 cm de color azul (2 cm de grosor).
1 cinta de 20 cm de color azul (0.5 cm de grosor).
Cuentas de su preferencia.
Hilo de coser azul y rojo
Aguja
Tijeras
Yesquero.
*Procedimiento:"
Paso 01: Sellé los bordes de las cintas con ayuda de un yesquero para evitar que se deshilache o desgaste.
Paso 02: Unir ambos bordes de la cinta usando aguja e hilo, así obtuve un círculo.
Paso 03: Realicé los bucles atando el centro con aguja e hilo, primero haciendo 3 puntadas para asegurar y luego bordeando con el hilo.
Ese procedimiento lo hice con los tres tipos de cintas.
Paso 04: Una vez que obtuve estos bucles 2 rojos, 2 rojos estampados y 2 azules, uní los pares usando la misma técnica del paso 3.
Paso 05: Seguidamente, fijé los lazos, colocando primero el lazo azul, luego el estampado y por último el rojo. Hice la costura procurando esconder el hilo, eso nos dará la calidad en el acabado.
Paso 06: Con la cinta más delgada cubrí el centro, (con una vuelta es suficiente siempre y cuando quede bien fijada) cerré con un nudo y rectifiqué que la cinta sobrante quedaran ambas del mismo tamaño.
Paso 07: Inserté las cuentas en las cintas, realice un nudo y sellé las puntas con yesquero.
Paso 08: Coloqué el gancho usando aguja e hilo para que quede mejor fijado y por ende, más duradero, siempre cuidando los detalles para que no se vea mal el hilo.
Estos lazos son muy accesibles en el mercado, cuestan alrededor de 1 $, sin embargo, lo que me llevó a diseñar este fue:
Mostrarle a Amanda el paso a paso del diseño y que ella participara.
Asumirlo como una iniciativa de "hágalo usted mismo".
Hacer algo diferente, estimular mi creatividad y retomar los trabajos manuales.
¿Qué les pareció?
Sé que es muy sencillo, solo que he perdido práctica, hace varios años que no los hago, espero el próximo sea mucho más fácil de crear jejejeje.
Me despido agradeciéndote por llegar al final del post, espero que haya sido de tu agrado.
Aguardo comentarios y sugerencias, las sabré valorar.
Un abrazo en la distancia.
Enhorabuena tu publicación ha sido elegida entre las mejores del día.
SIGUA CREANDO BUEN CONTENIDO.
Saludos @edu-venezuela
Que maravilloso!!!
Gracias infinitas, me emociona mucho jejeje.
Es un placer crear contenido para Hive.
Hecho con mucho amor y dedicación.
Gracias.
Un gran abrazo.
Congratulations @keila2022! You have completed the following achievement on the Hive blockchain And have been rewarded with New badge(s)
Your next target is to reach 7000 upvotes.
You can view your badges on your board and compare yourself to others in the Ranking
If you no longer want to receive notifications, reply to this comment with the word
STOPCheck out our last posts:
Hello.
How nice.
Thank you very much.
A hug.
You can do it @keila2022! Keep pushing yourself and reaching for the stars on Hive.
BTW, join the list of HiveBuzz supporters. Check out our funding proposal and consider supporting it.
All you need to do is to click on the "support" button on this page: https://peakd.com/proposals/248.
Thank you!
Cuando mi hija estaba pequeña también le hice muchos lazos y cintillos. Me hiciste recordar esa época
Hola @morepina
Verdad que hacer detalles como esos les da un valor agregado?
Me alegra haber removido el baúl de tus recuerdos. Jejeje.
Particularmente se los hago con mucho amor.
Cuando estaba embarazada de ella le hice muchos, tenía retazos de tela y los aproveché para esos detalles, también le decoré medias y pañitos.
Quedan muy bonitos.
Gracias por tomarte un tiempo para leer y comentar.
Bendiciones para tu familia.
Congratulations, your post has been upvoted by @dsc-r2cornell, which is the curating account for @R2cornell's Discord Community.
Enhorabuena, su "post" ha sido "up-voted" por @dsc-r2cornell, que es la "cuenta curating" de la Comunidad de la Discordia de @R2cornell.
Saludos @dsc-r2cornell
Agradezco profundamente el tiempo que dedican para valorar mi Post.
Es un placer compartir con todos.
Gracias infinitas.
Un gran abrazo!!!
This is really beautiful ❤️ Amanda will really be happy 😁
Hola @sommylove
That's right, she was really happy, even more so because she participated in the whole process, as she is small she does not manipulate needles, but she did help me to place the right color yarn, hold the loops, that is, she understood the process of elaboration.
Every time she uses it, her eyes shine with happiness.
Thank you for taking the time to read the post and comment.
It is a pleasure to share.
A big hug.
This is really lovely 🌹, to get involved in the process and it's usuage would really be a lot ton of happiness 😁.