
Reciban un afectuoso saludo y muchos brazos desde la distancia, mi querida gente de esta hermosa comunidad, espero que estén todos muy bien donde quiera que se encuentren.
Hoy vengo a hacer mi primera entrada al concurso del mes con la temática de gatos, estas mascotas encantadoras de la casa.
Inspirada por el maravilloso mundo de los gatos, después de pensar y buscar varias ideas decidí hacer algo útil que me hacía falta, siempre me gusta darle un buen uso a mi trabajo, así que aproveché para hacer un portalápiz, de un gato en color negro, este lo hice con un poco de material que tenía guardado, que me había quedado de otros trabajos.
Las fotografías que verán a continuación, fueron tomadas con mi teléfono modelo TECNO SPARK GO 2023.

Receive a warm greeting and many arms from afar, my dear people of this beautiful community, I hope you are all very well wherever you are.
Today I come to make my first contest entry of the month with the theme of cats, these lovely pets of the house.
Inspired by the wonderful world of cats, after thinking and looking for several ideas I decided to make something useful that I needed, I always like to give a good use to my work, so I took the opportunity to make a pencil holder, of a cat in black color, I made it with some material that I had saved, that I had left from other works.
The pictures you will see below were taken with my phone model TECNO SPARK GO 2023.

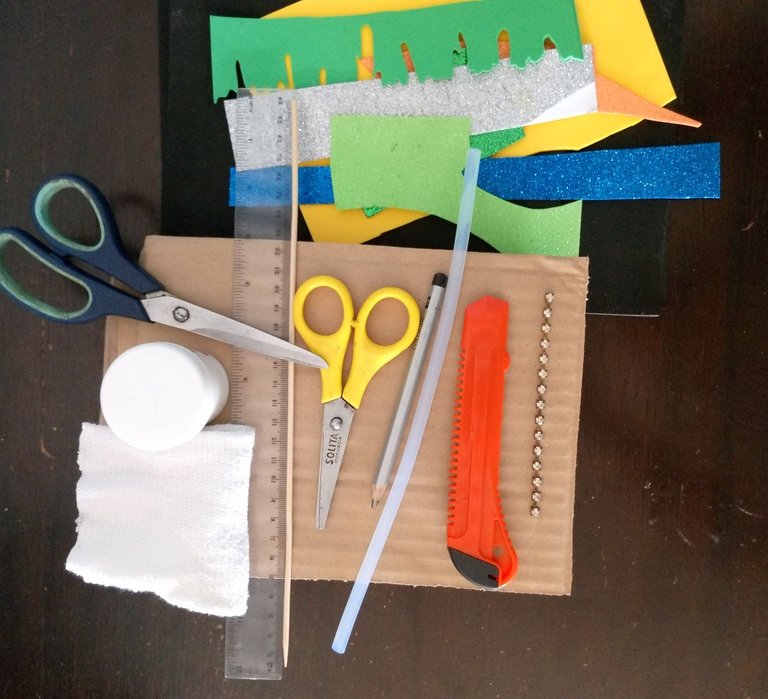
Los materiales que utilice:
- Varios trozos de cartón
- Retazos de fomi de colores variados
- 2 Láminas de fomi tamaño carta de color negro
- 1 hoja de papel tamaño carta de color gris oscuro
- 1 trozo de tela de algodón color blanco
- 3 barras de silicona delgada
- 1 lápiz 6B de dibujo
- 1 regla
- 2 tijeras, 1 para cortar papel y 1 para cortar tela
- Pintura al frío color blanco
- 1 palo de brocheta
- 1 cúter
- 1 trozo de cadena tipo mini diamantes de imitación
- 1 pistola para silicona caliente.
Materials you use:
- Several pieces of cardboard
- Fomi scraps of assorted colors.
- 2 sheets of black letter size fomi paper
- 1 sheet of dark gray letter-size paper
- 1 piece of white cotton fabric
- 3 thin silicone sticks
- 1 6B drawing pencil
- 1 ruler
- 2 scissors, 1 for cutting paper and 1 for cutting cloth
- White cold paint
- 1 skewer stick
- 1 box cutter
- 1 piece of mini rhinestone type chain
- 1 hot silicone gun.
 |  |
|---|
 |  |
|---|
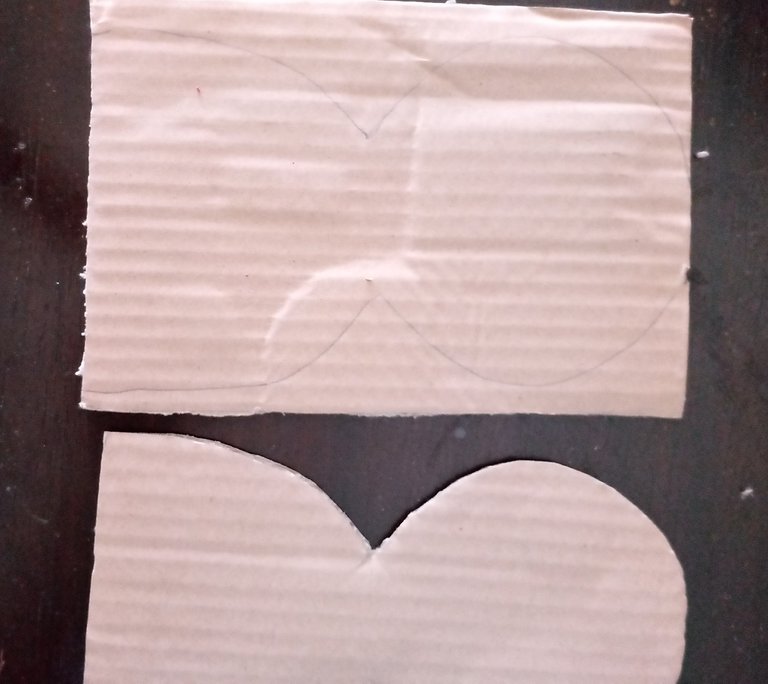
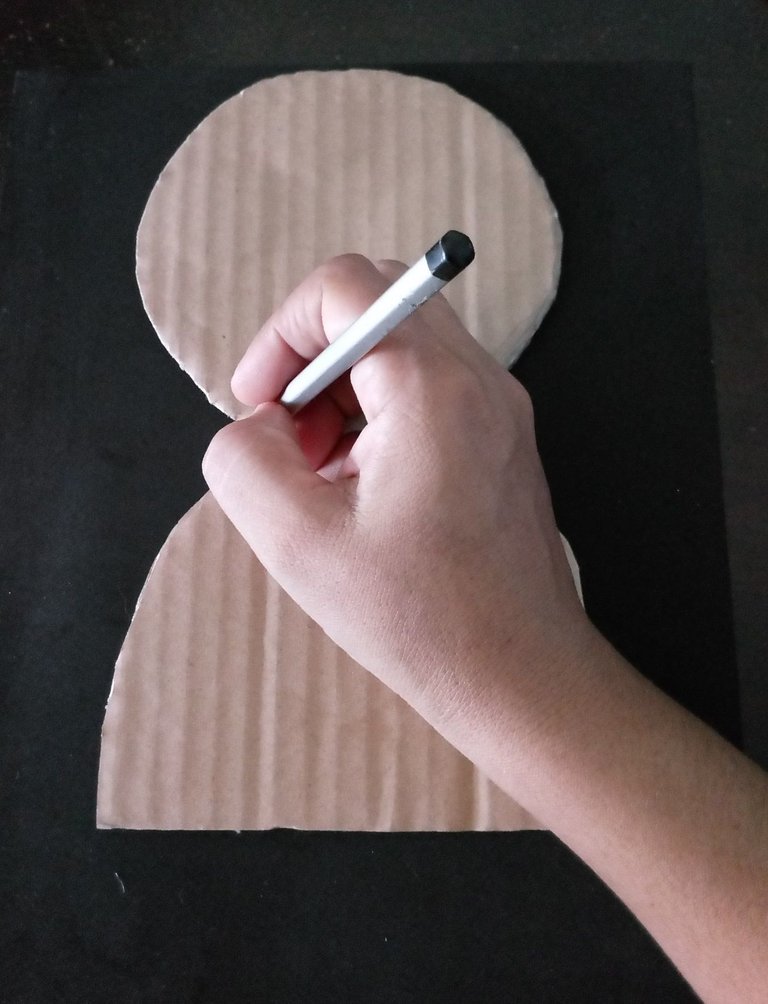
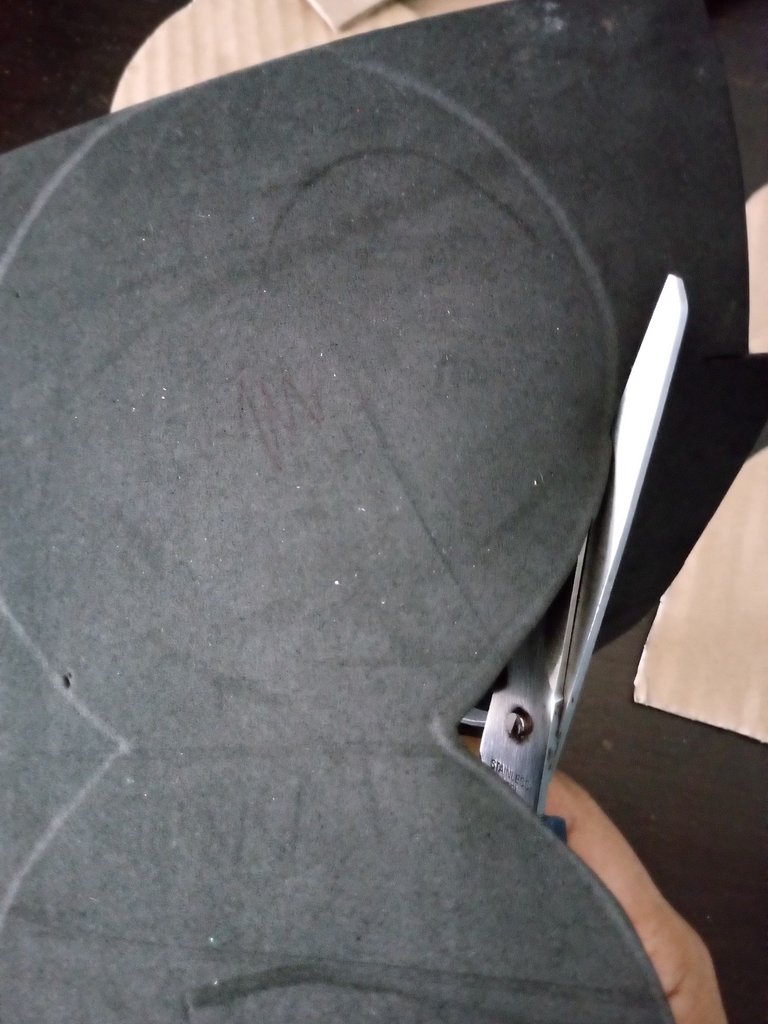
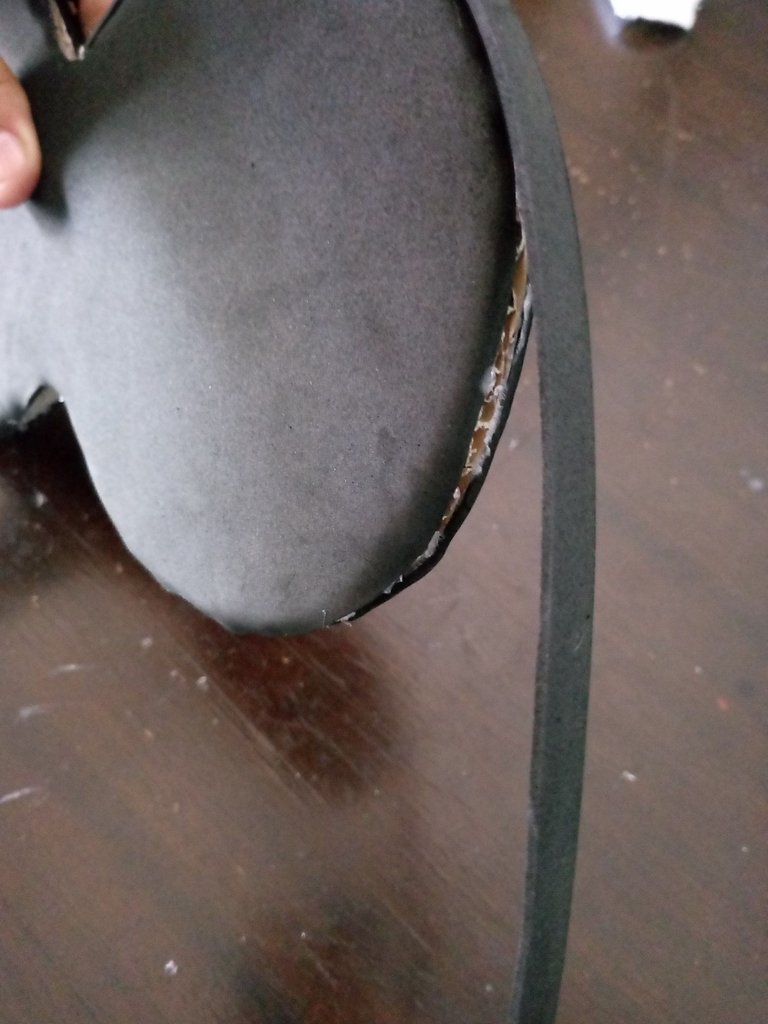
Para hacer este espectacular portalápiz de gato lo primero que haremos será dibujar la silueta de medio cuerpo de un gato, es como dibujar la silueta de una persona, dibujando primero la cabeza y luego la parte de los hombros, ya que se trata de un gato que está en una posición erguida.
Después de tener dibujada la primera silueta recortaremos y la vamos a colocar en un nuevo trozo de cartón y haremos el mismo procedimiento, para hacer dos iguales en cartón y dos iguales en fomi negro, esto nos servirá de mayor soporte y firmeza y también se ve con mejor aspecto por el volumen de las dos piezas pegadas.
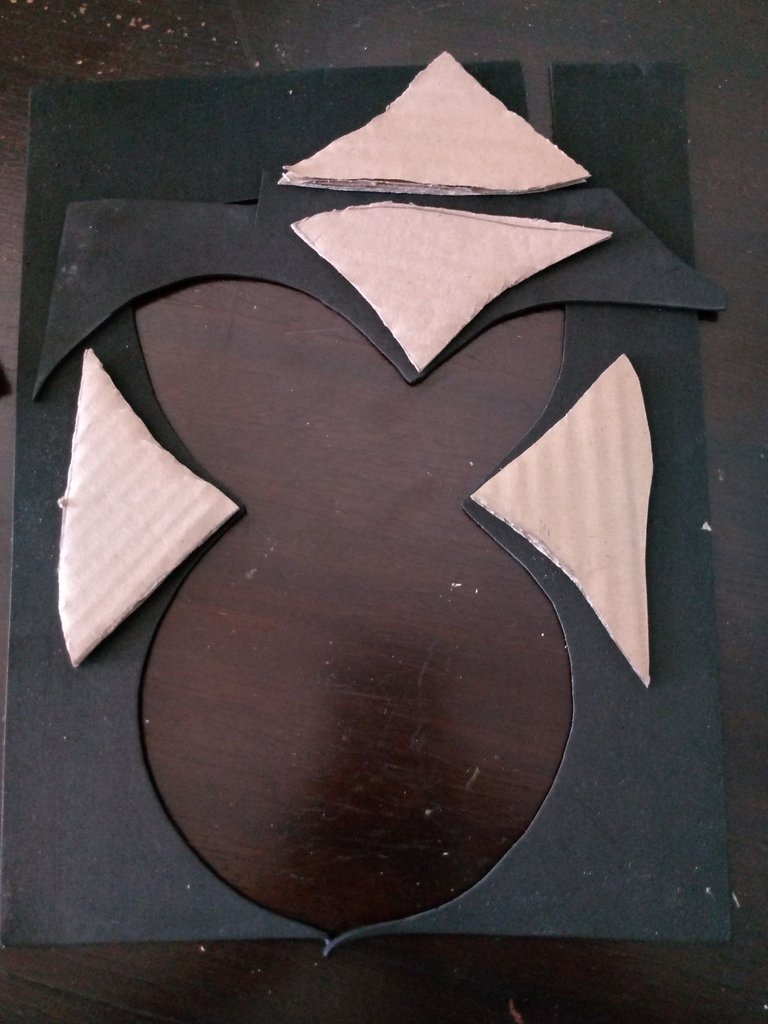
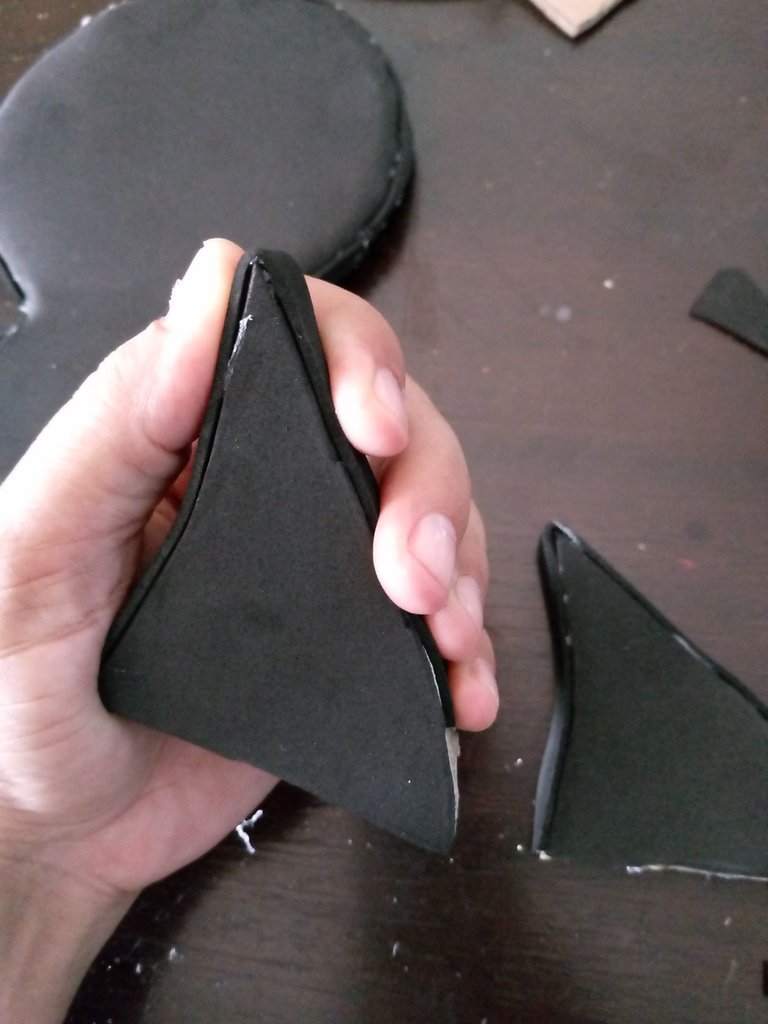
También aprovecharemos los retrasos y vamos a sacar las orejas tanto de los retazos de cartón como de fomi, las orejas también son muy fáciles de hacer, solo aremos unas formas de triángulo un poco ovalado y con una punta un poco más larga que sería cuestión de gustos.
To make this spectacular cat pencil holder the first thing we will do is to draw the half body silhouette of a cat, it is like drawing the silhouette of a person, drawing first the head and then the part of the shoulders, since it is a cat that is in an upright position.
After having drawn the first silhouette we will cut it out and place it on a new piece of cardboard and we will do the same procedure, to make two equal ones in cardboard and two equal ones in black fomi, this will give us more support and firmness and it also looks better because of the volume of the two glued pieces.
We will also take advantage of the delays and we are going to take the ears out of the cardboard and fomi scraps, the ears are also very easy to make, we will only make some triangle shapes a little oval and with a slightly longer tip that would be a matter of taste.
 |  |
|---|
 |  |
|---|
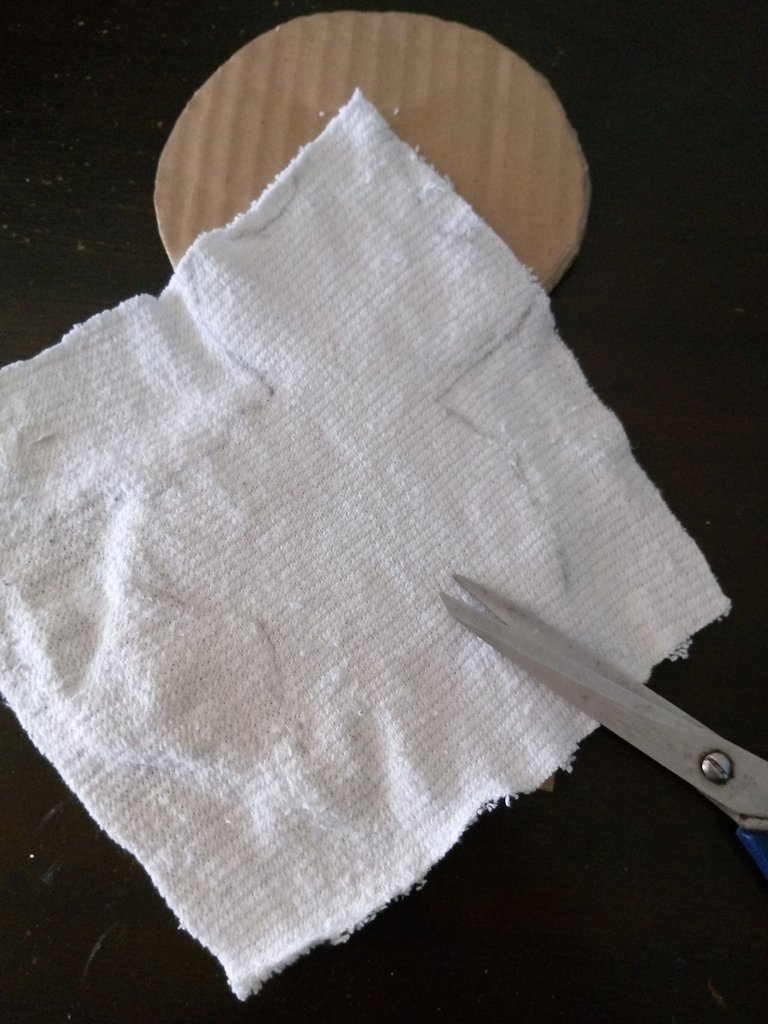
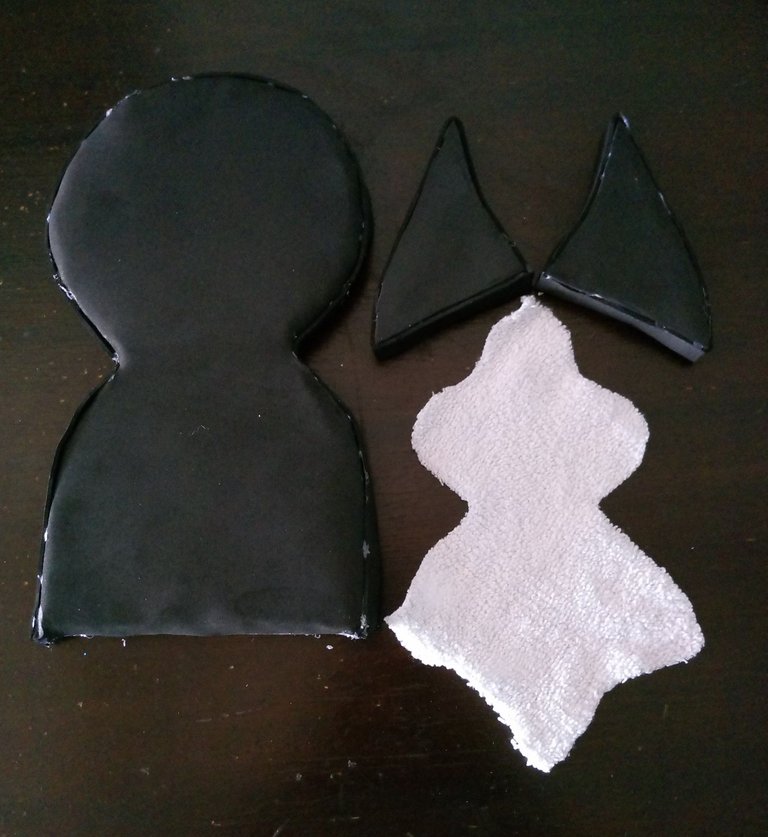
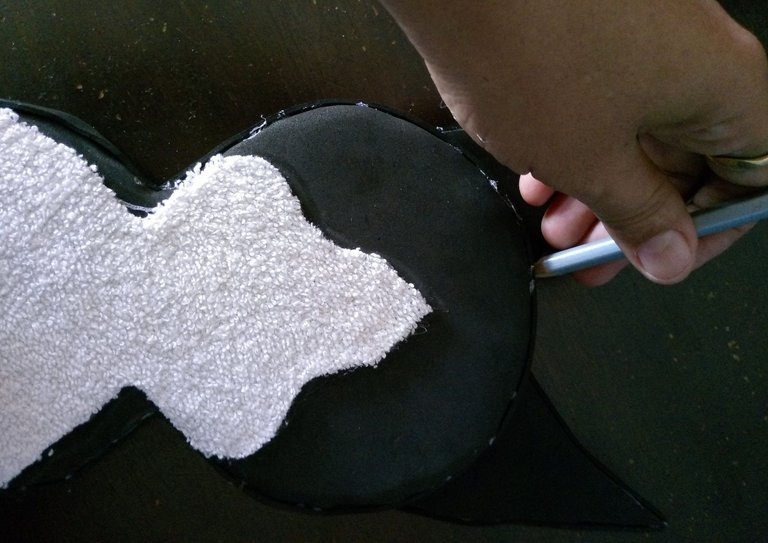
Seguido a los pasos anteriores vamos a utilizar el trozo de tela de color blanco, la tela que estoy utilizando aquí es de media de algodón que tiene dos lados, un lado lizo y un lado tipo tela de paño, vamos a dibujar una silueta por el lado lizo para que se vea mejor al momento de cortar, esta tela la colocaremos sobre la silueta del gato para calcular la posición donde la vamos a colocar y para estimar cuanto espacio queremos que cubra y de acuerdo a estos puntos la haremos.
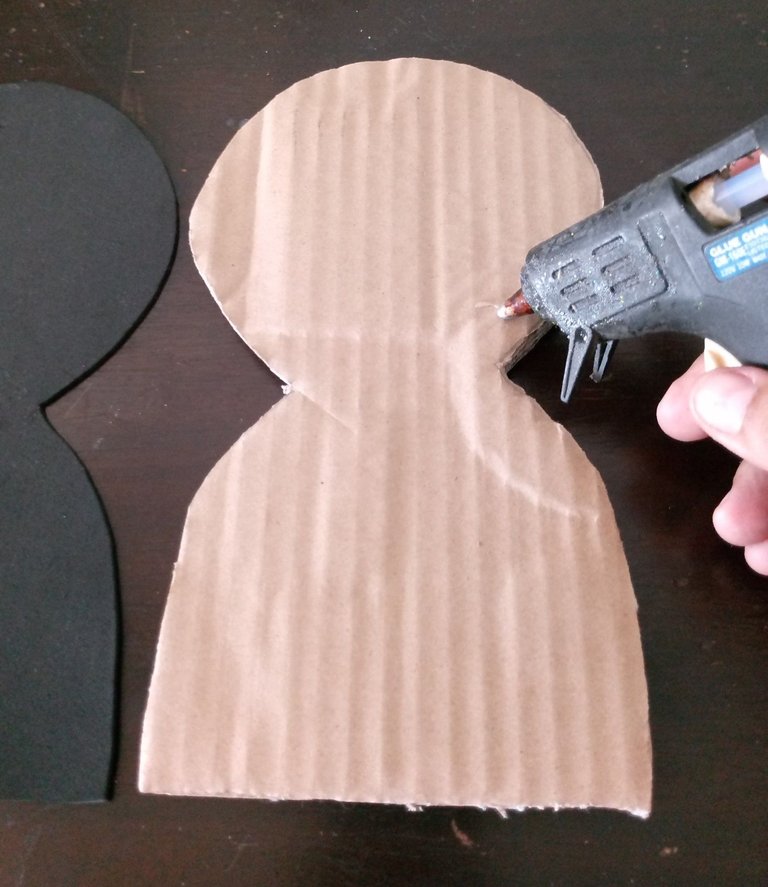
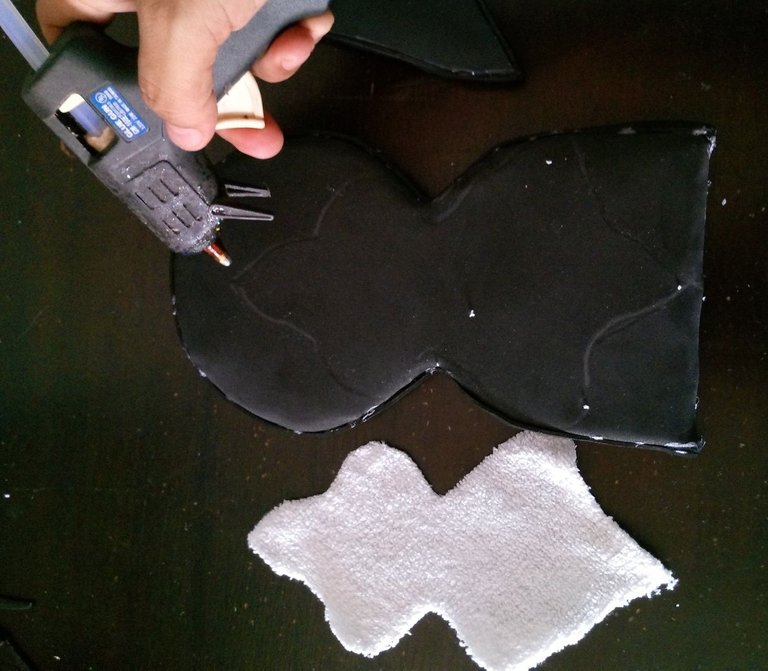
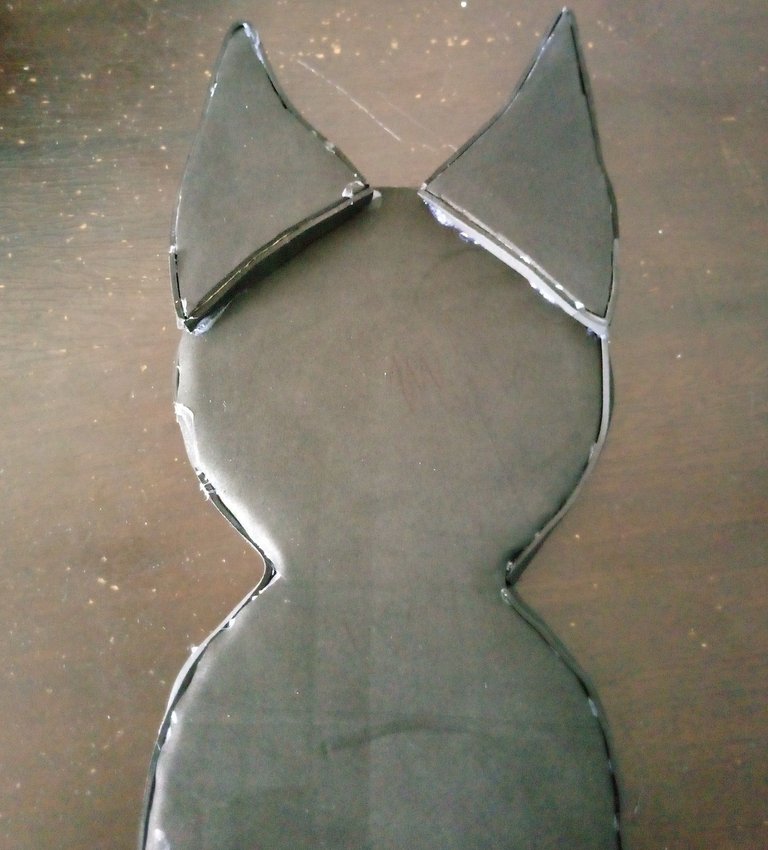
Luego de tener todas las piezas listas comenzaremos a darle mejor vista, lo primero que haremos será unir ambas piezas de cartón con silicona caliente, estando unidas pegaremos con la silicona ambas piezas de fomi por cada lado derecho y revés, teniendo ambas piezas pegadas cubriremos los bordes con algunas cintas de fomi negro que recortaremos en el proceso para cerrar las imperfecciones.
Following the previous steps we will use the piece of white fabric, the fabric I am using here is cotton stocking that has two sides, a smooth side and a cloth type side, we will draw a silhouette on the smooth side so that it looks better when cutting, this fabric will be placed on the cat silhouette to calculate the position where we will place it and to estimate how much space we want it to cover and according to these points we will make it.
After having all the pieces ready we will begin to give it a better view, the first thing we will do will be to join both pieces of cardboard with hot silicone, being joined we will glue with the silicone both pieces of fomi on each side right and back, having both pieces glued we will cover the edges with some black fomi ribbons that we will cut in the process to close the imperfections.
 |  |
|---|
 |  |
|---|
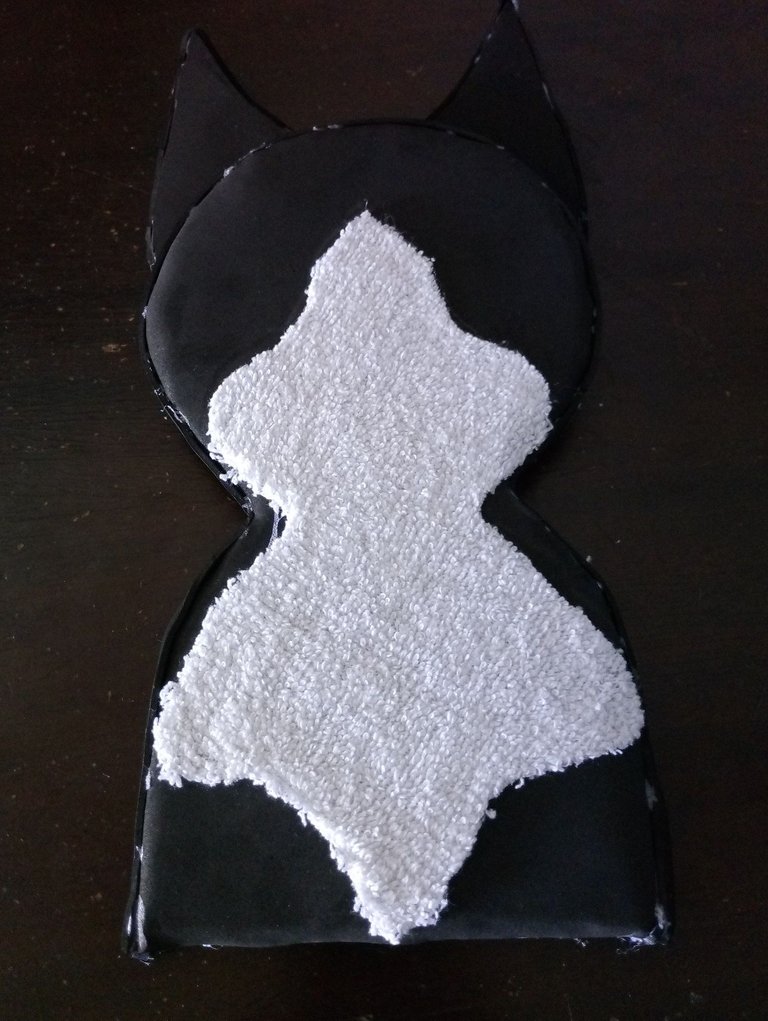
Seguiremos revistiendo las piezas como las orejas y la parte delantera del cuerpo, también vamos a posicionar las orejas, marcando con un lápiz vemos que tal se ven, luego las pegaremos con la silicona caliente.
We will continue to coat the pieces such as the ears and the front of the body, we will also position the ears, marking them with a pencil to see how they look, then we will glue them with hot silicone.
 |  |
|---|
 |  |
|---|
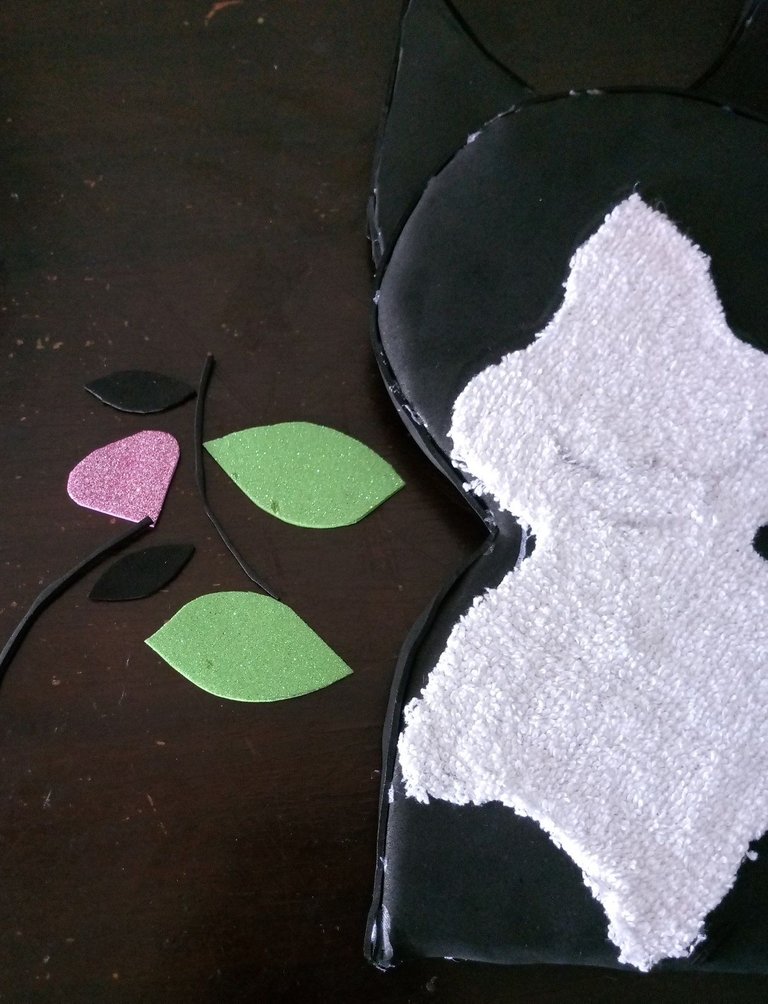
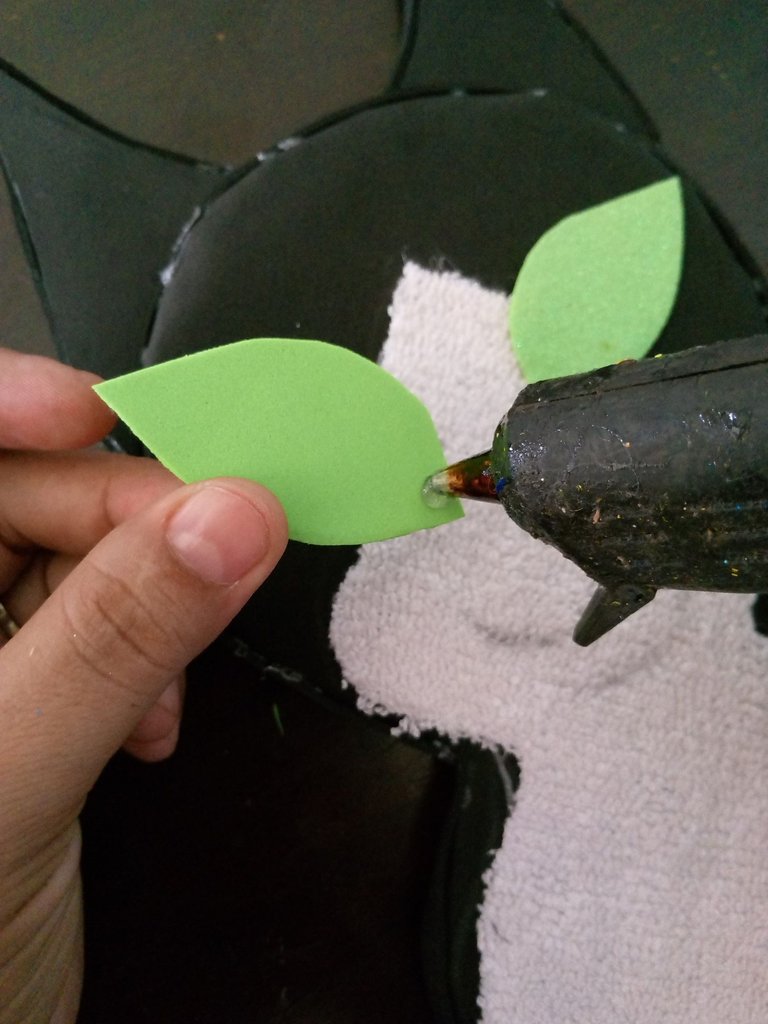
Las orejas van pegadas por la parte de atrás de la cabeza, después de tener listas las piezas principales pegadas, vamos a hacer lo que le da vida a este gatito como los ojos, nariz y boca, para los ojos utilizaremos un fomi del color de su preferencia o el que tengan en casa, yo utilice unos retazos de color verde manzana, sobre este retazo dibujaremos como unas hojas ovaladas, luego las recortaremos
También haremos unas hojas ovaladas más pequeñas que sería la pupila del centro del los ojos, para la nariz realizaremos un corte tipo diamante con fomi rosado, más unas tiras finas en fomi negro para los bigotes.
Antes de proceder a pegar cada una de las piezas que recortamos, dibujaremos la boca con un lápiz grafito, evitando que sea tan visible para evitar manchas sobre la tela de color blanco.
The ears are glued on the back of the head, after having ready the main pieces glued, we will do what gives life to this kitten as the eyes, nose and mouth, for the eyes we will use a fomi of the color of your preference or the one you have at home, I used some scraps of apple green color, on this scraps we will draw as oval leaves, then we will cut them out.
We will also make some smaller oval leaves that would be the pupil of the center of the eyes, for the nose we will make a diamond cut with pink fomi, plus some thin strips in black fomi for the whiskers.
Before proceeding to glue each of the pieces we cut out, we will draw the mouth with a graphite pencil, making sure it is not too visible to avoid stains on the white fabric.
 |  |
|---|
 |  |
|---|
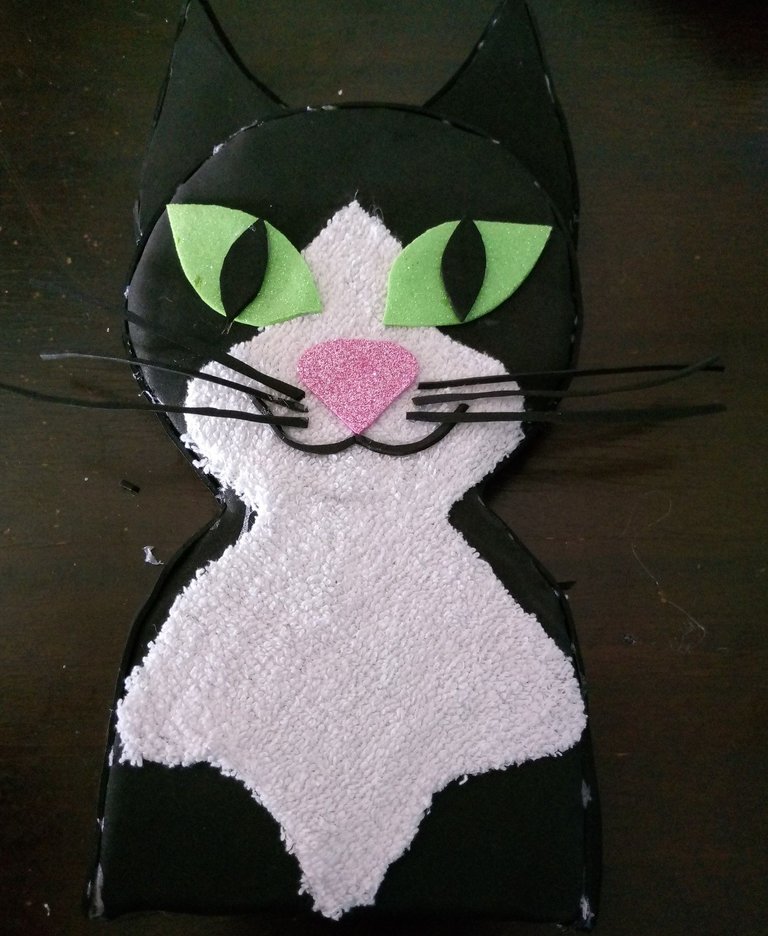
Seguido comenzaremos a pegar los ojos, nariz, boca y bigotes.
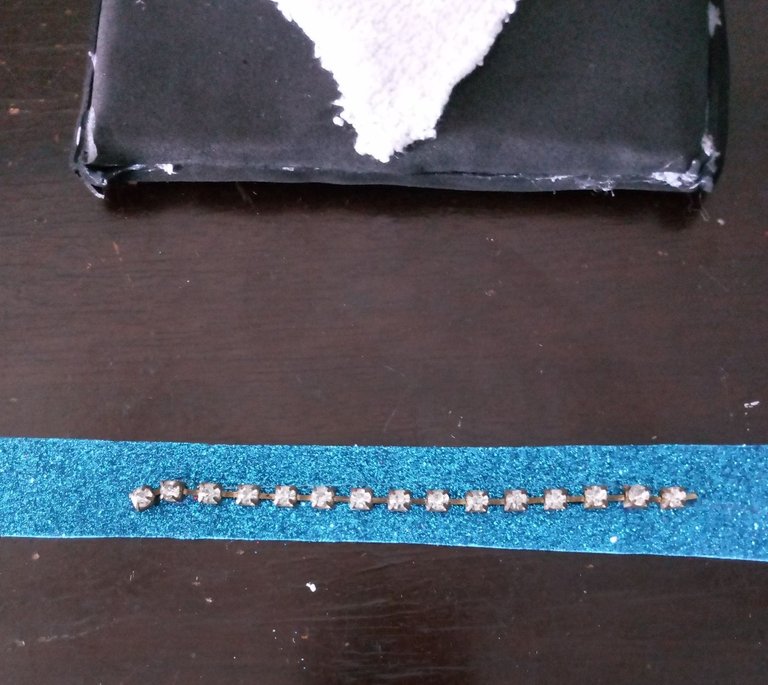
Faltaría un accesorio y es el collar para decorar el cuello del gato.
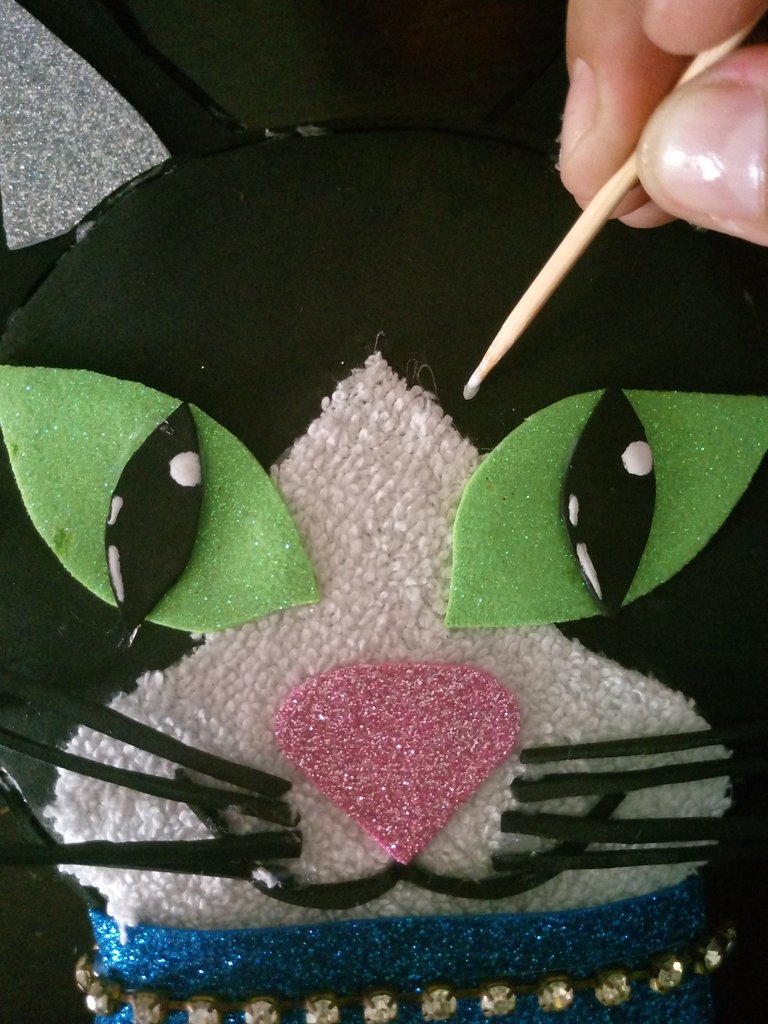
Sobre una cinta de silicona escarchada pegaremos una cadena para hacer más llamativo el collar, luego con la ayuda de un palo de brochetas o palo de altura, haremos las iluminaciones del rostro, las luces de los ojos y algunas pestañas.
Then we will start gluing the eyes, nose, mouth and whiskers.
One accessory is missing and that is the collar to decorate the cat's neck.
On a frosted silicone ribbon we will glue a chain to make the collar more eye-catching, then with the help of a skewer stick or height stick, we will make the illuminations of the face, the lights of the eyes and some eyelashes.
 |  |
|---|
 |  |
|---|
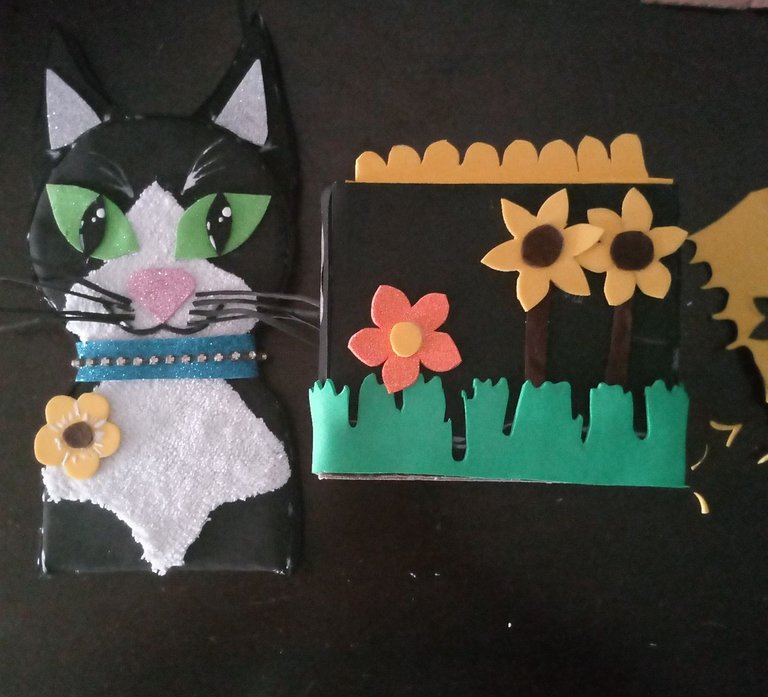
Después de haber culminado la silueta del gato, comenzaremos hacer las cajas para colocar los lápices, esta sería la otra parte del cuerpo del gato.
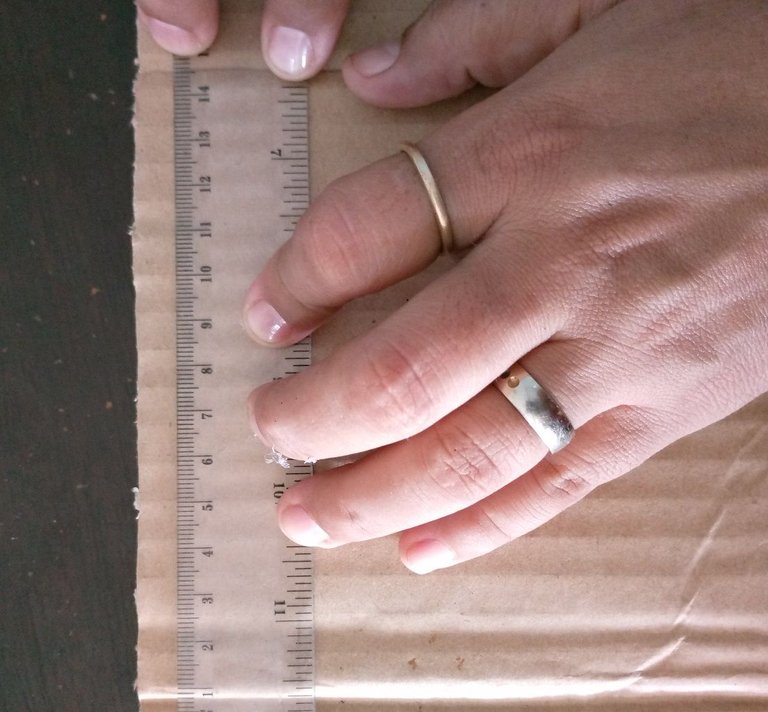
Lo primero que haremos será tomar las medidas de la parte inferior del cuerpo del gato, mediremos el ancho, en este caso tiene un ancho de 13 cm, pero vamos a medirlo a 14 cm para que al culminar la caja no se nos dificulte introducir el gato dentro de la caja.
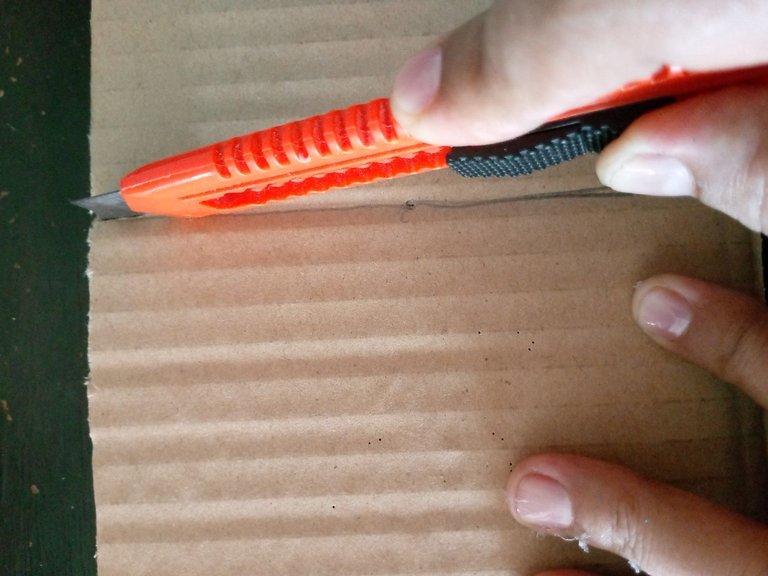
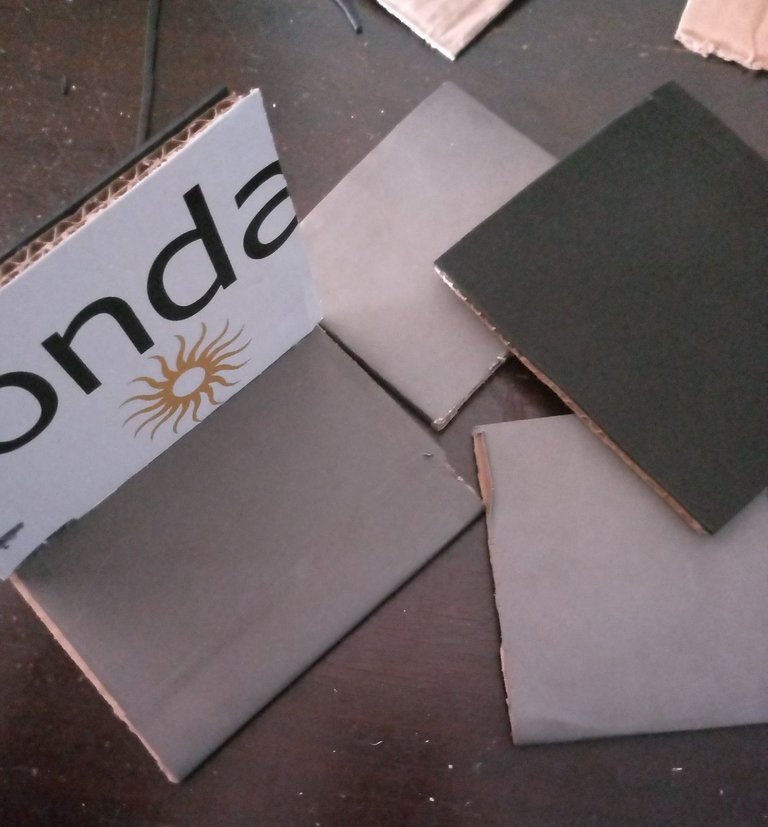
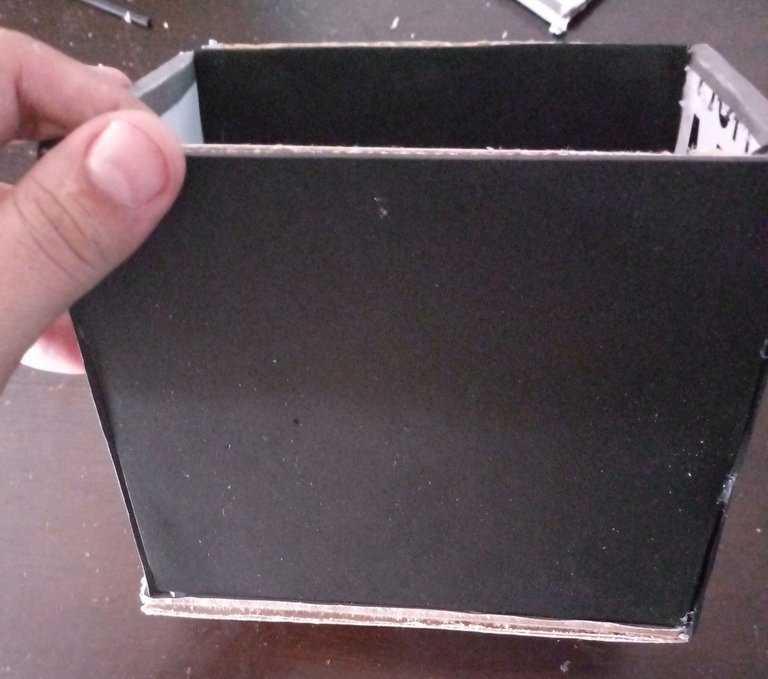
Haremos 4 rectángulos de cartón, 2 de 14x11cm y 2 de 10x11cm, los cuadros de 10 cm va a los lados que van pegados en una base de 14x11cm. Pegados todos los lados solo resta decorar la caja.
After having completed the silhouette of the cat, we will start making the boxes to place the pencils, this would be the other part of the cat's body.
The first thing we will do is to take the measurements of the lower part of the cat's body, we will measure the width, in this case it has a width of 13 cm, but we will measure it to 14 cm so that when we finish the box it will not be difficult to introduce the cat inside the box.
We will make 4 rectangles of cardboard, 2 of 14x11cm and 2 of 10x11cm, the squares of 10 cm goes to the sides that are glued on a base of 14x11cm. Once all the sides are glued, the only thing left to do is to decorate the box.
 |  |
|---|
 |  |
|---|
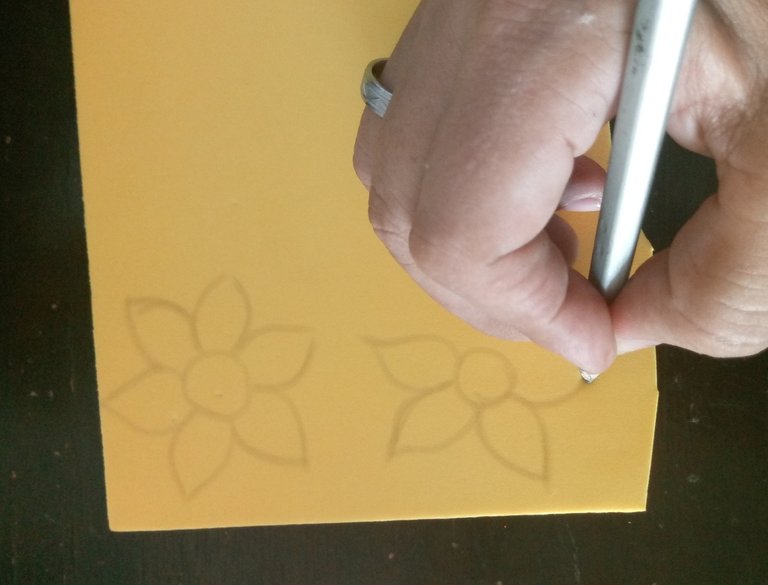
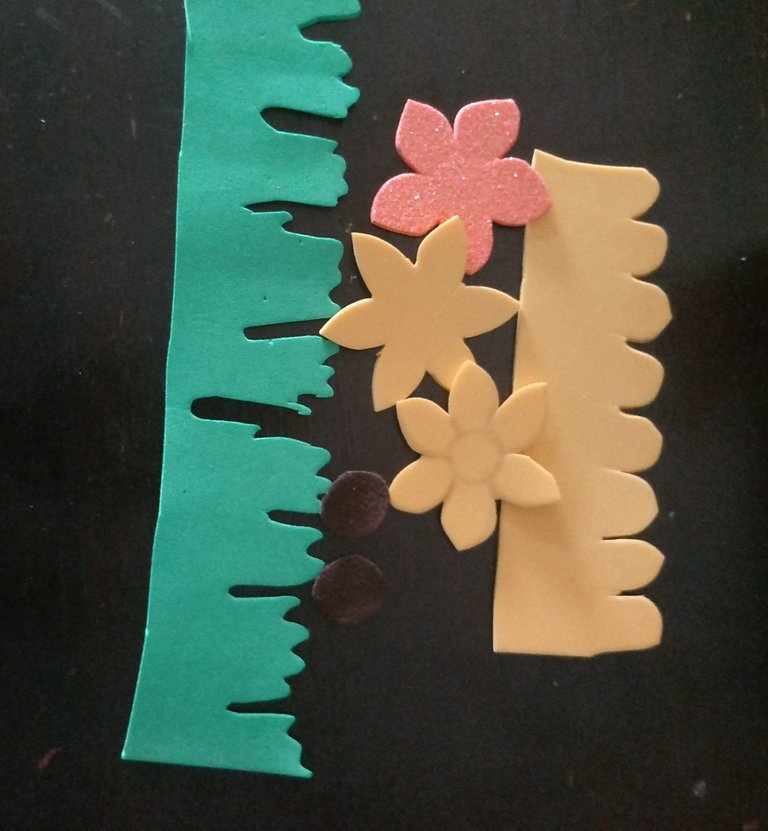
Para hacer la decoración usaremos fomi del color de su preferencia, dibujaremos flores estilo girasoles, le haremos unos tallos y pegaremos junto con algunos detalles estilo plantas, que pegaremos en la parte inferior de la caja y sobre la parte superior simularemos como varios, pétalos de color amarillo como pétalos de girasoles, además pegaremos una flor al cuerpo del gato como accesorio.
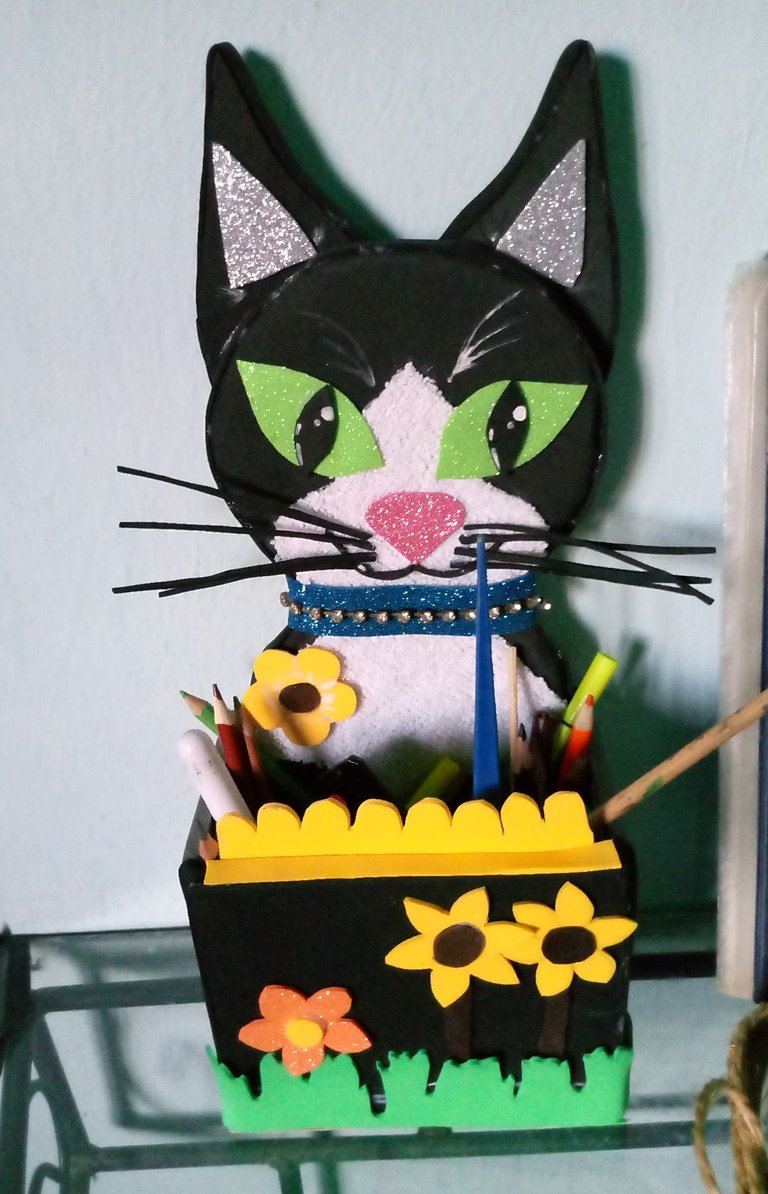
En este paso culmina mi publicación de hoy, espero que les agrade mucho y se animen hacer un portalápiz como este, es decorativo para colocarlo en la mesa de tareas, para que los niños y también los adultos amantes de los gatos lo disfruten y se animen en darle mucho uso a la escritura ahora con este porta lápices ya no habrá excusa de que no sé donde están los lápices. jajajaja
Gracias por acompañarme mis queridos amigos, los espero en otra de mis publicaciones.
To make the decoration we will use fomi of the color of your choice, we will draw sunflower style flowers, we will make some stems and paste along with some plant style details, which we will paste on the bottom of the box and on the top we will simulate as several, yellow petals as sunflower petals, we will also paste a flower to the body of the cat as an accessory.
This step culminates my publication today, I hope you like it very much and encourage you to make a pencil holder like this, it is decorative to place it on the homework table, so that children and also adult cat lovers enjoy it and encourage them to give much use to writing now with this pencil holder there will be no excuse that I do not know where the pencils are. hahahaha
Thanks for joining me my dear friends, I hope to see you in another of my publications.
social networks / redes sociales
![]()
![]()
Traductor Deepl
Translated Deepl
Ediciones Canva
Editions Canva


Necesito uno de estos y precisamente uno así me quedaría perfecto porque mi gata también es negra jajaja. Te quedó muy bonito! Encantador!
!discovery 30
Thank you, @gaboamc2393 for your appreciated comment, hahahaha, well your cat may fall in love and then she will be disappointed because this cat will only be looking at her, besides with all the colors she uses to have fun.
Gracias @gaboamc2393 por tu apreciado comentario, jajajaja, bueno puede que tu gata se enamore y luego se desilusione porque este gato solo la estará mirando a ella, además con todos los colores que usa para divertirse.😃🤗
The pencil holder is really beautiful and I like the cat themed design
!diy.
You can query your personal balance by
!DIYSTATSwow that looks really great thanks for sharing.
Que bonita cadena de strass tiene el gatito😁😊. tiene colores muy vivos está muy bonito!
Thank you, honey, I'm glad you liked it, my pencil holder cat is quite sturdy and very practical.🙂
This post was shared and voted inside the discord by the curators team of discovery-it
Join our Community and follow our Curation Trail
Discovery-it is also a Witness, vote for us here
Delegate to us for passive income. Check our 80% fee-back Program
Muy creativa te quedó hermoso feliz tarde.
Thank you very much, my dear, how nice to know that you liked it.😊🤗
It was a pleasure to visit you friend, I loved it, greetings and blessings.
Esta hermoso el portalápiz, los gatitos blanco y negro son muy bellos, bueno elección de color. Saludos 😊
It is an honor to have your appreciated appraisal of my art,
thank you friend.🙂
Te quedó muy bello el organizador, muy práctico, te felicito, gracias por compartir. Suerte en el concurso y feliz inicio de semana 🐱💕
Thank you very much for your encouraging comments.
Le ha quedado bastante bueno, los gatos siempre son seres muy queridos.
Gracias, querido @soltecno, lo hice con mucho entusiasmo, los gatos son una dulzura, los adoro.❤️🤗
Me encantó el resultado final, es muy lindo y sobre todo útil 😊 hasta me estoy sintiendo inspirada para hacer uno parecido para mi. Felicidades y suerte!