

Antes de comenzar con el desarrollo de mi publicación, es de mi agrado darles un gran saludo a todos mis queridos amigos que comparten día a día sus proyectos en las comunidades amigas.
Por fin llego el día que tanto quería, y es que tenía muchos deseos de participar en este concurso del mes de las flores que nos está presentando la comunidad de @diyhub en estos momentos.
Casi culminando el mes le doy gracias a Dios por permitirme realizar este proyecto, me he encontrado mal de salud, he incluso he estado hospitalizada, pero siempre mantuve la esperanza de poder participar y aquí estoy participado en este hermoso proyecto, uno de mis preferidos, el cual se trata sobre las flores.
¿A quién no le gustan las flores?
Anoche estuve trabajando hasta muy tarde para culminar y poder participar, así que utilice unos puntos de bordados muy fáciles, pero en el proceso se me presentaron algunas dificultades, debido a que la tela que estuve utilizando era de un tejido muy cerrado, no se me hizo fácil, pero quiero decirles que me encanta bordar y disfrute mucho la elaboración de este trabajo.
Las fotografías que verán a continuación, fueron tomadas con mi teléfono modelo Alcatel_5044R.

Before I begin with the development of my publication, it is my pleasure to give a big greeting to all my dear friends who share their projects every day in the friendly communities.
Finally, the day that I wanted so much has arrived, and I really wanted to participate in this contest of the month of flowers that the @diyhub community is presenting us right now.
Almost culminating the month I thank God for allowing me to do this project, I have been in bad health, I have even been hospitalized, but I always kept the hope to participate and here I am participating in this beautiful project, one of my favorites, which is about flowers.
Who doesn't like flowers?
Last night I was working very late to finish and be able to participate, so I used some very easy embroidery stitches, but in the process I had some difficulties, because the fabric I was using was of a very tight weave, it was not easy for me, but I want to tell you that I love embroidery and I enjoyed very much the elaboration of this work.
The pictures you will see below were taken with my Alcatel_5044R phone.

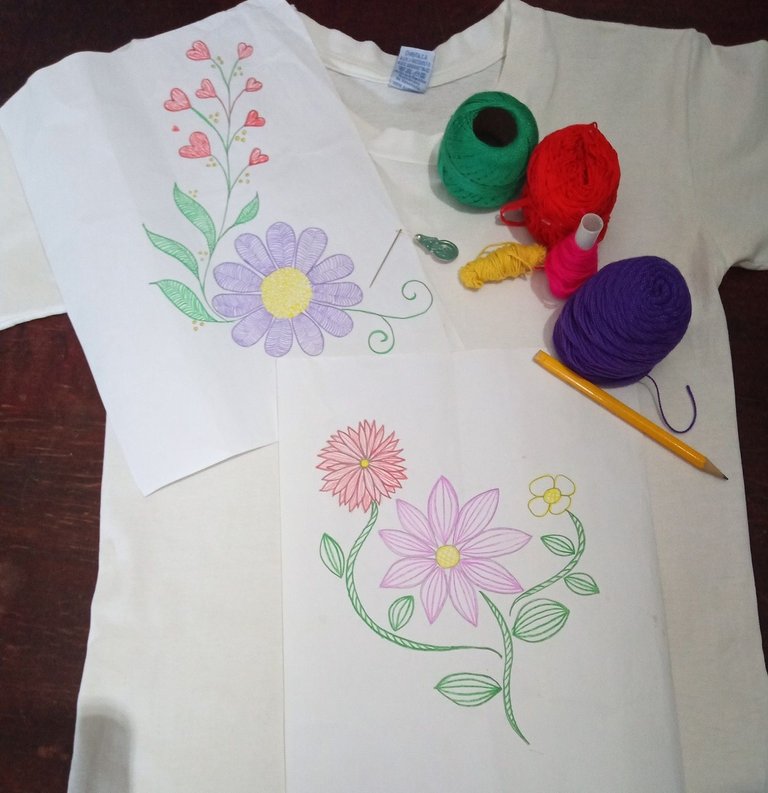
Materiales:
Pabilos de seda de color rojo, verde, fucsia, amarillo y morado.
Lápiz.
Aguja.
Dibujos.
Franela de algodón.
Tijera.
Materials:
Red, green, fuchsia, fuchsia, yellow and purple silk wicks.
Pencil.
Needle.
Drawings.
Cotton flannel.
Scissors.
 |  |  |
|---|
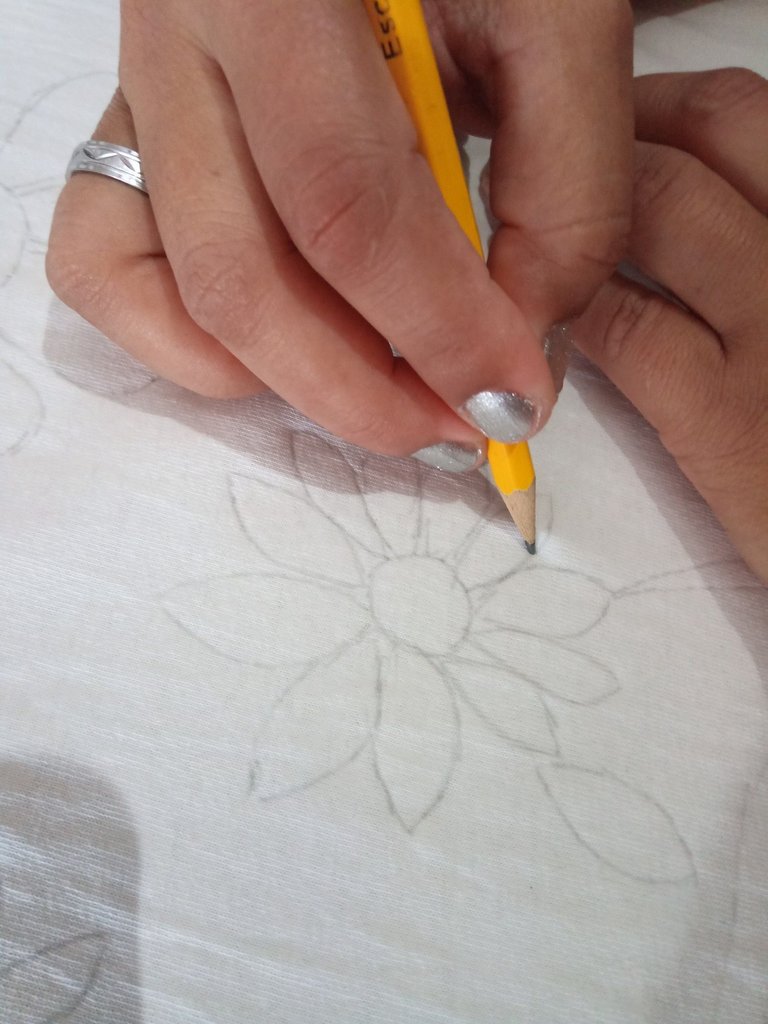
Para comenzar a realizar este diseño de bordado utilice una franela de color blanco de tela de algodón, donde dibuje sobre la parte delantera de la franela unas flores que había dibujado días antes para realizar este proyecto, estos dibujos son de mi autoría, ya que también me gusta el arte de dibujos, estas flores me parecieron ideales para estampar y bordar.
Así que mirando los dibujos de las flores, comencé a dibujar sobre la franela las flores, haciéndola lo más parecida posible a las que tenía dibujadas en las hojas, y así es como comienzo el primer paso para bordar.
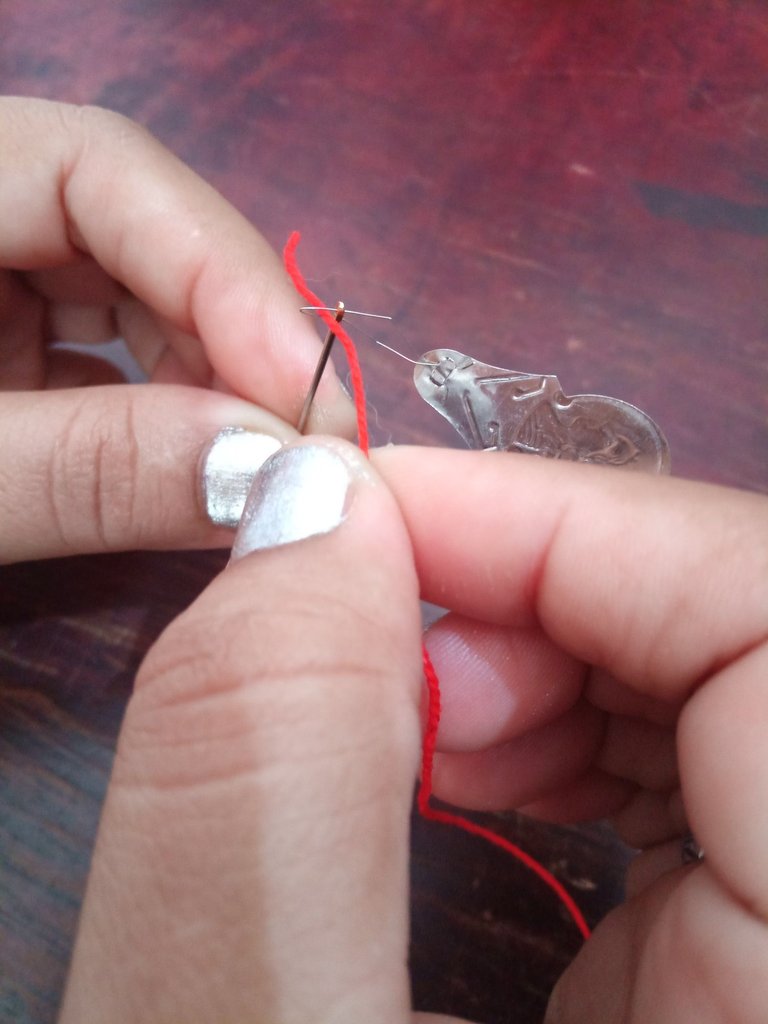
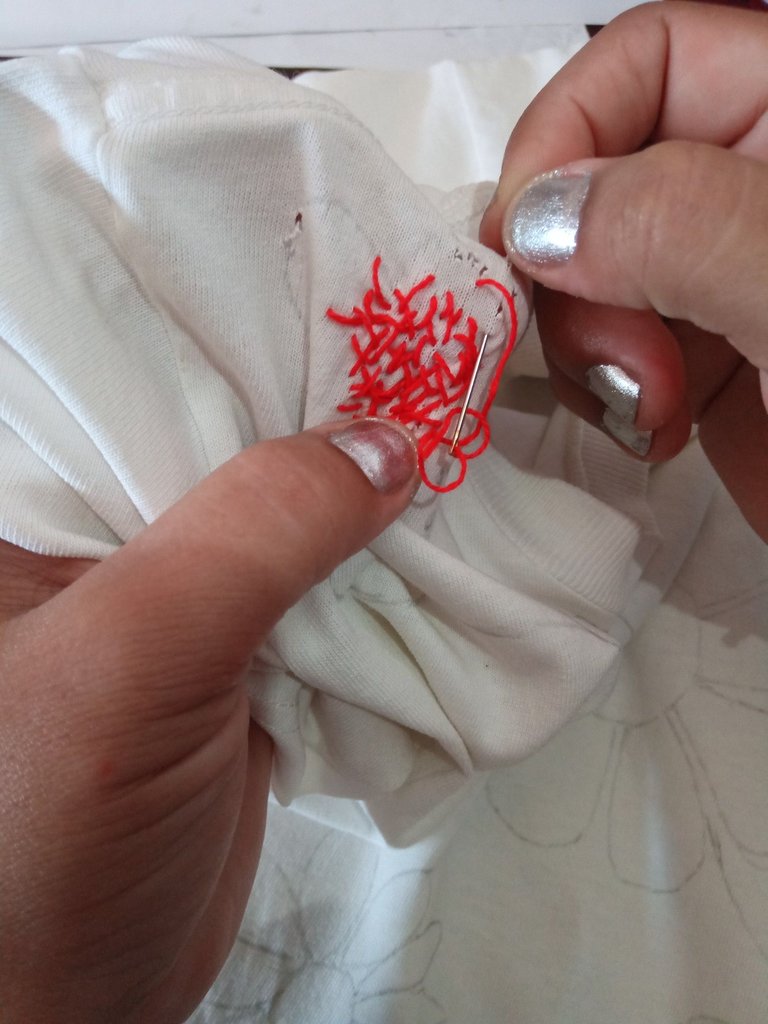
Luego inserto la aguja con un pabilo de seda color rojo con la ayuda con un accesorio que me facilito la inserción de este pabilo en el orificio de la aguja, ya que es un poco grueso y se me dificultaba hacerlo directamente.
Una vez teniendo este pabilo de 50 centímetros de largo insertado en la aguja, comienzo a dar las primeras puntadas de bordado.
To begin to make this embroidery design I used a white flannel of cotton fabric, where I drew on the front of the flannel some flowers that I had drawn days before to make this project, these drawings are of my authorship, since I also like the art of drawings, these flowers seemed ideal for stamping and embroidery.
So looking at the drawings of the flowers, I began to draw on the flannel the flowers, making it as similar as possible to the ones I had drawn on the leaves, and that's how I start the first step to embroider.
Then I insert the needle with a red silk wick with the help of an accessory that made it easier for me to insert this wick into the needle hole, since it is a little thick and it was difficult for me to do it directly.
Once I have these 50 centimeters long wick inserted in the needle, I start to make the first embroidery stitches.
 |  |  |
|---|
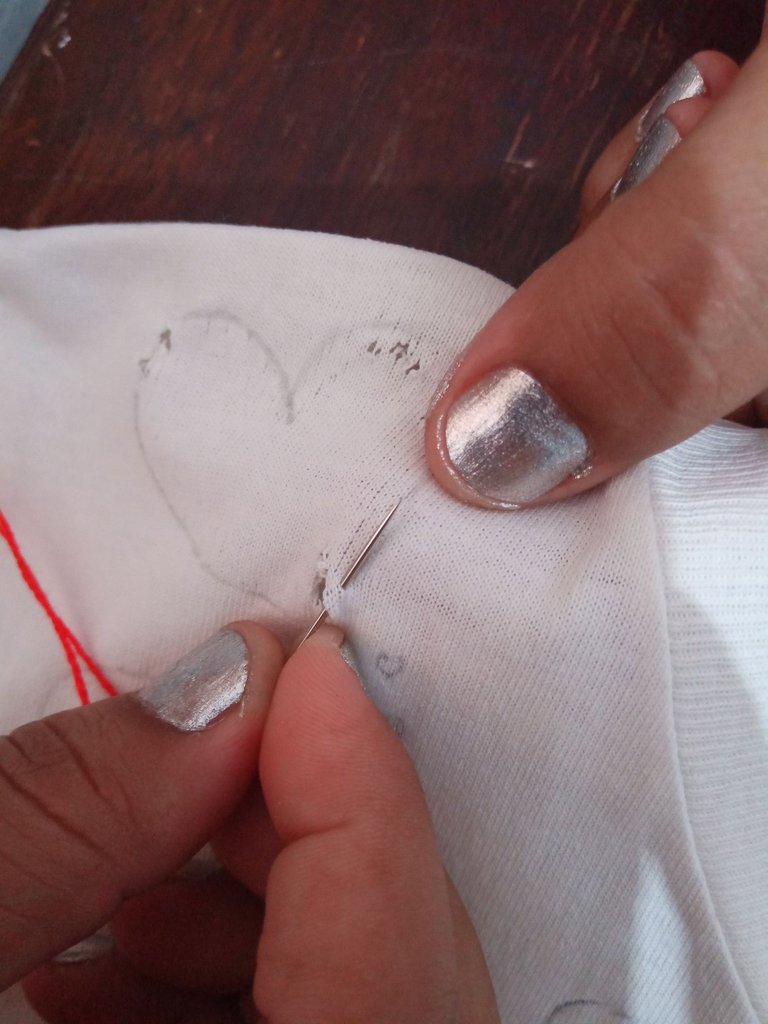
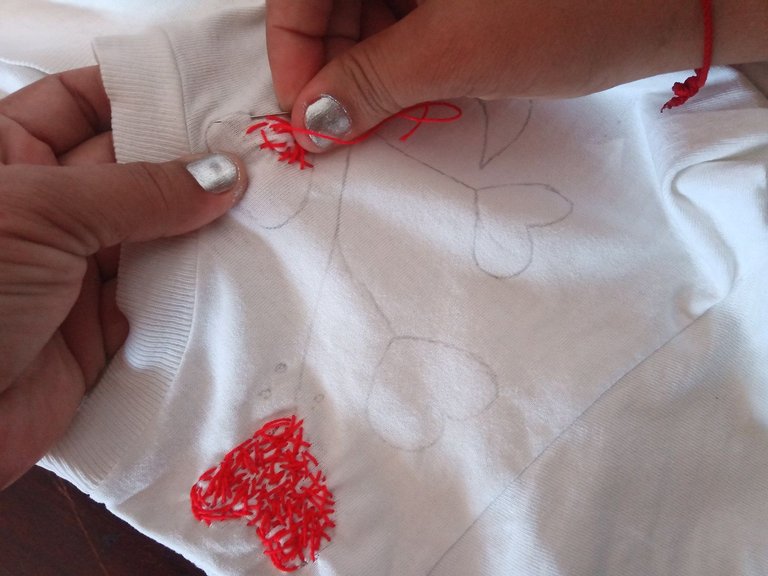
Comienzo en la parte superior bordando los corazones, aprovechando de cubrir algunas imperfecciones como orificios que tenía esta franela.
Los puntos que utilice para bordar estos corazones se llaman punto de cruz al azar, con estos puntos rellene los 4 corazones con el pabilo de color rojo hasta culminar cada uno de ellos.
Este punto se realiza haciendo una puntada, como el nombre lo dice, al azar entre cruces y formas de (X), podemos hacerlo separado o un poco más cerrado dependiendo del resultado que queramos obtener, en este caso, yo los realice semicerrados para cubrir las imperfecciones que ya les he mencionado, quedando muy disimuladas con un resultado satisfactorio.
I start on the upper part embroidering the hearts, taking advantage of covering some imperfections like holes that this flannel had.
The stitches I used to embroider these hearts are called random cross stitch, with these stitches I filled the 4 hearts with the red wick until each one of them was completed.
This stitch is made by making a stitch, as the name says, randomly between crosses and (X) shapes, we can do it separated or a little more closed depending on the result we want to obtain, in this case, I made them semi-closed to cover the imperfections that I have already mentioned, being very well concealed with a satisfactory result.
 |  |  |
|---|
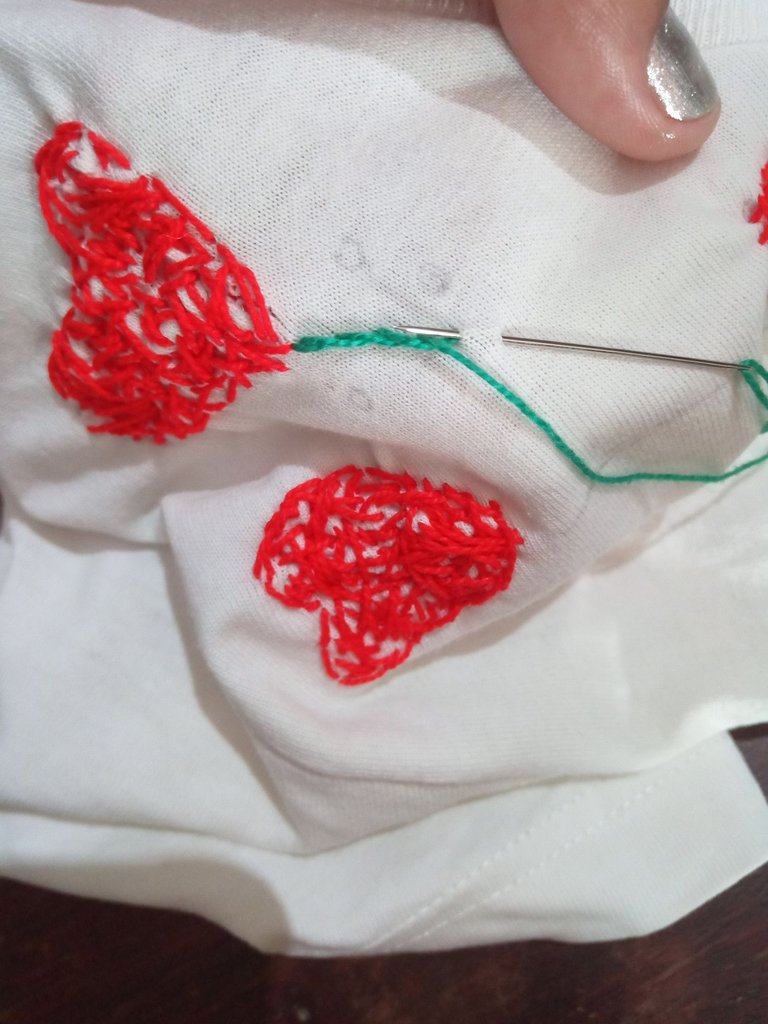
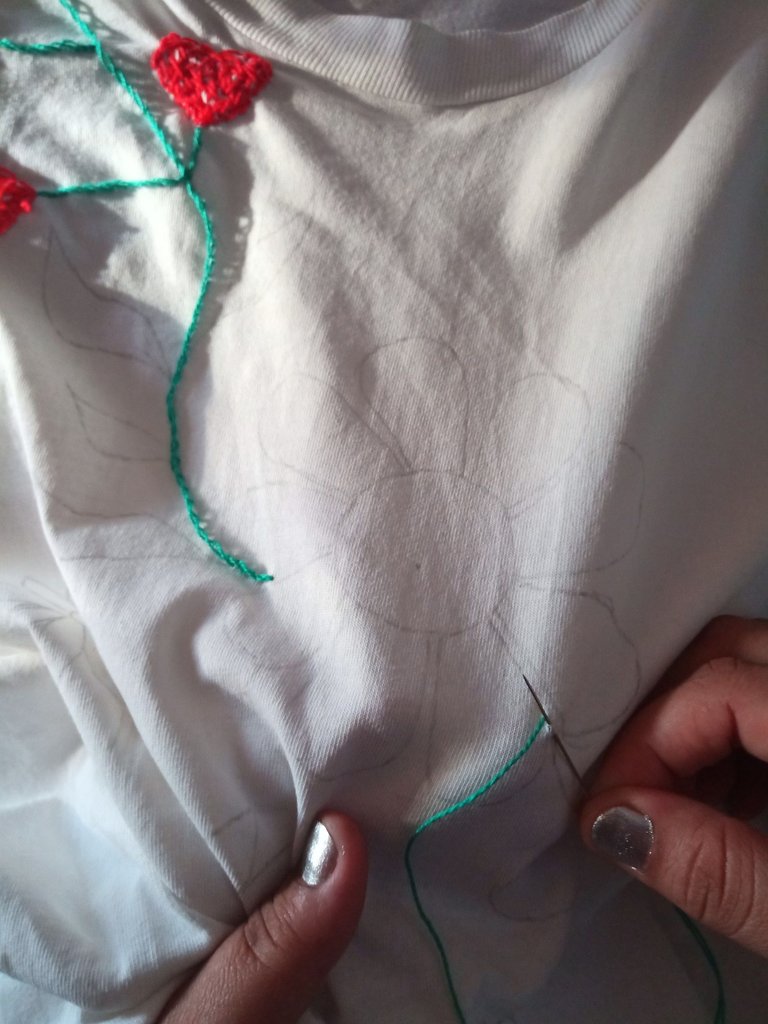
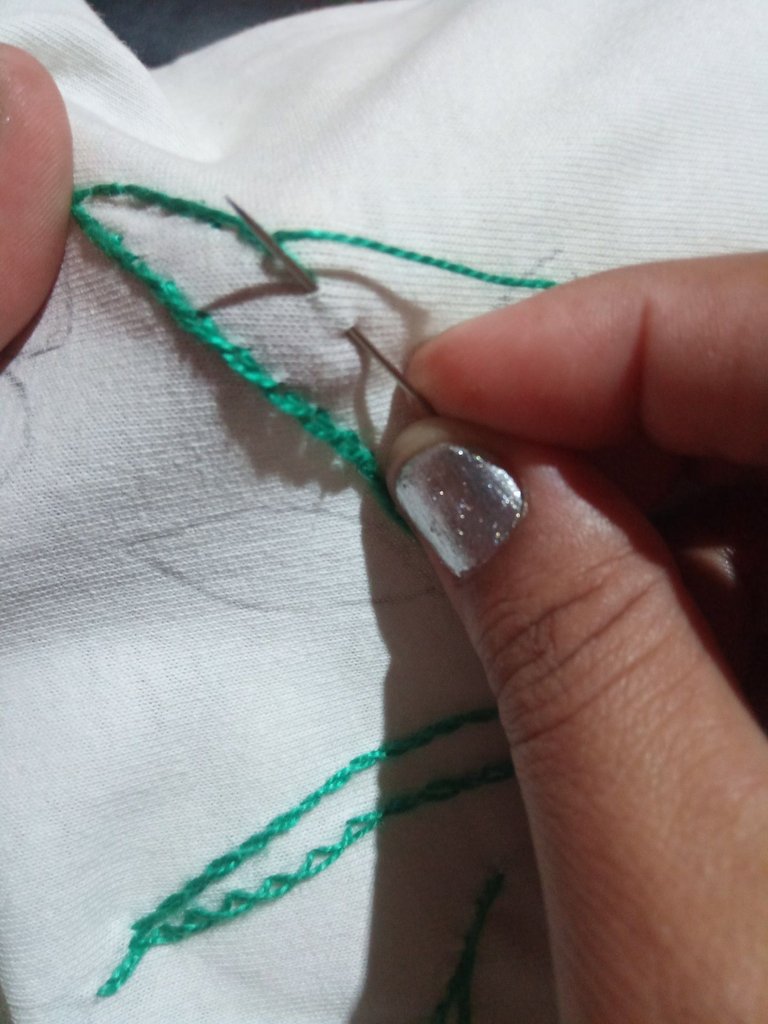
En el siguiente paso continuación, comencé a utilizar el pabilo de color verde donde me dedique a bordar los tallos y las hojas de este bordado, para los tallos utilice el punto de contorno.
Así como para algunas hojas donde también borde las 2 hojas del tallo superior con los siguientes puntos, rellene las 2 hojas con el punto satinado y las 2 hojas inferiores que están rellenas, las borde una con puntos satinado con borde de punto de contorno y la otra la rellene con punto de contorno de relleno, las otras dos inferiores las borde con punto atrás, este es un punto muy sencillo pero con un lindo acabado.
De esta manera culminé el bordado de los tallos y las hojas de las flores.
In the next step, I started using the green colored wick where I embroidered the stems and leaves of this embroidery, for the stems I used the outline stitch.
As well as for some leaves where I also bordered the 2 leaves of the upper stem with the following stitches, I filled the 2 leaves with the satin stitch and the 2 lower leaves that are filled, I bordered one with satin stitch with contour stitch border and the other one I filled with filling contour stitch, the other two lower leaves I bordered with back stitch, this is a very simple stitch but with a nice finish.
In this way, I finished the embroidery of the stems and leaves of the flowers.
 |  |  |
|---|
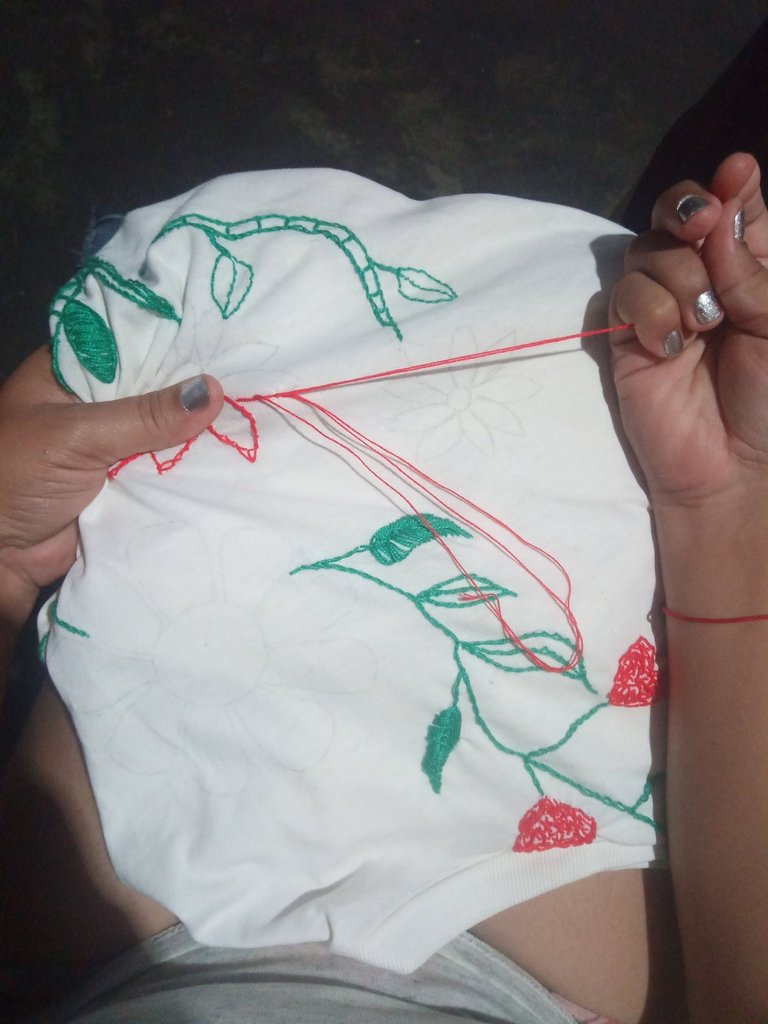
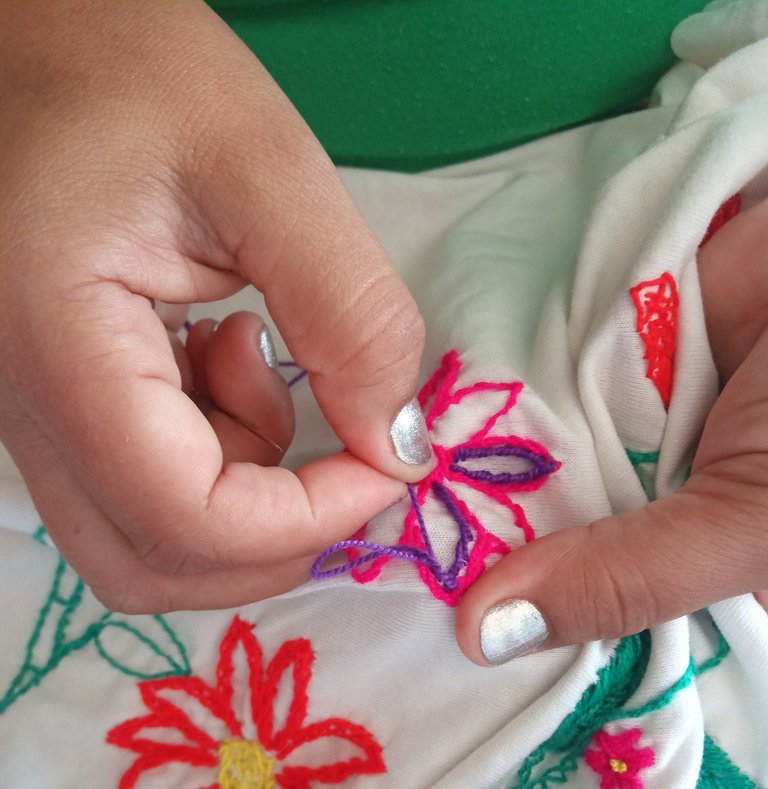
En este paso comienzo a bordar lo más bello que son las flores, estas las borde con el punto de contorno de doble línea, haciendo primero una línea por toda la forma, seguida de esta coloque la siguiente línea muy cerca a la anterior para hacer el efecto de doble línea, esto le da mayor volumen y belleza al bordado.
Culminando con este punto de contorno de cada uno de los pétalos de la flor con el pabilo de color amarillo, rellene el centro con punto de cruz al azar, bordeando con punto de contorno.
In this step I begin to embroider the most beautiful thing which are the flowers, these are bordered with the double line outline stitch, making first a line all over the shape, followed by this I place the next line very close to the previous one to make the effect of double line, this gives more volume and beauty to the embroidery.
Finishing with this outline stitch of each of the petals of the flower with the yellow colored wick, fill in the center with cross stitch at random, bordering with outline stitch.
 |  |  |
|---|
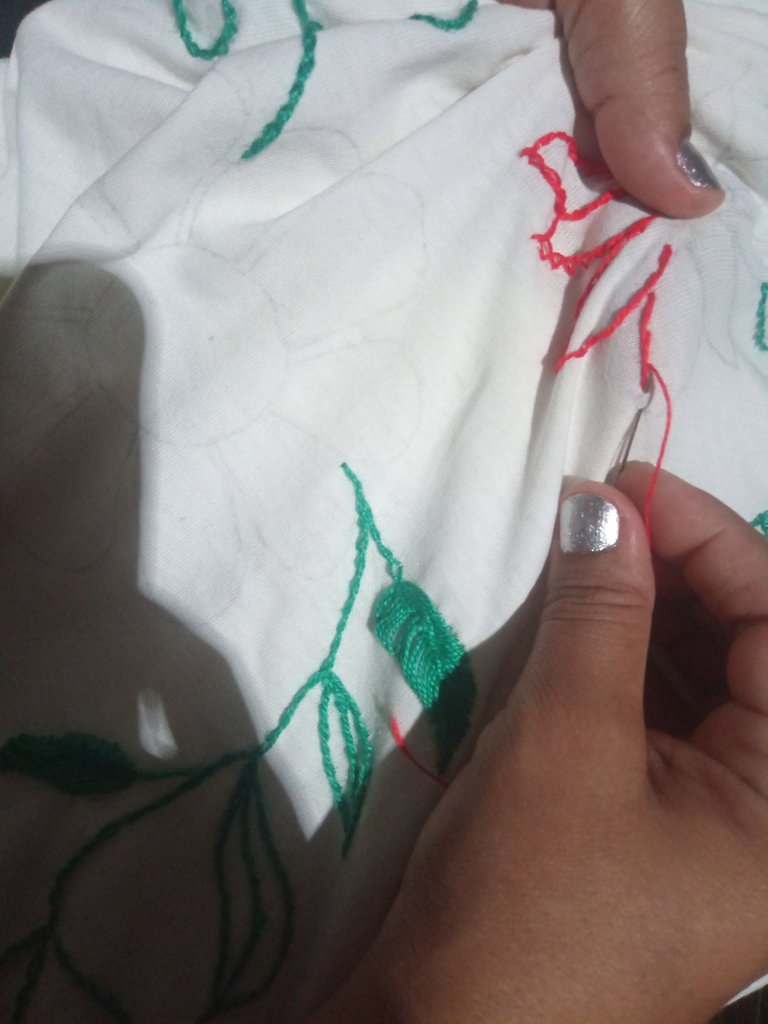
Continuó bordando las flores utilizando punto de contorno de doble línea con dos tonos de color, fucsia y morado violeta, terminando con esta flor, utilice hilo de color amarillo para rellenar el centro de la flor con punto de contorno y por el centro punto de cruz al azar, la flor de color amarillo la borde con una línea de punto de contorno por cada pétalo y el centro de la misma manera con punto de cruz al azar.
Para el bordado de la flor morado y violeta utilicé punto rumano separado, este punto se realiza haciendo una puntada de derecha a izquierda con un punto centrado seguido de una puntada del otro extremo, tomando en cuenta el tamaño del pétalo y siguiendo el diseño fui trazando cada una de las puntadas hasta lograr la forma que deseamos obtener.
Para el centro de la flor me gusto mucho el punto cruz al azar debido a que da un bonito aspecto, es muy fácil y sencillo de realizar, todos estos puntos son sumamente sencillos para hacer un bordado rápido, también en el tallo superior borde unas pequeñas margaritas de color fucsia con punto satinado recto y un punto centrado de color amarillo.
Continued embroidering the flowers using double line outline stitch with two shades of color, fuchsia and purple violet, finishing with this flower, use yellow color thread to fill the center of the flower with outline stitch and by the center random cross stitch, the yellow color flower the border with a line of outline stitch for each petal and the center in the same way with random cross stitch.
For the purple and violet flower embroidery I used separate Romanian stitch, this stitch is made by making a stitch from right to left with a centered stitch followed by a stitch from the other end, taking into account the size of the petal and following the design I traced each of the stitches until I achieved the shape we want to obtain.
For the center of the flower I really liked the random cross stitch because it gives a nice look, it is very easy and simple to make, all these stitches are very simple to make a quick embroidery, also in the upper stem I bordered some small fuchsia daisies with a straight satin stitch and a yellow centered stitch.
 |  |
|---|
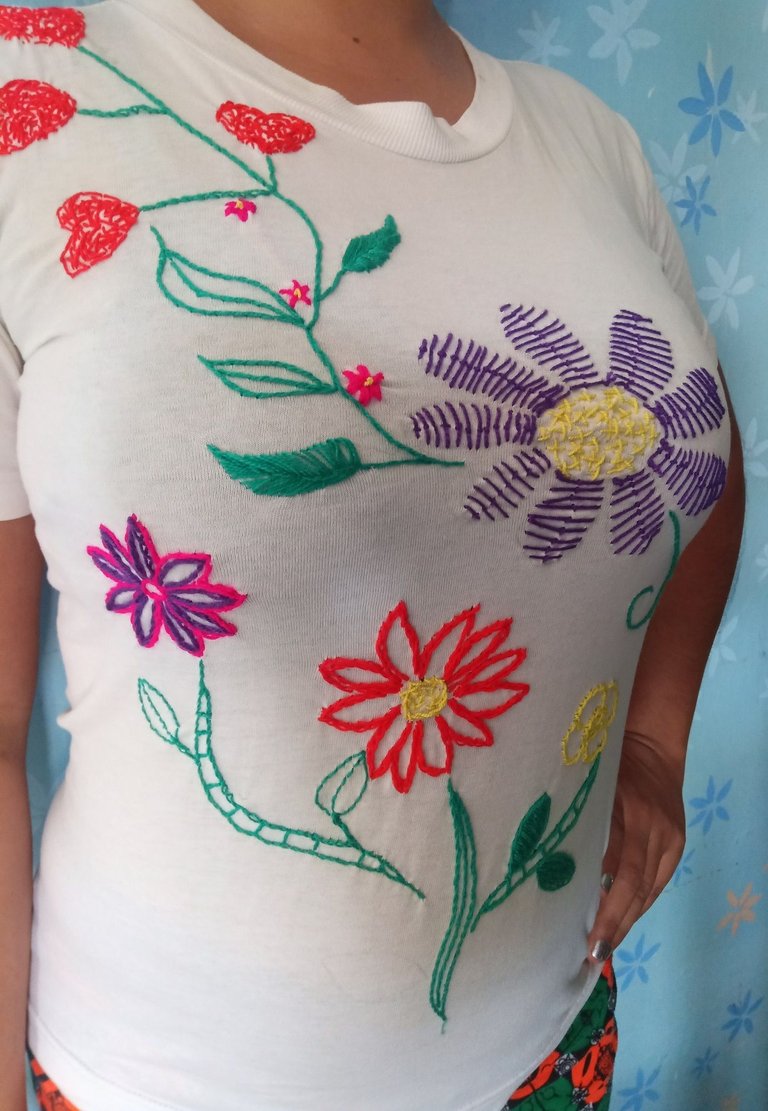
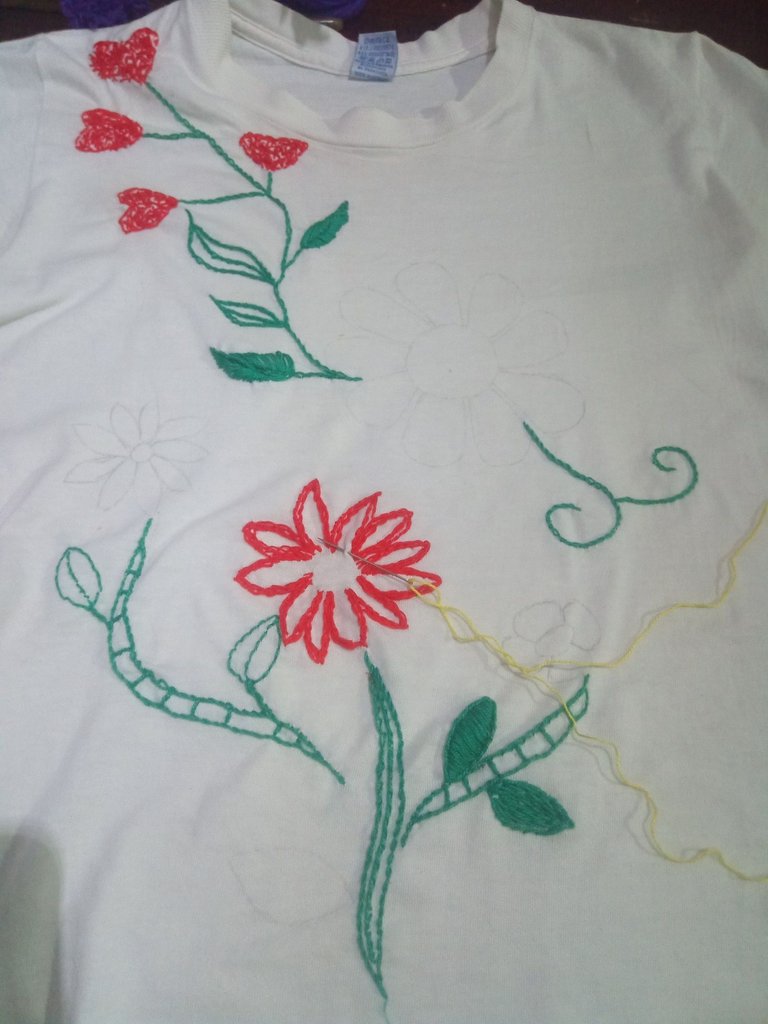
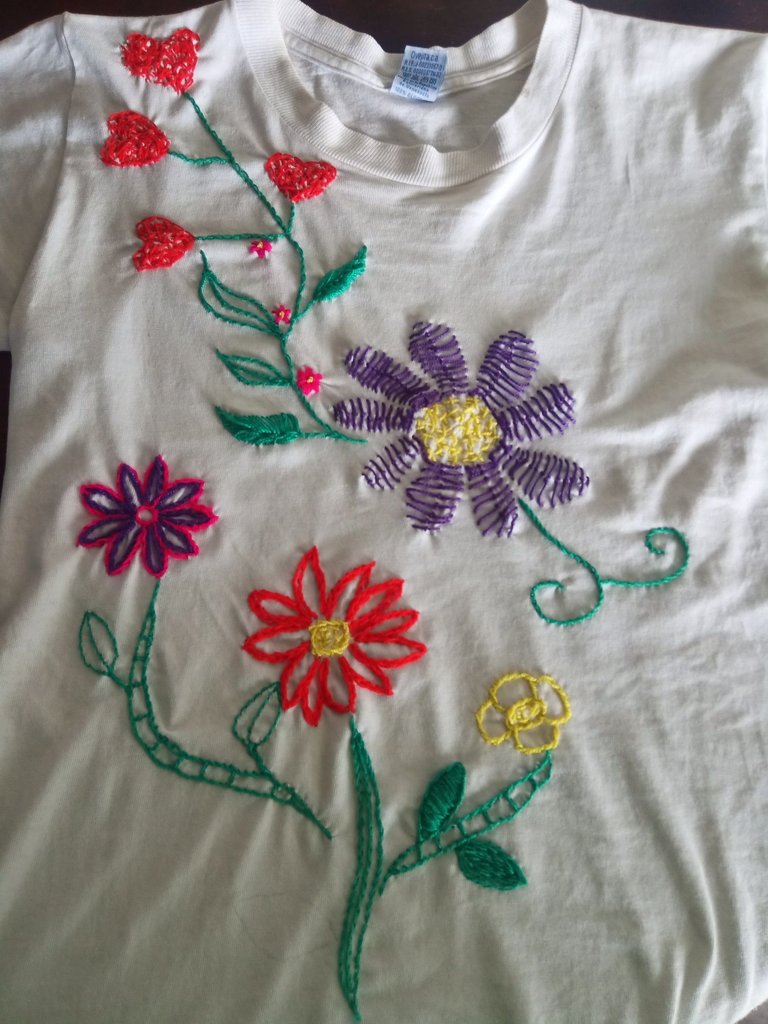
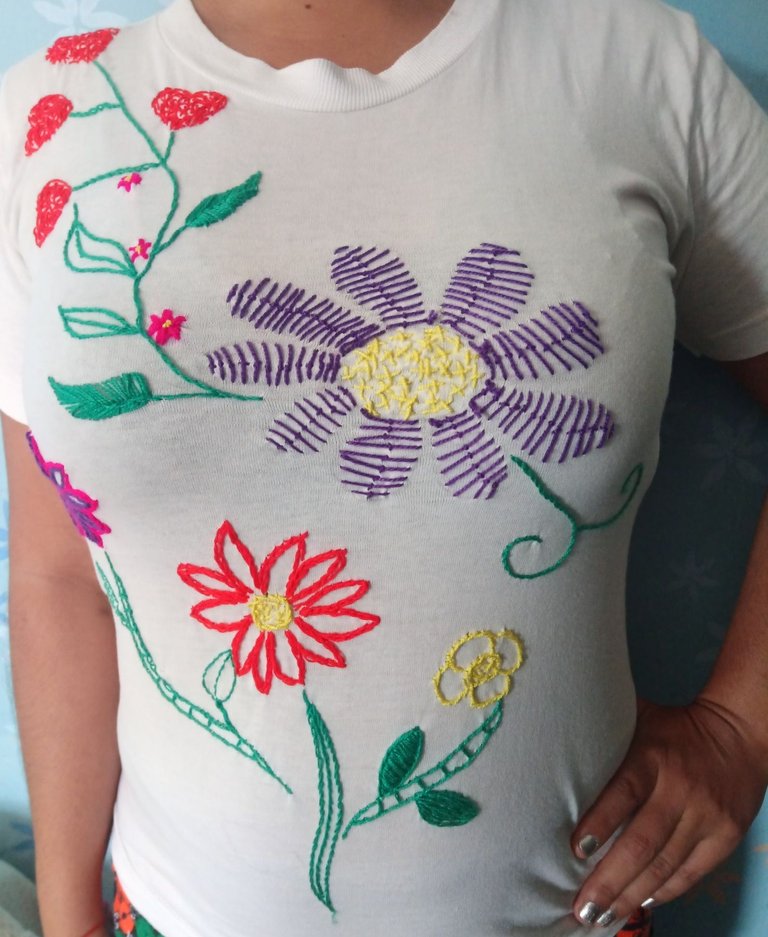
Este es el resultado de mi proyecto, espero que lo disfruten, que les pueda gustar mucho, hice este bordado para mí, pero mi hija se enamoró de la franela y me la quito, y como decirle que no, claro a ella le luce mucho más que yo, ya que es más delgada y holgada, más adelante bordaré una para mí y la compartiré con ustedes.
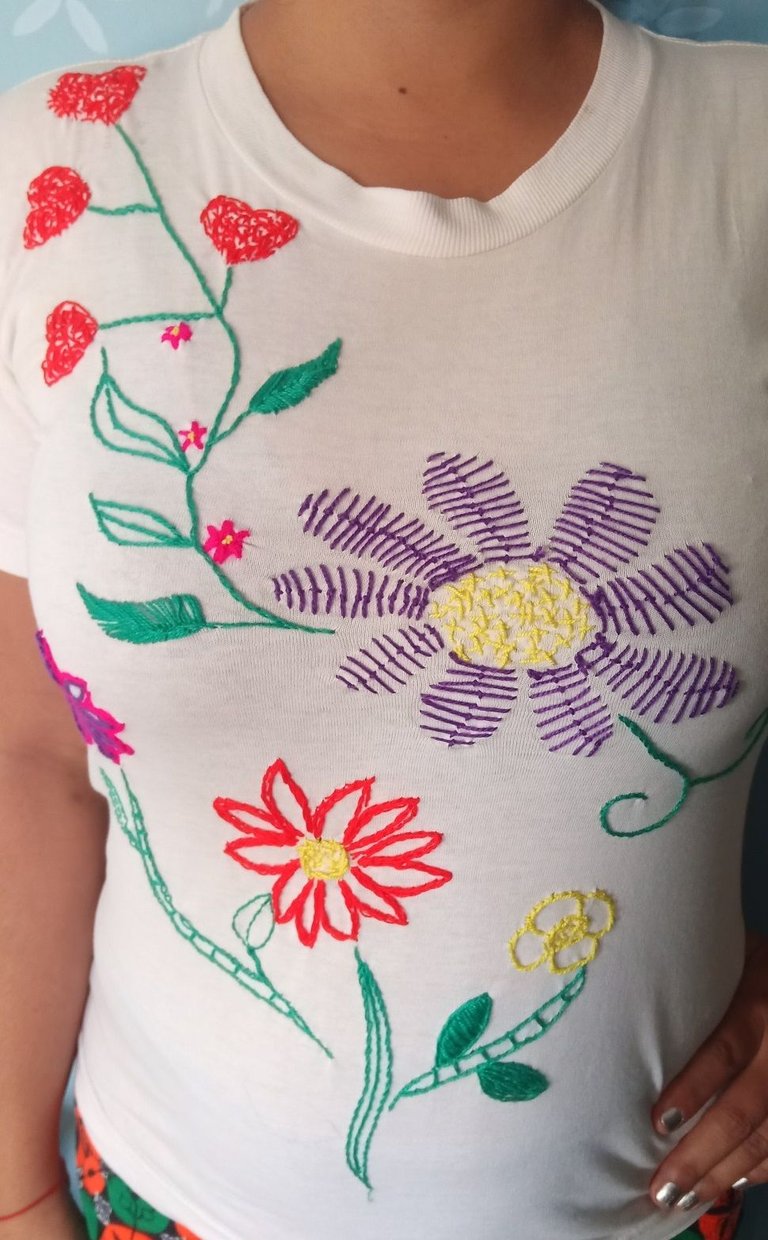
Claro, yo aproveché de probármela para esta foto y compartirla con ustedes, todo lo que tenga que ver con manualidades, costuras y bordados es mi pasión, me siento muy afortunada de tener una madre que también toda su vida se ha dedicado a la costura, diseño, bordado, tejido y pude adquirir un poco de esas habilidades de ella.
Muchas gracias por visitar mi publicación, les envió un inmenso abrazo y espero que todos se encuentren muy bien.
This is the result of my project, I hope you enjoy it, I made this embroidery for me, but my daughter fell in love with the flannel and took it from me, and how to say no, of course she looks much better than me, because she is thinner and baggier, later I will embroider one for me and I will share it with you.
Of course, I took the opportunity to try it on for this photo and share it with you, everything that has to do with crafts, sewing and embroidery is my passion, I feel very fortunate to have a mother who also all her life has been dedicated to sewing, design, embroidery, knitting, and I was able to acquire some of those skills from her.
Thank you very much for visiting my publication, I send you a big hug and I hope you are all very well.
social networks / redes sociales
![]()
![]()
Traductor Deepl
Translated Deepl
Ediciones Canva
Editions Canva


Hola muy hermoso y muy buen explicado tu trabajo es muy hermoso
🤗🤗🌹🌹🤗👑👑🤗🌹🌹🌹♥️♥️♥️♥️♥️🍊♥️🌞😚😚😚👏👏❤️❤️❤️😊😊☺️☺️☺️☺️
Gracias amiga, bendiciones para ti.
Que bueno que este usted mejor de salud, espero que se mantenga así por bastante tiempo, lejos de cualquier malestar. Es un trabajo bastante bonito. Mucha suerte.
Greetings friend amen thank you for your good wishes I hope you are also very well, thank you for liking my work I always try to do my best 🙂
Saludos amigo amén gracias por tus buenos deseos espero que también estés muy bien, gracias por gustarte mis trabajos siempre trato de dar lo mejor de mi 🙂
Gracias amigo @soltecno, me alegro de que te haya gustado, tomo su debido tiempo hacerlo, pero todo trabajo que toma su tiempo da mejores frutos.
Es una verdad, todo lo que nos cuesta es más apreciado. Que este usted bien.
Thank you for sharing this post in the DIYHUB Community!
Your content got selected by our fellow curator priyanarc & you just received a little thank you upvote from us for your great work! Your post will be featured in one of our recurring compilations which are aiming to offer you a stage to widen your audience within the DIY scene of Hive. Stay creative & HIVE ON!
Please vote for our hive witness <3
This is so beautiful,you have done a great job here @lauracraft, I so much love your creativity.
Thank you beautiful, it's good that you liked my work, thanks for the motivation.
I wonder competing with you if there will be hope for me to win. This is because what you just did here looks nice and I believe you may likely win. Well, let me see how my participation will turn out to be by tomorrow. Good luck friend.
hello friend happy day hahahaha I think you exaggerate but thank you very much and successes for you in this contest🙂🤗
Congratulations, your post has been upvoted by @dsc-r2cornell, which is the curating account for @R2cornell's Discord Community.
Enhorabuena, su "post" ha sido "up-voted" por @dsc-r2cornell, que es la "cuenta curating" de la Comunidad de la Discordia de @R2cornell.