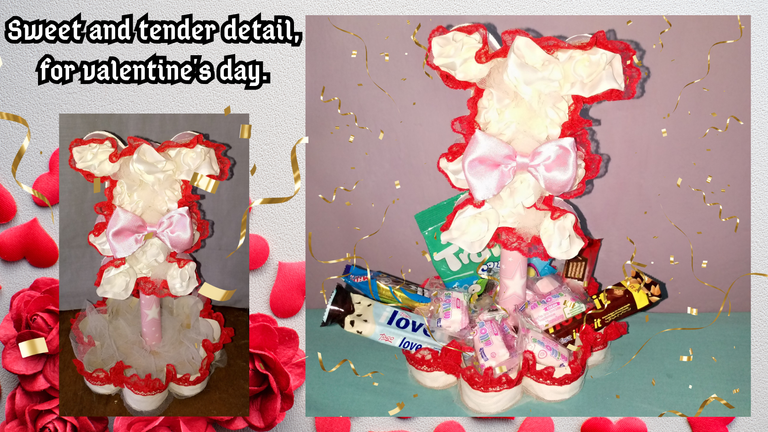

Hola querida comunidad DIYHub, es un todo un placer volver por aquí hacer mis publicaciones para compartir con ustedes una vez más, estoy muy emocionada hoy con mi entrada al concurso día de San Valentín, siempre me han gustado los osos.
Este característico osito cariñoso que hice hoy, lo hice con un gran entusiasmo y cariño porque se lo hice a mi adorada hija celeste, sé que será una gran sorpresa para ella quien también ama los osos, así que compartimos muchos gustos de cosas tiernas,
No veía el día de volver a participar en uno, los concursos de esta comunidad siempre son muy activos y creativos, lamento todo lo que me he perdido, pero seguiremos innovando a la par con el favor de Dios.
Las fotografías que verán a continuación, fueron tomadas con mi teléfono modelo TECNO SPARK GO 2023.

Hello dear DIYHub community, it is a pleasure to come back here to share with you once again, I am very excited today with my entry to the Valentine's Day contest, I have always loved bears.
This characteristic affectionate teddy bear that I made today, I made it with great enthusiasm and affection because I made it for my beloved daughter celeste, I know it will be a great surprise for her who also loves bears, so we share many tastes of tender things,
I couldn't wait to participate in one again, the contests of this community are always very active and creative, I'm sorry for everything I've missed, but we will continue to innovate with God's favor.
The pictures you will see below were taken with my phone model TECNO SPARK GO 2023.


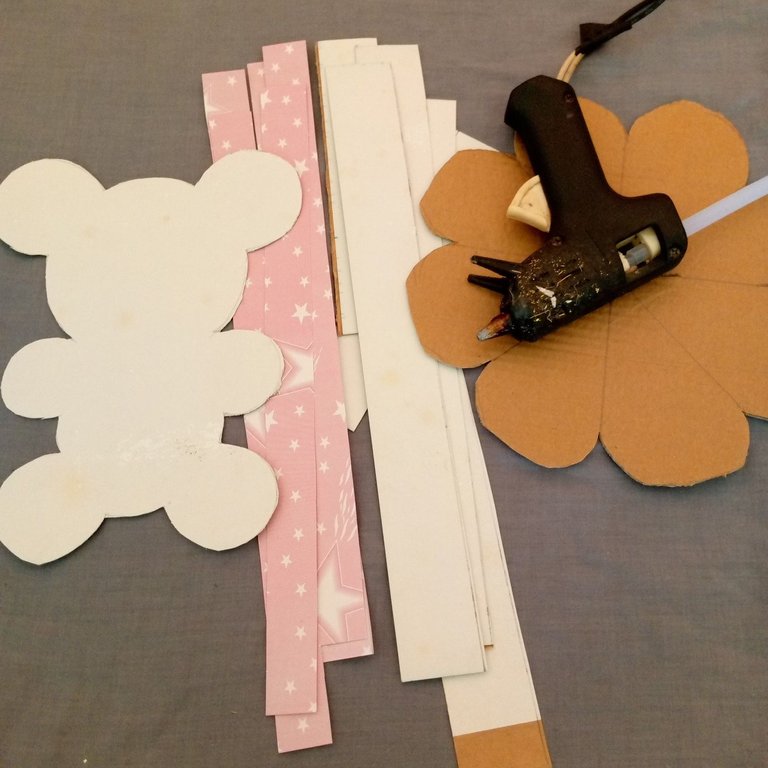
Los materiales que utilice;
1- Tela de satén blanco y rosado.
2- Encaje rojo con tul blanco.
3- Figura guía para dibujar el oso.
4- Cartón.
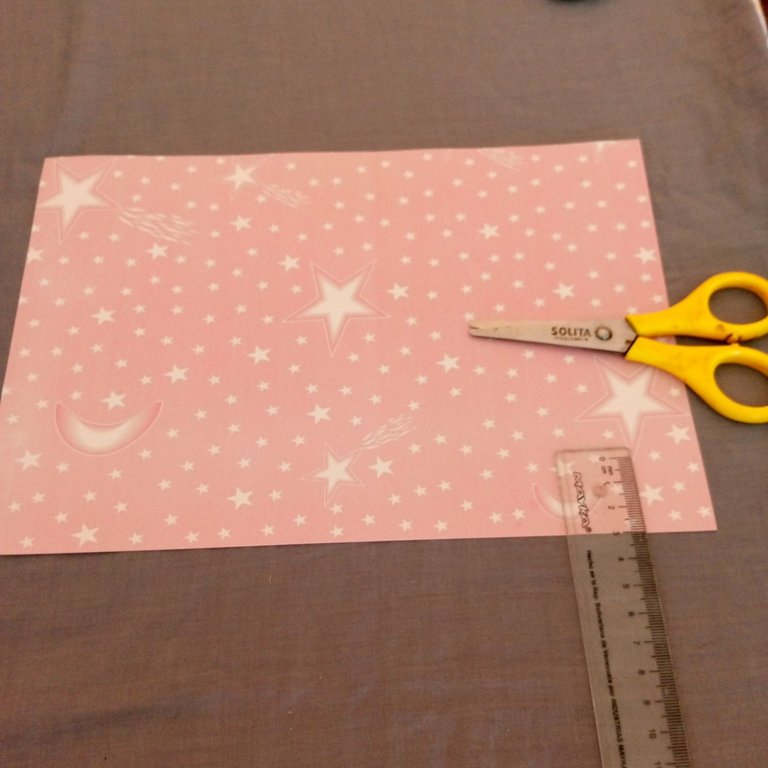
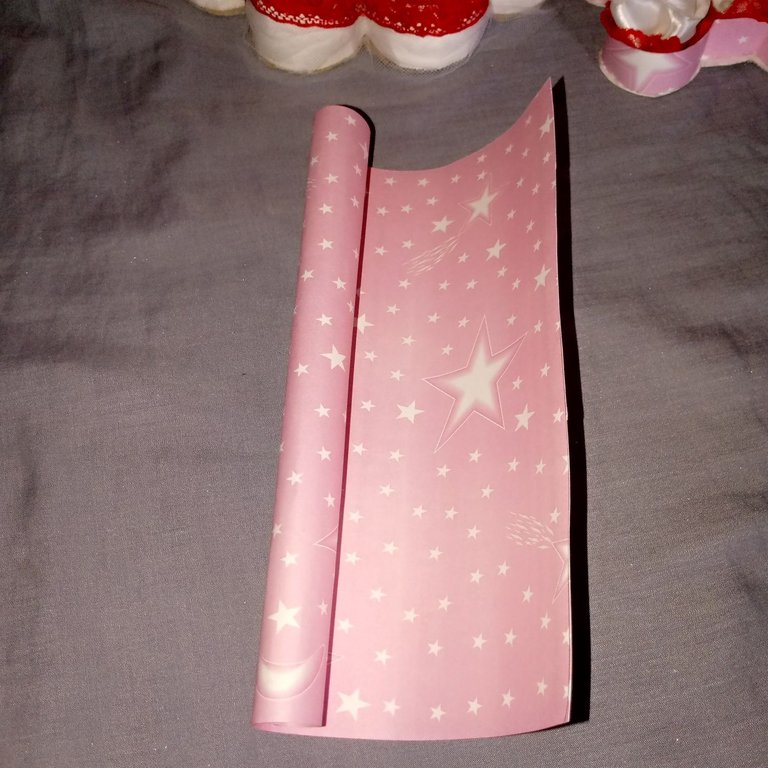
5- Cartulina estampada.
6- Barra de silicona.
7- Tijera.
8- Encendedor.
9- Lápiz.
10- Regla.
11- Pistola para silicona.
12- hilo y aguja.
13- Regla.
Materials I used;
1- White and pink satin fabric.
2- Red lace with white tulle.
3- Guide figure to draw the bear.
4- Cardboard.
5- Printed cardboard.
6- Silicone stick.
7- Scissors.
8- Lighter.
9- Pencil.
10- Ruler.
11- Silicone gun.
12- Needle and thread.
13- Ruler.
 |  |  |
|---|
 |  |  |
|---|
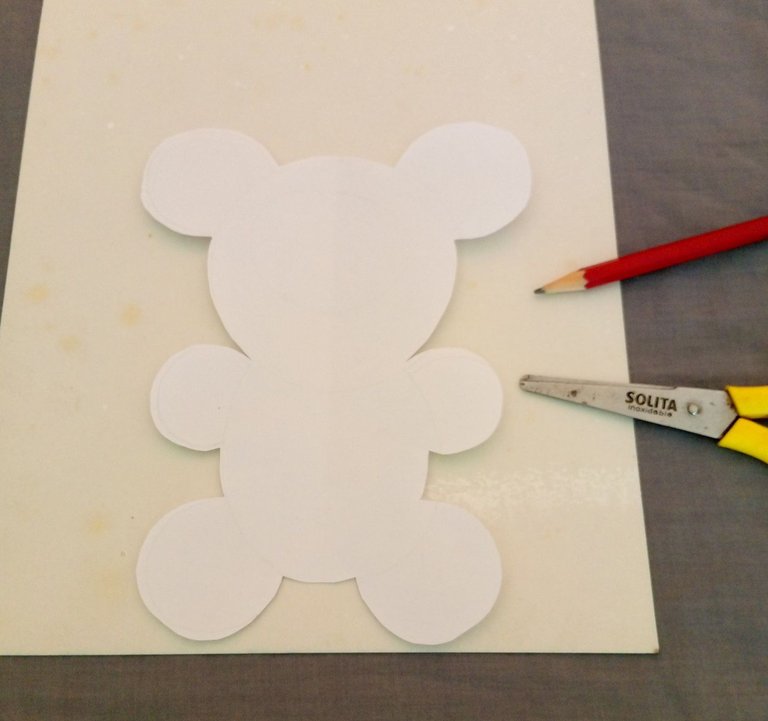
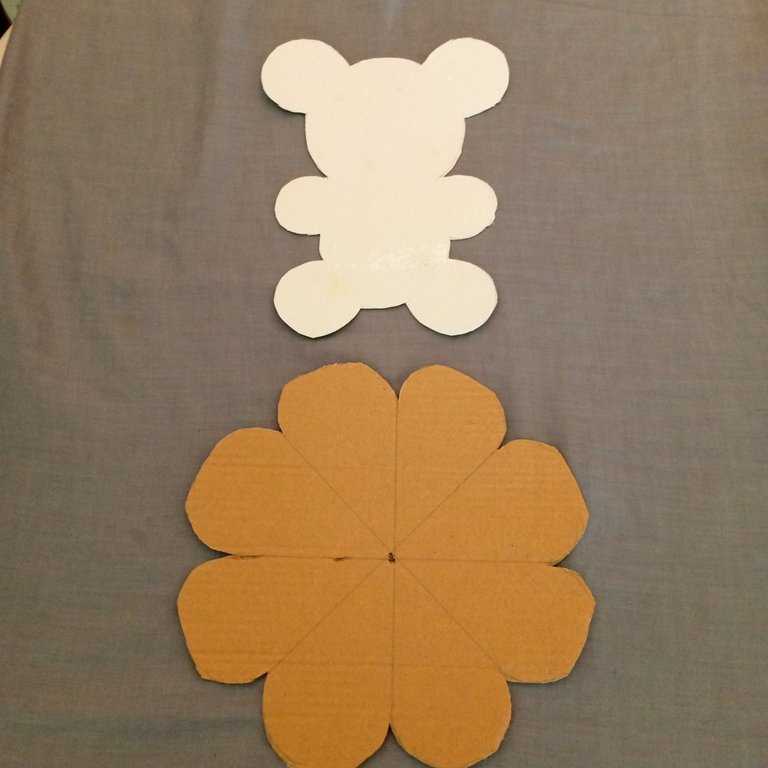
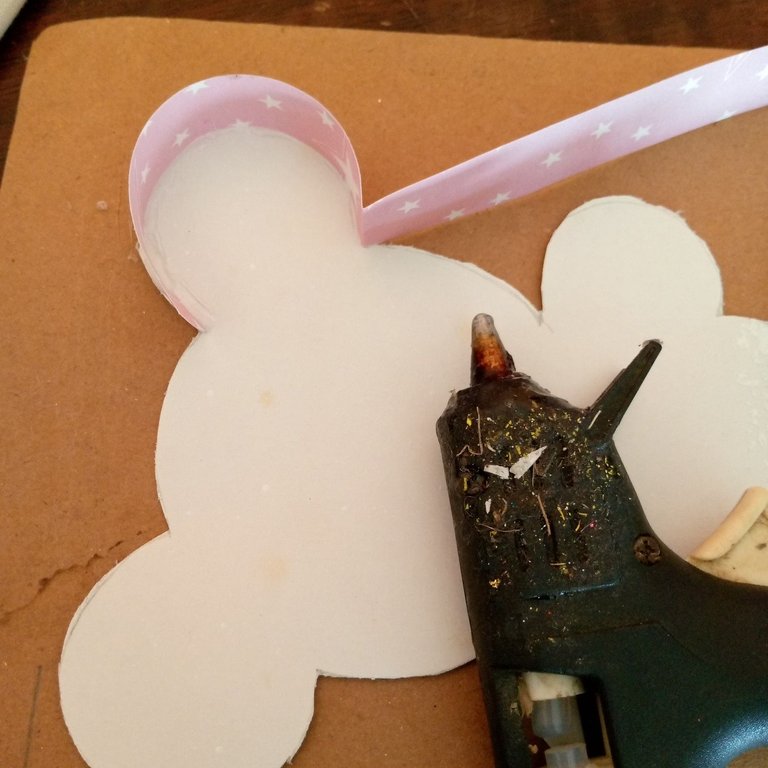
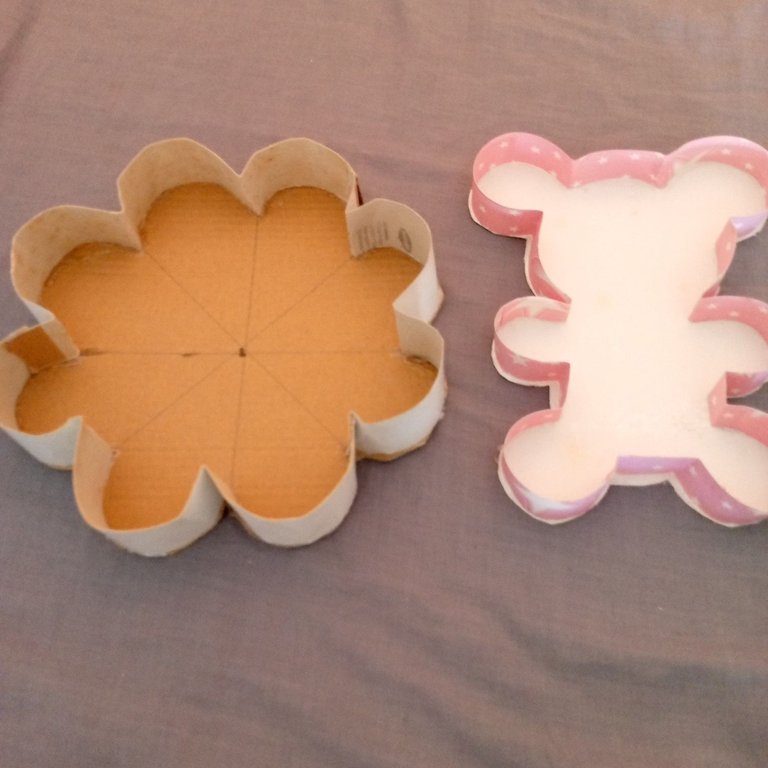
Primero comencé a usar la figura guía de un oso y lo coloqué sobre la cartulina blanca, después con un lápiz comencé a marcar la figura del oso, y con la ayuda de una tijera comencé a recortar el área marcada en la cartulina.
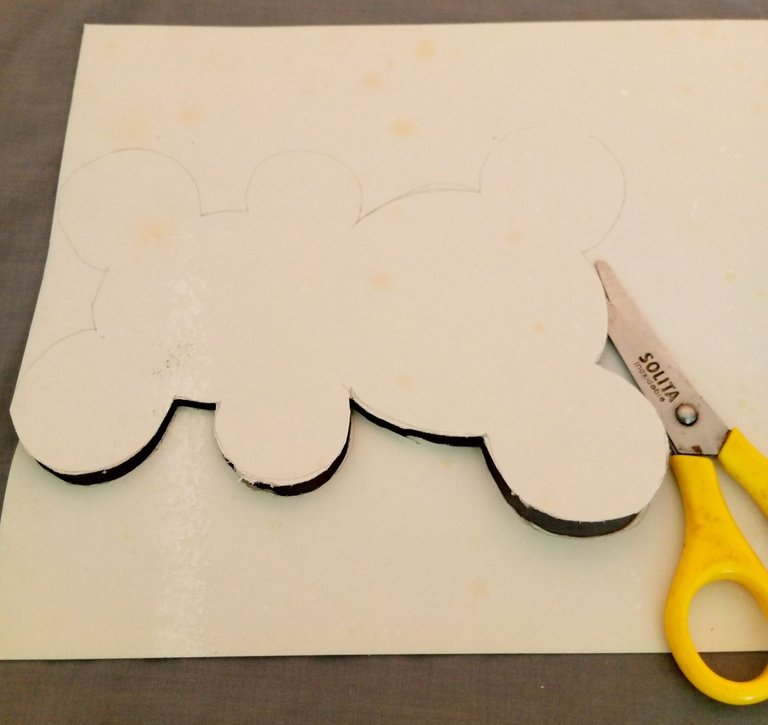
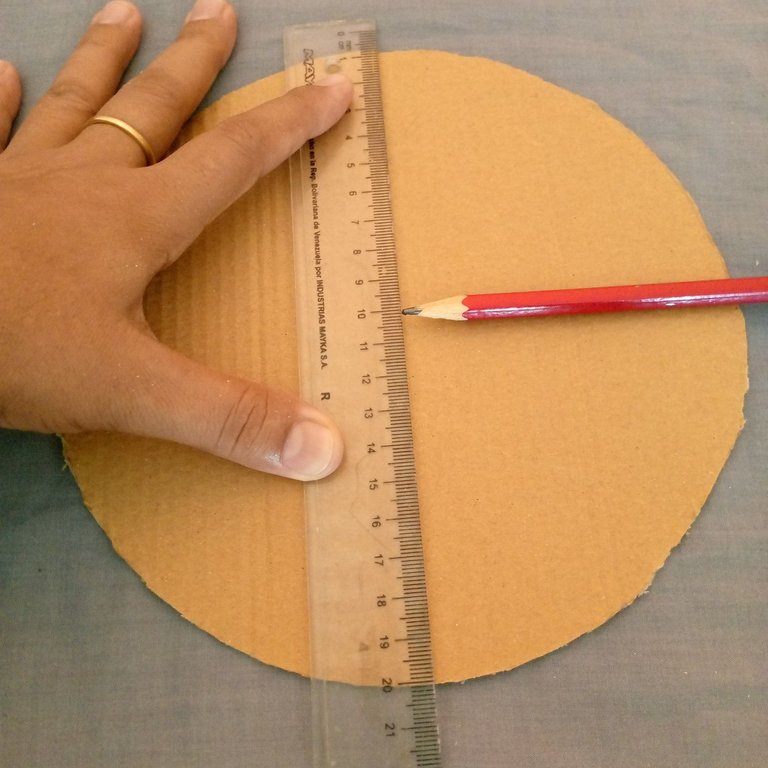
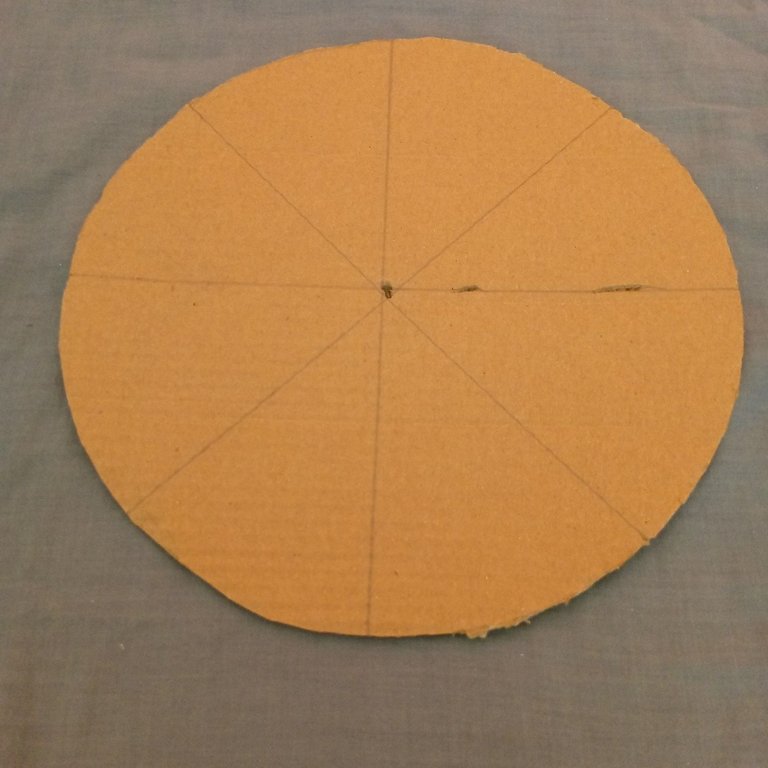
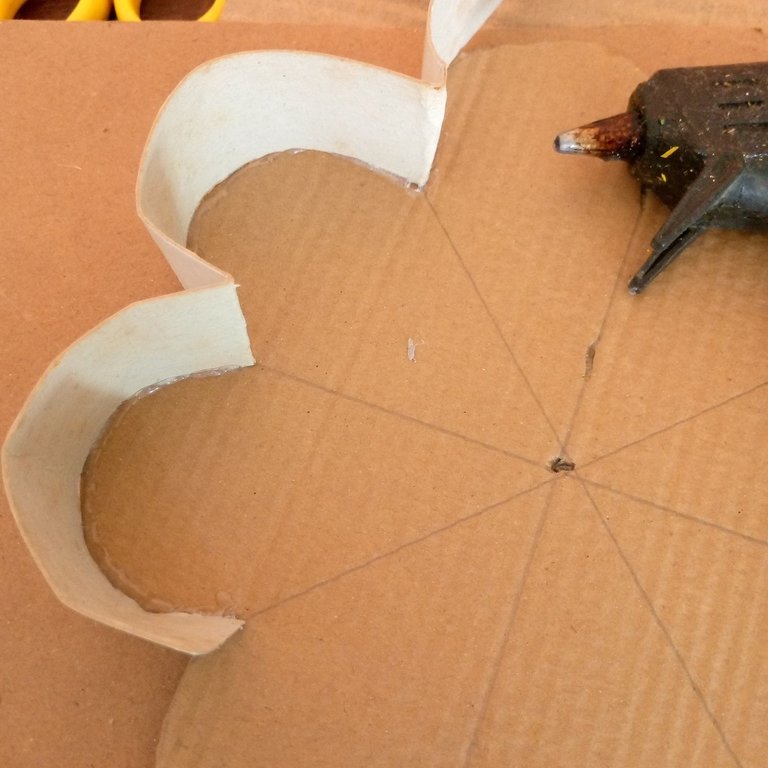
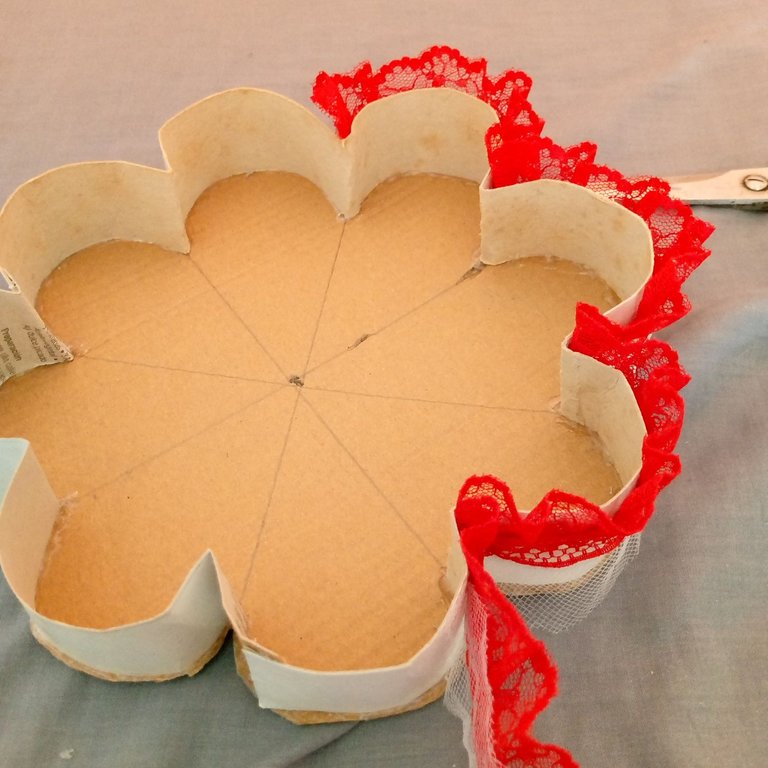
Después de recortar la figura del oso, tome un pedazo de cartón, que ya tenía la forma circular, este me sirvió de idea para hacer la forma de una espléndida flor, después con la ayuda de una regla y un lápiz, comencé a marcar el punto medio y a partir de él, marque el cartón con el lápiz y dividí el cartón en 8 partes iguales con la guía de una regla.
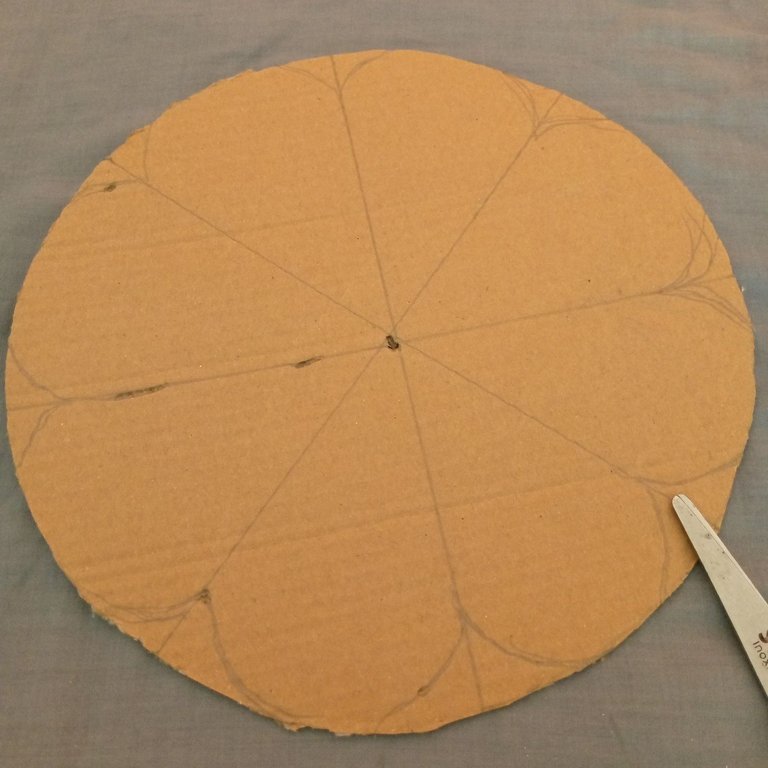
Por último, por el borde del cartón, hice líneas semi curvas para que al momento de recortar tome la forma de una flor.
First I started using a bear shape guide and placed it on the white cardboard, then with a pencil I began to mark the bear shape, and with the help of a scissors I began to cut out the area marked on the cardboard.
After cutting out the bear figure, I took a piece of cardboard, which already had the circular shape, this served me as an idea to make the shape of a splendid flower, then with the help of a ruler and a pencil, I began to mark the midpoint and from there, I marked the cardboard with the pencil and divided the cardboard into 8 equal parts with the guide of a ruler.
Finally, along the edge of the cardboard, I made semi-curved lines so that when I cut it out it would take the shape of a flower.
 |  |  |
|---|
 |  |  |
|---|
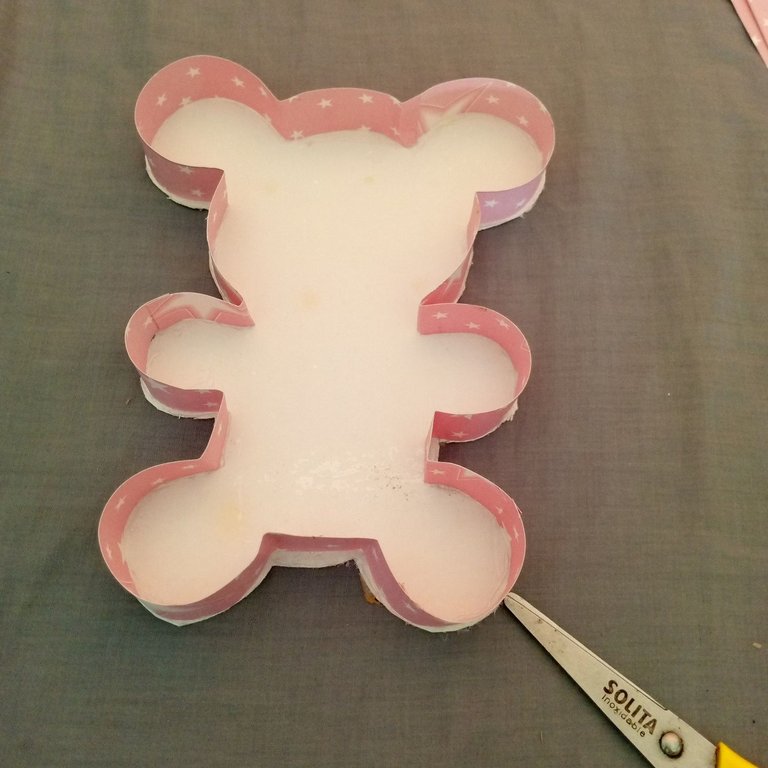
Una vez recortado el oso y la base que sostendrá todo nuestro trabajo con la cartulina que me sobro del oso, recorte varias tiras de 3 cm centímetros de ancho para colocarlos por todo el borde de las figuras, ahora nuestro siguiente paso será pegar y darle forma a nuestra base.
Sobre un pedazo de cartón coloque la forma del oso, para pegarlo minuciosamente por todo el borde de la figura, después use los pedazos de cartulina para pegarlos por todo el contorno del oso, dándole la forma del mismo en cada una de sus partes como orejas y patas, una vez quedado lo reserve aparte para que la silicona caliente se secara.
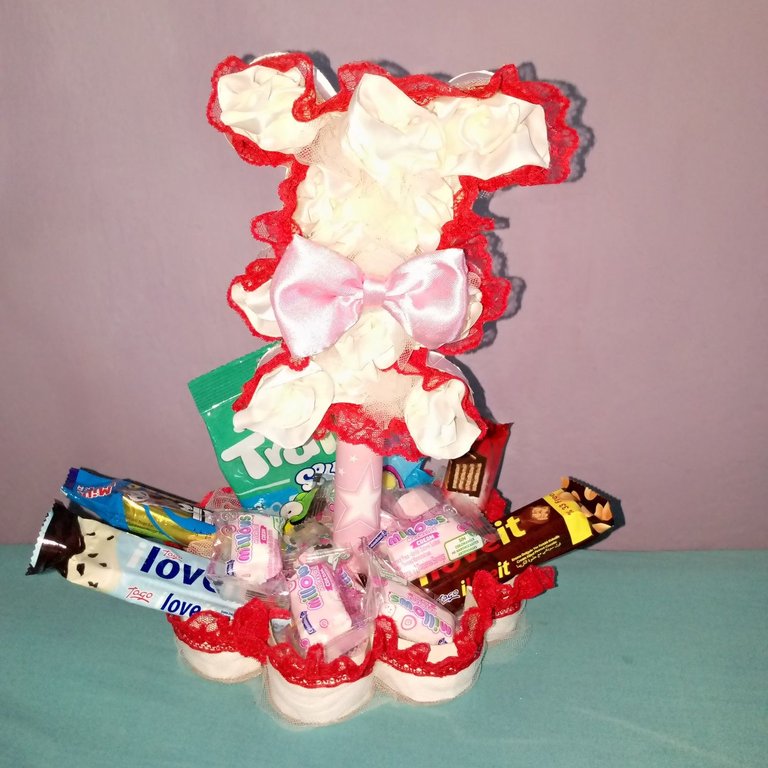
Al terminar con el oso hice el mismo proceso sobre la base donde colocaré los dulces, preferiblemente se vería lindo con bombones de chocolate para resaltar la hermosa forma de la flor, lo hice con esa idea para que en cada pétalo fuese un bombón, pero mi presupuesto no era el suficiente para este momento, sin embargo, se pudo lograr algo bueno, y de esta manera ya habremos culminado de pegar toda la base de nuestro hermoso regalo.
Once cut out the bear and the base that will hold all our work with the cardboard that I left over from the bear, cut several strips of 3 cm wide to place them around the edge of the figures, now our next step will be to paste and shape our base.
On a piece of cardboard place the shape of the bear, to paste it thoroughly around the edge of the figure, then use the pieces of cardboard to paste them around the contour of the bear, giving the shape of the same in each of its parts such as ears and paws, once it was set aside for the hot silicone to dry.
When I finished with the bear I did the same process on the base where I will place the candy, preferably it would look nice with chocolate chocolates to highlight the beautiful shape of the flower, I did it with that idea so that in each petal was a chocolate, but my budget was not enough for this moment, however, I could achieve something good, and in this way we will have finished gluing the entire base of our beautiful gift.
 |  |  |
|---|
 |  |  |
|---|
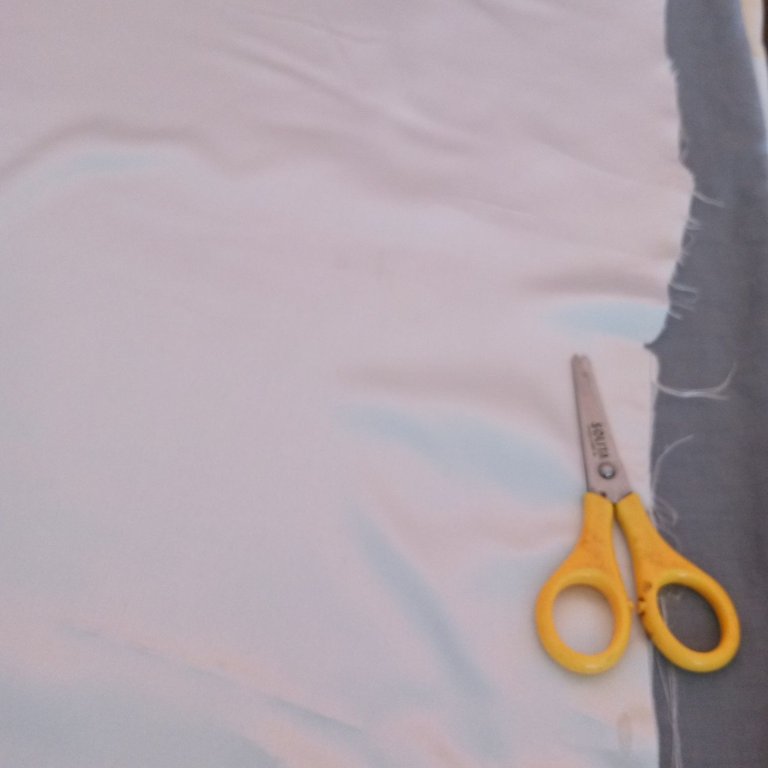
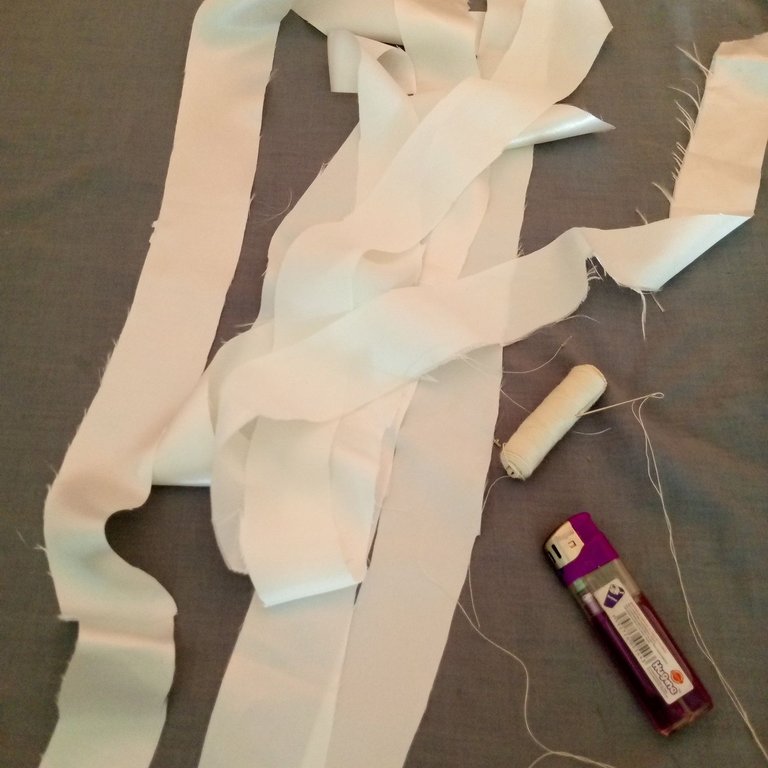
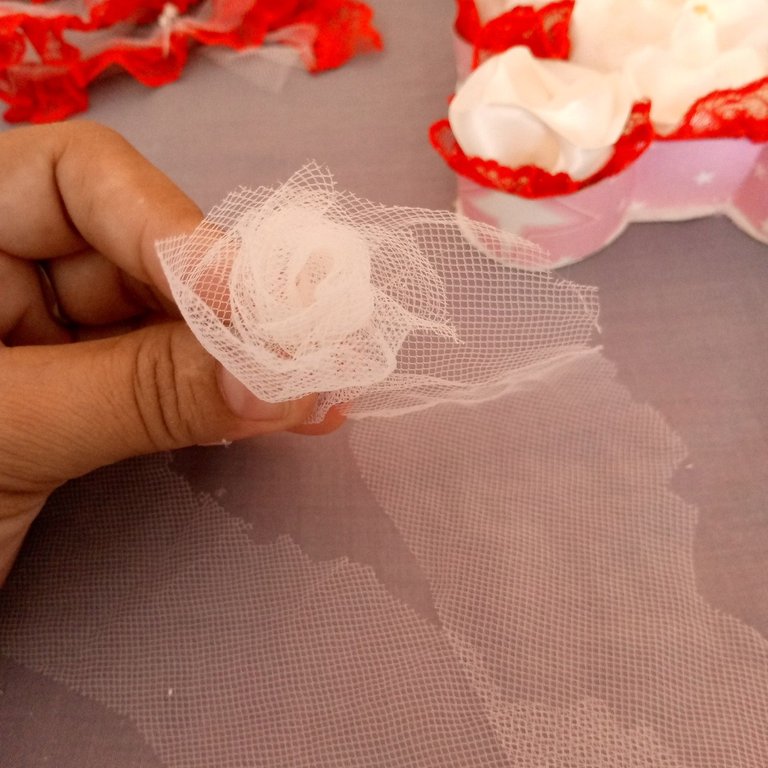
Ahora comencemos a trabajar con la decoración, el mismo fue elaborado con tela de saten blanco y rosado en conjunto del encaje rojo con tul blanco.
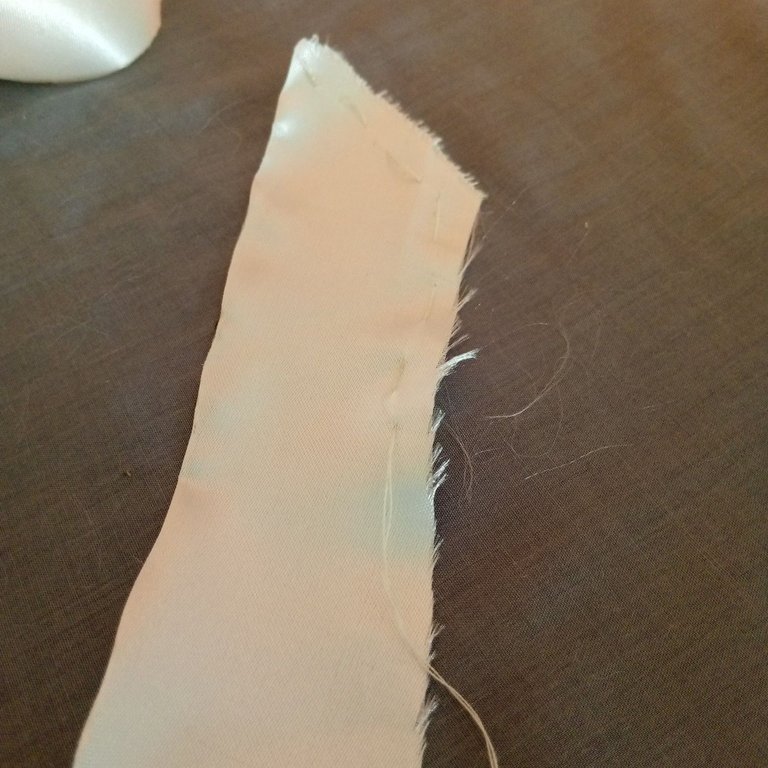
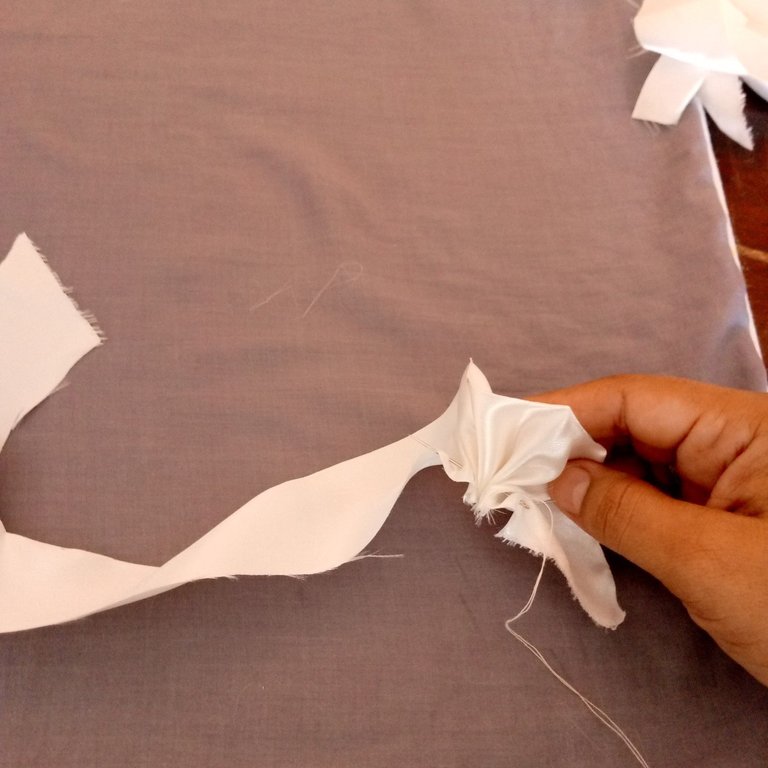
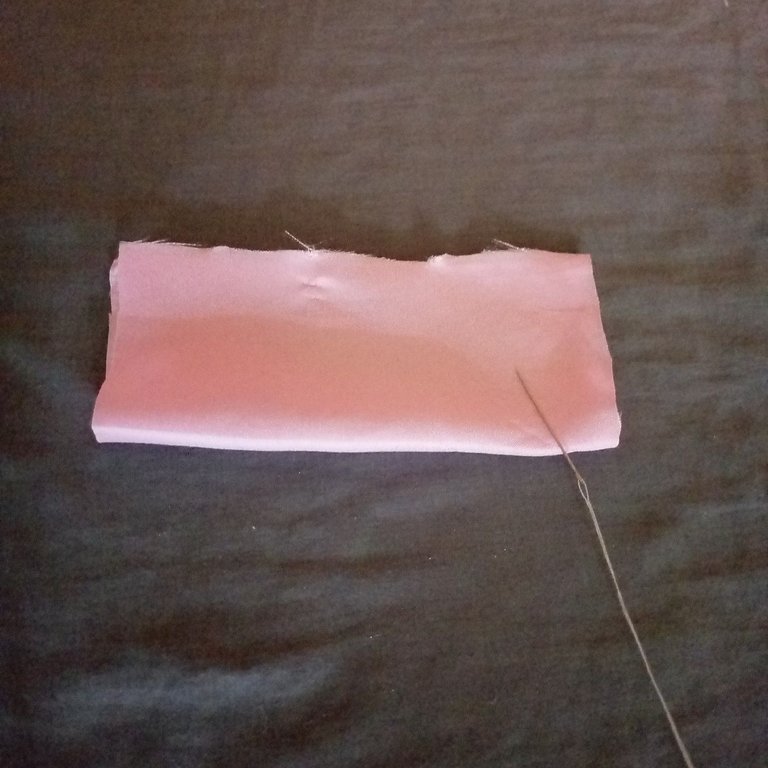
Primero comencé a recortar varias tiras de la tela de saten blanco, con la ayuda de un encendedor sellé los hilos sobresalientes de la tela por la parte superior, para la parte inferior no fue necesario porque este estará cocido para la forma que vamos a realizar.
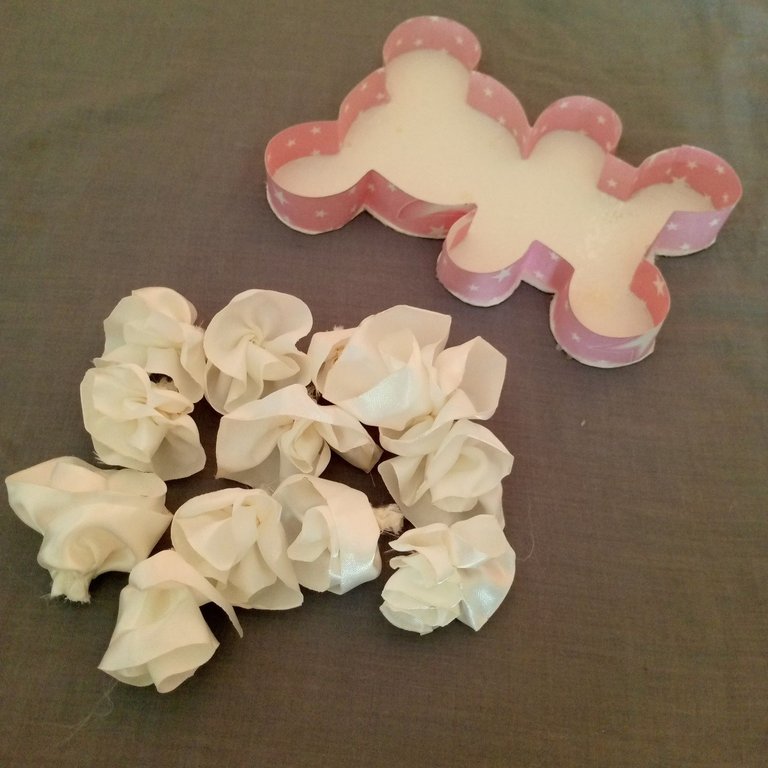
Para darle la forma de flor de rosa, comencé arruchar poco a poco y a medida que avanzaba cocía para que no se me desarmara la forma de flor, de esta manera, repetí el mismo proceso varias veces hasta tener lo suficiente como para llenar la parte interna del oso.
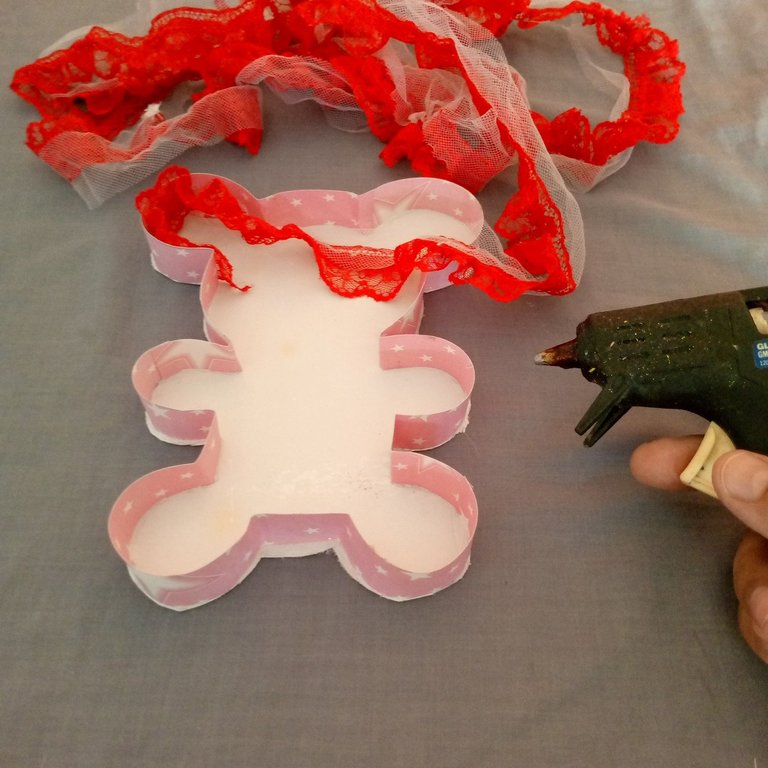
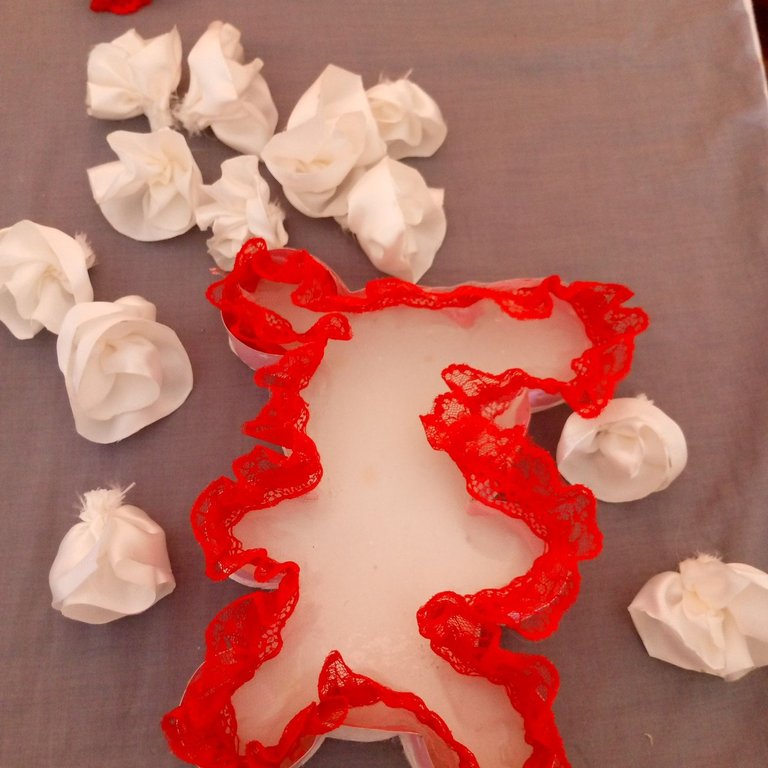
Después, con el encaje rojo con tul blanco, comencé a decorar todo el borde del oso que anteriormente había trabajado y reservado.
Now let's start working with the decoration, it was made with white and pink satin fabric together with red lace and white tulle.
First I began to cut several strips of the white satin fabric, with the help of a lighter I sealed the protruding threads of the fabric at the top, for the bottom was not necessary because this will be cooked for the form that we are going to make.
To give it the rose flower shape, I started by slowly stitching and as I progressed I cooked so that the flower shape would not fall apart, in this way, I repeated the same process several times until I had enough to fill the inner part of the bear.
Then, with the red lace with white tulle, I began to decorate the entire edge of the bear that I had previously worked on and set aside.
 |  |  |
|---|
 |  |  |
|---|
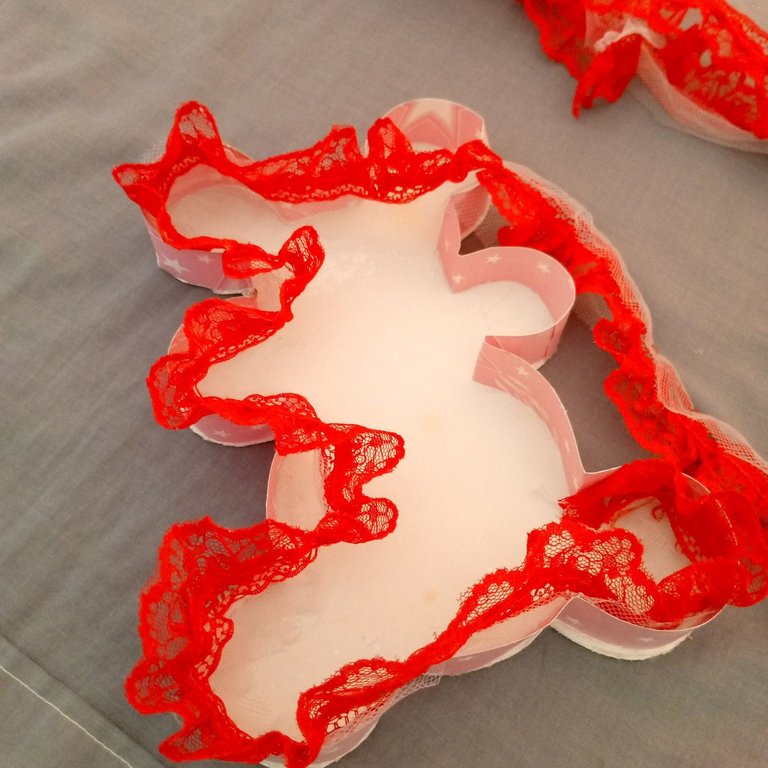
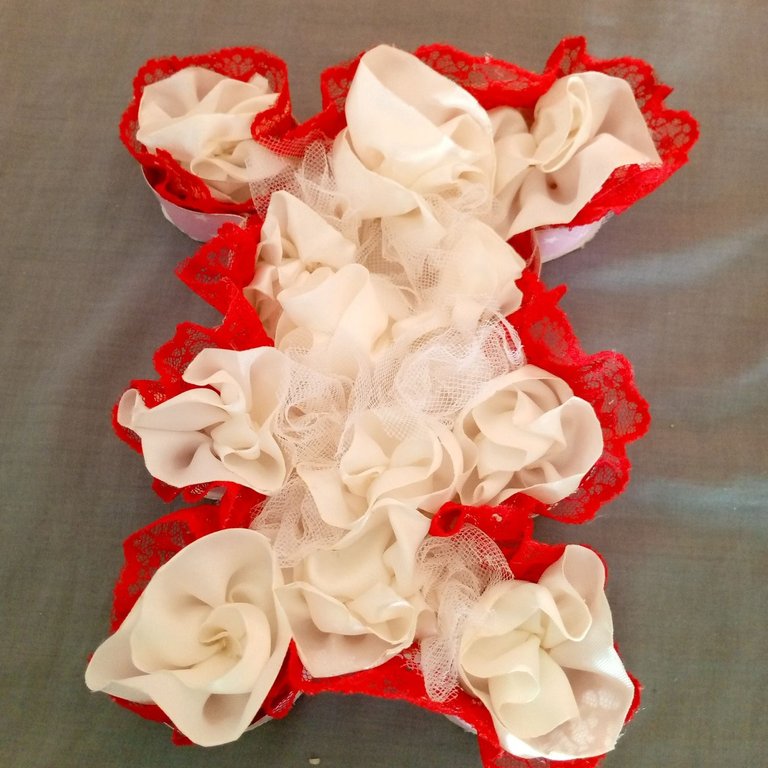
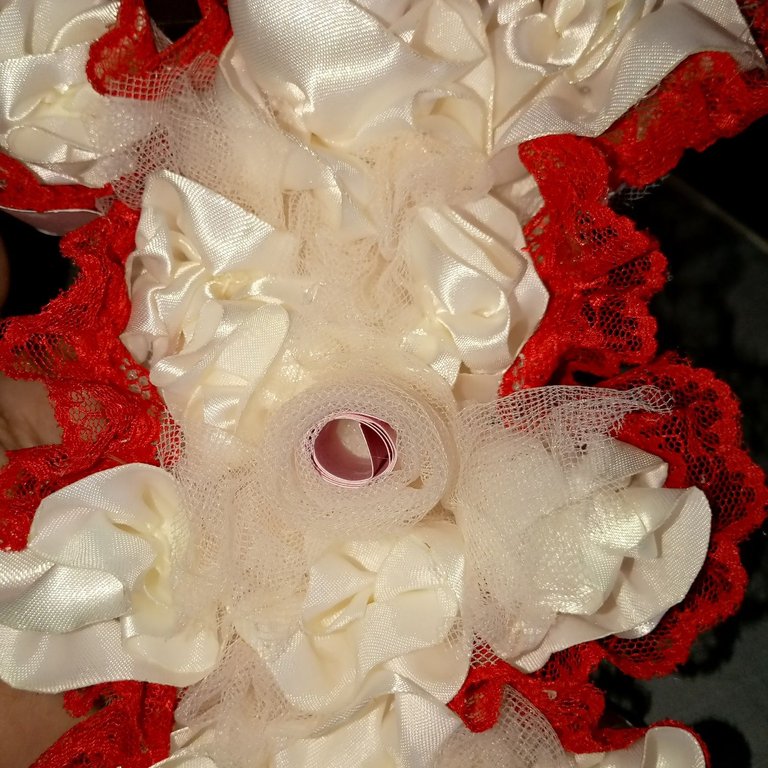
Como el encaje con tul blanco toma cualquier forma debido a su flexible material, para que este tuviera la forma del oso, use las flores que anteriormente había trabajado con la tela de saten, agregue puntos de silicona caliente para pegar cada una de las flores como relleno para el oso, de esta manera pude darle la forma deseada al encaje que había usado como decoración del oso, en su interior también agregue flores de tul blanco.
Después con el mismo encaje con tul blanco, decore el contorno de la base, agregando poco a poco silicona caliente en los bordes para adherir el encaje, seguido pegue como relleno y decoración del interior de la cesta con tul blanco para darle más belleza a este hermoso regalo.
Ya tendremos listo tanto la cesta como el oso de nuestro detalle.
As the lace with white tulle takes any shape due to its flexible material, to make it have the shape of the bear, I used the flowers that I had previously worked with the satin fabric, I added hot silicone dots to glue each of the flowers as stuffing for the bear, in this way I could give the desired shape to the lace that I had used as decoration of the bear, inside I also added white tulle flowers.
Then with the same lace with white tulle, decorate the contour of the base, adding little by little hot silicone on the edges to adhere the lace, then glue as filling and decoration of the inside of the basket with white tulle to give more beauty to this beautiful gift.
Now we will have ready both the basket and the bear of our detail.
 |  |  |
|---|
 |  |  |
|---|
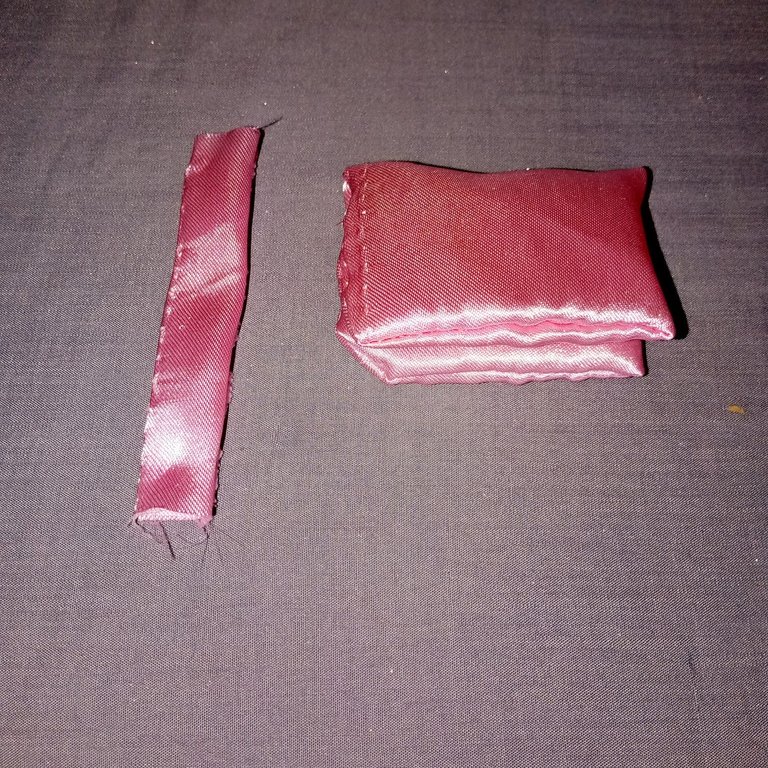
Luego de terminar con la cesta y el oso, comencé a trabajar en los detalles, así que primero hice un moño con la tela de saten rosado, recorte dos pedazos donde en el borde lo cocí para darle forma de una pequeña almohada, después recorte una tira donde cocí también el borde.
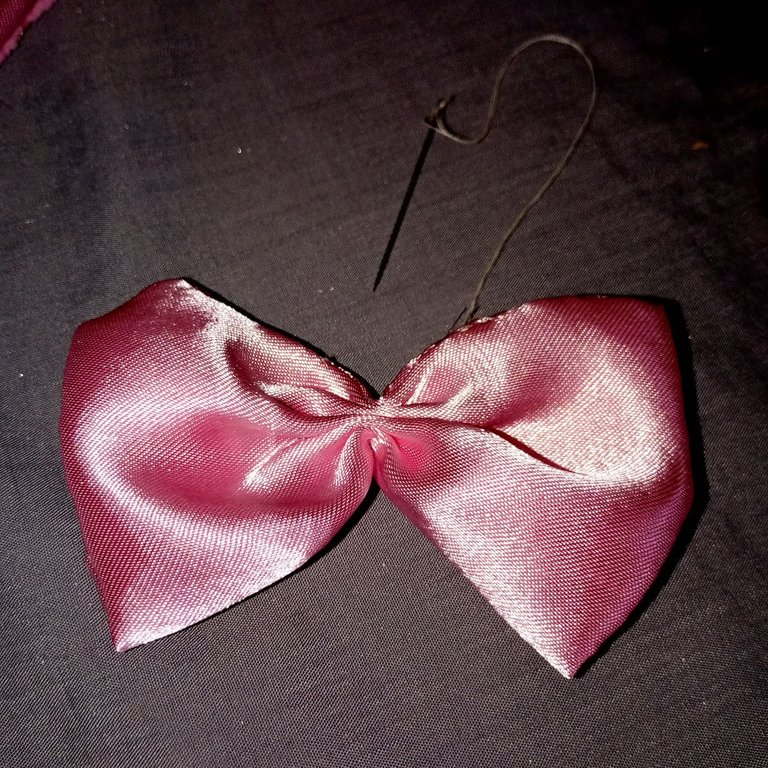
Teniendo estas partes realizadas comencé a unirlas, primero uni los dos pedazos más grandes y después como refuerzo pegue la tira más pequeña, de esta manera ya tendría el moño listo.
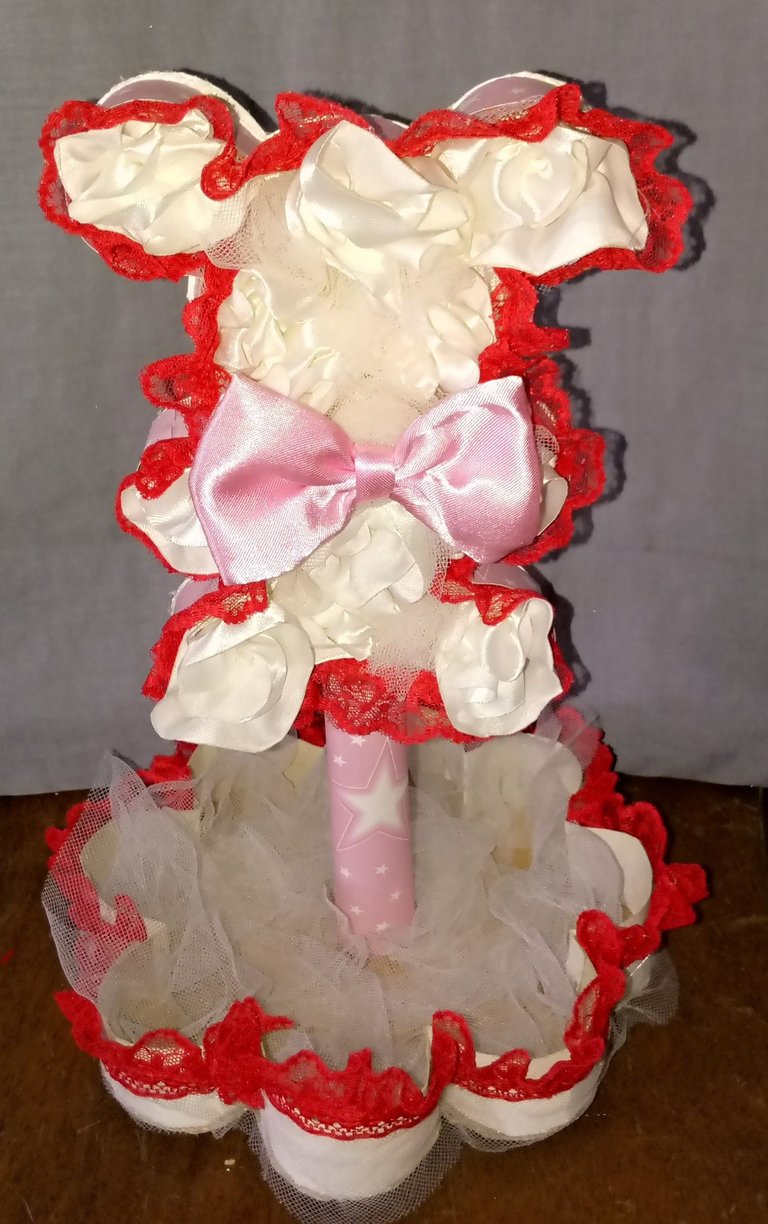
Para poder pegar el moño a nuestro hermoso oso, primero tuve que hacer una base que lo sostendrá, el mismo fue realizado con cartulina estampada, le di la forma de un royo y lo pegue en la parte del cuello para luego pegar con silicona caliente el moño sobre él, por último hice un rollo de cartulina estampada para hacer una base de altura para posicionar el osito de rosas dentro de la base de esta hermosa flor, y de esta manera lograremos un increíble resultado para regalar a tu ser querido.
After finishing with the basket and the bear, I started to work on the details, so first I made a bow with the pink satin fabric, I cut two pieces where the edge I cooked it to give it the shape of a small pillow, then I cut a strip where I also cooked the edge.
Having these parts made I began to join them, first I joined the two larger pieces and then as a reinforcement I glued the smaller strip, in this way I would have the bow ready.
In order to glue the bow to our beautiful bear, first I had to make a base that will hold it, it was made with printed cardboard, I gave it the shape of a roll and glued it on the part of the neck and then glued the bow on it with hot silicone, finally I made a roll of printed cardboard to make a high base to position the rose bear inside the base of this beautiful flower, and in this way we will achieve an incredible result to give to your loved one.
 |  |
|---|
Gracias por visitar mi publicación del día del amor y la amistad, espero que sea agradable para todos, deseo que puedan compartir con algún ser querido este lindo día y aunque el día del amor puede ser cualquier día, pues no hay día para amar, siempre es lindo hacer un día especial, sean felices con la vida y con todo lo que se tiene, veamos lo bonito de cada uno y desechemos lo negativo, siempre después del túnel hay una luz resplandeciente. Se les quiere un mundo infinito donde quiera que se encuentren.
Thank you for visiting my publication of the day of love and friendship, I hope it is pleasant for everyone, I hope you can share with a loved one this beautiful day and although the day of love can be any day, because there is no day to love, it is always nice to make a special day, be happy with life and everything you have, see the beauty of each one and discard the negative, always after the tunnel there is a bright light. An infinite world is dear to you wherever you are.
social networks / redes sociales
![]()
![]()
Traductor Deepl
Translated Deepl
Ediciones Canva
Editions Canva

Hello @lauracraft this projects can be saving money and great idea
Yes, they are a good initiative to save money, it can also be done to sell them. 👍😃
Es una manualidad muy tierna y creativa, el osito junto a todas esas chucherias para tu niña que de seguro le encantara, feliz dia ♥️
Hola amiga gracias, feliz día del amor y la amistad, mi hija recibió ese detalle y está feliz, es un osito de rosas bastante tierno para regalar en un momento especial.🩷🌸
Lindo trabajo, muy tierno este osito cariñoso que elaboraste para tu hija, estará muy feliz de recibirlo. Gracias por regalarnos tu paso a paso @lauracraft ✨
Suerte en el concurso...
!DIY
Saludos querida @dayadam, gracias por tus apreciadas palabras, es muy lindo saber que te agrade mi trabajo, mi hija recibió su detalle con una inmensa felicidad y sonrisa que no tiene precio. 🫂🌹
Very tender participation in the community with this affectionate bear, your daughter will be happy to receive it. Happy Valentine's Day ❤️. Successes...
Oh this is really pretty
Wow
And you’re really creative
I love you how you added the bow.
Greetings beautiful woman, Thank you for your appreciated comment. 🫂🌹🌹🌹🌹🌹
You’re welcome
This post has been manually curated by @bhattg from Indiaunited community. Join us on our Discord Server.
Do you know that you can earn a passive income by delegating to @indiaunited. We share more than 100 % of the curation rewards with the delegators in the form of IUC tokens. HP delegators and IUC token holders also get upto 20% additional vote weight.
Here are some handy links for delegations: 100HP, 250HP, 500HP, 1000HP.
100% of the rewards from this comment goes to the curator for their manual curation efforts. Please encourage the curator @bhattg by upvoting this comment and support the community by voting the posts made by @indiaunited.
TE quedó genial, digna obra del día de San Valentín!
Gracias @fixie estoy encantada por sus visitas.🙂