Photo nr. 02
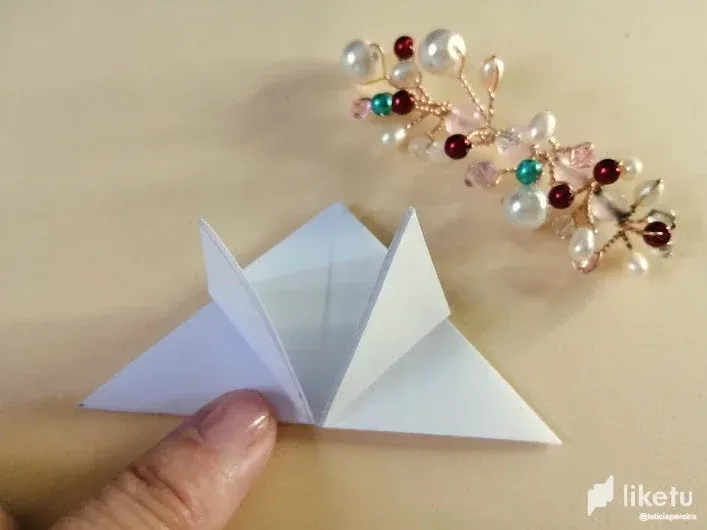
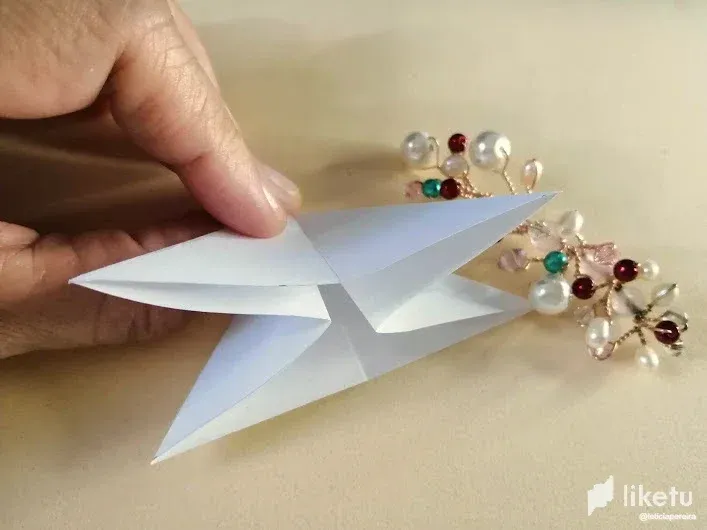
Photo nr. 03
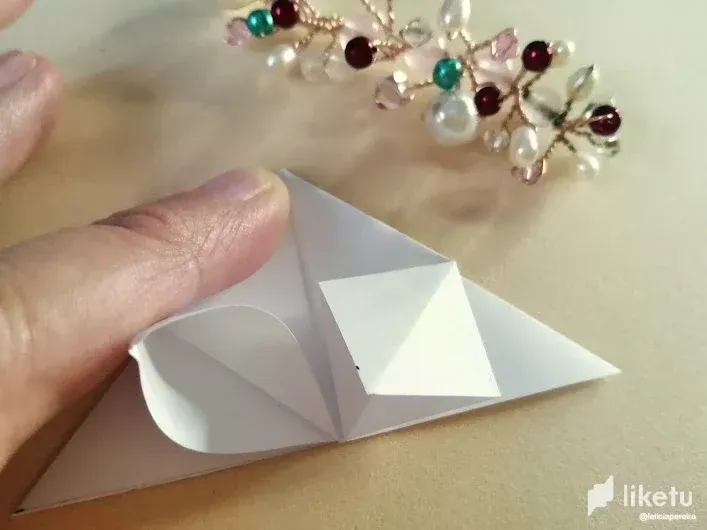
Photo nr. 04
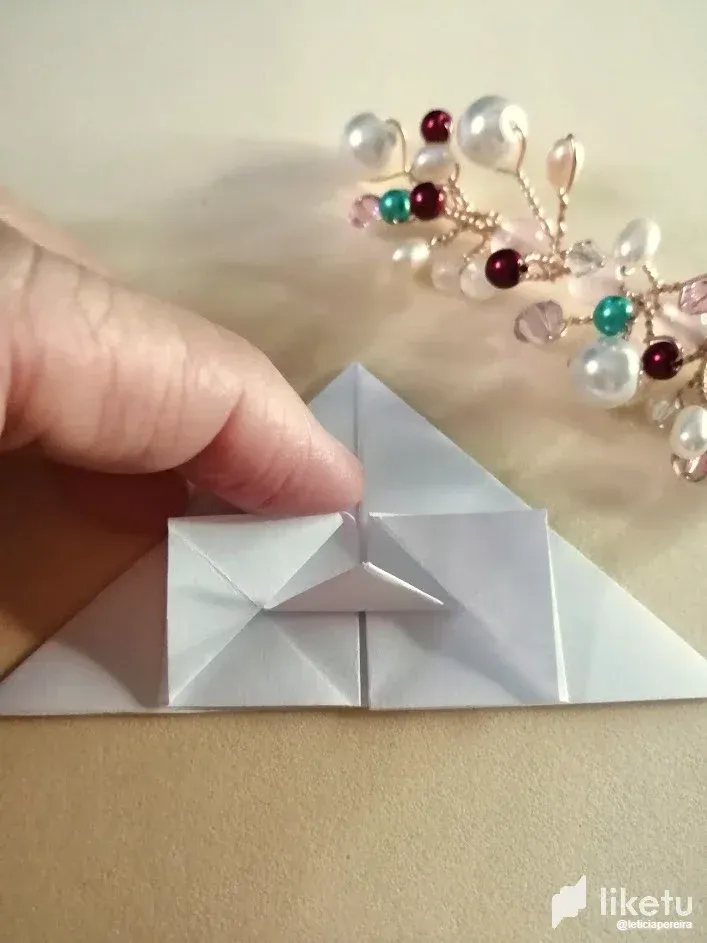
Photo nr. 05
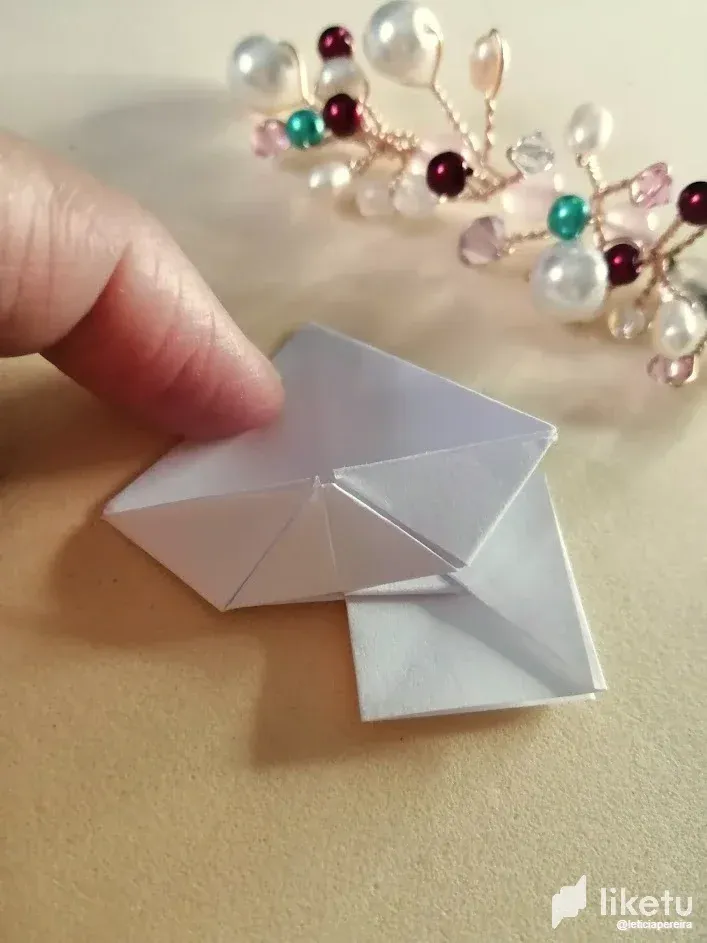
Photo nr. 06
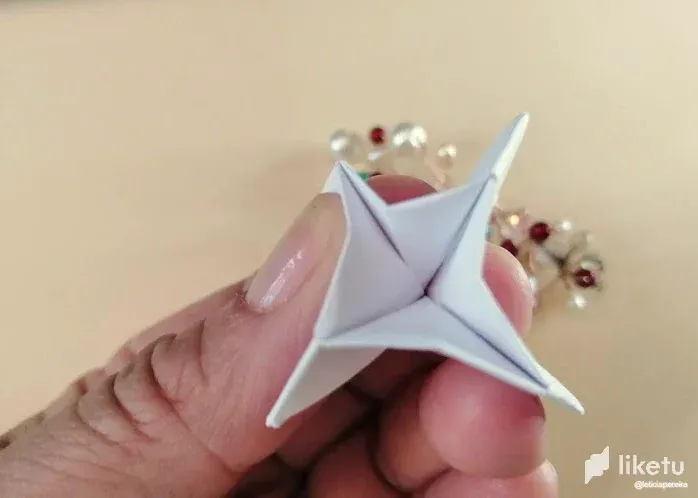
Photo nr. 07
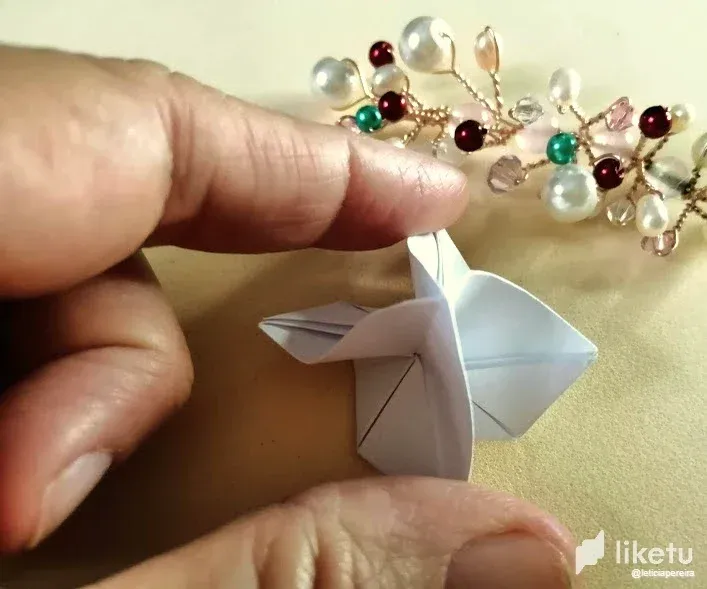
Photo nr. 08
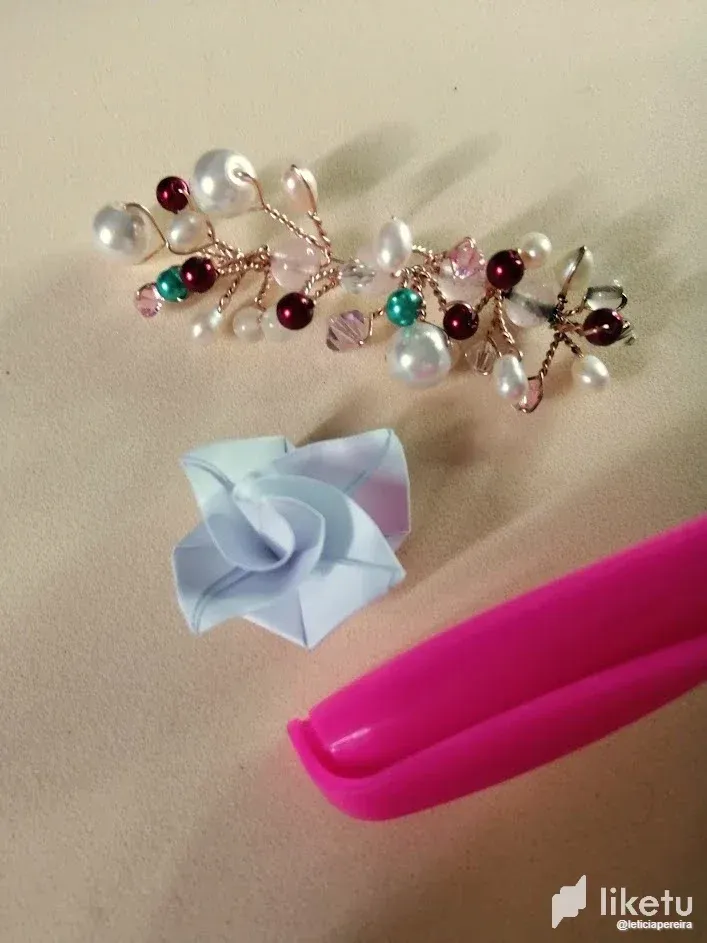
Photo nr. 09
In previous publications I have had the opportunity to indicate which and why roses are my favourite flowers, especially one in particular, as it contains my favourite colours, earning its name as "La locura del pintor", a rose that contains multiple colours which intensify along with its perfume, as they open their petals.
Inspired by this rose, I have come to present a new origami tutorial for the DIYHUB initiative, which is about to end in the next few hours, so I invite my friends @antoniarhuiz and @astrea to participate.
I have tried to capture the details of origami in each of the photographs, so that you can find your way around:
Photo nr. 2 - Step 1: Marking the fold.
The first thing to do is to mark very well all the corners and squares of our square, in this occasion I made it 8 x 8 cm, you can change its size, according to your taste, then make a triangle, as shown in the picture.
Picture nr. 3 - Step 2: Geometric Sides I
make two inner triangles, starting from the ends.
Picture no. 4 - Step 3: Geometric Sides II
Now, from the previous step, you will form squares.
Picture no. 5 - Step 4: Geometric Sides III
Again make triangles and fold the point in the middle.
Picture nr. 6 - Step 5: Repetition
Repeat the previous steps on the back of the piece and on the sides.
Photo no. 7 - Step 6:
Carefully, you will make the base of our flower, forming a square, making sure that the piece is placed at the top.
Photo nr. 8 - Step 7:
Once our flower is assembled, shape it by turning the upper end; make sure that the petals have the same direction of orientation as the turn you are going to make.
Photo nr. 9 - Step 8:
Colour your roses with coloured markers; combine to your taste and intensity. You can do this step before you start folding the paper.
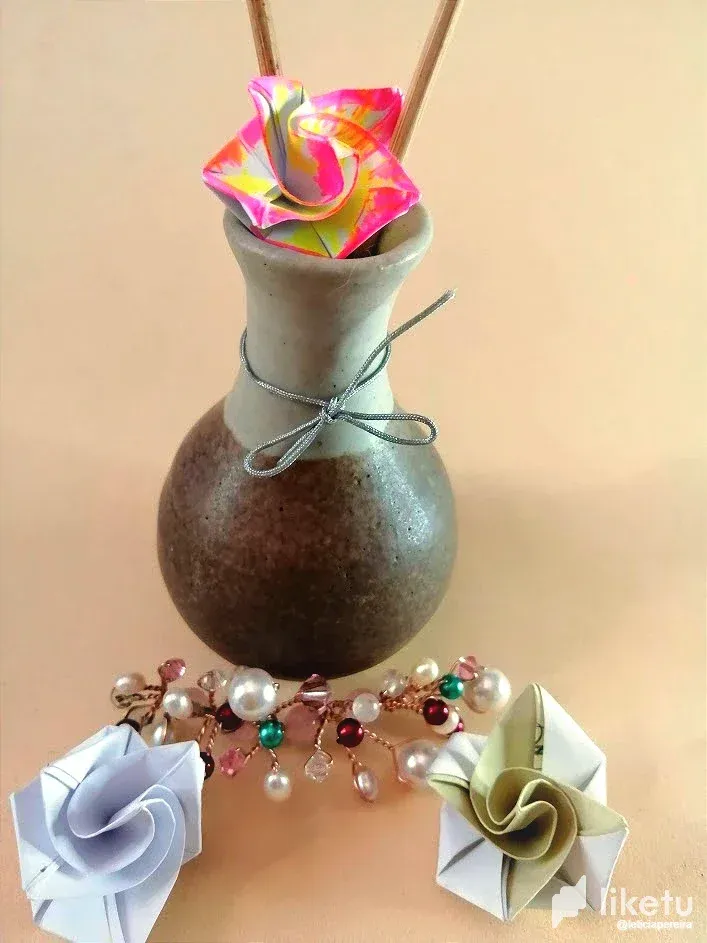
You can make as many as you like and decorate your desk, so you can remember this tutorial and initiative of the DIYHub Community
Thank you very much for joining me in this little tutorial!
Versión en Español
En publicaciones anteriores he podido tener la oportunidad de indicar cuál y porqué las rosas son mis flores favoritas, sobre todo una en especial, ya que contiene mis colores favoritos, ganando su nombre como "La locura del pintor", una rosa que contiene múltiples colores los cuales se intensifican junto a su perfume, a medida que van abriendo sus pétalos.
Inspirada en ésta rosa, he venido a presentarles un nuevo tutorial de origami, para la iniciativa DIYHUB, que está por culminar en las próximas horas, por lo que invito a mis amigas @antoniarhuiz y @astrea a participar.
He procurado que captar los detalles del origami en cada una de las fotografías, para que te puedas orientar:
Foto nro. 2 - Paso 1: Marcando el doblez.
Lo primero que haremos es marcar muy bien todas las esquinas y cuadros de nuestro cuadrado, en ésta ocasión lo realicé de 8 x 8 cm, puedes cambiar su tamaño, según el gusto, a continuación haz un triángulo, como se muestra en la imagen.
Foto nro. 3 - Paso 2: Lados Geométricos I
realiza dos triángulos internos, a partir de los extremos.
Foto nro. 4 - Paso 3: Lados Geométricos II
Ahora, a partir del paso anterior, formarás cuadrados.
Foto nro. 5 - Paso 4: Lados Geométricos III
Nuevamente haz triángulos y dobla la punta que estará en el medio.
Foto nro. 6 - Paso 5: Repetición
Repite los pasos anteriores por el reverso de la pieza y por los lados.
Foto nro. 7 - Paso 6:
Con cuidado, realizarás la base de nuestra flor, formando un cuadrado, procurando que la pieza se vaya acomodando en la parte superior.
Foto nro. 8 - Paso 7:
Una vez que está armada nuestra flor, dale forma girando el extremo superior; procura que los pétalos tengan el mismo sentido de orientación al giro que vas a realizar.
Foto nro. 9 - Paso 8:
Dale color a tus rosas, con marcadores de colores; combina a tu gusto e intensidad. Puedes realizar éste paso, antes de empezar a doblar el papel.
Puedes realizar la cantidad que gustes y adornar tu escritorio, así pordrás recordar éste tutorial e iniciativa de la Comunidad de DIYHub
Muchas gracias por acompañarme es éste pequeño tutorial!
©️ NOV-2023, @leticiapereira - Original Content
📷 HuaweiY9 - 2019
Filters by: Liketu & GooglePhoto App
App: Canva
🇻🇪 🔁 🇺🇸: Deepl
LEP045/2023
For the best experience view this post on Liketu
Saludos amiga, te quedó esplendorosa esa rosa. Gracias por la invitación, ya hice la mía hace días. 💐🌷🌺🌹🌻
Gracias amiga!!
Hola @leticiapereira esa rosa es hermosa, mi abuela las cultivaba gracias por traerme bonitos recuerdos.
El paso a paso está bien explicado y se ve fácil, es un lindo detalle para regalar y decorar, suerte en el concurso, un abrazo enorme. 🤗
Las flores en papel son más hermosas que las de verdad jiji, bueno a mí me gustan mucho, la verdad es un hermoso arte, te quedaron muy bien, saludos.
Muchas gracias!!
What beautiful roses❤. I've never seen this color of a rose before, it's very pretty.
Your paper-folding techniques are top-notch!
Good luck with your entry✨
Thank you very much for the support and for your comment!
@tipu curate 6
Upvoted 👌 (Mana: 0/72) Liquid rewards.
Gracias amigo por el apoyo!!
Que bonita rosa, me gusta mucho
Gracias por el apoyo amiga!!
From Venezuela, our witness drives decentralization and the adoption of Web3 technology, creating opportunities for the local community and contributing to the global ecosystem. // Desde Venezuela, nuestro testigo impulsa la descentralización y la adopción de la tecnología Web3, generando oportunidades para la comunidad local y contribuyendo al ecosistema global.
Sigue, contacta y se parte del testigo en: // Follow, contact and be part of the witness in:
Con el apoyo de la familia.
También nos puedes apoyar en nuestro Trail de TopFiveFamily
Si desea delegar HP al proyecto de la Familia del Top Family puedes hacerlo desde aquí: Delegue 5 HP - Delegue 10 HP - Delegue 20 HP - Delegue 30 HP - Delegue 50 HP - Delegue 100 HP.
Gracias por el apoyo Familia bella!!
#posh
~~~ embed:1729127858231189973?t=xavZWe9uvDBHEg9sR3_emA&s=19 twitter metadata:YWljaXRlbDF8fGh0dHBzOi8vdHdpdHRlci5jb20vYWljaXRlbDEvc3RhdHVzLzE3MjkxMjc4NTgyMzExODk5NzN8 ~~~
que belleza! muy bonito para decorar!
what a beauty! very nice to decorate!
Muy lindo trabajo amiga @leticiapereira. Te felicito. Gracias por sumarte al concurso de nuestra comunidad. Éxitos y mucha suerte...
!DIY
Nice origami work very nice, the rose was very pretty. Thanks for joining the contest in our community. Good luck and lots of success...
You can query your personal balance by
!DIYSTATShttps://reddit.com/r/hivevlog/comments/185jijc/origami_painters_folly_tutorial_diy/
The rewards earned on this comment will go directly to the people( @leticiapereira ) sharing the post on Reddit as long as they are registered with @poshtoken. Sign up at https://hiveposh.com.
Está hermosa tu rosa de origami. Felicitaciones y éxitos. Saludos y cariños, amiga @leticiapereira. 😍
Que buen origami me encantan aunque no tengo la destreza para realizarlos jejeje
Recuerda la campaña de inleo todavía tienes chance de ganar
Congratulations @leticiapereira! You received a personal badge!
You can view your badges on your board and compare yourself to others in the Ranking
En un próximo post me gustaria verte publicar desde team-mexico para poderte ver y votar! O crossp-post lo que sea, la idea es que pueda ver tu contenido. Aquí te dejo el link https://hive.blog/trending/hive-174683
Cuánto tiempo amigos..!! Muchas gracias por la invitación..!! Pronto voy a estar de regreso..!! Un abrazo!!