✨Bienvenidos. // Welcome. ✨

Hello to all my dear colleagues, it's a pleasure to greet you. Today I want to share with you one of my creative activities that I like to do with much affection for you a step by step. I hope you are very well today again poraca after a few days absent problem with the electrical system that is not yet resolved here I share a super cute eva rubber ornament to decorate our home this Christmas season is very practical to make and economical I hope you like it here I leave its elaboration.
Hola a todos queridos compañeros un gusto en saludarlos. Hoy les quiero compartir una de mis actividades creativas que me gusta hacer con mucho cariño para ustedes un paso a paso. Espero que estén muy bien hoy de nuevo poraca después de unos días ausente problema con el sistema eléctricos que aún no se resuelve aca les comparto un adorno de goma Eva súper lindo para decorar nuestro hogar en esta época navideña es muy práctico de hacer y económico espero que les guste aca les dejo su elaboración.

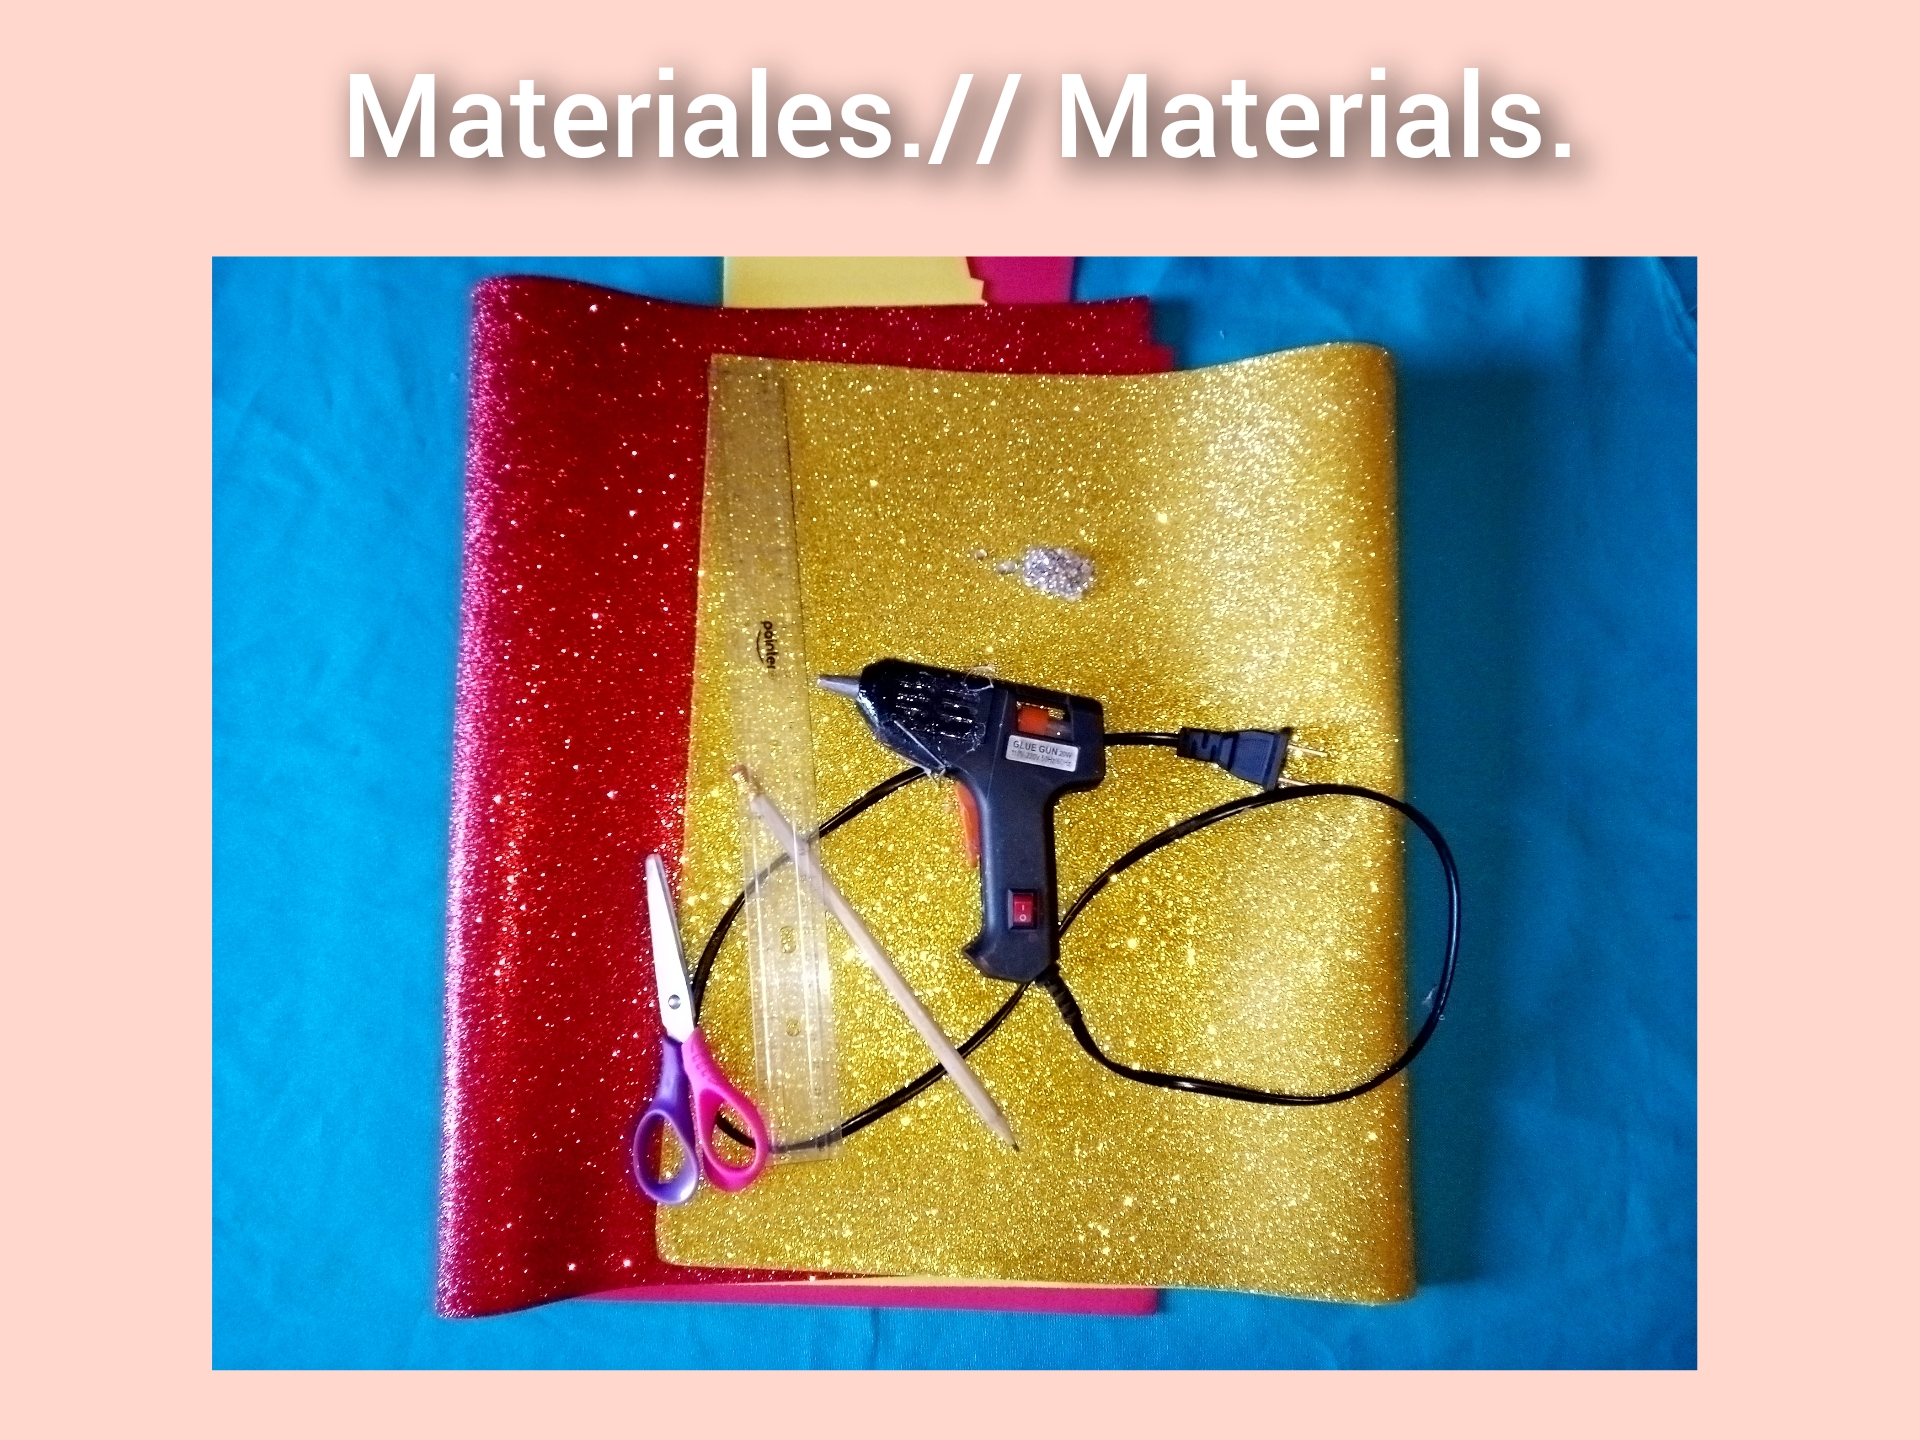
Materials.
Materiales.
- Red and gold frosted eva rubber.
- Scissors.
- Pencil.
- Ruler.
- Silicone gun.
- Shiny stone.
- Goma Eva escarchado rojo y dorado.
- Tijera.
- Lápiz.
- Regla.
- Pistola de silicón.
- Piedra brillante.
Step by step.
Paso a paso.
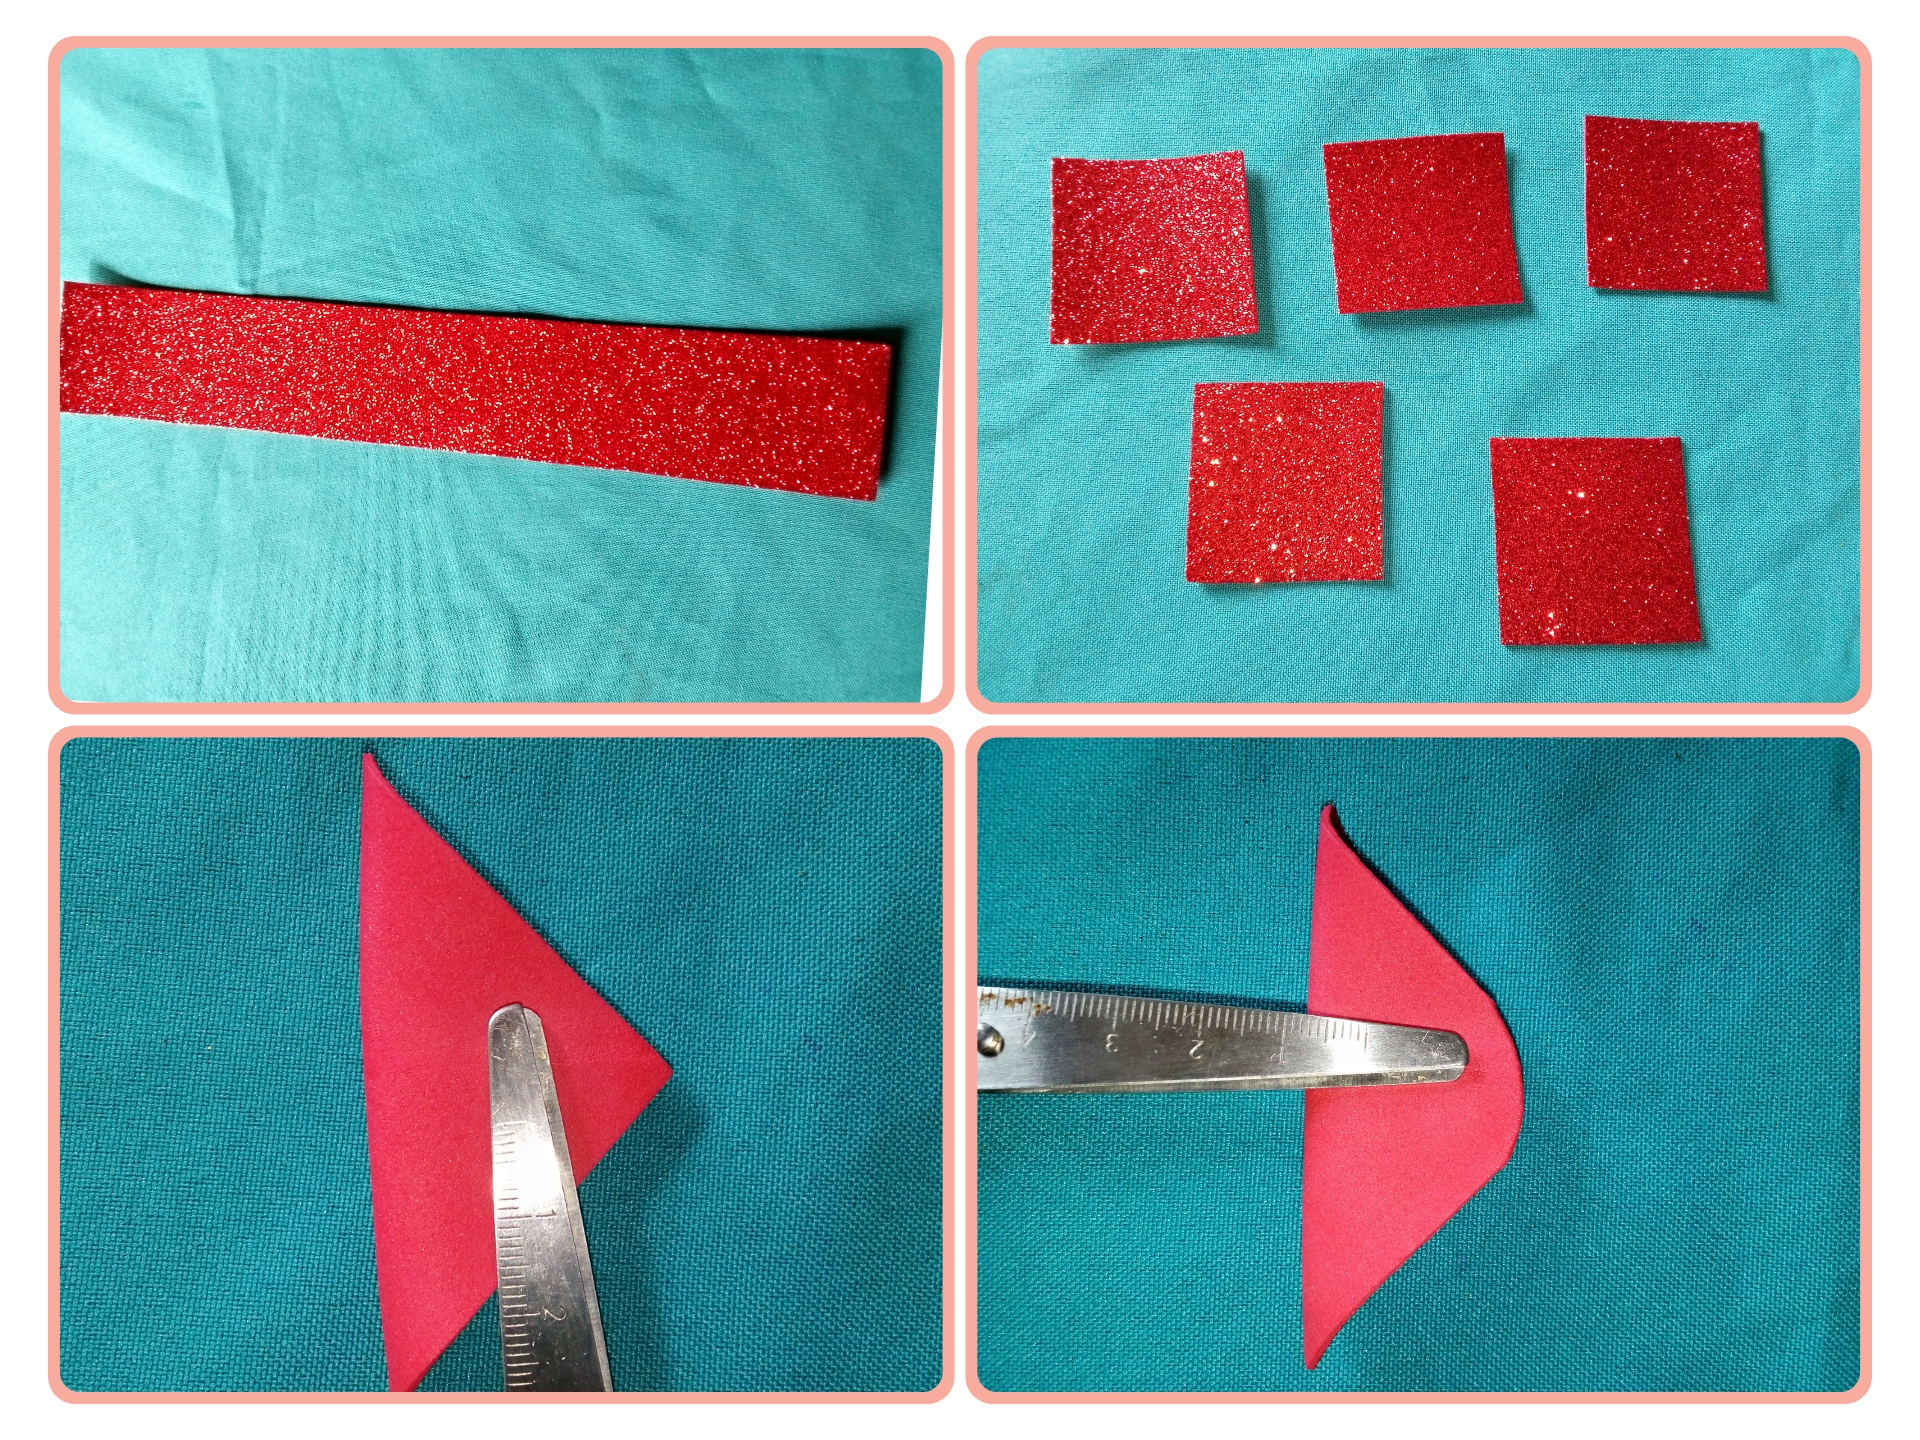
Paso 1. // Step 1.
Take a sheet of frosted eva gum and cut the measure of about 5x25 centimeters and divide five square of 5x5 centimeters. Fold in half the square at the tip cut oval.
Coge un pliego de goma Eva escarchado y corta la medida de unos 5x25 centímetros y divide cinco cuadrado de 5x5 centímetros. Dobla por la mitad el cuadrado en la punta cortamos ovalado.
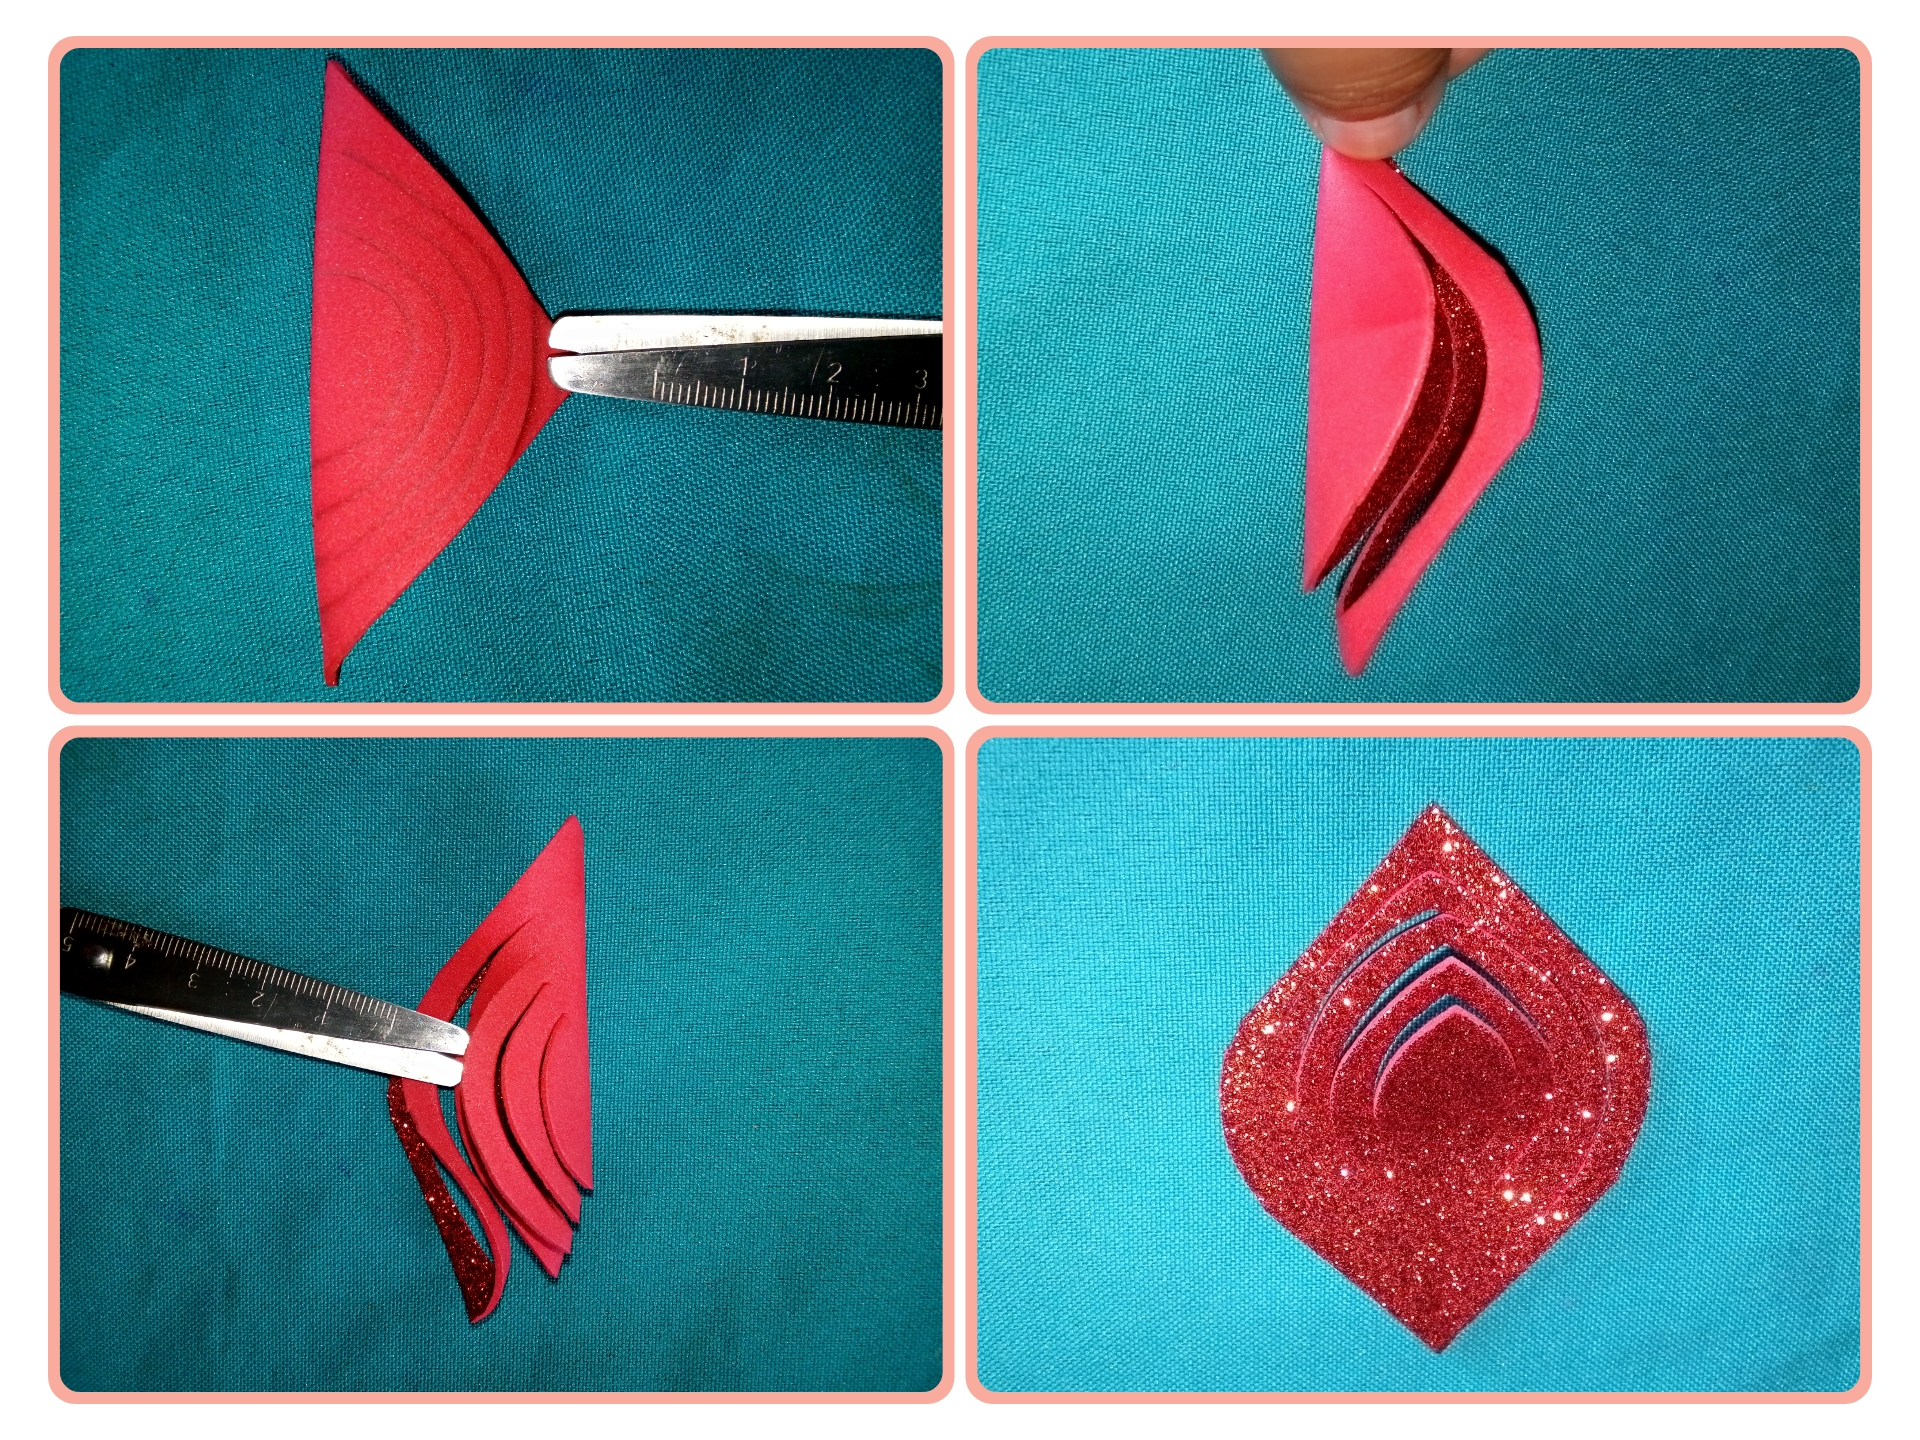
Paso 2. // Step 2
Once folded, mark with the help of a pencil four curved lines leaving 5 millimeters and cut carefully. Once cut, we open it and see that it will look like a sheet with 4 layers.
Ya doblado marcamos con la ayuda del lápiz cuatro líneas curvas dejando 5 milímetros y corta con cuidado una vez cortado abrimos vemos que parecerá como una hoja con 4 capas.
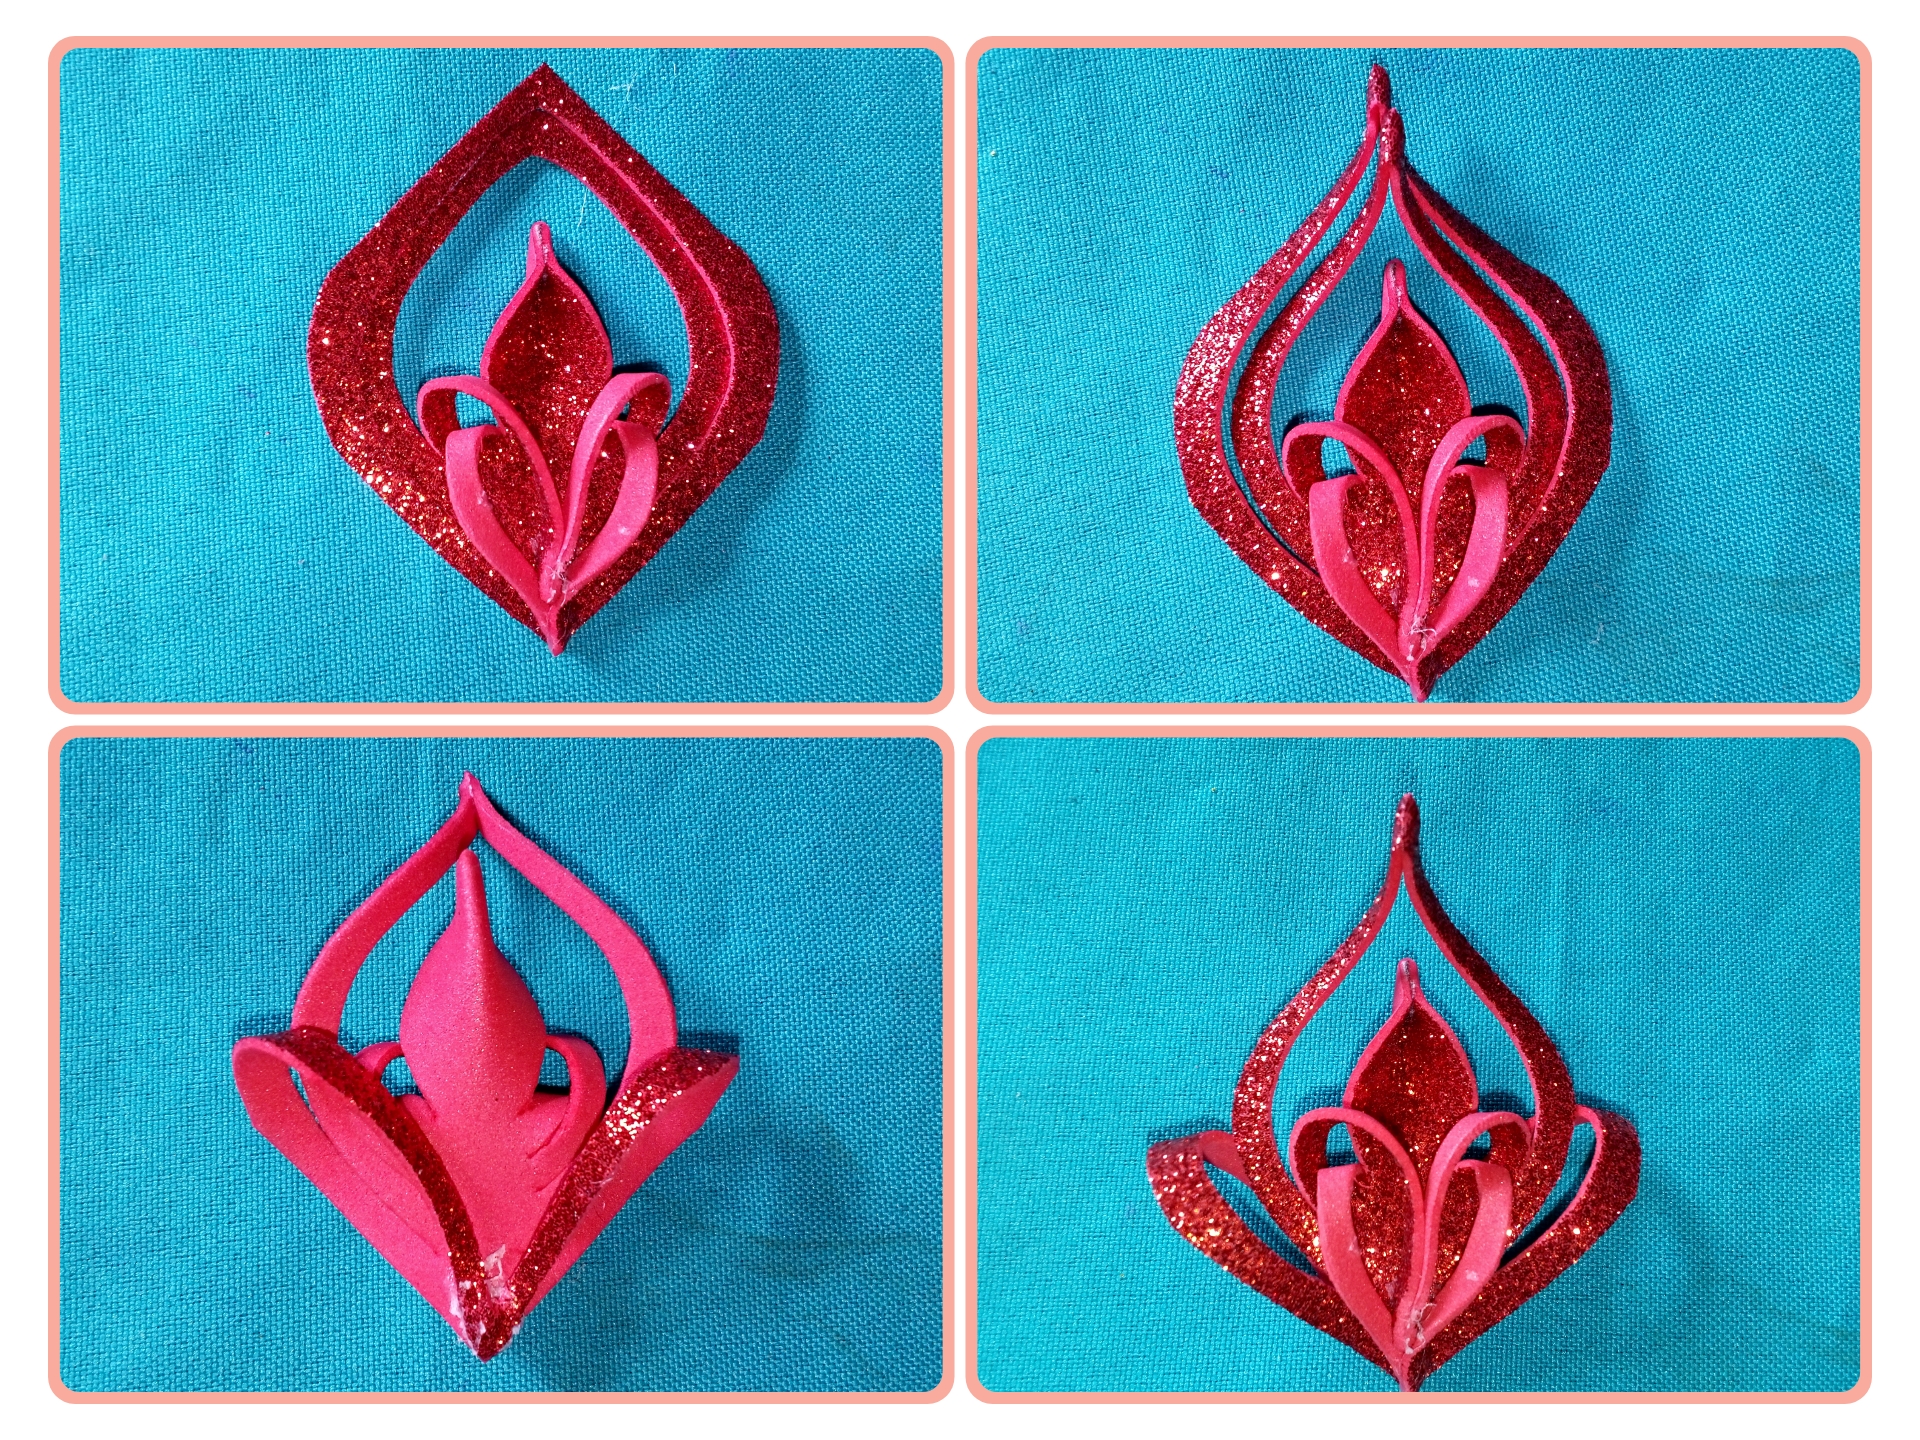
Paso 3. // Step 3.
Once our leaf is open, hot glue the first part to the tip with silicone. Glue the second part outwards also on the tip and glue under the second tip.
Una vez abierta nuestra hoja pega con silicón caliente la primera parte en la punta. Pega la segunda parte hacia afuera igualmente en la punta y pega bajo la segunda punta.
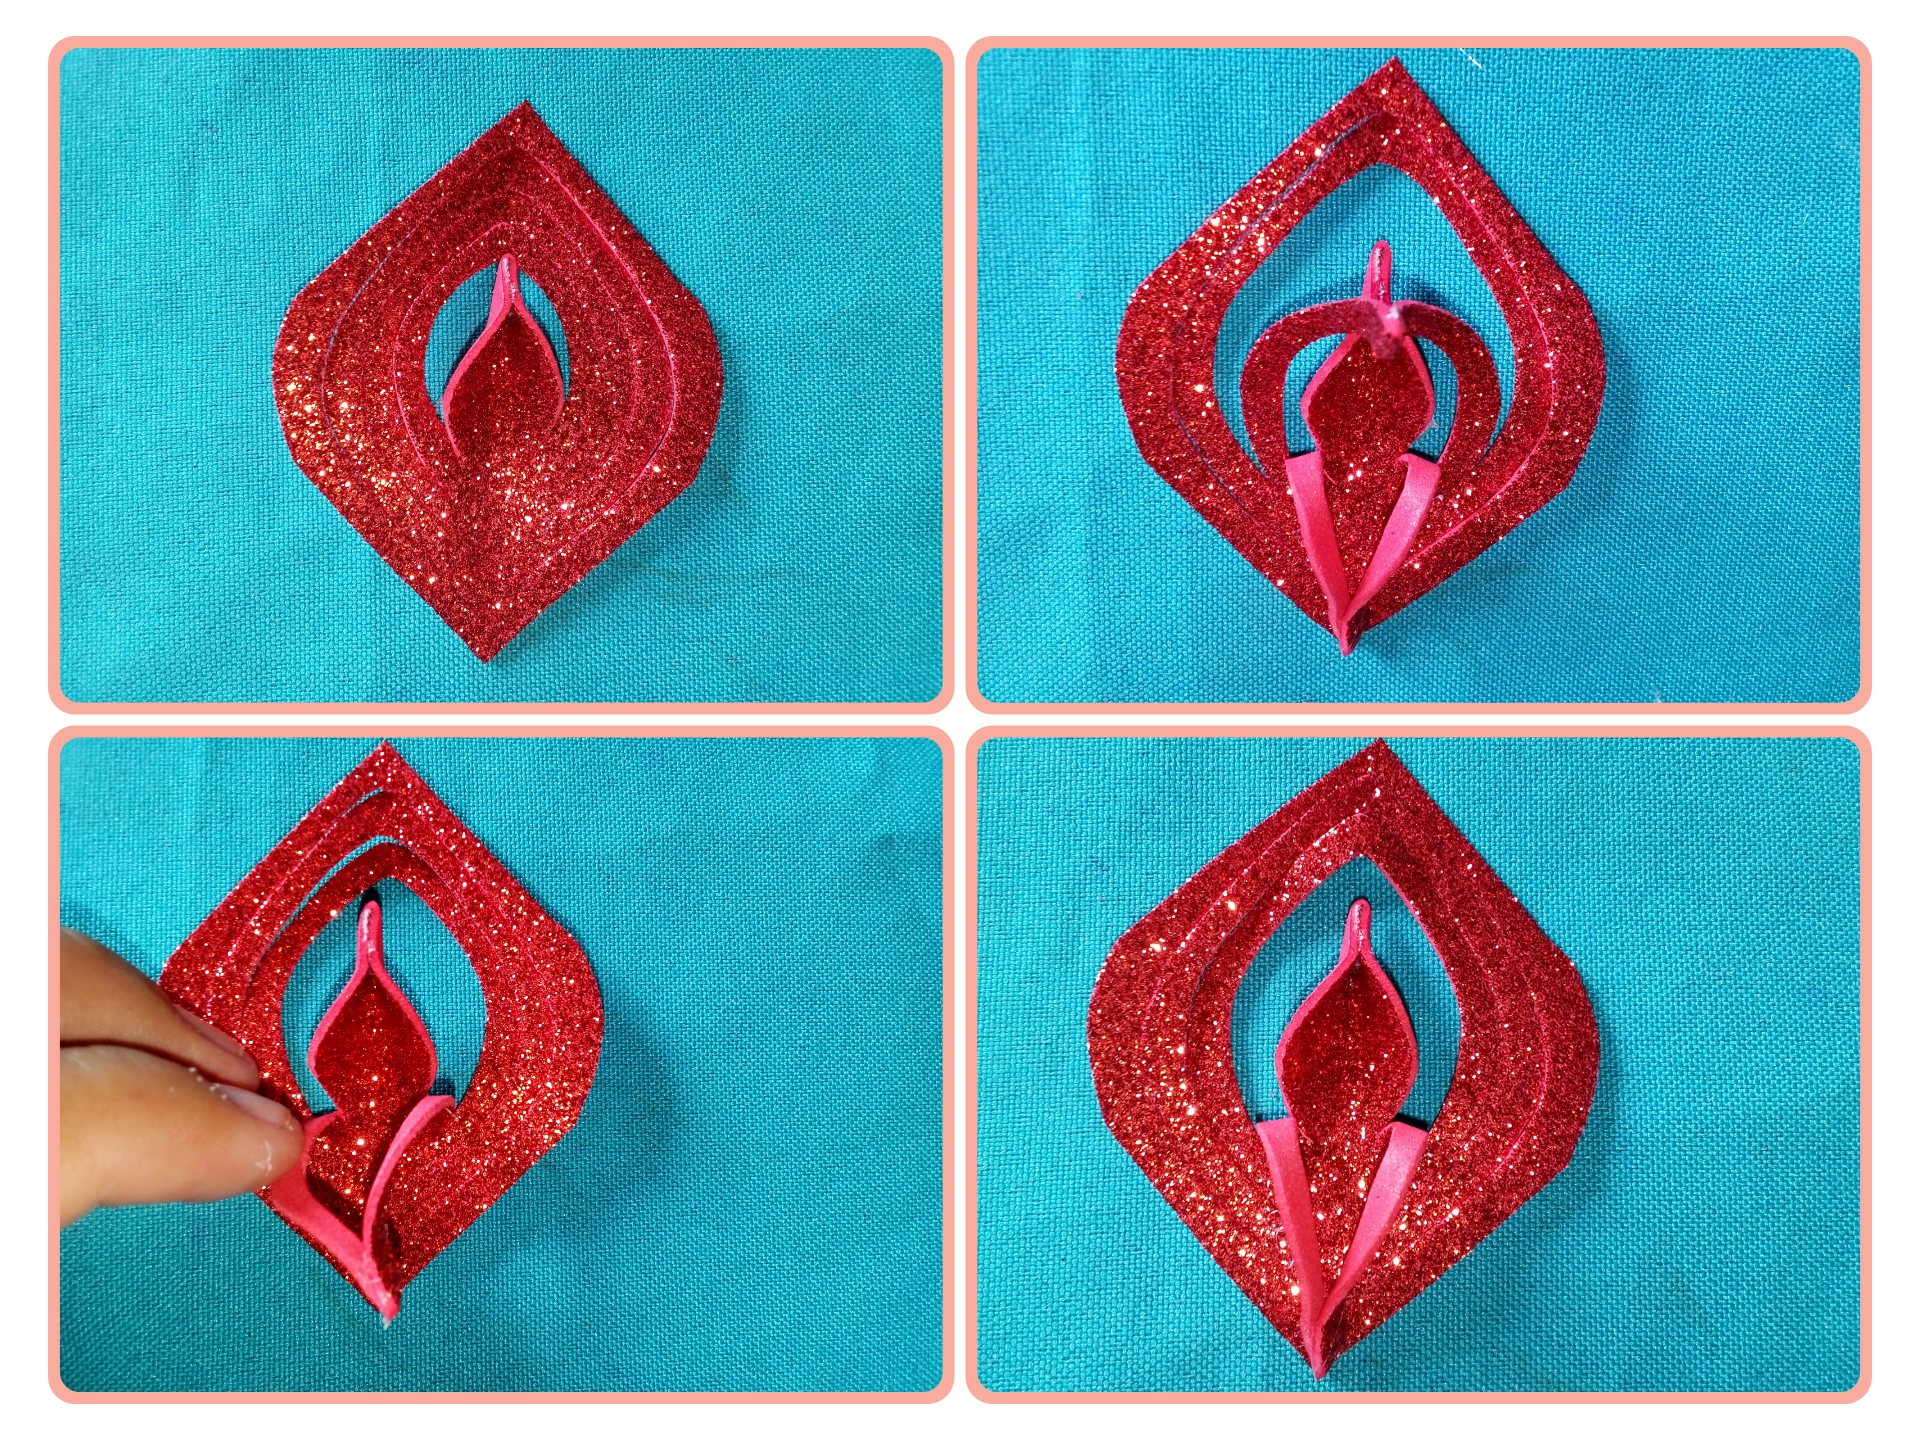
Paso 4. // Step 4.
The third part glue the tip outwards and also glue with hot silicone downwards. The fifth part glue the tip and glue towards the back. And the fourth part glue only the tip and leave it like this. This way our design will look like this.
La tercera parte pega la punta hacia afuera y igualmente pega con silicón caliente hacía abajo. La quinta parte pega la punta y pegamos hacia la parte trasera. Y la cuarta parte pega solo la punta y déjalo así. De esta manera quedara nuestro el diseño.
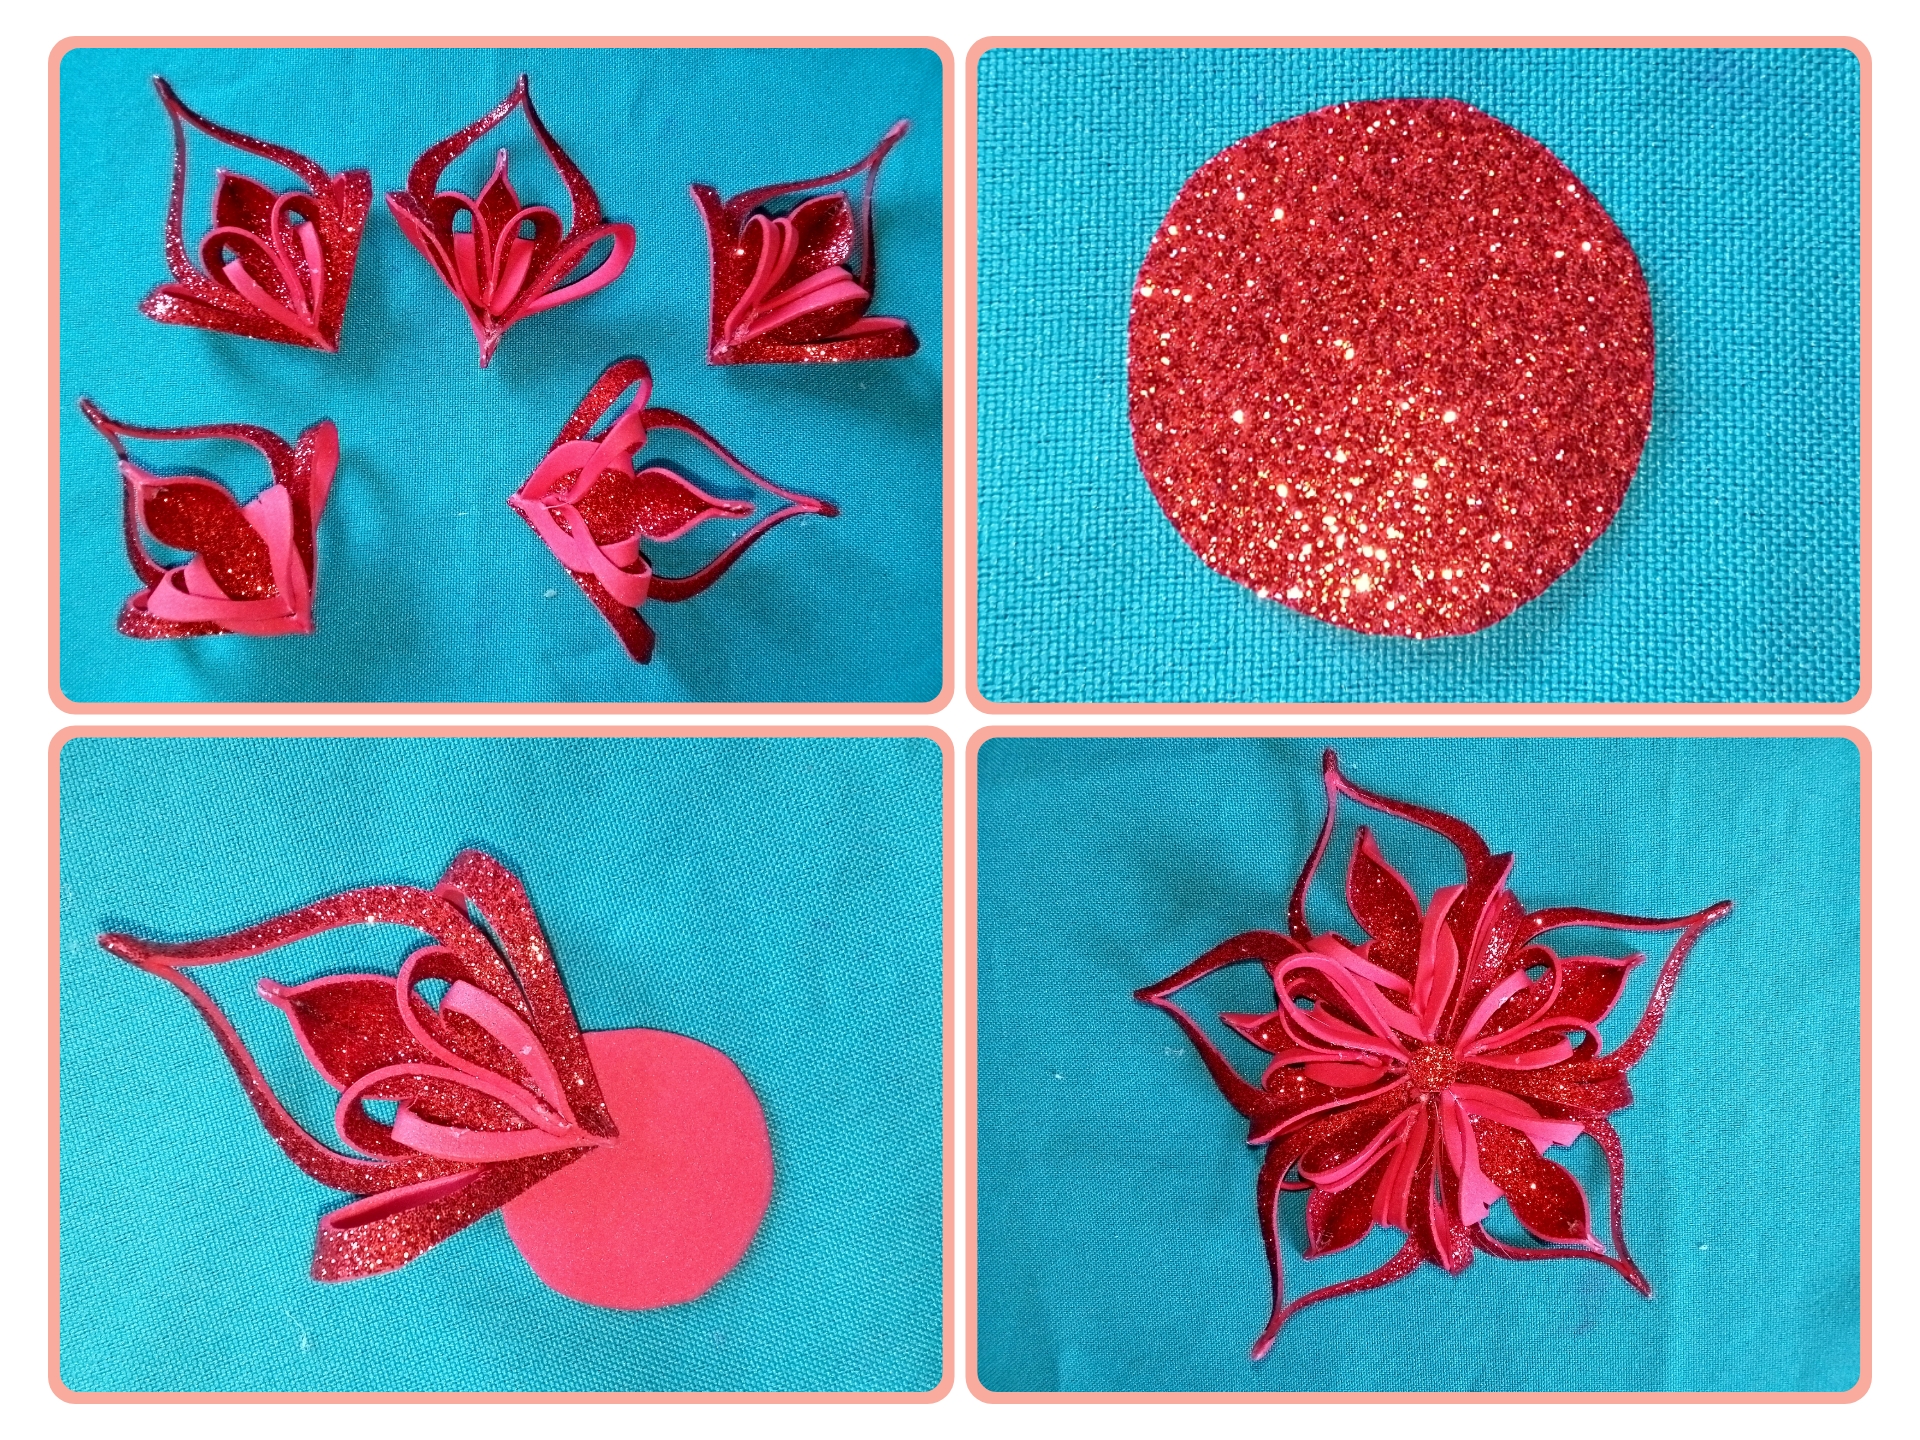
Paso 5. // Step 5.
Repeat the previous step with the other squares. And we will have five equal designs. Then cut an eva rubber circle of about 2 centimeters and glue with silicone each design on the circle.
Repite el pasó anterior con los demás cuadrados. Y tendremos cinco diseño iguales. Luego corta un círculo de goma Eva de unos 2 centímetros y pega con silicón cada diseño en el círculo.
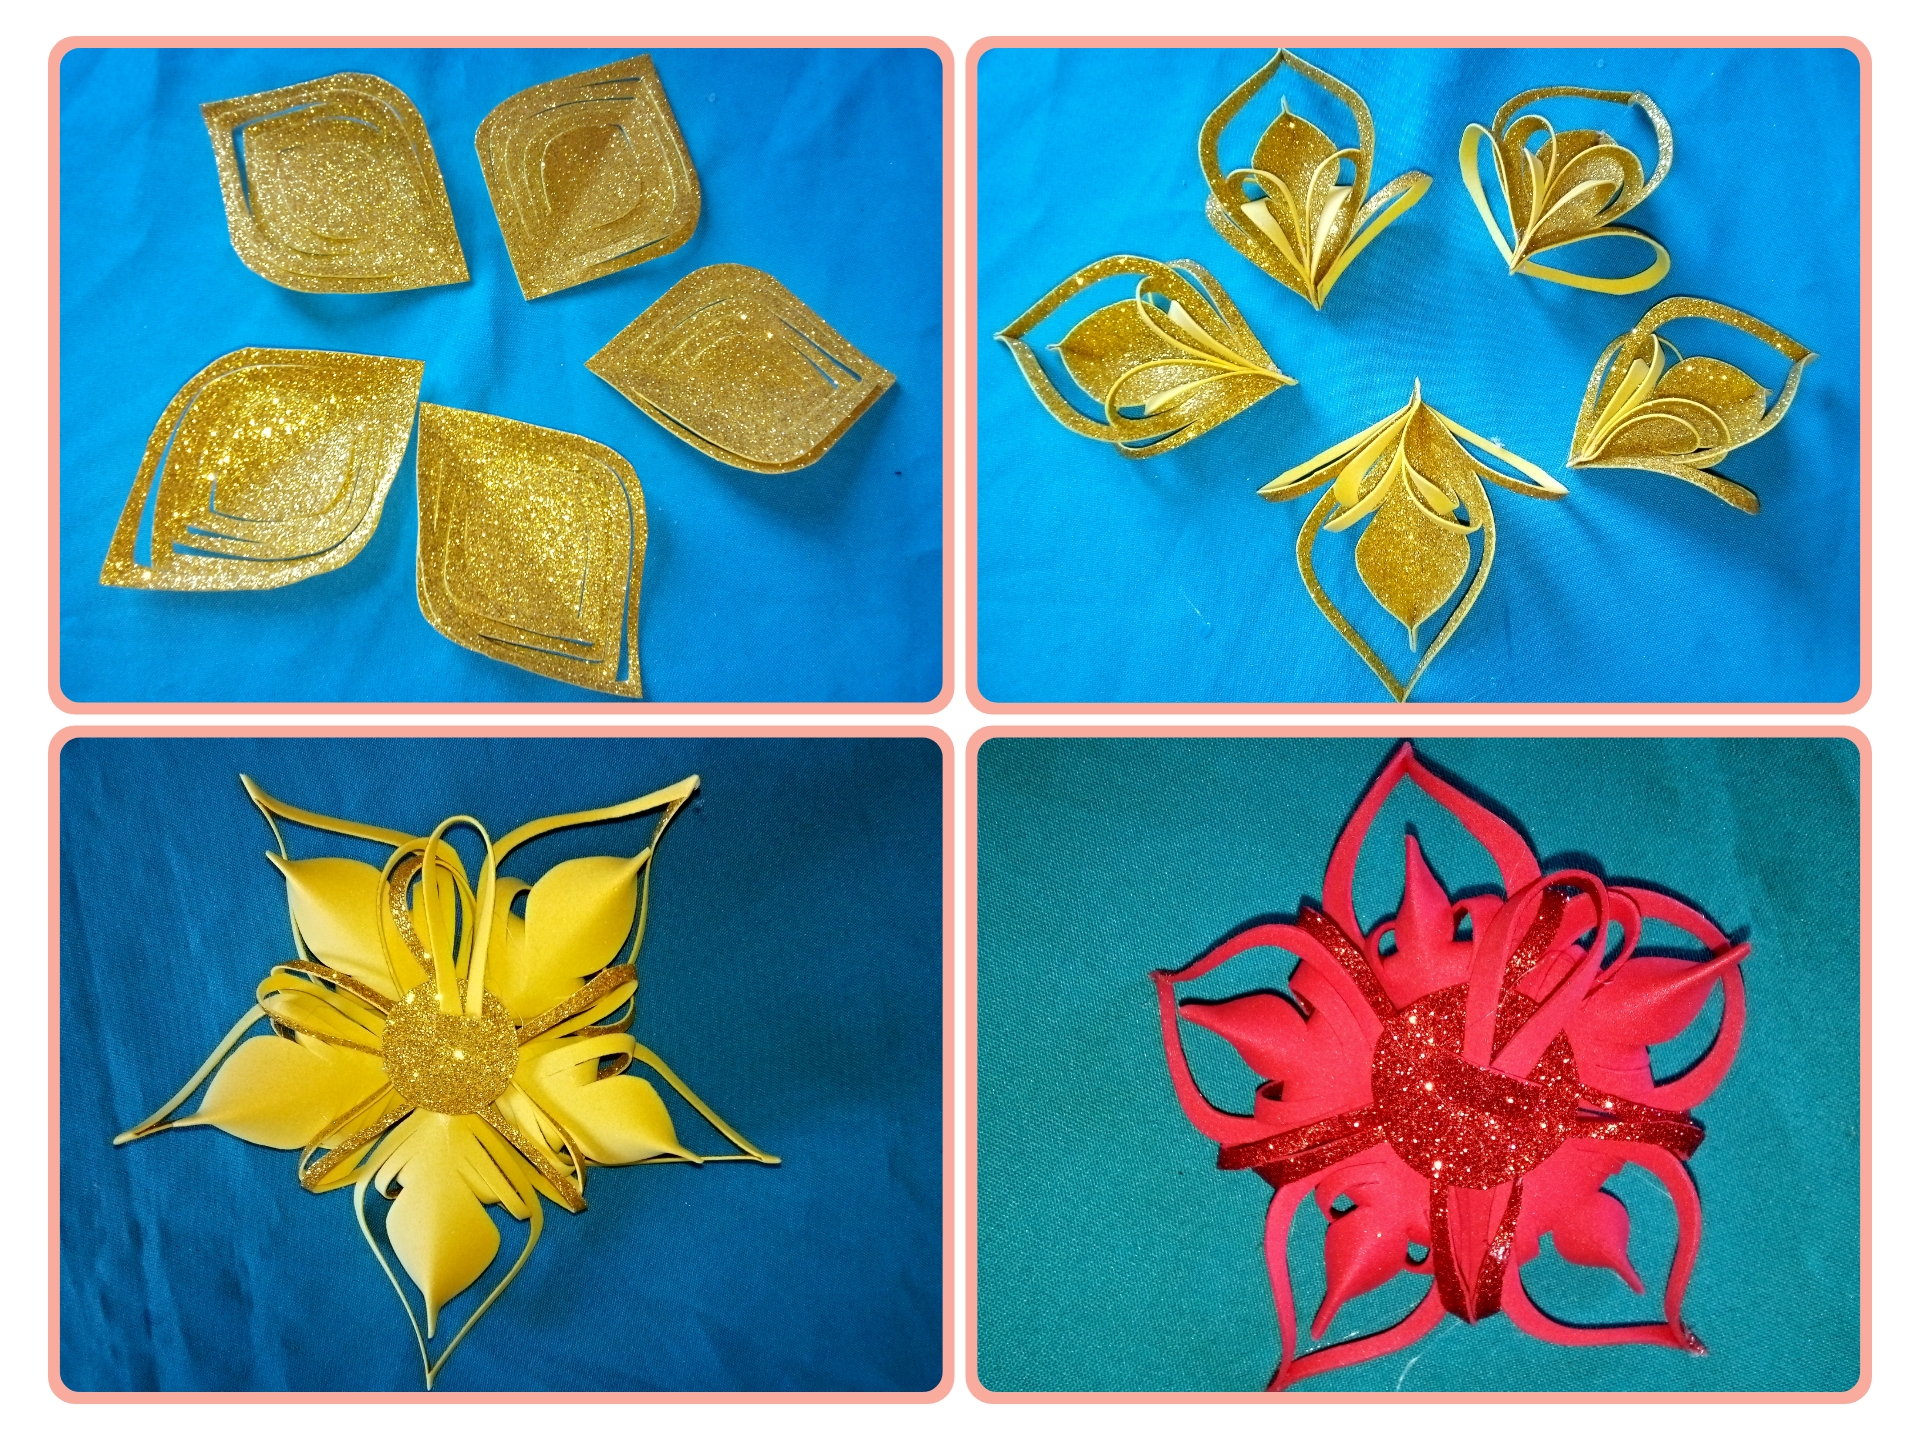
Paso 6. // Step 6.
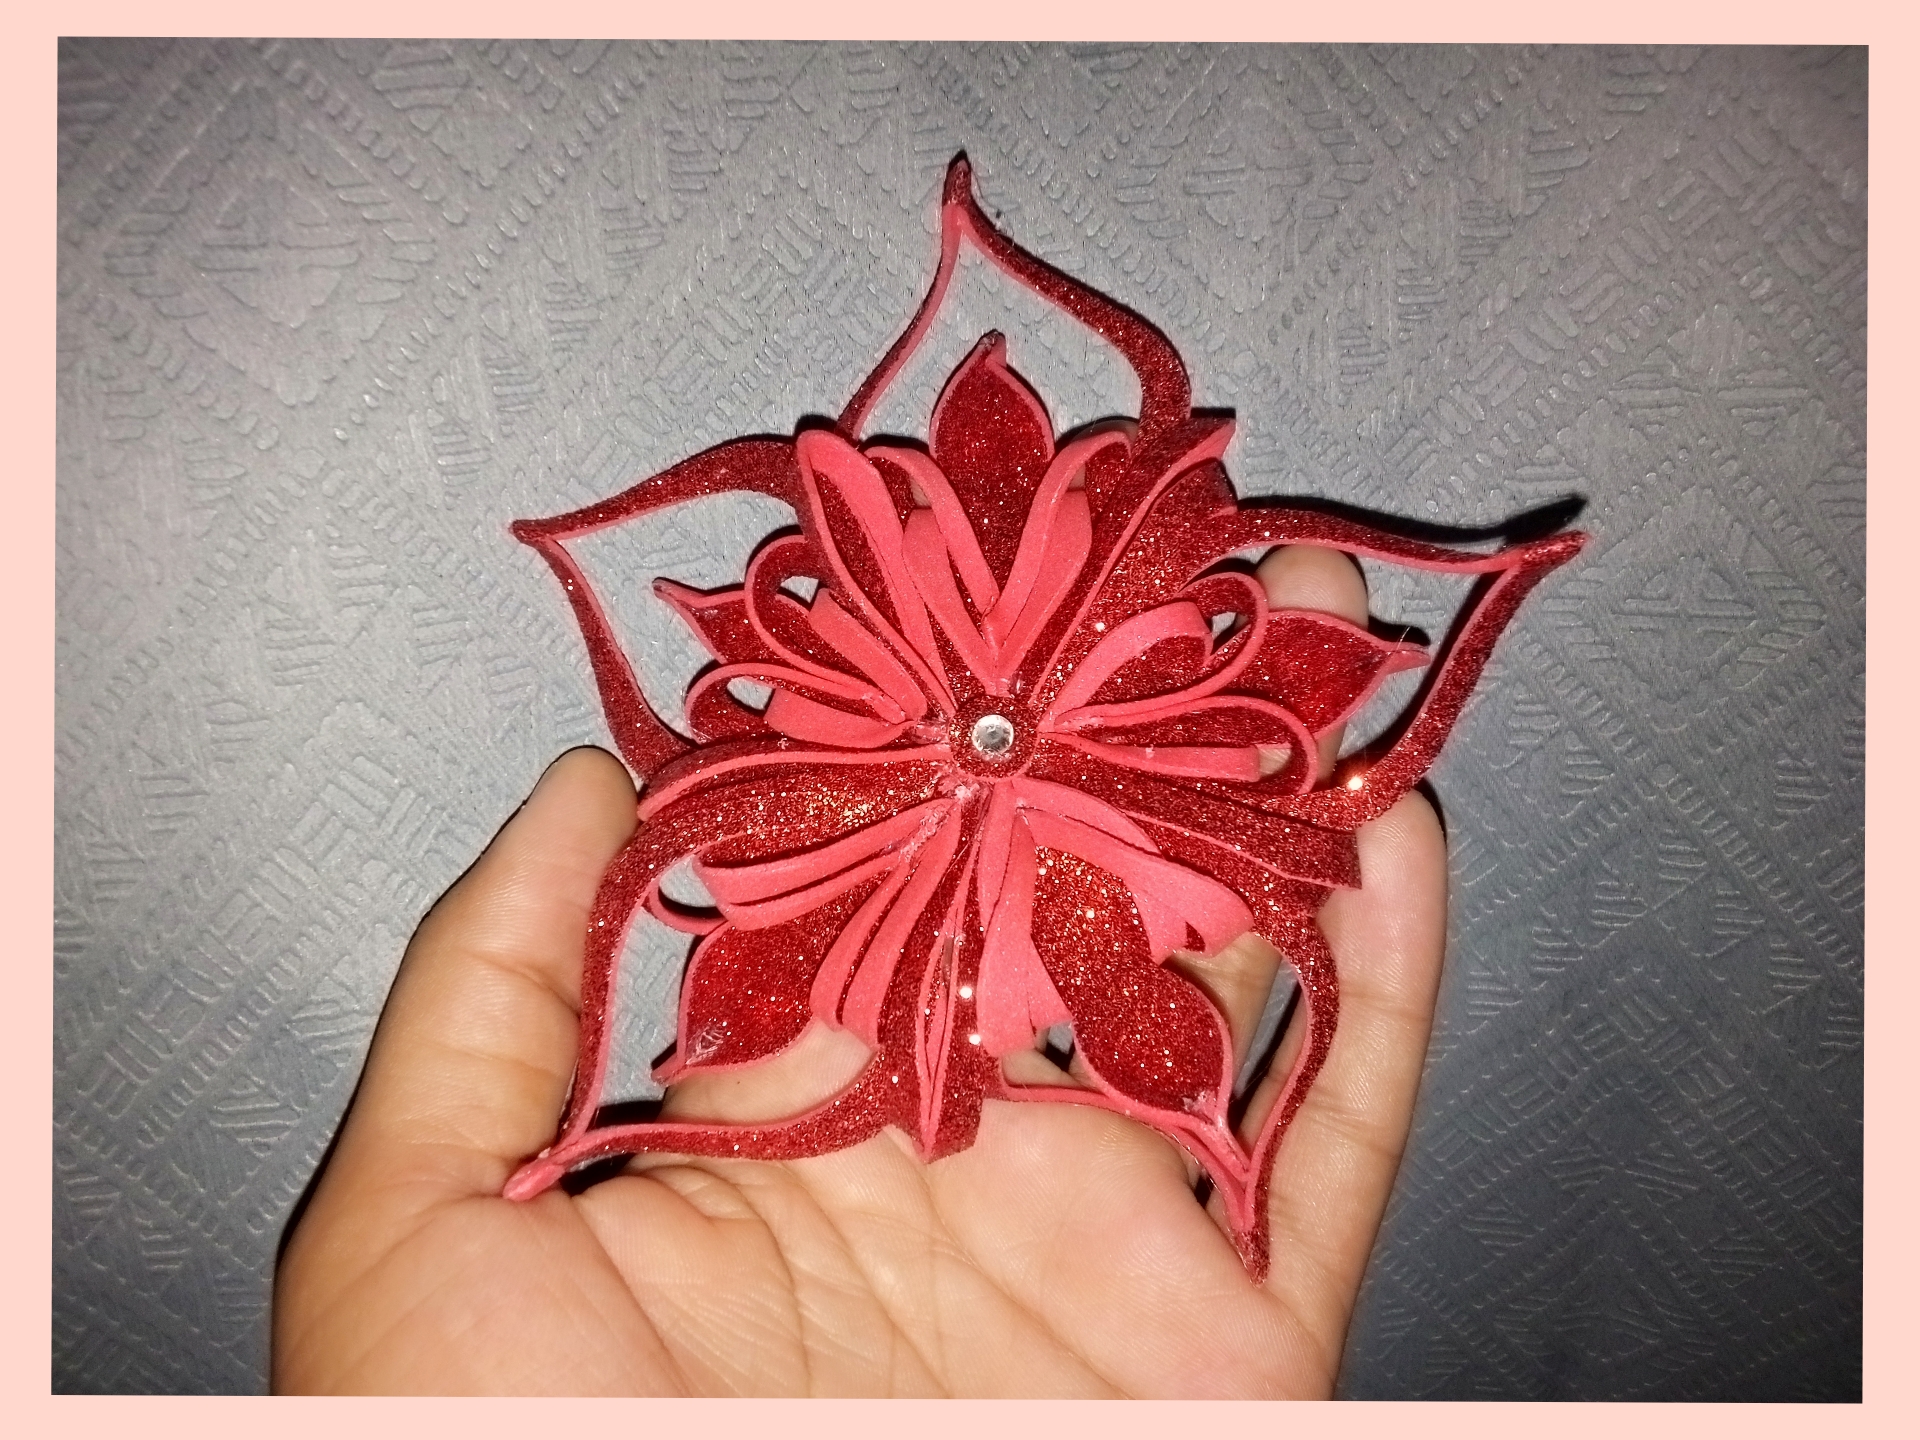
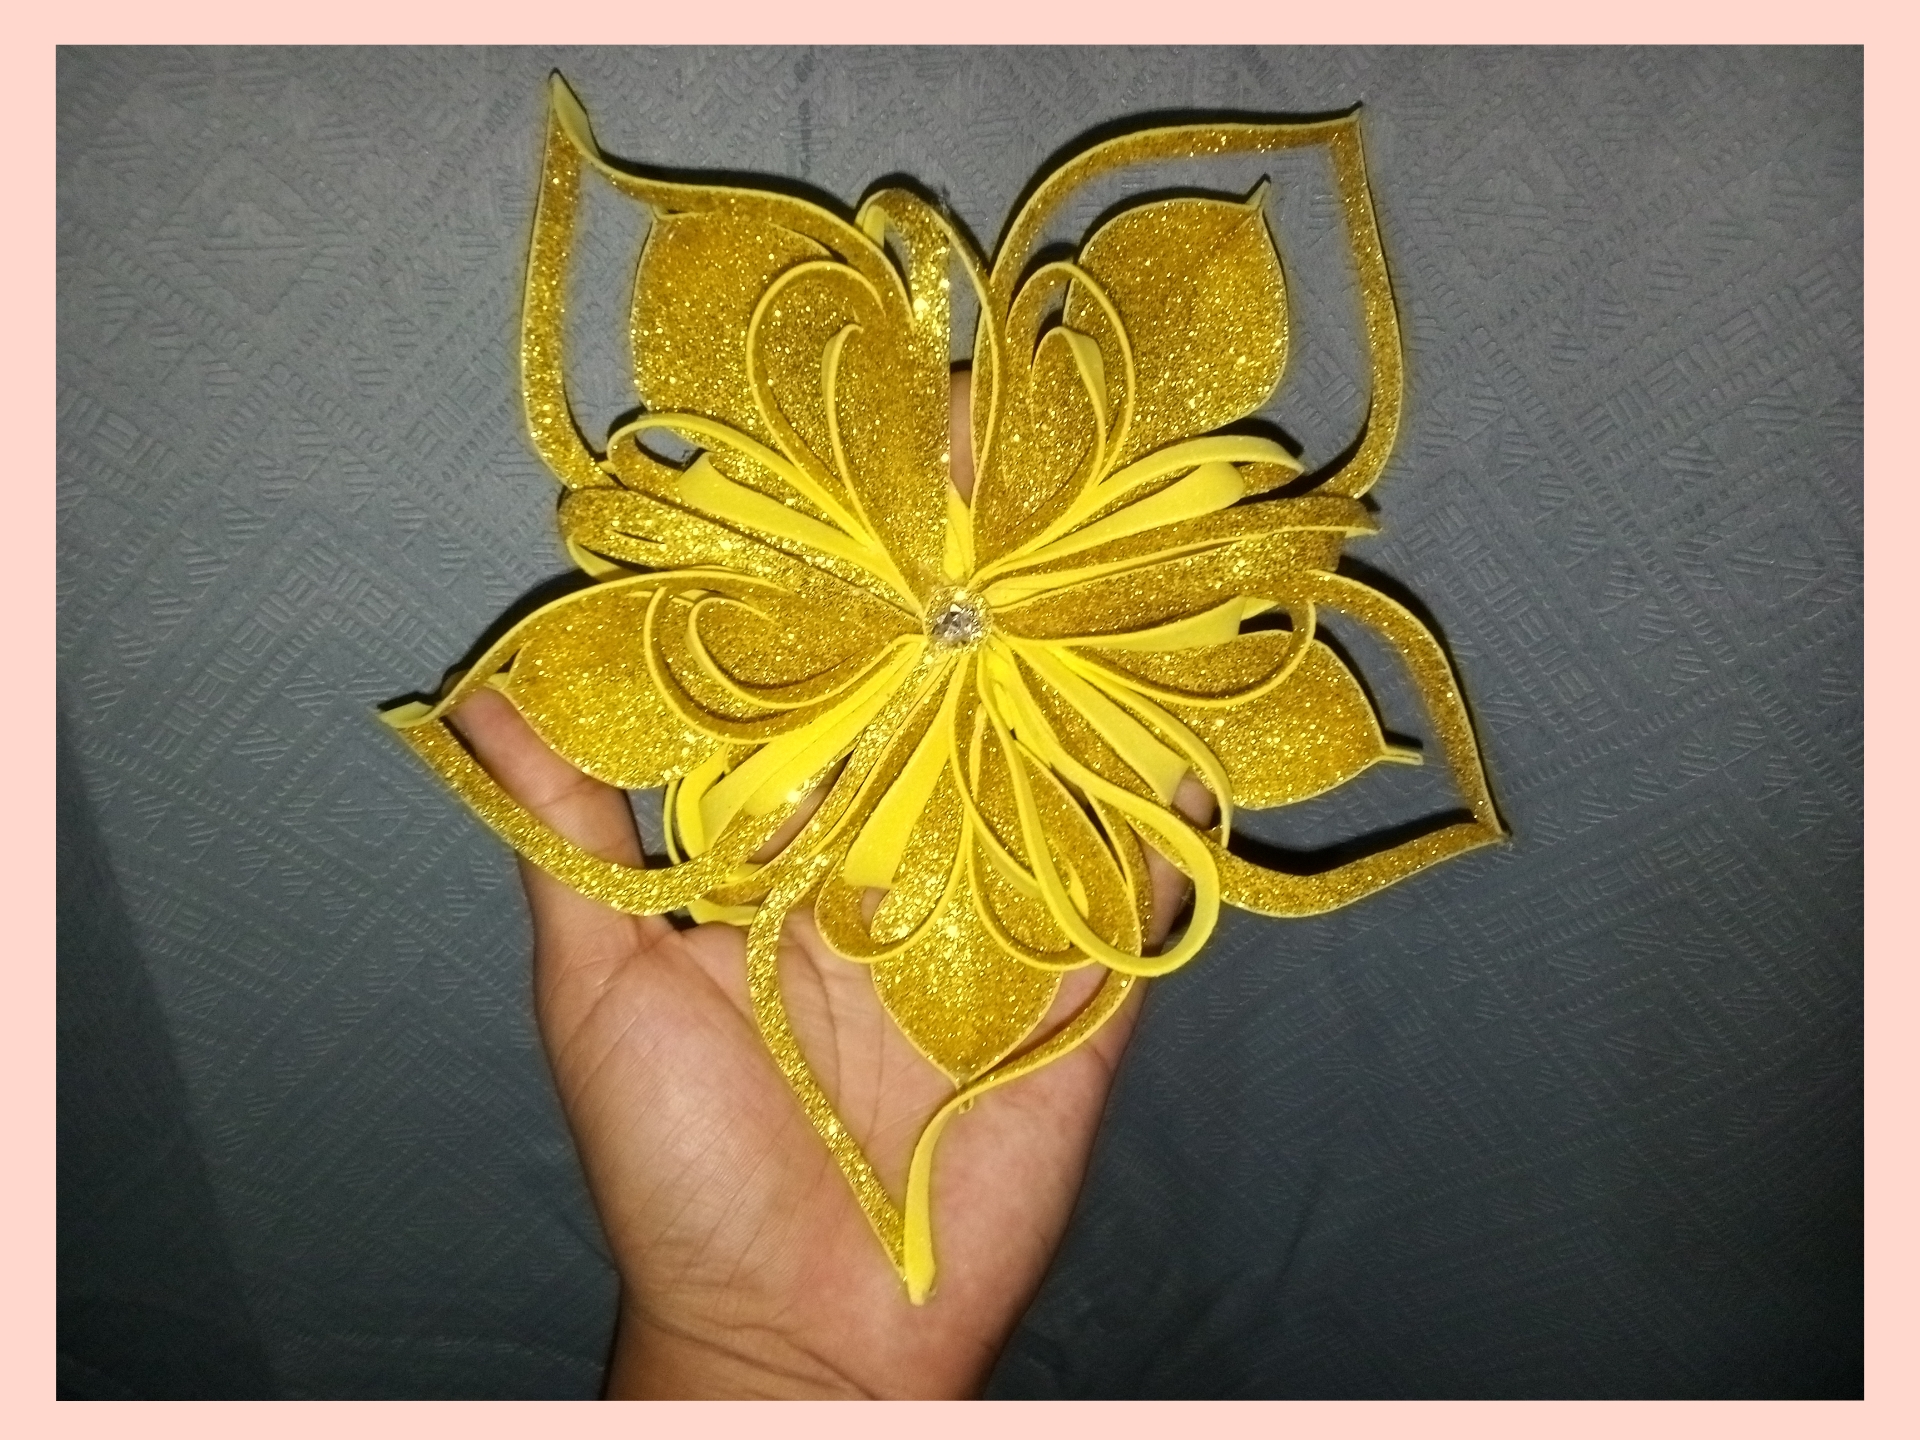
If you want the ornament a little bigger and in a different color, use the 8 x 8 centimeters size and use it in the gold color with the same steps, it is also beautiful. Finally glue in a small circle in the front part and next to that glue the shiny stone and to hang make a thin strip and glue in the back part.
Si quiere el adorno un poco más grande y de otro color usa la medida de 8 x8 centímetros esa la use en el color dorado con los mismos pasos queda bello también. Por último pega en un círculo pequeño en la parte delantera y junto a eso pega la piedra brillante y para colgar haz una tira fina y pega en la parte trasera.
✨Final result. // Resultado final.✨
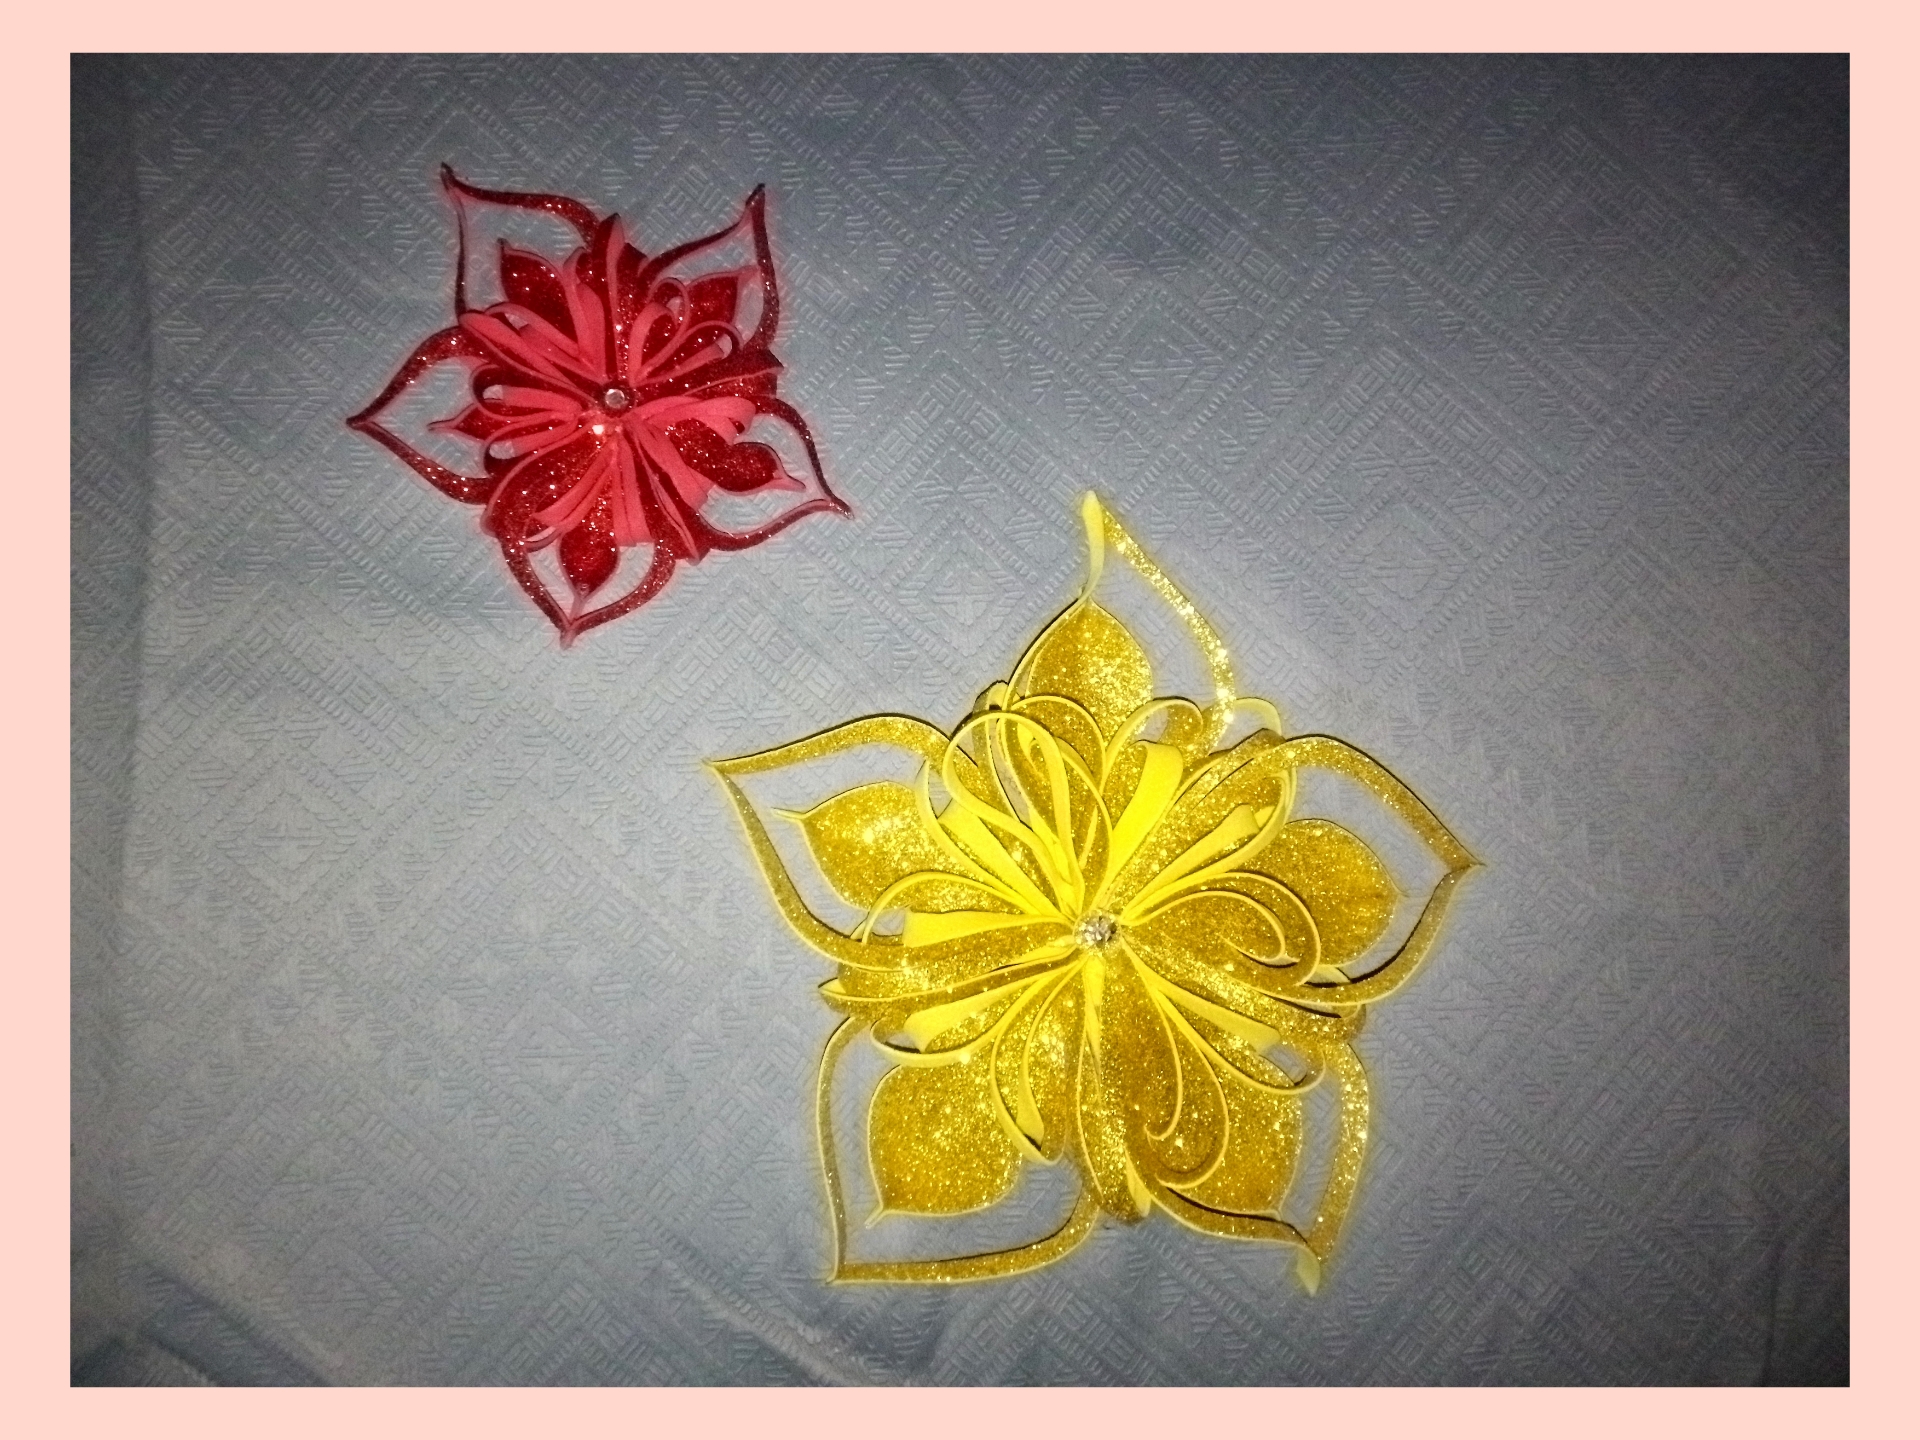
Gracias por visitar.
Todas las fotos y el contenido son originales que hago diariamente para mi blog. Para La traducción uso deepl los marcos y separadores es usado de canva .📷🖼️🤗
Thank you for visiting.
All photos and content are originals that I make daily for my blog. For translation I use deepl the frames and separators are used from canva .📷🖼️🤗

Quedaron preciosos, estos adornos quedarán muy bien en tu hogar 🎄
Hola, @marile21 si se ve muy bien gracias por comentar.
Festival is very important because this time we Forget everything. To decorated our home in a new addition and handmade thing is related our emotion. Lovely thing that you make for Christmas to decorations your home. Thank you to share.
Hello of course handmade is made with love and on time in this season that is very beautiful and special thanks for your comment.
Welcome..
That is a great piece of decoration for the home. It's almost the Christmas season.
That's right with that piece it will look nice house thanks @diyhub