✨Bienvenidos. // Welcome. ✨
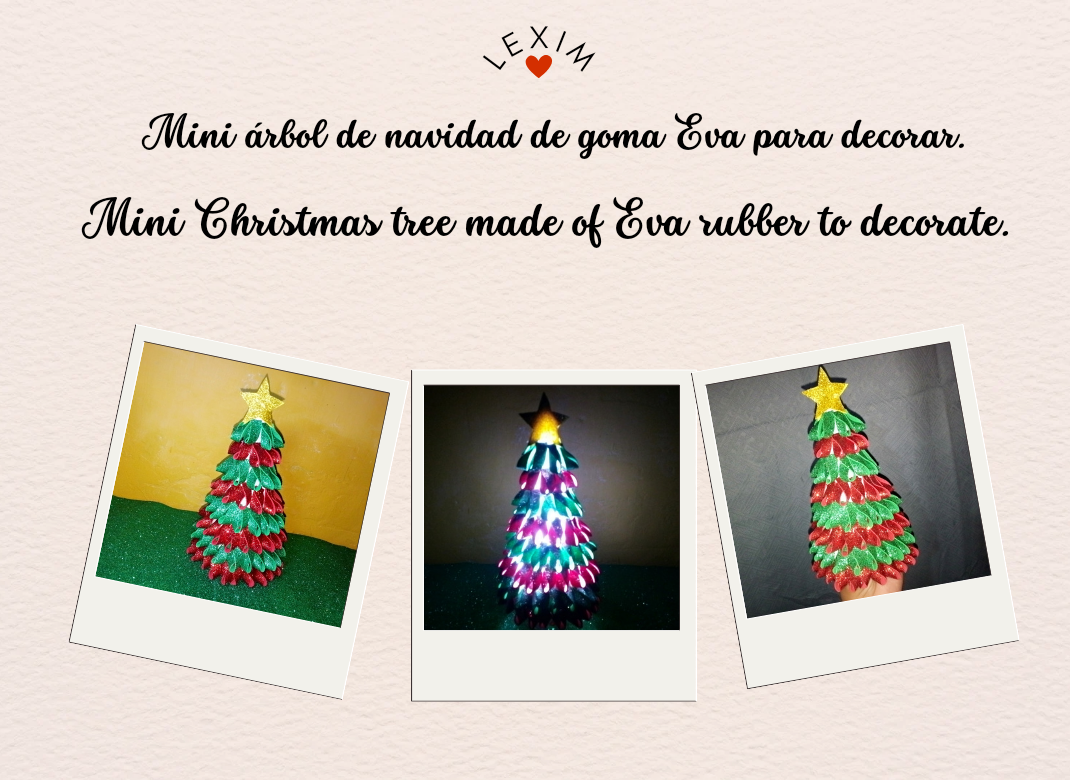
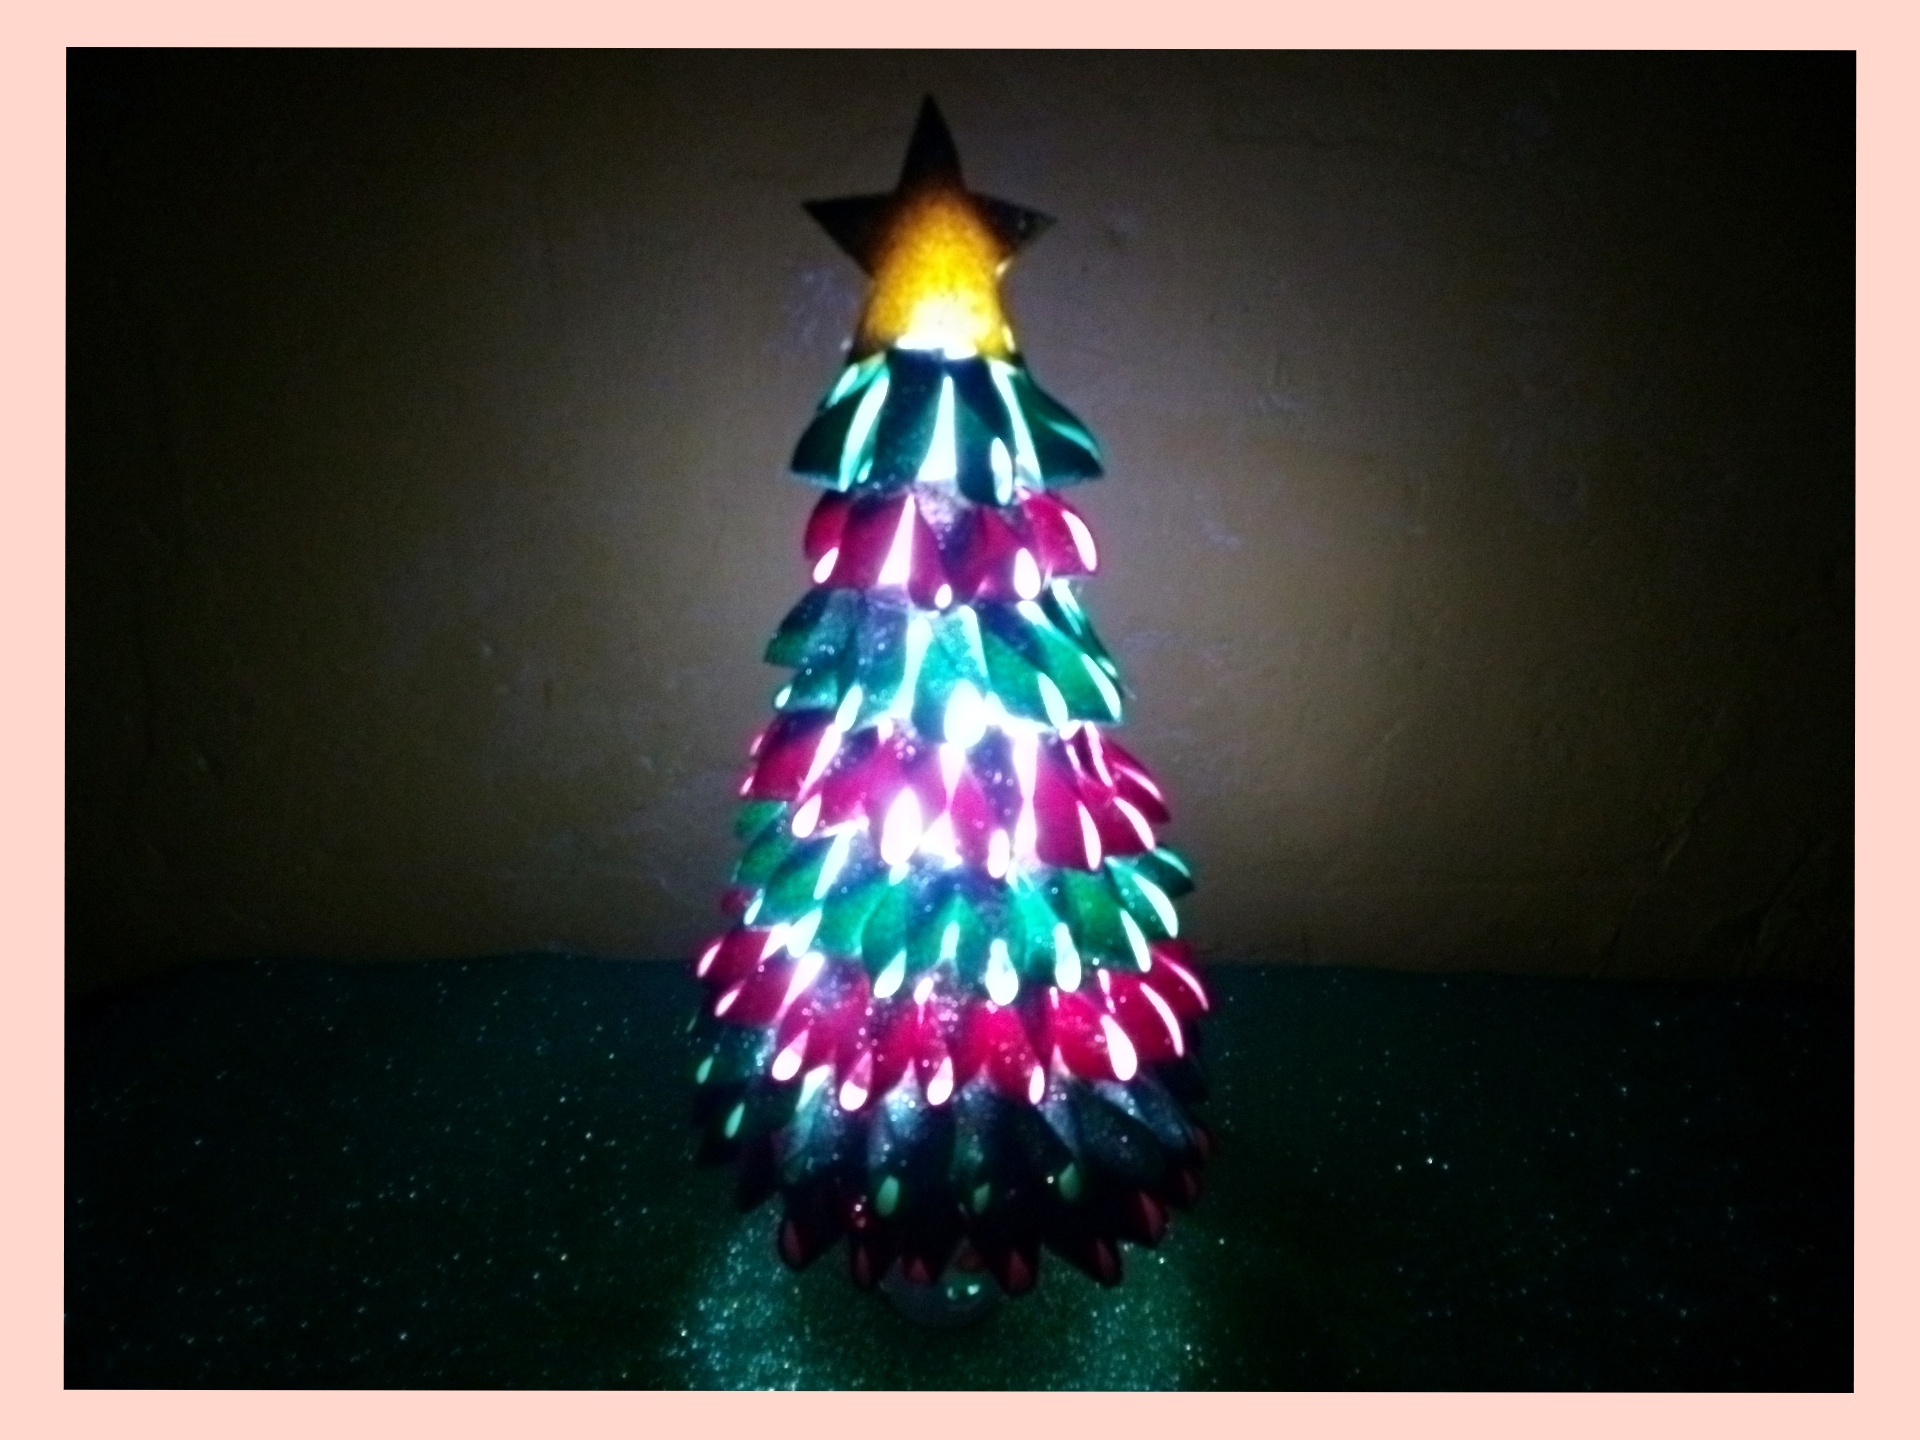
Hello everyone dear colleagues a pleasure to greet you. Today I want to share one of my creative activities that I like to do with much affection for you a step by step of a mini Christmas tree of Eva rubber to decorate what should not be missing in our home a small or large Christmas tree as you like and fit the space on this occasion I made a mini Christmas tree small to decorate and occupy our empty space and give joy and smell of Christmas to our sweet home with little materials and made this nice tree small Christmas tree to decorate and occupy our empty space and give joy and smell of Christmas to our sweet home with little materials and made this cute tree can also put in our bedroom and introduce a little light inside the tree looks very attractive and beautiful and the room will remain with little clarity. Here I leave you its elaboration.
Hola a todos queridos compañeros un gusto en saludarlos. Hoy les quiero compartir una de mis actividades creativas que me gusta hacer con mucho cariño para ustedes un paso a paso de un mini arbolito de navidad de goma Eva para decorar lo que no debe faltar en nuestro hogar un árbol de navidad chiquito o grande como guste y se ajuste al espacio en esta ocasión hize un mini árbol de navidad pequeño para adornar y ocupar nuestro espacio vacío y darle alegría y olor a navidad a nuestro dulce hogar con poco materiales e realizado este lindo árbol también podemos poner en nuestro dormitorio y introducir unas lucecita dentro del árbolito luce muy atractivo y bonito y el cuarto se mantendrá con poca claridad. Acá les dejo su elaboración.

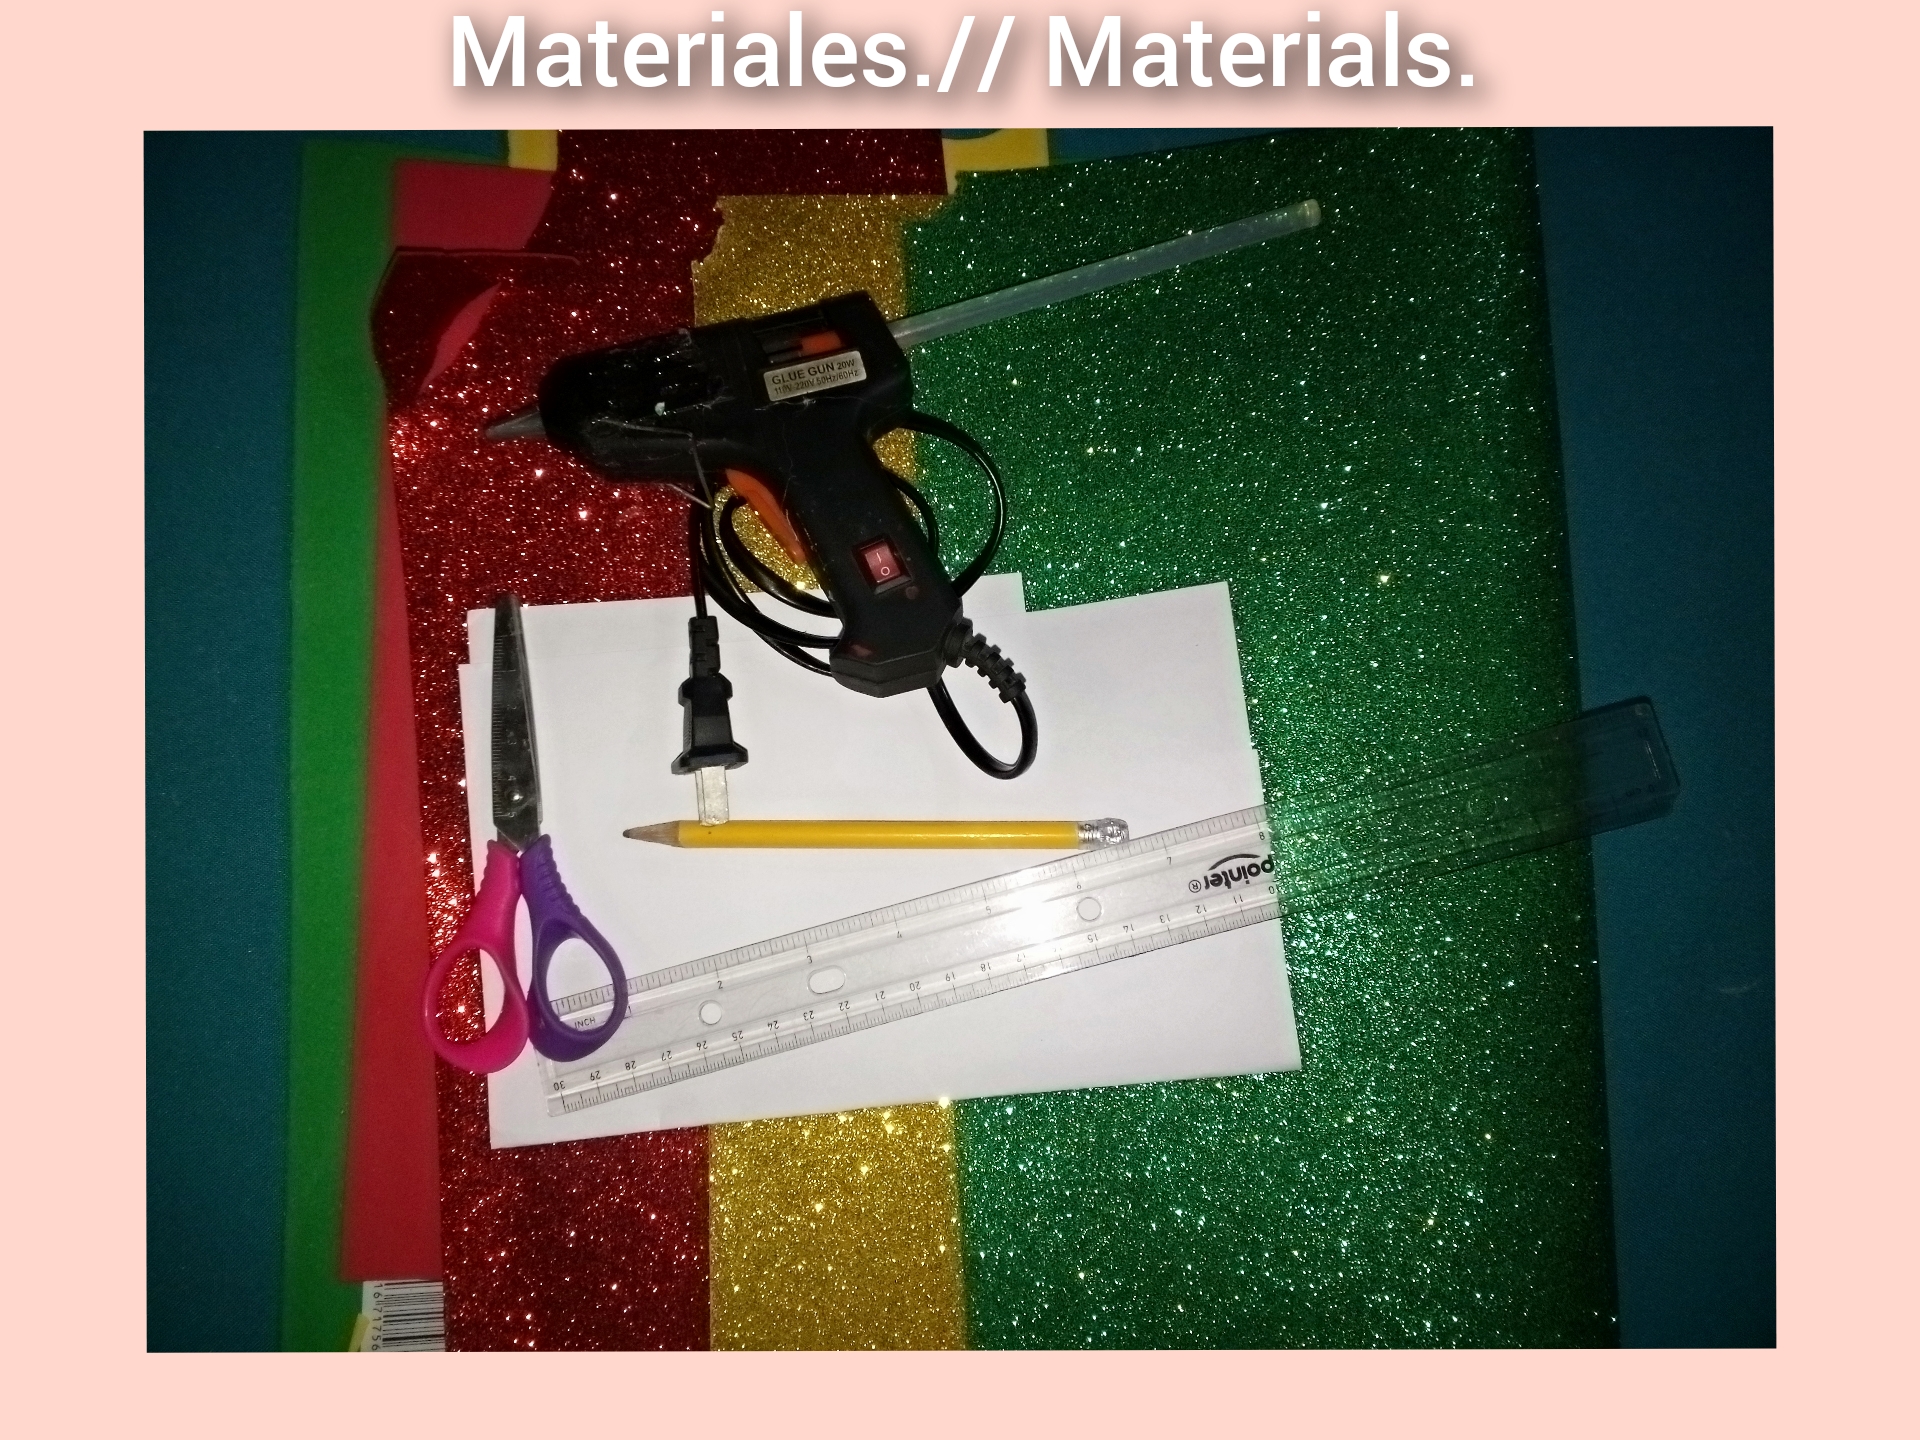
Materials.
Materiales.
- Red, green and gold frosted eva rubber.
- 1 white sheet.
- Pencil.
- Scissors.
- Ruler.
- Silicone gun.
- Compass.
- Goma Eva escarchada rojo, verde y dorado.
- 1 Hoja blanca.
- Lápiz.
- Tijera.
- Regla.
- Pistola de silicón.
- Compás.
Step by step.
Paso a paso.
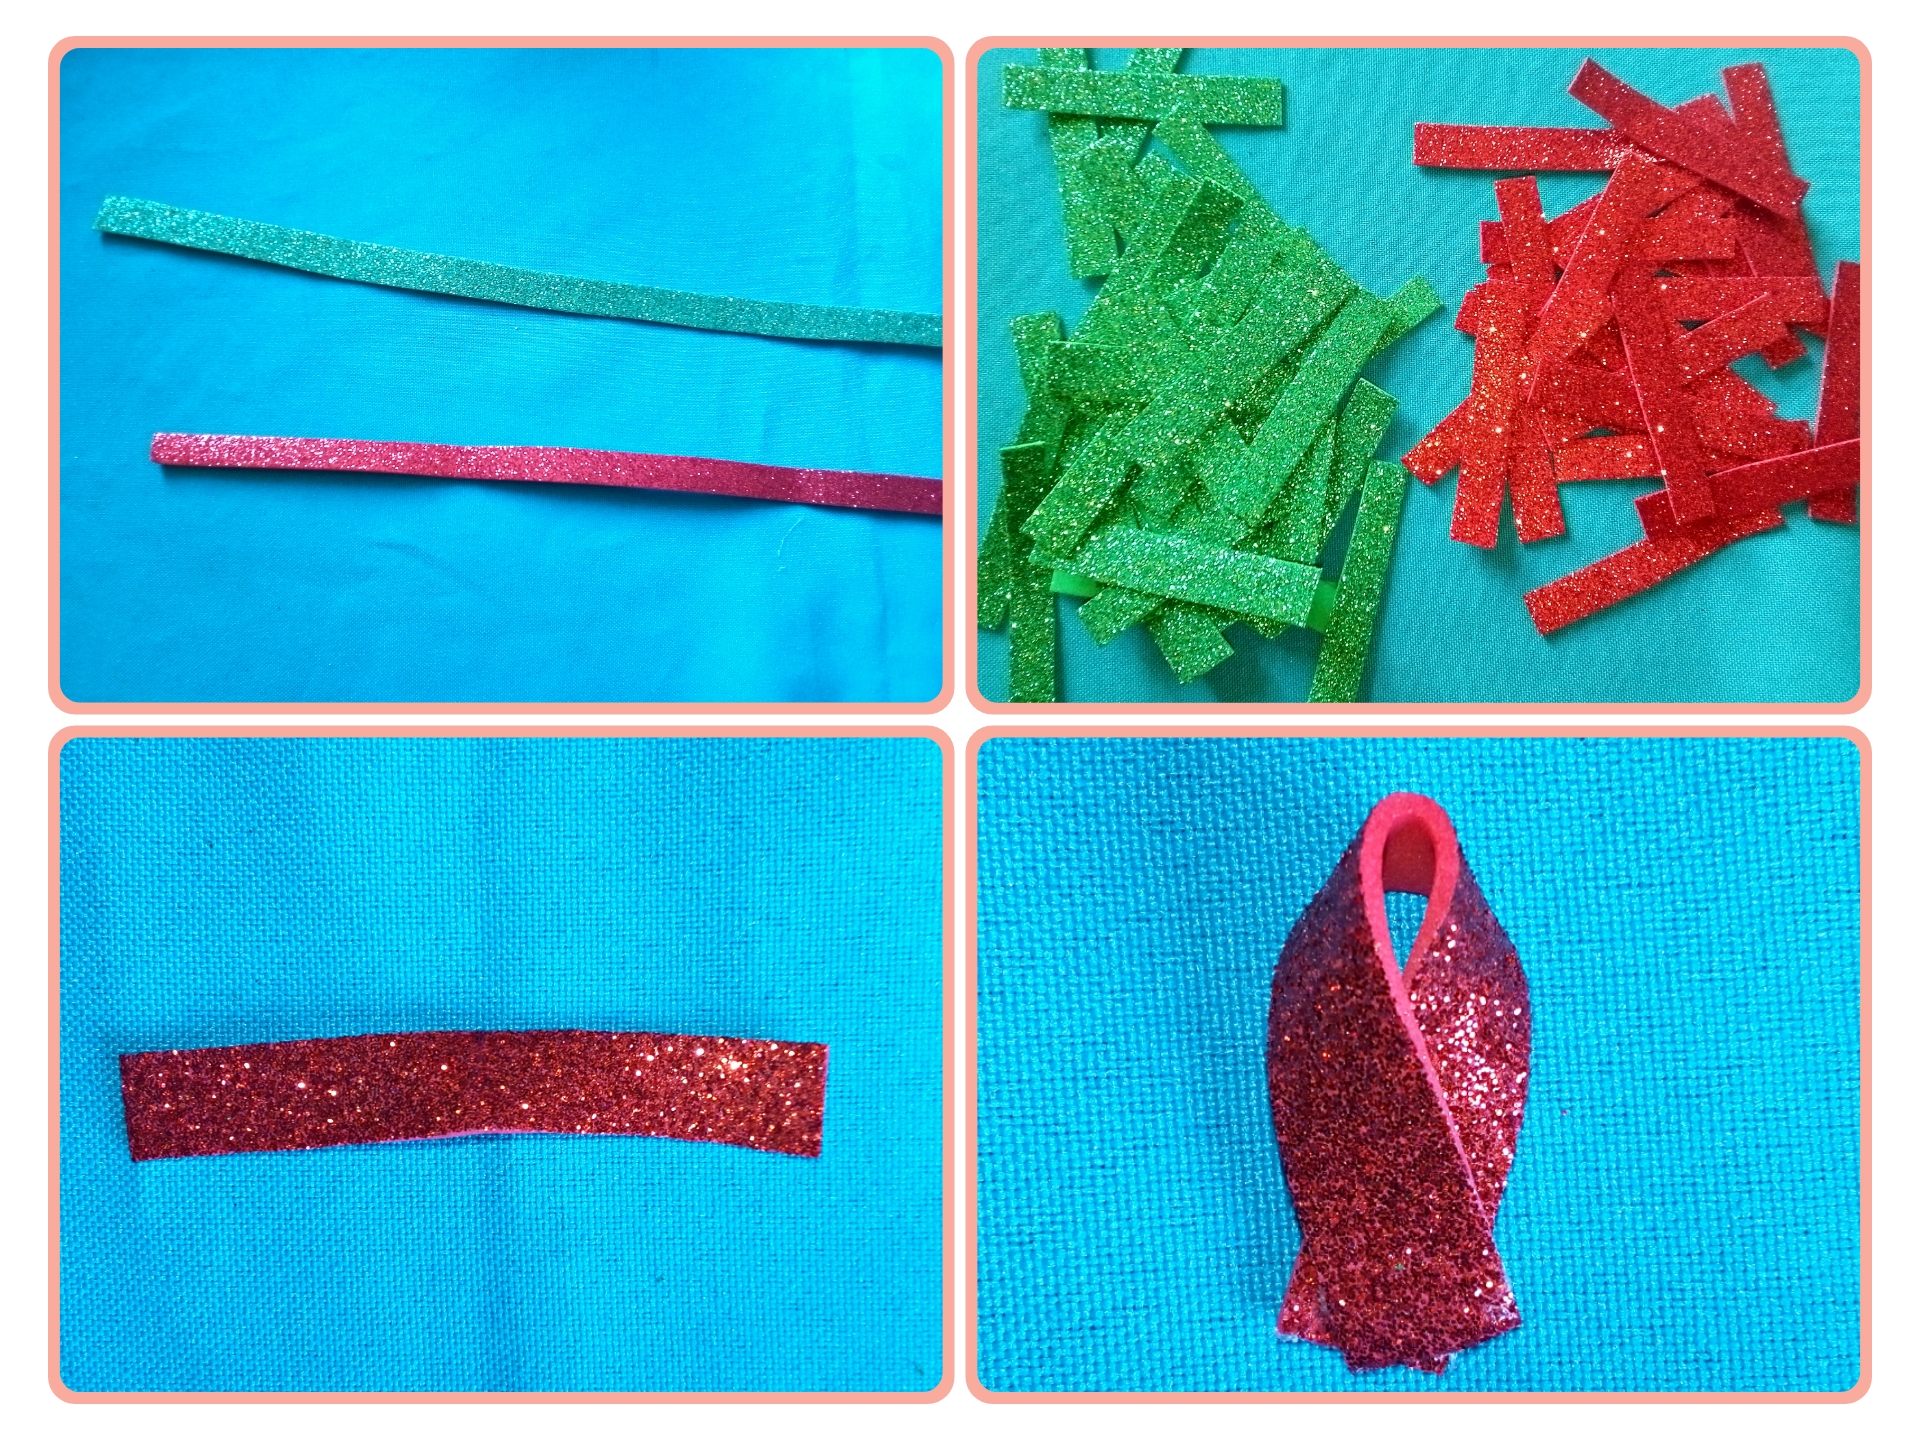
Paso 1. // Step 1.
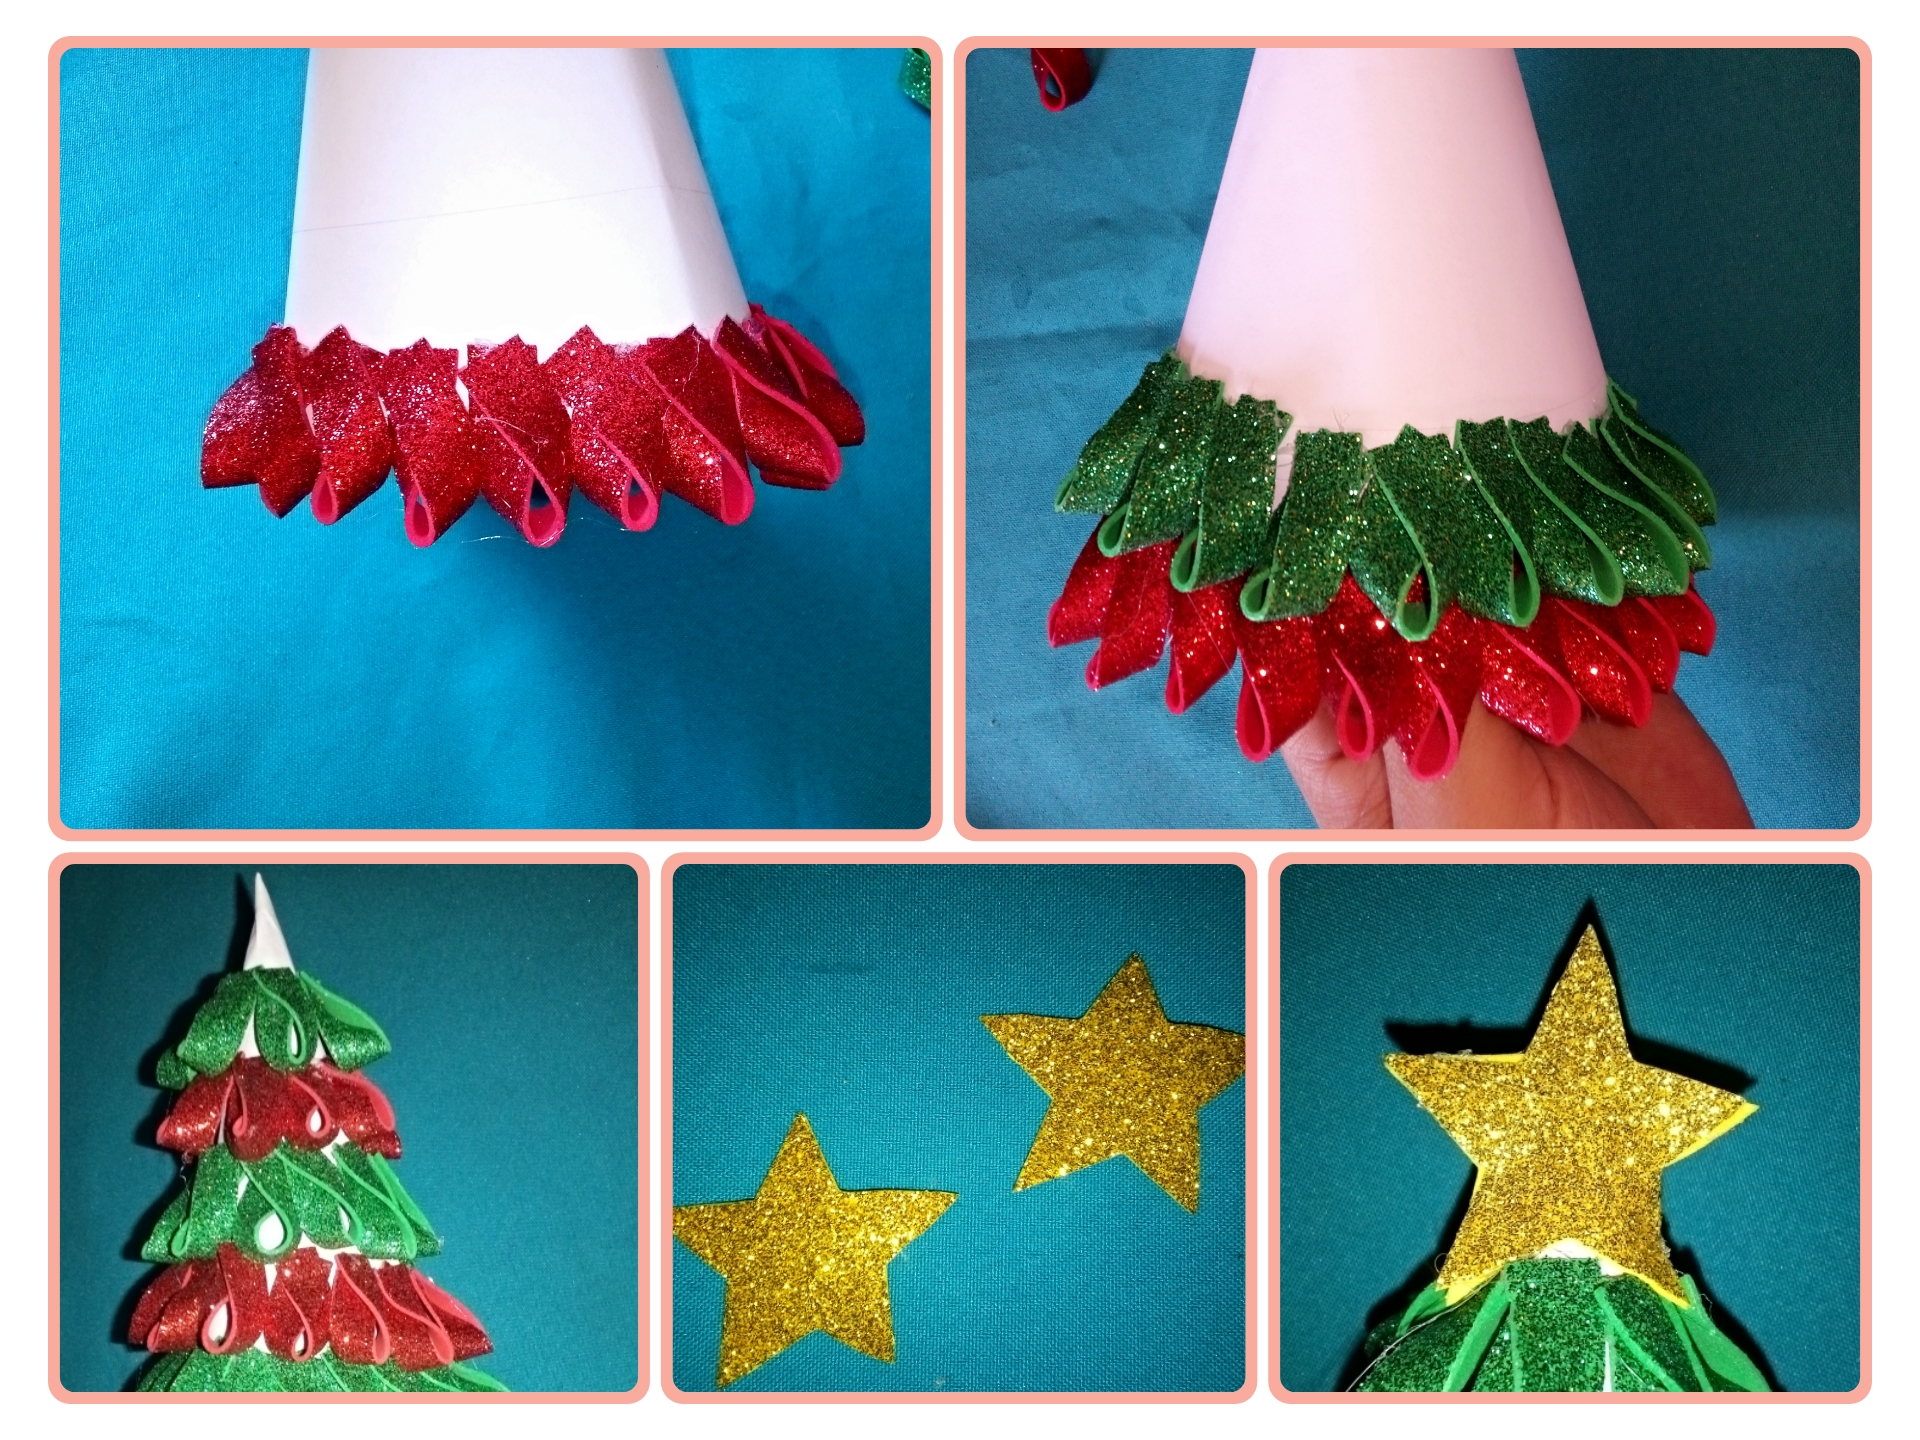
First step: cut 1x6 centimeter strips of Eva rubber of red and green color, take a strip and place a little silicone on the tip and glue it by folding the strip as if we were making a bow, make 62 red and 54 green.
Primer paso: corta tiras de goma Eva de 1x6 centímetros de color rojo y verde toma una tira y colocarle un poco de silicón en la punta y pega doblando la tira como si estuviéramos haciendo un lazo haz unos 62 rojo y unos 54 verde.
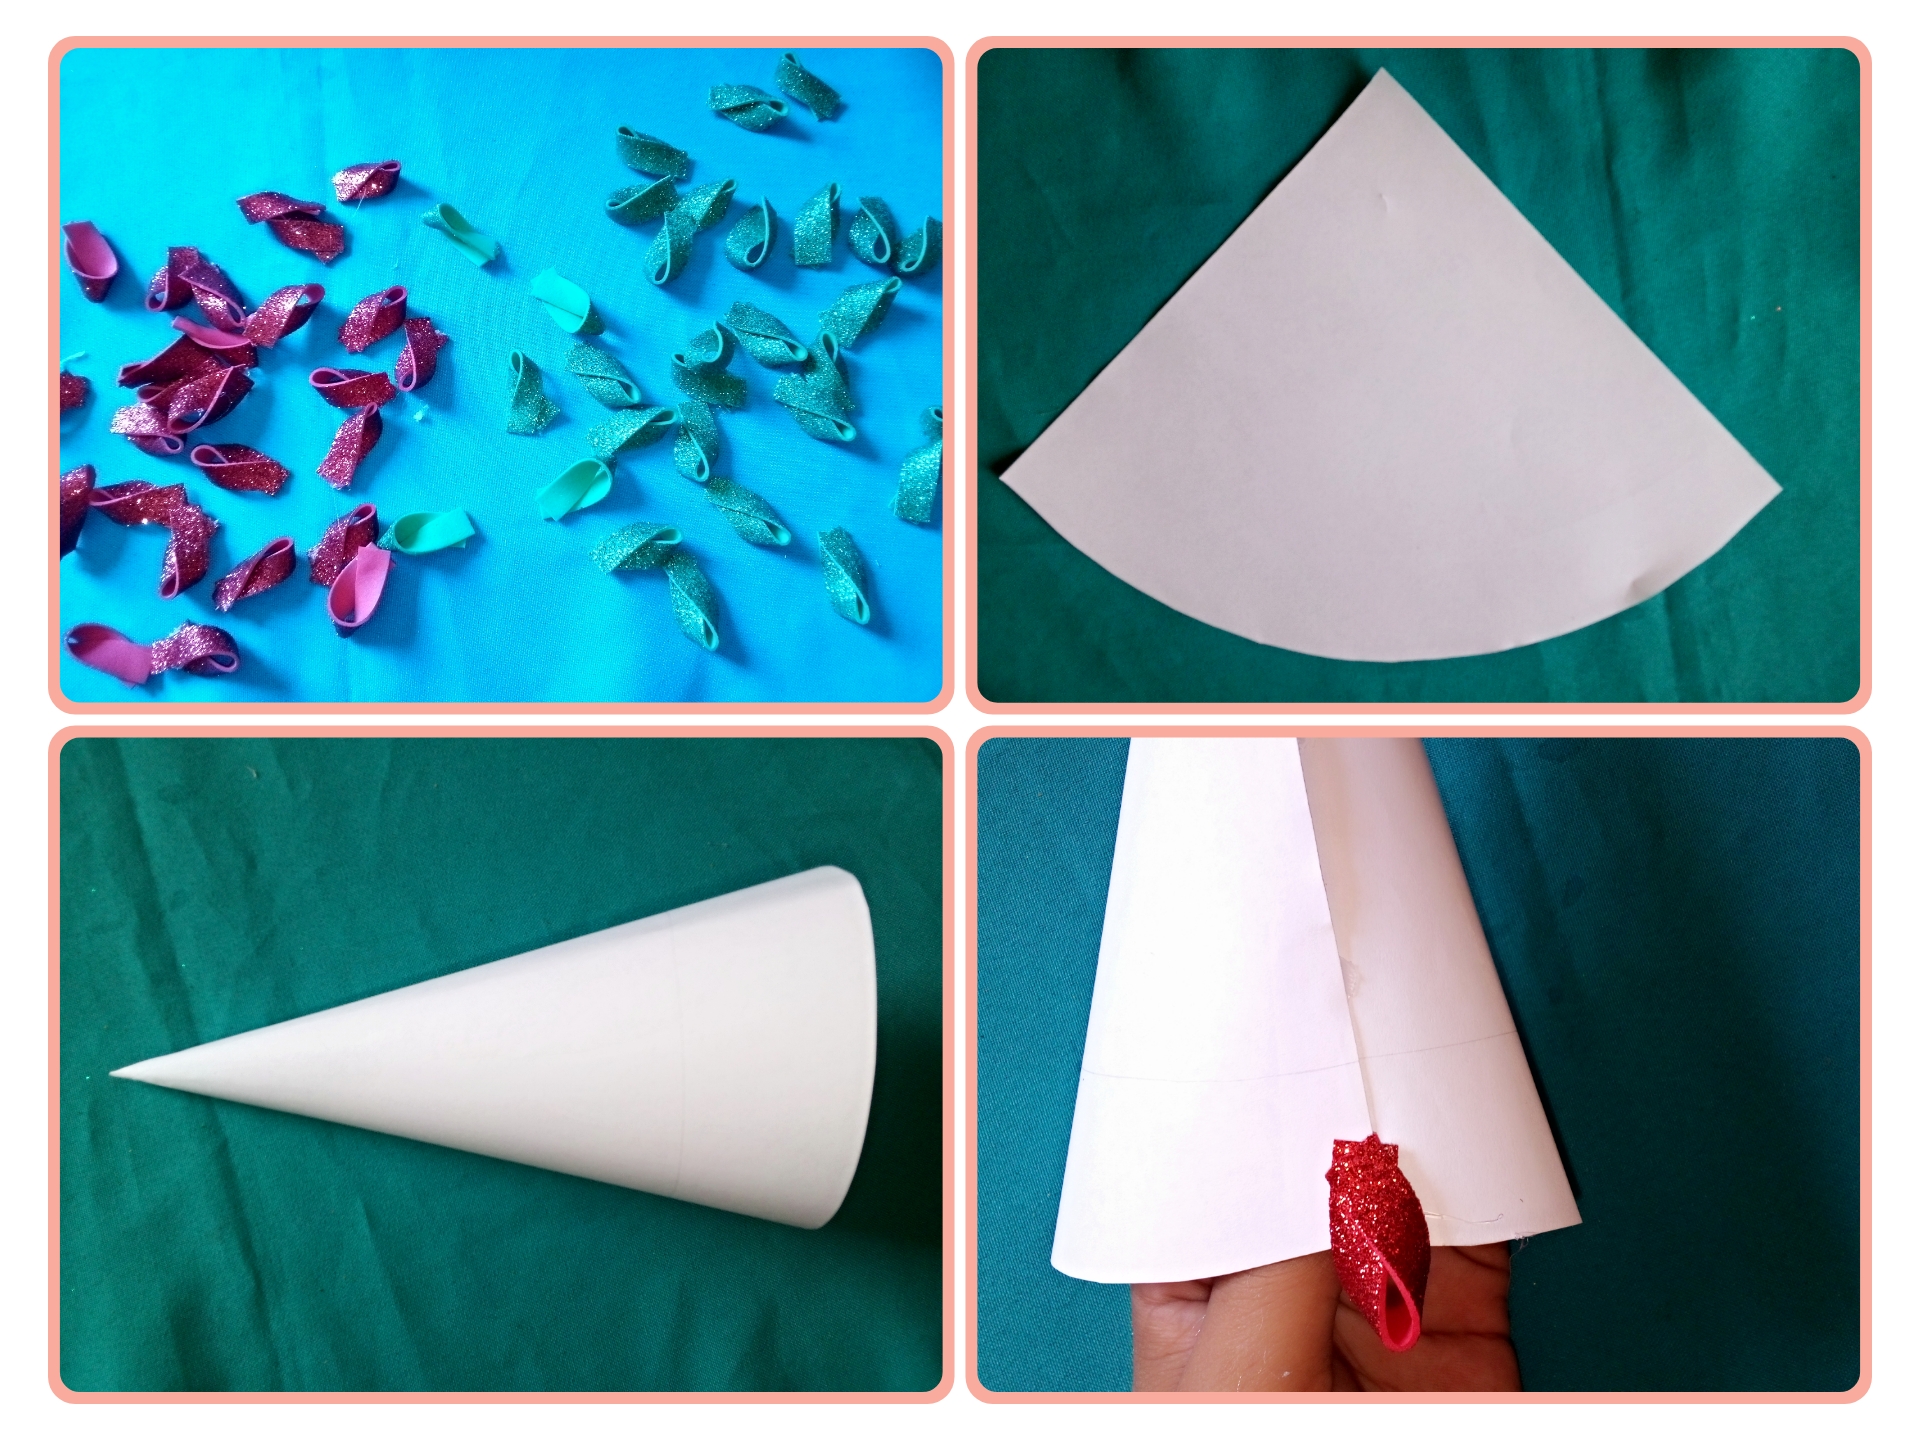
Paso 2. // Step 2
Once the previous step is done, measure on the white sheet about 16 centimeters and with the help of the compass make the circle and glue on the sides with the beak up to make a cone. Once the cone is made, start gluing the red ribbons one by one on the bottom of the cone.
Ya hecho el paso anterior mide en la hoja blanca unos 16 centímetros y con la ayuda del compás haz el círculo y pega a los lados con el pico para arriba para hacer un cono. Una vez hecho el cono comienza a pega en la parte de abajo alrededor los lazos una a una del color roja.
Paso 3. // Step 3.
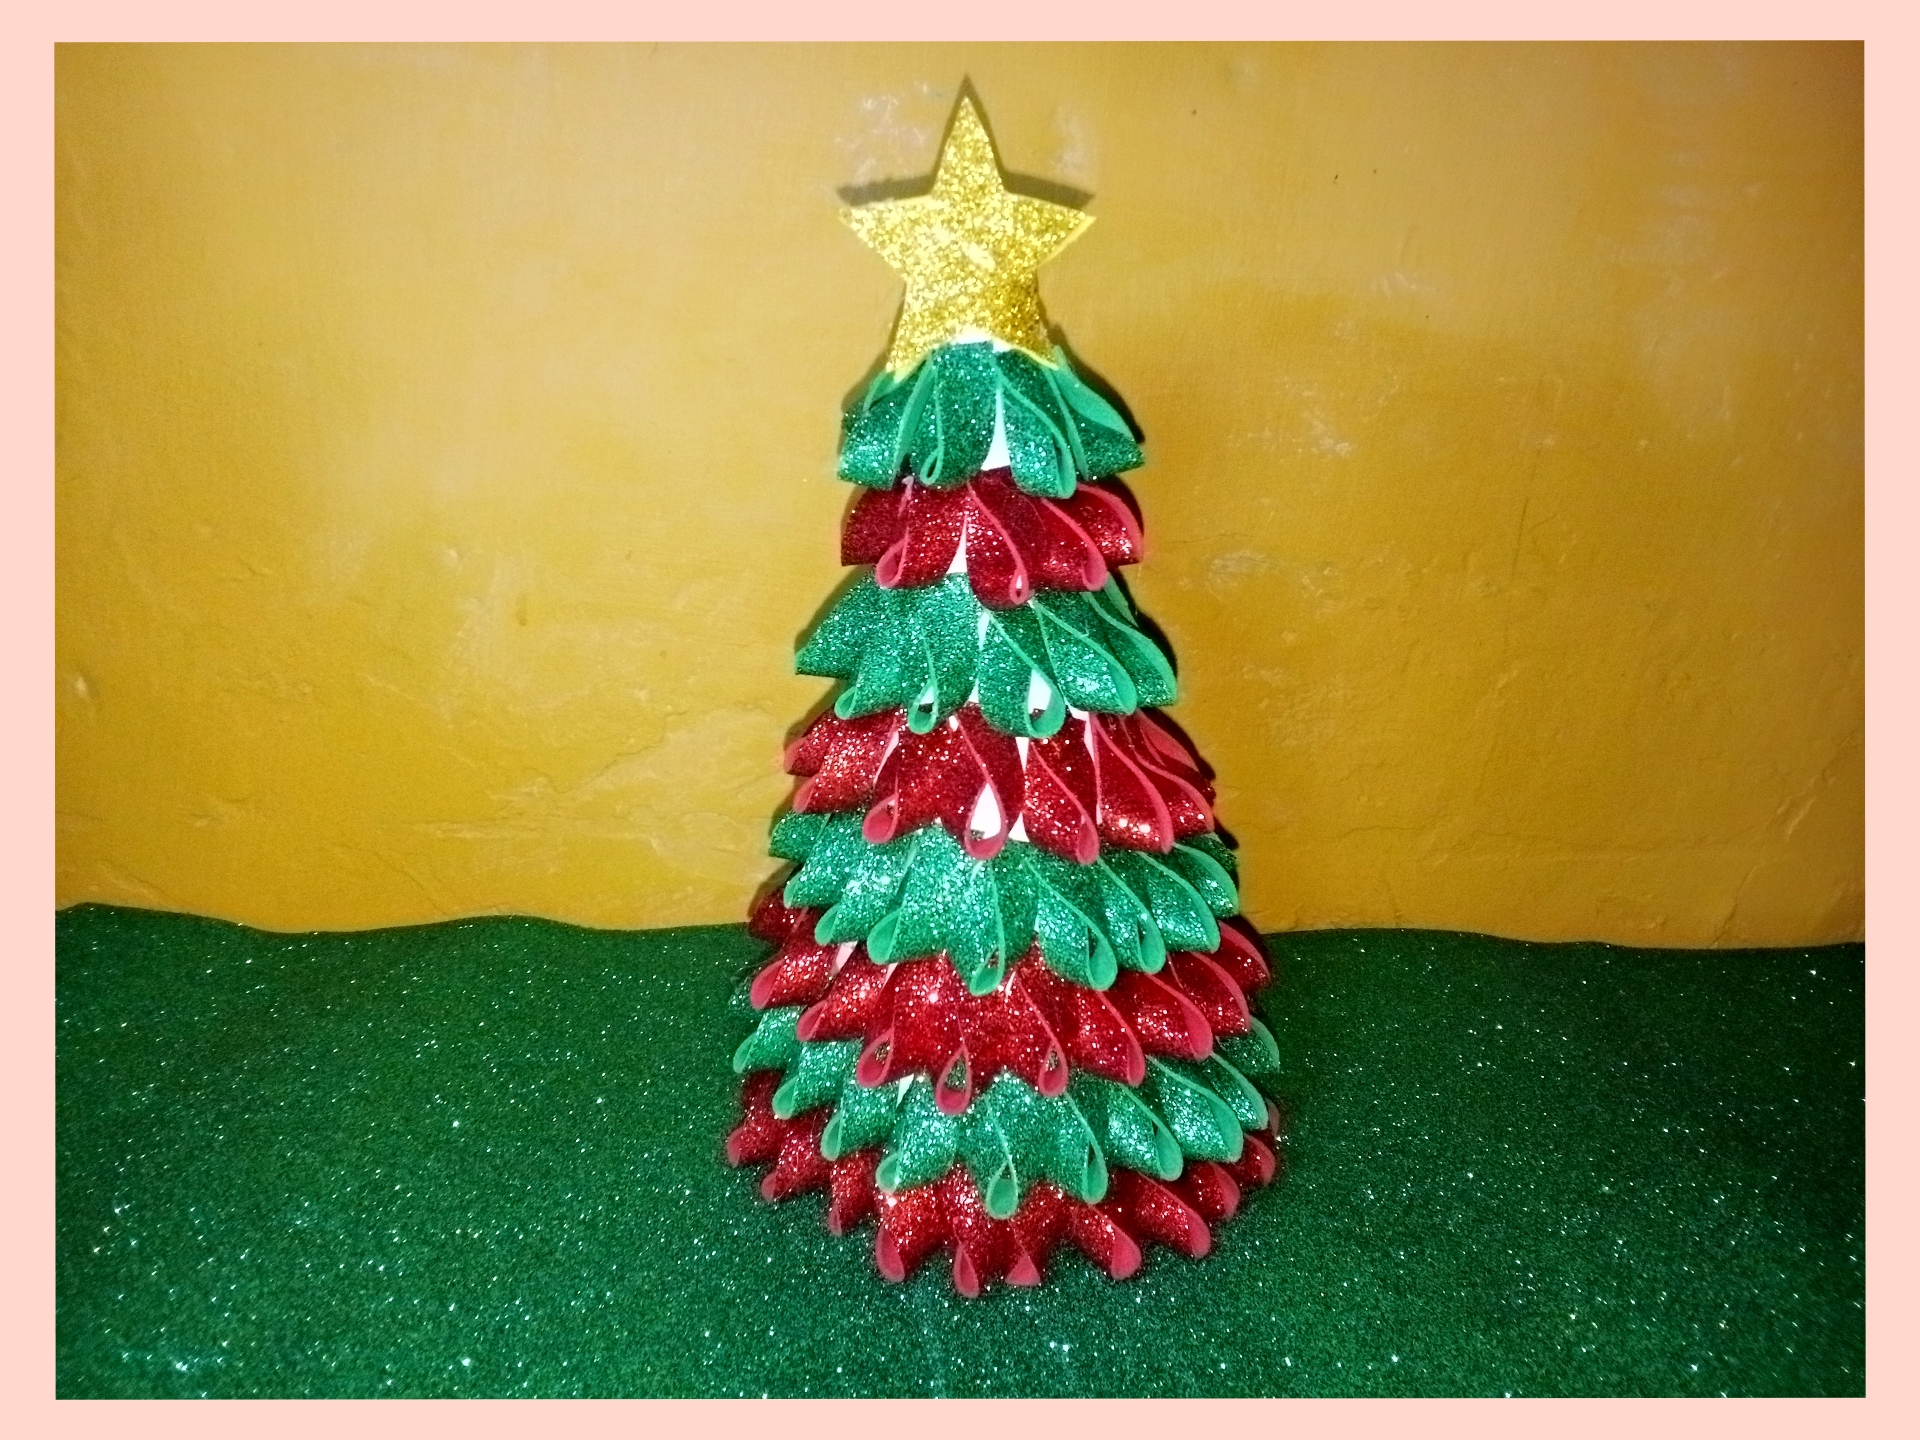
Once the red ribbons are glued, glue the green ribbons and so on and finish with green leaving a space at the tip to glue the stars. Make two stars of about 5 centimeters and glue on both sides at the tip of our Christmas tree.
Una vez pegado los lazos rojos pega los verde y así sucesivamente y finaliza con verde dejando un espacio en la punta para pega las estrellas. Haz dos estrellas de unos 5 centímetros y pega en ambos lados en la punta de nuestro arbolito de navidad.
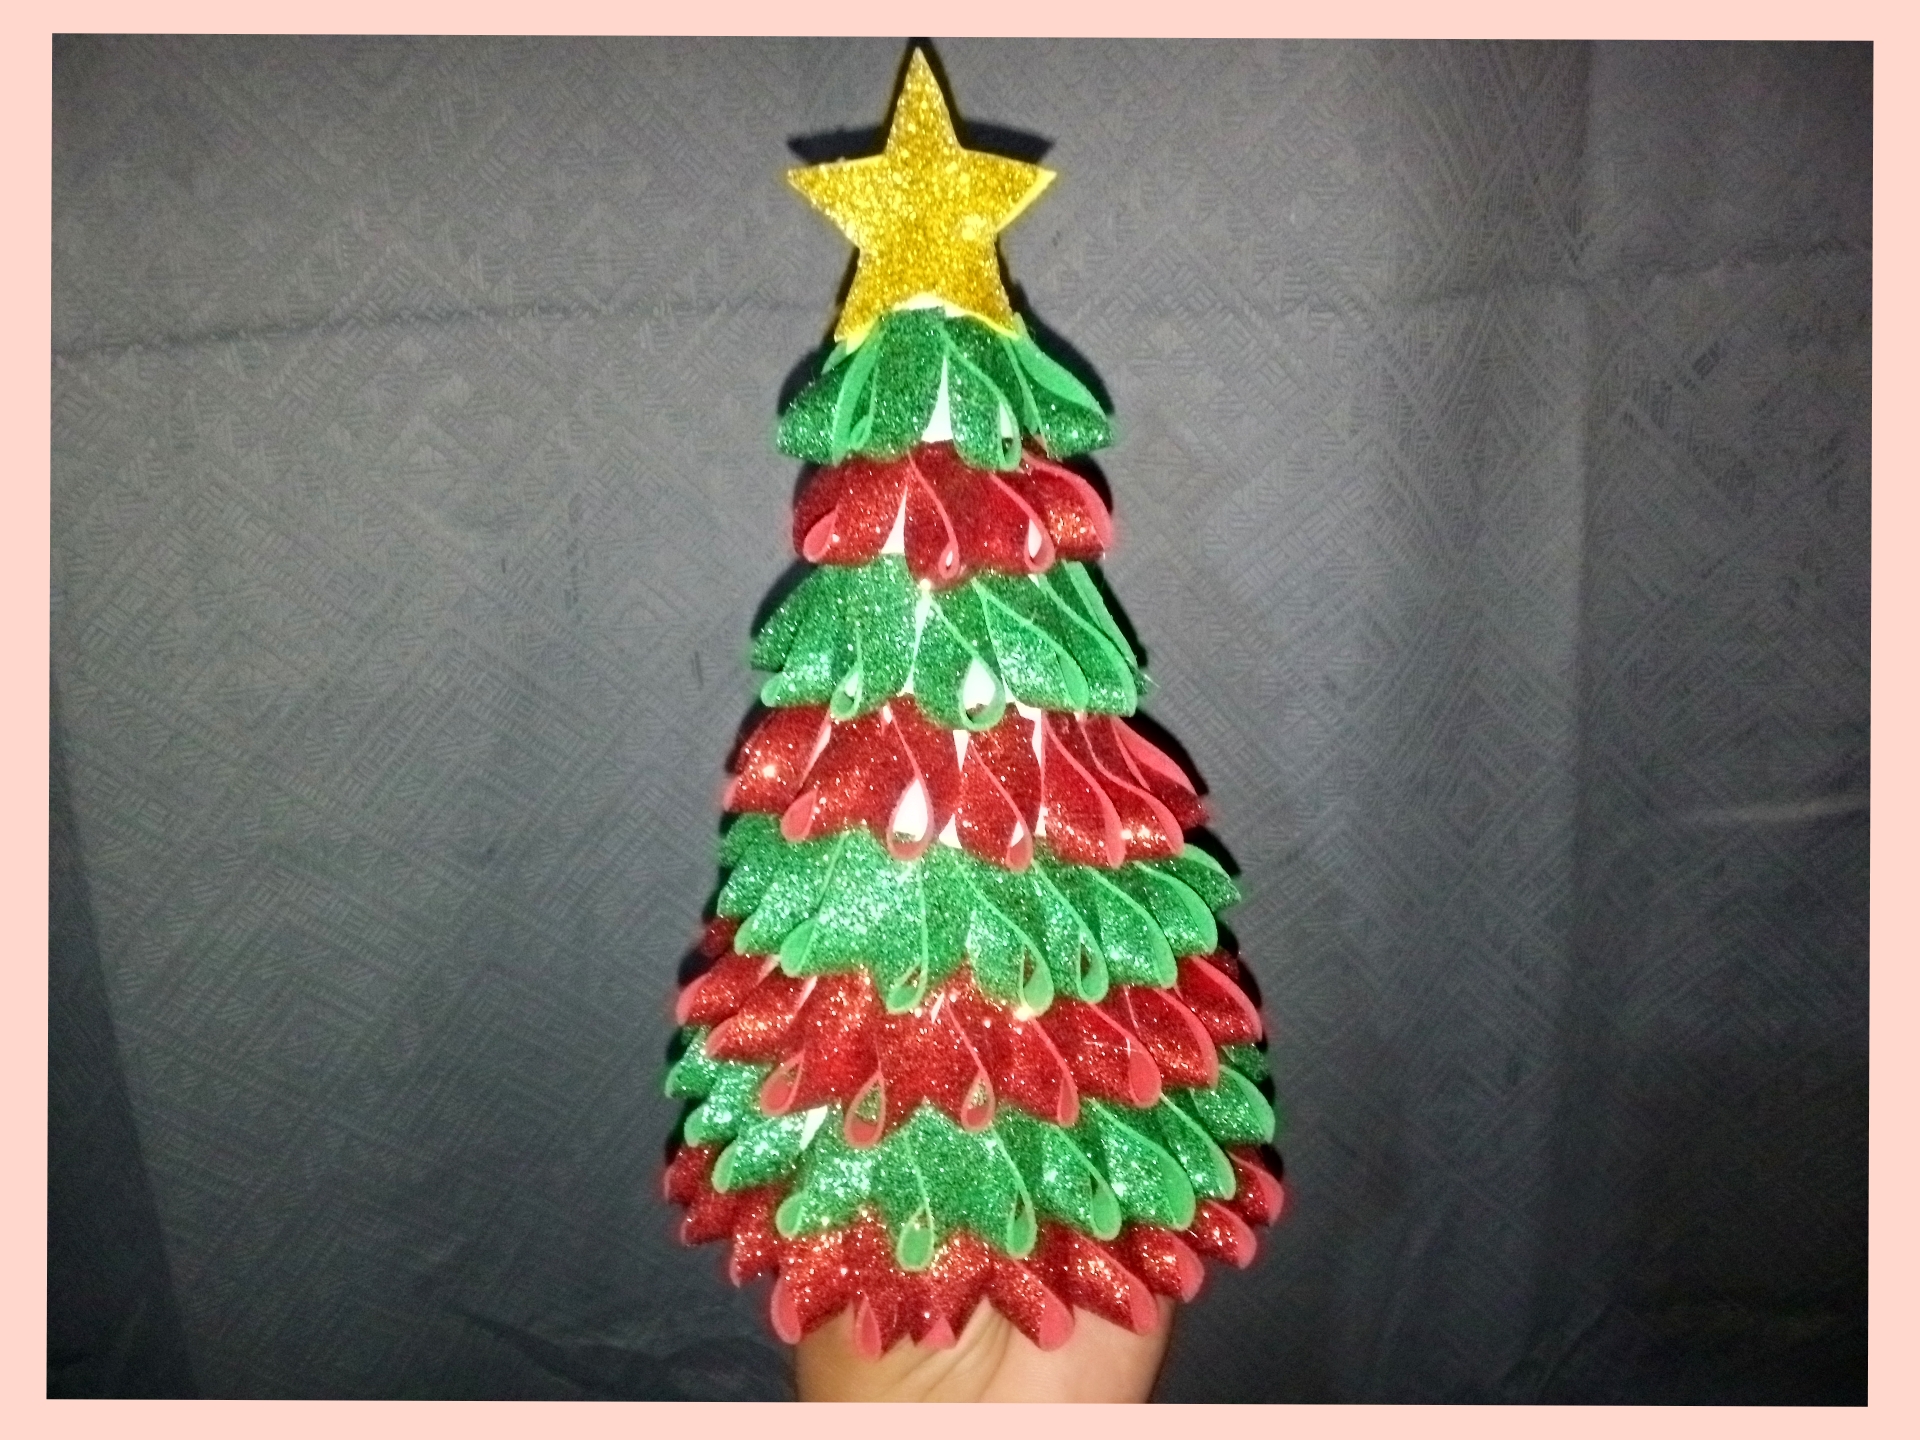
✨Final result. // Resultado final.✨
Gracias por visitar.
Todas las fotos y el contenido son originales que hago diariamente para mi blog. Para La traducción uso deepl los marcos y separadores es usado de canva .📷🖼️🤗
Thank you for visiting.
All photos and content are originals that I make daily for my blog. For translation I use deepl the frames and separators are used from canva .📷🖼️🤗

This is really cute, we can make it either large or small to decorate our homes. I like that Christmas mood is making the rounds everywhere.
Well done dear and thanks for sharing this beauty with us.
Hi @monica-ene if you can make it big or small I'm so glad you liked the Christmas tree thanks for your comment.
I know I have alot of designs to do this December because I have been getting serious of designs for that day. Kudos friend, lovely work
Happy festivity already, haha. Looks like you're getting in the mood already. Nicely
Haha yes thanks... It already smells like Christmas, we are close.
Congratulations, your post has been upvoted by @dsc-r2cornell, which is the curating account for @R2cornell's Discord Community.
Enhorabuena, su "post" ha sido "up-voted" por @dsc-r2cornell, que es la "cuenta curating" de la Comunidad de la Discordia de @R2cornell.
Gracias.
This is beautiful I love it, happy festive season
I should try this out too
Your little tree is very cute, I really liked that idea. Thanks for sharing ☺️.
You make me feel xmas. This is really beautiful and colorful. I hope you all full prepared to enjoy this Christmas with some more beautiful trees .
Thank you if it is beautiful and colorful we are already in that with the preparations to celebrate Christmas I hope you are too greetings!!!!