Un Saludo Amigos Hivers
Primero que nada un saludo con mucho cariño a todos los que forman parte de la hermosa comunidad de Hive.
Después de este tiempo ausente por algunos problemas que he tenido con mi Pc y el celular, hoy regreso con mucho ánimo para compartir con ustedes nuevamente. Cuándo hice mi primer post de presentación hace varios años, les mencioné que soy una apasionada de la música, pero también me encantan las manualidades y todo lo que tenga que ver con arte.
Desde hace algunos años me he interesado mucho en el tema del reciclaje, porque es una manera de crear algo nuevo y útil con cosas que normalmente desechamos. En esta oportunidad quiero mostrarles una idea que me ha gustado mucho y que he puesto en práctica porque me parece que es una labor sencilla y no necesitamos de mucho material para realizarla.
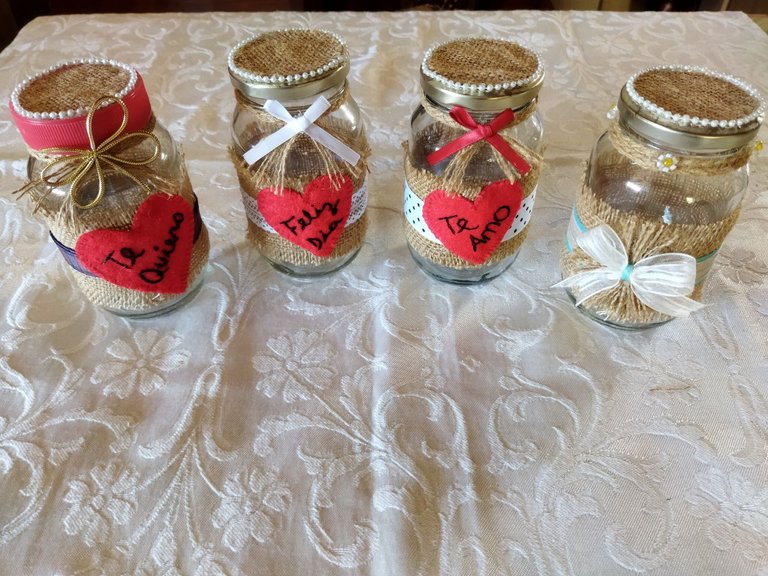
Se trata de envases decorados para obsequiar confites, galletas o bombones en cualquier ocasión. En este caso yo les voy a presentar envases de vidrio, pero si el obsequio es para niños, debemos hacerlo con un envase de plástico.
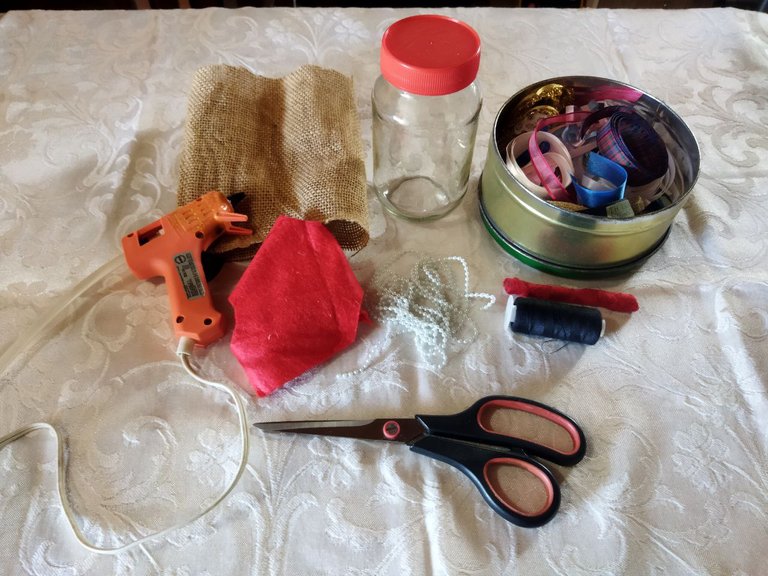
Envases Decorados
Tela de saco
Retazos de fieltro rojo
Hilos rojo y negro
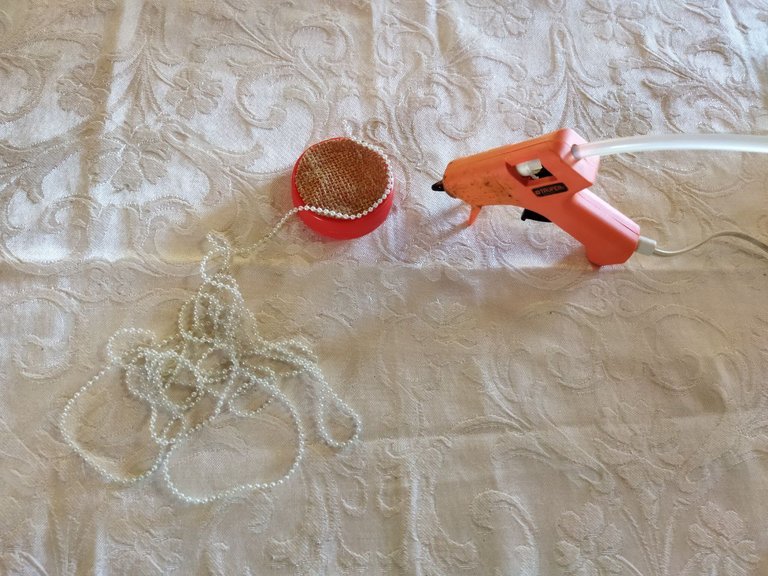
Silicon en barra
Cinta para decorar
Tijeras
Perla corrida
Lo primero que debemos hacer es tener el envase bien lavado y seco. Tomamos el pedazo de tela de saco y antes de cortar el trozo con la medida que vamos a utilizar, deshilachamos una orilla para obtener los hilos largos que vamos a necesitar para realizar parte de la decoración.
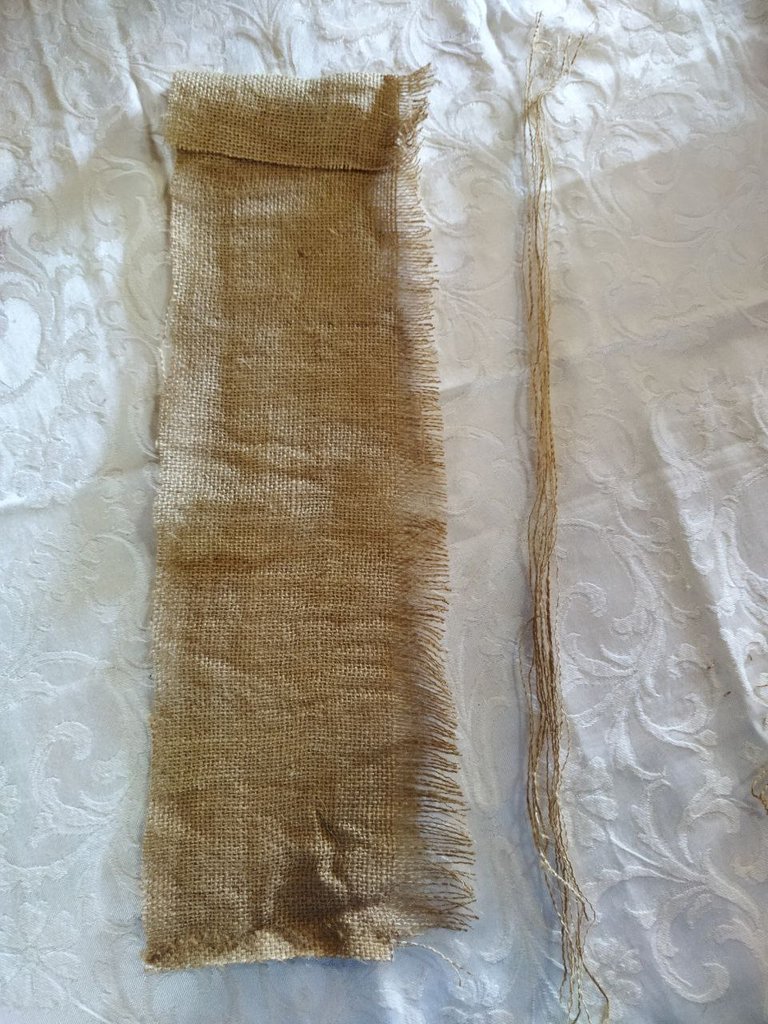
Deshilachar de esta manera.
Vamos a tomar nueve (9) de estos hilos divididos en tres (3) partes iguales y tejemos una clineja larga como muestro en la imagen.
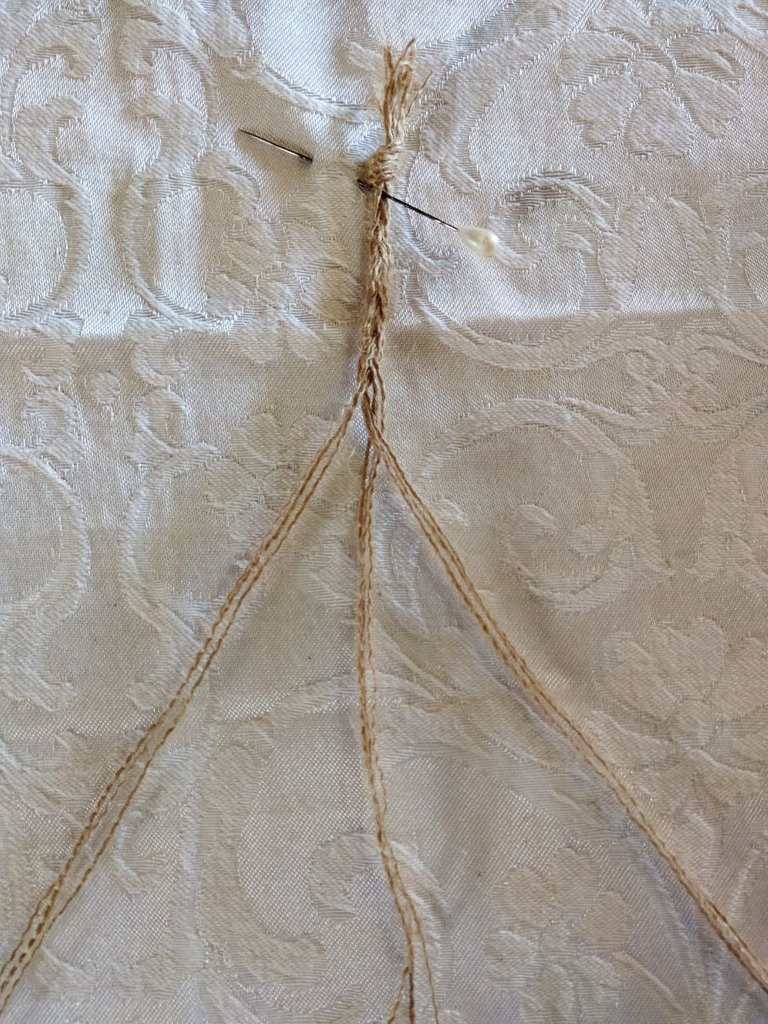
Tejido de clineja
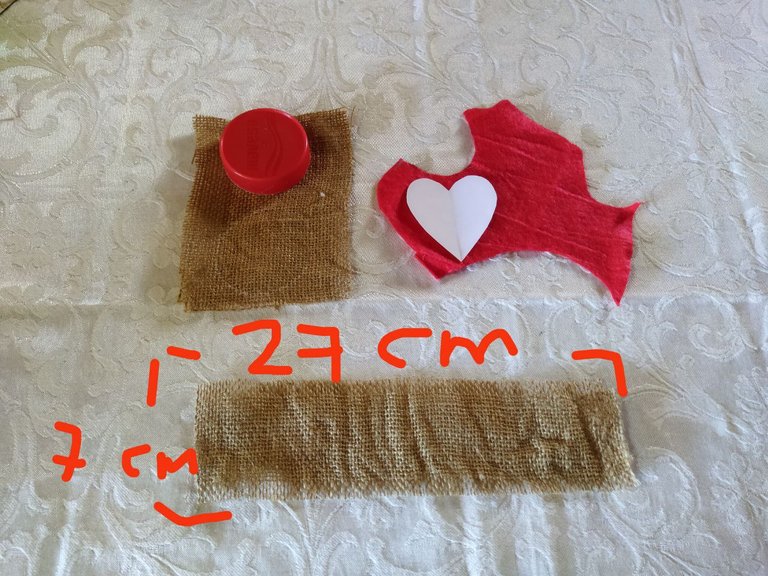
Luego vamos a cortar el trozo de tela de saco con la medida que necesitamos para decorar el envase (27cm x 7cm), deshilachamos por ambos lados 1cm para dejar los hilos como adorno, cortamos con una plantilla la figura de un corazón y un círculo con tela de saco para la tapa como se muestra en la imagen.
Una vez que tengamos las piezas que necesitamos como vemos en la siguiente imagen, procedemos a realizar la labor.
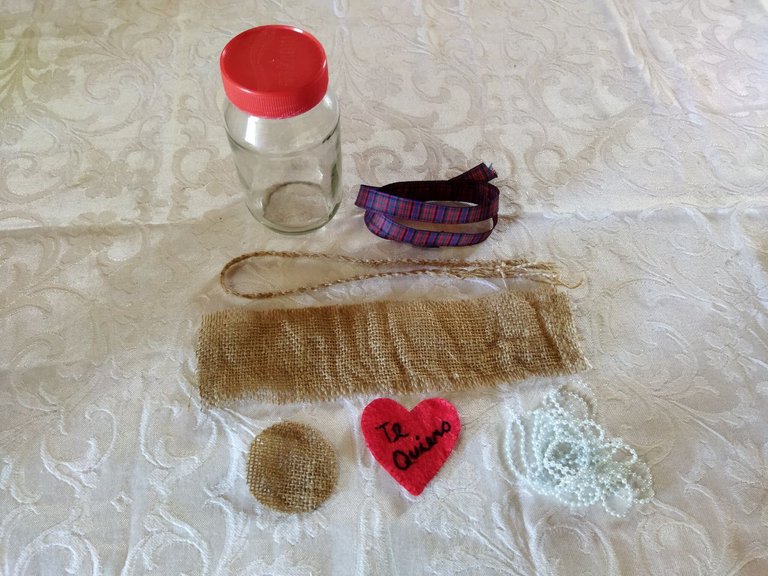
Aquí tenemos el envase, clineja, trozo de tela de saco para forrar, el corazón con detalle de mensaje bordado, cinta, forro para la tapa y la perla corrida.
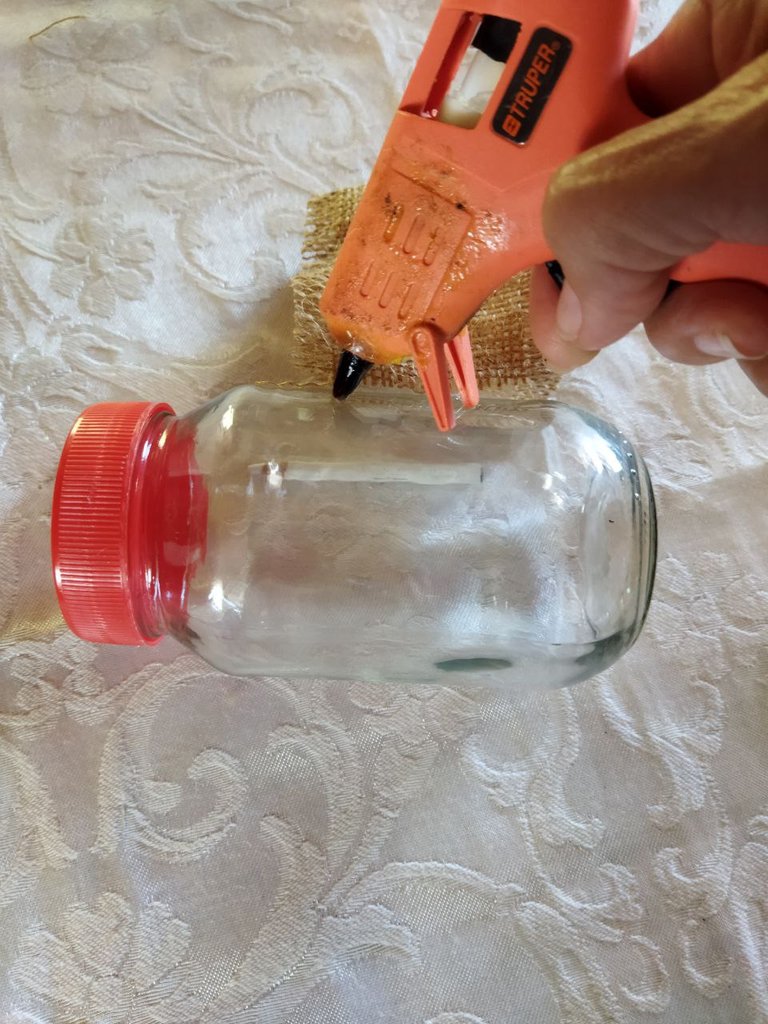
La decoración es muy sencilla de realizar, solo debemos pegar la tela de saco con silicón en el contorno del frasco. Yo utilice silicón caliente, pero también lo podemos hacer con silicón al frío que es más práctico porque evitamos el calor en los dedos. Comenzamos colocando silicón en la orilla y luego vamos poco a poco haciendo líneas de ambos lados para que quede bien adherido al frasco.
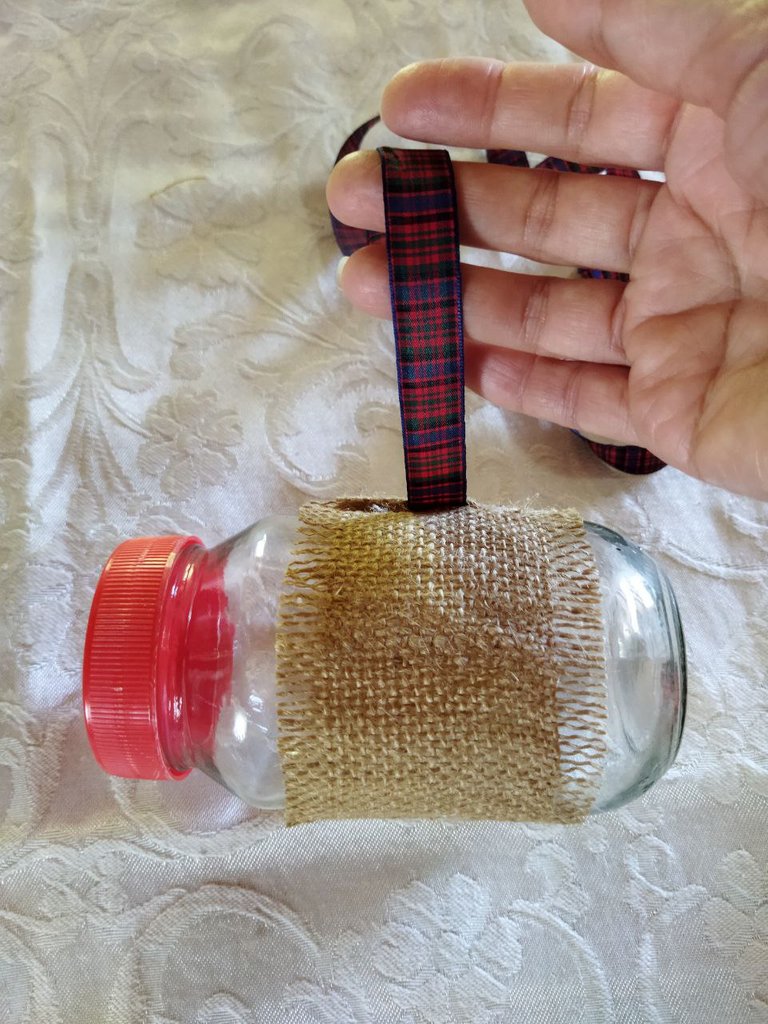
Luego pegamos la cinta para darle color y vida a la decoración.
Decoramos también la tapa con el círculo de tela de saco que cortamos y la perla corrida.
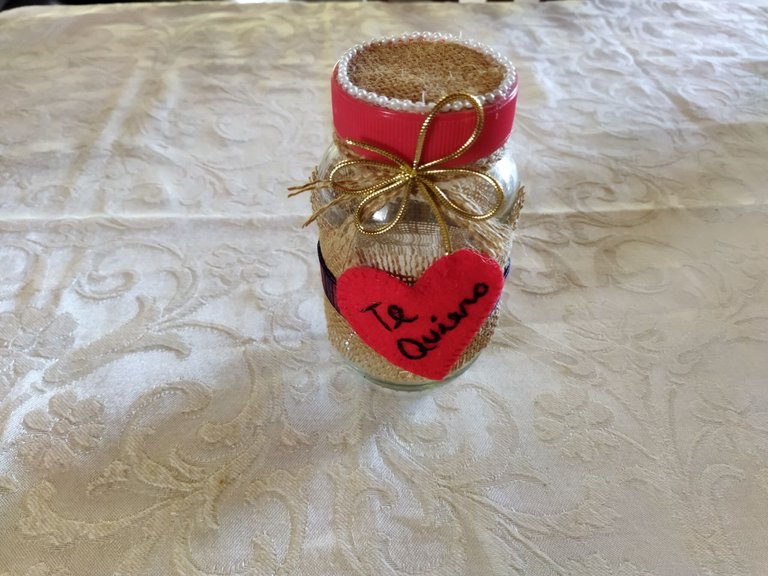
Por último, colocamos el corazón al cual yo le borde un mensajito con hilo de color negro. También podemos colocar detalles hechos con foami o cualquier otro material que tengamos y nos guste para la ocasión. Colocamos la clineja que tejimos en la parte de arriba del frasco, por debajo de la tapa y adornamos con un lazo de cinta o cualquier otro detalle que nos gusta y le de un toque delicado.
Y así queda nuestra labor!
Espero que les haya gustado la idea y la pongan en práctica. Es un trabajo sencillo, no es costoso y resulta ser un lindo detalle para obsequiar en cualquier ocasión a una amiga, el día de las madres, día de San Valentin, etc.
Muchas gracias por visitarme y como siempre les envío un fuerte abrazo, cargado de buenas vibras y mucho cariño. Hasta la próxima!

Greetings Hivers Friends
First of all a greeting with much affection to all who are part of the beautiful community of Hive.
After this time of absence due to some problems I have had with my PC and my cell phone, today I come back with a lot of encouragement to share with you again. When I made my first introduction post several years ago, I mentioned that I am passionate about music, but I also love crafts and everything that has to do with art.
For some years now I have been very interested in recycling, because it is a way to create something new and useful with things that we usually throw away. This time I want to show you an idea that I really liked and that I have put into practice because I think it is a simple task and we don't need a lot of material to do it.
We are talking about decorated containers to give candies, cookies or chocolates in any occasion. In this case I am going to present glass containers, but if the gift is for children, we should do it with a plastic container.
Decorated Containers
Sack cloth
Red felt scraps
Red and black threads
Silicon stick
Tape for decoration
Scissors
Bead runner
The first thing to do is to have the container well washed and dry. We take the piece of sackcloth and before cutting the piece to the size we are going to use, we fray an edge to obtain the long threads that we will need to make part of the decoration.
Fray in this manner.
We are going to take nine (9) of these yarns divided in three (3) equal parts and we weave a long crochet as shown in the image.
Clineja fabric
Then we are going to cut the piece of sackcloth with the size we need to decorate the container (27cm x 7cm), we fray 1cm on both sides to leave the threads as decoration, we cut with a template the figure of a heart and a circle with sackcloth for the lid as shown in the image.
Once we have the pieces we need as we can see in the following image, we proceed with the work.
Here we have the container, needle, piece of sackcloth for lining, the heart with embroidered message detail, ribbon, lining for the lid and the running pearl.
The decoration is very easy to make, we only need to glue the sackcloth with silicone around the contour of the bottle. I used hot silicone, but we can also do it with cold silicone, which is more practical because we avoid the heat on our fingers. We start by placing silicone on the edge and then we gradually make lines on both sides so that it is well adhered to the bottle.
Then we glue the ribbon to give color and life to the decoration.
We also decorate the lid with the circle of sackcloth that we cut and the pearl.
Finally, we place the heart to which I embroidered a little message with black thread. We can also place details made with foami or any other material we have and we like for the occasion. We place the knitted sinew on the top of the jar, under the lid and decorate it with a ribbon bow or any other detail that we like and gives it a delicate touch.
And this is how our work looks like!
I hope you liked the idea and put it into practice. It is a simple job, it is not expensive and it turns out to be a nice gift for any occasion to give to a friend, Mother's Day, Valentine's Day, etc.
Thank you very much for visiting me and as always I send you a big hug, full of good vibes and love. See you next time!
Thank you for sharing this post in the DIYHUB Community!
Your content got selected by our fellow curator desro & you just received a little thank you upvote from us for your great work! Your post will be featured in one of our recurring compilations which are aiming to offer you a stage to widen your audience within the DIY scene of Hive. Stay creative & HIVE ON!
Please vote for our hive witness <3
The rewards earned on this comment will go directly to the people( @nishani9 ) sharing the post on Twitter as long as they are registered with @poshtoken. Sign up at https://hiveposh.com.
Wao, this is so great.i was very much in haste to see where this would result into and boom! You did a great job, Weldon friend
Thank you very much for visiting me and for your appreciation my friend, I'm glad you liked my work. Regards!
Yeah,you are welcome
Congratulations your publication has been chosen among the best of the day.
KEEP CREATING GOOD CONTENT.