Un Saludo Amigos Hivers
Primero que nada un saludo con mucho cariño y mis mejores deseos a la apreciada comunidad DIYHUB. Es un gusto para mí estar nuevamente con ustedes y presentarles una segunda entrada para el concurso de este mes de mayo con el tema "Sea Life" #diyecencycontest.
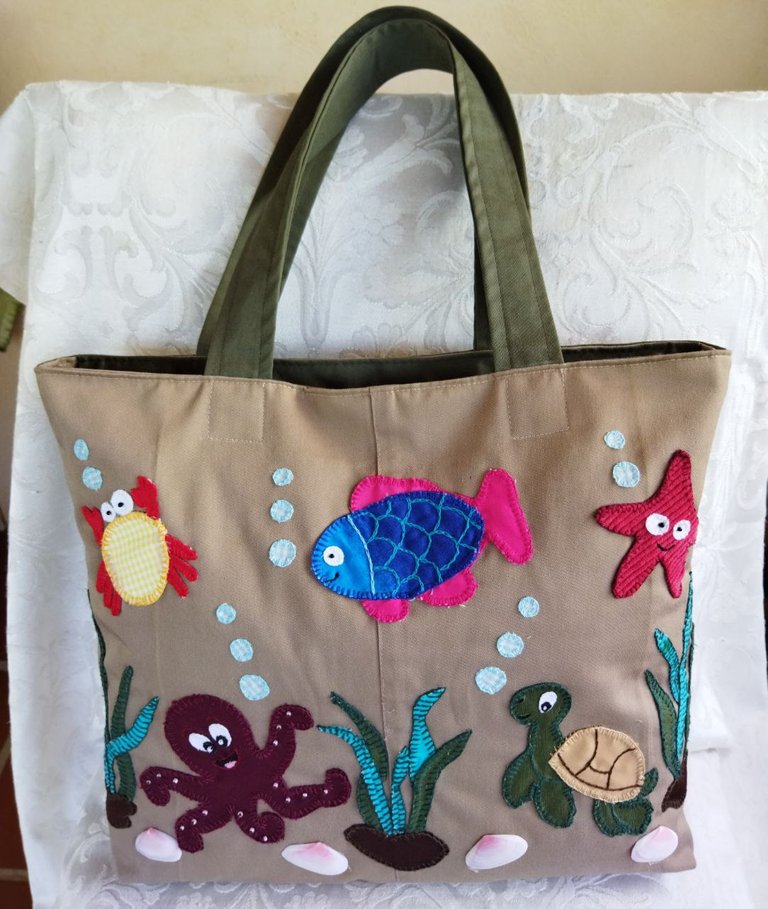
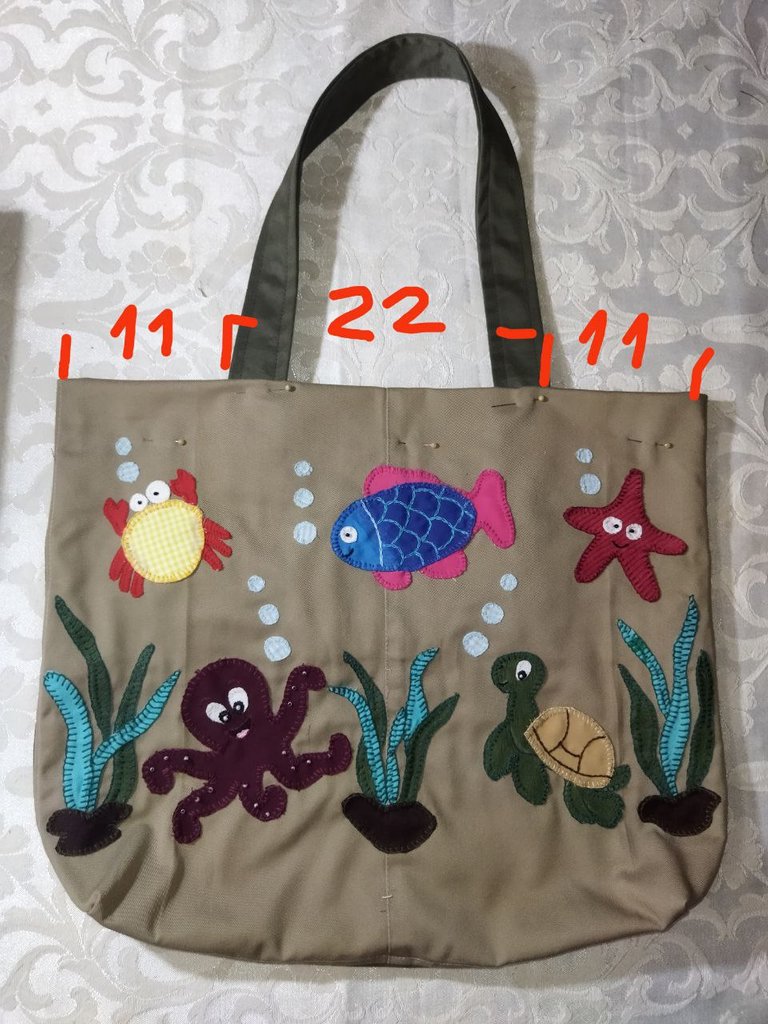
Desde hace algunos meses he tenido la intención de hacer un bolso para cuando voy a la playa, pero no había decidido como decorarlo porque tenía varias ideas en mi cabeza. El contexto de este mes me encanta y me ha servido de inspiración para hacer un bolso decorado con un paisaje de lindas criaturas marinas.
Al igual que en trabajos anteriores, organicé todo el material que tenía disponible para reciclar y de esta manera crear algo nuevo y útil.
Para realizar esta labor no se necesita mucho material y es un trabajo sencillo, así que los invito a que vean el proceso y manos a la obra.
MATERIALES
- Retazos de tela (para tapas del bolso / tiras colgantes)
- Retacitos de tela de colores (para figuras)
- Cierre de 15 centímetros (para bolsillo)
- Cierre de 40 centímetros (para tapa bolso)
- Tijera, cinta métrica, aguja, hilos
- Silicón al frío o en barrita (pistola)
- Mostacilla negra, perlitas blancas (para los ojos)
- Conchitas (opcional)

PROCEDIMIENTO
Paso 1
Para comenzar este trabajo, tomare una de las piezas de pantalón para reusar esa tela y cortar las tapas para el bolso, como les muestro en siguientes imágenes.

Voy a tomar una de las piezas y voy a cortar justo al lado de la costura como se indica en la imagen.
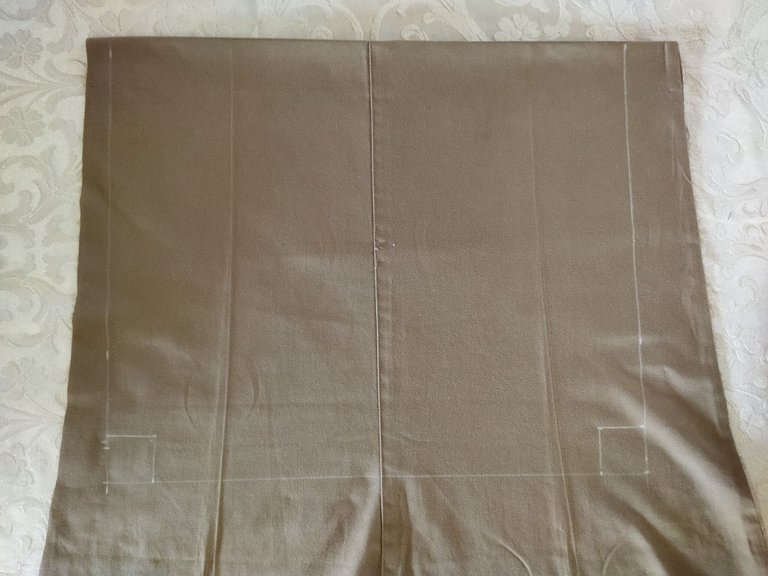
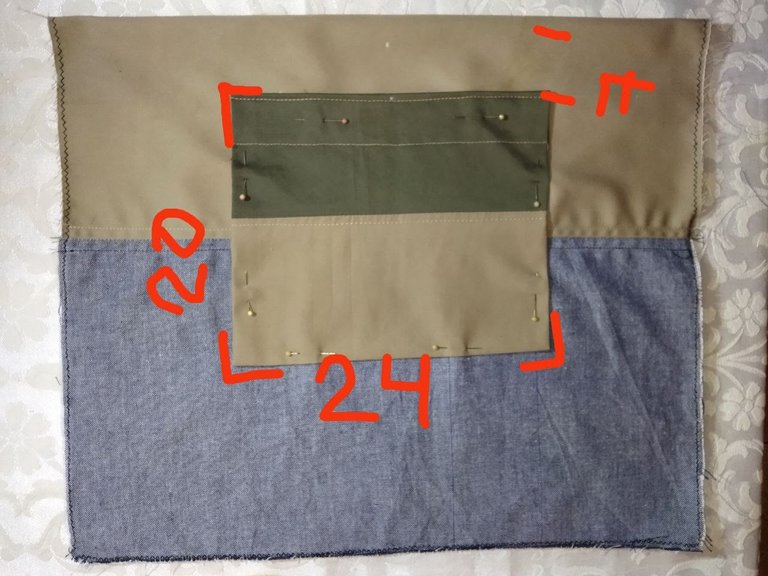
Aquí tengo la pieza de tela abierta y he marcado con creyón blanco las medidas, como se muestra en la siguiente imagen.
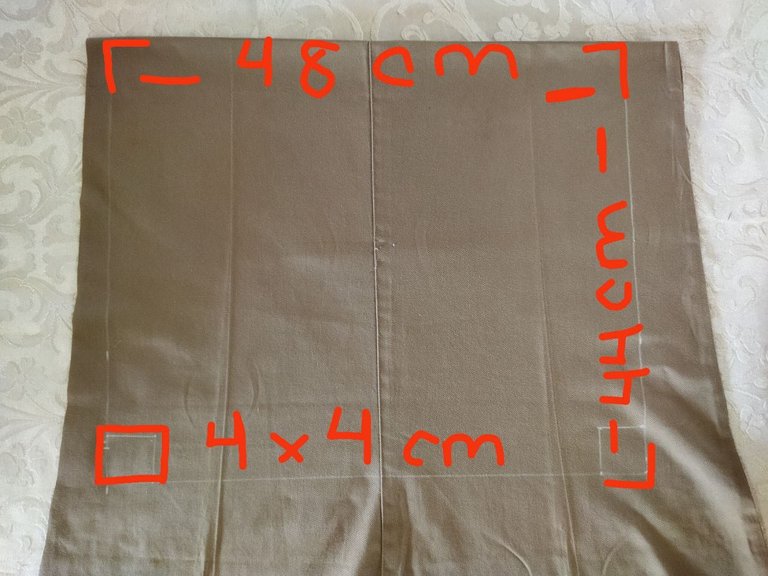
Quiero hacer este bolso con las medidas del patrón que se muestra en la imagen, para que tenga un tamaño adecuado para el uso que le voy a dar. En la línea del extremo inferior marcamos 4 centímetros en las direcciones que se indican, para formar la base del bolso. Ese paso se mostrará mas adelante.
Paso 2
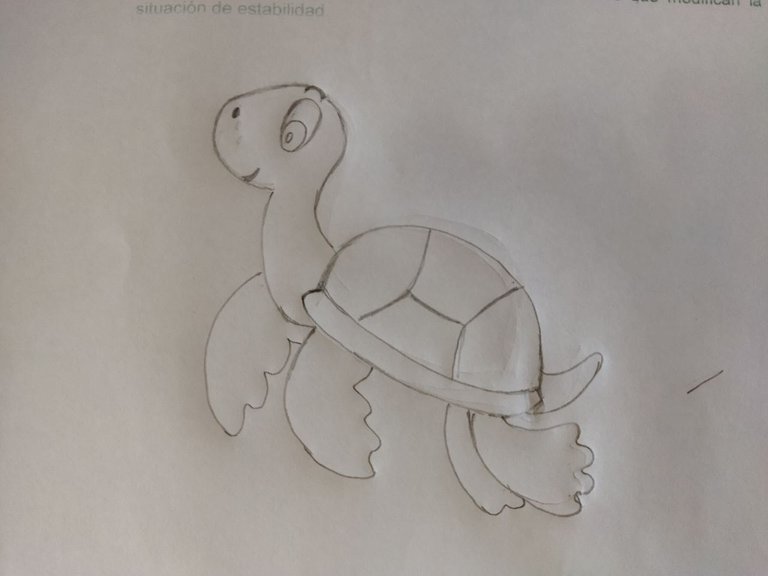
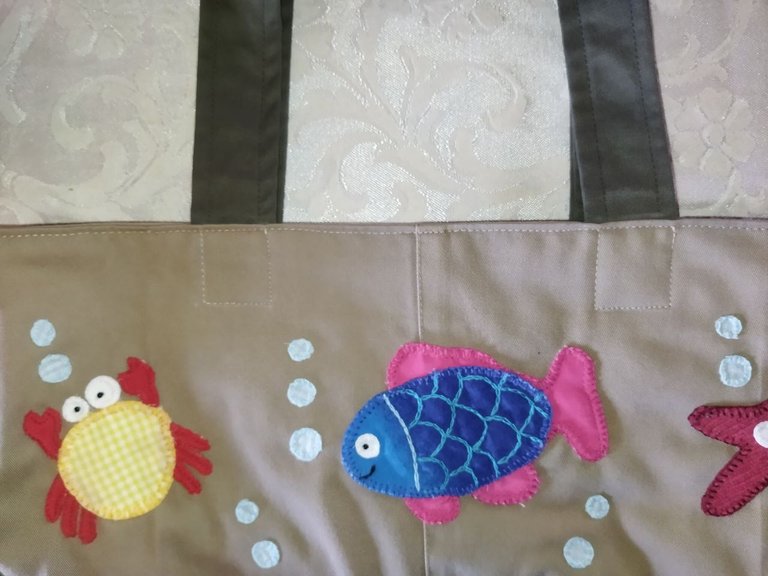
Para hacer la decoración del bolso, yo elegí 5 criaturas marinas: Cangrejo, Pez, Estrella de mar, Pulpo y tortuga. Busque imágenes en internet, las dibuje en papel, las recorté para sacar las plantillas y poder cortar las figuras en tela, como les muestro a continuación.


Hechas las plantillas, voy a marcar las figuras en la tela elegida y luego voy a cortar con cuidado. A las figuras realizadas con telas muy finas, les hice una base con tela de jeans color crema para dar firmeza, como se muestra en las imágenes.

Cangrejo y Estrella de Mar


Pez

Tortuga y Pulpo
Voy a cortar algunas hojas con tela verde y unas piezas de color marrón para hacer las plantas marinas con base. También voy a cortar círculos de tela azul claro en diferentes tamaños para colocarlas en forma de burbujas.
Voy a combinar los dos tonos verdes para las hojas y usaré de guía los botones para hacer las burbujas.
Vista preliminar del paisaje.
Paso 3
Para realizar el bordado de las figuras voy a utilizar dos puntos, a los cuales llamaré punto "A" y punto "B".
Ejecución del punto "A"
Este punto se usa para unir piezas, para que las orillas de las telas no se deshilachen.

Insertamos la aguja y colocamos la hebra de hilo en posición para formar un círculo.

Pasamos la aguja por dentro del círculo y cerramos.
Repetir haciendo las puntadas a la misma distancia y altura para que el bordado quede parejo.
Así queda el bordado.
Al finalizar, insertamos la aguja justo al lado del último punto como se muestra en la imagen.

Tejido cerrado.
Ejecución punto "B"
Este es el conocido punto de cadeneta.

Insertamos la aguja y colocamos la hebra en posición para formar un círculo.
Pasamos la aguja por el centro del círculo y cerramos.

Aquí vemos el primer punto formado.

Luego insertamos la aguja en el centro del primer punto, como se observa en esta imagen.
Formamos el círculo nuevamente con la hebra, pasamos la aguja por el centro y cerramos.
Repetimos cuantas veces sea necesario y así se forma la cadeneta.

Al finalizar, insertamos la aguja justo encima del último punto como se muestra en esta imagen y aseguramos.
Tejido cerrado.
Con estos dos puntos de bordado ya explicados, yo trabajé los detalles en cada figura, como les muestro en siguientes imágenes.
Al pulpo le dibuje las cejas y la boca con creyón blanco para poder bordar las líneas. La parte blanca de los ojos la hice con tela y lo demás lo haré bordado.
Como pueden observar, bordé el contorno de la parte blanca de los ojos con el punto "A". Las cejas, la boca y la parte negra de los ojos los bordé con el punto "B". Para completar los ojos, le coloqué dos perlitas blancas para darle brillo a la mirada.

Al pez le bordé el contorno de la parte blanca del ojo con punto "A". La boca, la división entre la cabeza/cuerpo y las escamas lo bordé con el punto "B" y coloque una mostacilla negra en el centro del ojo.
A la estrella de mar le bordé el contorno de ojos con punto "A", la boca con punto "B" y coloqué dos mostacillas negras en el centro de los ojitos.
Al cangrejo sólo le aseguré las piezas pequeñas con una bastilla y las mostacillas negras en el centro de los ojitos, lo demás debo hacerlo cuando lo fije a la tapa del bolso.
A la tortuga le bordé el contorno de la parte blanca del ojo con el punto "A", la boca y parte negra del ojo lo hice con punto "B". El punto negro de la nariz y el puntito blanco del ojo, lo hice formando un pequeño nudo con hilo.
Paso 4
Ya tengo listos los pequeños detalles en cada figura y ahora voy a trabajar con el bordado para fijar las figuras a la tapa del bolso y armar el paisaje completo.
Es recomendable, colocar una tela por detrás del espacio donde vamos a bordar para evitar que la pieza de tela principal se recoja a medida que vamos trabajando y apretando las puntadas. De esta manera reforzamos también cada pieza y las figuras quedan con un pequeño efecto de relieve.
Para comenzar este paso, lo primero que voy a hacer es bordar las plantitas, como les muestro en siguientes imágenes.

Así quedan las plantitas ya bordadas con el punto "A".
Antes de realizar el bordado de las figuras para fijarlas a la tapa, voy a colocar una bastilla para evitar que se muevan durante la ejecución del trabajo, como les muestro en siguiente imagen.
Para fijar las figuras, voy a bordar el contorno de todas ellas con el punto "A".
En el caso del pulpo, agregué un pequeño detalle después que bordé los contornos. Coloqué varias mostacillas en cada unos de los tentáculos, simulando las ventosas que ellos tienen para atrapar sus presas, como muestran las siguientes imágenes.
Ahora si está listo el pulpo para atrapar a su presa.
Como pueden observar, utilicé el punto "A" para fijar las piezas como mencioné anteriormente y el punto "B" lo utilice para marcar las líneas marrones en la caparazón de la tortuga y marcar la división del cuerpo.
Trabajo de bordado terminado.
Paso 5
Ya tengo lista la tapa delantera del bolso y ahora voy a realizar la tapa trasera. Quiero hacer el bolso bicolor y para ello voy a tomar una de las piezas de pantalón color verde que mostré al principio para marcar y cortar a la medida, de acuerdo al patrón.

Lo primero que voy a hacer es cortar la orilla del ruedo y a lo largo justo al lado de la costura para abrir la pieza, como muestra esta imagen.
Luego, con la ayuda de una regla voy a trazar una línea recta para eliminar la curva que tiene la pierna del pantalón como muestra la imagen.
Voy a coser a máquina con puntada recta dejando un margen de costura de 1 centímetro y corto el excedente.
Aquí ya tengo la pieza cosida a máquina con su margen de costura y he cortado tomando en cuenta la medida del ancho del bolso de 48 centímetros como muestra la imagen.
Abrí la pieza de tela y las costuras y voy a marcar la medida de altura (48 centímetros) para cortar el excedente.
Para hacerlo de manera sencilla, he Colocado la pieza delantera encima de la trasera, revés con revés, marqué y corté el excedente como indica la imagen.
Paso 6
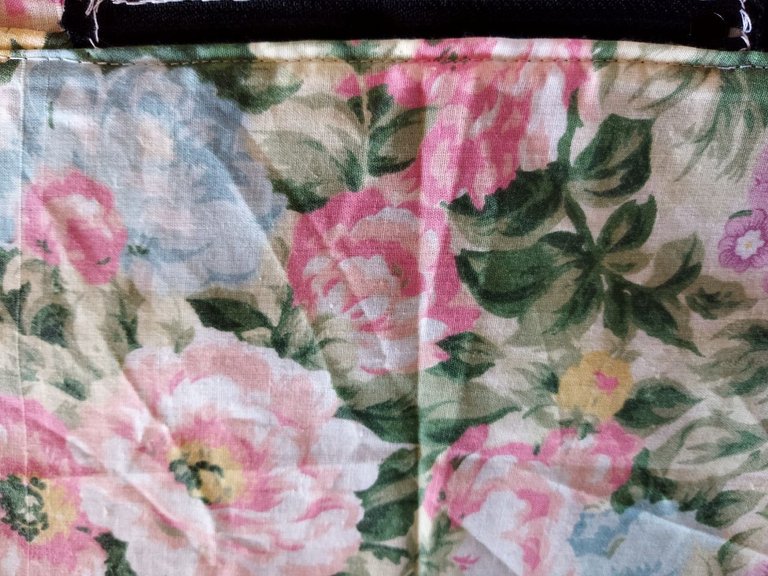
El siguiente paso será hacer un bolsillo con cierre en la tapa trasera del bolso. Para ello voy a utilizar un retazo de tela floreada que combina muy bien y un cierre de 15 centímetros.
Este tipo de bolsillos me gusta porque allí se pueden llevar las llaves o cualquier otra cosa que queramos tener a la mano como el documento de identificación o tarjetas.
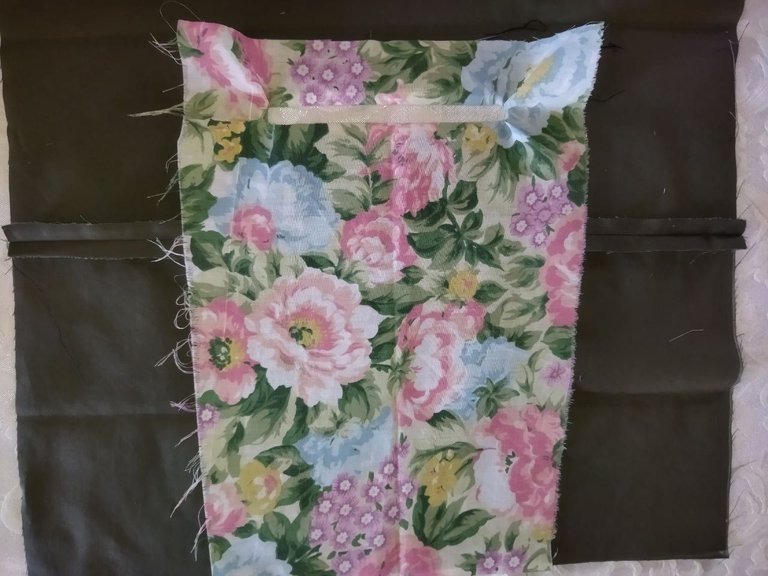
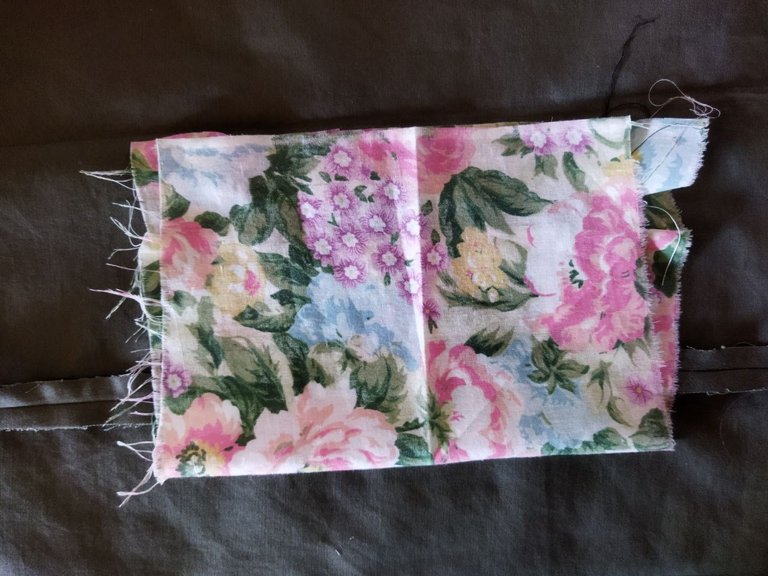
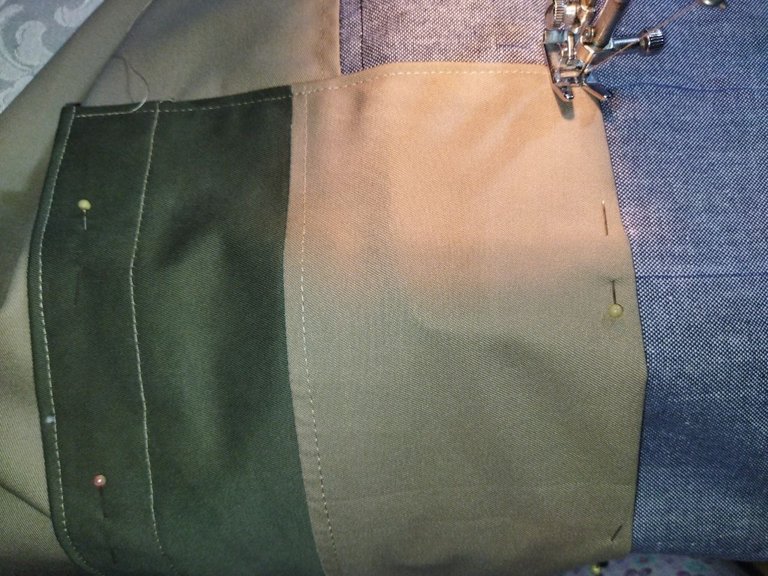
Lo primero que voy a hacer es colocar la tela floreada encima de la tapa, colocando derecho con derecho, como se muestra en esta imagen.
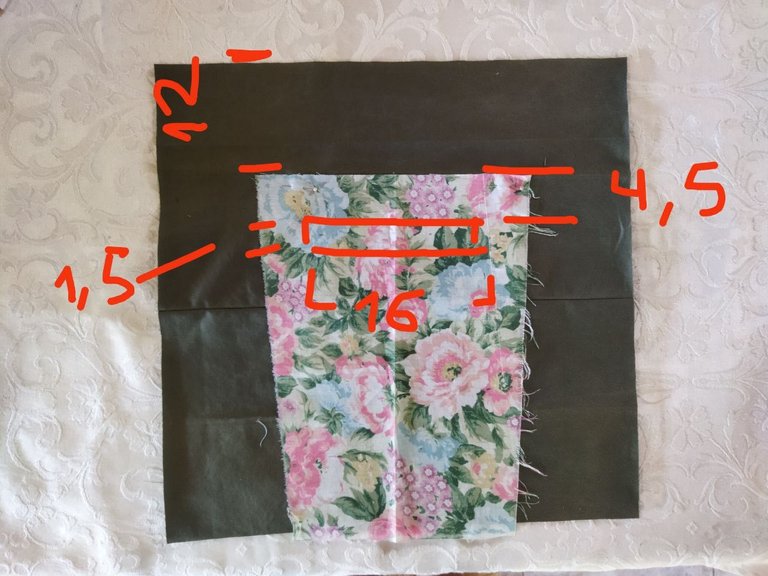
Como se indica en esta imagen, vamos a colocar la tela floreada a una distancia de 12 centímetros de la línea del extremo superior. Luego marcamos 4,5 centímetros desde la línea superior de la tela floreada hacia abajo y allí voy a trazar dos líneas de 16 centímetros con una separación de 1,5 centímetros entre ellas para formar un rectángulo. Este rectángulo debe estar bien centrado y para ello debemos marcar desde el inicio el punto central que nos servirá de guía antes de marcar las medidas.
Marcadas las medidas, vamos a coser a máquina con puntada recta en todo el contorno como indica la imagen.
Después de coser a máquina, marcamos una línea en el centro del rectángulo y a medio centímetro de cada extremo hacemos un pequeño triángulo como se muestra en esta imagen.
Luego, con mucho cuidado cortamos por toda la línea central hasta llegar a la punta del triángulo, allí cortamos hacia cada esquina cuidando de no llegar a la costura, como se observa en esta imagen.
A continuación, voy a pasar la tela hacia atrás por la abertura que acabo de hacer, como se observa en la imagen.

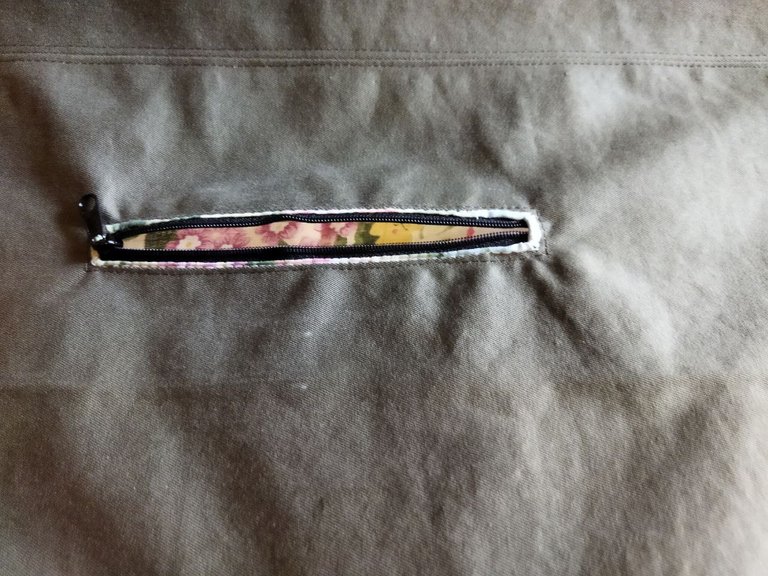
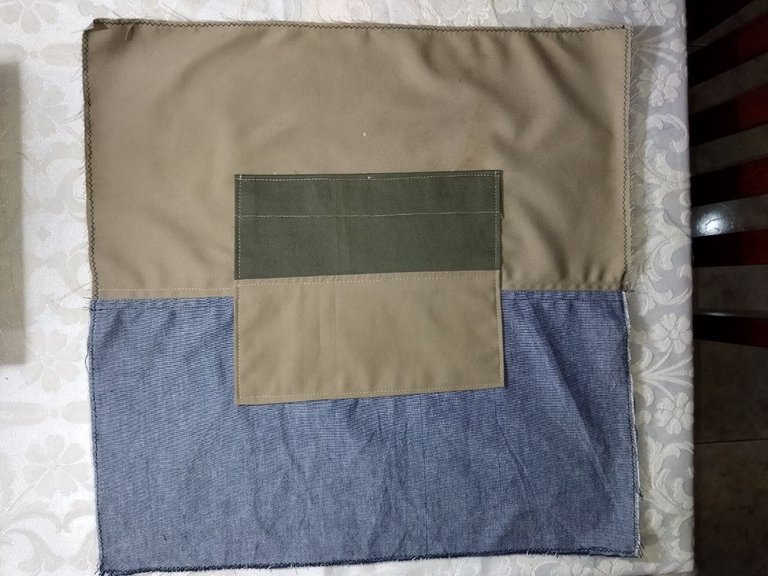
Ya tengo la abertura hecha para formar el bolsillo y vemos como le queda un pequeño borde de la tela floreada en el contorno como decoración.
Así queda por la parte interna y después que se pega el cierre, esta tela se recoge para formar la funda del bolsillo.
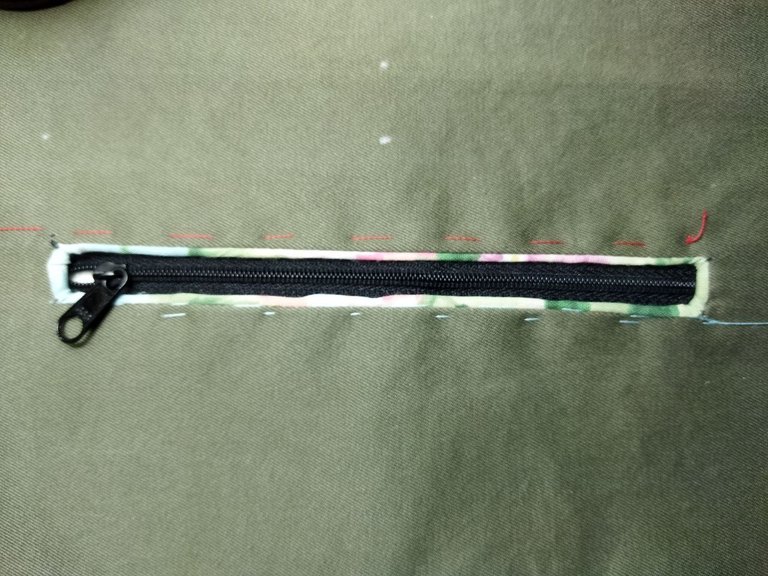
El siguiente paso es fijar el cierre con una bastilla para luego coser a máquina con puntada recta.
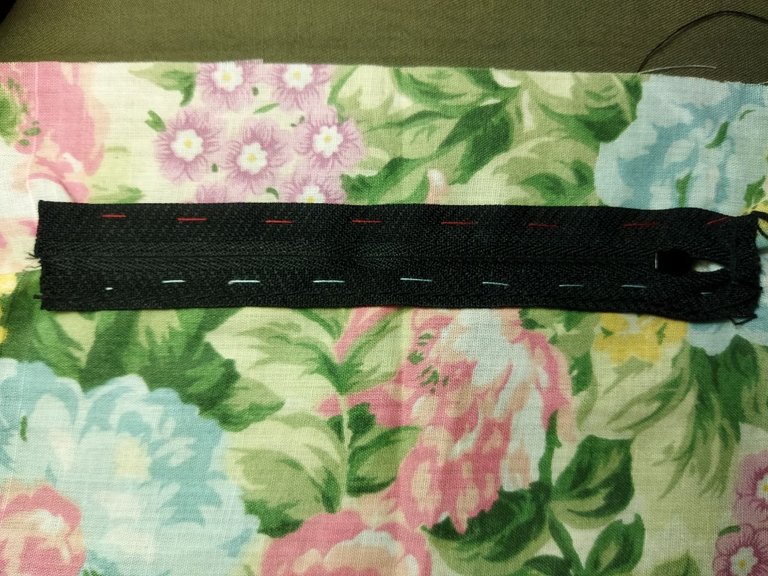
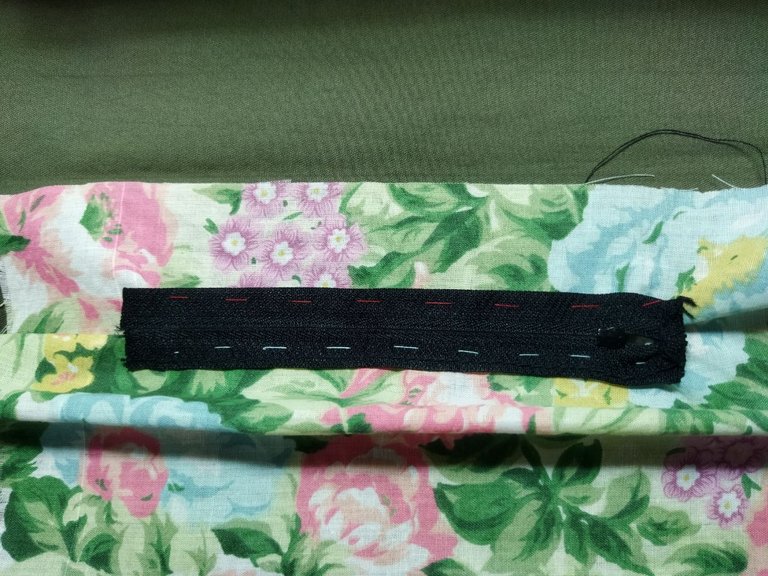
Para que las orillas del cierre no queden a la vista, voy a hacer un pequeño dobles de la tela floreada, lo voy a colocar encima de la orilla inferior del cierre y lo fijo con una bastilla para luego coser. La orilla superior del cierre quedará cubierta cuando termine el trabajo del bolsillo.

Aquí se observa la bastilla.

Voy a coser a máquina con puntada recta como lo indica la imagen y la línea superior la cosemos después que cerramos la funda del bolsillo.

Ya está lista la costura a máquina en este paso.
Ha quedado cubierta la orilla inferior del cierre como se observa en esta imagen.
Ahora voy a realizar los últimos pasos para terminar el bolsillo. Coloco ambos extremos de la tela floreada uno encima del otro y voy a coser los laterales para formar la funda del bolsillo.

Cosemos a máquina con puntada recta a una distancia de 2 centímetros de los extremos del cierre, dejamos 1 centímetro de margen de costura y pasamos zig zag en al orilla para que la tela no se deshilache.
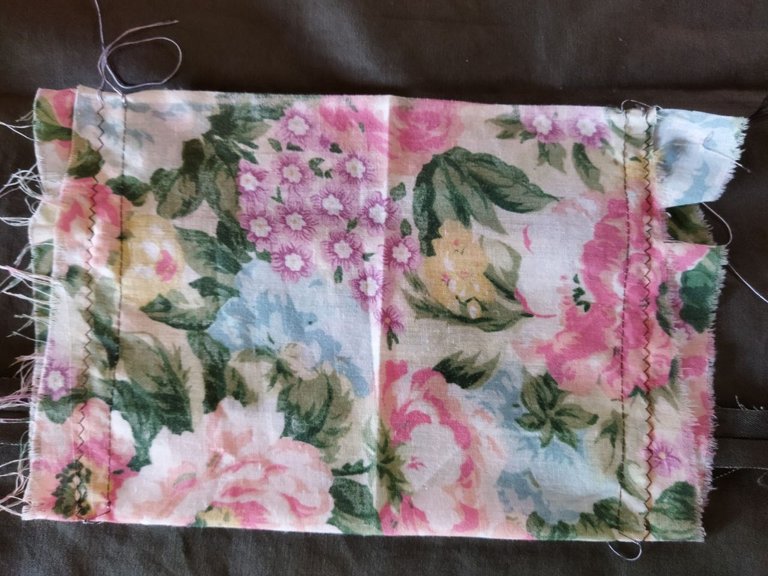
En esta imagen se observan las costuras y vamos a cortar el excedente de tela.

Así queda la funda del bolsillo por la parte interna y para terminar voy a coser a máquina la línea superior del cierre que había dejado pendiente para el final.
En esta imagen se observan las costuras en el contorno del cierre.

Terminado el trabajo del bolsillo.
Paso 7
Como ya tengo listas ambas tapas, el siguiente paso es armar el bolso como se muestra en siguientes imágenes.
Voy a colocar las piezas derecho con derecho y bien alineadas para coser a máquina con puntada recta como lo indica la imagen. Voy a dejar 1,5 centímetros de margen de costura en los laterales y 2 centímetros en la línea final.
En esta imagen pueden observar la tela que yo coloque de refuerzo por detrás a la tapa delantera para realizar el bordado.
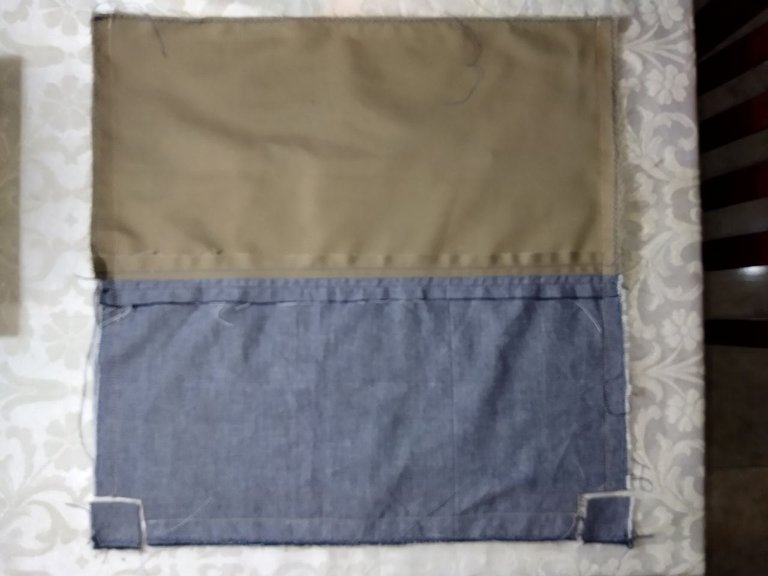
Después de coser, corte los cuadrados de las esquinas marcados en el patrón.
Después de cortar, abrimos y alineamos las costuras como se muestra en la siguiente imagen.
Marcamos un margen de costura de 1,5 centímetros y trazamos una línea para guiarnos. Coser a máquina ambos lados de la misma manera para formar el fondo del bolso.

Así queda el fondo del bolso! Ahora voy a abrir todas las costuras y les pasaré un pespunte en la máquina para que de esta manera se facilite el trabajo en los siguientes pasos y tenga una terminación delicada.

Costuras laterales.
Costura en fondo del bolso.
Paso 8
En este paso les voy a explicar como hice las asas para colgar el bolso, como se muestra en las siguientes imágenes.
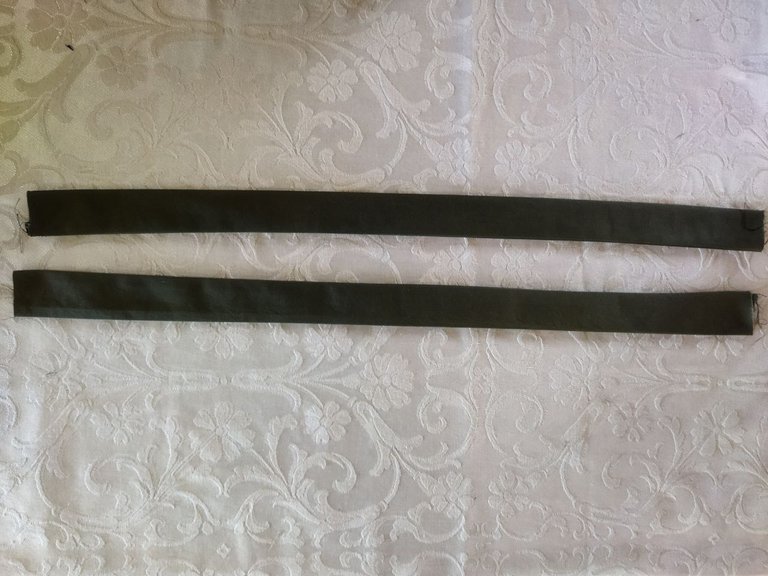
Lo primero que hice fue tomar la pieza de tela verde y trazar con una regla la línea recta para eliminar la curva que tiene esa zona del pantalón. Luego marqué las medidas como se muestra en la imagen y corté las tiras.
Voy a doblar la tira y voy a coser a máquina con puntada recta como se indica en la imagen.
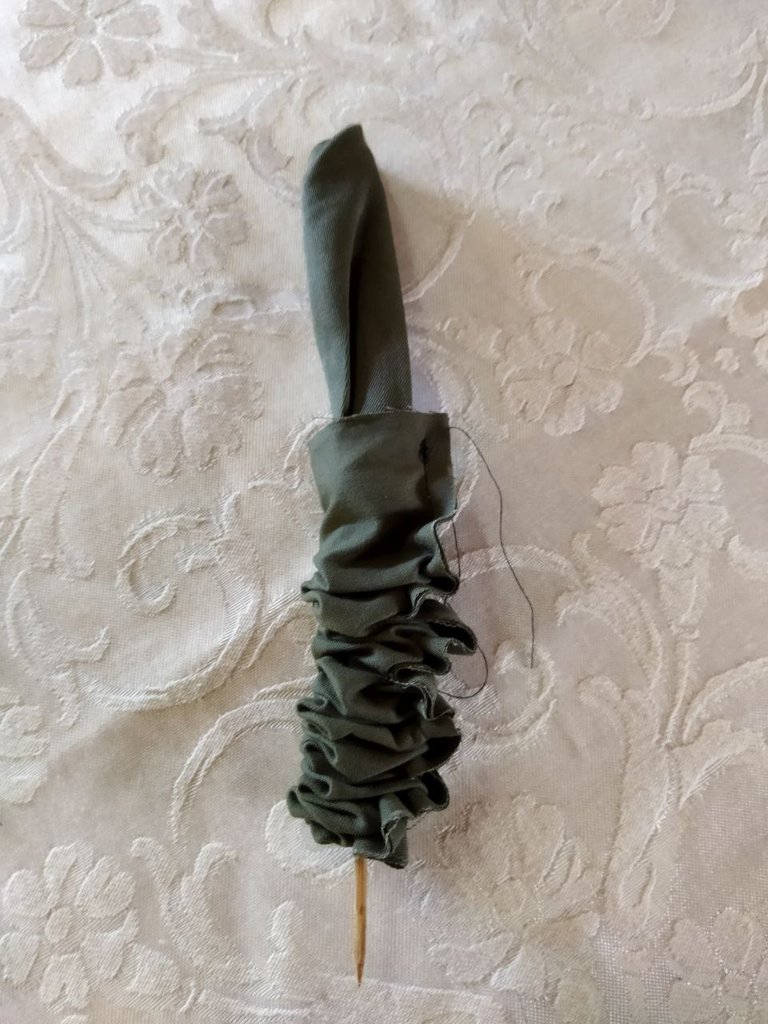
Después de coser, voy a voltear las tiras con la ayuda de un palito de madera como se muestra en siguientes imágenes.
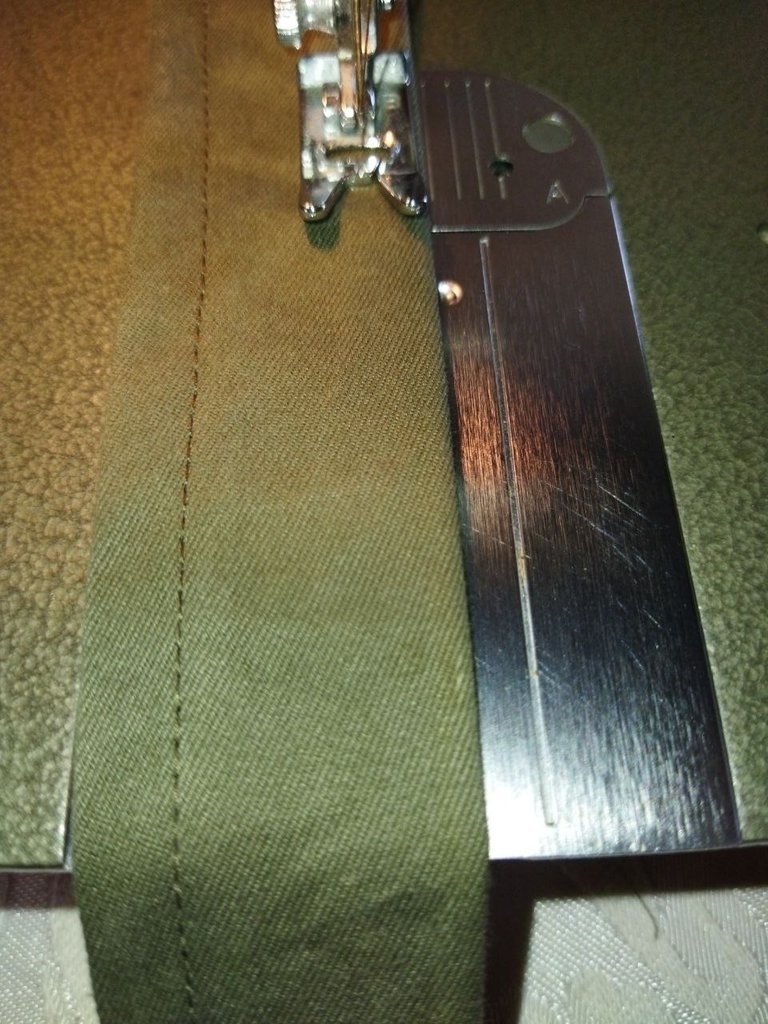
Después de voltear las tiras, las planché para pisar bien la costura y voy a coser nuevamente como se muestra en siguientes imágenes para que queden definidas y resistentes.
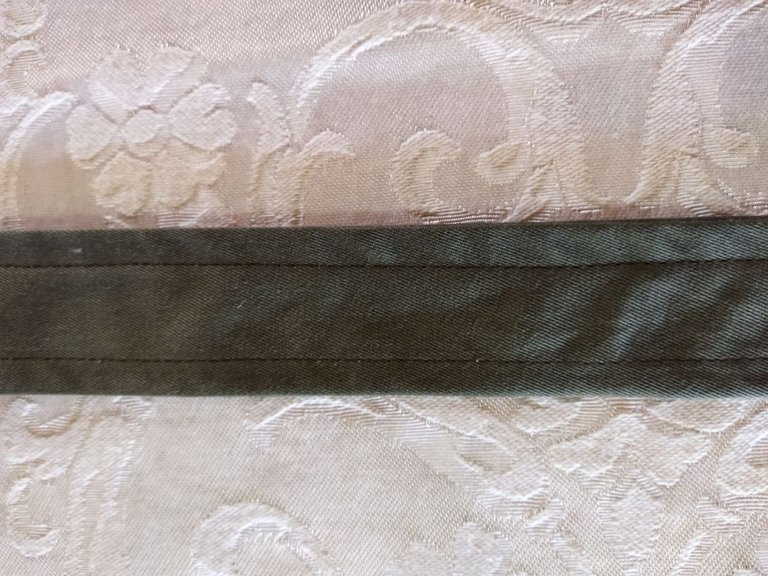
Así quedan las tiras y el siguiente paso es pegarlas al bolso.
Cada tira tiene un largo de 66 centímetros, voy a dejar un espacio de 5 centímetros en cada punta para pegarlas al bolso y los otros 56 centímetros serán para el tamaño del asa, así será cómodo a la hora de llevar. Voy a pegar las asas con la debida separación como se indica en la imagen.


Como se observa en la imagen, he cosido tres lados solamente y dejé la línea de la parte superior pendiente para un paso más adelante.
Paso 9
Para que el bolso tenga una buena presentación, le voy a colocar un forro interno. Para hacer este forro, el procedimiento es igual al del bolso, como se muestra en siguientes imágenes.
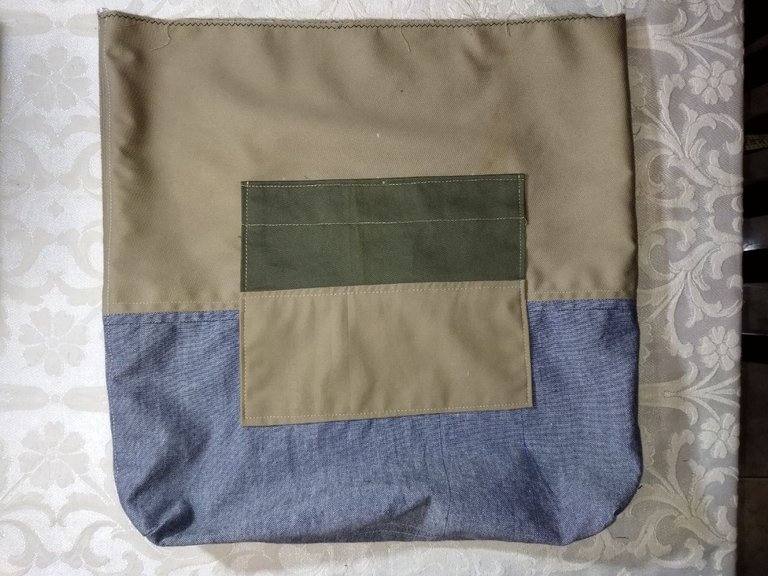
Tengo estas piezas de tela y voy a cortar las tapas con las medidas correspondientes al patrón.
Para armar las 2 tapas, he tenido que cortar 4 piezas de 26 centímetros de alto x 48 centímetros de ancho, las cosí a máquina y de esta manera obtuve el tamaño deseado.

Alineamos las piezas y cosemos a máquina con puntada recta.
Ambas tapas las hice bicolor y quiero pegar un bolsillo es esta que muestro en la imagen, ya que puede ser útil para colocar el celular o lo que desee dentro del bolso.
Pegado el bolsillo, el siguiente paso es pegar las tapas para armar el forro completo.
Cosí a máquina con puntada recta dejando los márgenes de costura igual que cuando arme el bolso. De la misma manera corte los cuadrados de las esquinas y repetí el procedimiento explicado en el paso 7.
Ya tengo el forro armado y al igual que en el bolso, voy a abrir las costuras y pasaré pespunte para fijarlas como se muestra en siguiente imagen.

He terminado el forro y ahora voy al siguiente paso.
Paso 10
En este paso les voy a mostrar como colocar el forro al bolso, es algo muy sencillo de hacer y le dará un acabado excelente a este trabajo.
Lo primero que voy a hacer es sujetar con alfileres los bordes del bolso y del forro para que no se corran y poder alinear bien ambas piezas. Luego voy a introducir el forro dentro del bolso revés con revés como se observa en esta imagen.
Voy a alinear las piezas como se observa en las imágenes.
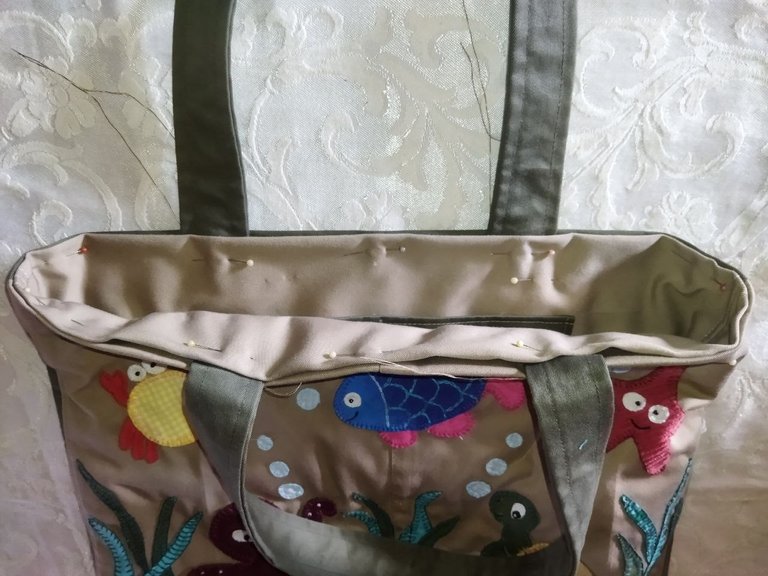

He colocado una bastilla para que las piezas no se muevan y planché las orillas para que no se formen arrugas en la tela cuando pase la costura a máquina.
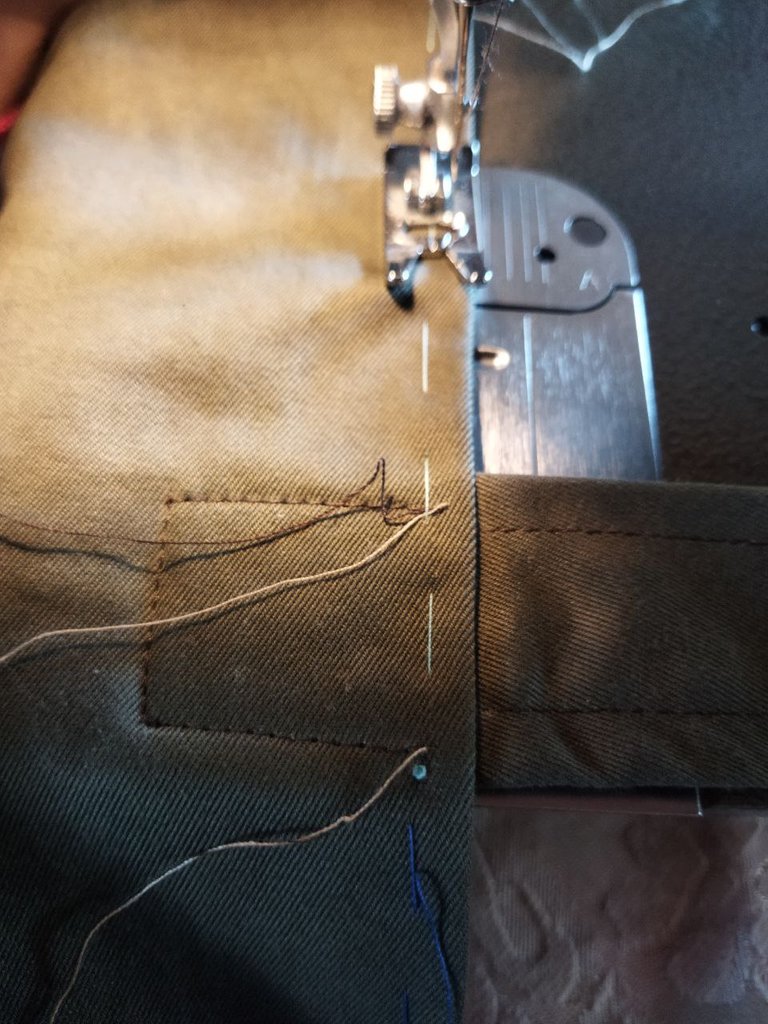
Coser a máquina lo más pegado que se pueda a la orilla para que queden bien pisadas con la costura y se vea mas bonito.
En este paso se ha completado la costura que faltaba en la parte superior cuando pegué las asas. Los hilos sobrantes los pasé hacia atrás, los aseguré con un nudo y con la ayuda de la aguja los pasé por dentro de las piezas para no dejar visible hilos cortados.
Hemos culminado con este paso y así ha quedado la unión del forro con el bolso.
Paso 11
Para finalizar este trabajo, quiero colocar una tapa con cierre al bolso, para que los objetos estén más seguros dentro y evitar que se nos pierda algo.
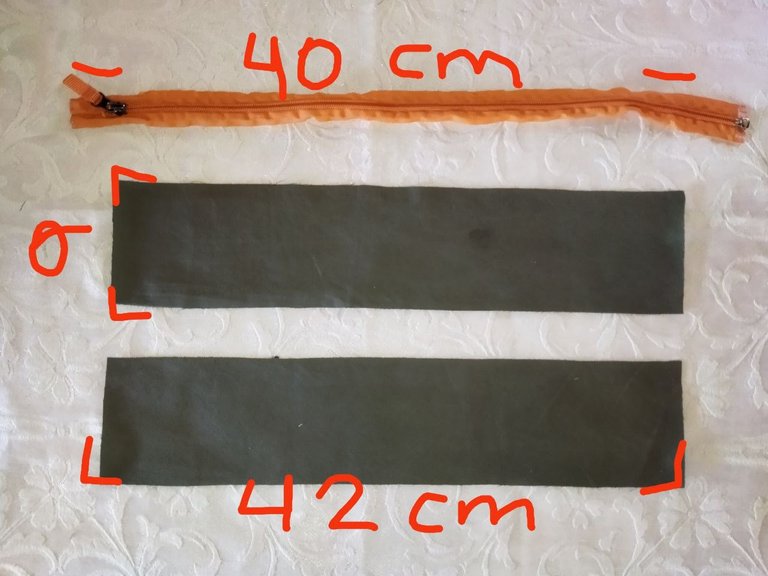
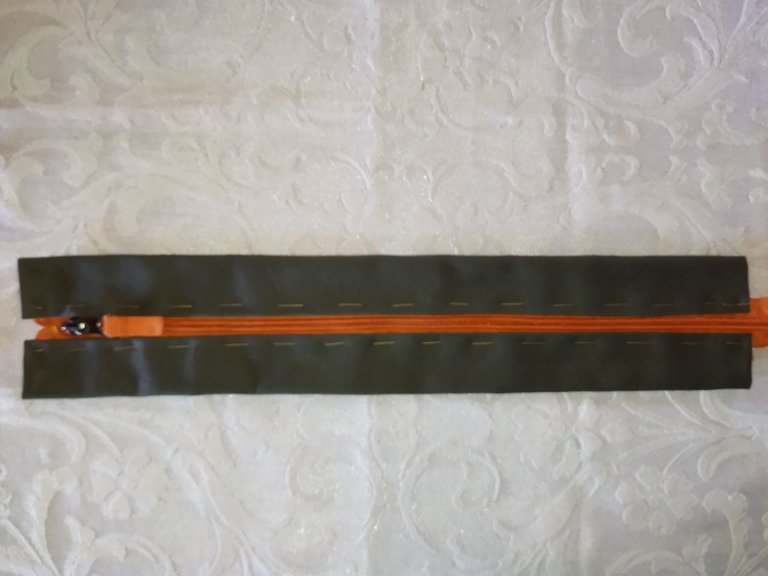
Tengo este cierre color naranja que era de un morral, tiene el largo que necesito y se ve muy bien combinado con la tela verde. He cortado 2 tiras con las medidas indicadas en esta imagen para realizar la tapa con cierre.
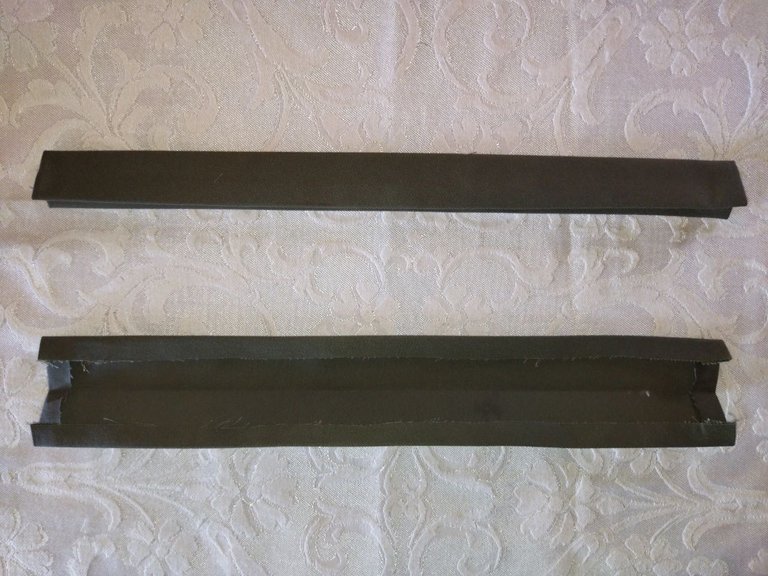
Con la ayuda de la plancha, he marcado el doblez de 1 centímetro en todos los lados, luego doble la pieza como se observa en la imagen y planché nuevamente para facilitar el trabajo.
Luego armé la tapa pegando el cierre con una bastilla para luego coser a máquina con puntada recta.

Para coser el cierre y pasar la costura lo mas pegado posible a la orilla en la punta donde se ubica el slider, abrimos el cierre y después que cosemos esa zona, levantamos el pie con la aguja dentro del tejido y corremos el slider hacia su lugar otra vez.
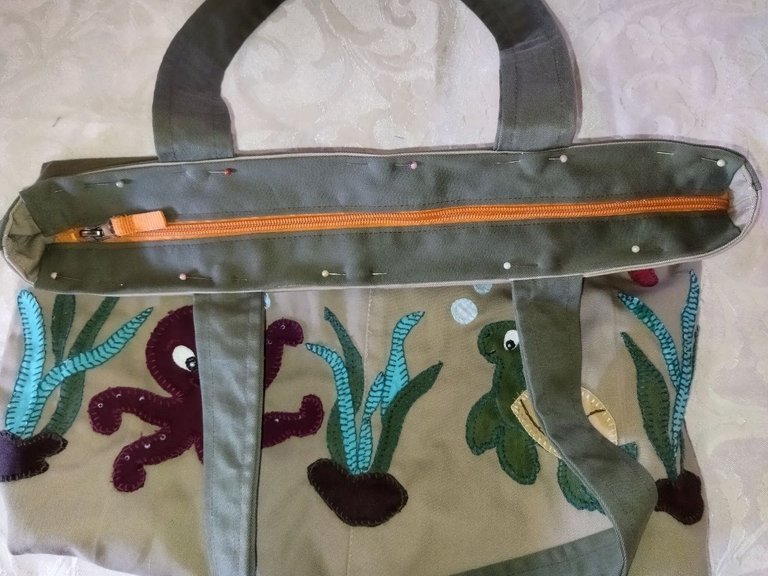
Fijamos la tapa con alfileres para luego coser.

Ya he pegado la tapa con cierre al bolso y de esta manera queda terminado este paso.
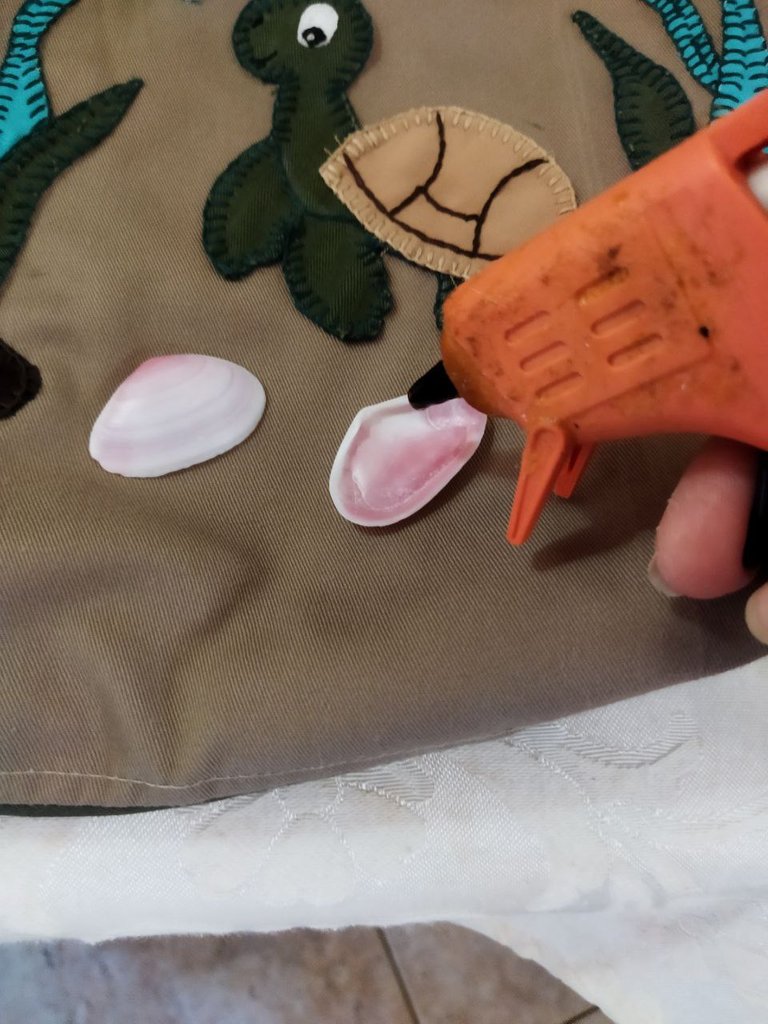
Como paso final para terminar completamente este lindo trabajo, voy a pegar unas conchitas que tenía guardadas desde hace mucho tiempo y me parece que le darán un toque muy bonito a la decoración del paisaje marino. Para eso he utilizado una pistola de silicón con mucho cuidado y de esta manera ha quedado terminado el bolso.
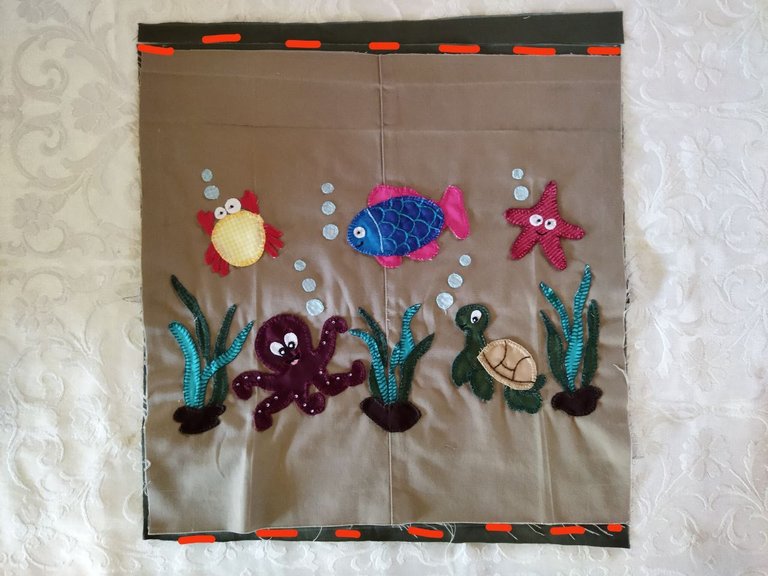
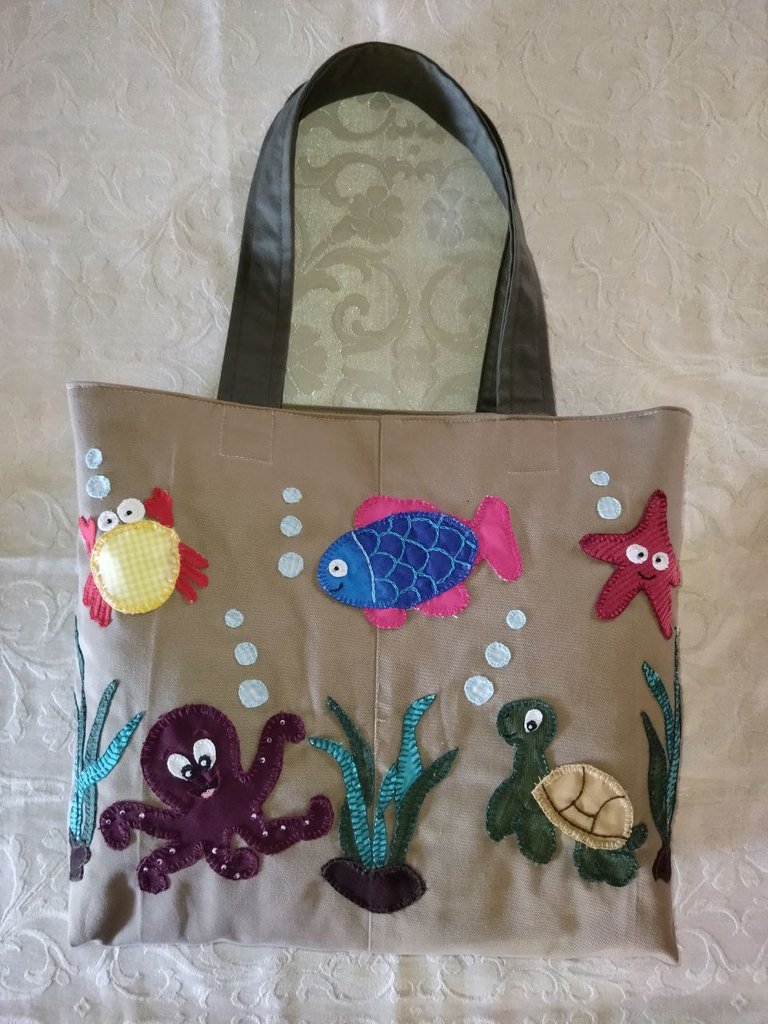
Bolso decorado con paisaje marino terminado!
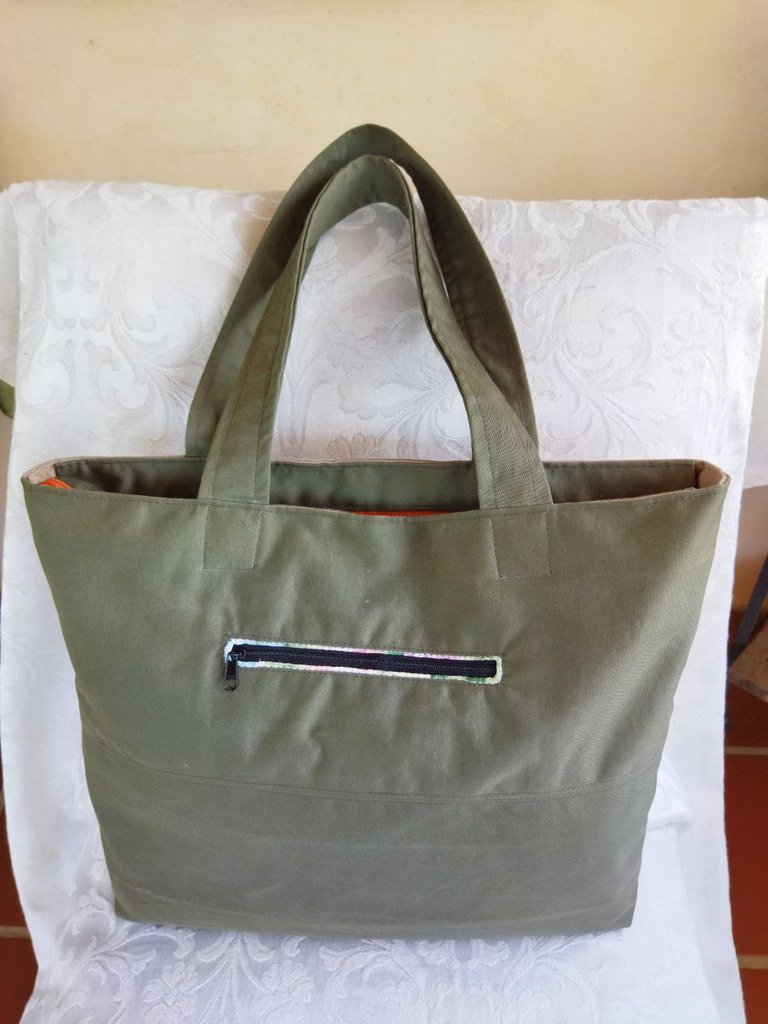
Parte trasera del bolso donde se puede observar el bolsillo.
He realizado este trabajo con mucho esmero, estoy muy contenta de haber logrado el objetivo y poder compartirlo con ustedes en esta segunda entrada al concurso, espero les guste y puedan poner en práctica esta idea.
Mil gracias por su visita y por leer hasta el final. Un fuerte abrazo!

Greetings Friends Hivers
First of all a warm greeting and best wishes to the appreciated DIYHUB community. It is a pleasure for me to be with you again and to present a second entry for this May's contest with the theme "Sea Life" #diyecencycontest.
For a few months now I've been meaning to make a bag for when I go to the beach, but I hadn't decided how to decorate it because I had several ideas in my head. This month's context I love it and it has inspired me to make a bag decorated with a landscape of cute sea creatures.
As in previous works, I organized all the material I had available to recycle and thus create something new and useful.
To do this work you don't need a lot of material and it is a simple job, so I invite you to see the process and get to work.
MATERIALS
- Fabric scraps (for bag lids / hanging strips)
- Colorful fabric scraps (for figures)
- 15 centimeter zipper (for pocket)
- 40 centimeter zipper (for purse cover)
- Scissors, measuring tape, needle, thread, threads
- Cold glue or glue stick (pistol)
- Black clay, white beads (for the eyes)
- Shells (optional)
PROCEDURE
Step 1
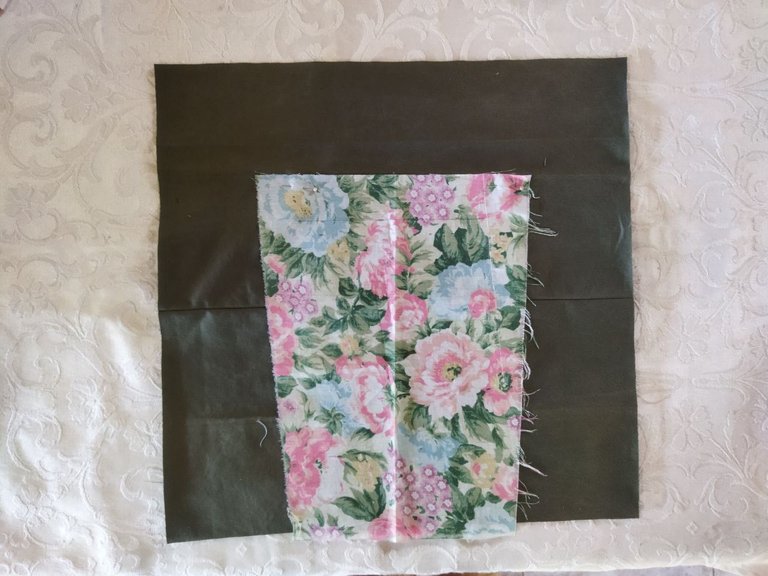
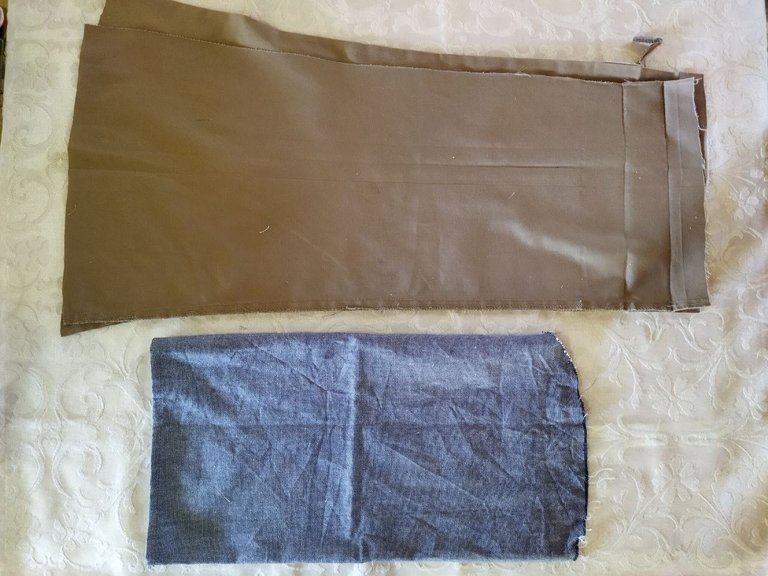
To begin this work, I will take one of the pieces of pants to reuse that fabric and cut the covers for the bag, as shown in the following images.
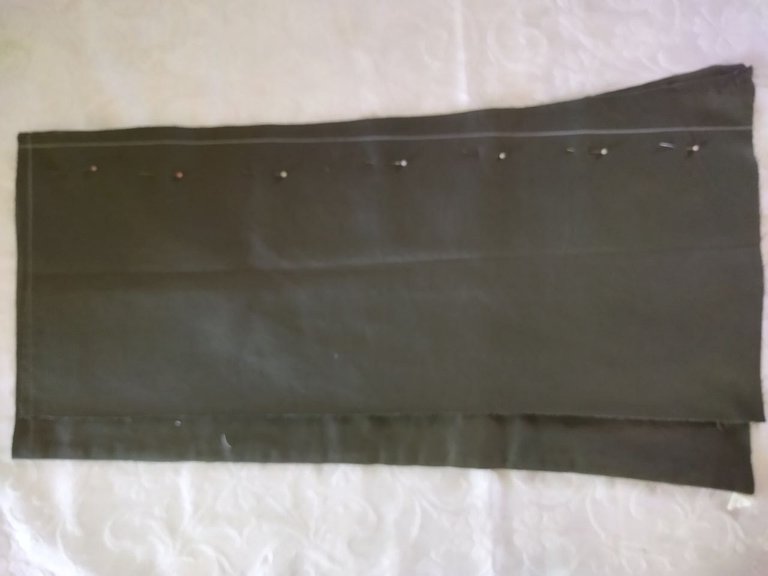
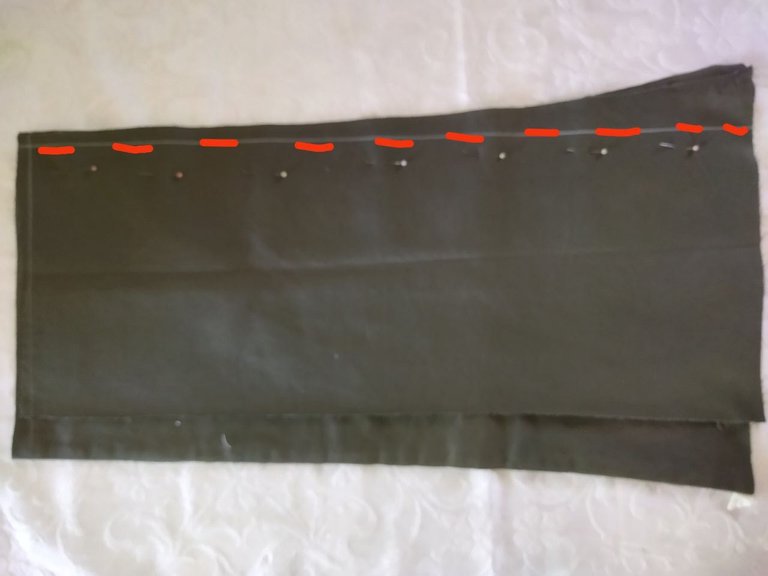
I am going to take one of the pieces and cut right next to the seam as indicated in the picture.
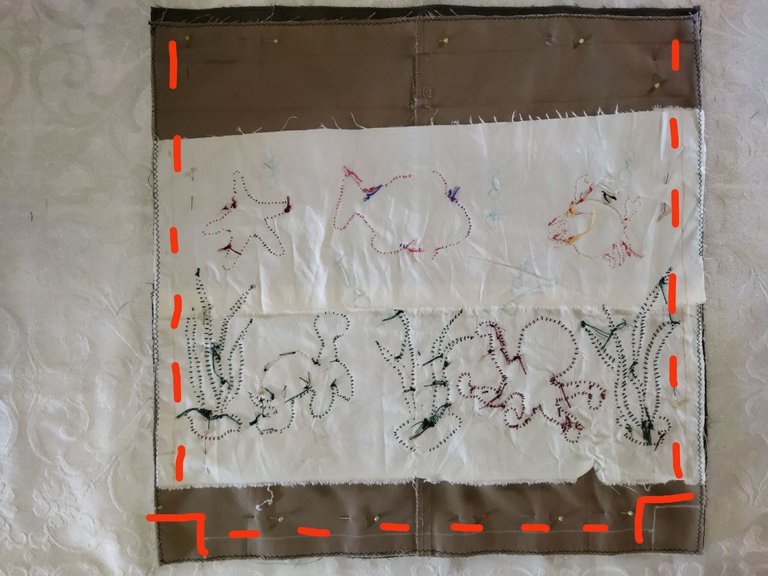
Here I have the piece of fabric open and I have marked with white crayon the measurements, as shown in the following image.
I want to make this bag with the measurements of the pattern shown in the image, so that it has a suitable size for the use I am going to give it. On the bottom end line we mark 4 centimeters in the directions indicated, to form the base of the bag. This step will be shown later.
Step 2
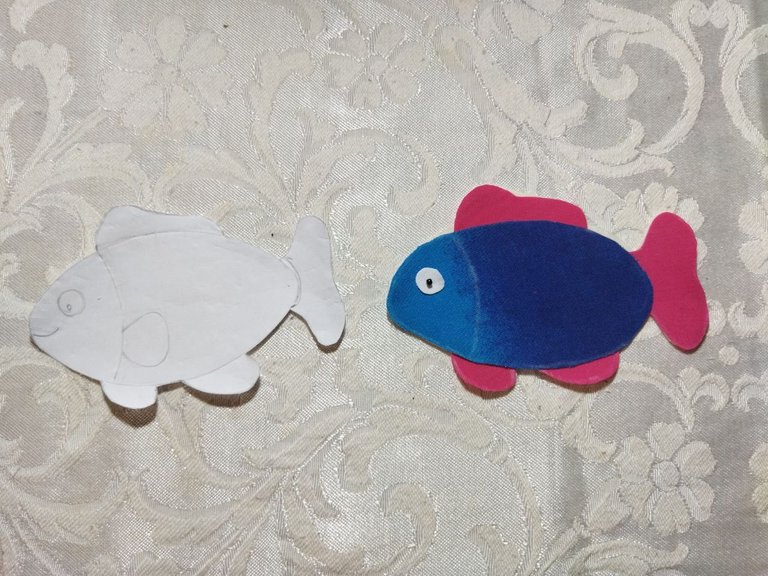
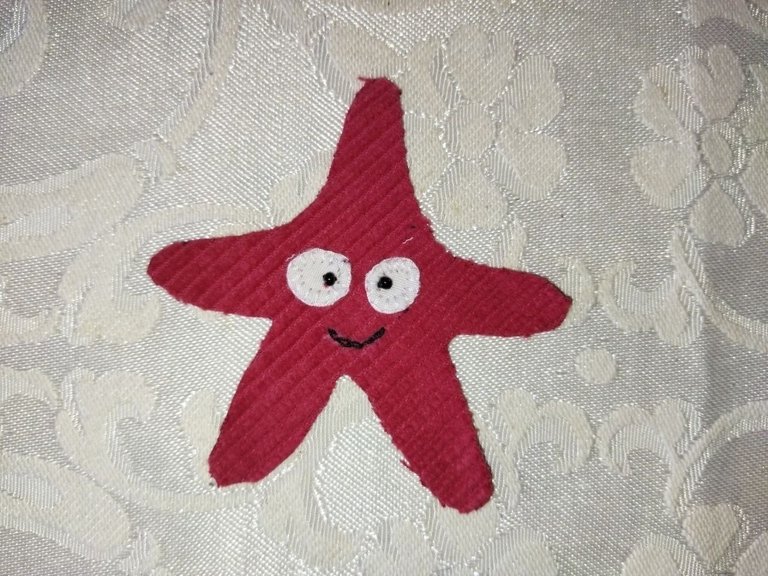
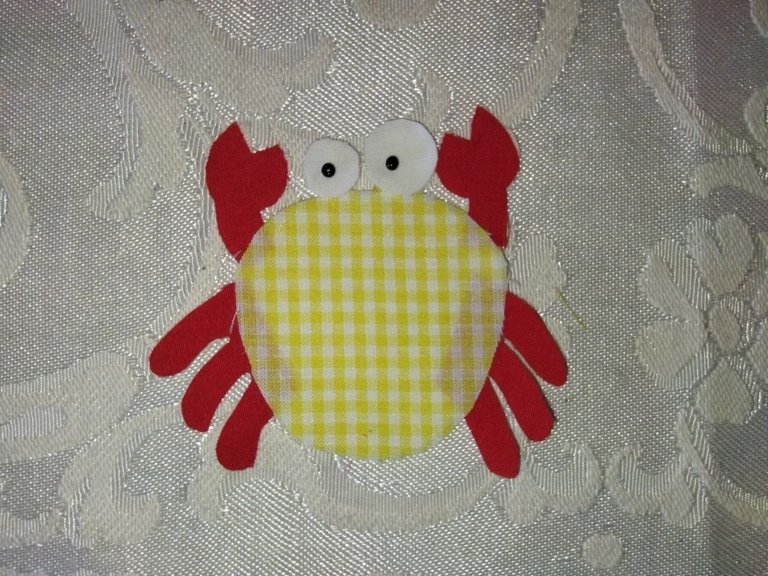
To decorate the bag, I chose 5 sea creatures: Crab, Fish, Starfish, Octopus and Turtle. I looked for images on the internet, drew them on paper, cut them out to make the templates and cut the figures on fabric, as shown below.
Once the templates are done, I will mark the figures on the chosen fabric and then I will cut them carefully. To the figures made with very thin fabrics, I made a base with cream-colored jeans fabric to give firmness, as shown in the images.
Crab and Starfish
Fish.
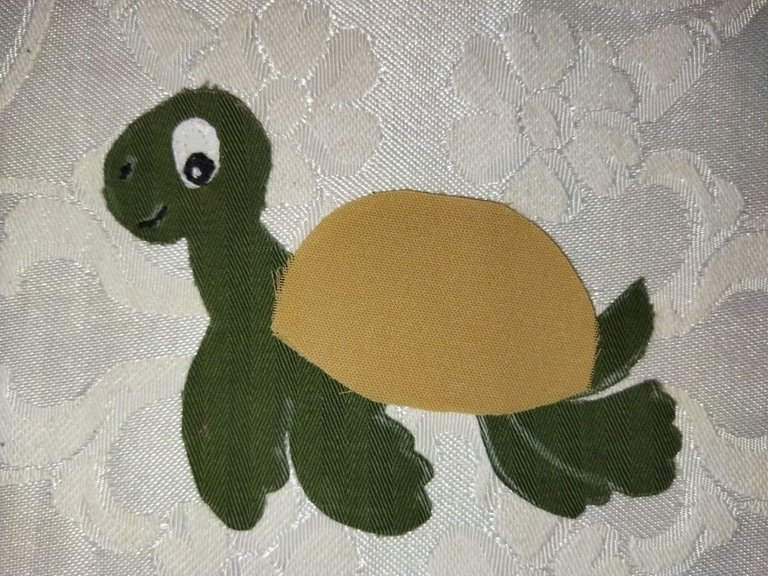
Turtle and octopus.
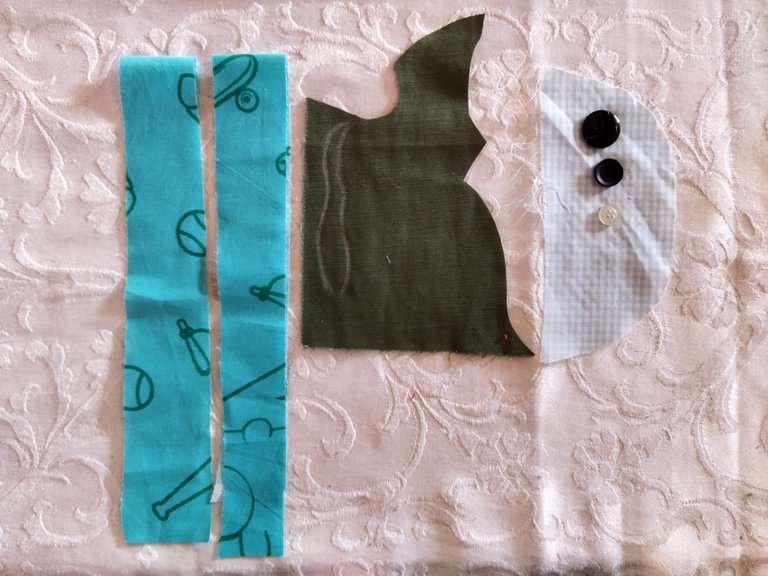
I am going to cut some leaves with green fabric and some brown pieces to make the sea plants with base. I am also going to cut circles of light blue fabric in different sizes to place them in the shape of bubbles.
I will combine the two shades of green for the leaves and use the buttons as a guide to make the bubbles.
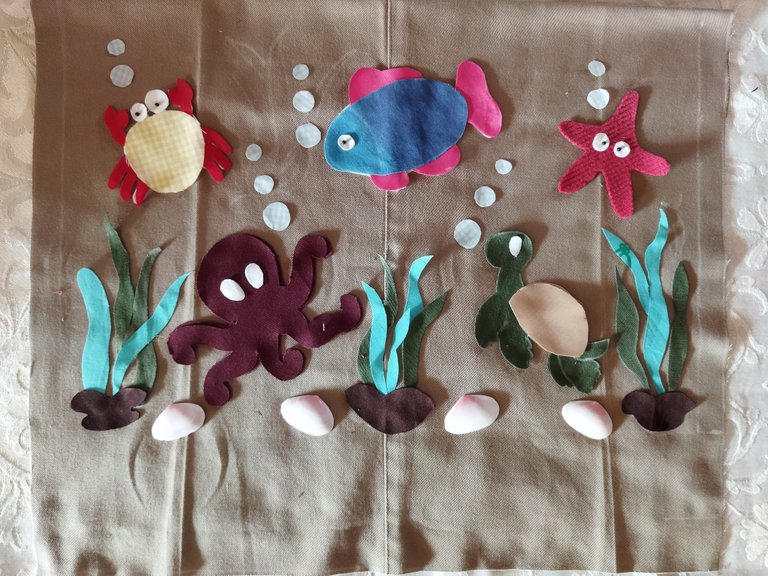
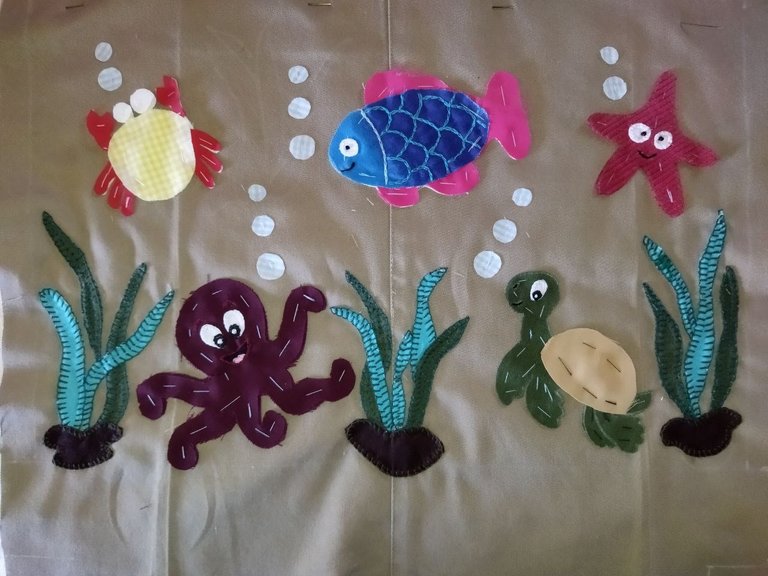
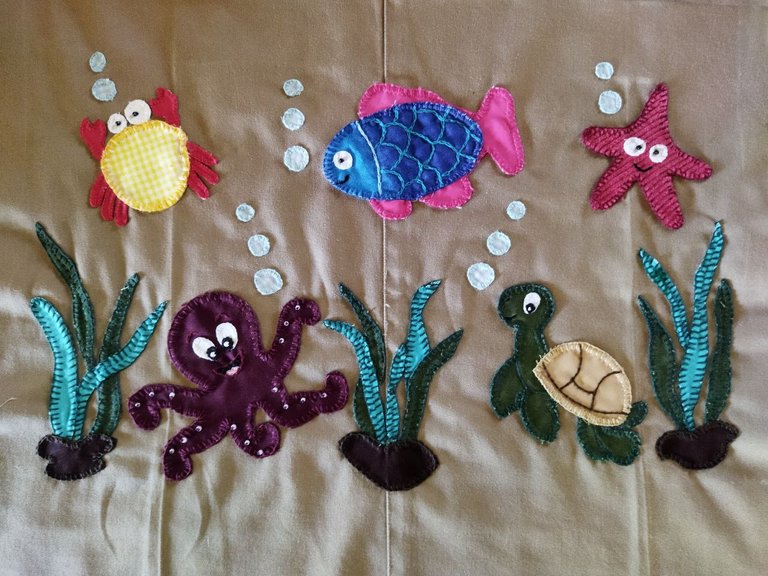
Landscape preview.
Step 3
To embroider the figures I will use two stitches, which I will call stitch "A" and stitch "B".
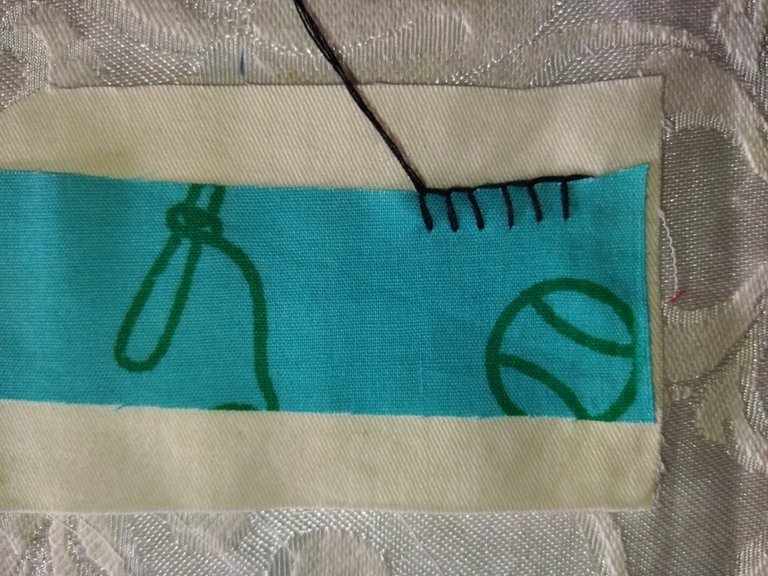
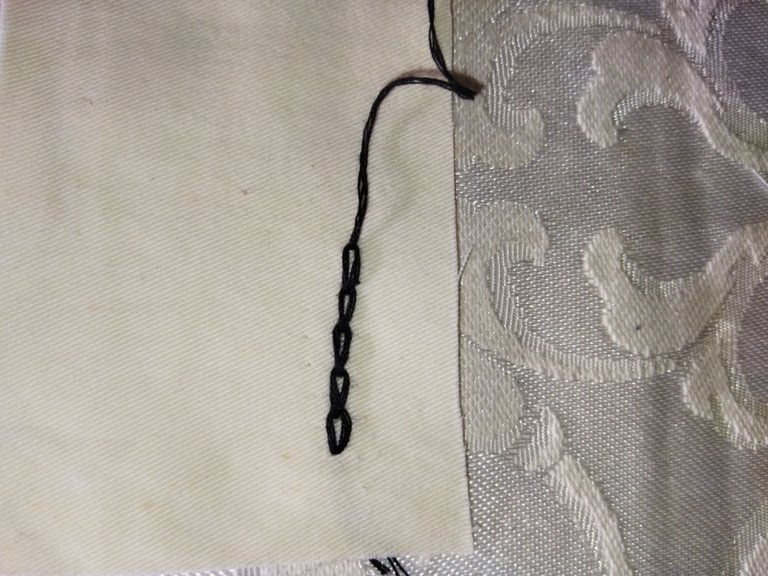
Execution of the "A" stitch
This stitch is used to join pieces together, so that the edges of the fabrics do not fray.
Insert the needle and place the thread strand in position to form a circle.
Pass the needle through the inside of the circle and close.
Repeat making the stitches at the same distance and height so that the embroidery is even.
This is how the embroidery looks.
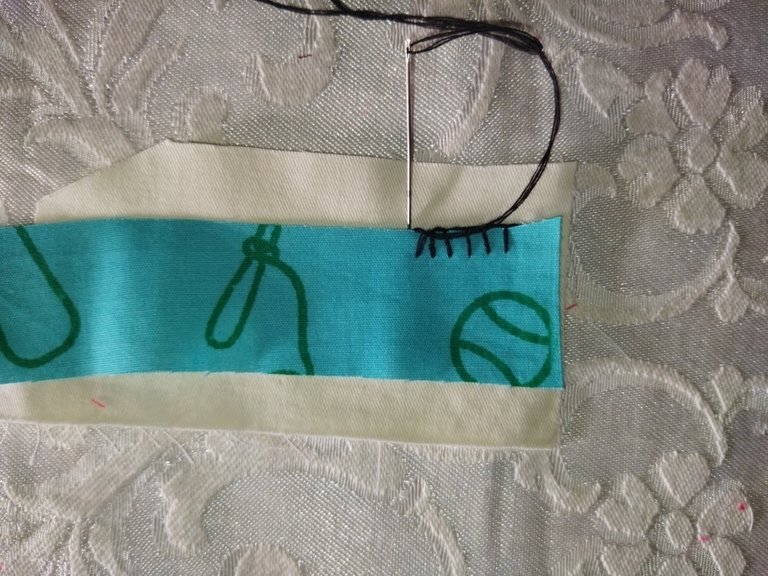
When finished, we insert the needle right next to the last stitch as shown in the picture and secure.
Closed fabric.
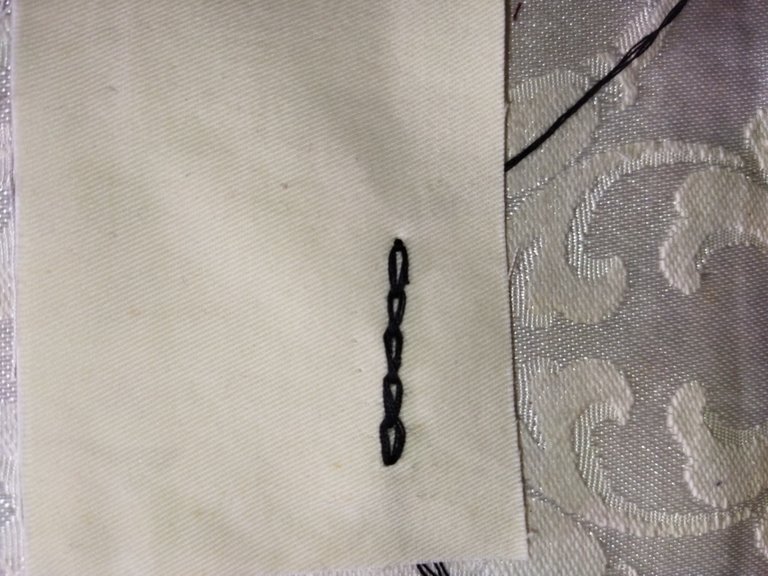
Execution of stitch "B".
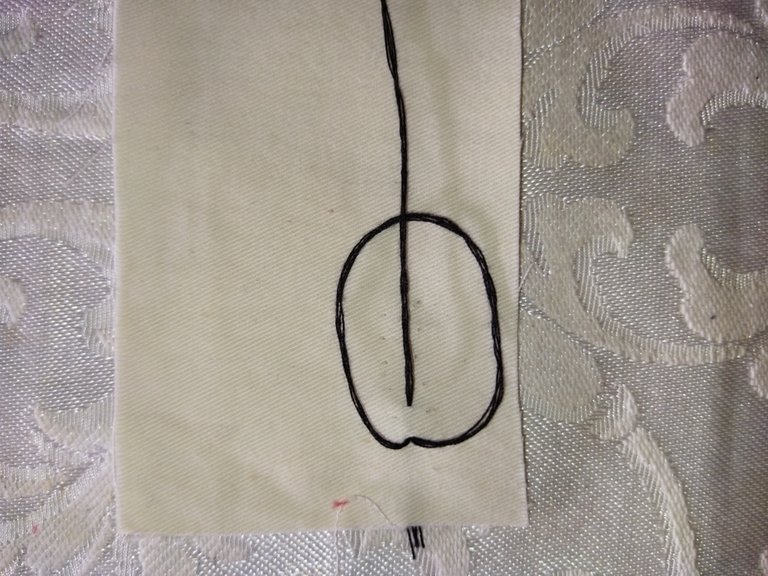
This is the well-known chain stitch.
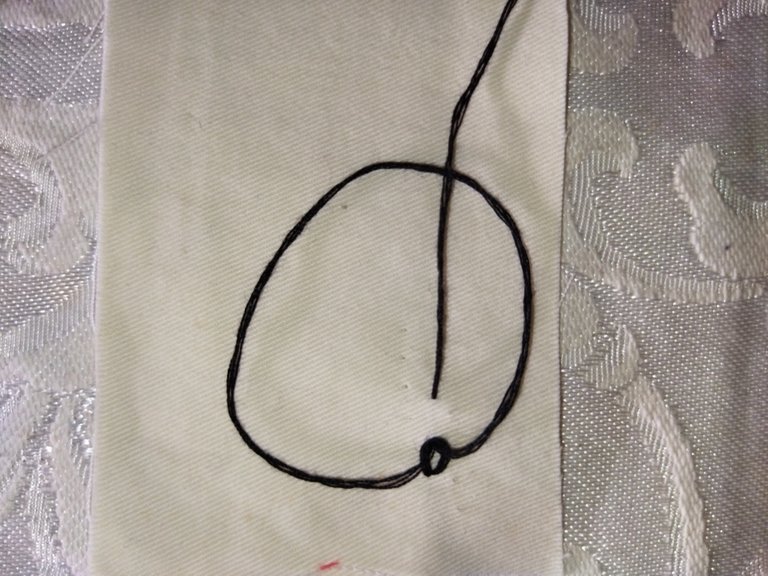
Insert the needle and place the yarn in position to form a circle.
Pass the needle through the center of the circle and close.
Here we see the first point formed.
Then we insert the needle in the center of the first stitch, as shown in this image.
We form the circle again with the yarn, pass the needle through the center and close.
Repeat as many times as necessary to form the chain stitch.
When finished, insert the needle just above the last stitch as shown in this image and secure.
Closed fabric.
With these two embroidery stitches already explained, I worked the details on each figure, as shown in the following images.
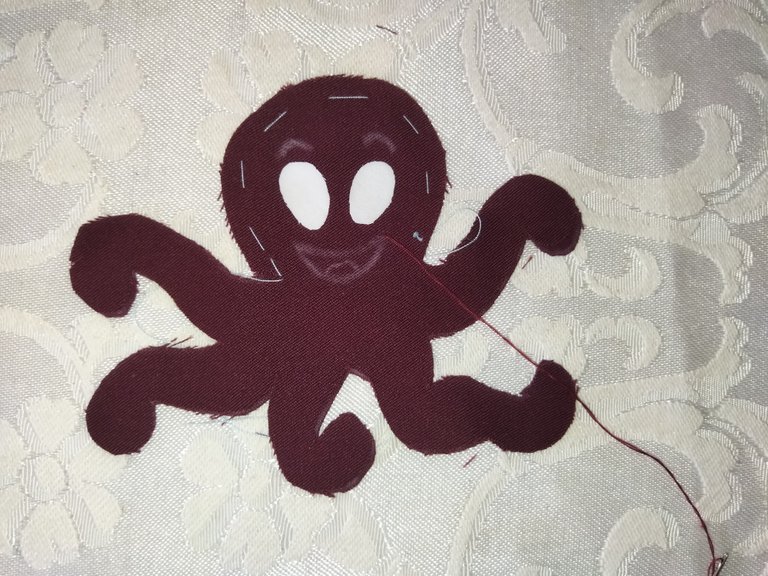
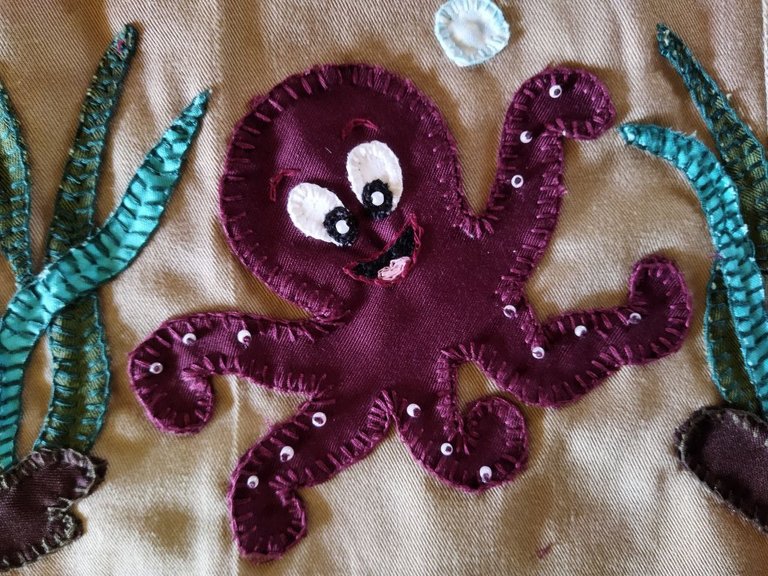
I drew the eyebrows and mouth on the octopus with white crayon so I could embroider the lines. The white part of the eyes I made with fabric and the rest I will embroider.
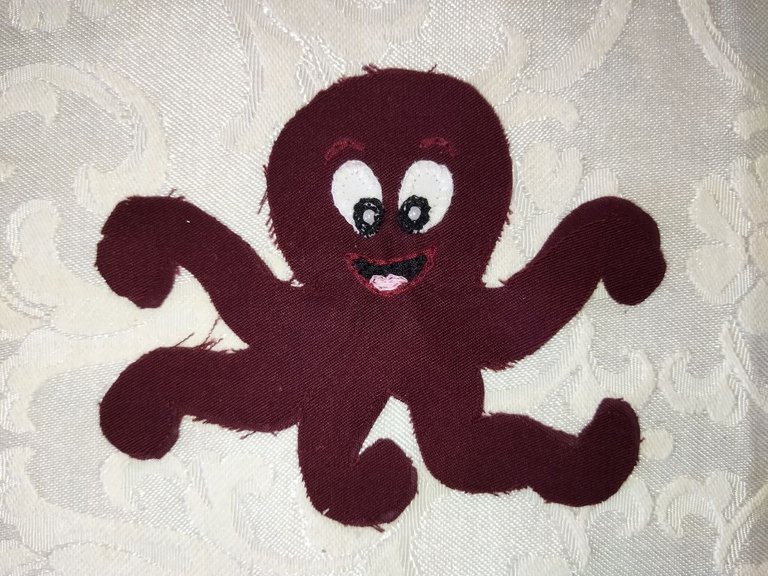
As you can see, I embroidered the outline of the white part of the eyes with stitch "A". The eyebrows, the mouth and the black part of the eyes I embroidered with stitch "B". To complete the eyes, I added two little white pearls to brighten up the eyes.
On the fish I embroidered the outline of the white part of the eye with stitch "A". The mouth, the division between the head/body and the scales I embroidered with stitch "B" and placed a black bead in the center of the eye.
I embroidered the outline of the starfish's eyes with "A" stitch, the mouth with "B" stitch and placed two black beads in the center of the eyes.
I only secured the small pieces to the crab with a bastille and the black beads in the center of the eyes, the rest I have to do when I attach it to the top of the bag.
I embroidered the outline of the white part of the eye with stitch "A", the mouth and the black part of the eye with stitch "B". The black stitch of the nose and the white dot of the eye, I made a small knot with thread.
Step 4
I have the small details ready in each figure and now I am going to work with the embroidery to fix the figures to the top of the bag and assemble the complete landscape.
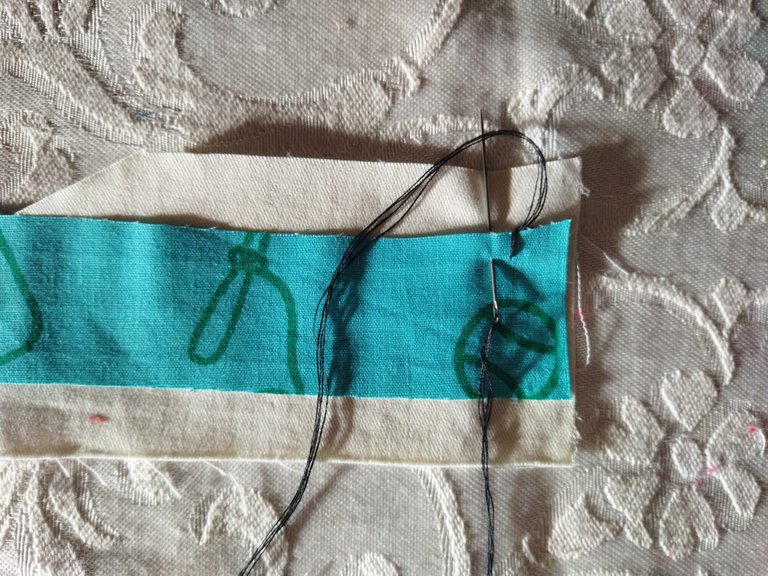
It is advisable to place a piece of fabric behind the space where we are going to embroider to prevent the main piece of fabric from gathering as we are working and tightening the stitches. In this way we also reinforce each piece and the figures are left with a small relief effect.
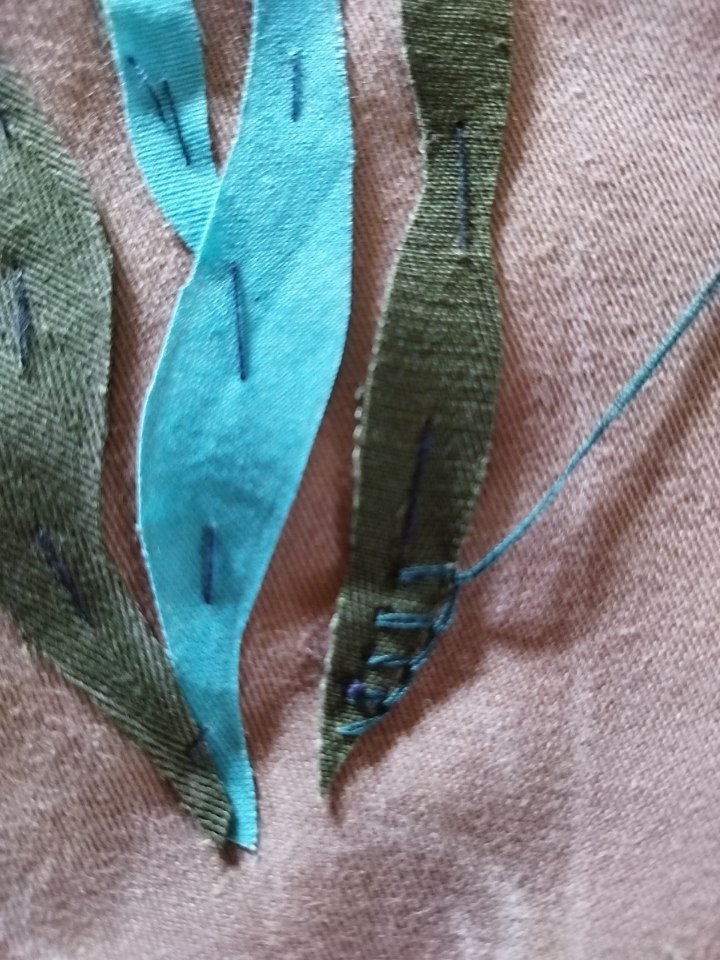
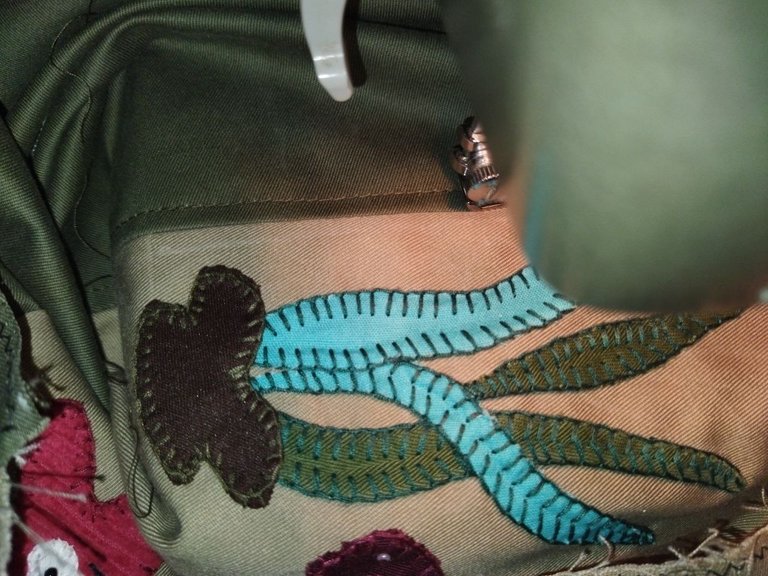
To begin this step, the first thing I am going to do is to embroider the little plants, as I show you in the following images.
This is how the seedlings are embroidered with the stitch "A".
Before embroidering the figures to fix them to the cover, I will place a bastille to prevent them from moving during the execution of the work, as shown in the following image.
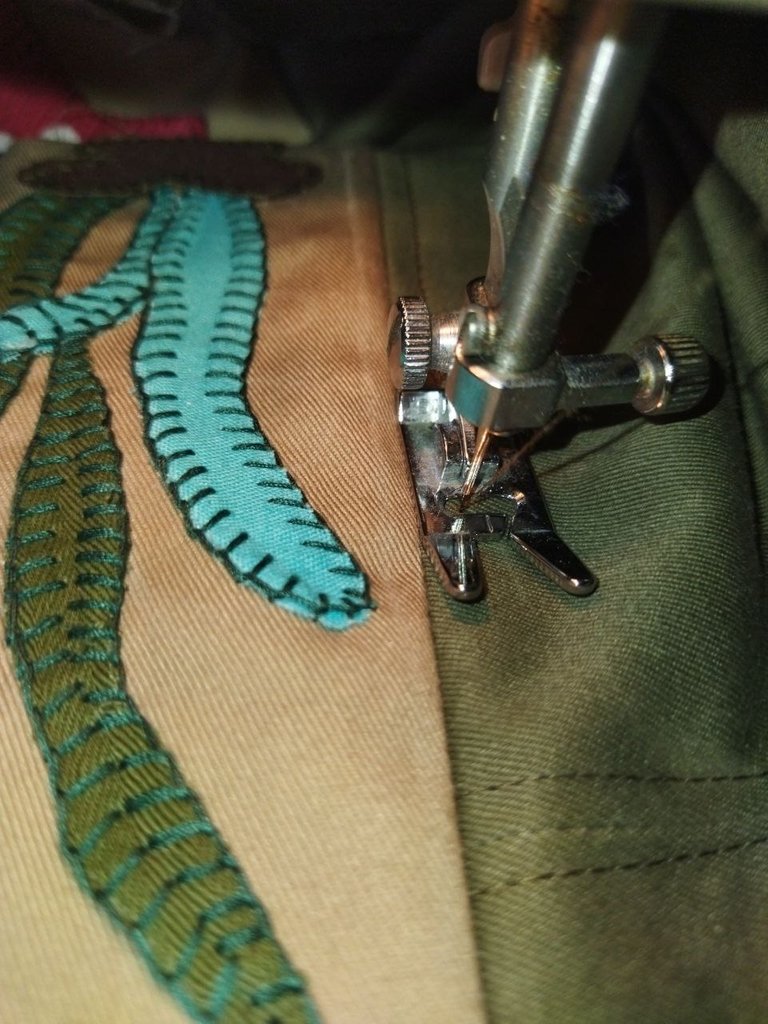
To fix the figures, I will embroider the outline of all of them with stitch "A".
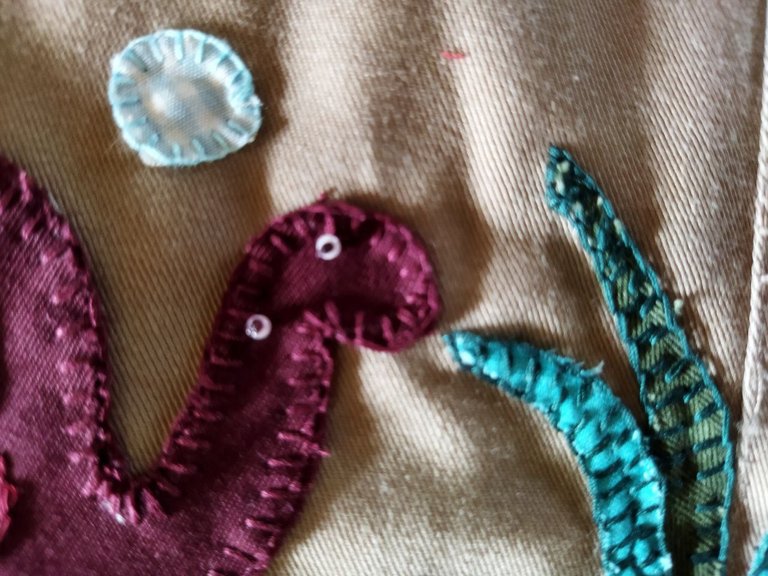
In the case of the octopus, I added a small detail after I embroidered the outlines. I placed several beads on each of the tentacles, simulating the suction cups they have to catch their prey, as shown in the following images.
Now the octopus is ready to catch its prey.
As you can see, I used stitch "A" to attach the pieces as I mentioned before and stitch "B" I used to mark the brown lines on the turtle's shell and mark the division of the body.
Finished embroidery work.
Step 5
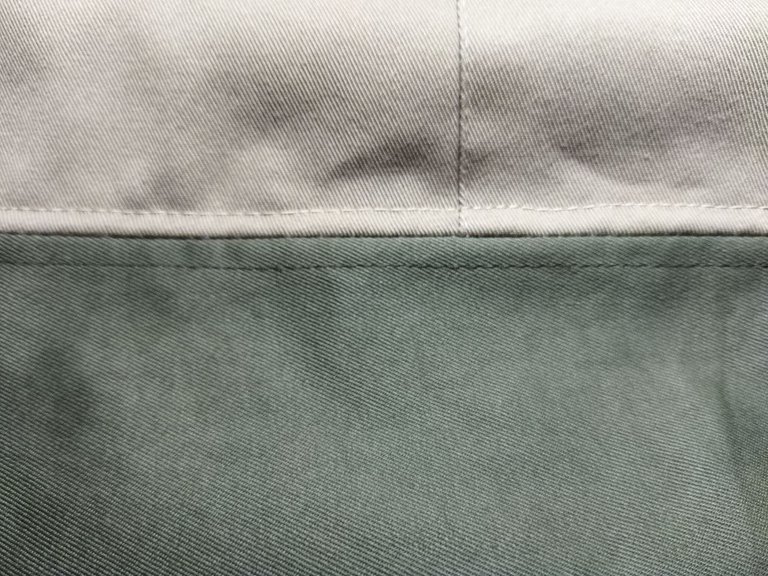
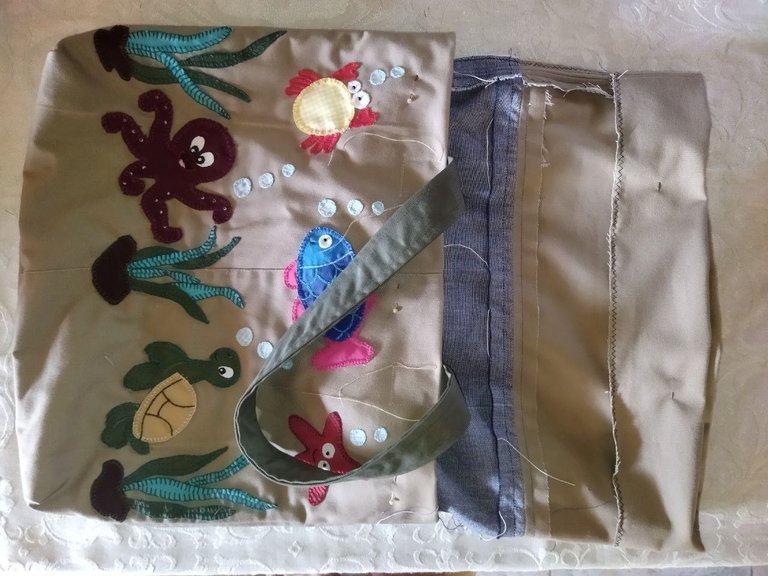
I have the front flap of the bag ready and now I am going to make the back flap. I want to make the two-color bag and for this I'm going to take one of the pieces of green pants that I showed at the beginning to mark and cut to size, according to the pattern.
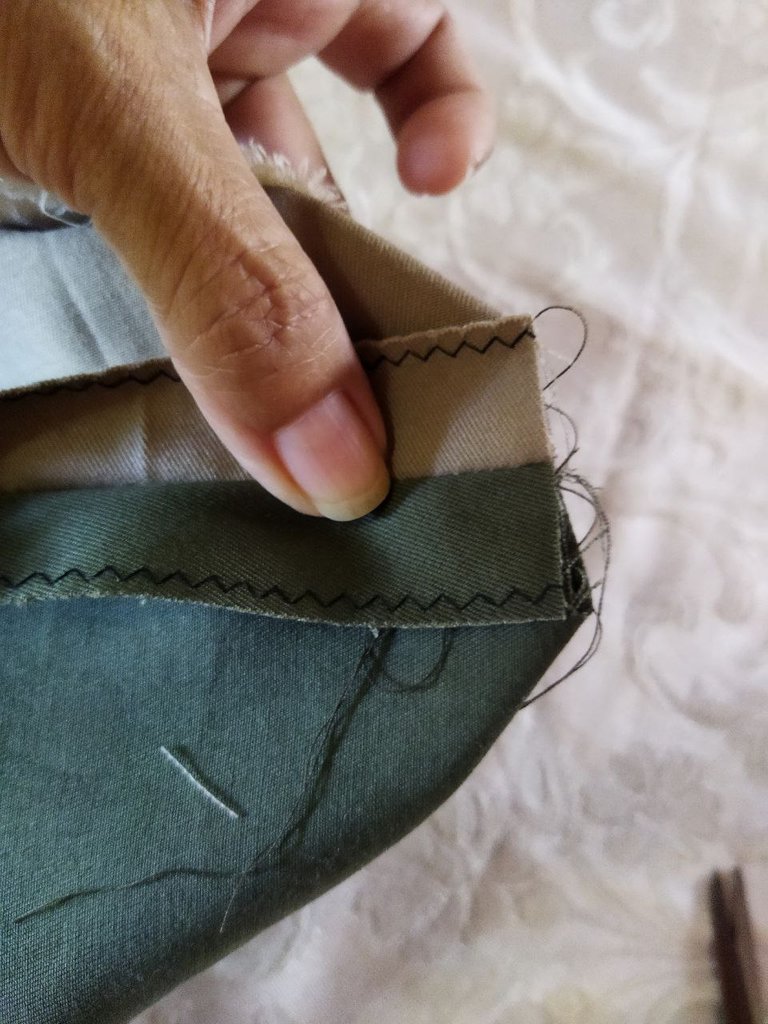
The first thing I'm going to do is to cut the edge of the hem and lengthwise right next to the seam to open the piece, as shown in this picture.
Then, with the help of a ruler I will draw a straight line to eliminate the curve of the pant leg as shown in the image.
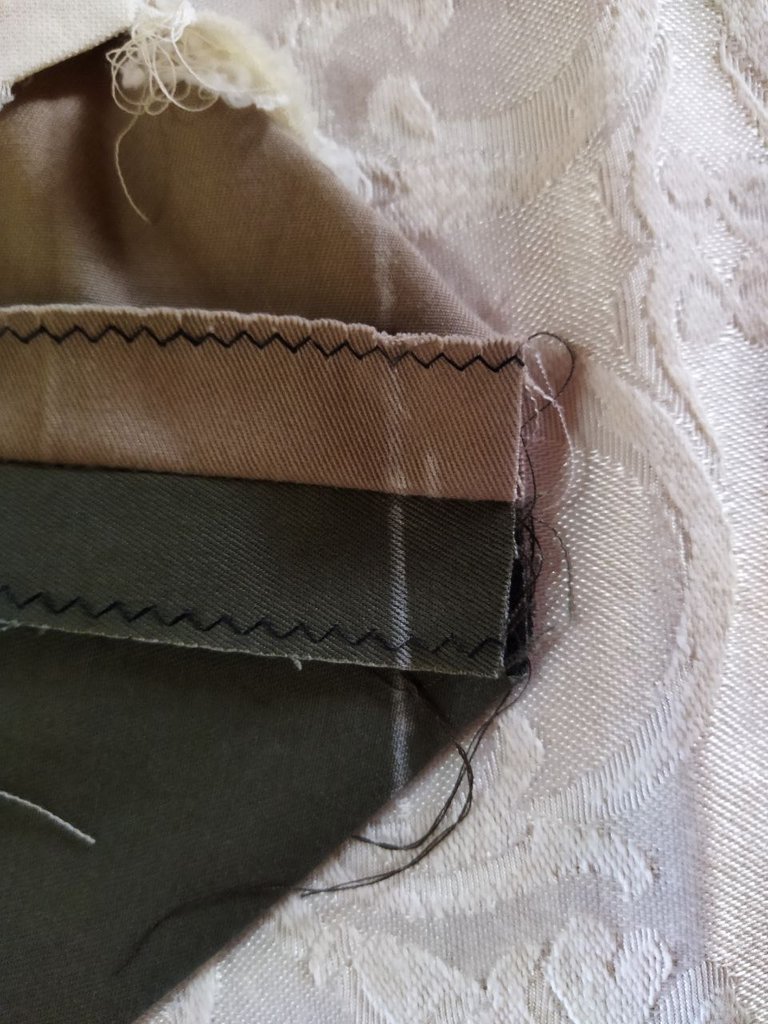
I will machine stitch with a straight stitch leaving a seam allowance of 1 centimeter and cut off the excess.
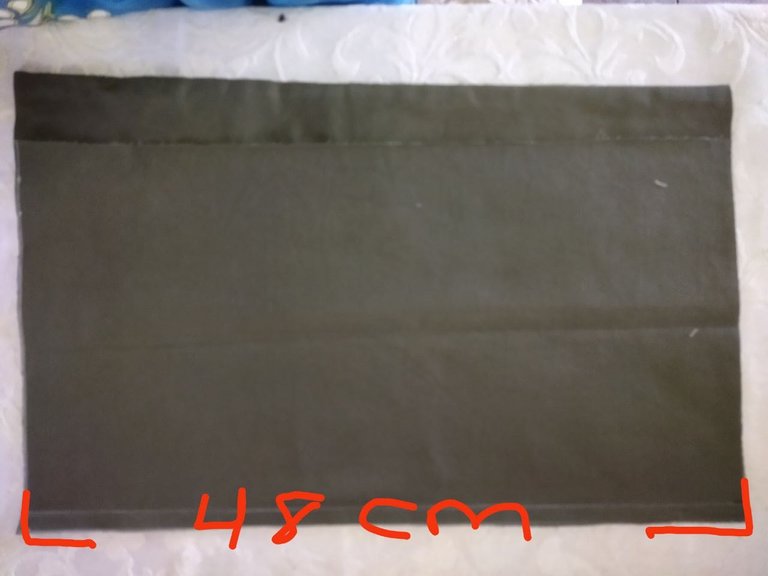
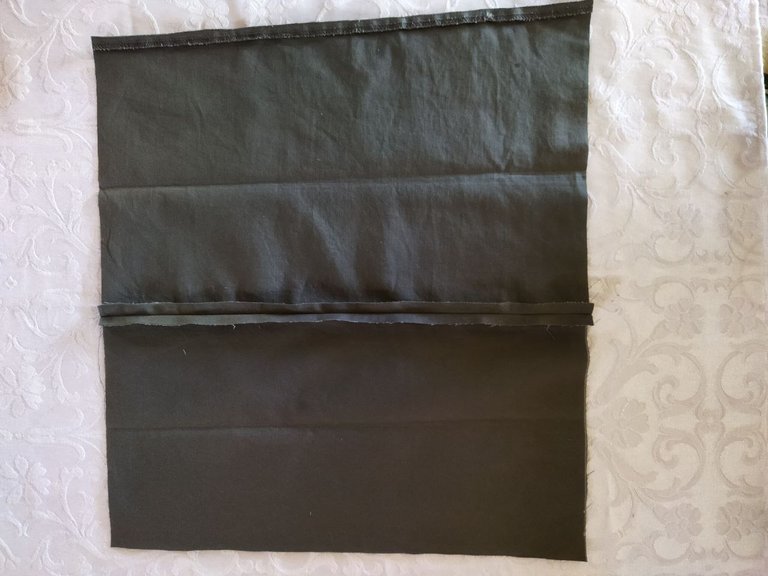
Here I have the piece sewn by machine with its seam allowance and I have cut taking into account the width of the bag of 48 centimeters as shown in the image.
I opened the piece of fabric and the seams and I will mark the height measurement (48 centimeters) to cut the excess.
To do it in a simple way, I placed the front piece on top of the back piece, back to back, marked and cut the excess as shown in the image.
Step 6
The next step is to make a zippered pocket on the back of the bag. For this I am going to use a piece of floral fabric that matches very well and a 15 centimeters zipper.
I like this kind of pockets because there you can carry your keys or any other thing you want to have at hand such as your ID or cards.
The first thing I am going to do is to place the flowered fabric on top of the cover, placing it right side up, as shown in this image.
As indicated in this image, we are going to place the flowered fabric at a distance of 12 centimeters from the upper end line. Then we mark 4.5 centimeters from the top line of the flowered fabric down and there I will draw two lines of 16 centimeters with a separation of 1.5 centimeters between them to form a rectangle. This rectangle must be well centered and for this we must mark from the beginning the central point that will serve as a guide before marking the measurements.
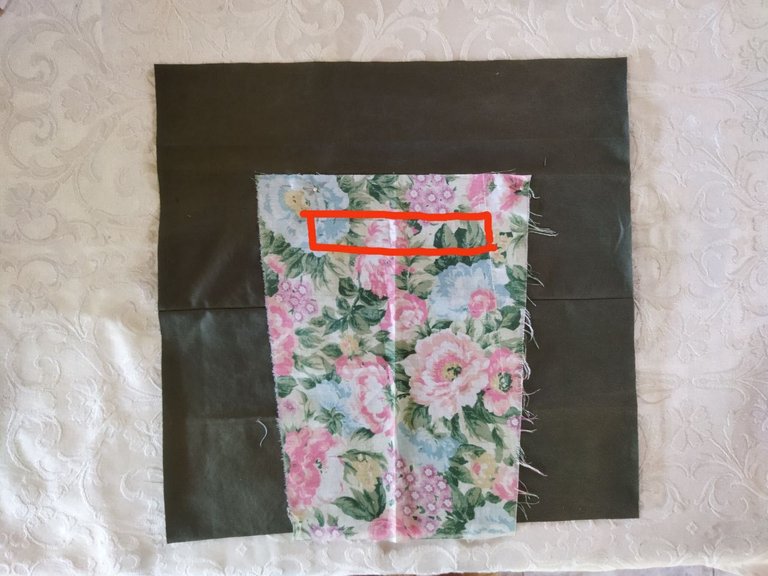
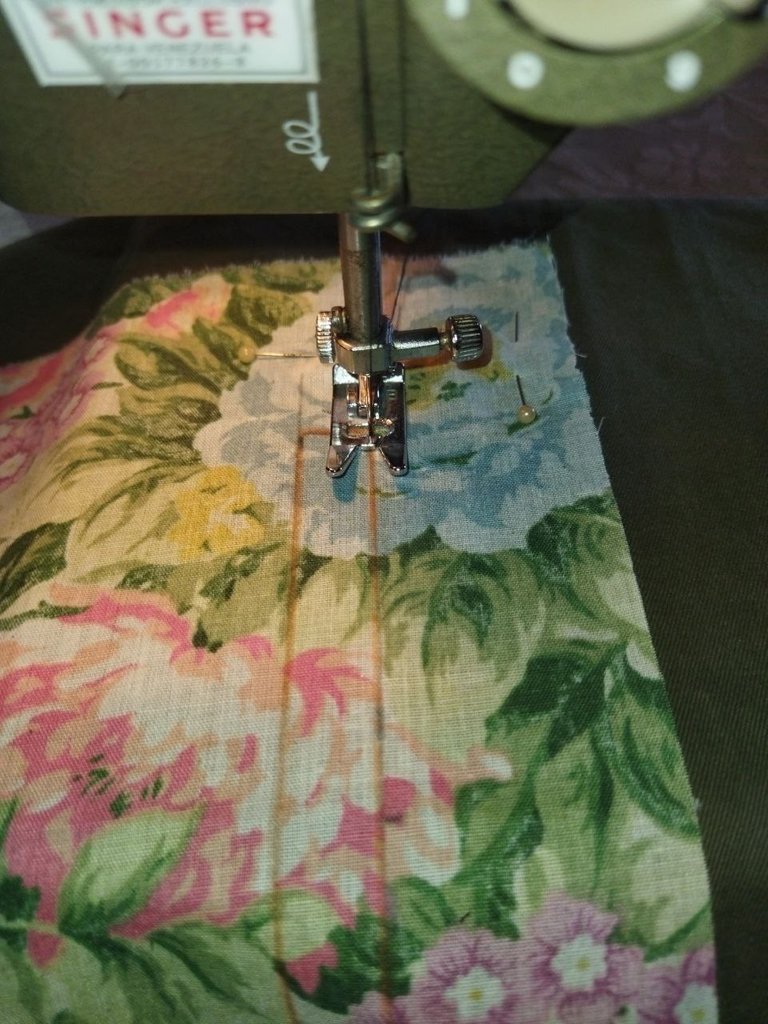
Once the measurements are marked, we are going to sew by machine with a straight stitch all around the contour as shown in the image.
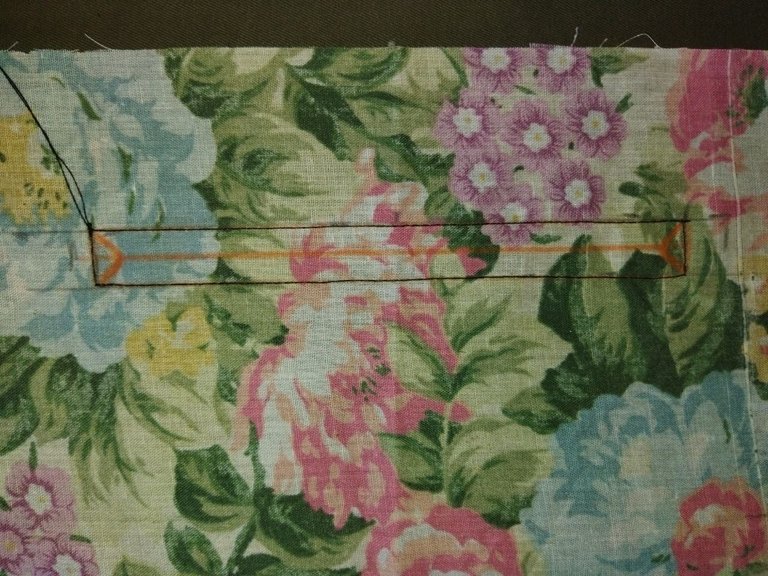
After machine sewing, we mark a line in the center of the rectangle and half a centimeter from each end we make a small triangle as shown in this image.
Then, carefully cut along the center line until you reach the tip of the triangle, then cut towards each corner taking care not to reach the seam, as shown in this image.
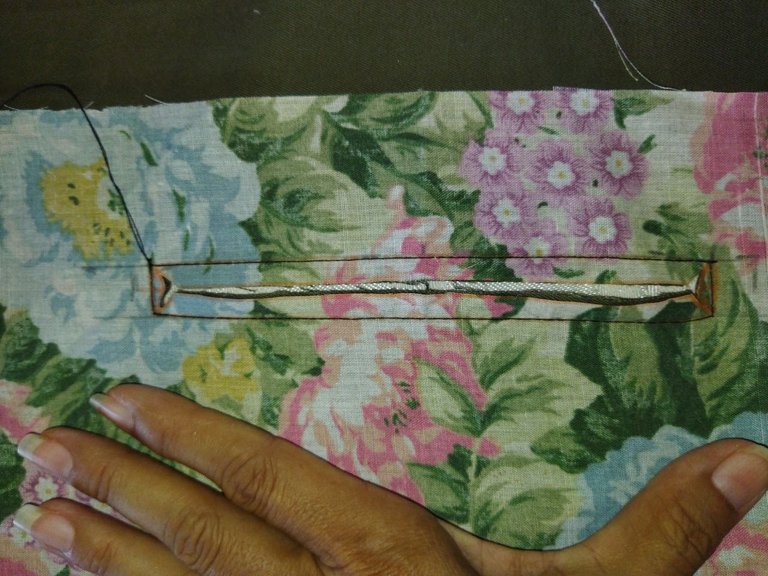
Next, I am going to pass the fabric backwards through the opening I just made, as shown in the image.
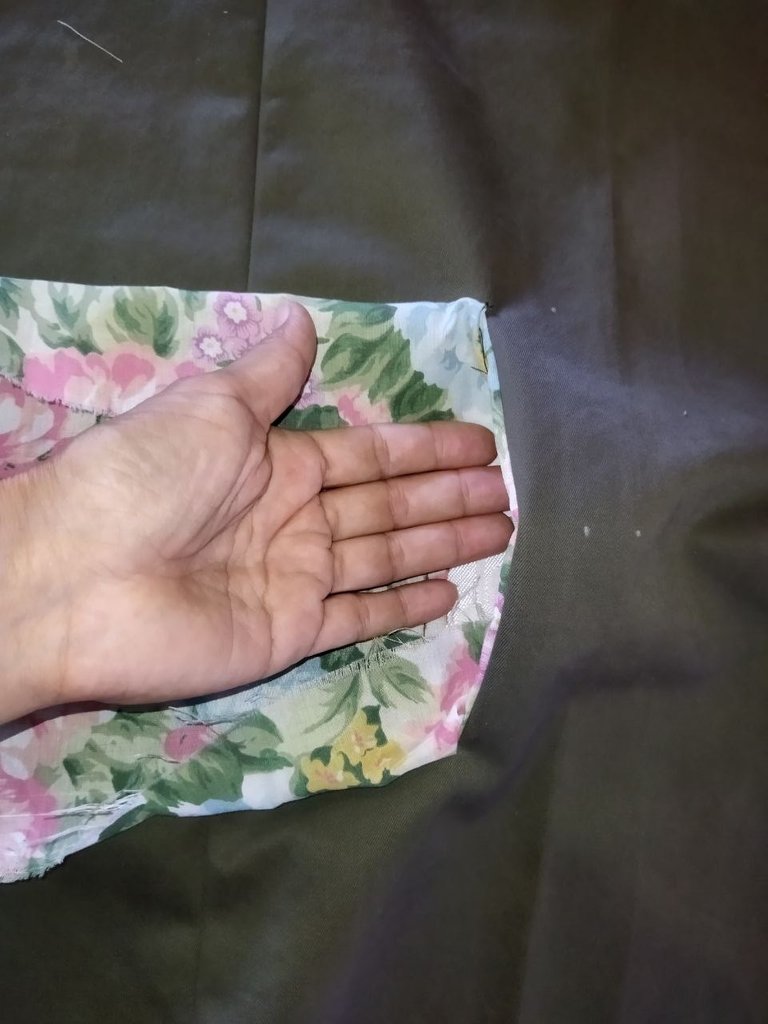
I already have the opening made to form the pocket and we can see how it has a small border of the flowered fabric in the contour as decoration.
After the zipper is attached, this fabric is gathered to form the pocket cover.
The next step is to fix the zipper with a bastille and then machine sew with a straight stitch.
So that the edges of the zipper are not visible, I am going to make a small fold of the flowered fabric, place it on top of the bottom edge of the zipper and fix it with a bastille and then sew. The top edge of the zipper will be covered when I finish the pocket.
The bastille is shown here.
I will machine stitch with straight stitch as indicated in the image and the top line will be sewn after we close the pocket cover.
The machine stitching is ready in this step.
The lower edge of the closure has been covered as shown in this image.
Now I am going to do the last steps to finish the pocket. I place both ends of the flowered fabric on top of each other and sew the sides together to form the pocket cover.
Machine sew with a straight stitch at a distance of 2 centimeters from the ends of the zipper, leave 1 centimeter seam allowance and zig zag along the edge so that the fabric does not fray.
In this image you can see the seams and we are going to cut the excess fabric.
This is how the inside of the pocket cover looks like and to finish I will machine stitch the top line of the zipper that I had left pending for the end.
This image shows the stitching on the contour of the zipper.
Finished pocket work.
Step 7
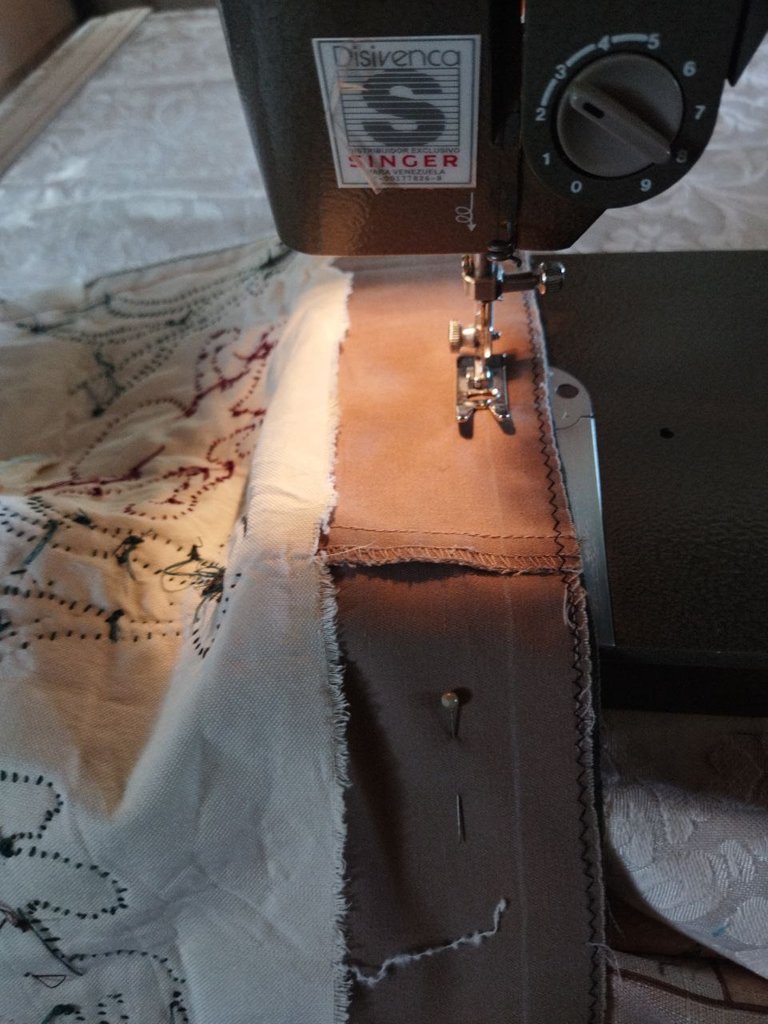
As I have both lids ready, the next step is to assemble the bag as shown in the following images.
I will place the pieces right sides together and well aligned to sew by machine with a straight stitch as shown in the image. I will leave 1.5 centimeters of seam allowance on the sides and 2 centimeters on the final line.
In this image you can see the fabric that I placed as reinforcement on the back of the front cover to make the embroidery.
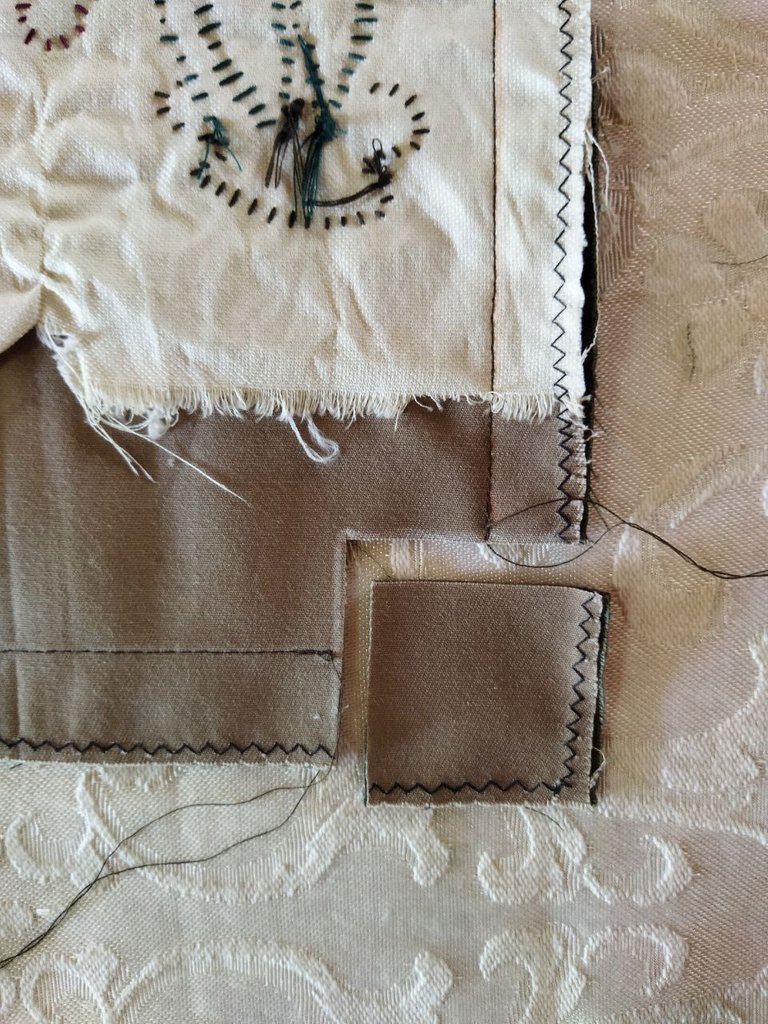
After sewing, cut the corner squares marked on the pattern.
After cutting, we open and align the seams as shown in the following image.
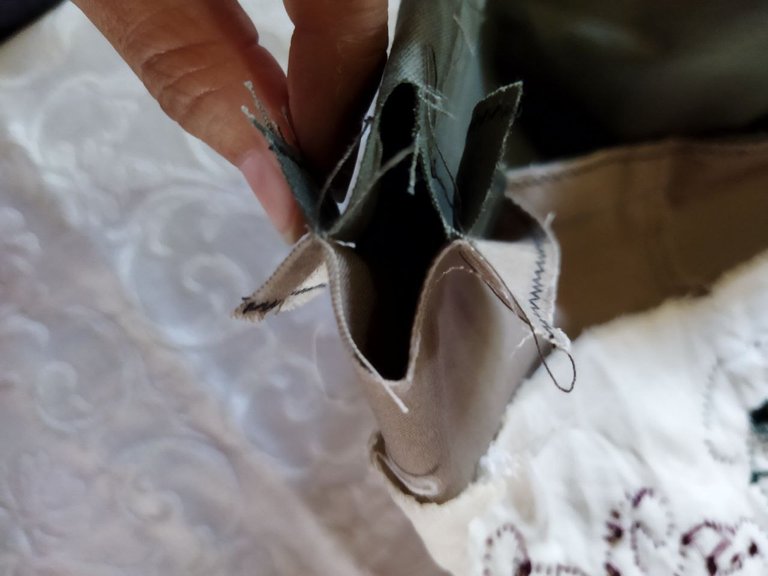
We mark a seam allowance of 1.5 centimeters and draw a line to guide us. Machine stitch both sides in the same way to form the bottom of the bag.
This is how the bottom of the bag looks like! Now I'm going to open all the seams and stitch them on the machine to make it easier to work on the next steps and have a delicate finish.
Side seams.
Stitching on the bottom of the bag.
Step 8
In this step I am going to explain how I made the handles to hang the bag, as shown in the following images.
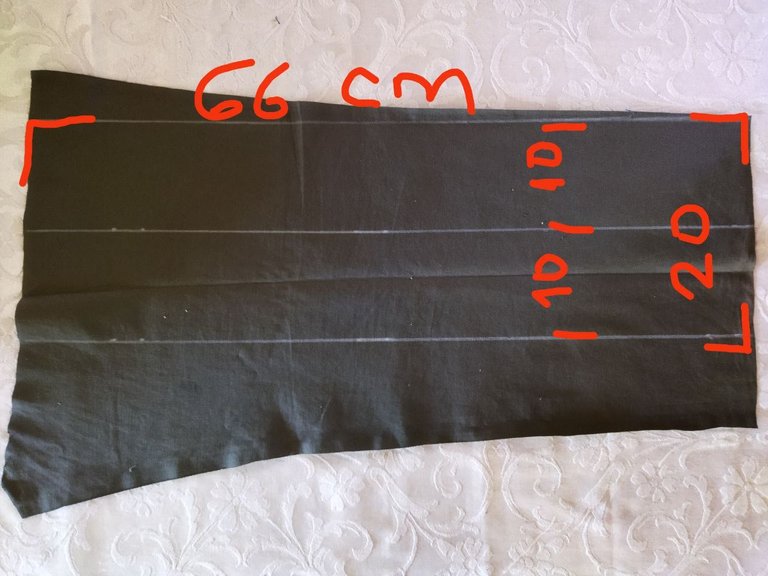
The first thing I did was to take the piece of green fabric and trace with a ruler the straight line to eliminate the curve that has that area of the pants. Then I marked the measurements as shown in the image and cut the strips.
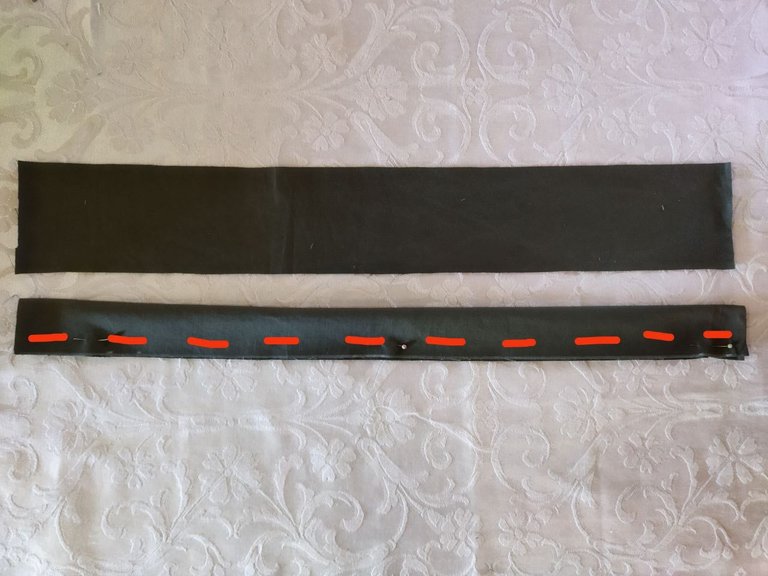
I will fold the strip and machine sew with straight stitch as indicated in the image.
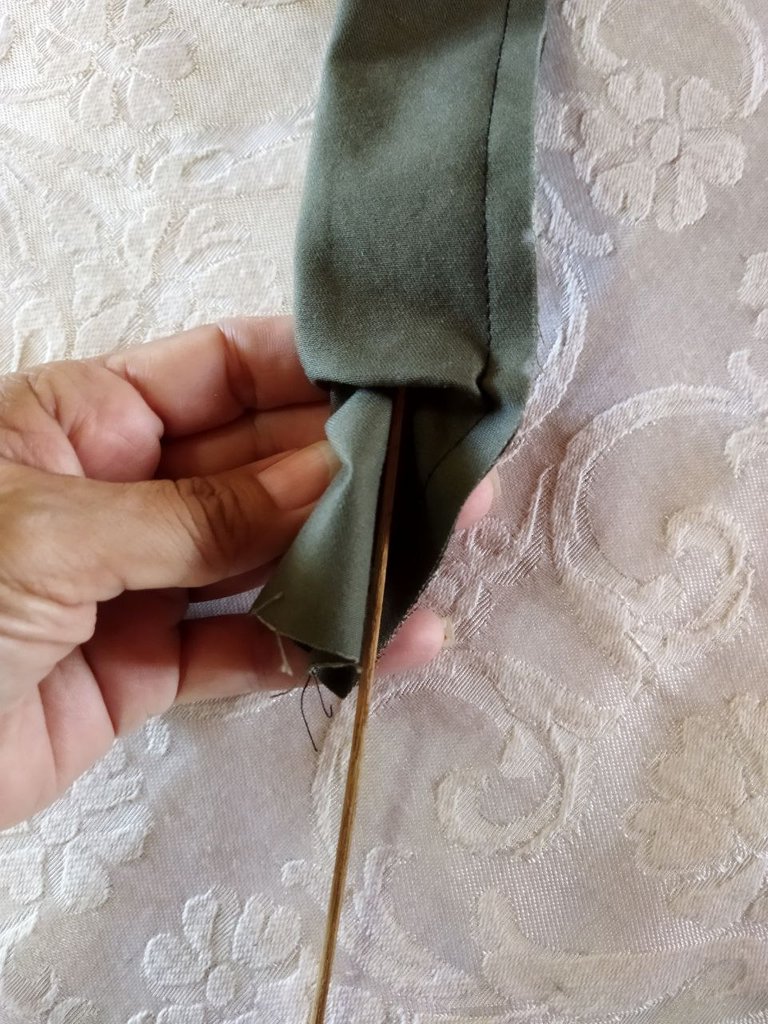
After sewing, I will flip the strips with the help of a wooden stick as shown in the following images.
After turning the strips over, I ironed them to press the seam well and I will sew them again as shown in the following images so that they are defined and resistant.
This is how the strips look like and the next step is to glue them to the bag.
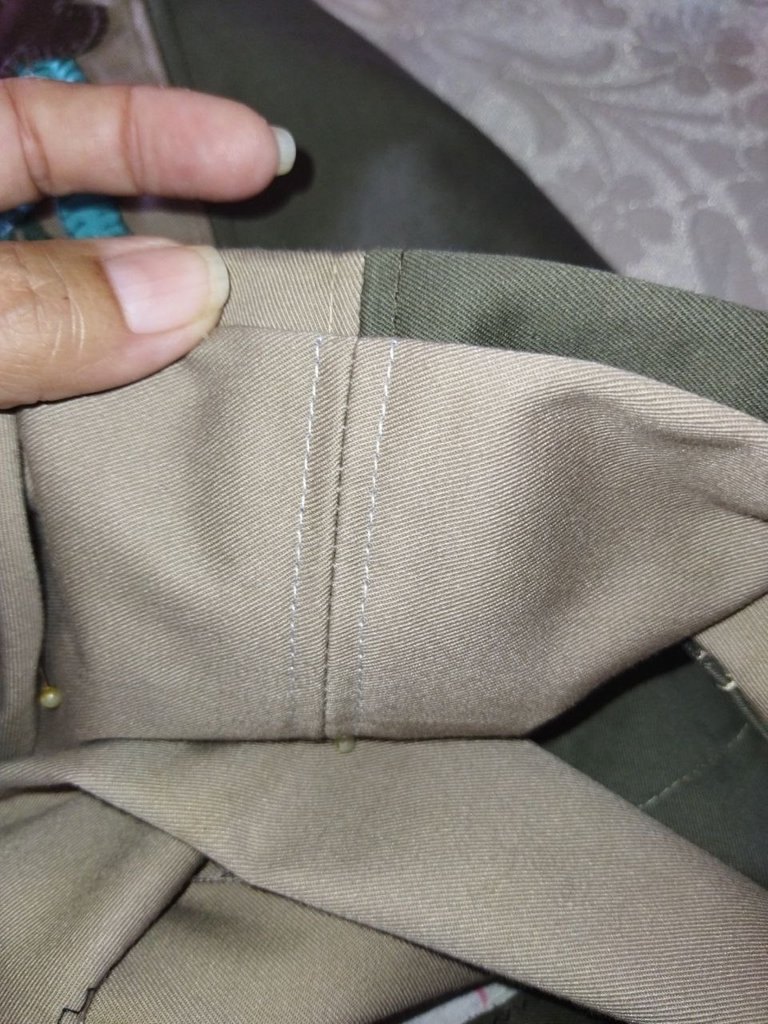
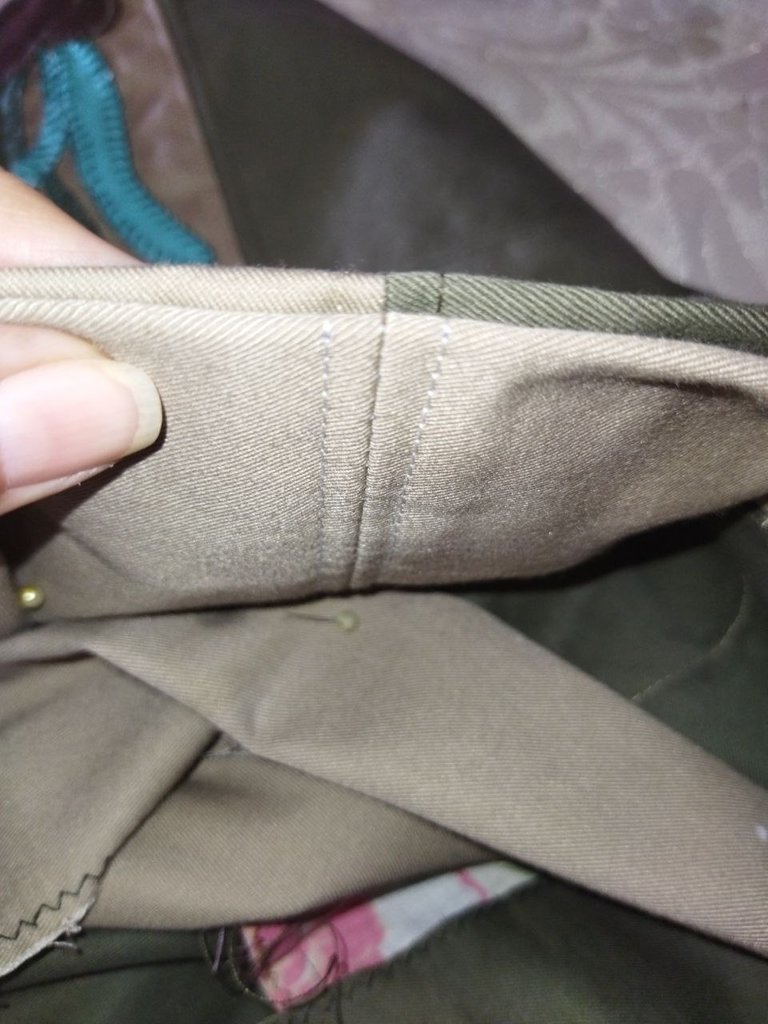
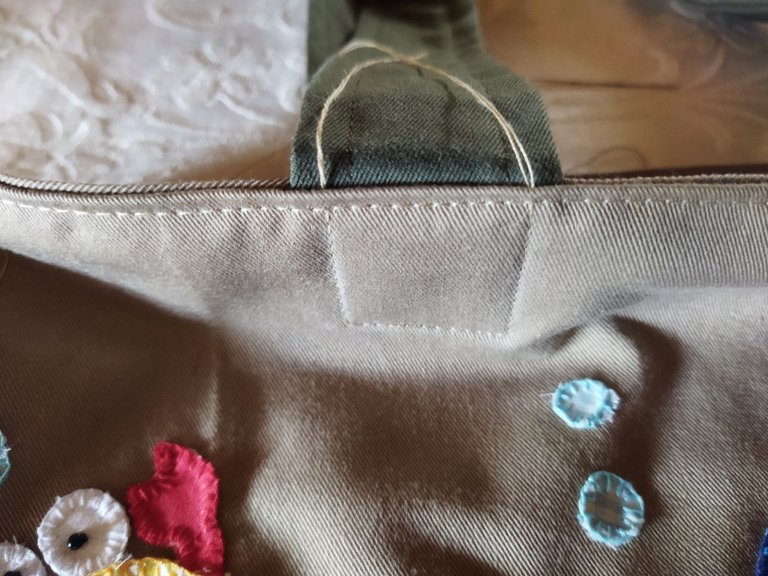
Each strip has a length of 66 centimeters, I will leave a space of 5 centimeters at each end to glue them to the bag and the other 56 centimeters will be for the size of the handle, so it will be comfortable to carry. I will glue the handles with the proper spacing as indicated in the image.
As seen in the picture, I have sewn three sides only and left the top line pending for a later step.
Step 9
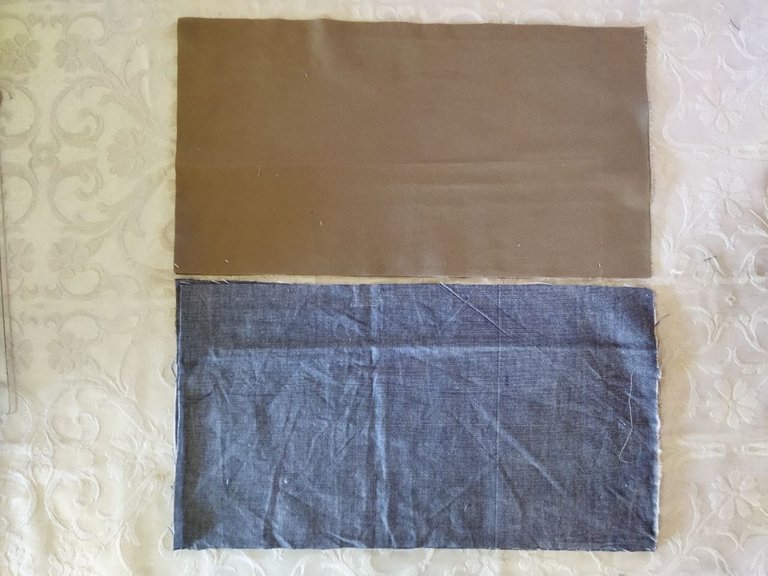
For the bag to have a good presentation, I am going to place an internal lining. To make this lining, the procedure is the same as for the bag, as shown in the following images.
I have these pieces of fabric and I'm going to cut the tops with the measurements corresponding to the pattern.
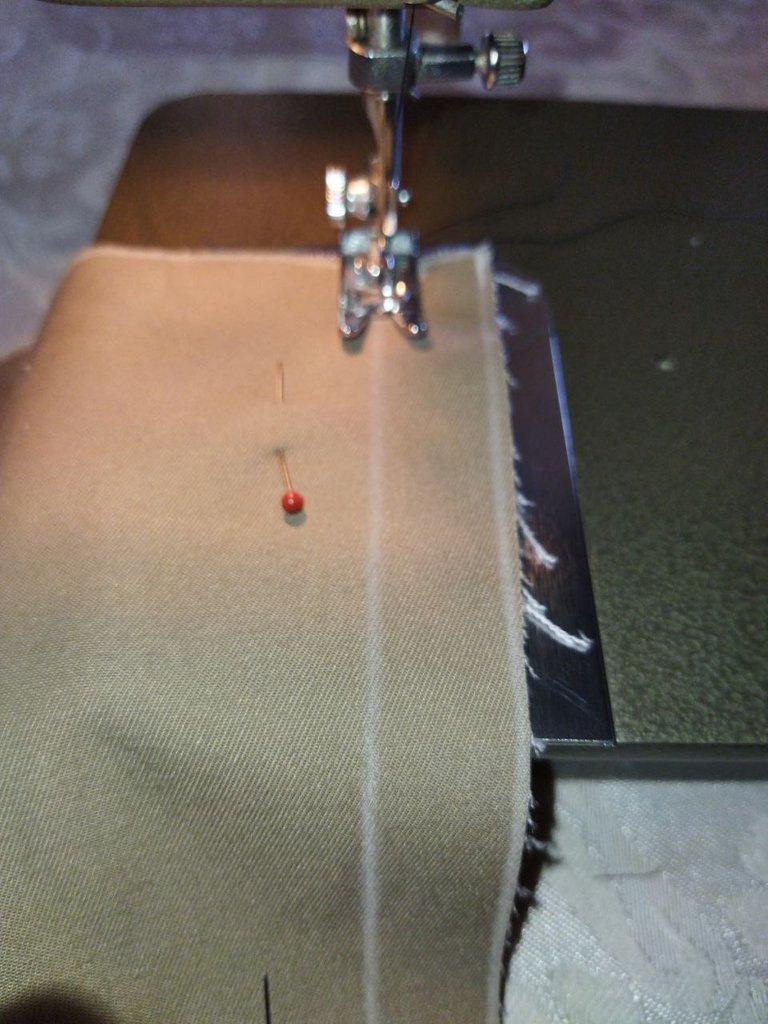
To assemble the 2 covers, I had to cut 4 pieces of 26 centimeters high x 48 centimeters wide, I sewed them by machine and in this way I obtained the desired size.
Align the pieces and machine sew with a straight stitch.
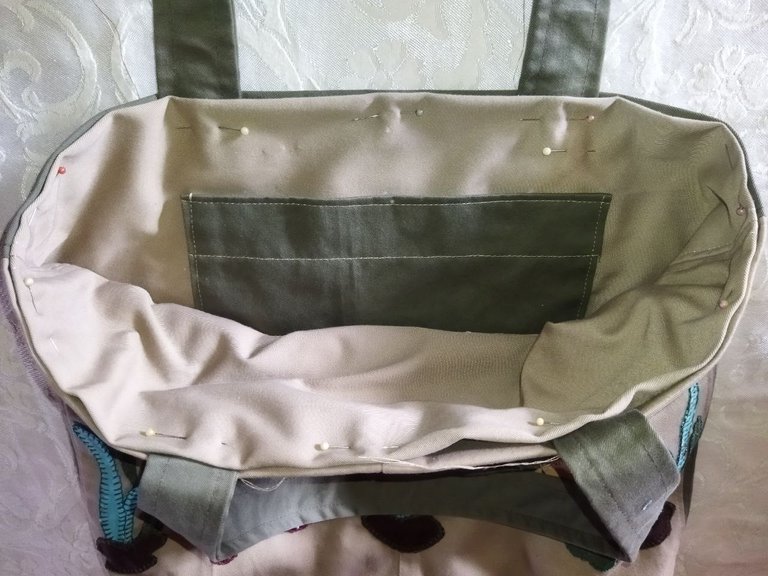
I made both covers bicolor and I want to paste a pocket is this one that I show in the image, as it can be useful to place the cell phone or whatever you want inside the bag.
Once the pocket is glued, the next step is to glue the covers to assemble the complete lining.
I machine stitched with a straight stitch leaving the seam allowances the same as when I assembled the bag. In the same way cut the corner squares and repeat the procedure explained in step 7.
I already have the lining assembled and as in the bag, I will open the seams and stitch to fix them as shown in the following image.
I have finished the lining and now I go to the next step.
Step 10
In this step I will show you how to attach the lining to the bag, it is very easy to do and will give an excellent finish to this work.
The first thing I'm going to do is to pin the edges of the bag and the lining so that they don't run and I can align both pieces well. Then I'm going to insert the lining inside the bag inside out as shown in this image.
I will align the pieces as shown in the images.
I have placed a bastille so that the pieces do not move and I ironed the edges so that the fabric does not wrinkle when I machine stitch.
Machine stitch as close to the edge as possible so that the seam will be well stitched and it will look more beautiful.
In this step the seam that was missing at the top when I glued the handles is completed. I passed the excess threads to the back, secured them with a knot and with the help of the needle I passed them through the inside of the pieces so as not to leave visible cut threads.
We have finished with this step and this is how the lining has been joined to the bag.
Step 11
To finish this work, I want to place a zippered lid on the bag, so that the objects are more secure inside and to avoid losing anything.
I have this orange zipper that was from a backpack, it has the length I need and looks great combined with the green fabric. I have cut 2 strips with the measures indicated in this image to make the cover with zipper.
With the help of the iron, I marked the fold of 1 centimeter on all sides, then I folded the piece as shown in the image and ironed again to facilitate the work.
I then assembled the cover by gluing the zipper with a bastille and then machine stitching with a straight stitch.
To sew the zipper and pass the seam as close as possible to the edge at the point where the slider is located, open the zipper and after sewing that area, lift the foot with the needle inside the fabric and slide the slider back into place.
We fix the cover with pins and then sew.
I have already glued the zippered lid to the bag and this is the end of this step.
As a final step to completely finish this beautiful work, I am going to glue some shells that I had saved for a long time and I think they will give a very nice touch to the seascape decoration. For that I have used a silicone gun very carefully and this way the bag is finished.
Handbag decorated with finished seascape!
Back of the bag where the pocket can be seen.
I have done this work with great care, I am very happy to have achieved the goal and to be able to share it with you in this second entry to the contest, I hope you like it and you can put this idea into practice.
Thank you very much for your visit and for reading to the end. A big hug!
Herramientas usadas / Used tools
Fotos tomadas de mi teléfono Poco M3 / Photos taken from my Poco M3 phone.
Traducción por Deelp / Translation by Deelp.
WoW este proyecto está súper hermoso lo ame sin duda tiene un talento con la costura extraordinario que bonito resultado lleno de tantos detalles sin duda usaría el bolso 💫 sería perfecto para mí look de playa, gran trabajo felicitaciones @marifi 💫☺️✨👏💫☺️✨👏💫☺️✨👏
Un gusto saludarte amiga Mili! Muchas gracias por visitar mi blog y por tu apreciado comentario. ❤️ Me alegra que te haya gustado el trabajo, está hecho con mucho amor, me encantan las manualidades y disfruto mucho haciendo cada labor! Bendiciones! 🙏
Será un placer seguir viendo tus creaciones @marifi feliz inicio de semana. ✨
Gracias, igualmente amiga!
Wowwwwww. Wonderful work @marifi, love this portfolio, each of the pieces is spectacularly worked. My admiration to you. Best of luck in the contest. 💕✨
Wowwwwww. Maravilloso trabajo @marifi, ame esta cartera, cada una de las piezas esta espectacularmente trabajada. Mi admiración para ti. La mejor de la suertes en el concurso. 💕✨
Un gusto saludarte amiga dayadam! Muchas gracias por visitar mi blog y por tu apreciado comentario. 😍❤️ Me alegra mucho que te haya gustado el trabajo, está hecho con mucho amor y entusiasmo, amo las manualidades y todo lo que tenga que ver con Arte! Bendiciones! 🙏
@marifi amiga que HERMOSAAAA, esta cartera es bellisima! De verdad que me encanto!!!😗
Un gusto saludarte amiga! Muchas gracias por visitar mi blog y por tu apreciado comentario. Me alegra que te haya gustado el trabajo! Bendiciones! ❤️🙏
!discovery 50
This post was shared and voted inside the discord by the curators team of discovery-it
Join our Community and follow our Curation Trail
Discovery-it is also a Witness, vote for us here
Delegate to us for passive income. Check our 80% fee-back Program
Thank you very much for your support and appreciation of the work. Best regards!
Hermoso bolso playero. Felicidades y suerte!! 🌷🌹🌺💐🌻
Muchas gracias por tu visita y por tu valioso comentario! 😍 Me alegra mucho que te haya gustado el trabajo. Amén! Saludos y bendiciones. 🙏
Excellent work and very creative. This wallet was wonderful with a great finish, and design allusive to the marine world. Thanks for participating in the contest. Best of luck @marifi // Excelente trabajo y muy creativo. Esta cartera te quedo maravillosa con un gran acabado, y diseño alusivo al mundo marino. Gracias por participar en el concurso. Mucha Suerte @marifi
Happy and grateful for the support and appreciated comment. 😍❤️ I'm so glad you liked the work, it's made with lots of love and enthusiasm, I love crafts! Greetings and blessings to this appreciated Community! 🙏
https://leofinance.io/threads/dayadam/re-leothreads-2ivwxn5uz
The rewards earned on this comment will go directly to the people ( dayadam ) sharing the post on LeoThreads,LikeTu,dBuzz.
Yay! 🤗
Your content has been boosted with Ecency Points, by @stevenson7.
Use Ecency daily to boost your growth on platform!
Support Ecency
Vote for new Proposal
Delegate HP and earn more
Thank you very much for your support and for your appreciation of the work. Greetings to the entire Ecency Community! Blessings!