Un Saludo Amigos Hivers
Es un gusto saludar nuevamente a esta linda comunidad y compartir con ustedes otro proyecto de reciclaje muy interesante y de utilidad.
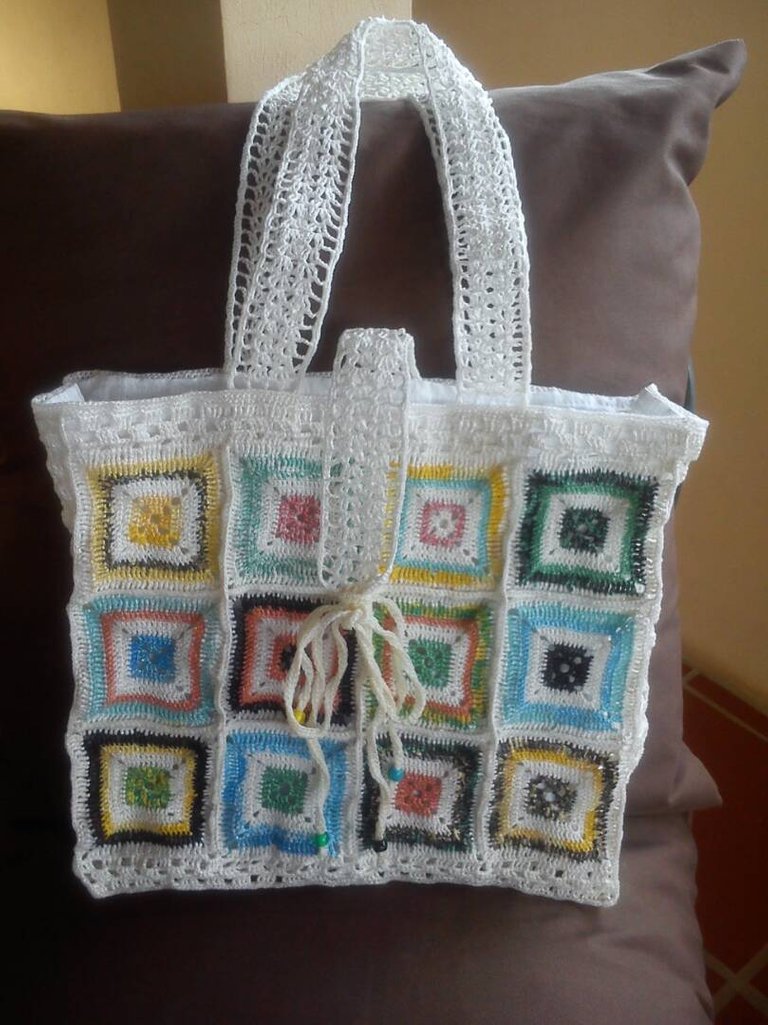
En esta oportunidad quiero mostrarles un trabajo que he realizado reciclando bolsas plásticas. Se trata de la elaboración de un bolso tejido y para ello he aplicado lo que aprendí en mis clases de tejido a crochet hace muchos años. El proceso para hacerlo es sencillo, solo necesitamos paciencia, entusiasmo y que dejemos volar nuestra imaginación.
MATERIALES:
Bolsas plásticas de varios colores
Tela para el forro
Cordón y cuentas de colores (opcional)
Lo primero que debemos hacer es seleccionar las bolsas, estas deben estar limpias para que el trabajo quede impecable. Luego las cortamos y formamos los rollos de distintos colores para comenzar a tejer los motivos y piezas que formaran el bolso, como se muestra en las siguientes imágenes.
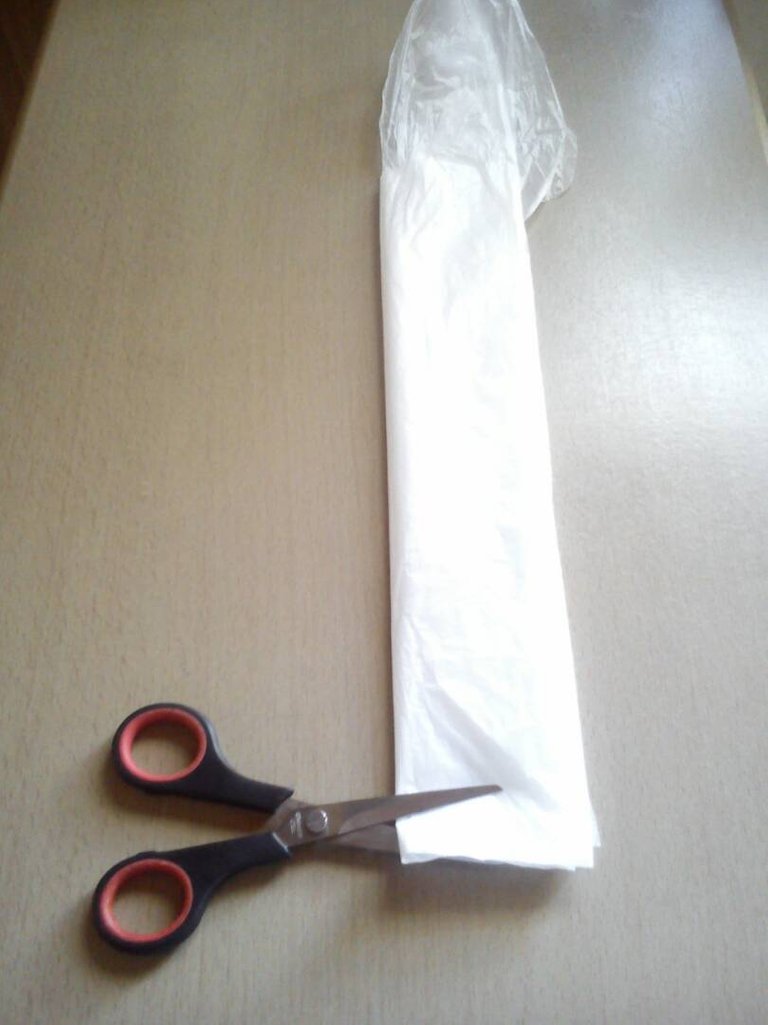
Doblar la bolsa de esta manera para luego cortarla.
Cortar cada pieza con 1cm de ancho.
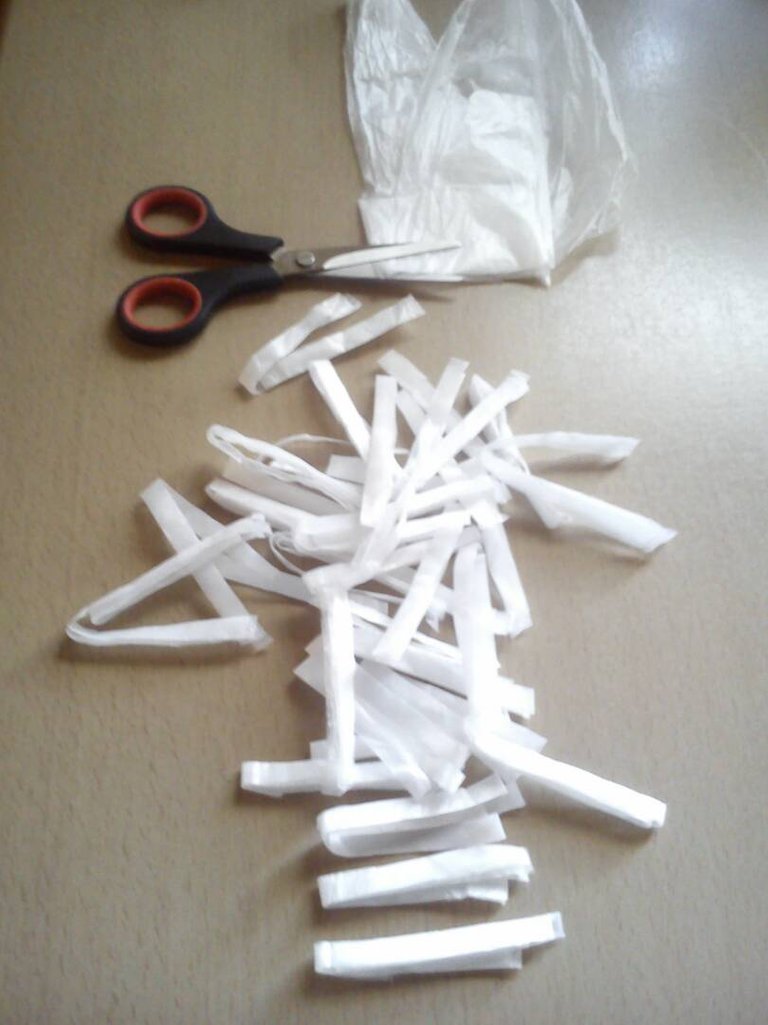
Abrir todos los trozos que cortamos y comenzamos a unir uno con otro como se observa en esta imagen.
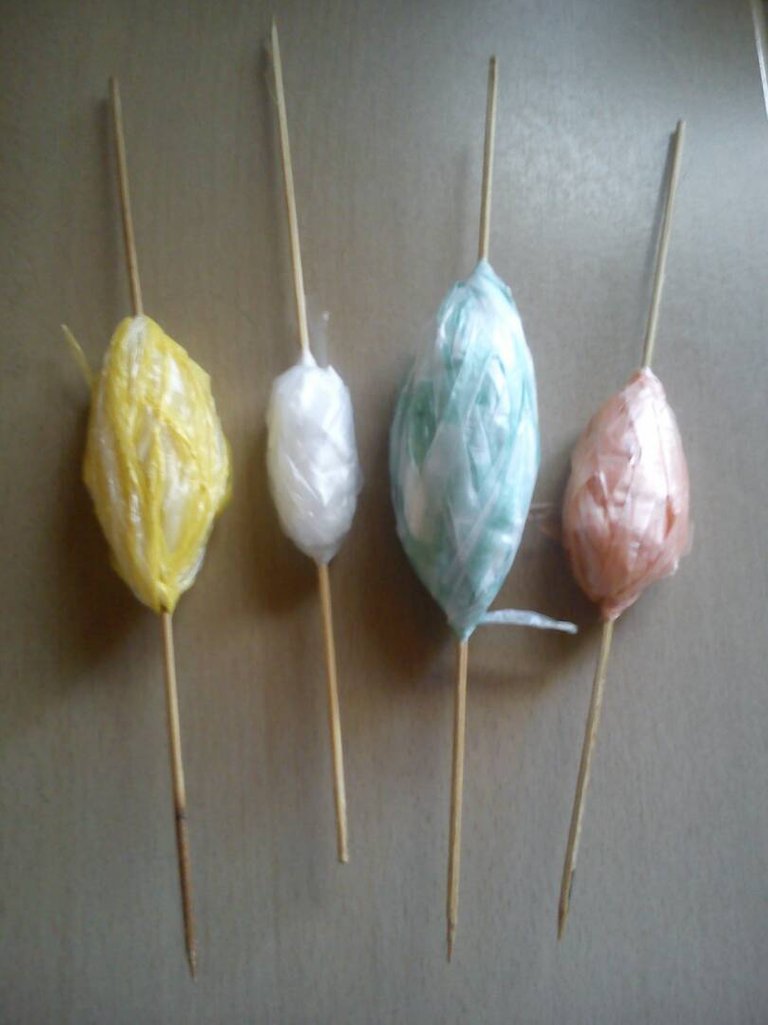
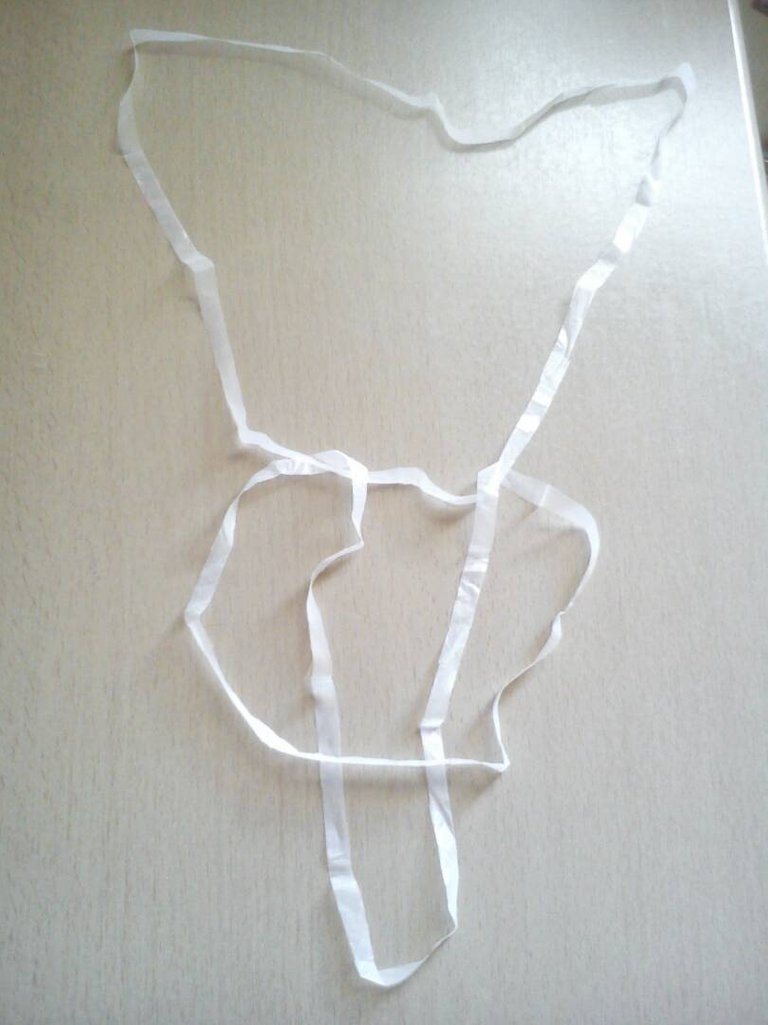
Hacer los rollos de esta manera.
Una vez que tengamos nuestros rollos, comenzamos a tejer la labor. A continuación les comparto hoja de instrucción de la revista Ganchillo Artístico para que observen como se ejecutan los puntos utilizados para el tejido y también los esquemas para realizar los motivos que forman las tapas del bolso, las asas y la pieza de contorno del bolso.
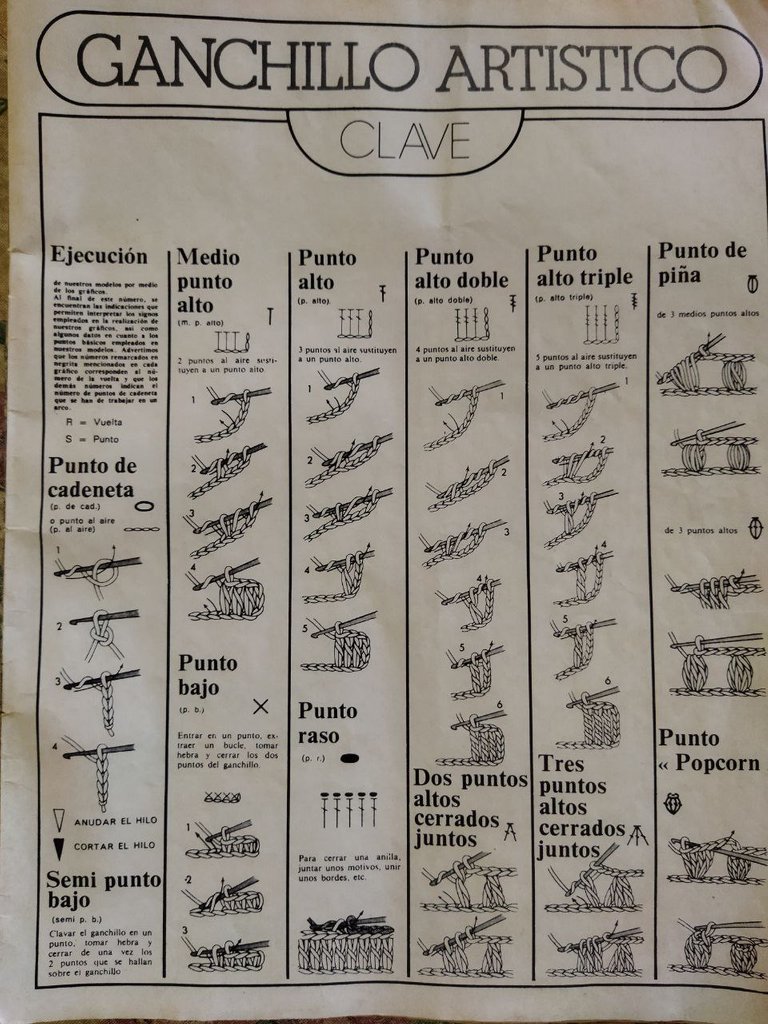
Instrucción para ejecutar los puntos.
Yo comencé este trabajo elaborando los motivos que forman las tapas de acuerdo al "Esquema 1" (tejí 12 motivos para cada tapa) y luego forme cuatro (4) piezas de tres motivos, uniendo unos a otros como les muestro a continuación.
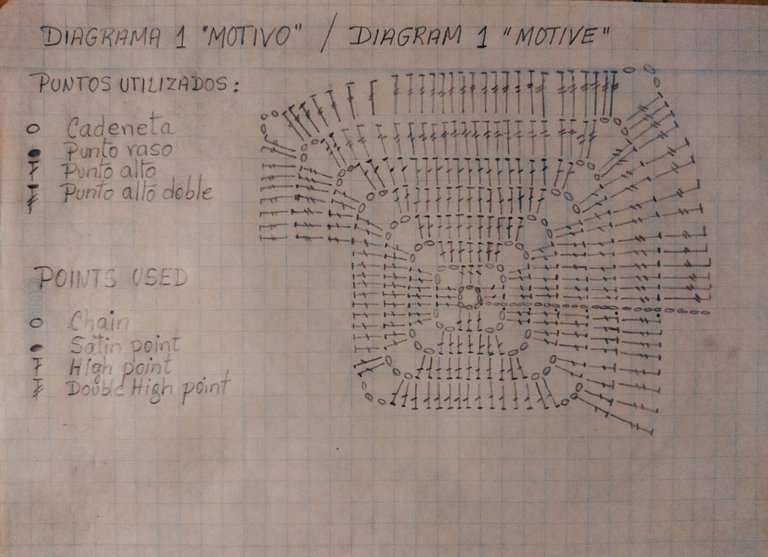
Diagrama 1 (Motivo para formar tapas)
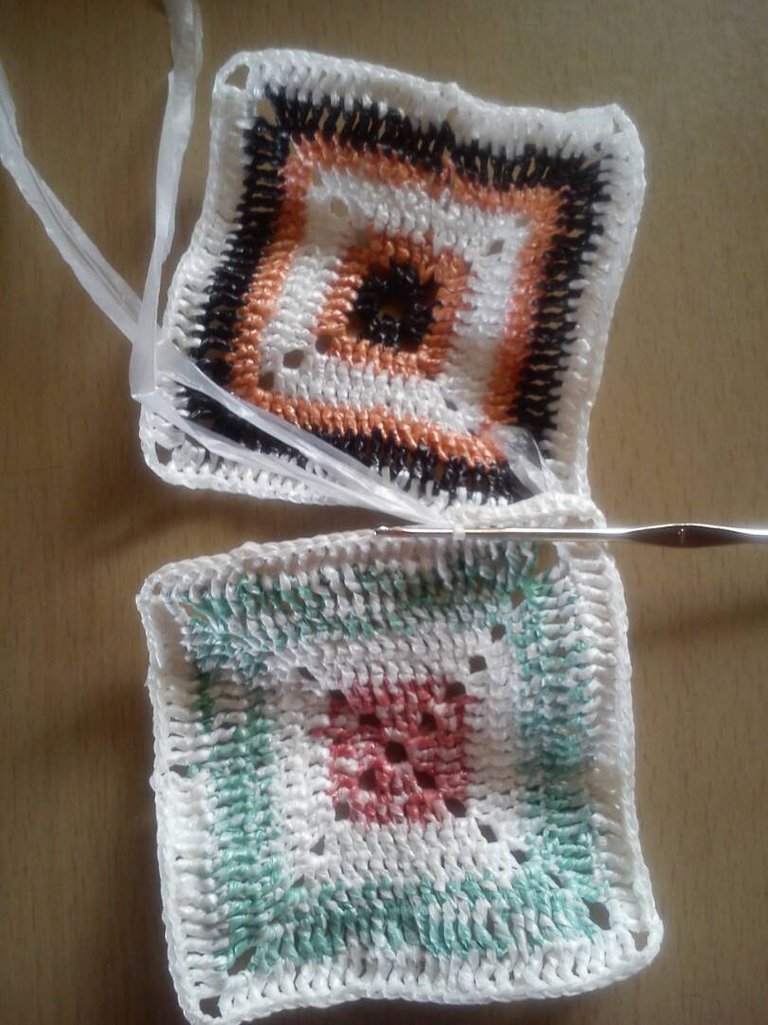
Unión de motivos (utilizar puntos bajos)
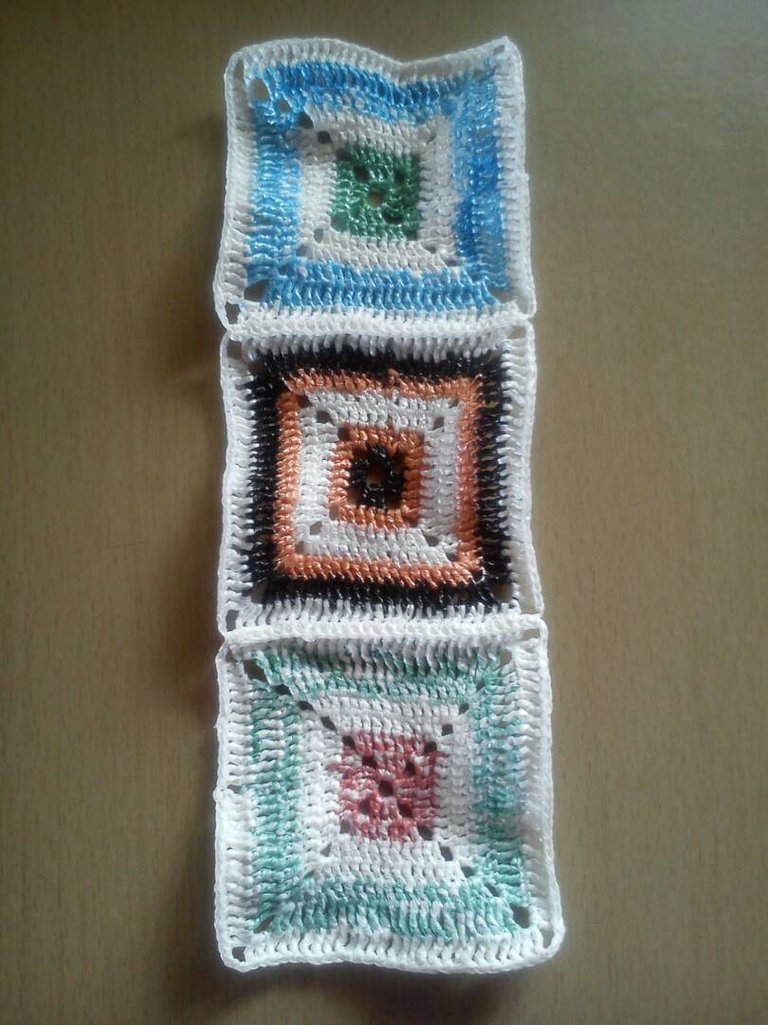
Pieza formada por tres motivos
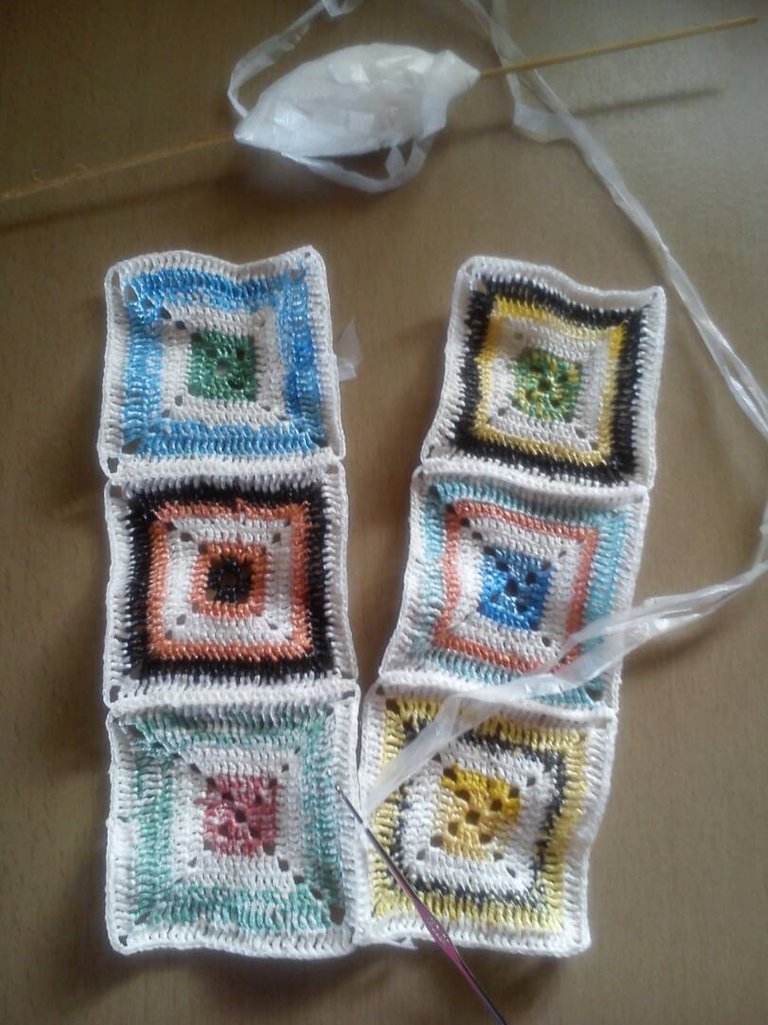
Unir las piezas hechas con los motivos para formar la tapa.
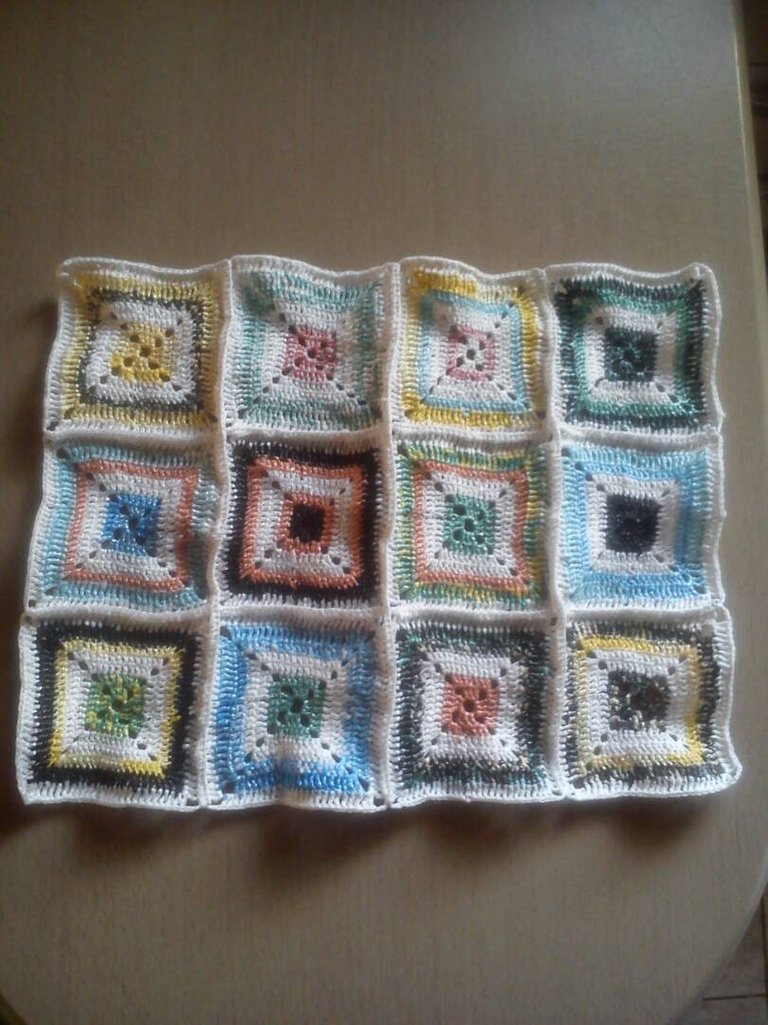
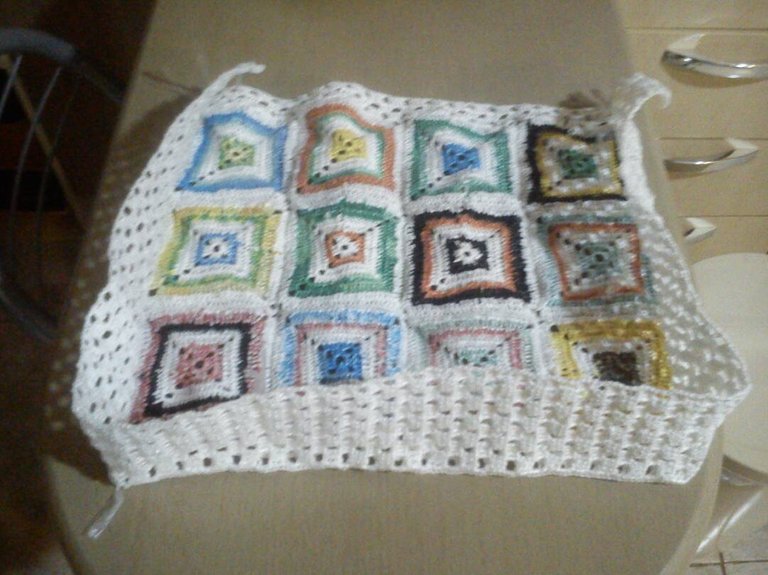
Así quedaría la unión de los (12) motivos.
Para darle una buena terminación a la tapa, yo tejí tres vueltas de puntos en la parte superior e inferior, como les muestro en la siguiente imagen.
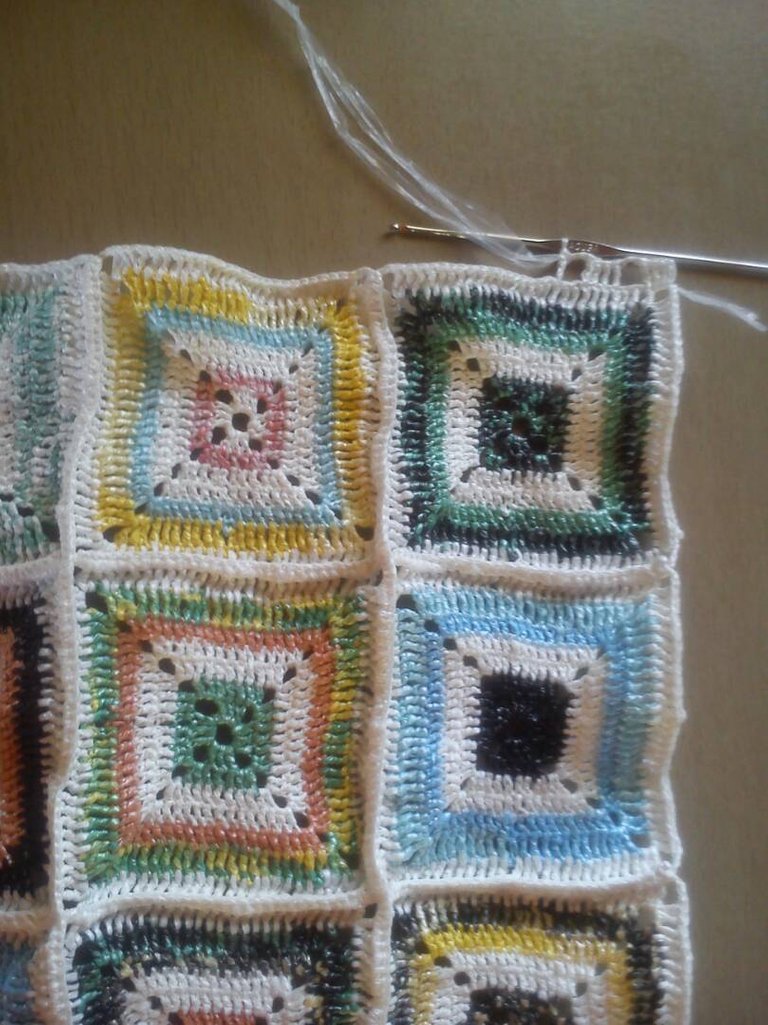
Esas tres vueltas están trabajadas con puntos altos dobles, de la misma manera que se elabora la pieza de contorno del "Diagrama 2". Serian (4) puntos altos, dos cadenetas para formar espacio y luego (4) puntos altos y así sucesivamente hasta completar cada vuelta.
Así quedarían ambas tapas para formar el bolso.
Luego elaboramos la pieza que usaremos de contorno y con la cual vamos a unir las tapas para formar el bolso, de acuerdo al "Diagrama 2" que muestro en la siguiente imagen.
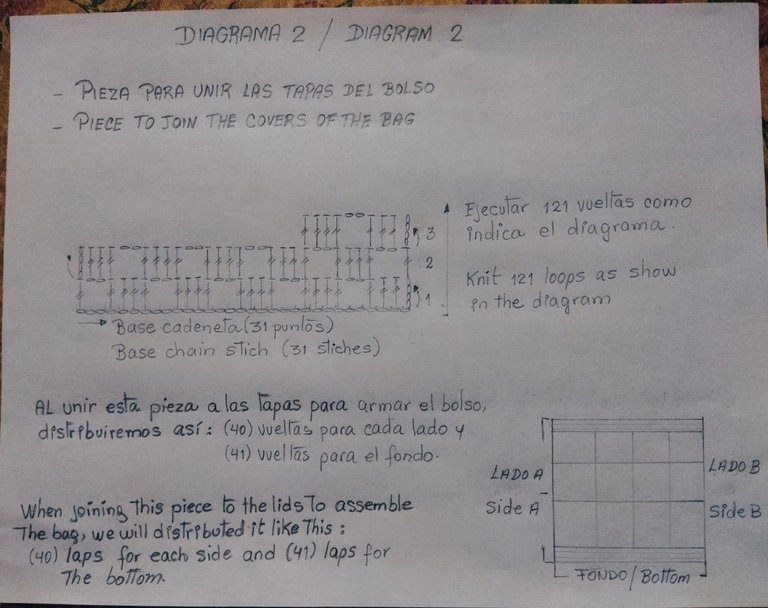
Diagrama para hacer pieza de contorno.
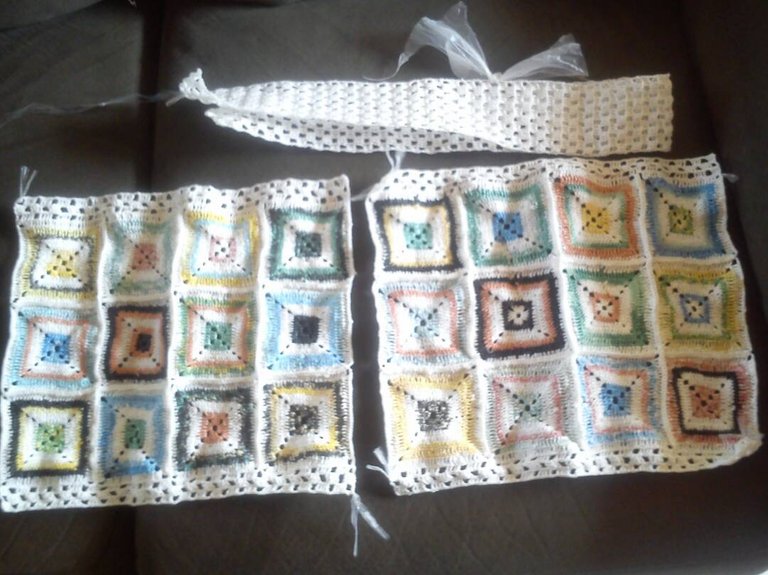
Aquí tenemos listas ambas tapas y la tira de contorno.
Ahora que tenemos listas las piezas para formar el bolso, procedemos a unirlas ejecutando puntos bajos (x). Primero unimos la pieza de contorno a una de las tapas y luego a la otra, distribuyendo el largo de la pieza de contorno como se indica en el "Diagrama 2".
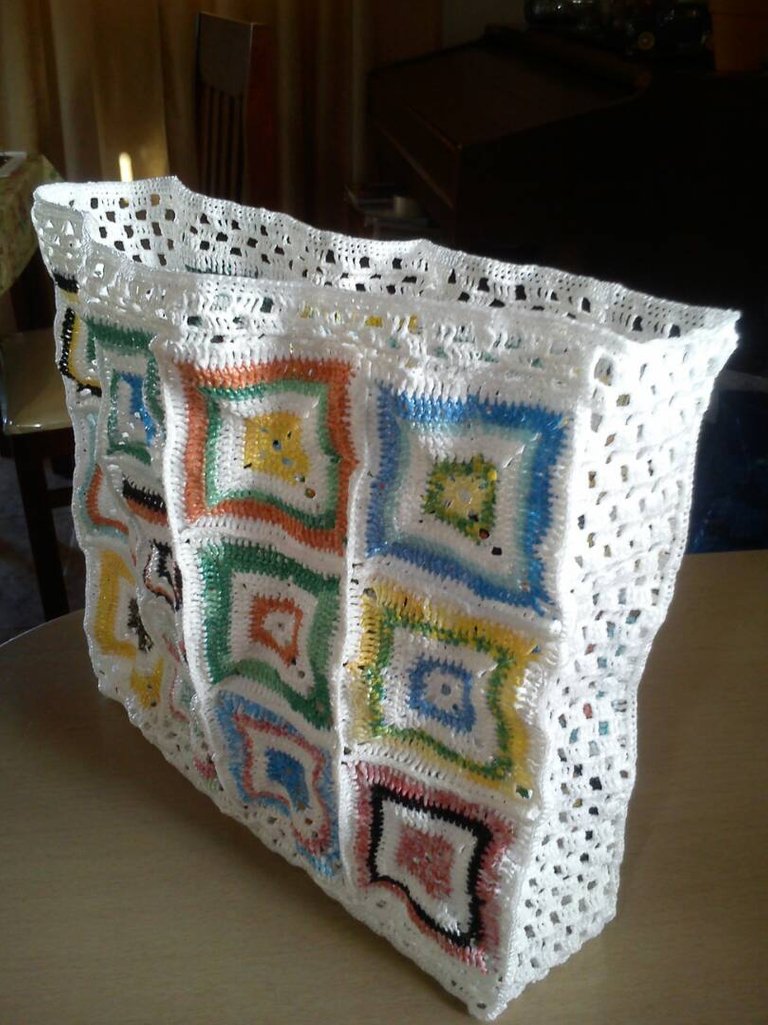
Aquí tenemos el bolso armado.
Para culminar con esta parte del trabajo, vamos a tejer (3) vueltas de puntos bajos (x) en toda la orilla superior del bolso, para darle un acabado limpio y delicado, como se observa en la imagen anterior.
Ya tenemos el bolso armado y ahora vamos a elaborar las asas colgantes, de acuerdo al "Diagrama 3" que muestro en la siguiente imagen.
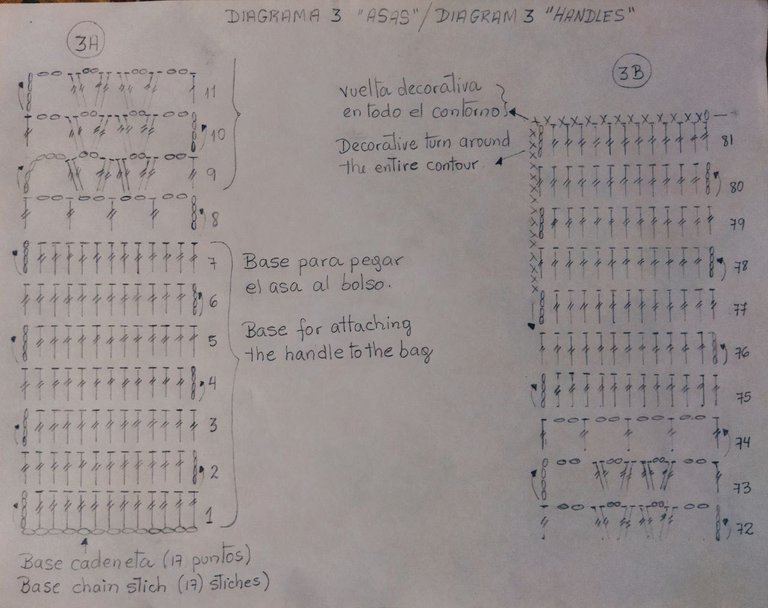
Diagrama para hacer las asas.
Como indica el "Diagrama 3" (3A), tejemos una cadeneta base con trece (13) puntos, luego levantamos (4) cadenetas para formar el primer punto alto doble y continuamos hasta terminar la primera vuelta con (13) puntos altos dobles. Repetimos siete (7) vueltas de puntos altos dobles para formar la base del asa. La octava vuelta será la base para realizar el motivo que forma el asa y a partir de la novena vuelta, trabajaremos (65) vueltas iguales para conseguir el largo adecuado, es decir, que tejemos igual desde la vuelta 9 hasta la vuelta 73.
Para terminar la vuelta 73, debemos cerrar con (2) cadenetas y un punto alto doble como se muestra en el "Diagrama 3B" , para luego poder trabajar la siguiente vuelta que nos facilitará terminar el asa de la misma manera que la comenzamos, realizando (7) vueltas iguales de puntos altos dobles (75 - 81) y así formar la otra base del asa.
Al terminar la vuelta 81, levantamos un punto de cadeneta y realizamos una vuelta de puntos bajos (x) por todo el contorno del asa para darle una terminación más fuerte y decorativa al trabajo.
Asas terminadas.
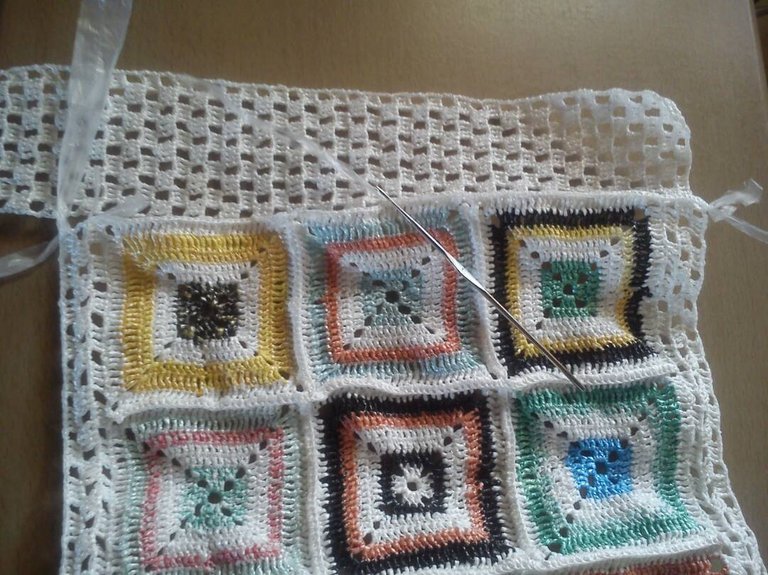
Hecho esto, procedemos a pegar las dos (2) asas al bolso, como les muestro a continuación:

Utilicé una aguja punta roma con tira de bolsa como hilo para coser las asas.
Después de pegar las asas y cualquier otro detalle que queramos agregar, hacemos el forro de tela según las medidas que tenga el bolso de alto, largo y ancho. Al forro podemos colocarle bolsillos para celular y llaves.

Aquí se puede observar el forro con los bolsillos
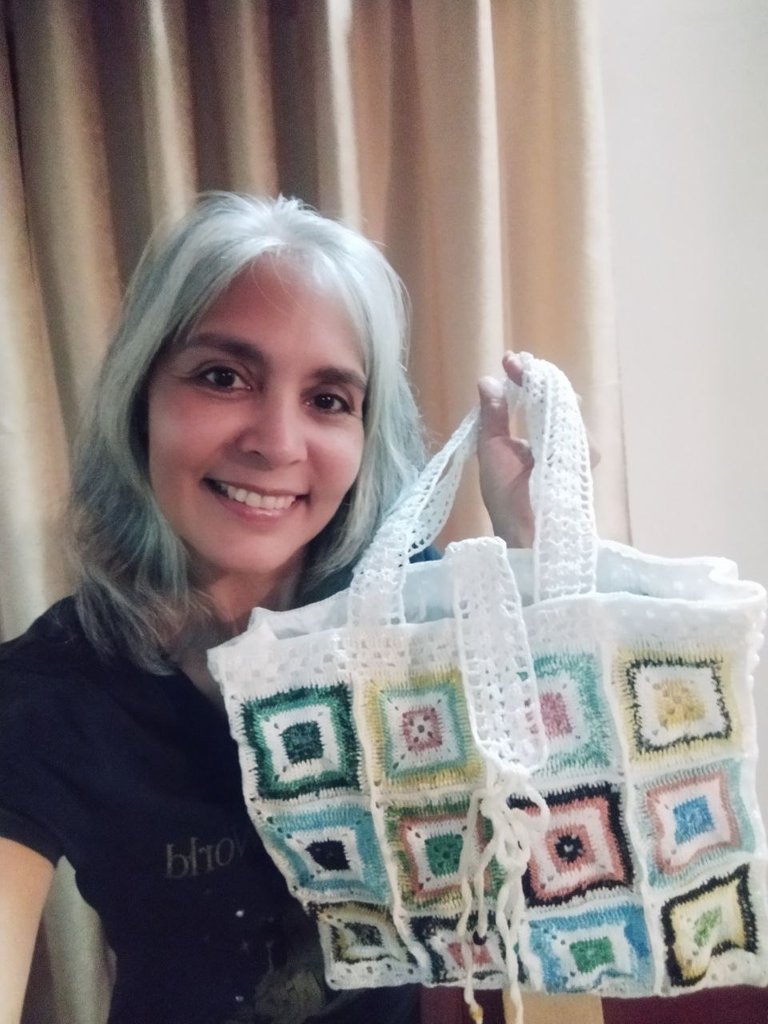
Para terminar esta labor, se me ocurrió colocarle una tira con cordón y cuentas de colores para darle un toque coqueto, también para que el bolso se mantenga más cerrado y estén más seguros los objetos que llevamos dentro.
Bolso terminado
Antes de despedirme, quiero mostrarles varias labores que he realizado reciclando bolsas plásticas, me gusta mucho porque una vez tejido el material queda muy resistente.
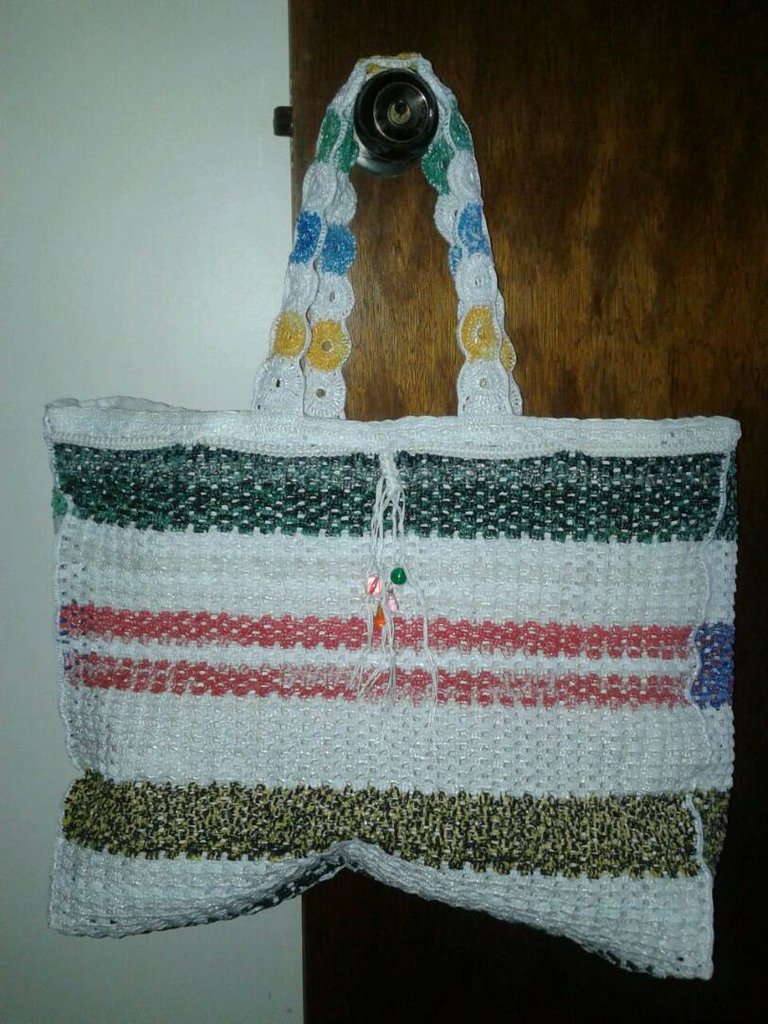
Este es mi bolso para la playa
Este bolso grande que uso para la playa, lo tejí hace diecisiete (17) años y se ha mantenido igual. Siempre lo lavo a mano y lo pongo a secar sin exprimir.
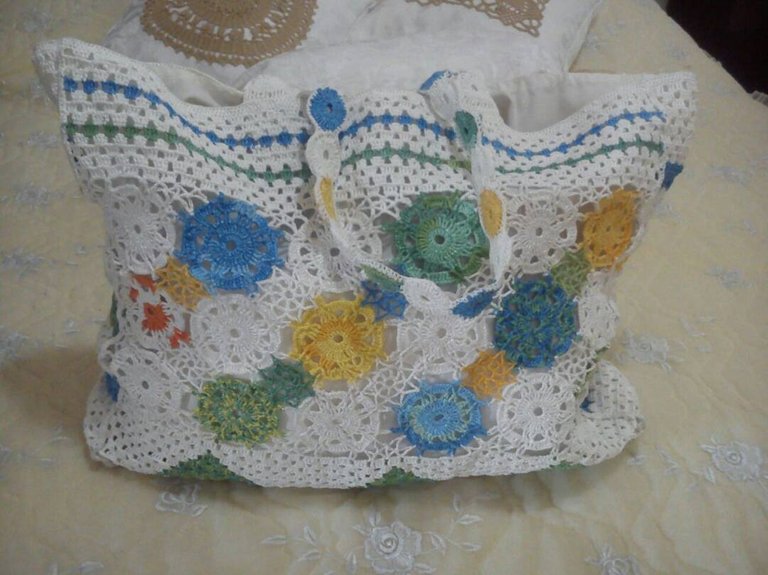
Este bolso lo hice para una amiga
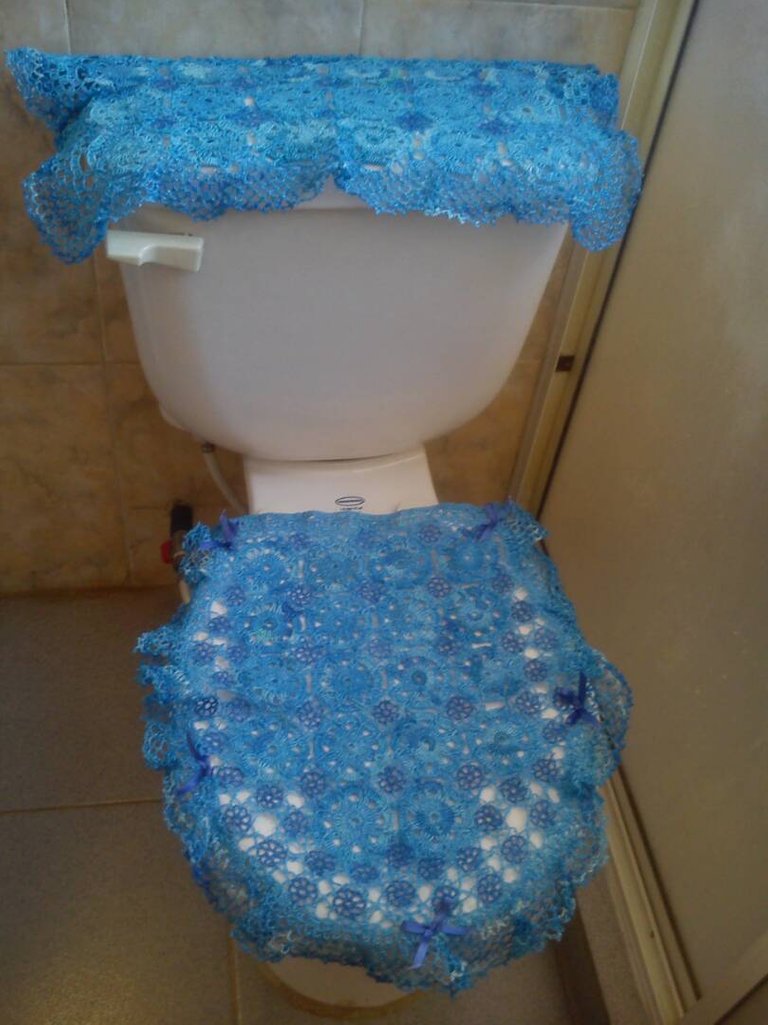
Juego de baño
Me siento muy contenta de haber puesto en práctica esta gran idea, porque es un trabajo con excelentes resultados, me encanta poder crear cosas nuevas, útiles y lo mejor de todo es que no gastamos en materia prima y colaboramos con el medio ambiente.
Espero que les haya gustado mi trabajo y a quienes les guste tejer se animen y lo pongan en práctica. Muchas gracias por su visita a mi blog y como siempre les envío un fuerte abrazo. Hasta la próxima!

Greetings Friends Hivers
It is a pleasure to greet again this nice community and share with you another very interesting and useful recycling project.
This time I want to show you a work that I have done by recycling plastic bags. It is the elaboration of a knitted bag and for this I have applied what I learned in my crochet knitting classes many years ago. The process to make it is simple, we only need patience, enthusiasm and let our imagination fly.
MATERIALS:
Plastic bags of various colors
Fabric for the lining
String and colored beads (optional)
The first thing to do is to select the bags, these must be clean so that the work is impeccable. Then we cut them and form the rolls of different colors to start weaving the motifs and pieces that will form the bag, as shown in the following images.
Fold the bag in this way and then cut it.
Cut each piece 1 cm wide.
Open all the pieces that we cut and begin to join one with the other as shown in this image.
Make the rolls in this way.
Once we have our rolls, we begin to knit the work. Here is an instruction sheet from Artistic Crochet magazine so that you can see how to knit the stitches and also the schemes to make the motifs that form the tops of the bag, the handles and the contour piece of the bag.
Instruction to execute the points.
I started this work by making the motifs that form the tops according to "Scheme 1" (I knit 12 motifs for each top) and then I made four (4) pieces of three motifs, joining one to the other as shown below.
Diagram 1 (Reason for forming lids)
Joining of motifs (use low stitches)
Piece formed by three motifs
Join the pieces made with the motifs to form the lid.
This is how the union of the (12) motifs would look like.
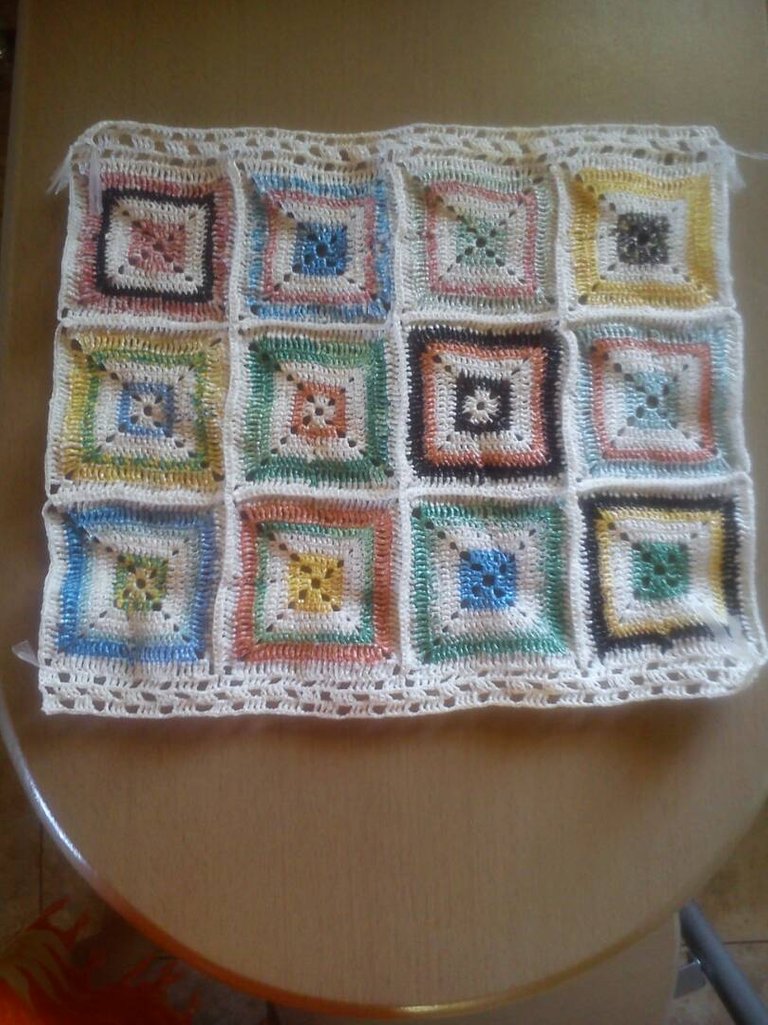
To give a nice finish to the cover, I knit three rows of stitches on the top and bottom, as shown in the following image.
These three rows are worked with double double double crochet, in the same way as the outline piece in "Diagram 2". There would be (4) double crochets, two chain stitches to form space and then (4) double crochets and so on until each round is completed.
This is how both lids would look to form the bag.
Then we make the piece that we will use as an outline and with which we will join the lids to form the bag, according to "Diagram 2" shown in the following image.
Diagram to make a contour piece.
Here we have both covers and the contour strip ready.
Now that we have the pieces ready to form the bag, we proceed to join them by executing low stitches (x). First we join the outline piece to one of the tops and then to the other, distributing the length of the outline piece as shown in "Diagram 2".
Here we have the assembled bag.
To finish this part of the work, we are going to knit (3) rows of single crochet (x) in all the upper edge of the bag, to give it a clean and delicate finish, as shown in the previous image.
We already have the bag assembled and now we are going to make the hanging handles, according to "Diagram 3" shown in the following image.
Diagram to make the handles.
As indicated in "Diagram 3" (3A), we knit a base chain with thirteen (13) stitches, then we pick up (4) chains to form the first double crochet and continue until we finish the first row with (13) double crochets. We repeat seven (7) rounds of double crochet to form the base of the handle. The eighth row will be the base to make the motif that forms the handle and from the ninth row, we will work (65) equal rows to get the right length, that is, we knit the same from row 9 to row 73.
To finish row 73, we must close with (2) chain stitches and a double crochet as shown in "Diagram 3B" , to then be able to work the next row that will allow us to finish the handle in the same way we started it, making (7) equal rows of double crochets (75 - 81) and thus form the other base of the handle.
At the end of the 81st row, we pick up a chain stitch and knit a row of single crochet (x) all around the handle to give a stronger and more decorative finish to the work.
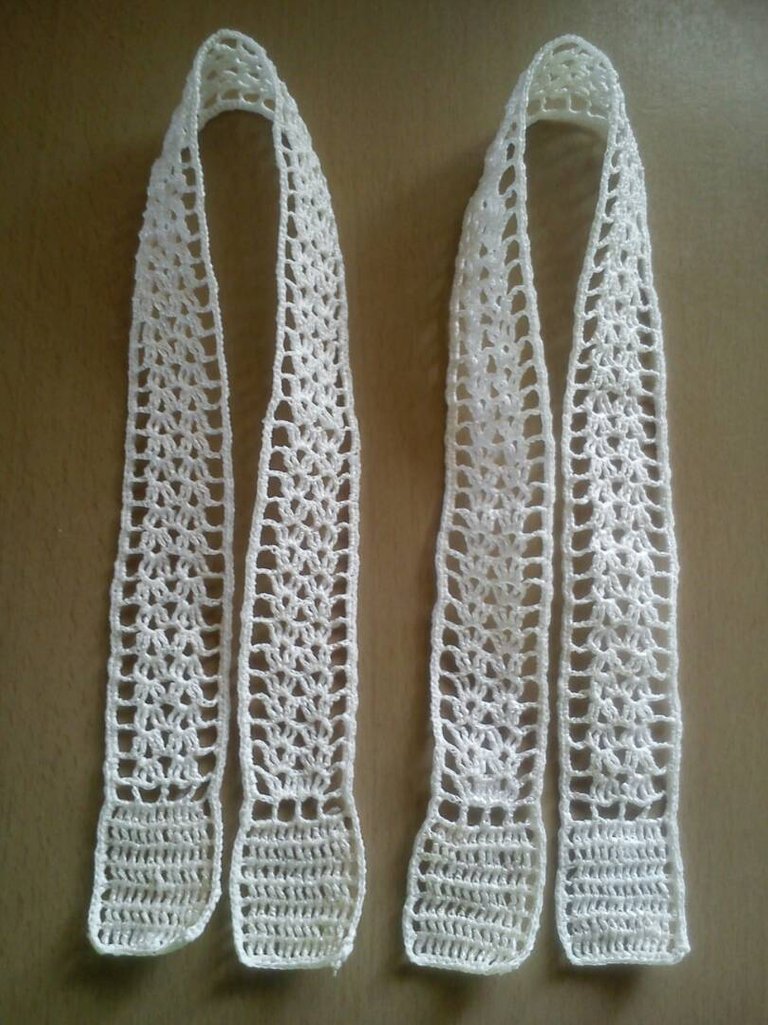
Finished handles.
Once this is done, we proceed to glue the two (2) handles to the bag, as shown below:
I used a blunt needle with a strip of bag as thread to sew the handles.
After gluing the handles and any other details we want to add, we make the fabric lining according to the bag's height, length and width measurements. We can add pockets for cell phone and keys to the lining.
Here you can see the lining with the pockets.
To finish this work, I thought of adding a strip with string and colored beads to give it a flirty touch, and also to keep the bag more closed and the objects inside more secure.
Finished bag
Before I say goodbye, I want to show you several projects that I have made using recycled plastic bags, I like it very much because once woven the material is very resistant.
This is my bag for the beach
This large bag that I use for the beach, I knitted seventeen (17) years ago and it has stayed the same. I always hand wash it and lay it out to dry without wringing it out.
I made this bag for a friend
Bathroom set
I am very happy to have implemented this great idea, because it is a work with excellent results, I love to create new, useful things and best of all is that we do not spend on raw materials and collaborate with the environment.
I hope you liked my work and those who like knitting are encouraged to put it into practice. Thank you very much for visiting my blog and as always I send you a big hug. See you next time!
Herramientas Usadas / Used tools
The rewards earned on this comment will go directly to the people( @semarekha ) sharing the post on Twitter as long as they are registered with @poshtoken. Sign up at https://hiveposh.com.
Thank you for sharing this post in the DIYHUB Community!
Your content got selected by our fellow curator desro & you just received a little thank you upvote from us for your great work! Your post will be featured in one of our recurring compilations which are aiming to offer you a stage to widen your audience within the DIY scene of Hive. Stay creative & HIVE ON!
Please vote for our hive witness <3
This is very pretty and unique. I did not realize upon looking at it that it was made of plastic. Only when I read did I find that out.
It is great to find a way to reuse plastic but not necessarily good for the environment.
Nice to greet you! Thank you for your visit and appreciation of our work.
This is a really great thing you have done, not only a great idea but you have executed it perfectly. Thanks for sharing !DIY
Nice to greet you! Thank you very much for visiting and for your appreciation of my work. I'm glad you liked it, my friend!
Congratulations @marifi! You received a personal badge!
You can view your badges on your board and compare yourself to others in the Ranking
Check out our last posts:
Support the HiveBuzz project. Vote for our proposal!